

Warmup W3WT01, W3WT02 Operating Instructions Manual
Colour Touch Thermostats
W3WT01 & W3WT02 (Wi-Fi)
Operating Instructions
Models W3WT01 and W3WT02 (WiFi)
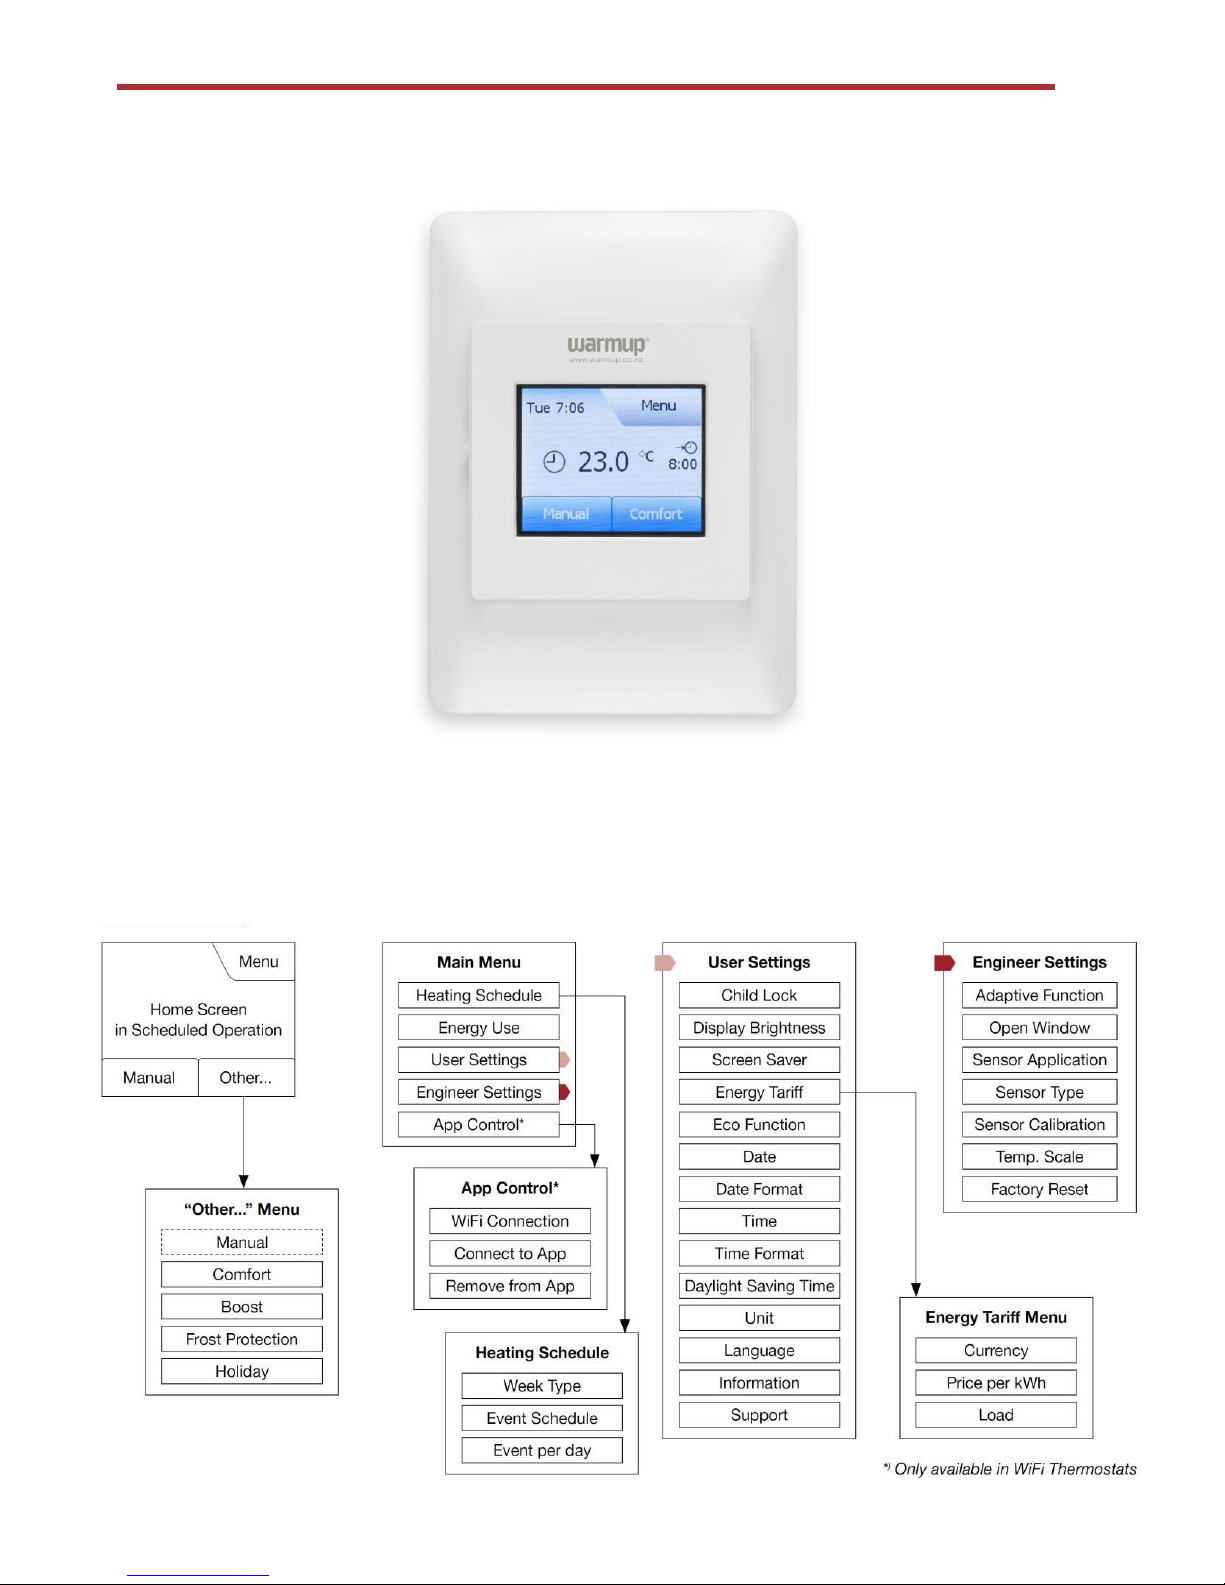
Menu Structure
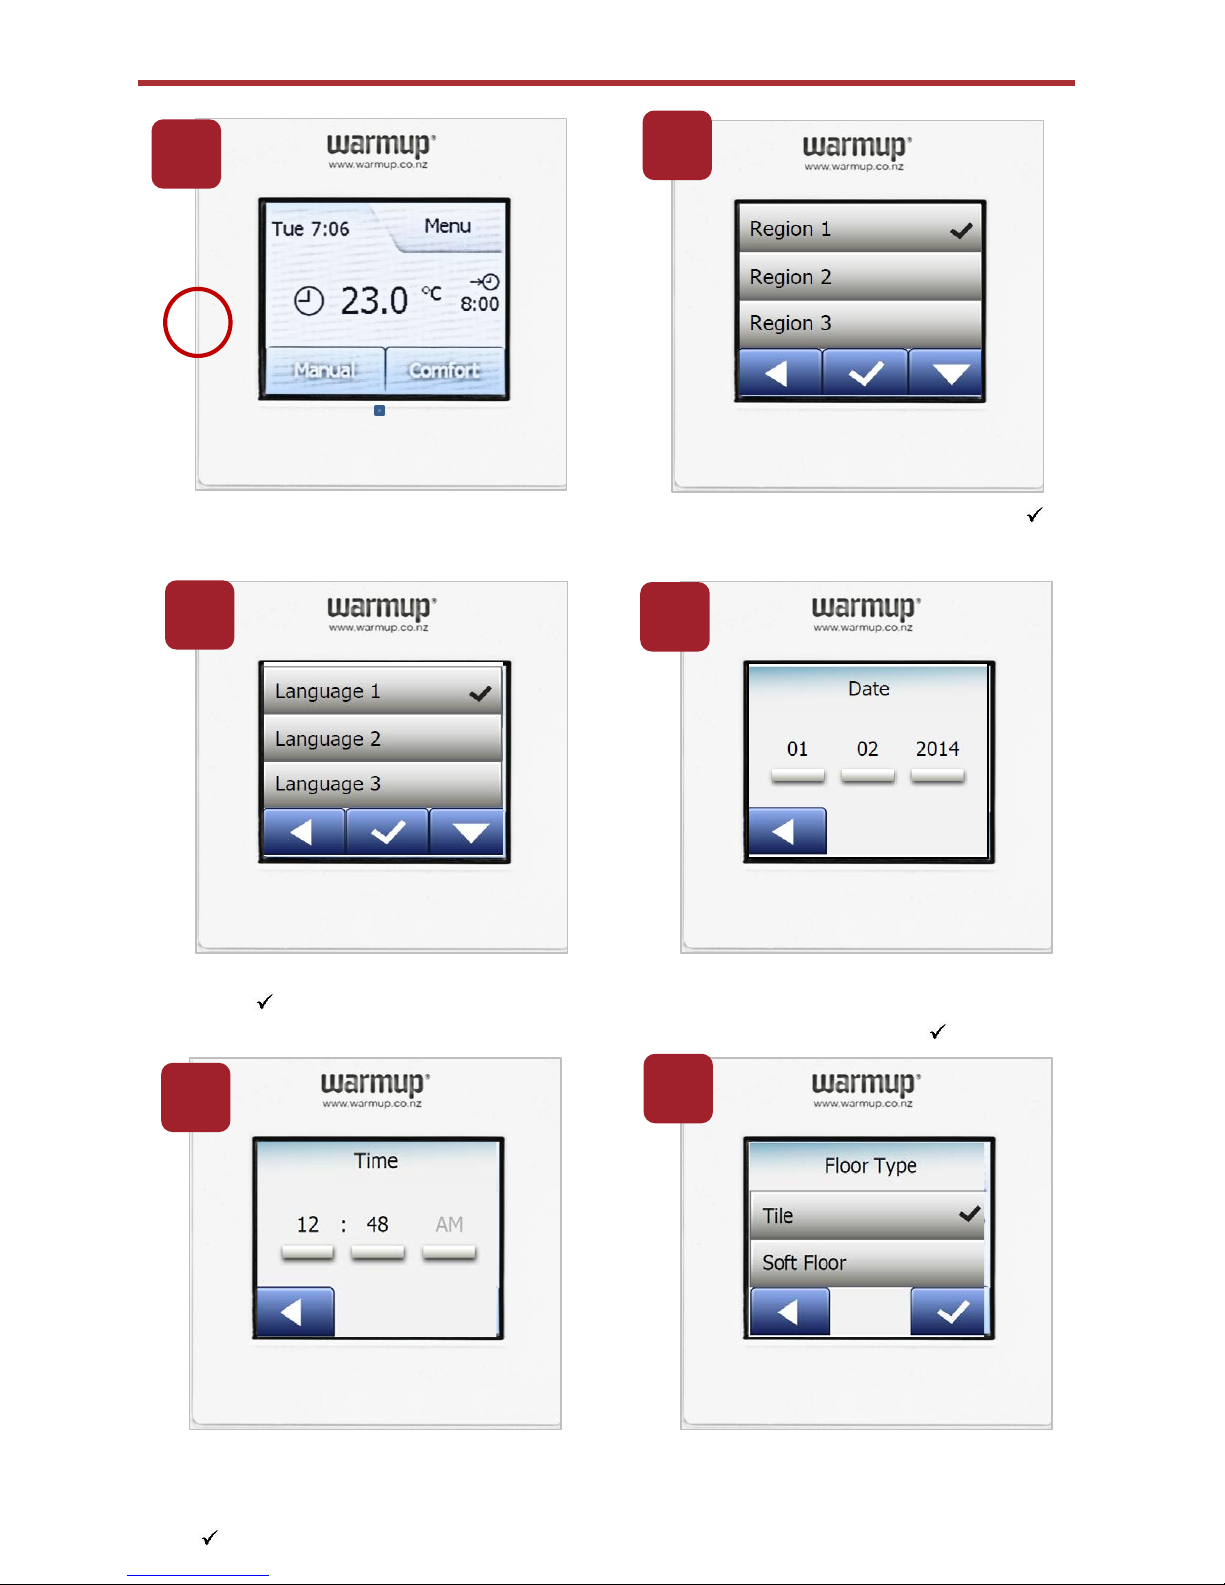
Turn on the thermostat (you will find
the switch on the left)
Use the easy navigation to set the date
using the buttons to toggle selections.
Confirm each setting with “ “
Use the easy navigation to set the
time using the buttons to toggle
selections. Confirm each setting with
“ “
Select your region and confirm with “ “
It should default to ‘New Zealand’
Startup Wizard
Select your language and confirm
with “ “
Select the type of floor covering –
Tile: floors made of tile or stone
Soft Floor: carpeted, wooden or other
engineered floors
1
2
3
4
5
6
The thermostat comes with pre-programmed schedule for easy and economic heating control
of most homes. Below are the factory settings or the preset schedule.
This schedule can be changed in the Heating Schedule menu.
Wake Up Leave Home Come Home Go to Sleep
5:30 8:00 18:00 21:30
24°C 16°C 24°C 16°C
Pre-programmed schedule
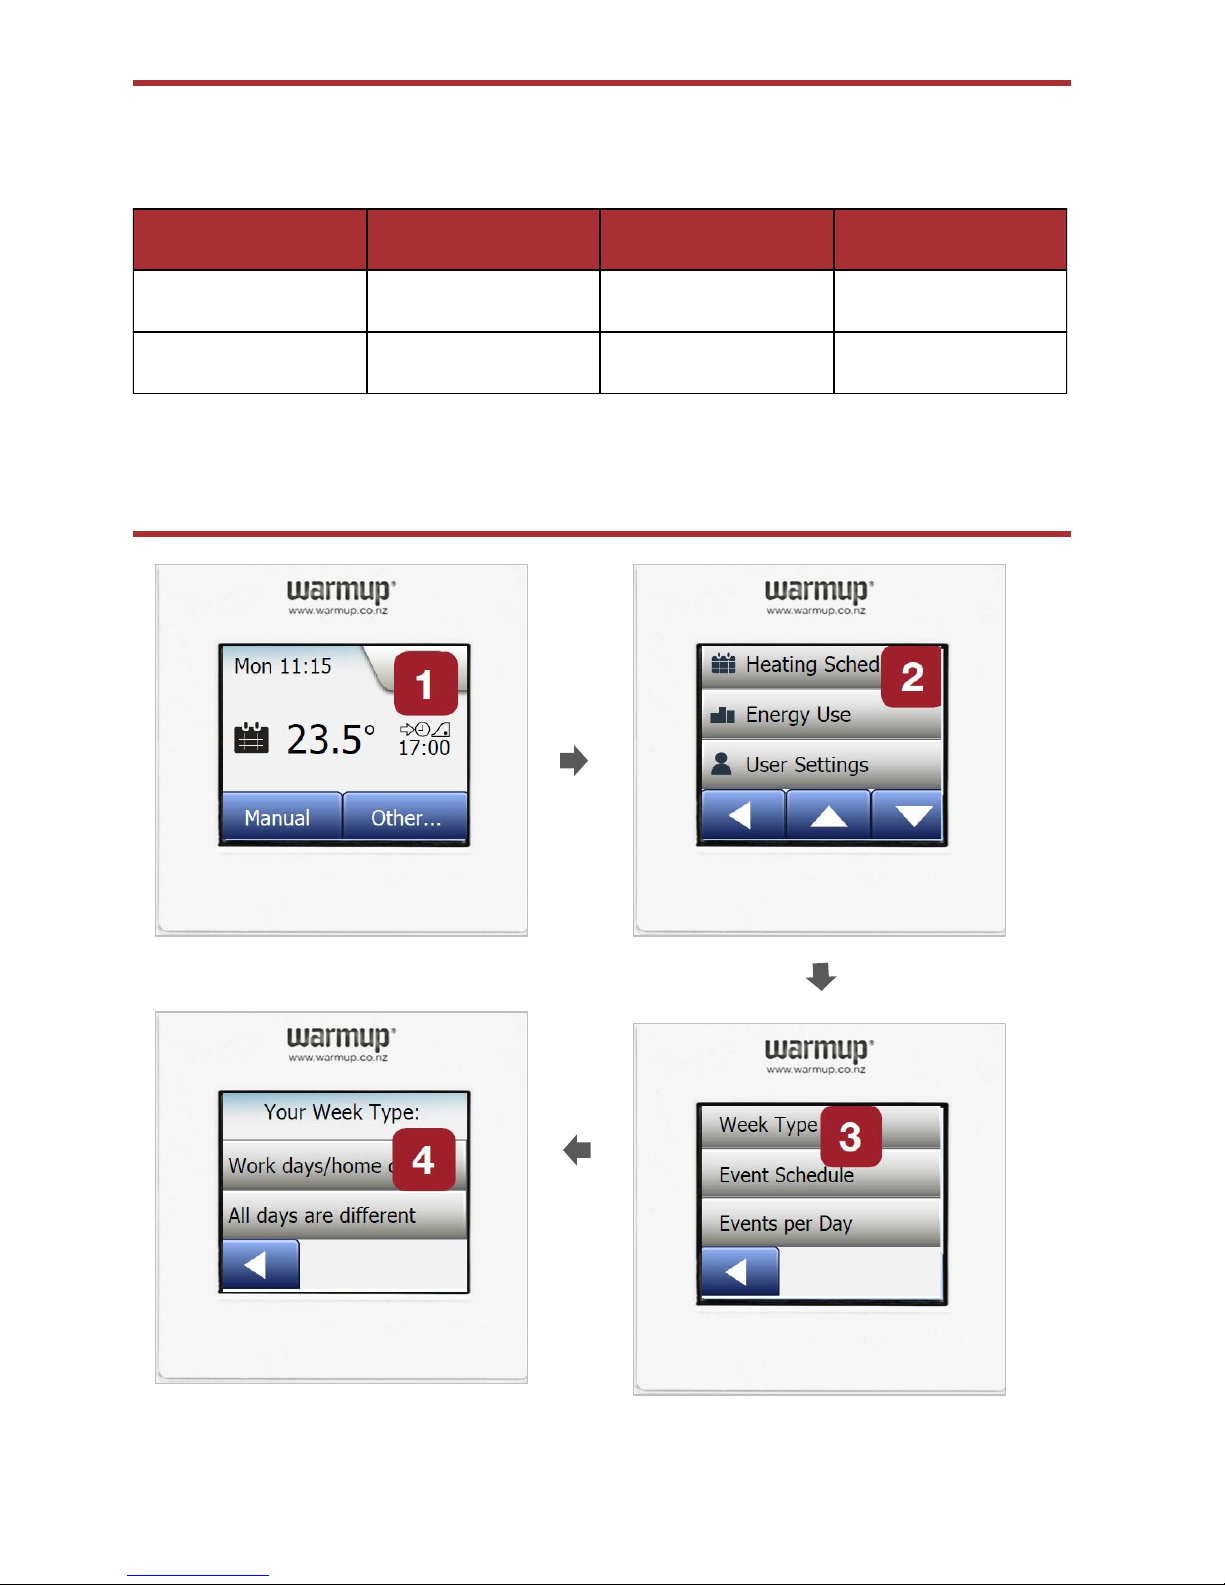
Personalise your settings -
Week Type
1. Select the Menu button on the top right to reveal the list of options
2. Start with selecting “Heating Schedule”
3. Then select “Week type”
4. Select “Work days/Home days. Select “ All days are different if your heating times are
different for all days of the week.
* In step 4 if you selected ‘All days are different’ – skip steps 5, 6 and 7 and go to Step 8 and
select ‘Event Schedule’
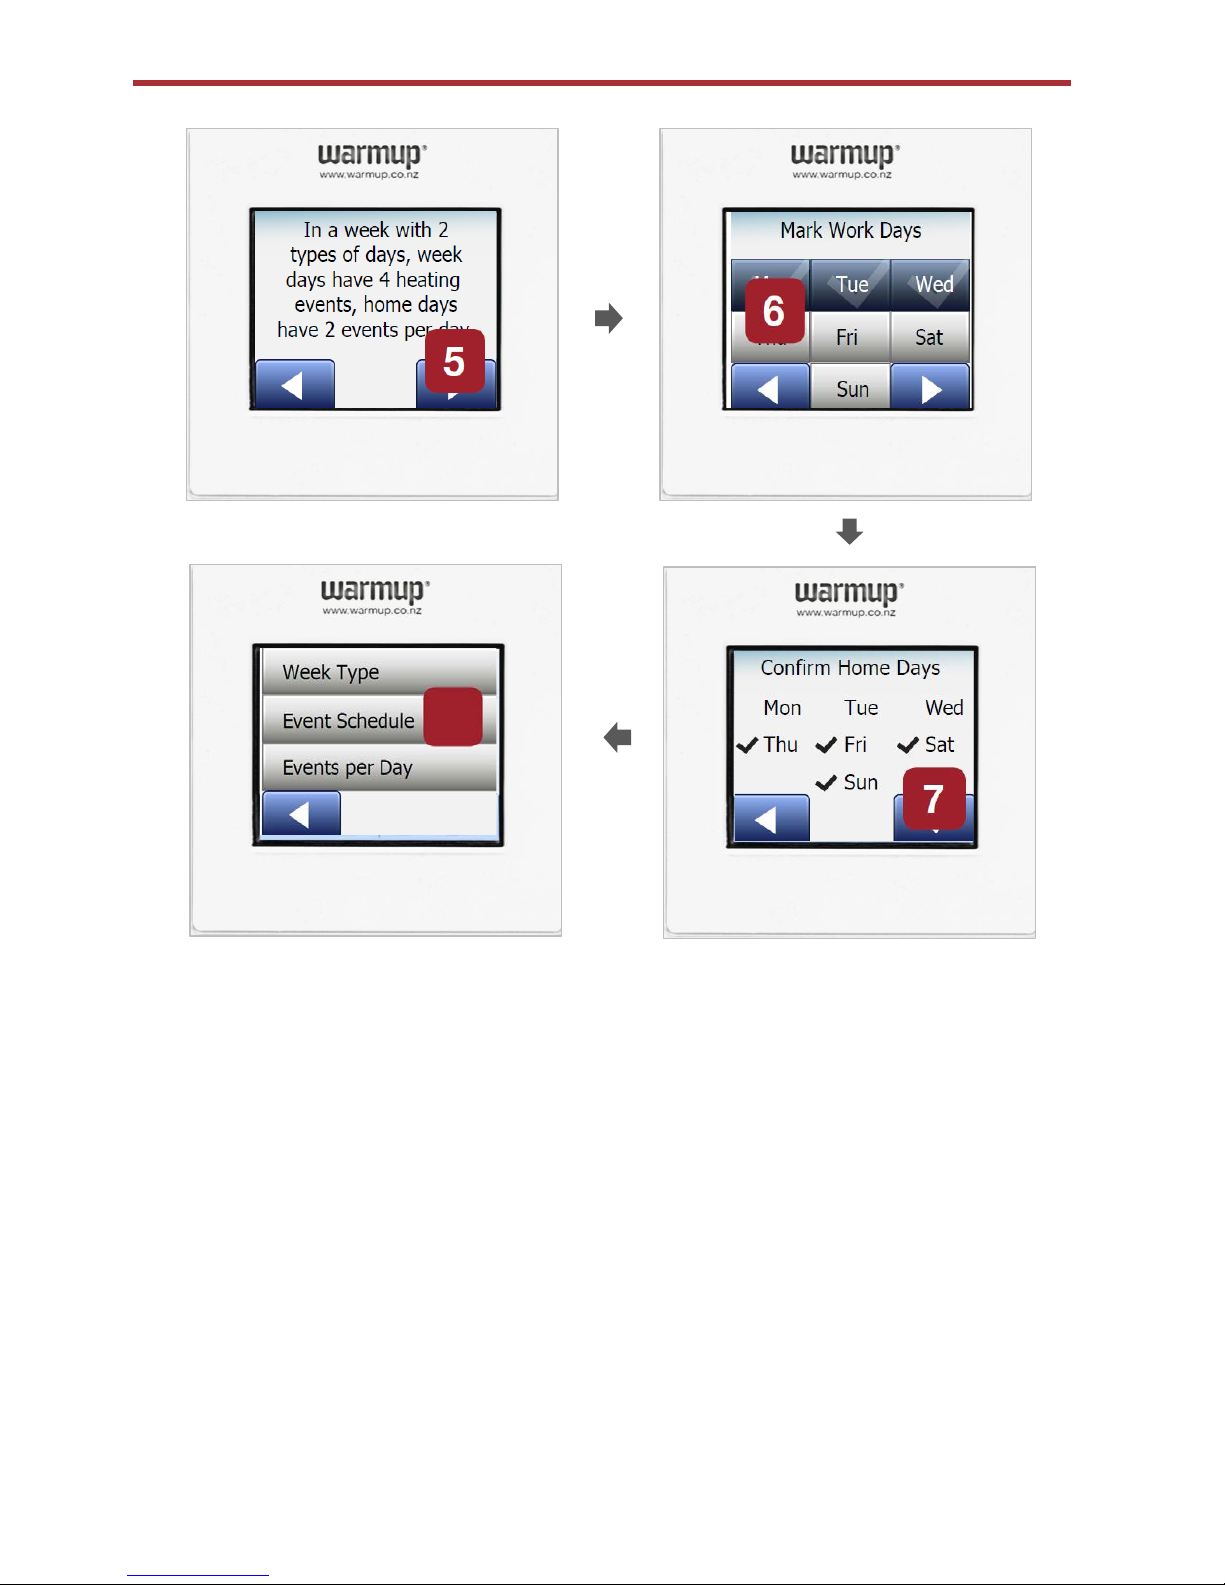
Personalise your settings -
Week Type (cntd)
8
5. Select the right arrow
6. Mark your “Work days” and confirm
7. Then confirm “Home days”.
8. You will now see the Heating Schedule menu
 Loading...