

Warmup WLFH-140W, Underlaminate Foil Heater, underlaminate Installation Manual
Installation Manual:
Underlaminate
Foil Heater
CHNICAL HELPLINE
0845 345 2288
IMPORTANT
R
ead this manual before attempting to
ins
tal
l y
our f
oil he
ater.
Incorrect installation could damage the
heater and will invalidate your warranty.
by filling in your Guarantee
information online at
warmup.co.uk
Complete and submit the
w
arranty form online
at www.warmup.co.uk

2
Your Warmup® Underlaminate Foil Heater has been designed so that
installation is quick and straight forward, but with all electrical systems,
certain procedures must be strictly followed.
Please check the sizing guide at the back of this manual to ensure that
y
ou ha
ve the correct heater(s) for the area you wish to heat.
Getting Started
Before installing your new Warmup®underlaminate foil heating mats, be sure you have the following
additional parts:
Electrical junction box – used as the connecting junction for the electrical supply cables of the
heating mats.
Control thermostat – allows you to control the temperature of the room.
Residual Current Device - Consult your electrician regarding the applicable RCD.
Hard insulation materials – used as heat insulator under the foil heating mats in installations with
concrete subfloors to provide more efficient heating. The material comes in plates, usually made from
foamed Polyurethane or Polystyrene and should have Compressive strength of more than 28PSI
(2Kg/cm
2
). An example of this is the Warmup®Insulation Board.
Soft insulation material – any soft insulation suitable for wood or laminate. which has a fire rating
of B2 or greater.

2
4
6
7
9
13
16
Getting Started
Important!
About the Product/
Modifying Your Heating Mats
Step 1:
Planning Your Installation
Step 2:
Laying Out Your Foil Heating Mats
Step 3:
Making the Electrical Connections
Installation Examples
Standard sizes of foil heating
mats and their values
Contents
NOTICE:
This product MUST be used
with a dedicated RCD
(residual current device)
If these instructions are followed you should have no problems.
However, if you do require help at any stage, please call our 24hr helpline:
Warmup Technical Helpline 0845 345 2288
You can also find a copy of this manual, wiring instructions, a list of frequently asked
que
s
tions and mor
e help
ful information on our website:
www.warmup.co.uk
3

Important!
WARNING
Onc
e the f
oil heating mat has been installed avoid all traffic over the mat until the floor has been laid.
Do no
t ins
tal
l the f
oil he
a
ting mat until the floor is ready to be laid. If the floor is not being laid
immediately, all heating mats must be protected with two layers of cardboard or hardboard to
prevent damage.
Immedia
tely prior to the floor being laid, check it has not been damaged in transit.
If y
ou are in any doubt call the Warmup helpline on
0845 345 2288
4
Please read carefully before installing your Warmup®underlaminate foil
heating mats.
DON’T leave insulating materials such as bean bags; linen or towels on the floor
surface. The maximum thermal resistance recommended between the heater
and the room is 0.15 m2K/W (1.5 TOG).
DON’T overlap heating mats.
DON’T fold or wrinkle Warmup®Underlaminate foil heating mats.
DON’T place heavy/sharp tools (or any other potentially damaging object)
on top of the heating mats.
DON’T walk unnecessarily on the foil heating mats.
DON’T install electrical cables or pipes under the floor with the foil heating mats.
DON’T use cellulose insulation.
DON’T install mats when the room temperature is below -5ºC.
DON’T install foil heating mats anywhere except inside buildings.
DON’T install foil mats under walls or partitions,or in areas under heavy cabinets,
closets, or fixtures (toilets, sinks, tubs, etc.).
DON’T install foil mats within 30mm of any heat conductive building part, such as
cold water pipes.
DON’T install foil mats within 10mm of one another, 50mm of any wall, or
150mm of a fireplace or hot water pipe.
DON’T connect any other electrical appliance on the same electric fused
spur or RCD/SPUR unit of the heating system
DON’T install foil heating mats under wooden floor, if the wooden floor is thicker than
18 mm.
DON’T put accustic material between the foil heating mats and the wooden floor,
installing wooden type floor.
DON’T use this heater under any floor covering other than wood or laminate
flooring.
DON’T place items on the floor surface which will stop the air flow or not allow heat
to rise into the room.
DON’T:

Important!
5
ALWAYS ensure all earth leads are connected to the earth ring.
ALWAYS ensure that the electric circuit that supplies electricity to the Warmup
®
Underlaminate heating system is equipped with a 30mA residual current
device (RCD).
ALWAYS connect all cold wire leads from the Warmup®Underlaminate foil heating
mats in parallel inside an electrical junction box or boxes.
ALWAYS ensure that the total current needed for all mats connected in parallel
is not more than 80% of the listed amperage capacity of the electrical
junction box and its power supply line and breaker (For advice consult
your recommended Part P qualified electrician).
ALWAYS provide each room with an Warmup®Underlaminate foil heating system with
its own electrical junction box and control thermostat. Each Warmup®thermostat
has a maximum capacity of 16 Amps. If the amount of Amps in the room is
greater than 16 Amps, divide the amperage over several thermostats.
(To calculate the amount of Amps in the room see tables in page 16).
ALWAYS use insulation under the mats to reduce running costs and warm-up
time. Check with your installer to determine the R value of the sub floor
insulation layer. If there is no insulation, or if the R value of the insulation
layer is lower than 0.57ft2*h*°F/Btu (0.1m2*°C/W or 1 Tog), please read
the insulation instructions on page 6 and act accordingly.
ALWAYS ensure that no sharp edges (e.g. metal-edged laminate locking systems)
come in contact with the foil heating.
ALWAYS fit the floor sensor and ensure that the thermostat is set for the correct
heater type and floor finish.
ALWAYS:
Note: Timber products often have a limitation on the maximum temperature allowed for floor heating- This
is usual
ly ar
ound 27
ºC. Check with your flooring supplier what the limitations are for your preferred floor
finish.
As with all electrical projects which are subject to Part P Building Regulations, all electrical work should be
carried out by a certified/qualified electrician.
All work must conform to BS 7671:2008 and the current IEE Wiring Regulations.
About the Product
Specifications:
Construction: Aluminium foil heater with fluoropolymer insulated twin-conductor,
sandwiched between 2 layers of specially reinforced aluminium
foil.
Standard Wattage: 80 W/SqM and 140 W/SqM
(see page 16 for individual mat specifications)
Mat Width: 500mm
Heating cable spacing: 50mm
Cold lead length: 3m
6
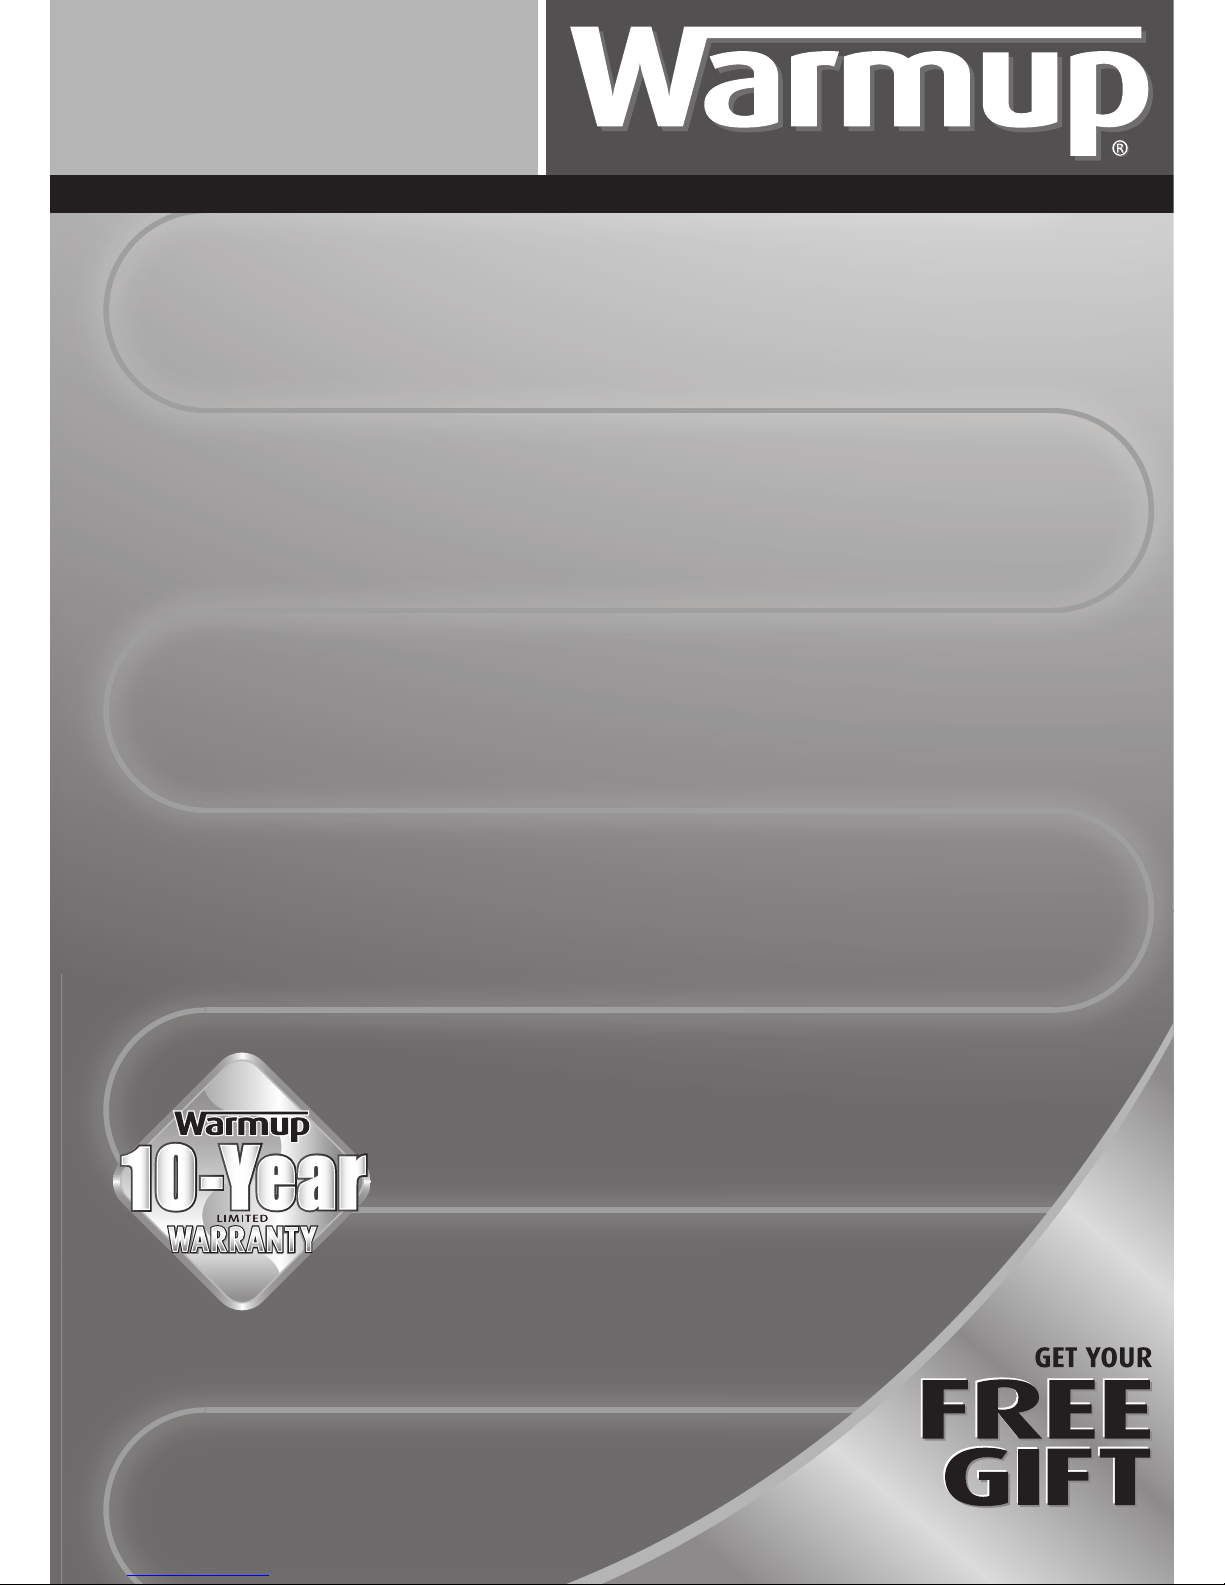
CCuuttttiinngg aanndd ttuurrnniinngg tthhee mmaatt::
In some instances, you may need to cut
and turn the mat to suit the room.
IItt iiss eesssseennttiiaall tthhaatt yyoouu ddoo nnoott ccuutt,, ttwwiisstt oor
r
kkiinnkk tthhee hheeaattiinngg wwiirree.
.
To make a cut, turn the mat over so that
the loops are exposed. Lift the wire out of
the way when cutting. Once the aluminium
foil has been cut and the mat has been
repositioned, use the aluminium tape
provided to cover the exposed wire and link
the two pieces of the mat.
Modifying Your Heating Mats
Top
Cold
Lead
Exposed
Wire
Aluminium Mat
Bottom
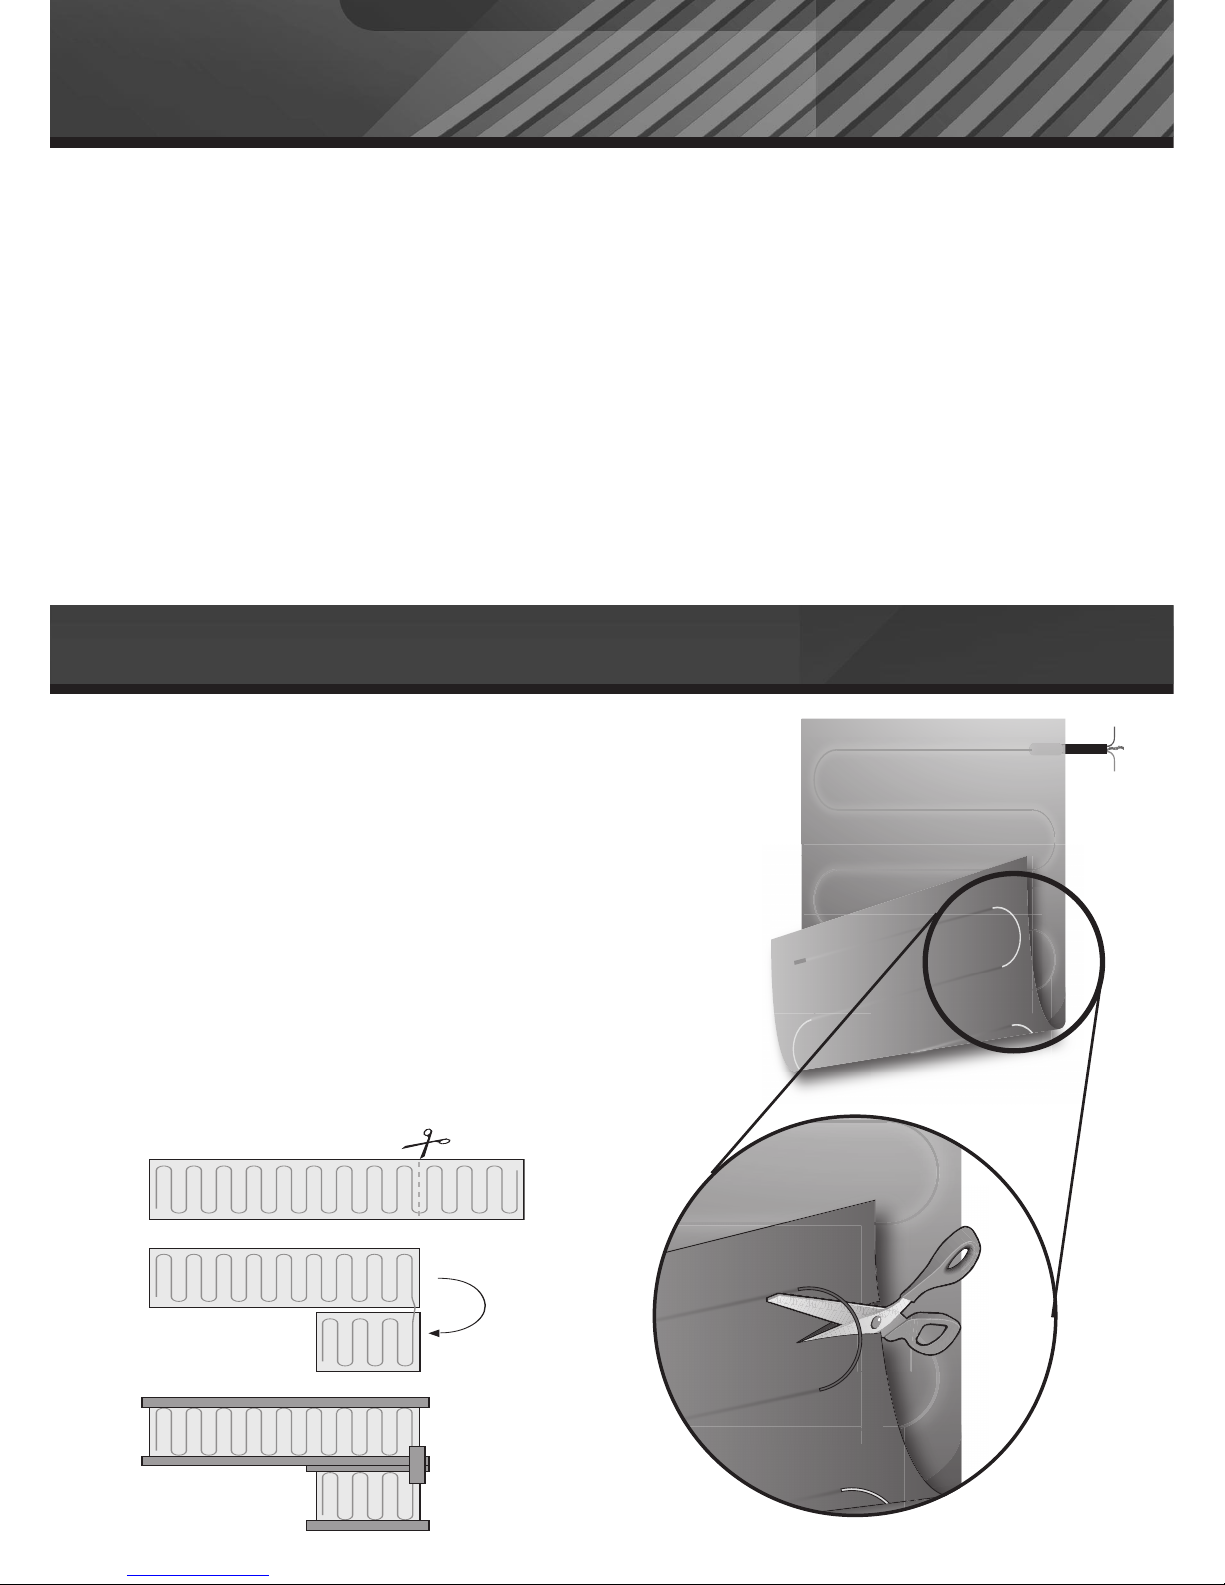
Before installing, draw an installation plan showing the placement of the
mats, floor sensor, and junction box
or boxes.
The Warmup
®
underlaminate foil heating mats should cover at least 80% of
the floor area of your room to be used as a primary heat source*. Warmup’s
foil heating mats are available in several convenient sizes. Choose the
combination of heating mats that best enables you to cover the
recommended 80% of your room. Plan to use the larger foil heating mats as
much as possible and to use smaller mats only as gap fillers.
Note: The mats are supplied with 3 metres of electrical cold leads.If
this is not enough, ask your electrician to extend the electrical
supply cables.
*Depending on insulation, air-flow & overall heat-loss within the room, additional heating may be required.
1 Clean all debris from the floor base.
2 Insert Warmup® Insulation Board
3 Clean all debris from the surface of the grout or insulating material.
4 Roll out heating mats on top of the insulating material. It is recommended to leave a gap of about
50mm from the wall to the heating mats, and a gap of about 10mm between each mat. Ensure that
each heating mat is completely flat. Make sure that the cold leads of the mats are on the side of the
mat that is closest to the location of the electrical junction box (See step 3 – Making the Electrical
Connection).
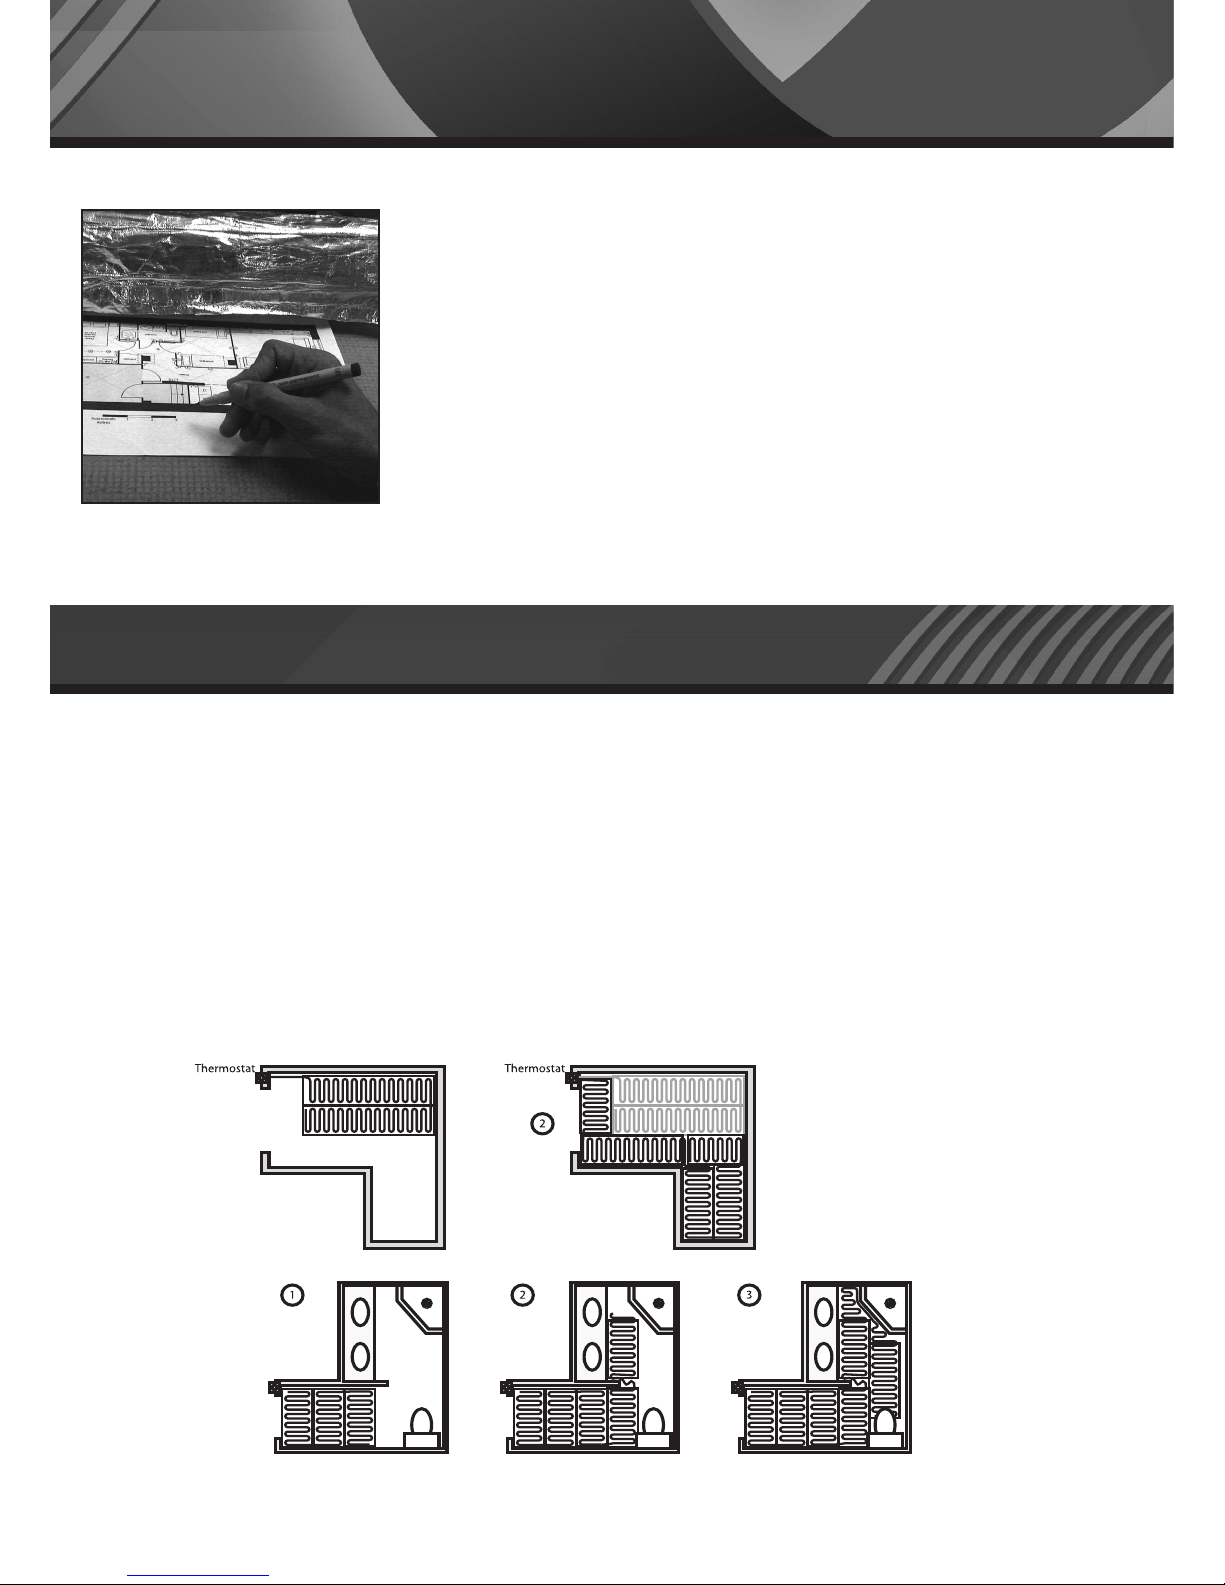
Step 2: Laying Out Your Heating Mats
Step 1: Planning Your Installation
7
NOTE:
When laying two or
more heaters, ensure
the cold tails reach the
thermostat.
 Loading...