

Warmup PT502, PT504, PT503 Installation & Operating Instructions Manual
Installation & Operating Instructions
Model PT502 Model PT503 Model PT504
Your new electronic thermostat is
equipped with a microprocessor.
Depending on the selected mode, this
thermostat has been designed to
control:
A: Ambient temperature
F: Floor temperature (floor heating)
The ON/OFF button should be pressed
once to turn off the thermostat. The
thermostat is now in sleep or standby
mode.
HIGH
LOW
There are 4 available setpoints to identify
and select your comfort temperature
Your new electronic timer is
equipped with a microprocessor.
Depending on the selected time,
this timer has been designed to
control the temperature as
follows:
This timer is an electronic timing device, with
preset temperature control, which allows the
heating to be switched over a pre-programmed
period.
This device has 4 programmes:
Manual – the heating will be manually controlled
by a preset comfort level setting
P1
•Turn on at desired time
•Heat for 3.5 hrs
•Off for 8 hrs
•Heat for 5.5 hrs
•Off for 7 hrs
•The cycle is then repeated
P2
•Heat is on for 3 hrs
•Off for 21 hrs
•The cycle is then repeated
P3
•Heat for 3 hrs
•Off for 9 hrs
•Heat for 3 hrs
•Off for 9 hrs
•The cycle is then repeated
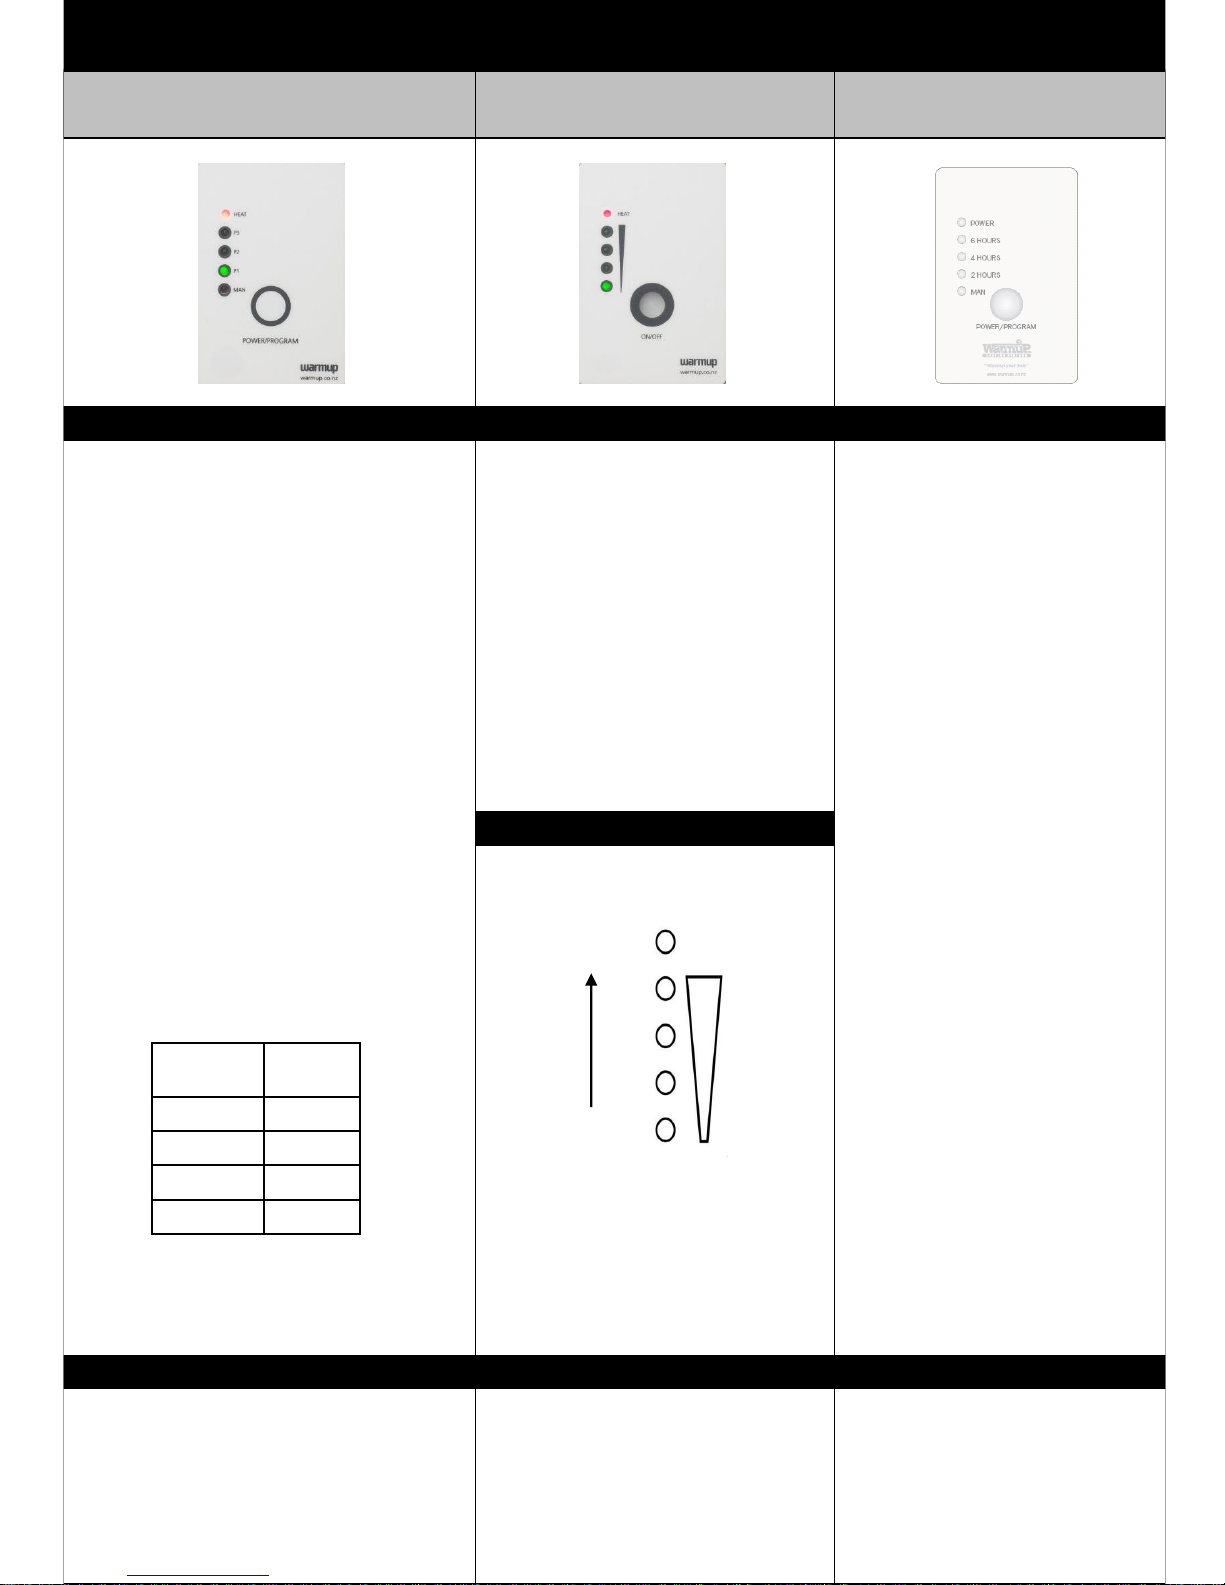
Heating On
Prog
Time
5am 5pm
6am 6pm
7am 7pm
12am 12pm
Model Information
Setpoint Definition
Technical Specifications
Electrical rating: 230-240V, ac 50 Hz
Load:15A resistive
Warranty: Two (2) year
Temperature control settings
Comfort: 20 C – 28 C
Backup: 5 C
Electrical rating: 230-240V, ac 50 Hz
Load:15A resistive
Warranty:Two (2) year
Temperature control settings
Comfort: 20 C – 28 C
Backup: 5 C – 16 C
Electrical rating: 230-240V, ac 50 Hz
Load:15A resistive
Warranty:Two (2) year
HEAT
To set 2 hour/4 hour/ 6 hour mode
Press the On/Off button until the 2
hour LED light comes on.
Press the On/Off button three times
and the 4 hour LED light will come
on.
Then press the On/Off button three
times and the 6 hour LED light will
come on.
To set manual mode
Press the On/Off button and hold for
5 seconds. The Power and Man lights
will come on.
NB: The Power LED will be lit up
when the heating is on.
The ON/OFF button should be
pressed once to turn off the timer.
Model PT502 Model PT503 Model PT504
• Press the ON/OFF button once
• The bottom LED comes on
• You can select your comfort
temperature by pressing the ON/OFF
button the desired number of times
so that the required LED is lit.
• When you have selected the required
setting and the desired temperature
has been attained – the HEAT LED
will turn red after one minute.
• You can move from the top to the
bottom LED by pressing the ON/OFF
button twice.
• When the thermostat is turned off,
the desired temperature setting will
be saved and will come on when the
thermostat is turned on again
Method of Operation
To set 2 hour/4 hour/ 6 hour mode
Press the On/Off button until the 2
hour LED light comes on.
Press the On/Off button three
times and the 4 hour LED light will
come on.
Then press the On/Off button
three times and the 6 hour LED
light will come on.
To set manual mode
Press the On/Off button and hold
for 5 seconds. The Power and Man
lights will come on.
NB: The Power LED will be lit up
when the heating is on.
To set Manual mode
Press the Power button and one of the green
LED lights (P1, P2 or P3) will flash on/off once.
Then press & hold the Power button for approx 5
secs and the manual and heat LED’s will light
up.
The controller will now operate in manual mode
controlled by a preset comfort level setting.
To turn off Manual mode
Press the Power button once. The green LED
which remains on is the programme mode which
is now operating (P1, P2 or P3).
To completely turn off the heating
Wait until only one green LED is on – then press
the Power button once.
To set Programme mode
Establish desired start time of heating.
Add 12 hours onto this time and this is when you
programme the Timer (Refer to the Twelve Hour
Set Back Table).
Press the Power button and one of the green
LED’s P1, P2 or P3 will flash on/off once.
Press & hold the Power button for approx 5 secs
and the manual and heat LED’s will light up. Do
not release but continue to push the Power
button and the unit will scroll through Manual,
P1, P2 & P3 and then all LED’s will turn off.
Release the Power button.
The start time for P1, P2 & P3 are now
programmed. To select the desired programme
(P1, P2 or P3) press the Power button once to
turn off Programme mode.
Press the Power button once to turn on
programme mode, before the green LED flashes,
you must quickly press the Power button
repeatedly to scroll through P1, P2 and P3. Stop
pressing when the desired Green LED for P1, P2
or P3 is lit. To change the Programme mode
from P1 to P3(for example) you must repeat this
entire step.
To turn off Programme mode, press the Power
button once.
NB: The Heat LED will be lit up when the heating
is on.
WARMUP NEW ZEALAND LTD - TWO(2) YEAR WARRANTY
This product is warranted against defects in material and workmanship under normal conditions of use for a period of two (2) years from the date
of purchase. During this period, Warmup will repair or replace the product if it is defective in normal operating conditions in terms of materials
or workmanship with a new product of equivalent quality at Warmup's option. This warranty is intended to give you the protection given to you
as a consumer under the Consumer Guarantees Act 1993. The warranty does not cover costs of transportation, removal, installation or damage
caused by misuse or accident. In no event will Warmup be liable for consequential loss resulting from the installation of the product. Any
defective product should be sent with the original invoice to the original installer, or shipped prepaid, insured and addressed to: WARMUP NEW
ZEALAND LTD. Copsey Business Park, 2/20 Copsey Place, Avondale, Auckland
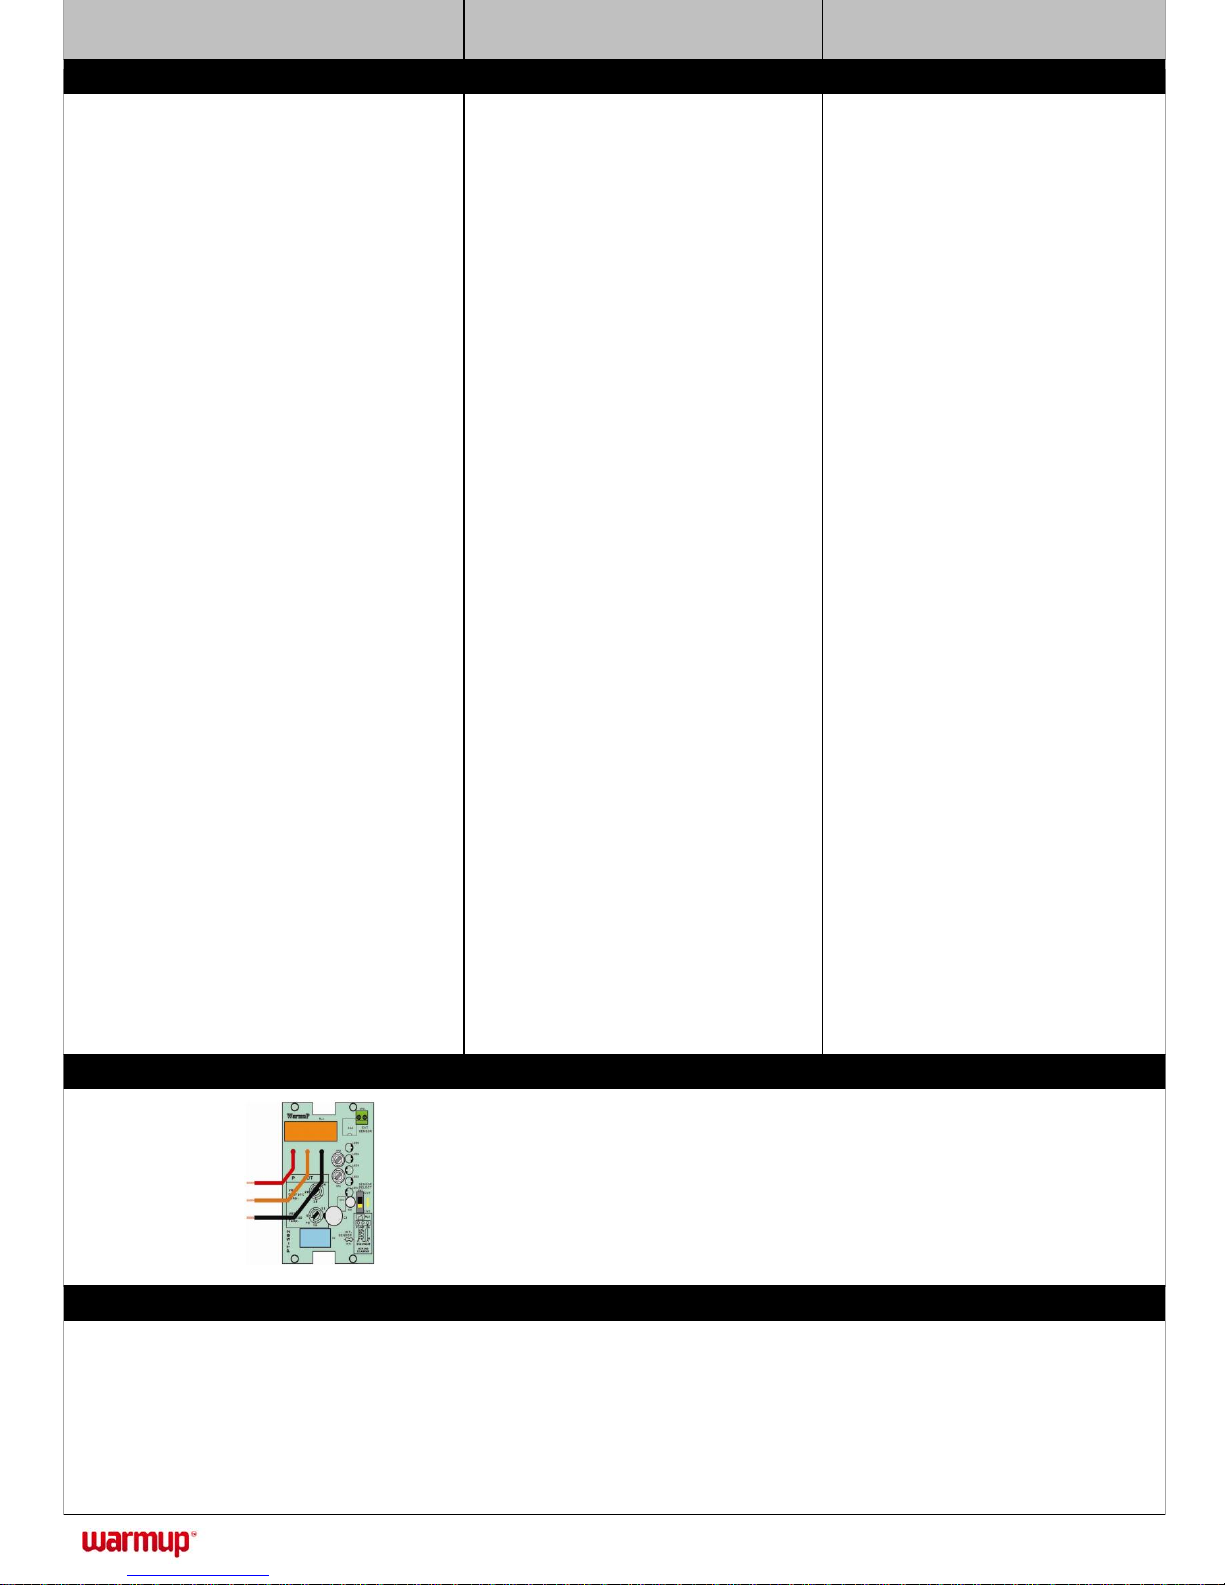
Control Module Installation
Warranty
Phase (red)
Element (brown)
Neutral (black)
Before wiring ensure that:
•All electrical connections are performed by a registered electrician only, as required by law.
•The supply is disconnected at the distribution board
•All connections are secure and tested prior to activation
•You have studied and fully understood the connection diagram.
•Ensure the floor probe is connected & the sensor select switch is set to external (EXT) position.
Warmup New Zealand Ltd.
PO Box 19144, Avondale, Auckland
Freephone: 0800 WARMUP (927 687) www.warmup.co.nz
 Loading...