

Page 1
R
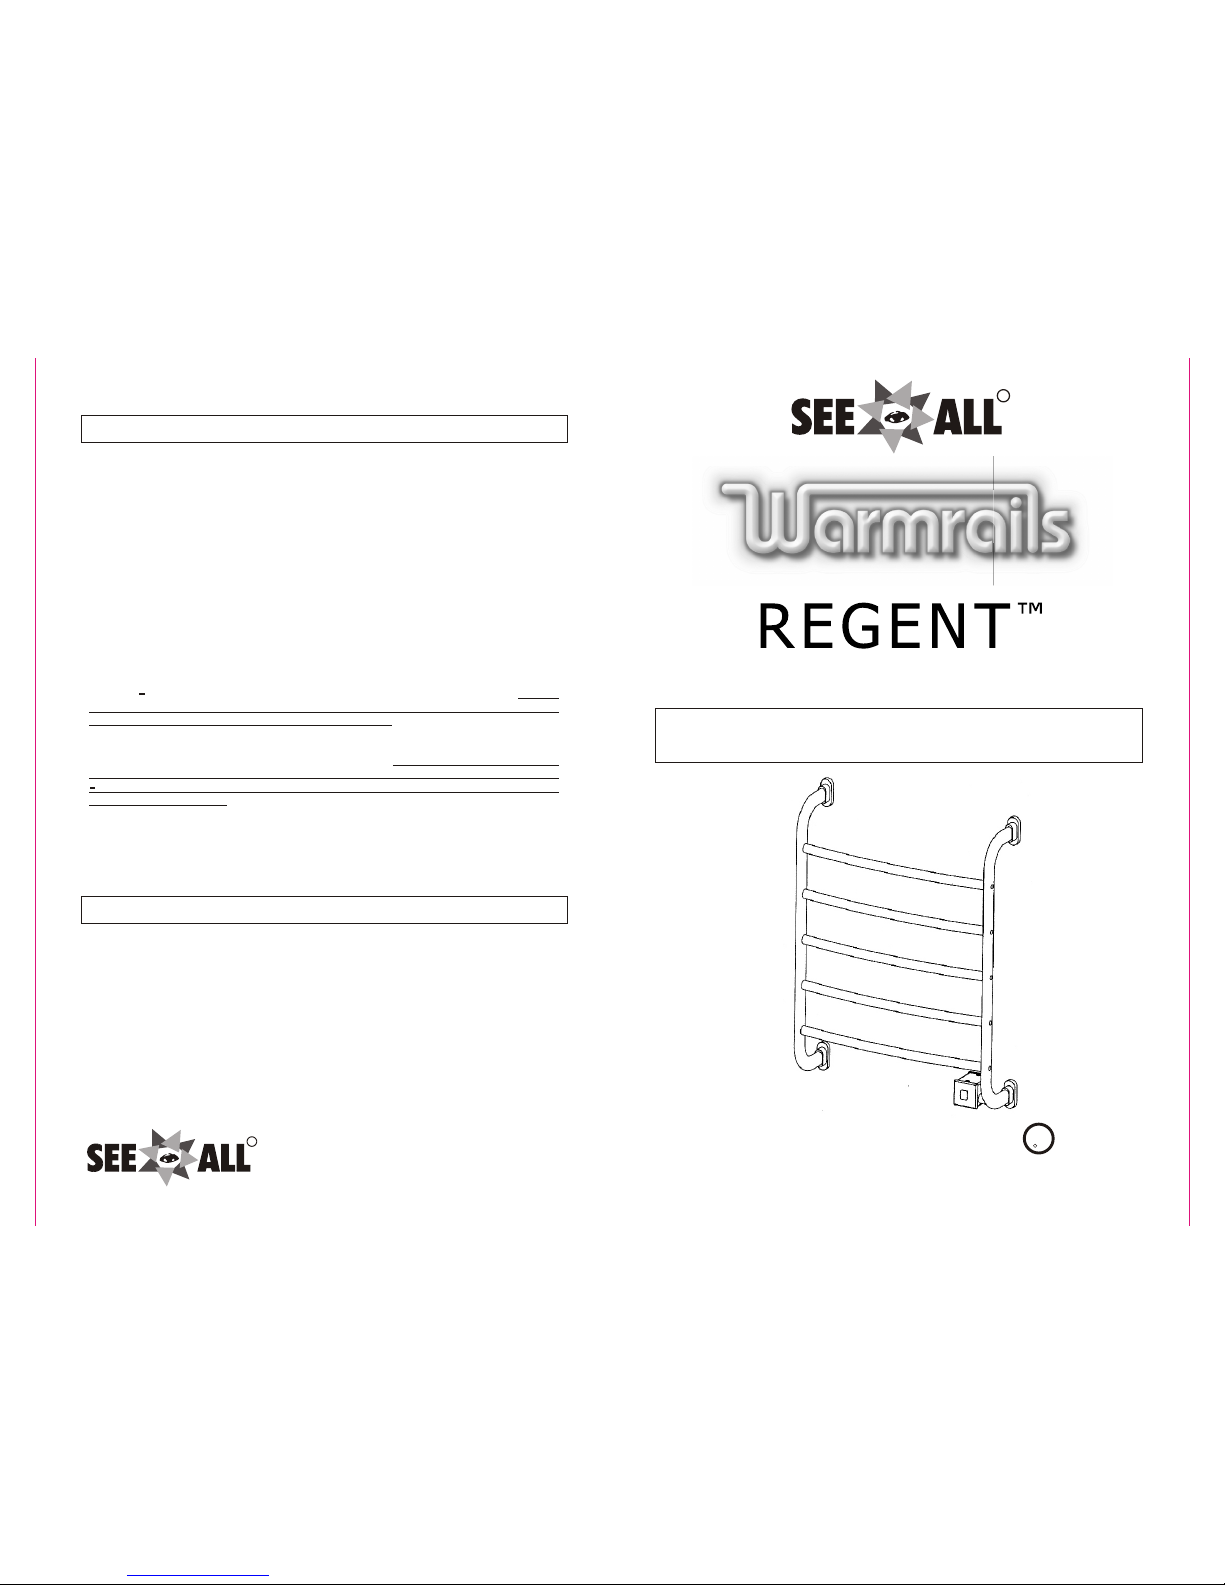
TOWEL WARMER AND DRYING RACK
INSTRUCTION MANUAL
Printed in China
C US
U
L
R
LISTEDLISTED
OPERATION
CARE
To operate, turn on the switch. It will be illuminated when on and will be dull when off.
temperature, although this time will be shorter if towels are in place.
of the Heated Towel Rack will quickly drop back.
such as a towel underneath.
Your Warmrail Heated Towel Rack costs less or about as much as running a regular light
bulb. It will take approximately 45 minutes for the Heated Towel Rack to reach its operating
The Warmrails Heated Towel Rack operates with a fixed power output. However, when
operated with several layers of towels over the Heated Towel Rack, the temperature will
increase. Once the towels are removed and where the rails are exposed, the temperature
Please note: damp or wet material that has either been dyed, or is not colorfast, can cause
discoloration in the finish if that material is draped over a Heated Towel Rack while hot.
Again, it is suggested that items are dried by using a completely protective layer of material
Warning this appliance is intended only for drying textiles washed in water. Fabrics
that contain soap or detergent residue may show what appears to be scorch marks.
Warmrails does not accept responsibility for any damage, discoloration or other
damage to any item regardless of circumstance. To reduce the possibility of
damaqe, do not place any items other than towels directly on the Heated Towel Rack
always have a completely protective layer of towels between the Heated Towel
However this is simply the discoloration of the residue.
Rack and any other item.
The Heated Towel Rack should be wiped down from time to time with a damp cloth.
Do not use any abrasive or corrosive cleaners
R
Marketed and Distributed by
3623 South Laflin Place, Chicago, IL 60609
Toll-free: 800.873.1313 | FAX: 773.927.7742
www.seeall.com
Page 2
SPECIFICATIONS
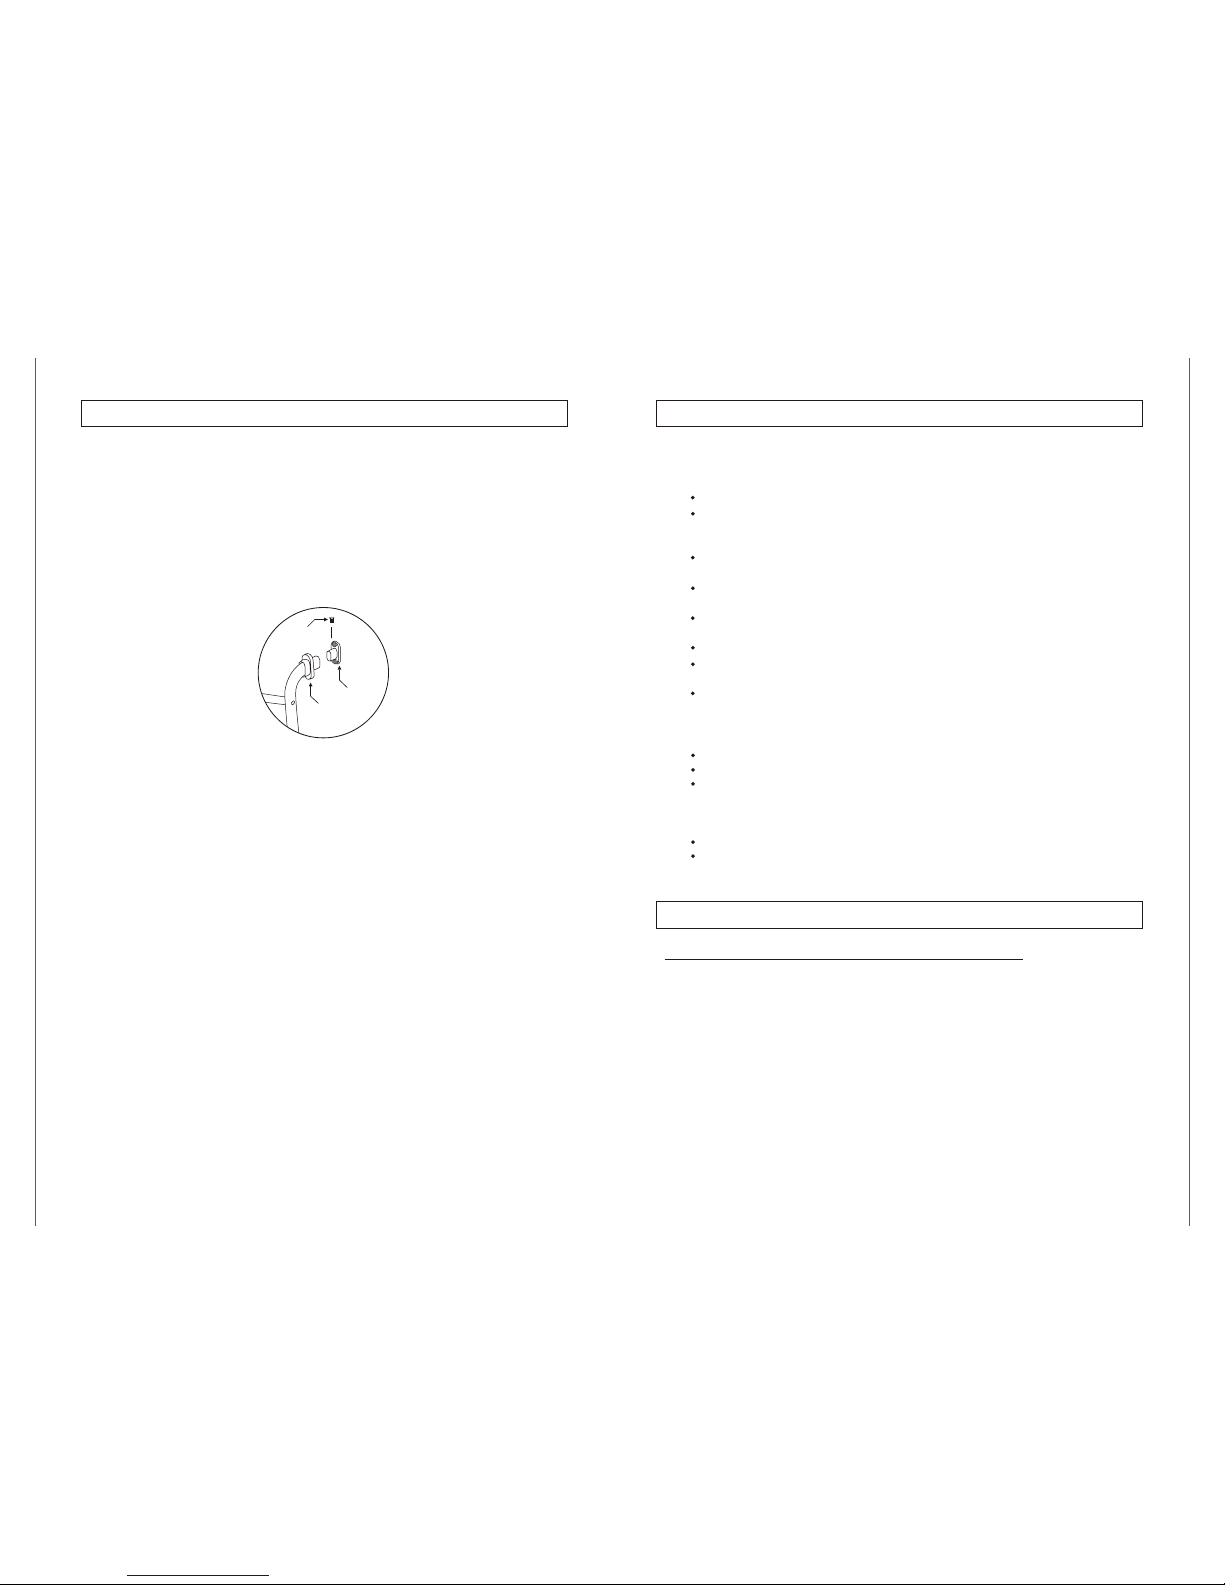
Locking Screw
Bracket Cover
Wall Bracket
Fig. 1
ASSEMBLY
This appliance must be used in accordance with any prevailing electrical code and relevant
electrical wiring rules and regulations and in particular those regulations that cover use of
appliances and accessories in damp situations such as bathrooms, showers, laundries and
other areas with fixed water containers.
Your Warmrail comes complete with all the mounting hardware you require, which includes
8 screws, 8 wall anchors, 4 wall brackets, 4 bracket covers, 4 locking screws, 1 "hard-wire"
Connector, 1 "hard-wire" Connection Box Cover, and 1 "hard wire" Wall Plate. Remove all
the components from the carton and make sure that all parts are present. If any parts are
missing, do not attempt to install the appliance, instead call Warmrails on 1-800-626-8627.
The Warmrail is shipped in the "soft-wired" configuration.
1.
2.
3.
4.
5.
6.
7.
To install this unit as "soft-wired", position the four bracket covers on the Heated
Towel Rack. (Refer to Fig 1).
Insert the four wall brackets (the pieces with the two screw holes) into the four mounts
on the unit and secure them in place by inserting the four locking screws through the
holes you will see at the top of each of the mounts (if you can't see the holes you most
likely have the unit upside down).
With the wall brackets now firmly attached, hold the Heated Towel Rack against the
wall in the location where you would like it to be installed, preferably on a stud. Use a
pencil or pointed tool to mark the location of the screw holes onto the wall through the
screw holes in the wall brackets. Put the Heated Towel Rack aside and drill pilot
holes through the marks you have made on the wall.
You can just use screws to attach wall brackets that are conveniently on a stud. For
the remaining wall brackets, use the wall anchors supplied. Push the wall anchors
into the dry wall (you may need to make larger pilot holes where the wall anchors
need to be located).
Attach each of the four brackets on the pilot holes or wall anchors you have placed on
the wall by using the 8 screws provided. Tighten the screws until the wall mounts are
firmly against the wall.
Place the Heated Towel Rack back in position against the wall on the installed
brackets. Attach a locking screw over each of the mounts and tighten. Gently slide the
bracket covers towards the wall to completely cover the wall brackets.
Once securely attached to the wall, the unit can be plugged into an electrical outlet
(we recommend using a GFI protected outlet at all times) and your Warmrail is ready
for use. Please note, this model must be installed with the power entry coming out
from the bottom right-hand side of the unit.
SAFETY INFORMATION
When using any electrical appliance, basic safety precautions should always be observed.
READ THESE INSTRUCTIONS CAREFULLY
Do not use this appliance for other than its intended use.
To avoid a hazard, the Heated Towel Rack MUST NOT be used to hold towels or
any other articles that have been in contact with oil, petroleum based products or
Use this appliance only on the voltage specified on the rating plate, or elsewhere
Regulations require that only authorized persons carry out electrical work. For
Do not store your Heated Towel Rack while hot or still connected to the power
Do not allow the cord set to come into contact with heated surfaces during
dry cleaning fluids.
in the instructions.
your own safety and that of others, ensure this is done.
supply.
Do not immerse the Heated Towel Rack in water or any other liquid.
operation.
This product should not be used outdoors.
WARNINGS
HIGH OPERATING TEMPERATURE:
This towel warmer operates at high temperature that can cause burns.
Do not touch surfaces of the towel warmer while the warmer is in operation.
Do not allow unsupervised children in the vicinity of the towel warmer; and warn
children of hot surfaces.
TO AVOID THE POSSIBILITY OF ELECTROCUTION:
Do not immerse towel warmer in water or any other liquid.
Do not place towel warmer in a location where it may fall into a tub or shower, or
otherwise become immersed in water; and if the towel warmer falls into water,
immediately unplug it. Do not reach into the water.
HEIGHT WIDTH DEPTH
25 1/4" 18" 5 3/4"
Supply: 120 volts a.c. 60 Hz, single phase
 Loading...