

WarmlyYours TRT12040X40 Installation Manual
TempZone™ Shower Mat (Bench & Floor)
INSTALLATION INSTRUCTIONS
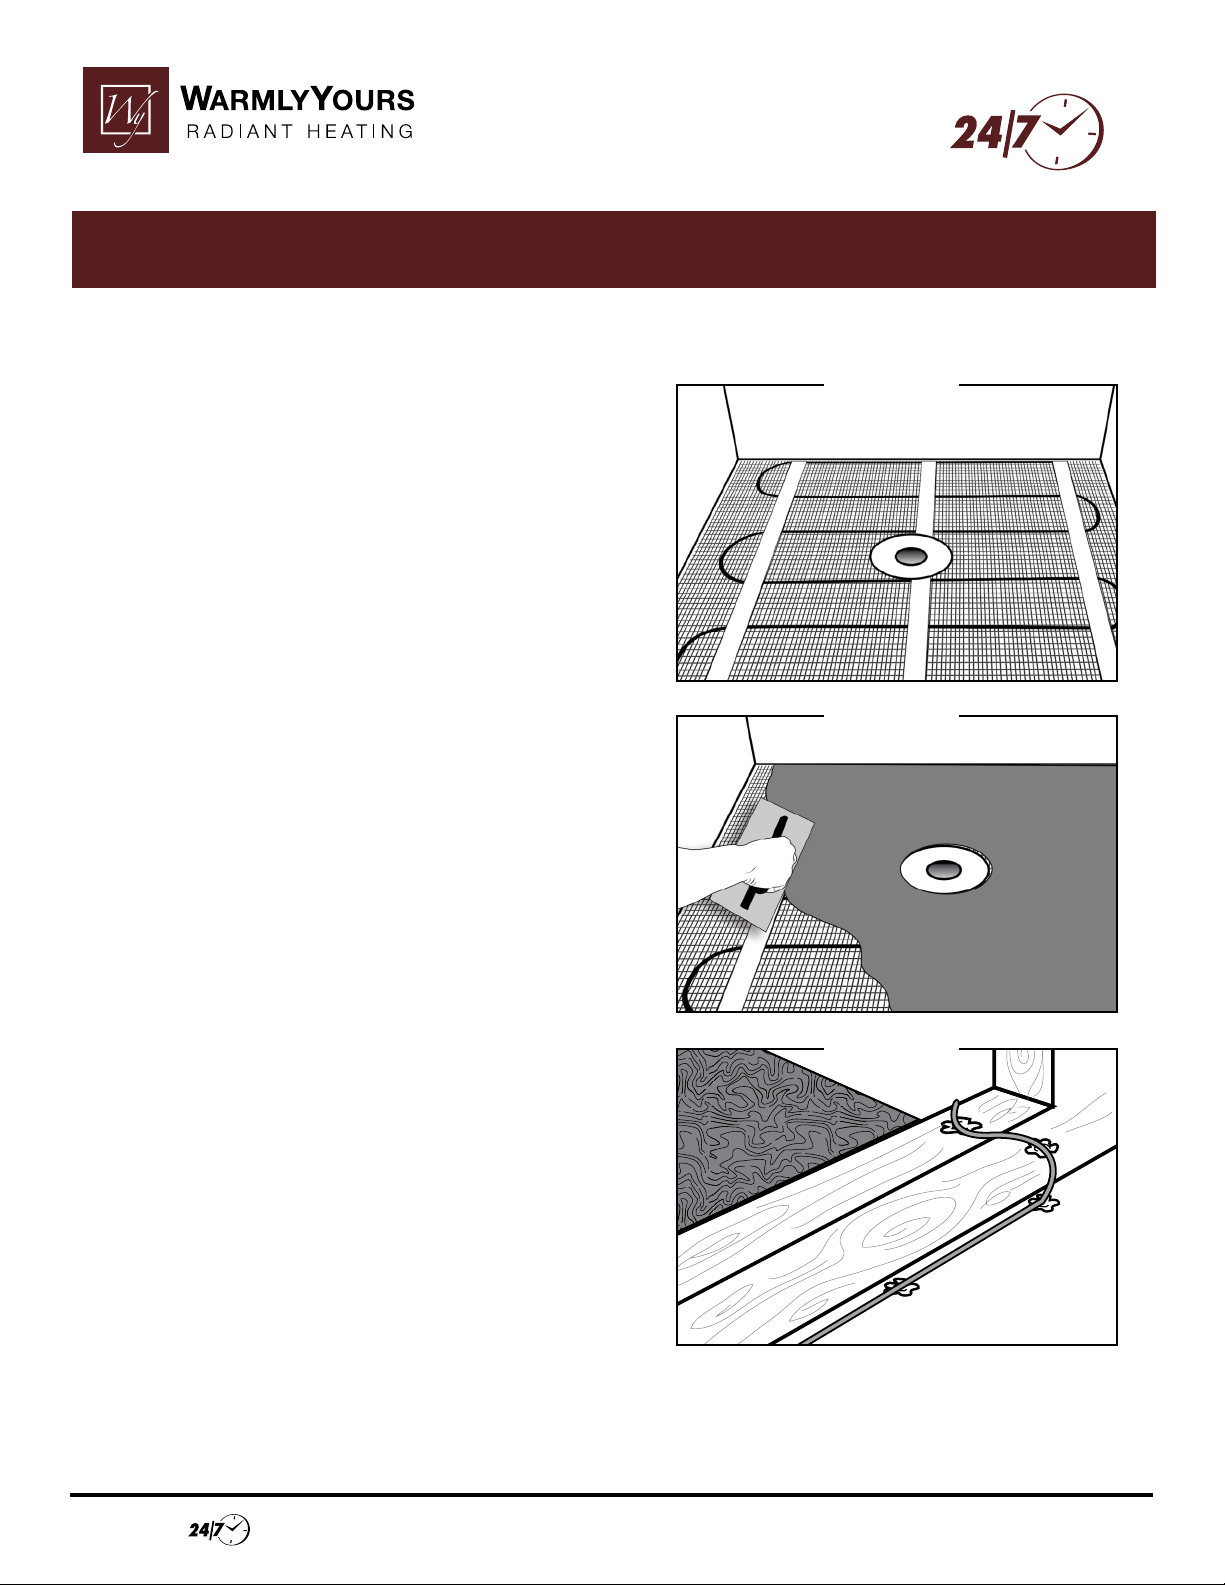
STEP 1
Once the mortar bed has set, dry t the TempZone™
Shower Mat to verify its dimensions and ensure it ts
the contours of the shower area. Verify that no portion
of the nished drain will make contact with the heating
wire.
Conduct insulation & resistance tests. Record readings
on the warranty card found inside the TempZone™
Installation instructions.
Step 2
Attach the mat to the suboor using hot glue.Prepare
the latex-modied thinset. Using a at trowel, spread a
coat of thinset over the installed mat. We recommend a
3/8” bed of thinset.
For best results, we recommend a 1” maximum distance
between the heating cable and the top of the tile. (see
Figure 6)
Please ensure the slope of the mortar bed is maintained
to direct water toward the shower drain.
STEP 1
STEP 2
Allow the thinset mortar to set. Conduct resistance tests
and record readings on warranty cards.
Step 3
Using a hot glue gun, secure the cold lead or heating
wire to the mortar bed and over the shower curb. In
order to minimize tension on the cold lead or heating
wire, use an “S” formation to bring the cold lead or
heating wire over the shower curb. Do not allow the tip
of the hot glue gun to touch the cold lead or heating
wire as it may damage the TempZone™ Shower Mat.
Direct the supply lead to the thermostat box or junction
box. Some people choose to locate the factory splice
outside of the shower itself. If this is done, the splice
and the heating wire need to be embedded in 3/8” of
latex modied thinset.
Installation Support • No Nonsense™ Warranty • (800) 875-5285 • www.WarmlyYours.com
STEP 3
TempZone™ Shower Mat (Bench & Floor)
Step 4
Install a secondary waterproong membrane in
accordance with the membrane manufacturer’s
installation instructions.
A secondary waterproong membrane will protect the
mortar bed from any moisture that may seep through
the tile, which could cause mold problems over time.
Step 5
Install tile ooring according to the tile manufacturer’s
instructions. Conduct insulation & resistance tests and
record the values on the warranty card.
Note:
Before activating the WarmlyYours TempZone™
Shower Mat, allow both the thinset mortar and grout
to properly cure (according to manaufacturer’s
requirements).
STEP 4
STEP 5
1/4” per foot slope
1”
CROSS SECTION OF THE LAYERS
Drain
Figure 6
Installation Support • No Nonsense™ Warranty • (800) 875-5285 • www.WarmlyYours.com
Tile
Membrane
TempZone™
Cerazorb (optional)
Pan or Pack
pitched at 1/4” per
foot
B 8/2013
 Loading...