

Page 1
#900157
#900138
#900018
#900142
#900067
HARDWARE #900108
#900044
HARDWARE #900108
Premium+
Bunny Barn
Item #01519
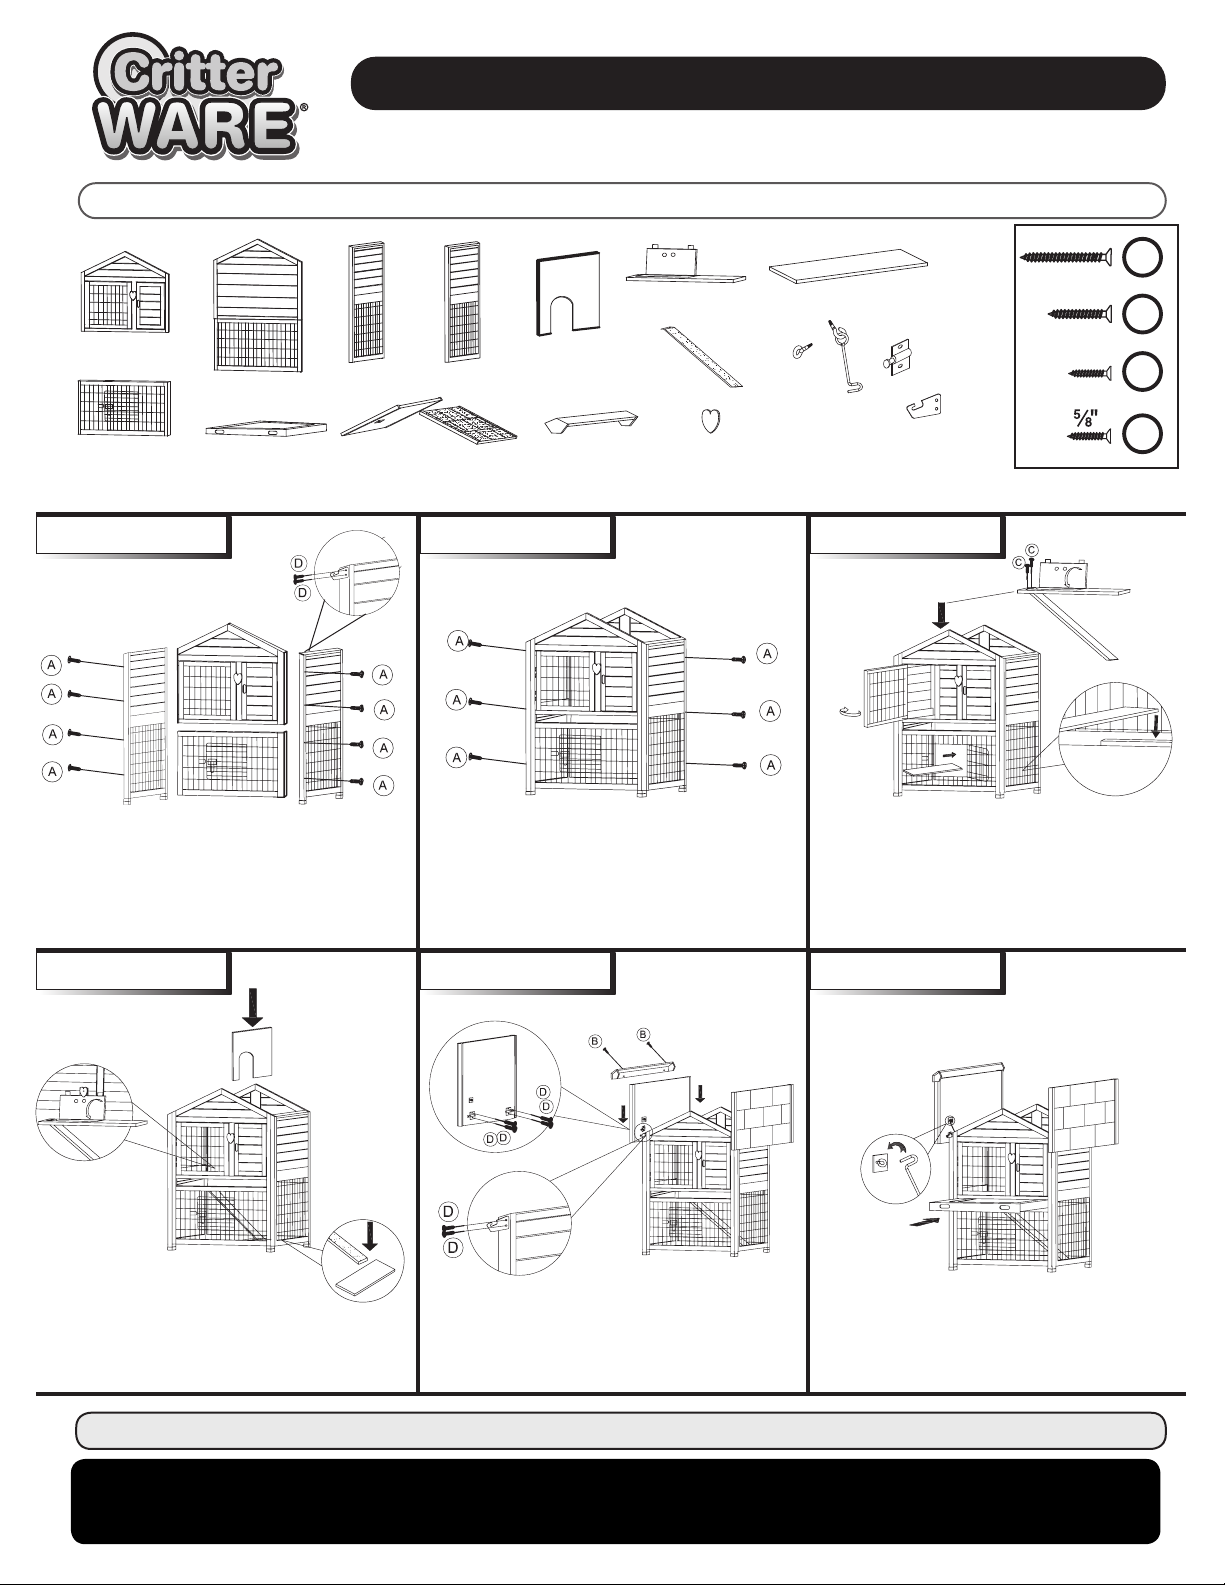
FRONT PANEL (up)
#900193
BACK PANEL
#900159
FRONT PANEL (down)
DRAWER
STEP 1 STEP 2
LEFT SIDE
#900009
LEFT ROOF
RIGHT SIDE
#900068
RIGHT ROOF
PARTITION
#900165
RIDGE CAP
MIDDLE FLOOR
#900196
LADDER
#900158
KNOB (2)
HOOK
& EYE
SAFETY
LATCH
#900177
BASE PLATFORM
#900167
HINGE
#900288
HINGE PLATE
#900289
STEP 3
Assembly
Instructions
1¾"
14 pcs
2 pcs
2 pcs
16 pcs
A
1"
B
½"
C
D
Set up side and front panels.
Attach panels using 8- 1¾" screws (A).
Attach hinge plates to side panels
using 8- 5/8" screws (D).
STEP 4 STEP 5
The doorway
between the
upper and lower
level can be
locked open
or closed as
needed.
Insert the partition. Ladder rests on the
base platform.
panels as shown. Secure ridge cap on
Set up back panel.
Attach back panel using
6- 1¾" screws (A).
Attach hinges to bottom side of roof
roof using 2- 1" screws (B).
Attach ladder to middle floor using
2- ½" screws (C). Insert ladder, middle
floor and brace. Place base platform
inside lower section so it rests on the
lower edge inside.
STEP 6
Screw hook and eye safety latch in
place on the roof. Slide drawer in place
as shown.
WARE TIP: To preserve the life and beauty of your Bunny Barn, we recommend annual treatment with a non-toxic water-based stain.
If you have any questions or concerns about this product, contact our customer service
department at 1-800-295-2243 or [email protected] and we will help you with any
problems, Mon-Fri 8:00-4:00 MST
 Loading...