

Ware Pet Products Pagoda Hutch 14054 Assembly Instructions Manual
Step 1 Step 2
Chicken
ChickenChicken
A
B
C D
E
F
G H
J
Q
x4
R
S
x4
L
M
x2
N
x2
O
I K
P x4
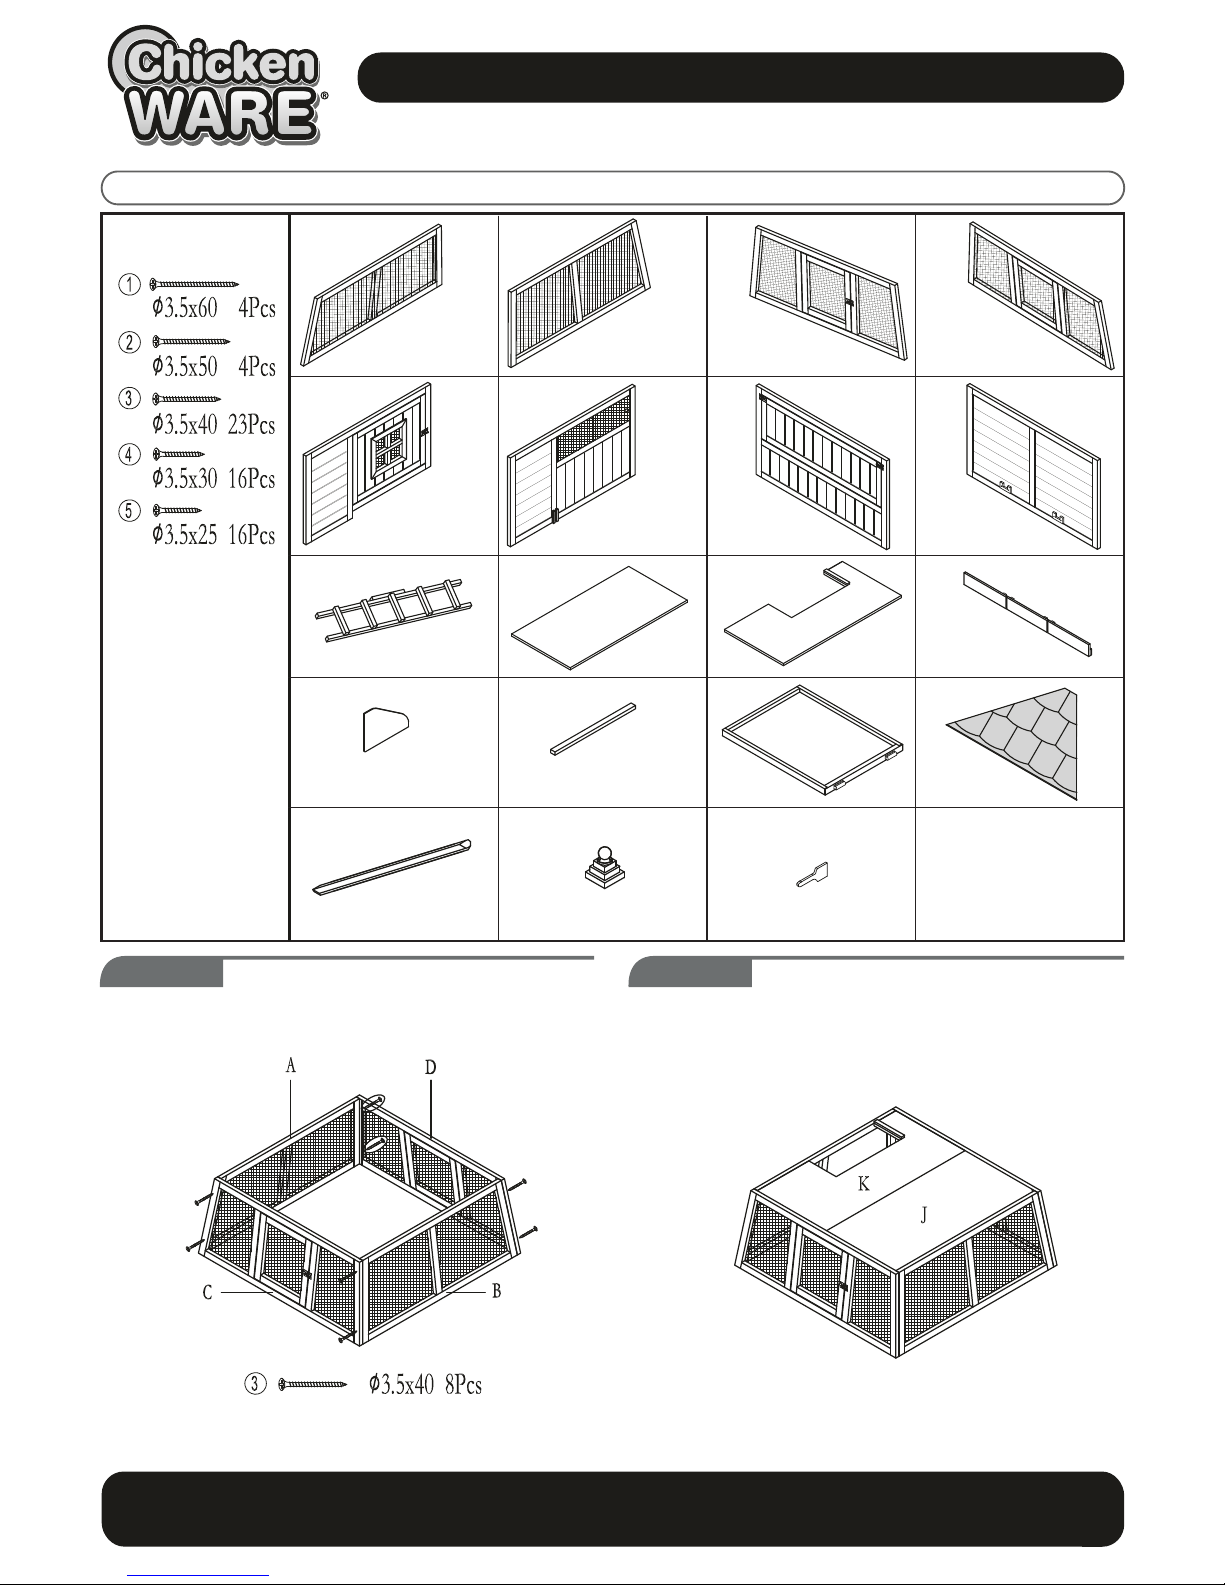
Assemble the hutch pen by attaching the
Back Wire Panel (A), Front Wire Panel (B), Left Wire Panel
(C), and Right Wire Panel using eight Ø3.5 x 40 screws
(3).
Assemble the floor by placing Floor Panel 1
(J) and Floor Panel 2 (K) onto the assembled wire base.
Chicken Pagoda Hutch
Assembly
Instructions
Hardware
#902150
Item #14054
#30014054
Back Pen Pa nel
#9 02131
Front Pen Pan el
#9 0213 2
Left Pen Pa nel
#9 0213 3
Right Pen P anel
#9 0213 4
Front Panel
#9 0213 5
Back Pane l
#9 0213 6
Left Pan el
#9 0213 8
Right Panel
#9 0213 8
Ladder
#9 0213 9
Floor Panel 1
#9 02140
Floor Panel 2
#9 02141
Nest Box G uide
#9 02142
Nest Box D ivider
#9 02143
Roost Ba r
#9 0214 4
HUTCH PEN
Pull Pan
#9 02145
Roof rid ge cap
#9 02147
Roof Finial
#9 02148
Handles
#9 02149
Roof Panel
#9 02146
If you have any questions or concerns about this product contact our customer service department
at 1-800-295-2243 Mon-Fri 8:00 – 4:00 MST or email us at cs@waremfginc.com
Step 3 Step 4
Step 5 Step 6
Step 7 Step 8
Step 9 Step 10
Care Tip
To protect the wood on your hutch you need to re-apply the protective stain finish at least 1x each year.
Use a safe and non-toxic water based stain (available at your local paint or hardware center).
Keep hutch in a safe area away from high winds and extreme temperatures.
If you have any questions or concerns about this product contact our customer service department
at 1-800-295-2243 Mon-Fri 8:00 – 4:00 MST or email us at cs@waremfginc.com
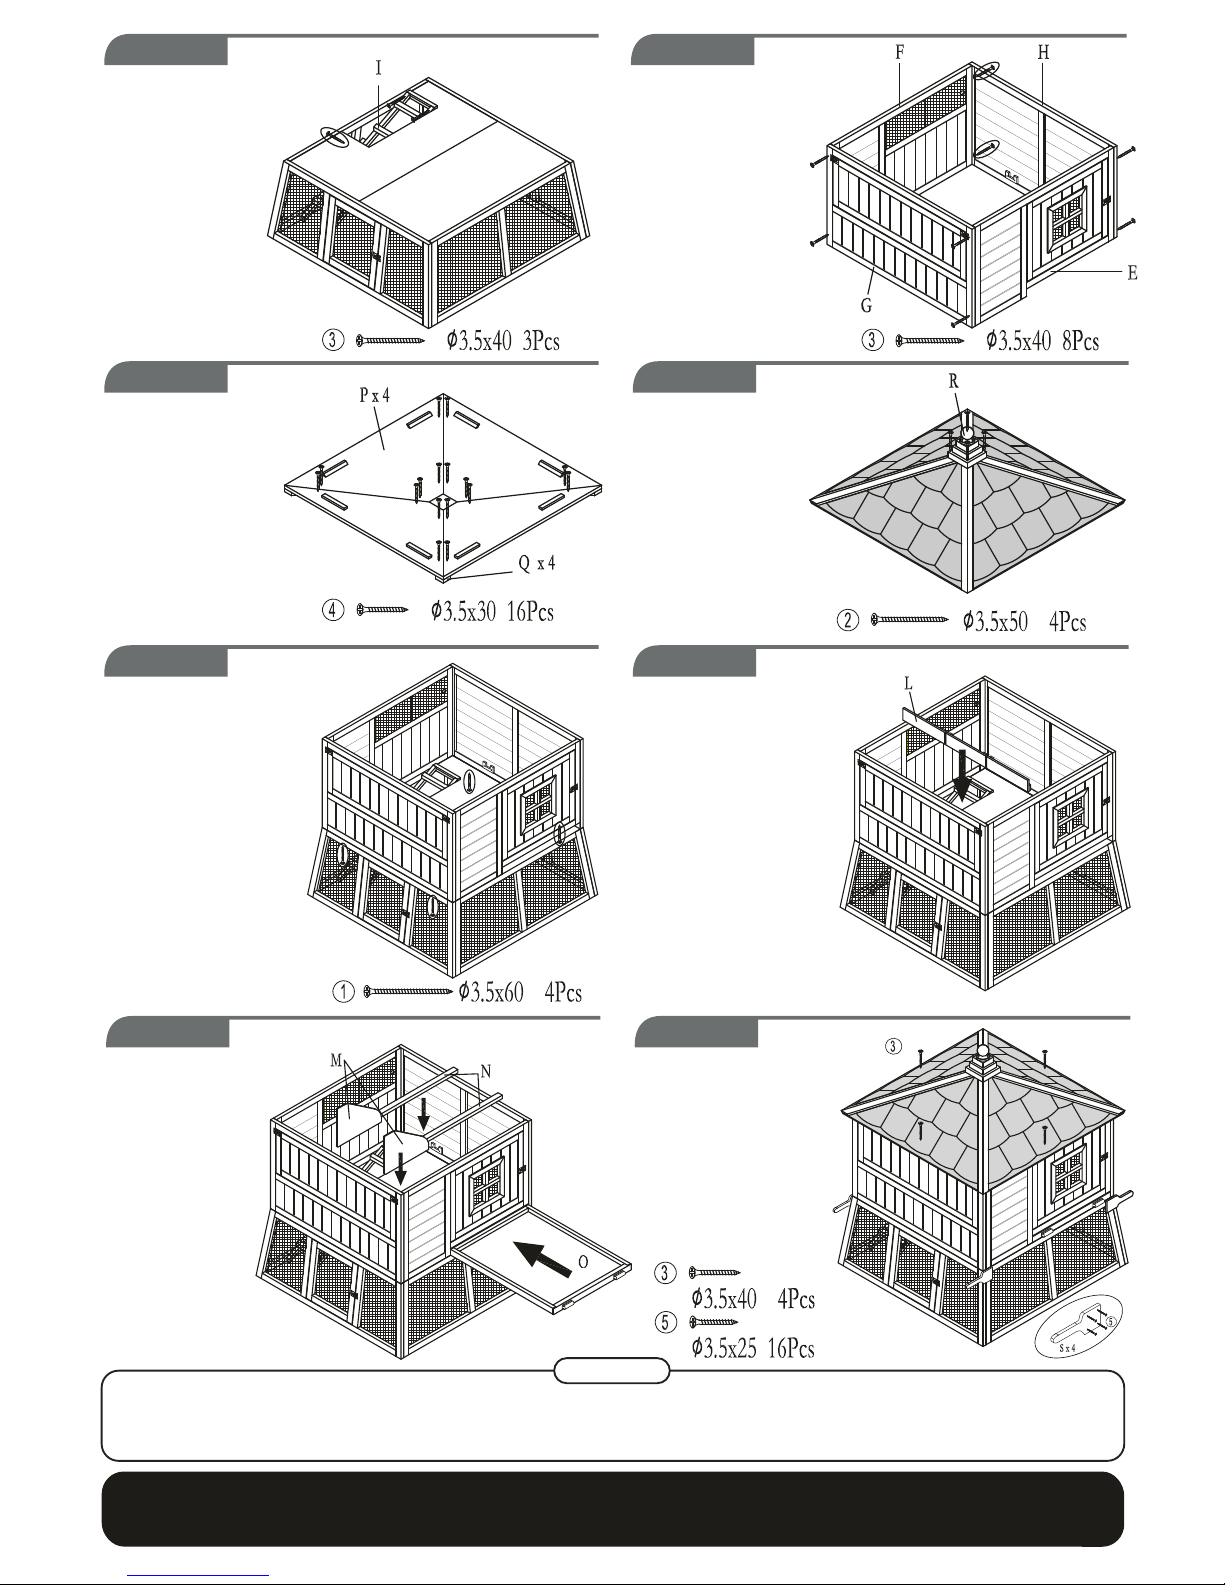
Assemble the
main hutch body by attaching
the Front Panel (E), Back
Panel (F), Left Panel (G),
and Right Panel (H)
using eight Ø3.5 x 40
screws (3).
Attach the Ladder (I) to
Floor Panel 2 (K) using
three Ø3.5 x 40 screws.
Assemble the hutch roof by
attaching the roof panels (P)
to the Roof Ridge Caps
(Q) using sixteen
Ø3.5 x 30 screws (4).
Attach the Hutch Pen to
the Hutch Body using four
Ø3.5 x 60 screws (1).
Place the Roost Bars
(N) into the wooden
slots on the Left
Panel and Right
Panel of the hutch.
Place the Nest Box
Dividers (M) into
the guide slots in
the nest box.
Slide the Pull Pan
(O) into the slot on
the Front Panel.
Place the Nest Box Guide
(L) into the wooden slots
on the Front and Back
Panels of the hutch body.
Attach the Roof to the
Hutch Main Body using
four Ø3.5 x 40 screws
(3).
Attach the Handles (S)
to the hutch pen using
sixteen Ø3.5 x 25
screws (5).
Attach the Roof Finial (R) to
the assembled hutch roof
using four 3.5 x 50 screws
(2).
HUTC H BODY
HUTCH RO OF
 Loading...