

Ware Manufacturing Chick-N-Hutch Assembly Instructions Manual
625 S. 27th Avenue
Suite 120
Phoenix, AZ 85009
www.waremfginc.com
1-800-295-2243
Revised 02/10/09
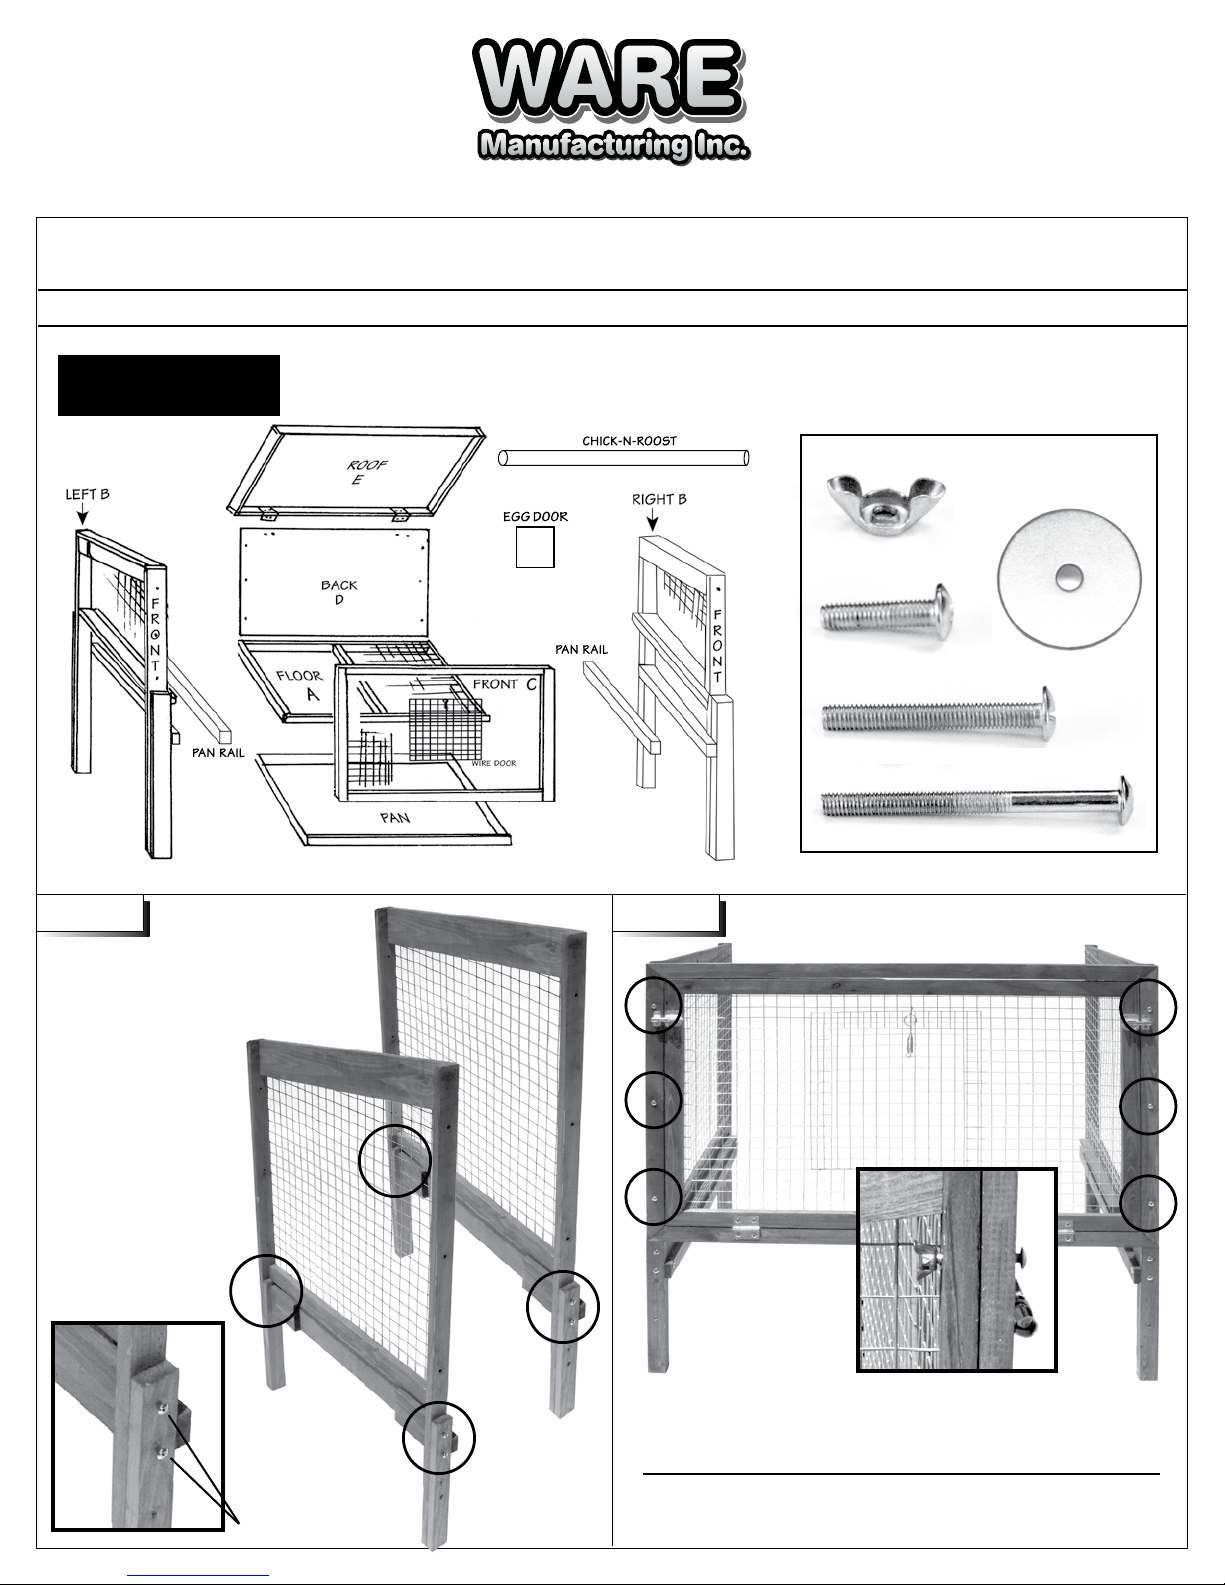
Chick-N-Hutch
All wire must face
into the cage
•
Assembly Instructions
Tools Required: Regular Screwdriver
17 - Wing Nuts
10 - ¾
8 - 1 ½
14 - 2
PARTS DESCRIPTION:
6 - Washers
Bolts
”
Bolts
”
Bolts
”
STEP 1
Install Pan Rails
on the Left "B"
and Right "B"
sides using
8- 2" Bolts
2" Bolts
1 of 2
STEP 2
Fasten Side Panels (B) to Front Panel (C).
Use 6- 2" Bolts and 6- Wing Nuts.
Make Sure Door Faces Outward on Left Side
and that the Hutch Slants to the Back.
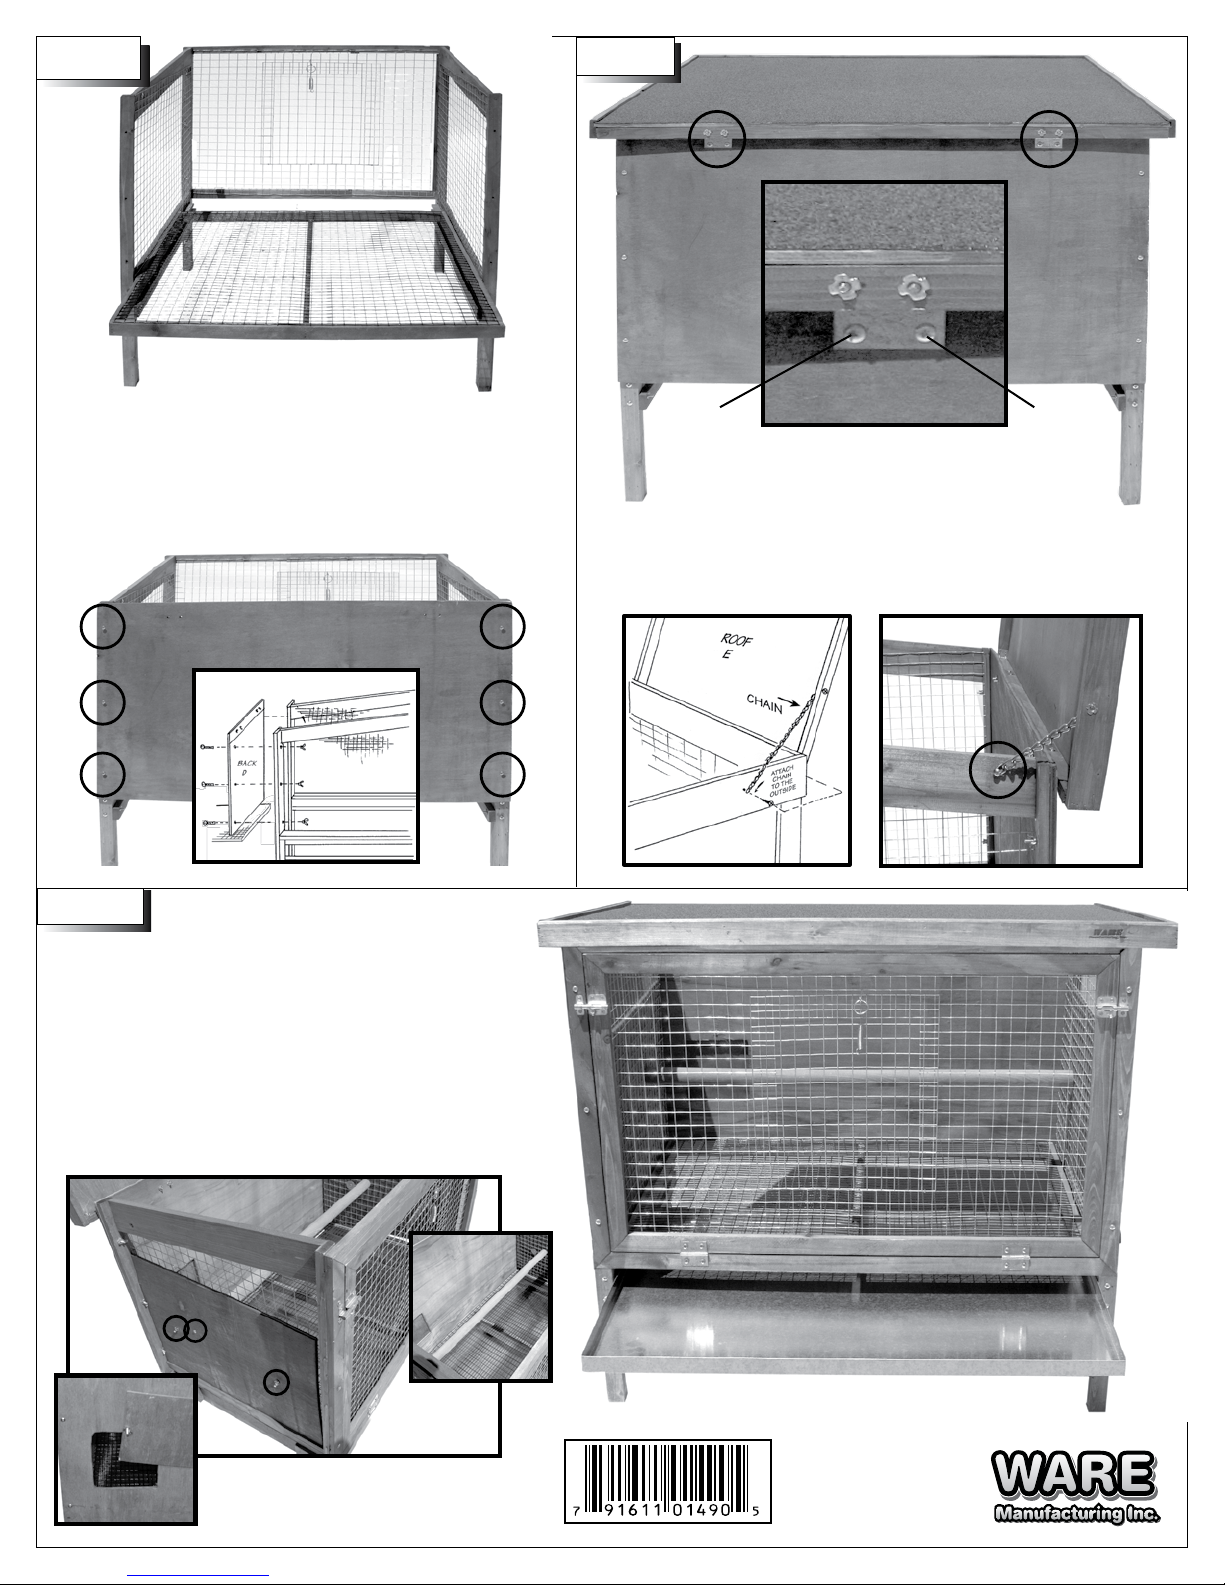
STEP 3
STEP 4
FLOOR
Slide Floor into Bottom of Hutch, Wire
Side Up. Align Side Holes and Fasten
Back Panel (D) to Side Panels using
6- 1 1/2" Bolts and 6- Wing Nuts.
Wing Nuts should face into the Hutch.
STEP 5
Slide Pan in Front Below Floor on Pan
Rails. Attach Wind Guards to Outside
Side Panels Using 4- 3/4" Bolts,
4- Washers and 4- Wing Nuts.
3/4" Bolt 3/4" Bolt
Set Roof on Top of Hutch.
Align Hinges and Attach 4- 3/4" Bolts.
Install “Stop Chain” as Shown Below
using 1- 3/4" Bolt.
Attach Chick-N-Roost Using
2- 1 1/2" Bolts and 2- Washers
Attach Egg Door with
1- 3/4" Bolt and 1- Wing Nut
Tip: This item (as any wood) should be periodically (every 12 to 18 months
depending on climate) treated with a non-toxic exterior grade stain.
ITEM #01490
MADE IN CHINA
to the exact Design Specications of
WARE MFG.INC
Phoenix, AZ, USA 85004
VISIT US AT
www.waremfg.com
 Loading...