

Ware Manufacturing 01465 Assembly Instructions Manual
Premium+ Chick-N-Barn Assembly Instructions
Item #01465 Tools Required: Standard Screwdriver
A
12-Bolts and Nuts: 2 1/2”
B
8-Wood Screws: 1 3/4”
C
8-Wood Screws: 1 1/4”
D
6-Wood Screws: 3/4”
Hardware Part #900140
STEP 1
Unfold the Front and Back panels. Attach Left side panel to Back
panel with two 2 1/2” Bolts and Nuts (A). Then attach Right side
panel to Back panel with two 2 1/2” Bolts and Nuts (A). Then
attach the Front panel with four
2 1/2” Bolts and Nuts (A).
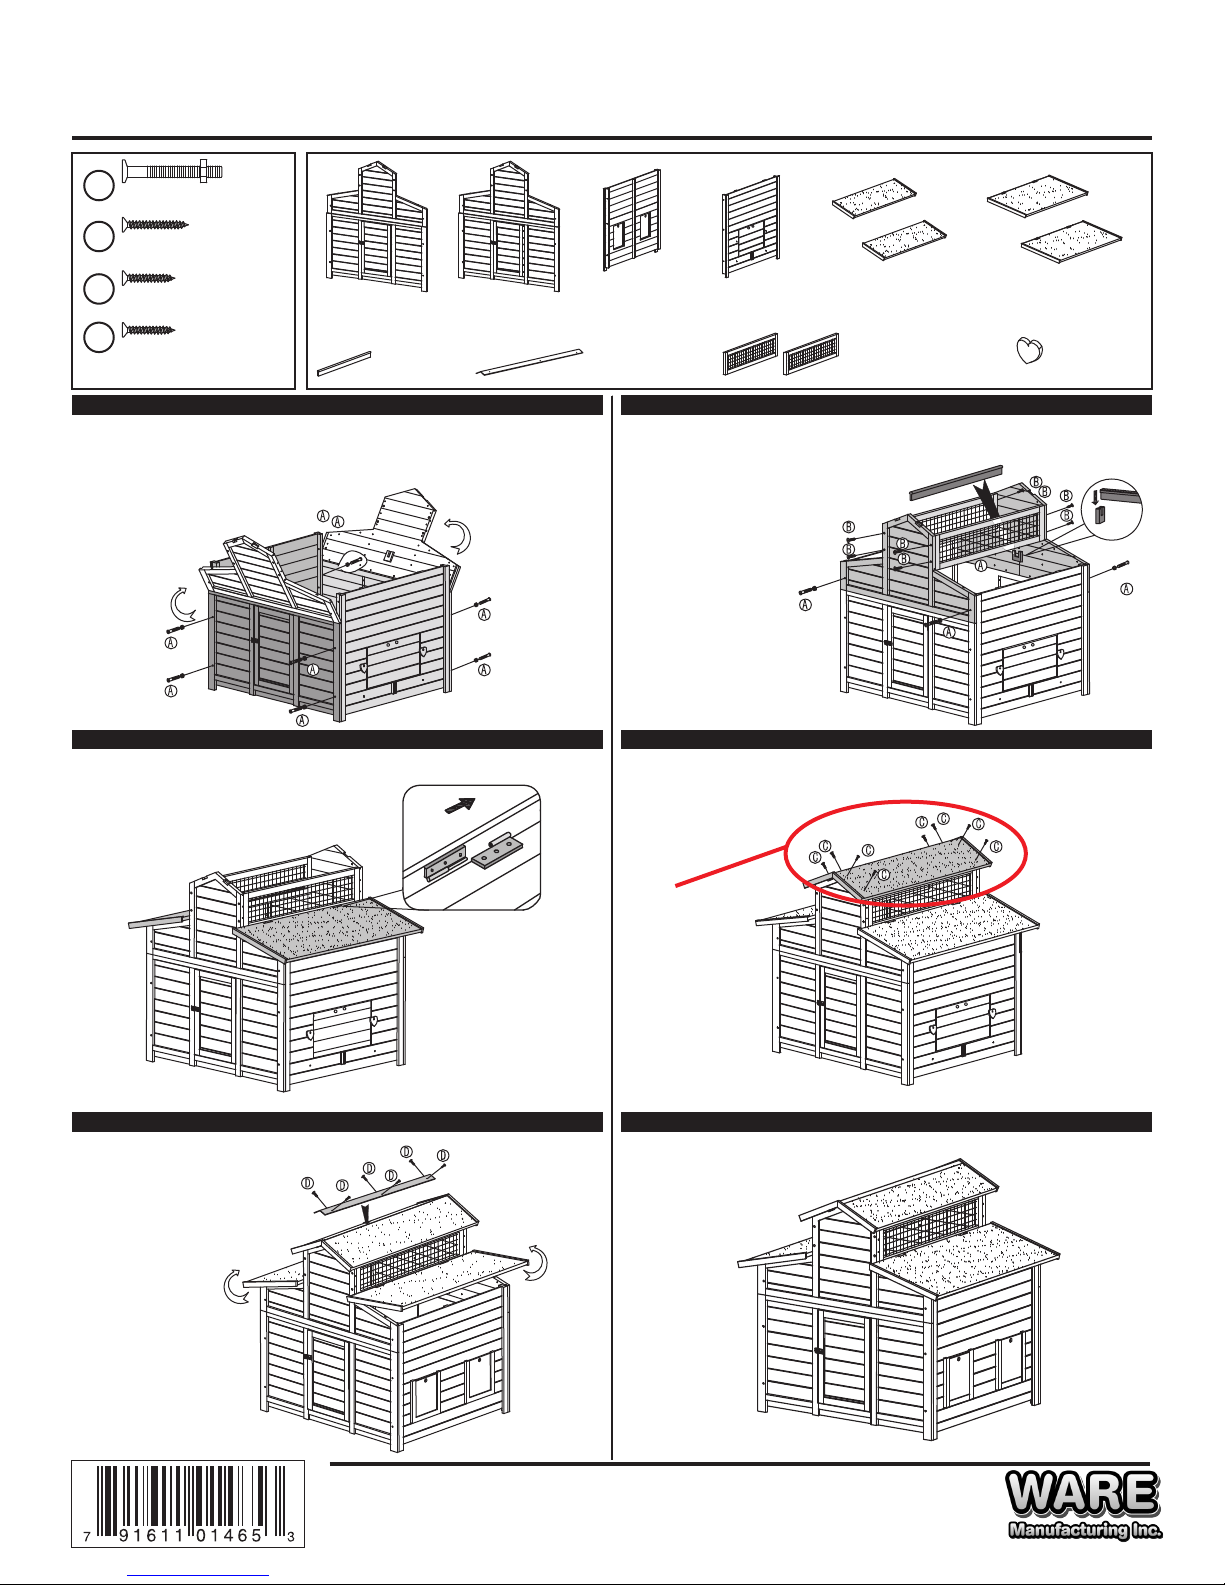
STEP 3
Slide the hinges together on each Large side roof to the Side
screens and swing down to close.
Front panel
#900131
Roosting bar
#900135
Back panel
#900139
Left side panel
#900130
Ridge cap
#900136
STEP 2
Secure the Front and Back panels with four 2 1/2” Bolts and Nuts
(A). Place roosting bar in notched area in upper section. Attach
each screen with four
1 3/4” wood screws (B).
STEP 4
Attach each Top small roof separately using four 1 1/4” wood
screws (C). Eight total wood screws (C) used in this step.
Right side panel
#900132
Top roof x 2 (Small)
#900133
Two side screens x 2
#900137
Two side roof x 2 (Large)
#900134
Heart-shaped
Knob x 2
#900138
STEP 5
Attach Roof cap on Barn, align holes
and secure with six
3/4” wood screws (D).
Item #01465
Item needs
8 pre drilled
holes and
8 wood screws
1 1/4” in size.
STEP 6
Finished Premium+ Chick-N-Barn.
to the exact design specifications of: WARE MFG. INC. Phoenix, AZ 85009, USA
Made in China
www.waremfginc.com
 Loading...