

wanscam JW0009, JW0018 Quick Installation Manual
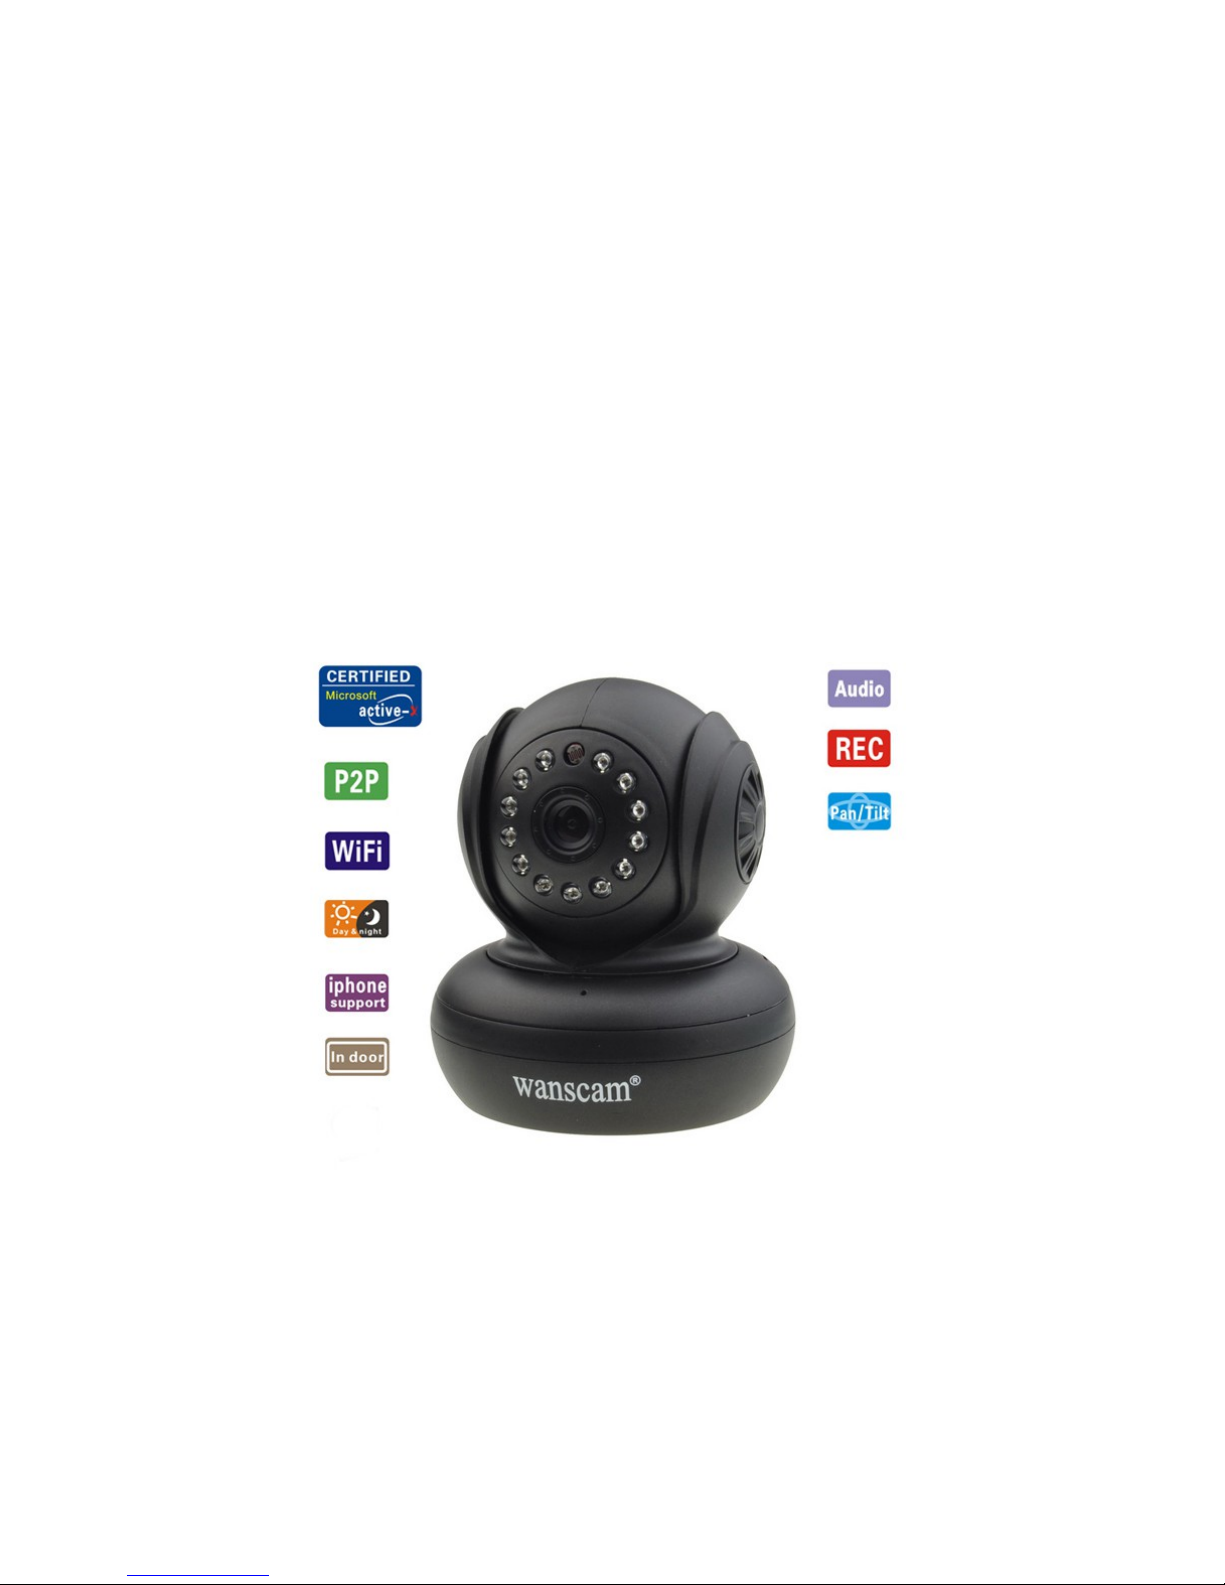
Wireless IP
Camera
Quick Installation
Guide
(Model:JW0009,JW0018,etc)
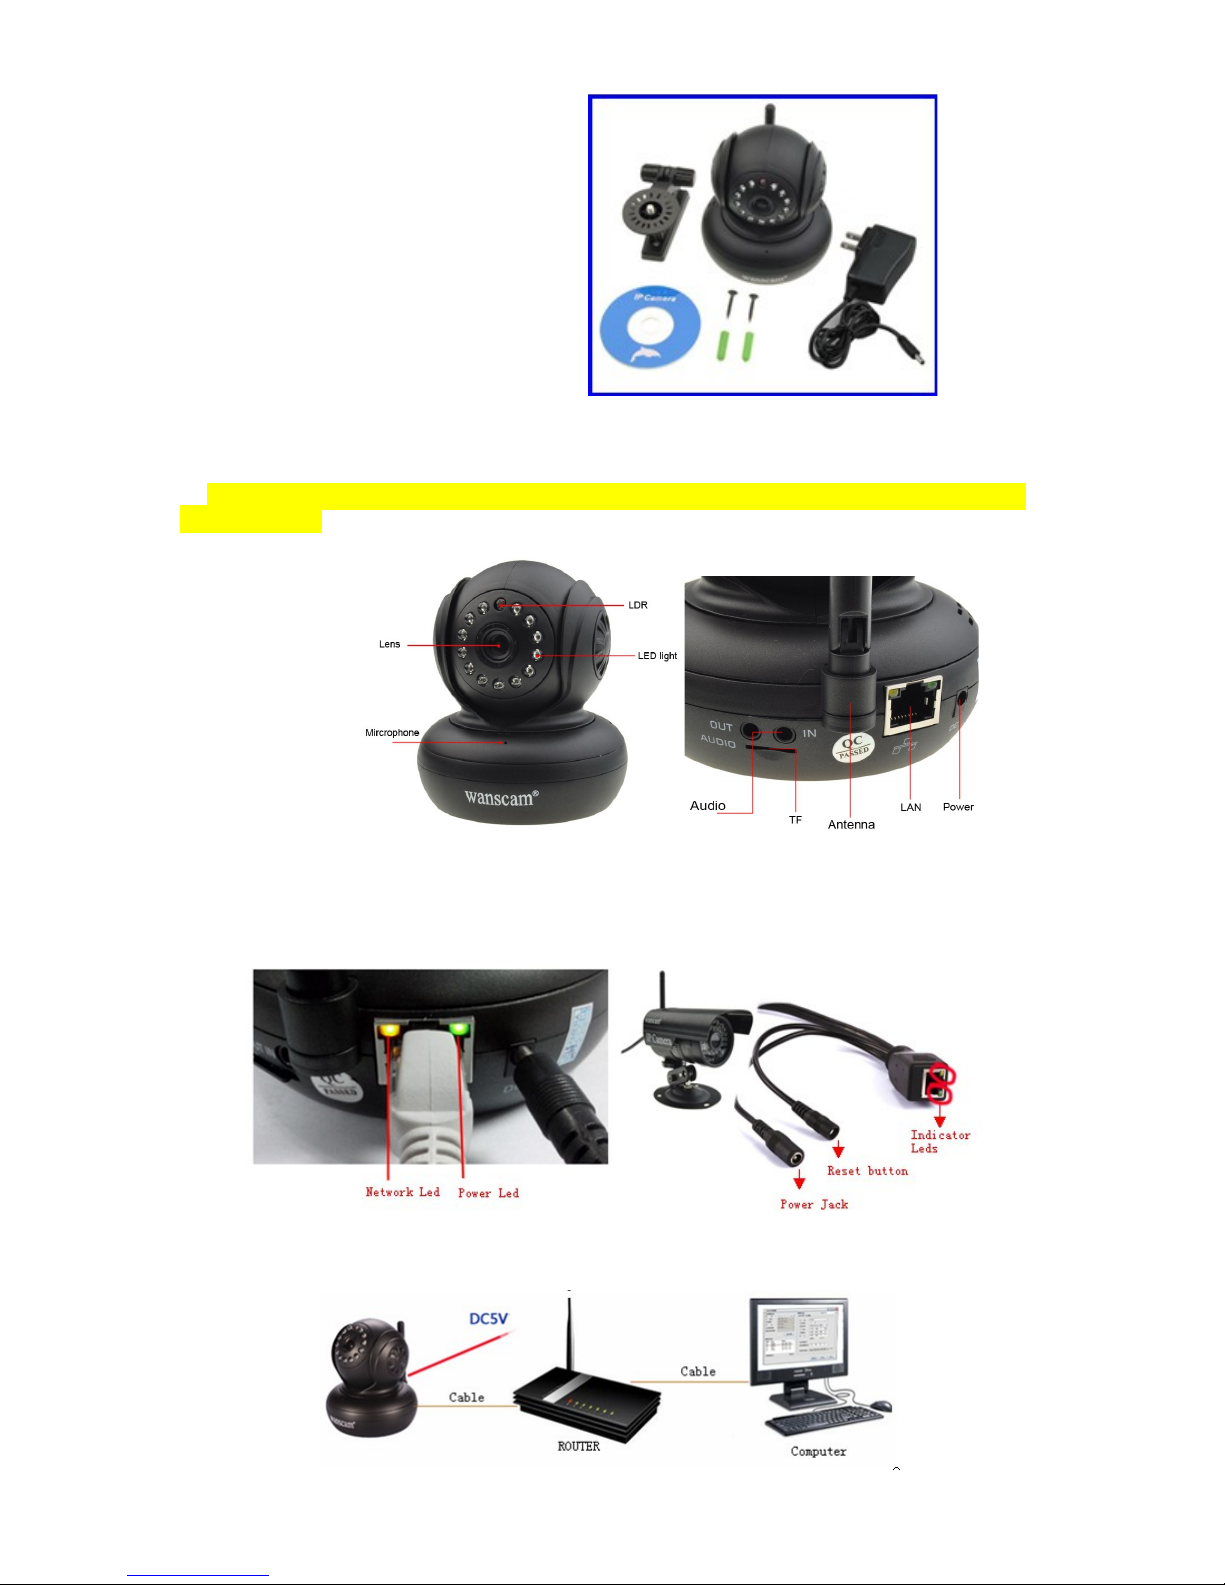
Packing List
●IP Camera X1
●DC Power Supply X1
●CD X1
●Certificate of Quality X1
●Warranty Card X1
●Mounting bracket X1
Step 1: Hardware Installation
1. Install the antenna.
2. Plug in the right power supply.
3. Connect the camera to the router (Modem or Switcher) with net cable the first
time you use.
Install the antenna to the back of the camera.Connect the camera to the router,switcher with
net cable. Plug in the power. After a while, the yellow network light at the rear of the camera
will blink and the camera starts to pan and tilt automatically.The green power light will keep on.
The method of the camera connection:
1
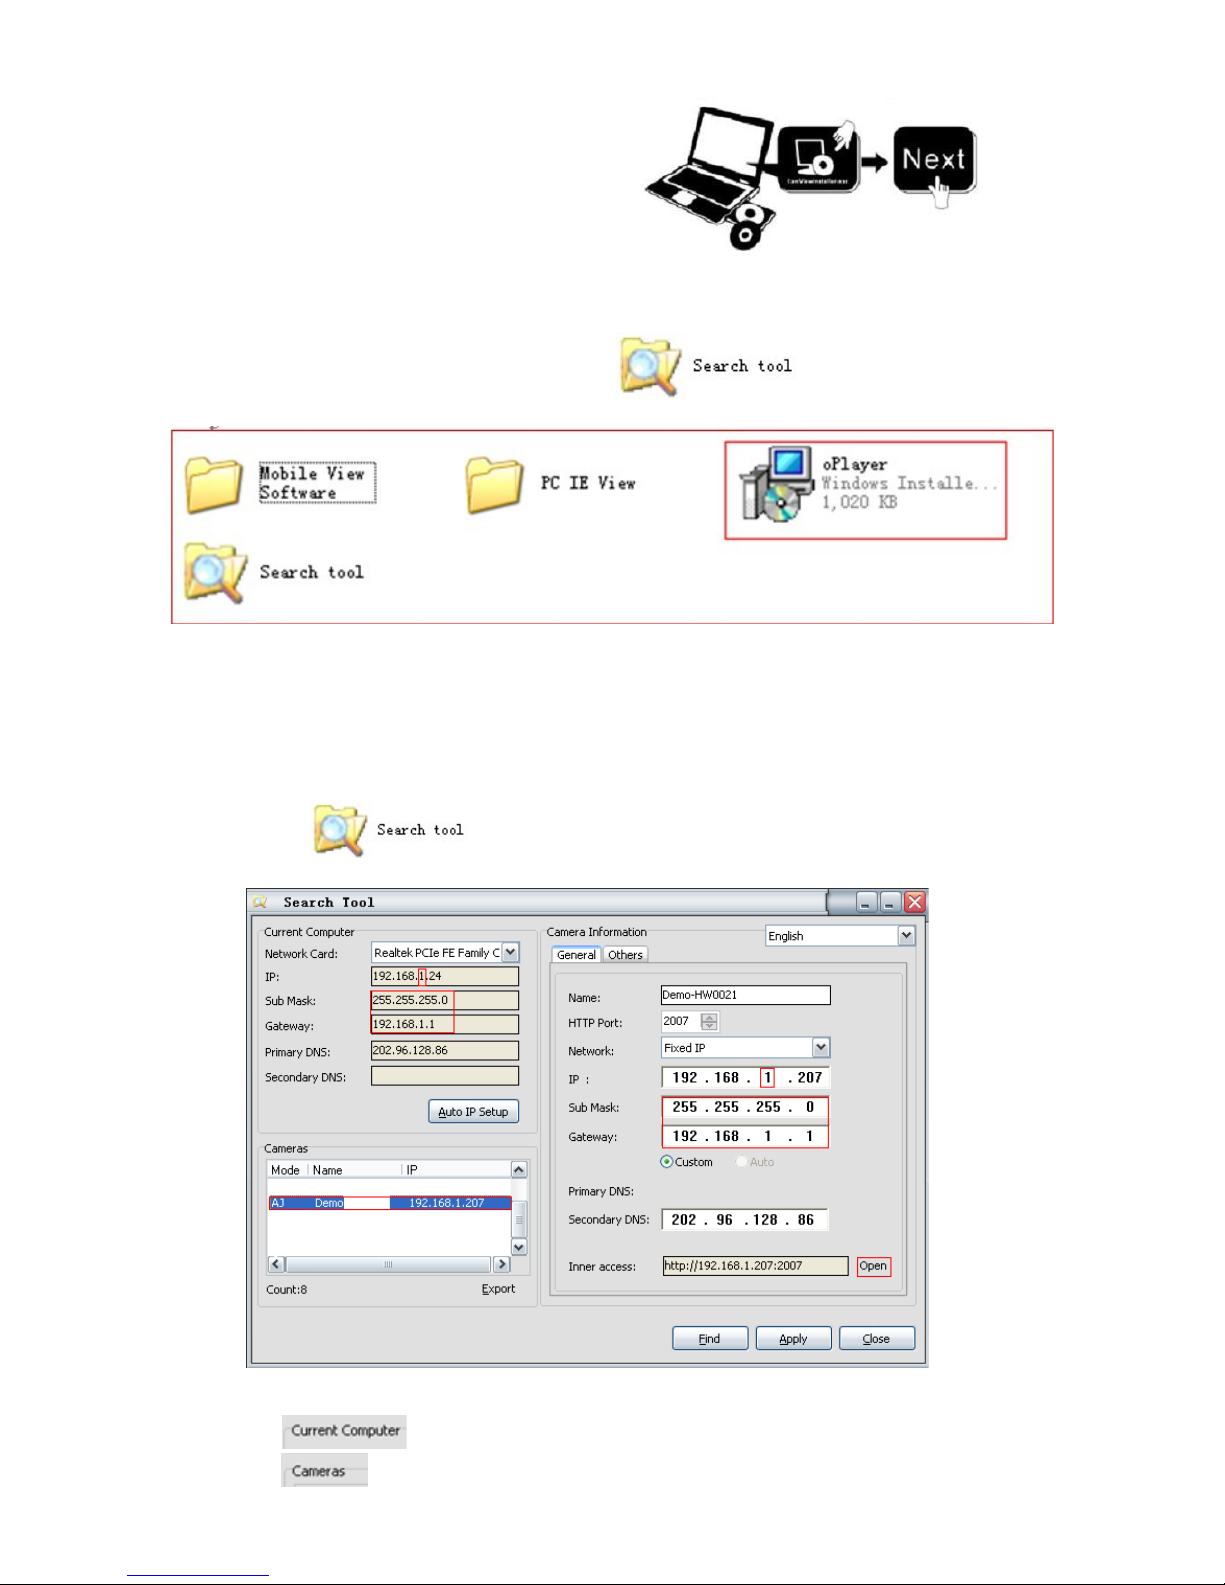
Step 2: Software Installation
Insert the small CD to computer CD driver, open the CD, install the following software:
1. ActiveX: Click “oPlayer”—“Next”—“Install”—“Finish”. (This is just a plugin for IE browser.)
2. Search Tool: Open the CD, click and run to find your camera IP
address,( No need to install. You can copy this software to your desktop.)
The camera has an IP address, fixed or dynamic.Search tool is used to find camera IP address and
port,you can use the search tool to modify your camera’s information as well.
Step 3: Login the Camera
1. Double click , and following screen will pop up.
Attention:1. Shows the computer’s network information.
2. This is camera list,showing the cameras which are connected in LAN.
2
 Loading...