

Wandboard Solo, Dual User Manual

WANDBOARD USER GUIDE
(20130208)

Page 2 of 13
WANDBOARD DESIGN AND DISCLAIMER
These design materials referred to in this document are *NOT
SUPPORTED* and DO NOT constitute a reference design. Only
"community" support is allowed via resources at Wandboard.org forums.
THERE IS NO WARRANTY FOR THE DESIGN MATERIALS, TO THE EXTENT
PERMITTED BY APPLICABLE LAW. EXCEPT WHEN OTHERWISE STATED IN
WRITING THE COPYRIGHT HOLDERS AND/OR OTHER PARTIES PROVIDE
THE DESIGN MATERIALS "AS IS" WITHOUT WARRANTY OF ANY KIND,
EITHER EXPRESSED OR IMPLIED, INCLUDING, BUT NOT LIMITED TO, THE
IMPLIED WARRANTIES OF MERCHANTABILITY AND FITNESS FOR A
PARTICULAR PURPOSE. THE ENTIRE RISK AS TO THE QUALITY AND
PERFORMANCE OF THE DESIGN MATERIALS IS WITH YOU. SHOULD THE
DESIGN MATERIALS PROVE DEFECTIVE, YOU ASSUME THE COST OF ALL
NECESSARY SERVICING, REPAIR OR CORRECTION.
This board was designed as an evaluation and development tool. It was
not designed with any other application in mind. As such, these design
materials may or may not be suitable for any other purposes. If used, the
design material becomes your responsibility as to whether or not it meets
your specific needs or your specific applications and may require changes
to meet your requirements.
Page 3 of 13
Page 4 of 13
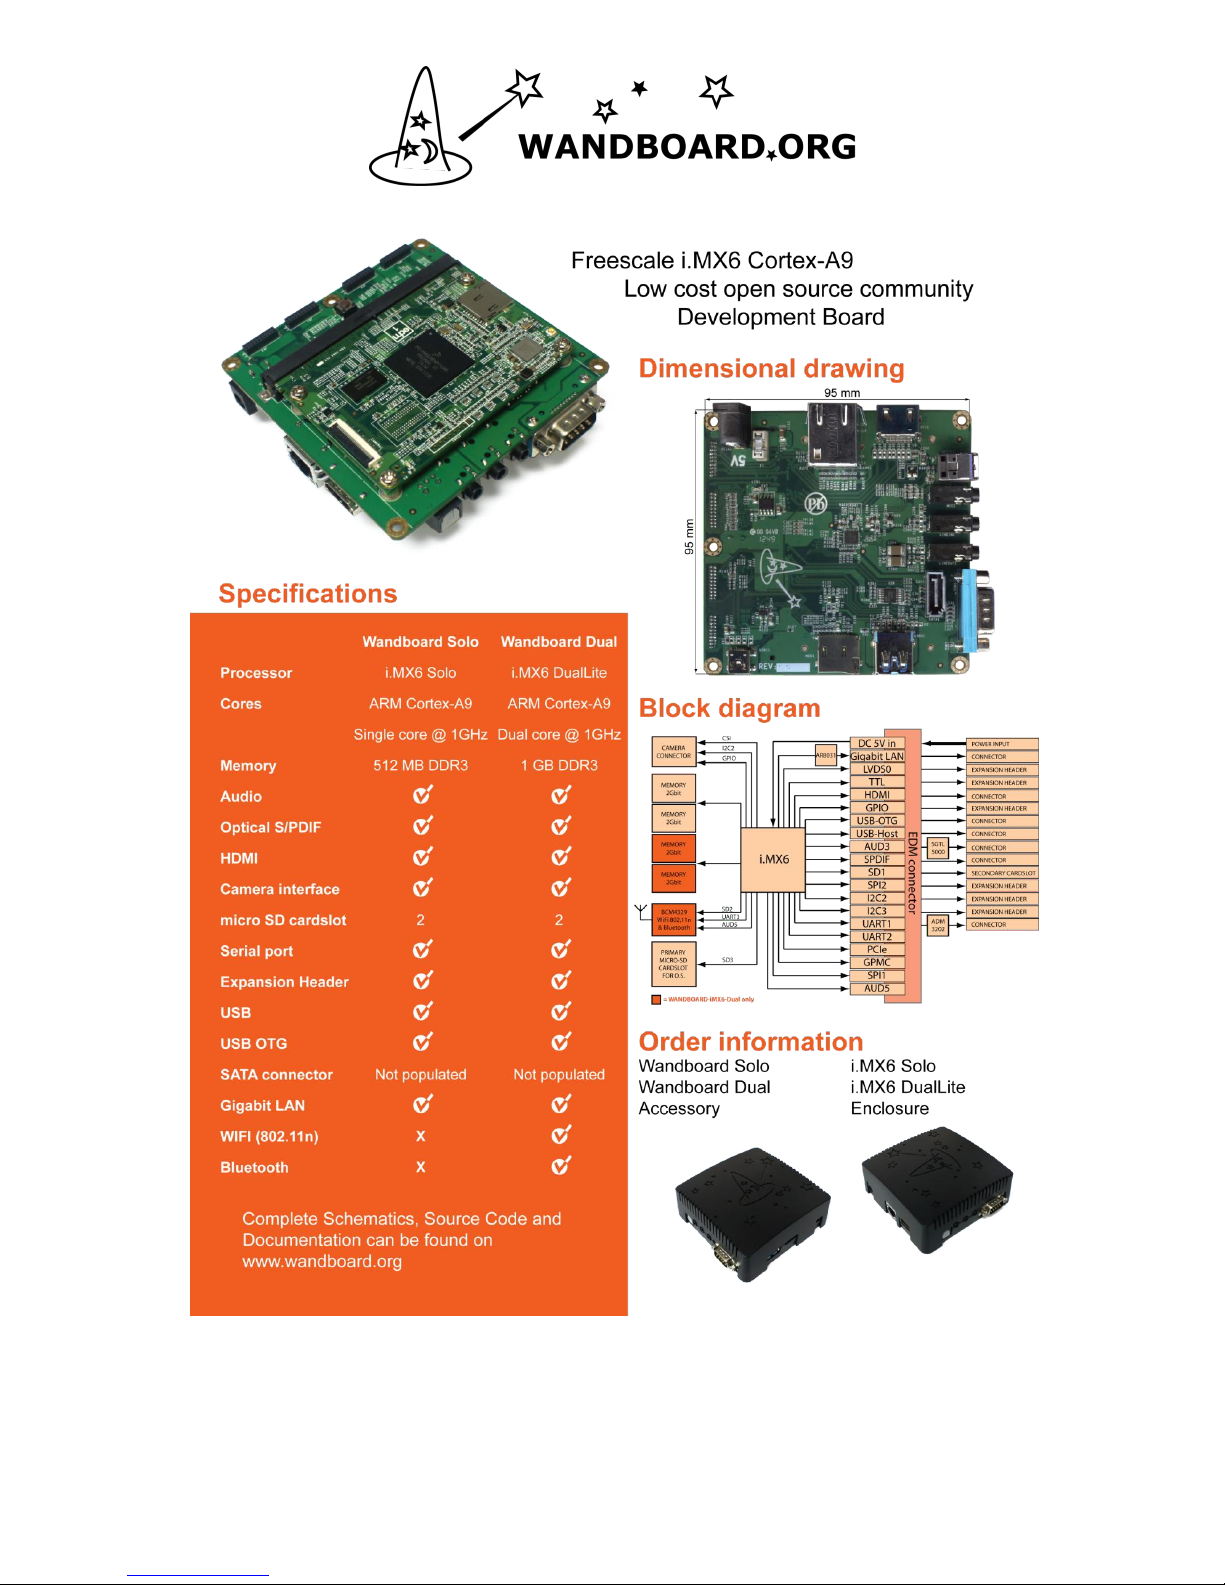
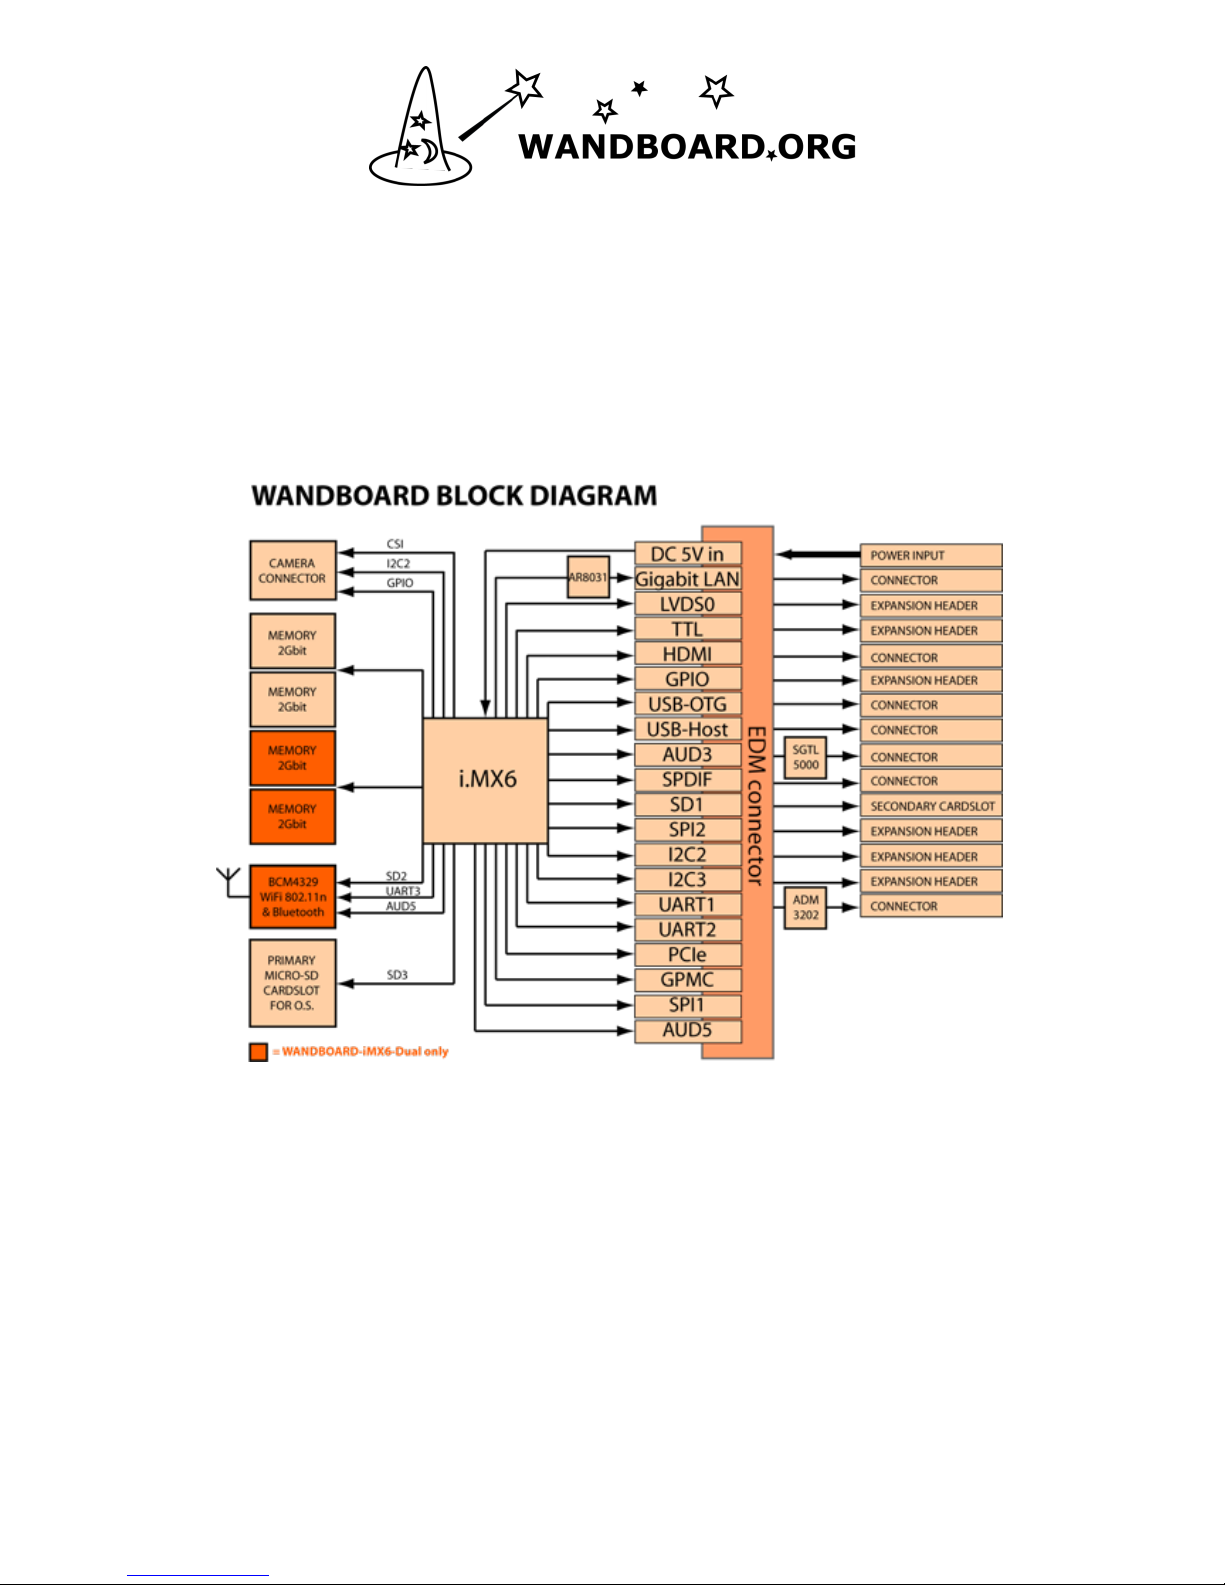
Block Diagram
Page 5 of 13
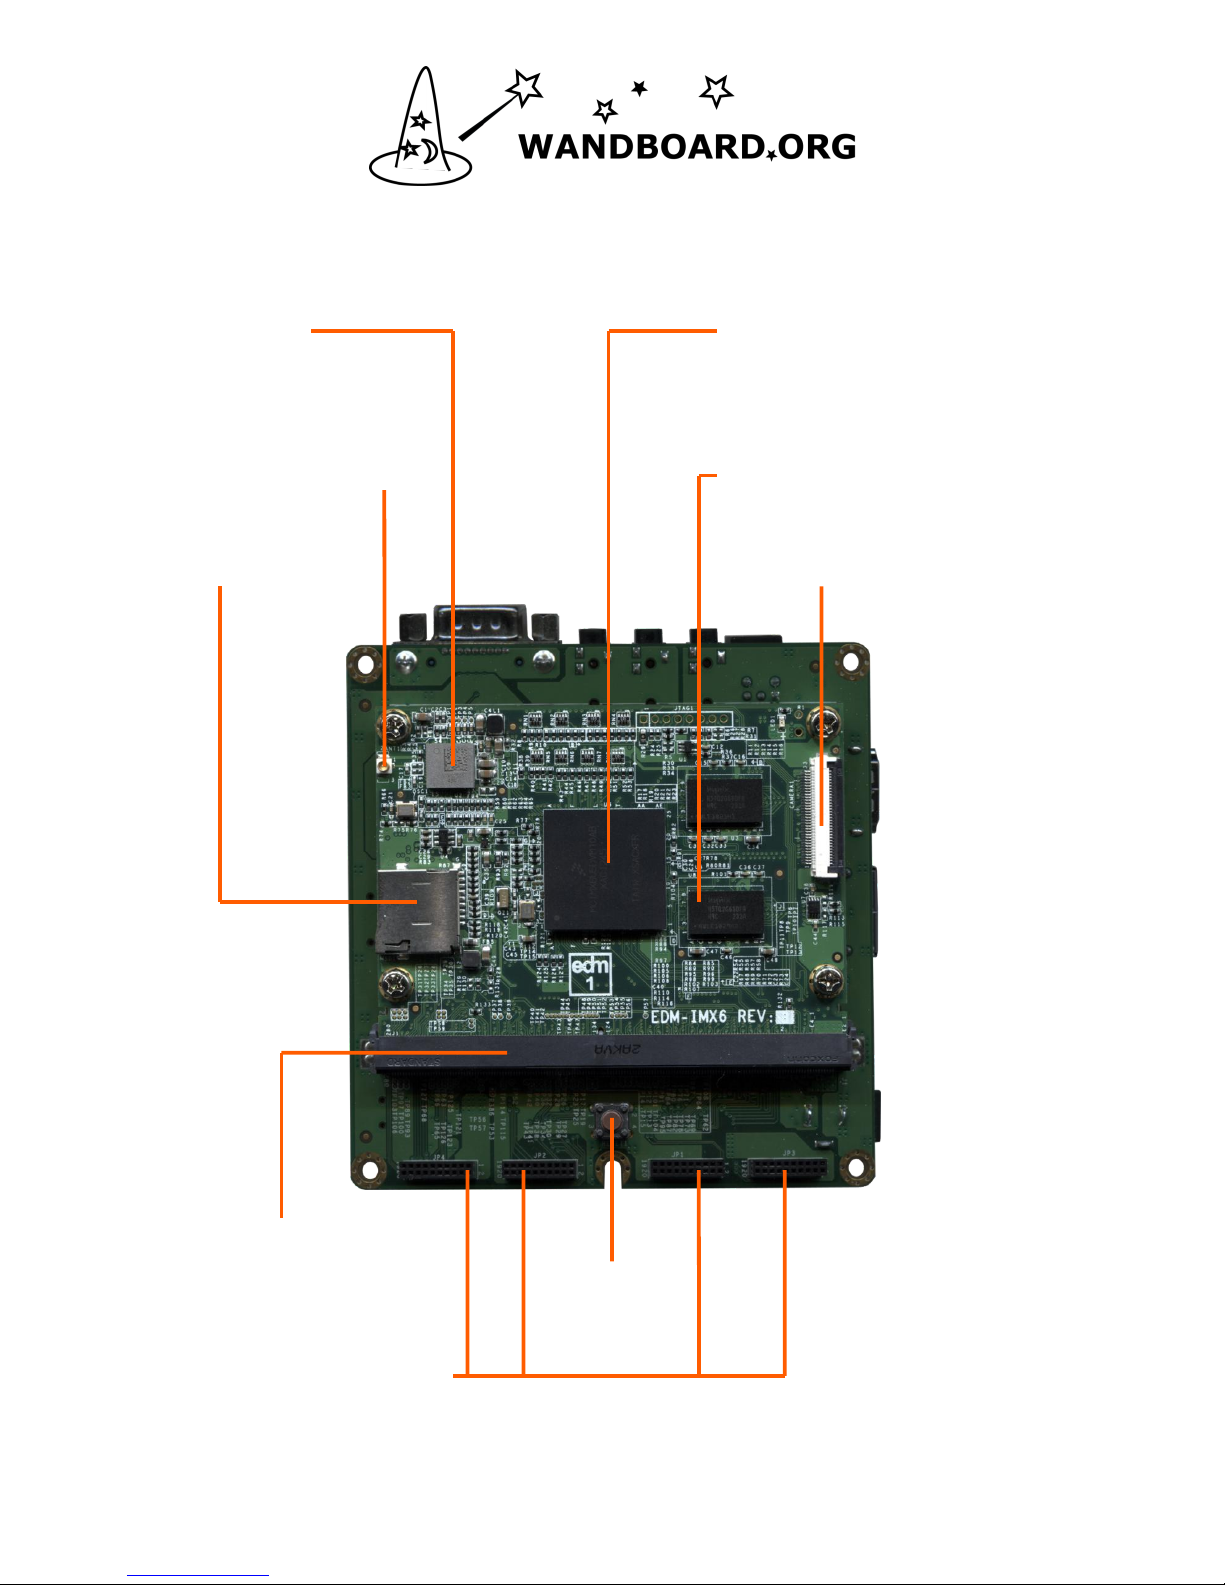
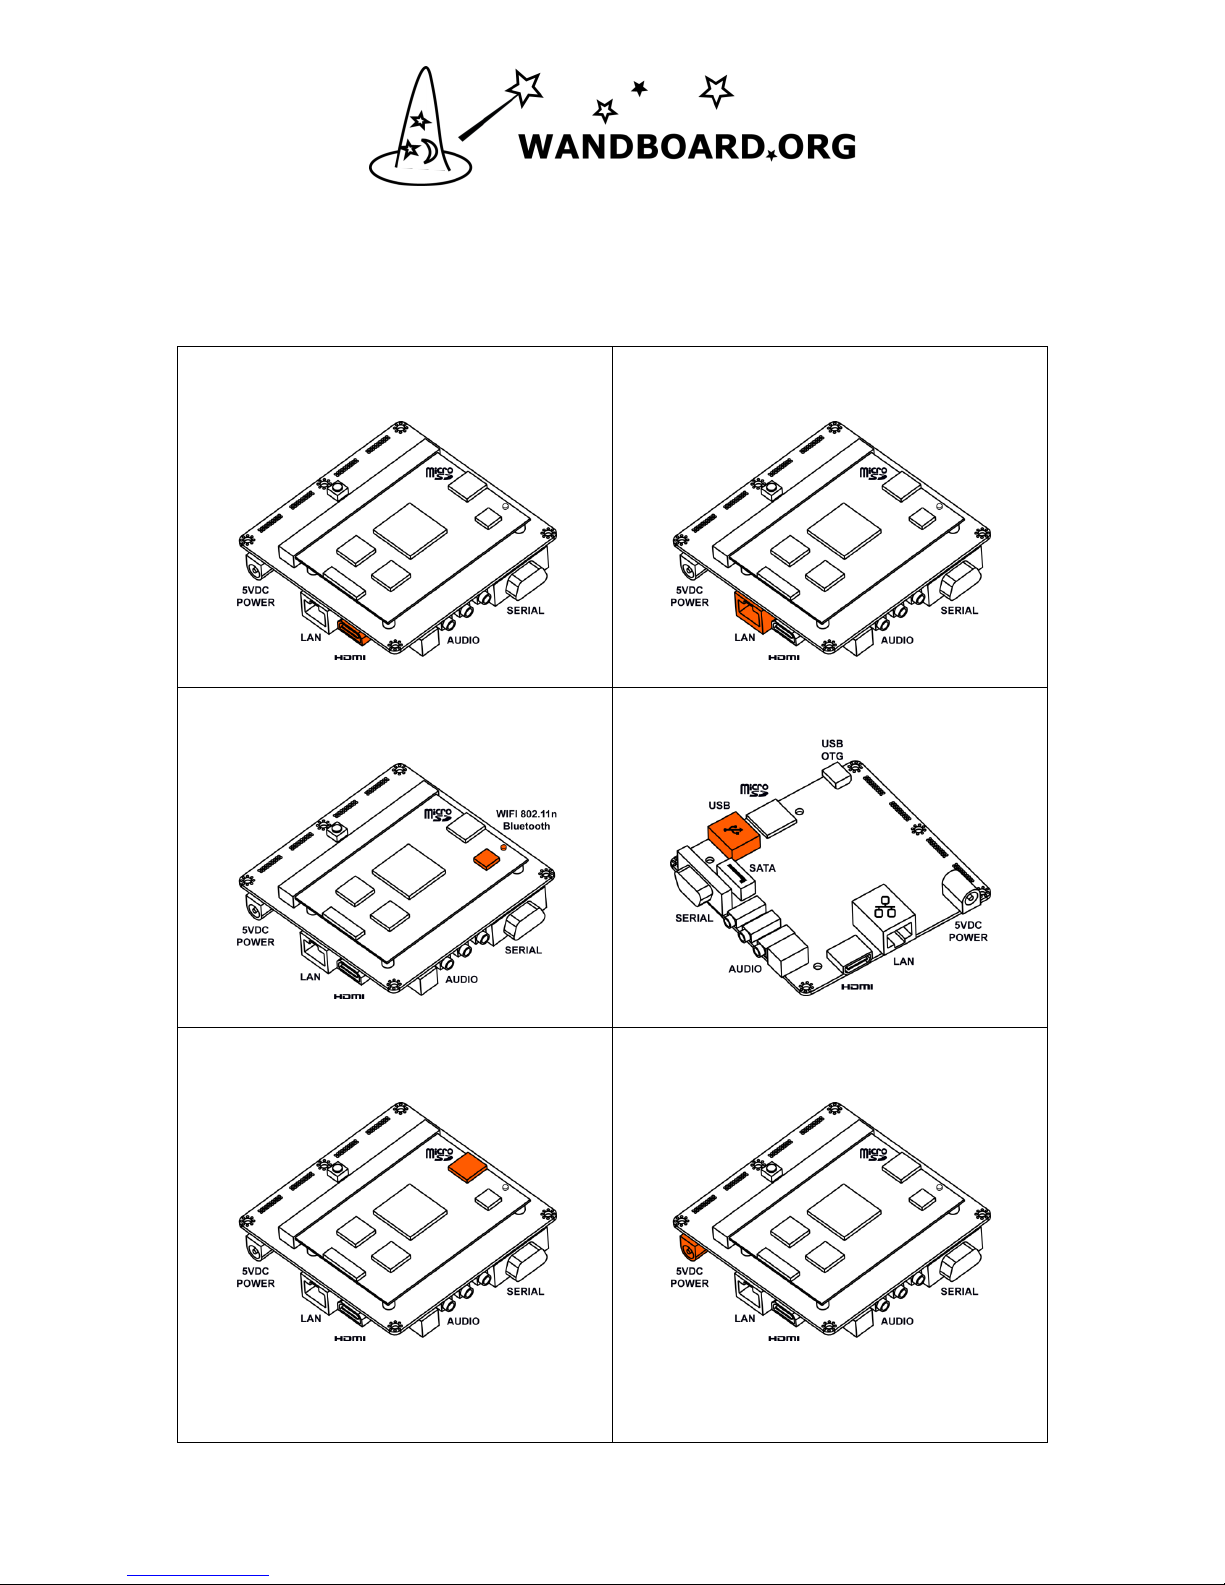
Overview
Wi-Fi chip iMX6 CPU
uFL IPEX connector
for Wi-Fi & Bluetooth Memory
SD-card (OS) Camera header
EDM-Standard
Connector Reset button
Expansion Pin headers
Page 6 of 13
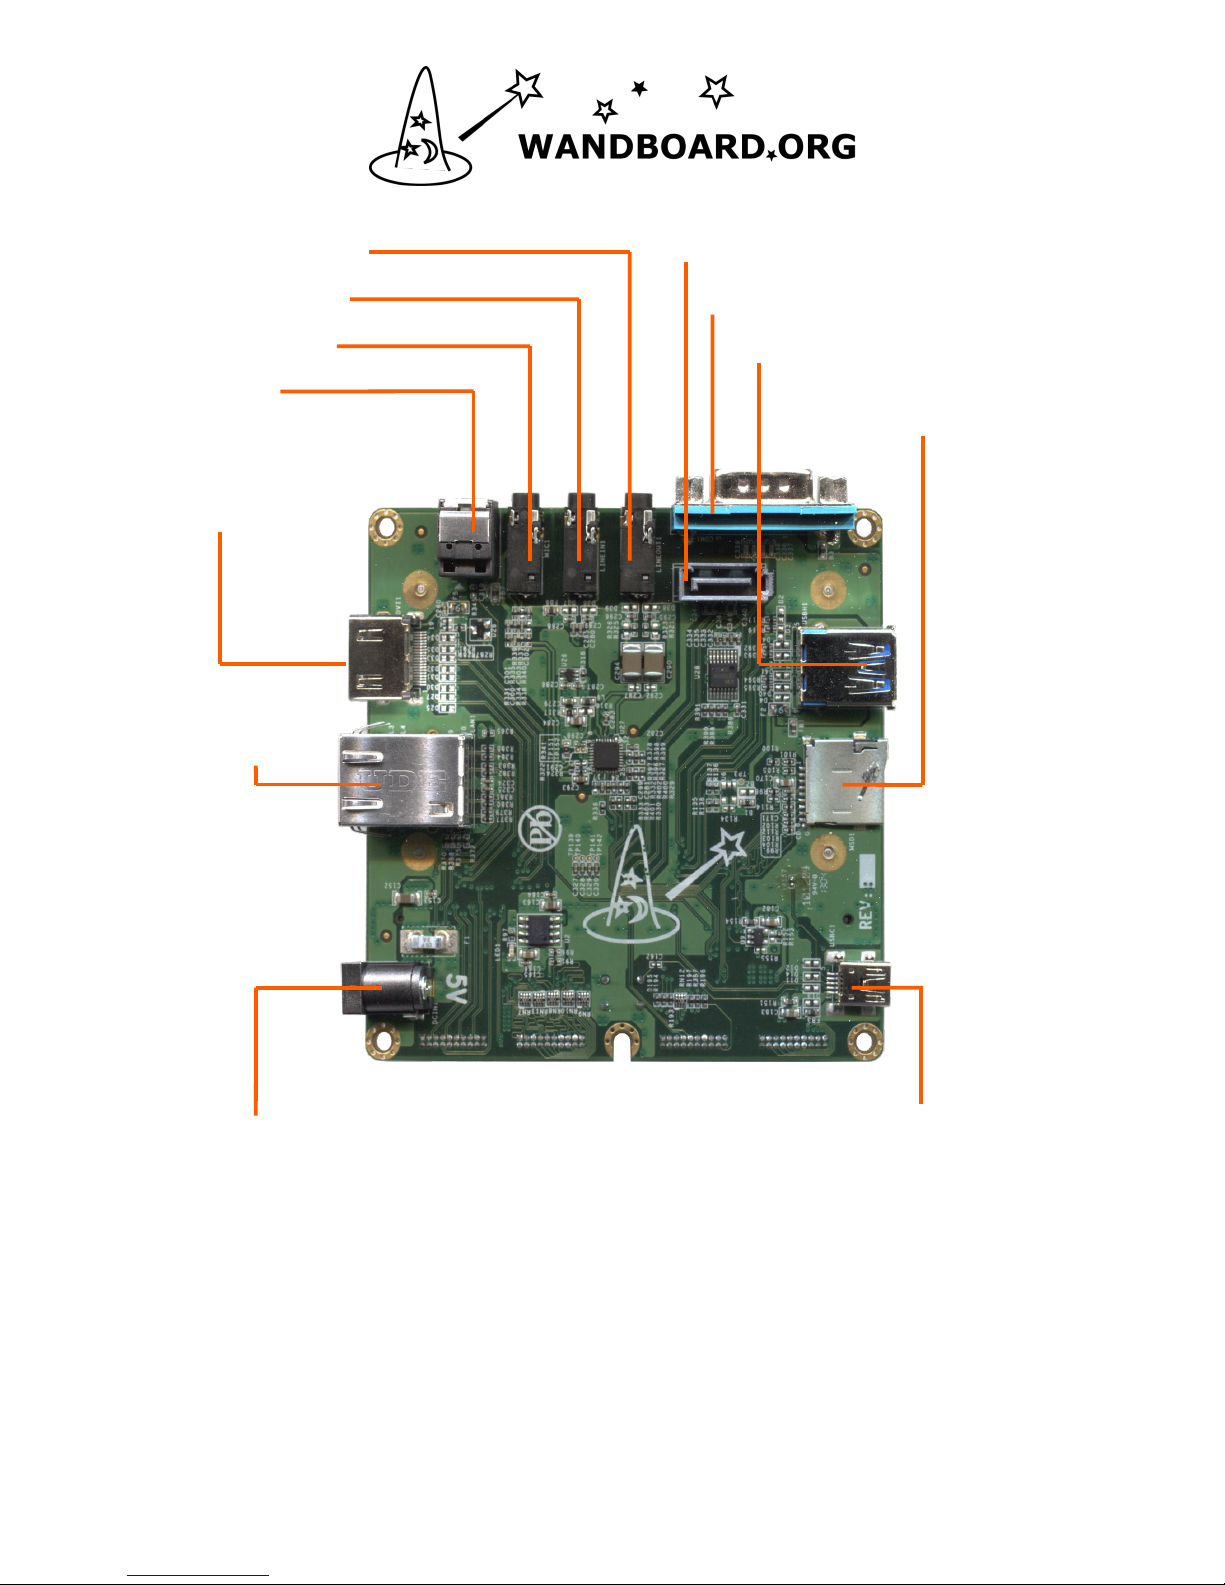
Digital line Out SATA (not populated)
Digital line in Serial
Microphone USB Host
S/PDIF SD-card
(applications)
HDMI
Gigabit LAN
5VDC in USB OTG

Page 7 of 13
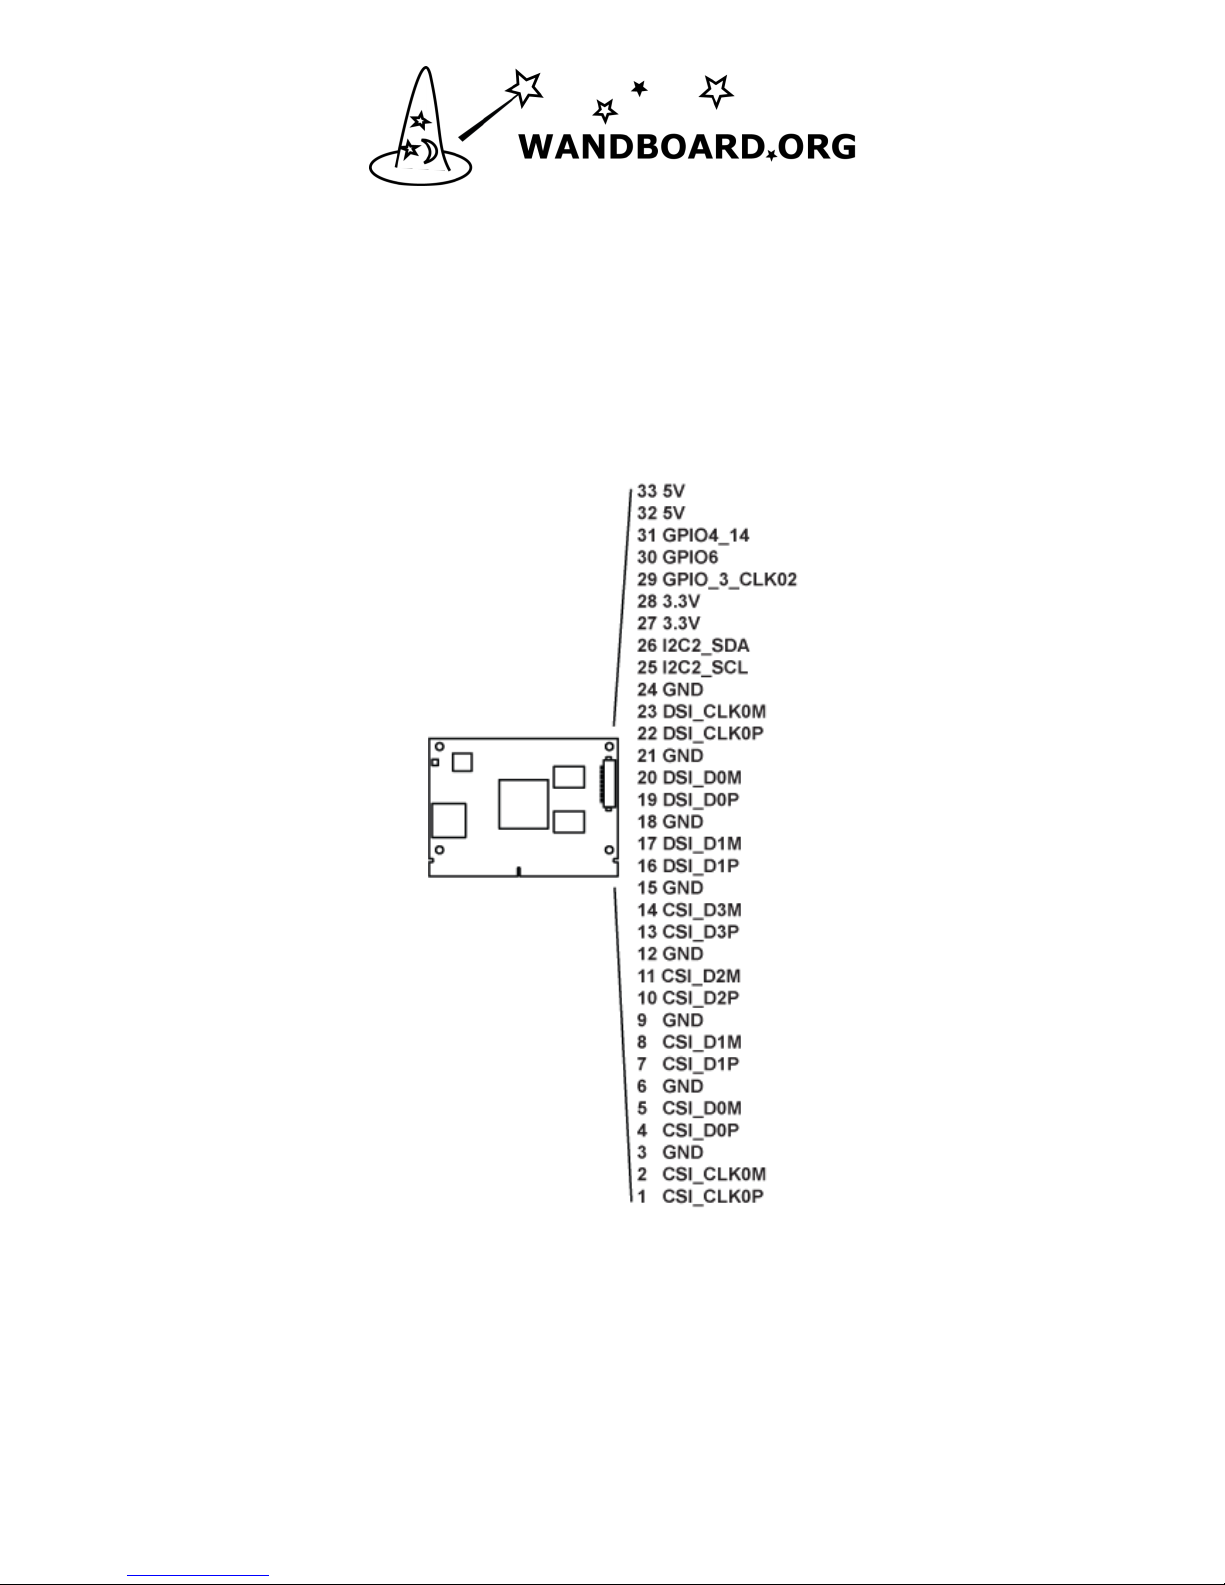
Expansion pin headers
Page 8 of 13
Camera header
Page 9 of 13
Quick Start Guide
a) Connect display: use a quality
HDMI cable to connect to your
HDMI TV or Monitor.
b) Connect network: use a standard
RJ45 LAN cable to connect your
wired network (optional)
c) Connect wireless antenna (sold
separately). This option is only
available on Wandboard dual)
d) Connect a standard USB mouse
or keyboard
e) Insert the microSD (orange
microSD card slot)
Read the last 2 pages of this document
to create a microSD card containing
the Operating System.
f) Power up: Plug in a power supply
(5 VDC at 2A is recommended)
(Storage)
(for OS)
 Loading...