

Walthers Cornerstone Series, ARGOSY BOOKSELLERS Reference Book
HO Scale Structure Kit
ARGOSY BOOKSELLERS
# 933-3466
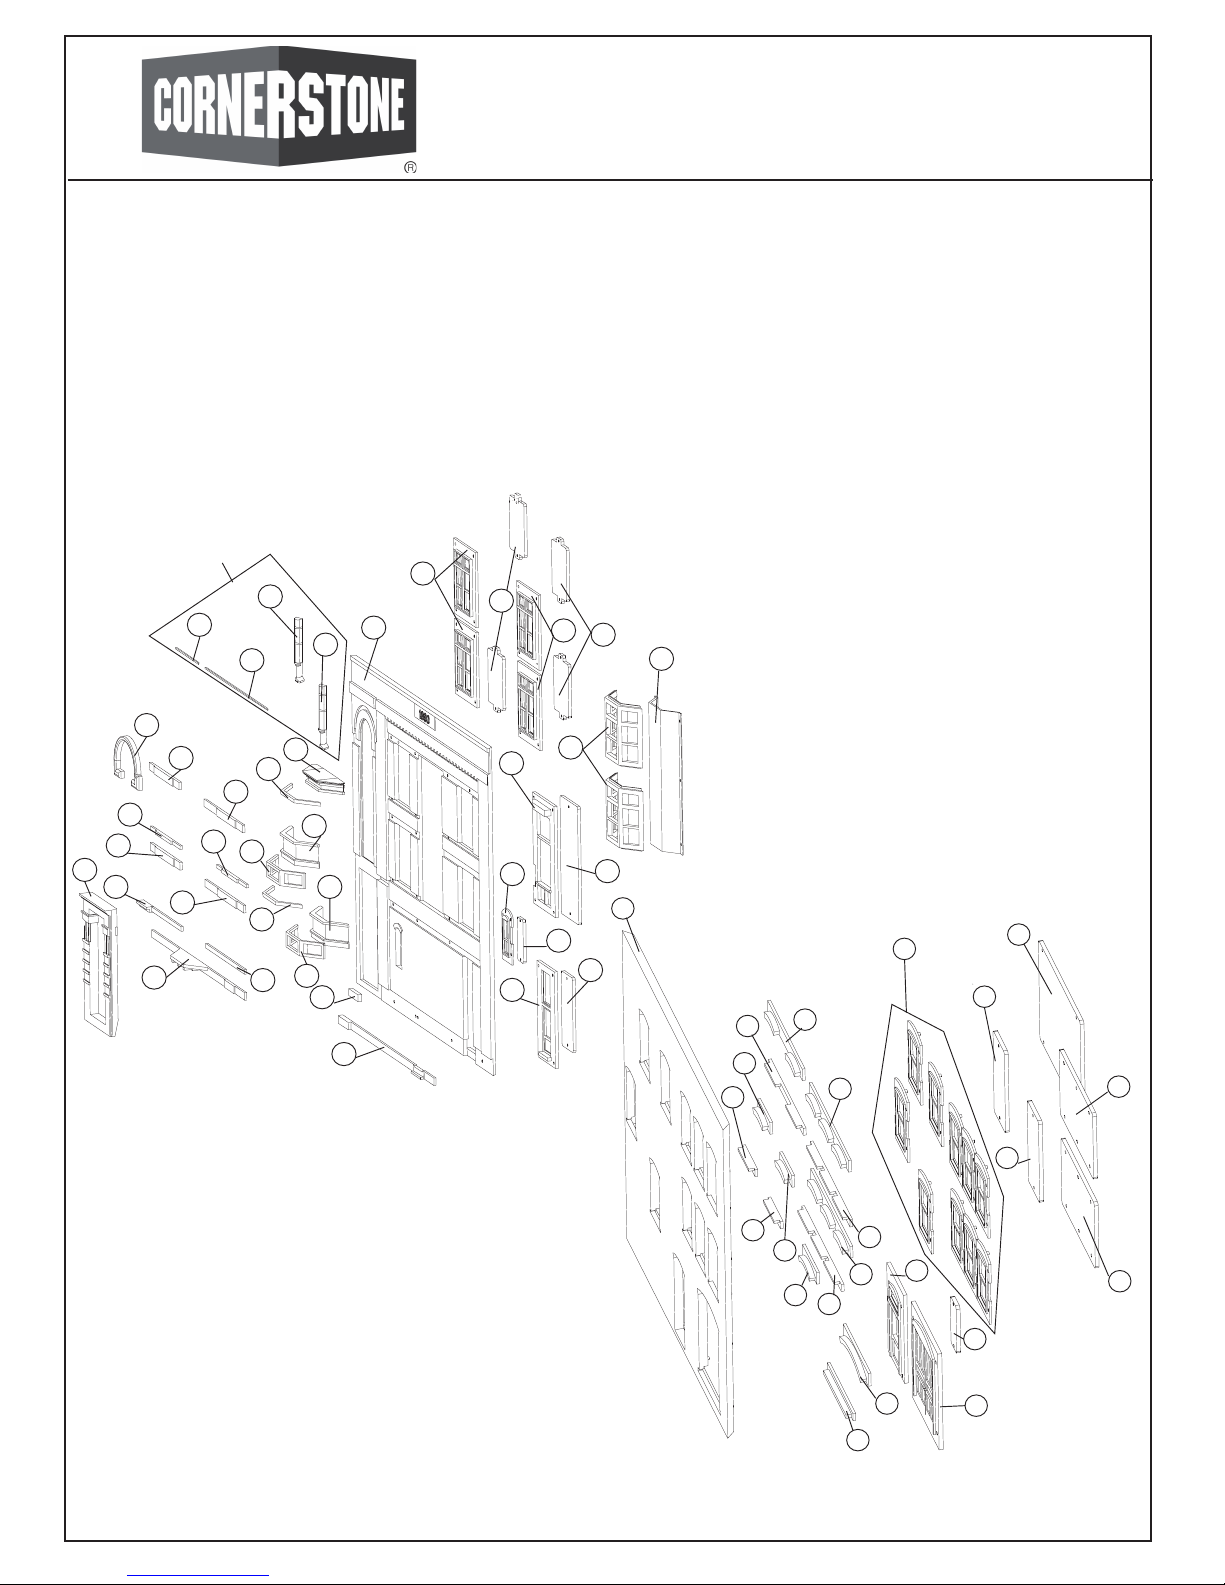
1. Note: There are several detail parts included with this kit. Read and locate all parts and locations prior to assembling the walls. Glue
Window, Door Frames and Wall Detail Parts to each Wall as shown. Glue Window Glass in place as shown. Interior windows can be added
at this time (refer to printed interior sheet)
76
77
6
60
59
79
83
50
48
54
55
51
56
68
61
53
62
78
64
75
80
82
83
81
84
8
89
8
89
9
92
22
91
14
97
19
96
Note: Attach #76 & 77 prior
to part #59 & 60
Thanks for purchasing this Cornerstone Series® kit. Please read all instructions and study the drawings before starting — directions for the
interior graphics are printed directly on that sheet. All parts are styrene plastic, so use compatible glue. If you wish to decorate your model, use
paints for plastic models. With appropriate details and signs, your finished model fits almost any era.
As education became increasingly important in the 19th century, more people learned to read and write, and bookstores became common in
larger cities and many towns. The playing field began to change in the late 20th century, with the rise of major chains and the Internet both having
a profound impact on how books and magazines were bought and sold. Today, chain bookstores can be found in or near malls in larger cities,
stocking books on just about any subject imaginable, while independent shops are often located in revitalized business areas and specialize in
used books, first editions, or specific subjects such as history.
For more Cornerstone Series® kits as well as additional details to complete your scene,
see your hobby shop, check out the latest Walthers HO Model Railroad Reference Book and our Website at walthers.com.
5
70
71
73
73
69
63
65
63
66
65
95
13
20
74
72
90
87
90
86
86
67
10 x10
© 2013 Wm. K. Walthers, Inc., Milwaukee, WI 53218 waltherscornerstone.com I-933-3466

14
40
49
37
39
38
35
33
36
98
98
34
3
7
2
14
1
52
2. Glue All Wall Assemblies together.
3. Glue Roof Trim (3) to the top of the walls.
Then Glue Base Trim (2) to the bottom of
structure.
4. Glue in Roof (7)
5. Glue together Chimney parts ([40, 39, 49,
14], [37, 38, 49, 14], [34, 35, 98, 14] and [33,
36, 98, 14])
6. The Roof Trim has locator pins for each
chimney. Glue each chimney into place.
7. Glue Back Door Stairs (52) to locator pins on
back of structure.
8. The finished structure can be set on the
Base (1), which nests inside of the Base Trim
(2) if you wish to add interior details at a later
time, or glued in place to complete construction.
© 2010 Wm. K. Walthers, Inc. Milwaukee, WI 53218 Printed In China
Note: Glue Part 3 to structure
prior to part 7. See instruction
above.
44
29
26
25
45
43
24
58
12
16
12
21
23
17
11
15
11
85
93
88
28
42
32
27
31
57
11
12
18
94
30
 Loading...