

Page 1
User's Guide
60-C 783EFS
Page 2

TABLE OF CONTENTS
Page
I - Introduction
. . . . . . . . . . . . . . . . . . . . . . . . . . . . . . . . . . . . . . . . . . . . . . . . . . . . . . . . . . . . . . . . . . . . . . .
A) Control panel pictograms
. . . . . . . . . . . . . . . . . . . . . . . . . . . . . . . . . . . . . . . . . . . . . . . . . . . . . . . . . . . . . .
B) Front and back view of the machine
C) Wand control buttons
D) Fume elimination system
. . . . . . . . . . . . . . . . . . . . . . . . . . . . . . . . . . . . . . . . . . . . . . . . . . . . . . . . . . . . . .
panel
. . . . . . . . . . . . . . . . . . . . . . . . . . . . . . . . . . . . . . . . . . . . . . . . . . . . . . . . . . . . . . . . . . . . . . . . . . . .
A) Main power switch
. . . . . . . . . . . . . . . . . . . . . . . . . . . . . . . . . . . . . . . . . . . . . . . . . . . . . . . . . . . . . . . . . . .
B) Wand selector switch
C) Voltage regulating switch
. . . . . . . . . . . . . . . . . . . . . . . . . . . . . . . . . . . . . . . . . . . . . . . . . . . . . . . . . . . . . .
D) Solution pump switch
. . . . . . . . . . . . . . . . . . . . . . . . . . . . . . . . . . . . . . . . . . . . . . . . . . . . . . . . . . . . . . . . .
E)
Indicator lights
F)
A) What is included in the box
. . . . . . . . . . . . . . . . . . . . . . . . . . . . . . . . . . . . . . . . . . . . . . . . . . . . . . . . . . . .
B) Filling the reservoir
C) Mounting a cleaning pad
D) Connecting
E) Plugging in the power cord
F)
Plugging in the ground clamp
. . . . . . . . . . . . . . . . . . . . . . . . . . . . . . . . . . . . . . . . . . . . . . . . . . . . . . . . . . .
A) Selec
C) S
. . . . . . . . . . . . . . . . . . . . . . . . . . . . . . . . . . . . . . . . . . . . . . . . . . . . . .
D)
S
E)
Cleaning and passivating
F) Neutralizing
. . . . . . . . . . . . . . . . . . . . . . . . . . . . . . . . . . . . . . . . . . . . . . . . . . . . . . . . . . . . . . . . . . . . . . . . .
. . . . . . . . . . . . . . . . . . . . . . . . . . . . . . . . . . . . . . . . . .
A) Selecting the proper mode
B) Selecting the voltage type, AC or DC
C) Manual pumping mode
. . . . . . . . . . . . . . . . . . . . . . . . . . . . . . . . . . . . . . . . . . . . . . . . . . . . . . . . . . . . . . . .
D) Cleaning and passivating
E) Neutralizing
F) List of supplies and part numbers
. . . . . . . . . . . . . . . . . . . . . . . . . . . . . . . . . . . . . . . . . . . . . . . . . . . . . . . .
Page 3

. . . . . . . . . . . . . . . . . . . . . . . . . . . . . . . . . . . . . . . . . . . . . . . . . . . . . . . .
A) Selecting the proper mode
B) Selecting the voltage type, AC or DC
C) Selecting the proper voltage setting
. . . . . . . . . . . . . . . . . . . . . . . . . . . . . . . . . . . . . . . . . . . . . . . . . . . . .
D) Procedure for marking
E) Marking Wand supplies and part numbers
. . . . . . . . . . . . . . . . . . . . . . . . . . . . . . . . . . . . . . . . . . . . . . . .
. . . . . . . . . . . . . . . . . . . . . . . . . . . . . . . . . . . . . . . . . . . . . . . . . . . . . . . . . . . . . . . . . . . . . . . . . . . .
. . . . . . . . . . . . . . . . . . . . . . . . . . . . . . . . . . . . . . . . . . . . . . . . . . . . . . . . . . . . . . . . . . . . . . . . . . . . .
A) Cleaning tips
. . . . . . . . . . . . . . . . . . . . . . . . . . . . . . . . . . . . . . . . . . . . . . . . . . . . . . . . . . . . . . . . . . . . . . .
B) Cleaning pads
. . . . . . . . . . . . . . . . . . . . . . . . . . . . . . . . . . . . . . . . . . . . . . . . . . . . . . . . . . . . . . . . . . . . . .
C) Cleaning boots
D) PTFE clamp rings
. . . . . . . . . . . . . . . . . . . . . . . . . . . . . . . . . . . . . . . . . . . . . . . . . . . . . . . . . . . . . . . . . . .
E) Surfox-T solution
. . . . . . . . . . . . . . . . . . . . . . . . . . . . . . . . . . . . . . . . . . . . . . . . . . . . . . . . . . . . . . . . . . . . . . . . . .
A) Sparks
B) Interna
C) AC/DC current basics
. . . . . . . . . . . . . . . . . . . . . . . . . . . . . . . . . . . . . . . . . . . . . . . . . . . . . . . . . . . . . . . .
D) AC/DC settings on the Surfox machine
. . . . . . . . . . . . . . . . . . . . . . . . . . . . . . . . . . . . . . . . . . . . . . . . . .
E) Welds that cannot be cleaned
A) War
B) Where to get service
. . . . . . . . . . . . . . . . . . . . . . . . . . . . . . . . . . . . . . . . . . . . . . . . . . . . . . . . . . . . . . . . .
. . . . . . . . . . . . . . . . . . . . . . . . . . . . . . . . . . . . . . . . . . . . . . . . . . . . . . . . . . . . . . . . . . . . . . . . . . . .
xx
. . . . . . . . . . . . . . . . . . . . . . . . . . . . . . . . . . . . . . . . . . . . . . . . . . . . . . . . . . . . . . . . . . . . . . . . . . . .
xx
Page 4

weld cleaning equipment quickly, easily and cost effectively removes the heat tint created
owner's manual completely as we take you step-by-step through the
equipment. Your new SURFOX
machine
urability to stand up to the hea
equipment will provide years of dependable service.
MACHINE CAN CLEAN:
formation of the passive film layer.
start to rust.
I - INTRODUCTION
Page 5

weld cleaning machines are produced in accordance with applicable standards governing the
and limitations.
correspondingly grounded receptacle.
airflow through the vent openings is required to prevent the unit from overheating.
ignited by sparks. Do not use this tool when flammable liquids or gases are present. Keep handles clean, dry
and free from cleaning solution, oil and grease. Do not use in rain, damp or wet locations.
working in high places. Do not let unqualified persons handle this machine.
working gloves, ear plugs, safety shoes, etc.
before coming in contact with exposed skin.
equipment.
the tool when you are tired. Never leave it running unattended.
starting.
perform its intended function.
Center or a
Authorized Service Center.
do not use if damaged.
Surfox-T weld cleaning solution contains phosphoric acid and may cause burns when
not handled properly. Avoid skin contact.
Refer to WALTER MSDS #S-01E for complete safety data information.
Surfox-T weld cleaning solution with this unit and NEVER mix it with any other products.
persons. Keep container contents clean.
reuse Surfox-T solution.
II - SAFETY INSTRUCTIONS
Page 6

hot and could cause serious burns.
receptacle. Keep the cord away from heat, oil and sharp edges. Inspect the cord periodically, if damaged,
have it replaced by a WALTER Factory Service Center or a WALTER Authorized Service Center.
replacing cleaning pads and other accessories, while performing maintenance and before servicing.
jury to the
user and
the ordering number.
protected.
will not be held responsible for any damages resulting from leaked cleaning solution or
II - SAFETY INSTRUCTIONS
Page 7
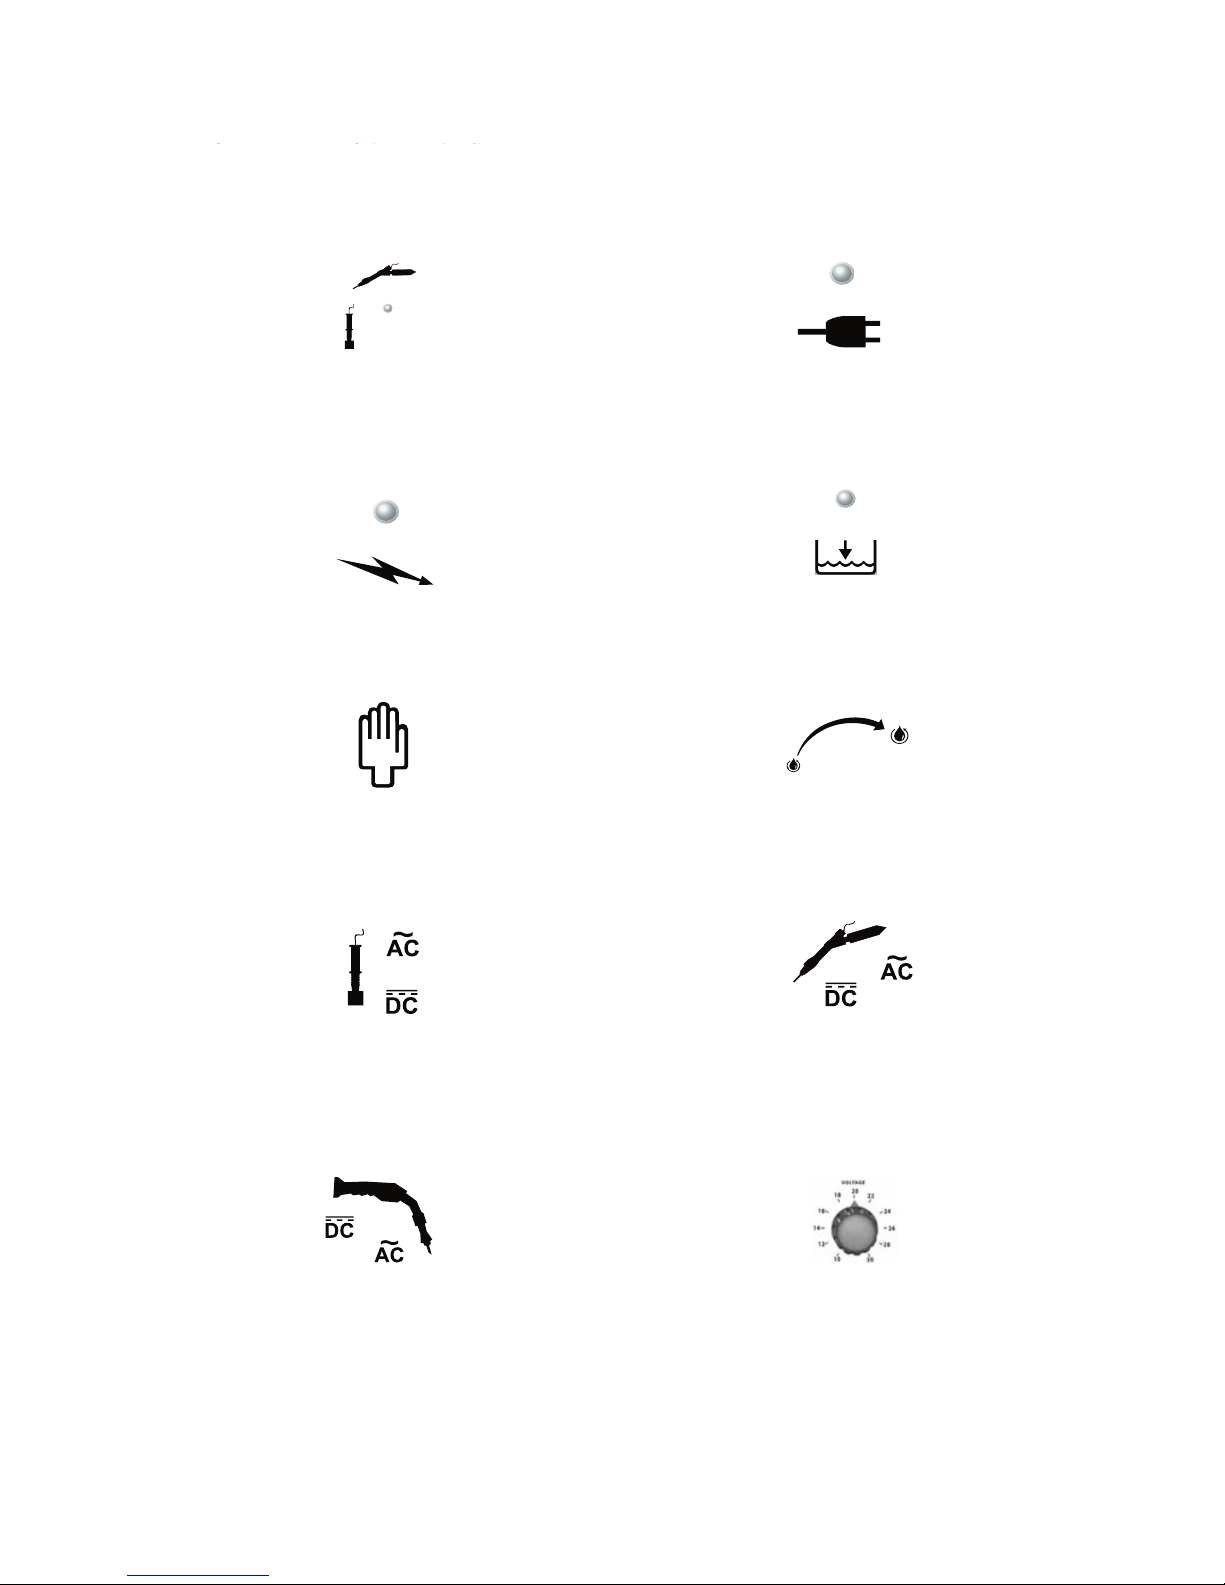
Outlet for Mini Wand or Marking Wand Indicator for unit power ON
Indicator for wand tip power ON Indicator for LOW solution level
Manual pumping mode Automatic pumping mode
Marking Wand selector Mini Wand selector
Cleaning Wand selector Voltage selector
III - EQUIPMENT CONTROLS
Page 8
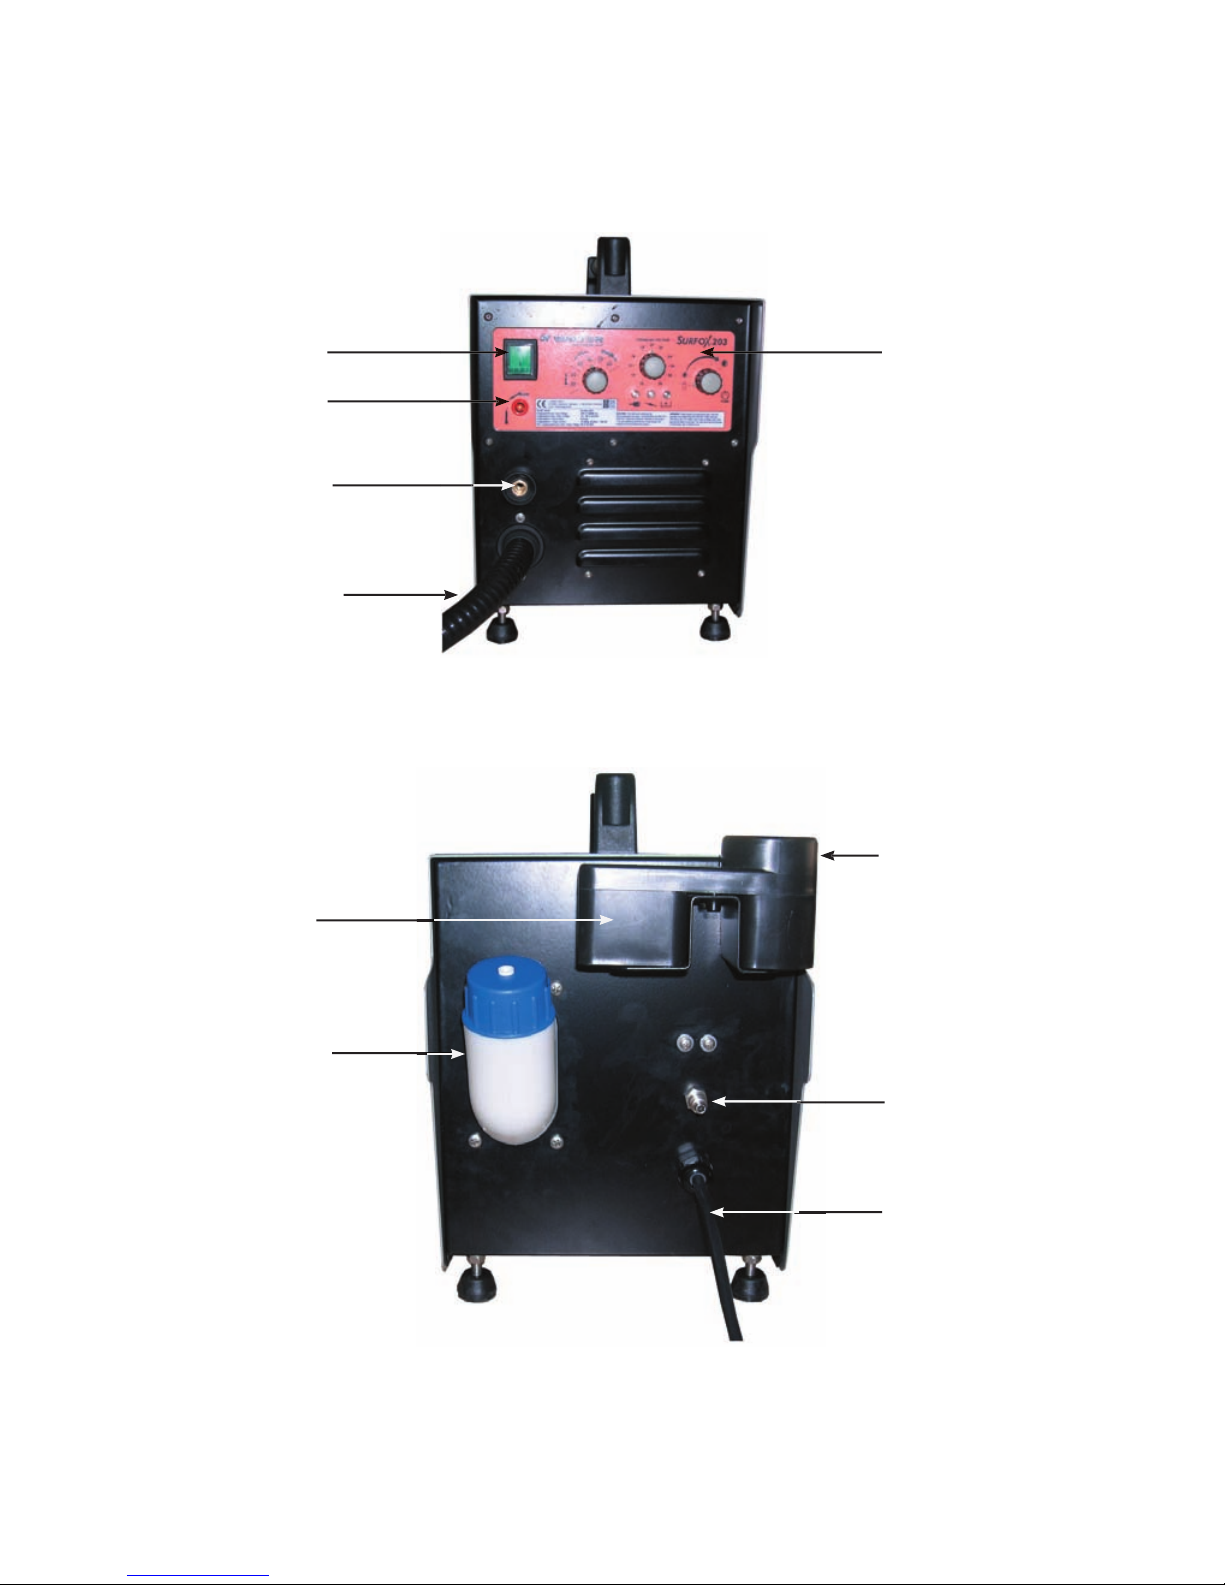
III -
EQUIPMENT CONTROLS
Page 9
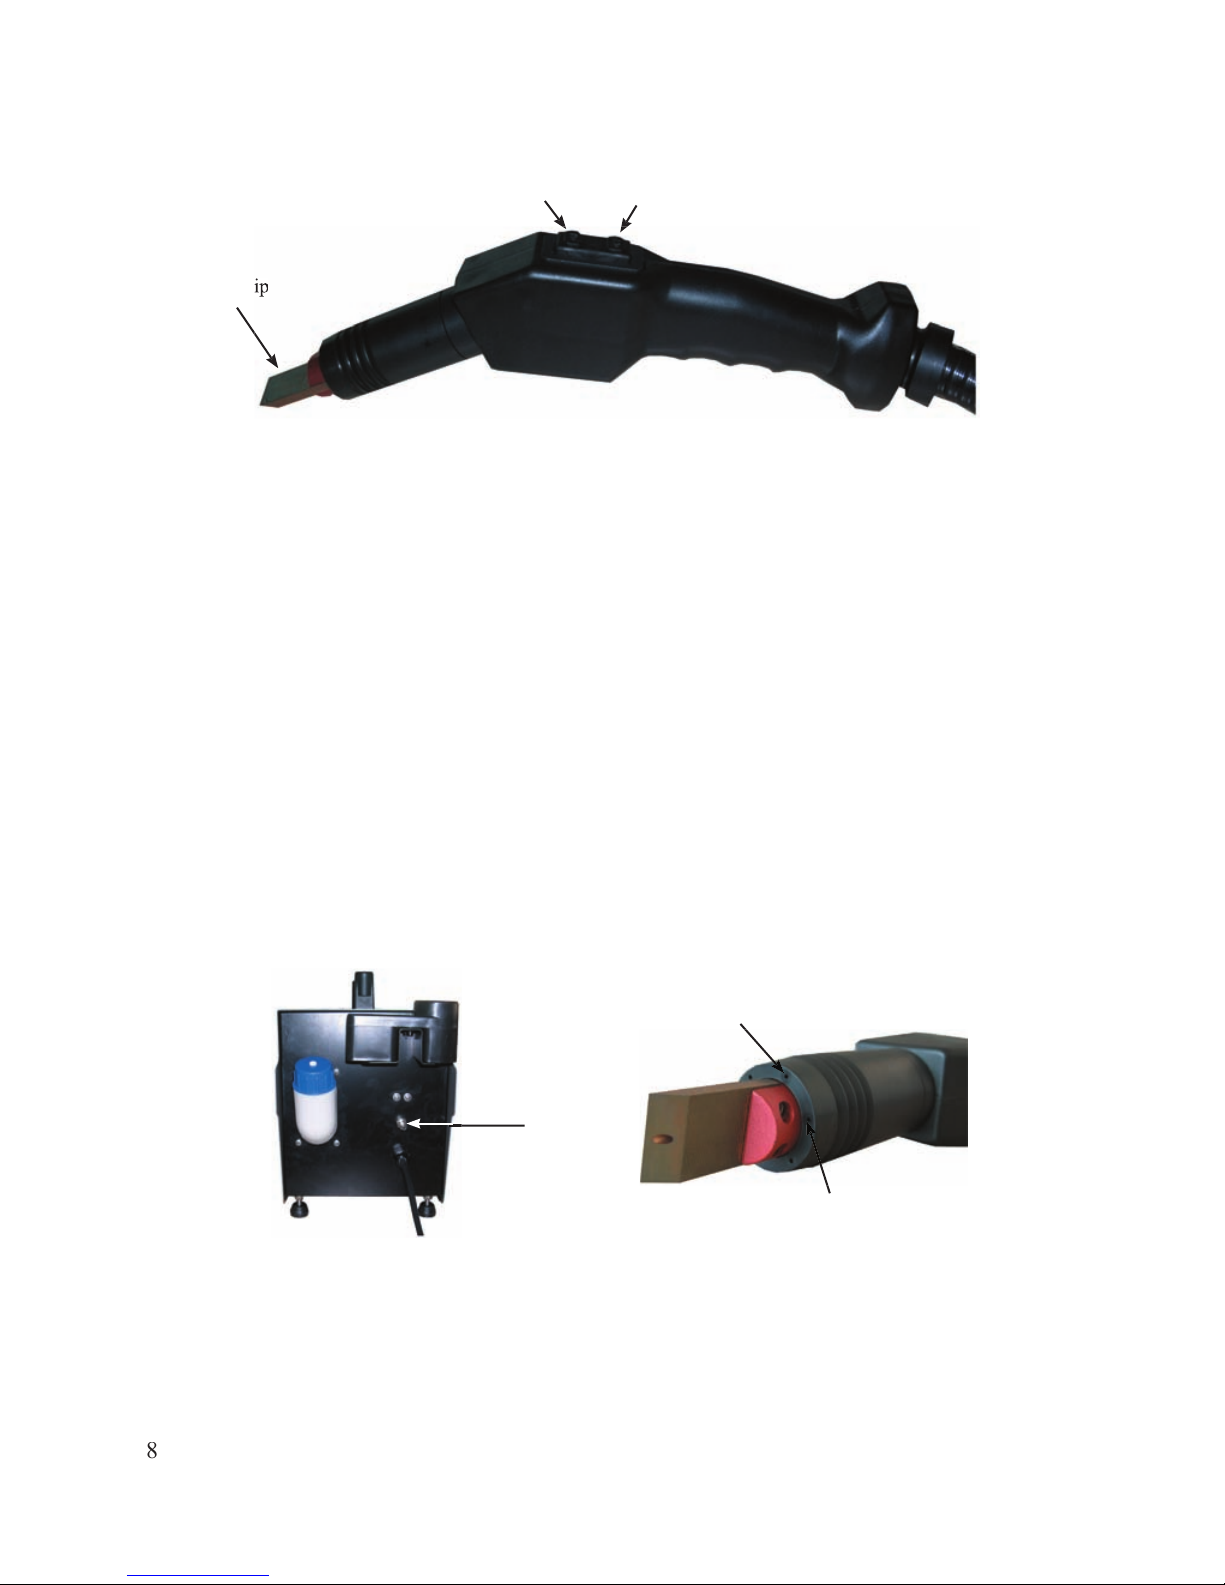
The ON butt
press the
ON button to activate the pump.
How
pump, press the OFF button. When finished working with the machine (in either mode) make sure to press
the
OFF button.
Once the ON button is pressed, there will be continuous power at the tip until the OFF button is pressed.
working conditions. Although the fumes are non-toxic and non hazardous, they can be uncomfortable when
working in confined areas.
To activate this feature simply connect a compressed air line (150 PSI max., 80 PSI min.) to the fitting at the
back of the machine. The fume elimination system is automatically activated when the ON button is pressed on
the Hand Wand. The fume elimination system is turned OFF when the OFF button on the Hand Wand is
pressed.
The working principle is quite simple and highly effective; the air comes out through the small openings behind
the Tungsten tip. This preset regulated air pressure condenses the vapors out of the air.
EQUIPMENT CONTROLS
Page 10
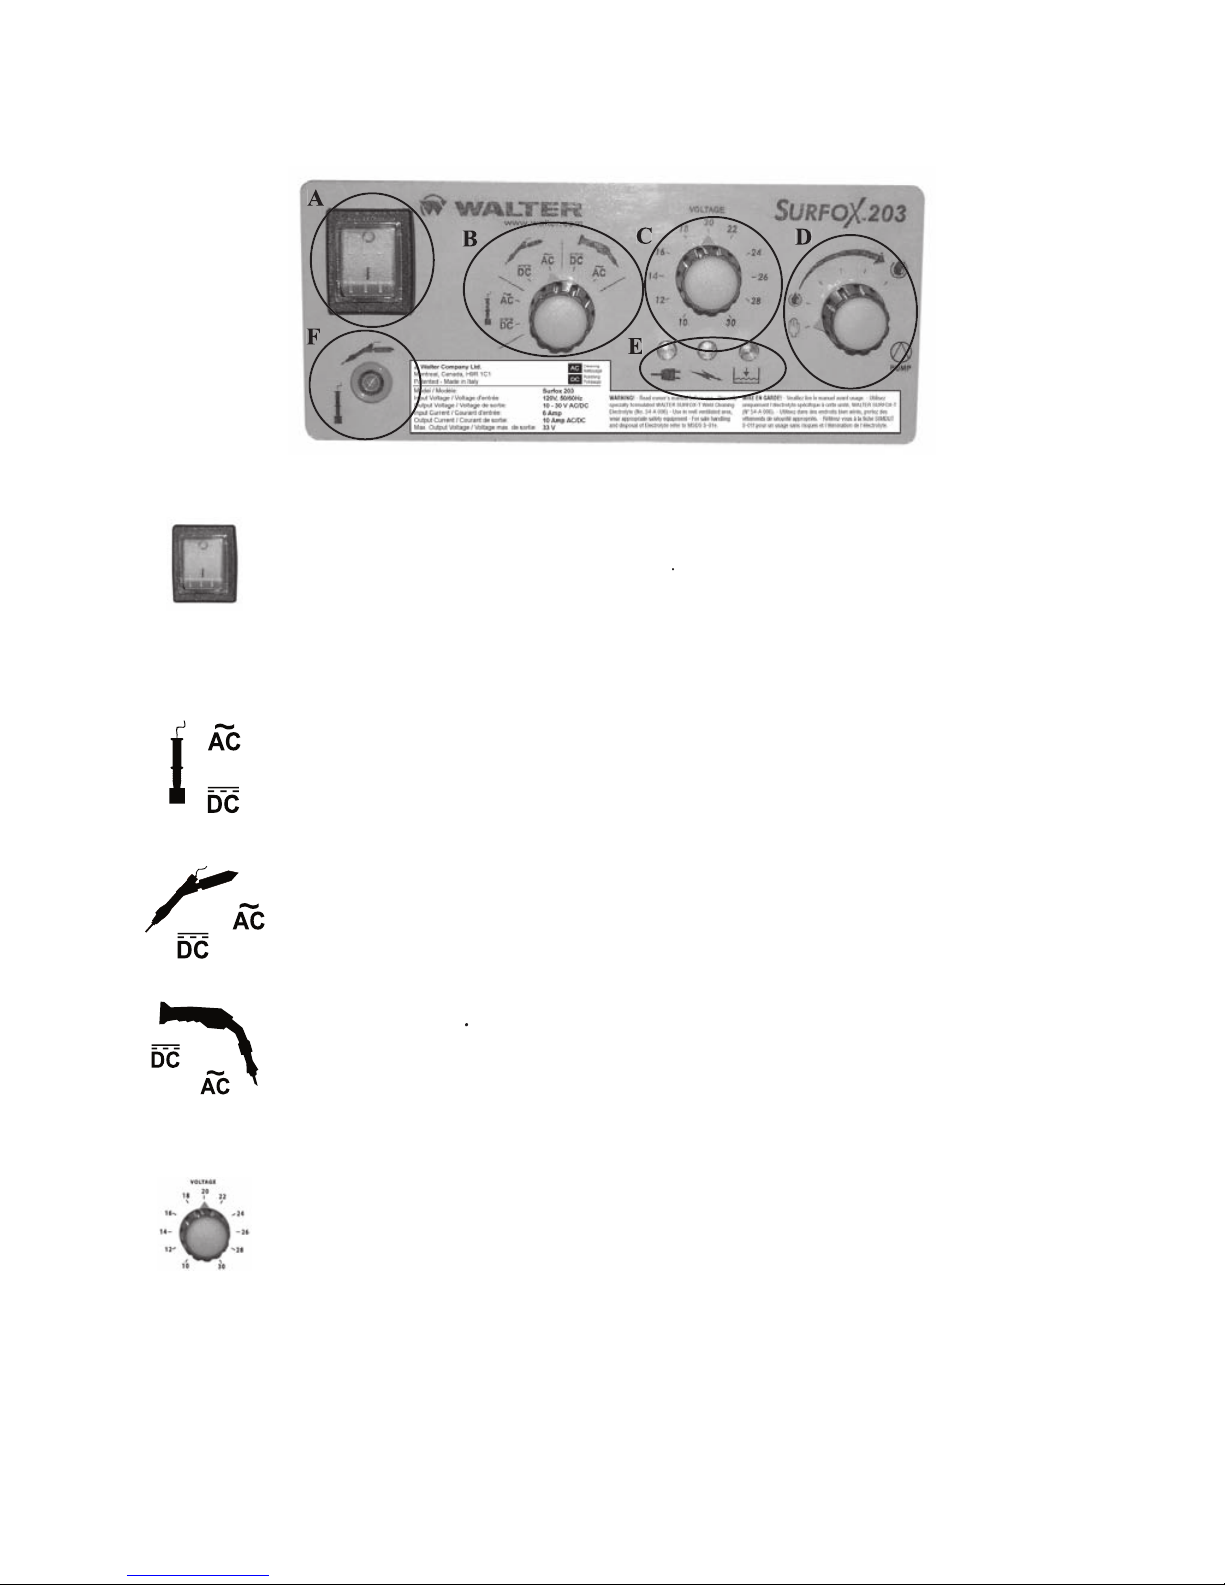
Turns the main power to the unit
and
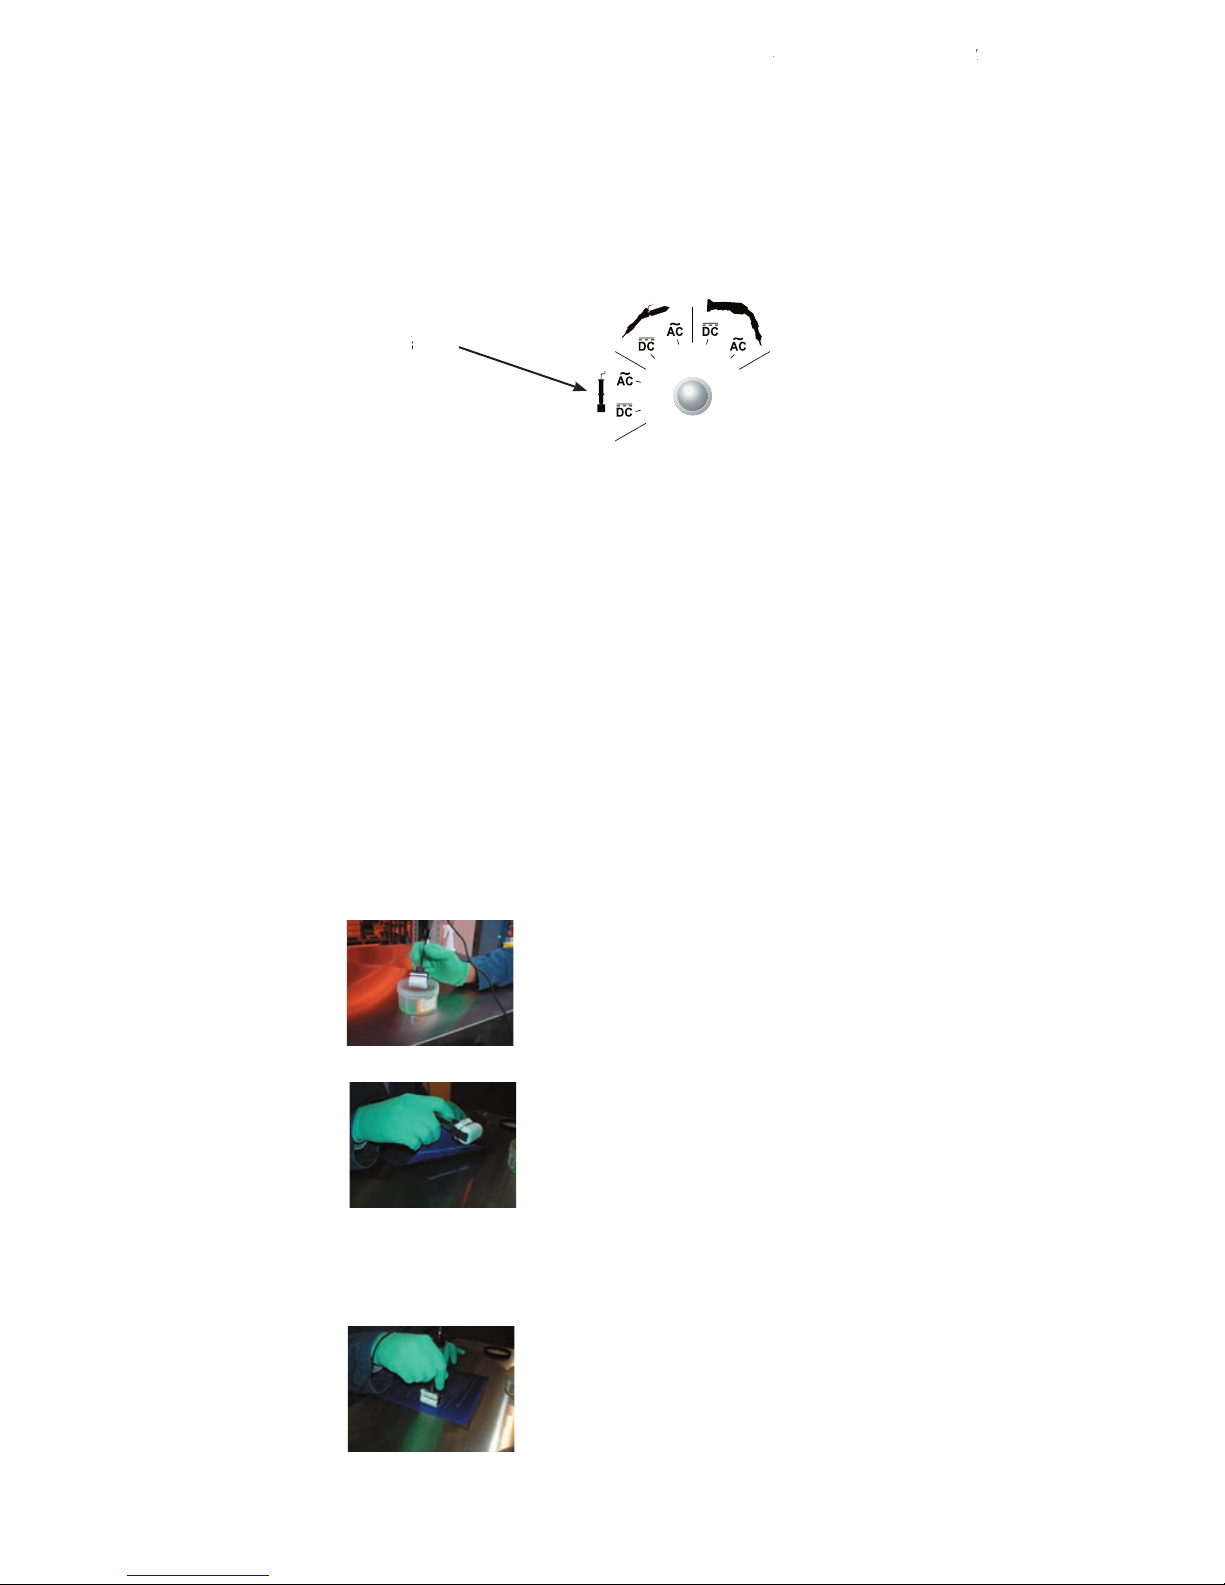
Marking Wand selector.
Select this setting when using a Marking Wand which has been
plugged into the accessory outlet. Select AC for stainless steel and DC for aluminum.
Select this setting when using the Mini Wand which has been plugged into
the accessory outlet. Select AC for cleaning and DC for polishing.
Hand Wand se
Select this setting when using the Hand Wand attached to the Surfox unit.
Select AC for cleaning and DC for polishing.
Voltage selector.
Select a lower voltage for cleaning on delicate surfaces (mirror finish).
Select a higher voltage for thicker plates. The selector controls the voltage for all outlets (except
the Marking Wand which is preset at 12 Volts when the wand selector is positioned for the
Marking Wand (either AC or DC)).
IV -
Page 11
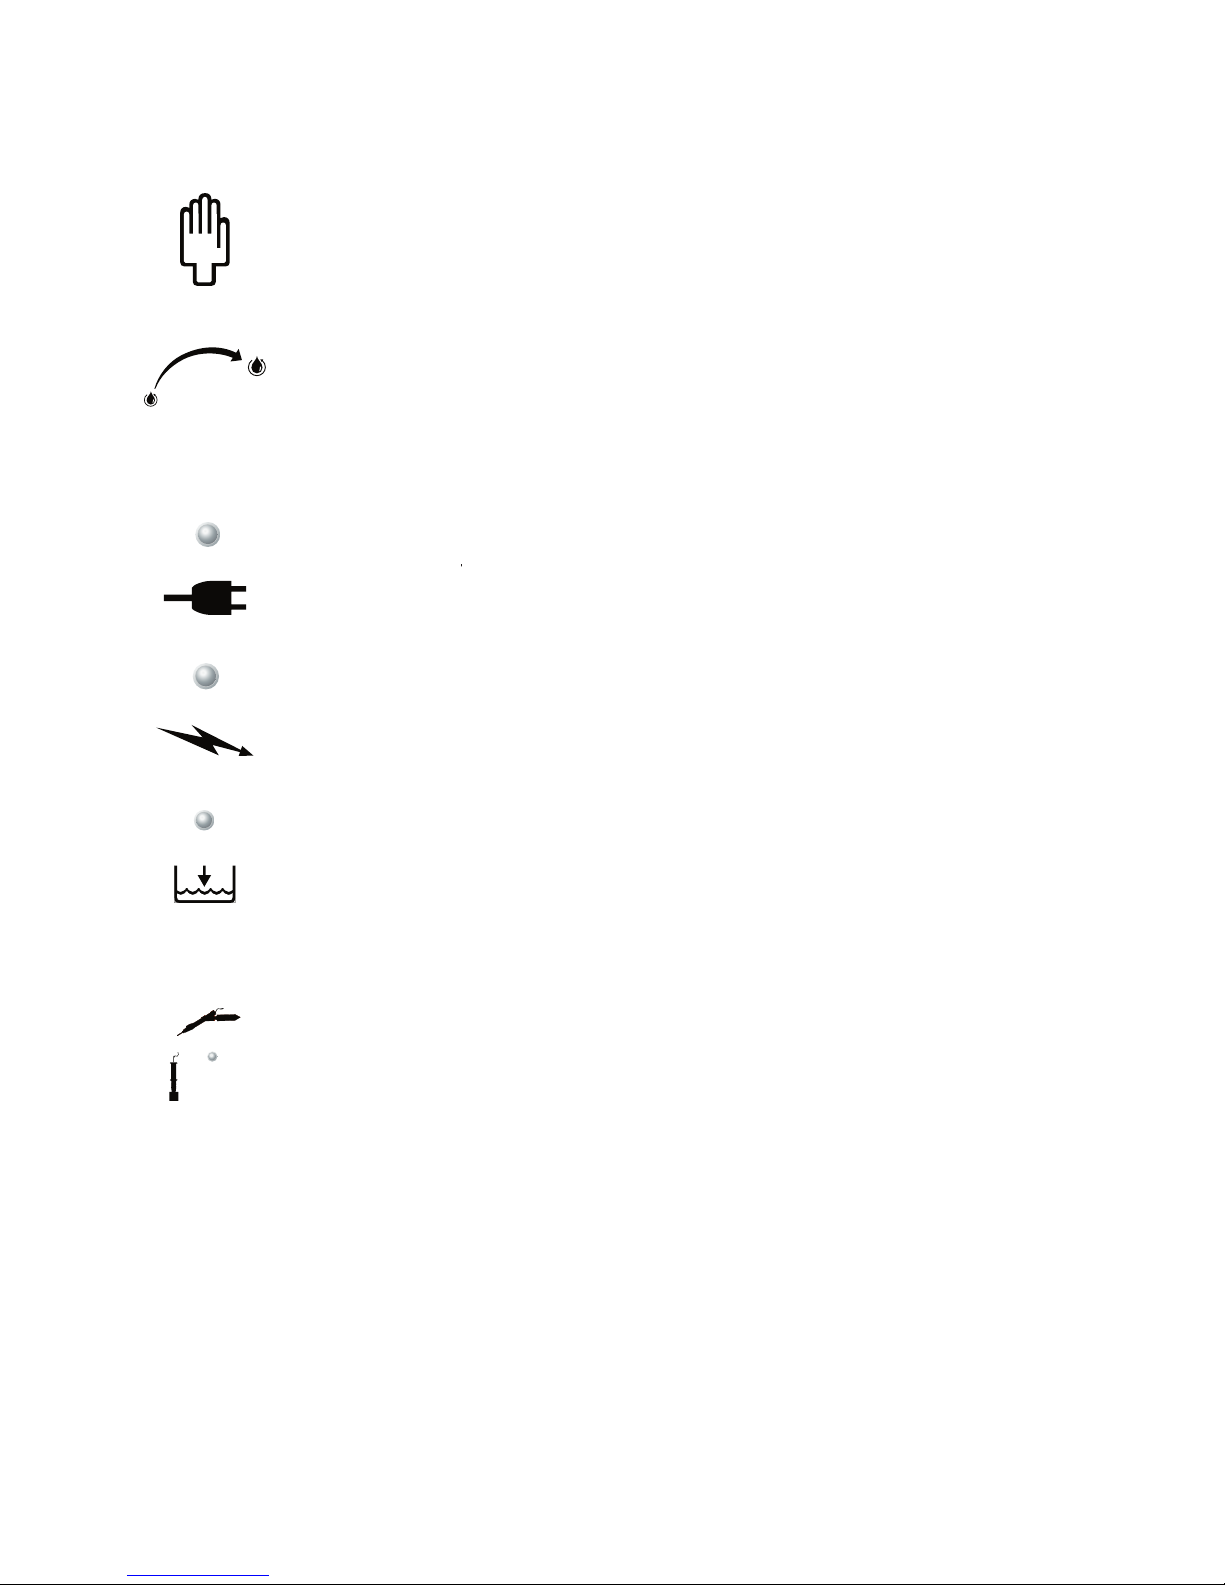
Choose the manual pumping mode to control the amount of solution
pumping to the tip. Hold the Hand Wand ON button down to pump solution to the tip. Release
the ON button to stop the pumping cycle. Always use enough solution to keep the cleaning pad
wet. Too little solution will reduce the cleaning pad life.
Automatic pumping mode.
To start the automatic pumping mode, press the ON button on the
wand. Once it is activated, it will automatically pump the liquid. The quantity of liquid can be
selected from less to more. Pumping will continue in this mode until the OFF button is pressed.
Green light is on when the unit is plugged in and the main power switch is
turned on.
The yellow light goes ON when the Hand Wand ON button
is pressed and there is power to the tip. Power to the tip is OFF when the Hand Wand OFF
button is pressed.
When solution level is low, the red indicator light will go on.
The Marking Wand is used to permanently
etch your company name, logo, part number or other desired information onto any metal surface.
The Mini Wand is used to access hard to reach areas for cleaning and passivating, which are too
small for the Hand Wand.
IV -
Page 12
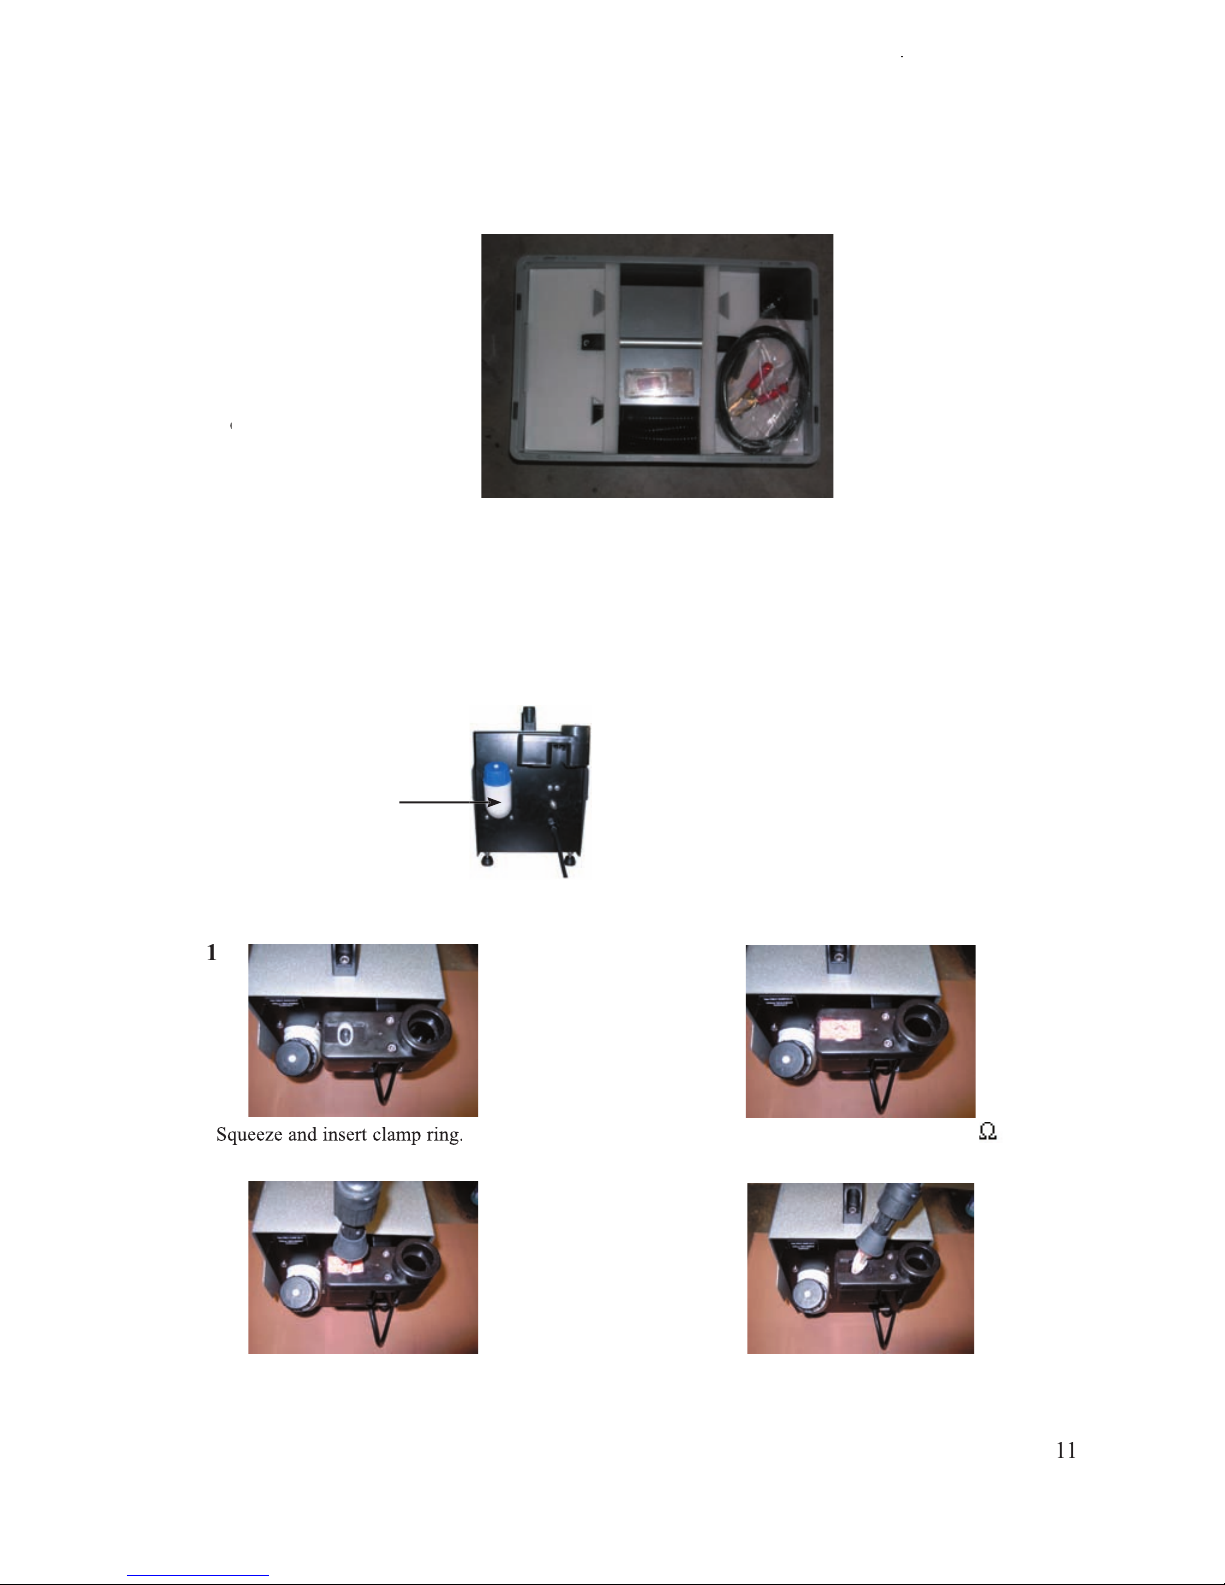
1- Surf
2- Hand Wand and connecting hose
3
4- Accessory kit contai
- 3 cleaning pads
- 1 PTFE clamping ring
- 1 cleaning boot
- 1 x 2.5mm hexagonal key for changing Tungsten cleaning tips
Fill the reservoir in the back of the machine with Surfox-T solution. The reservoir holds 1.9L of Surfox-T
solution.
facing up.
Page 13
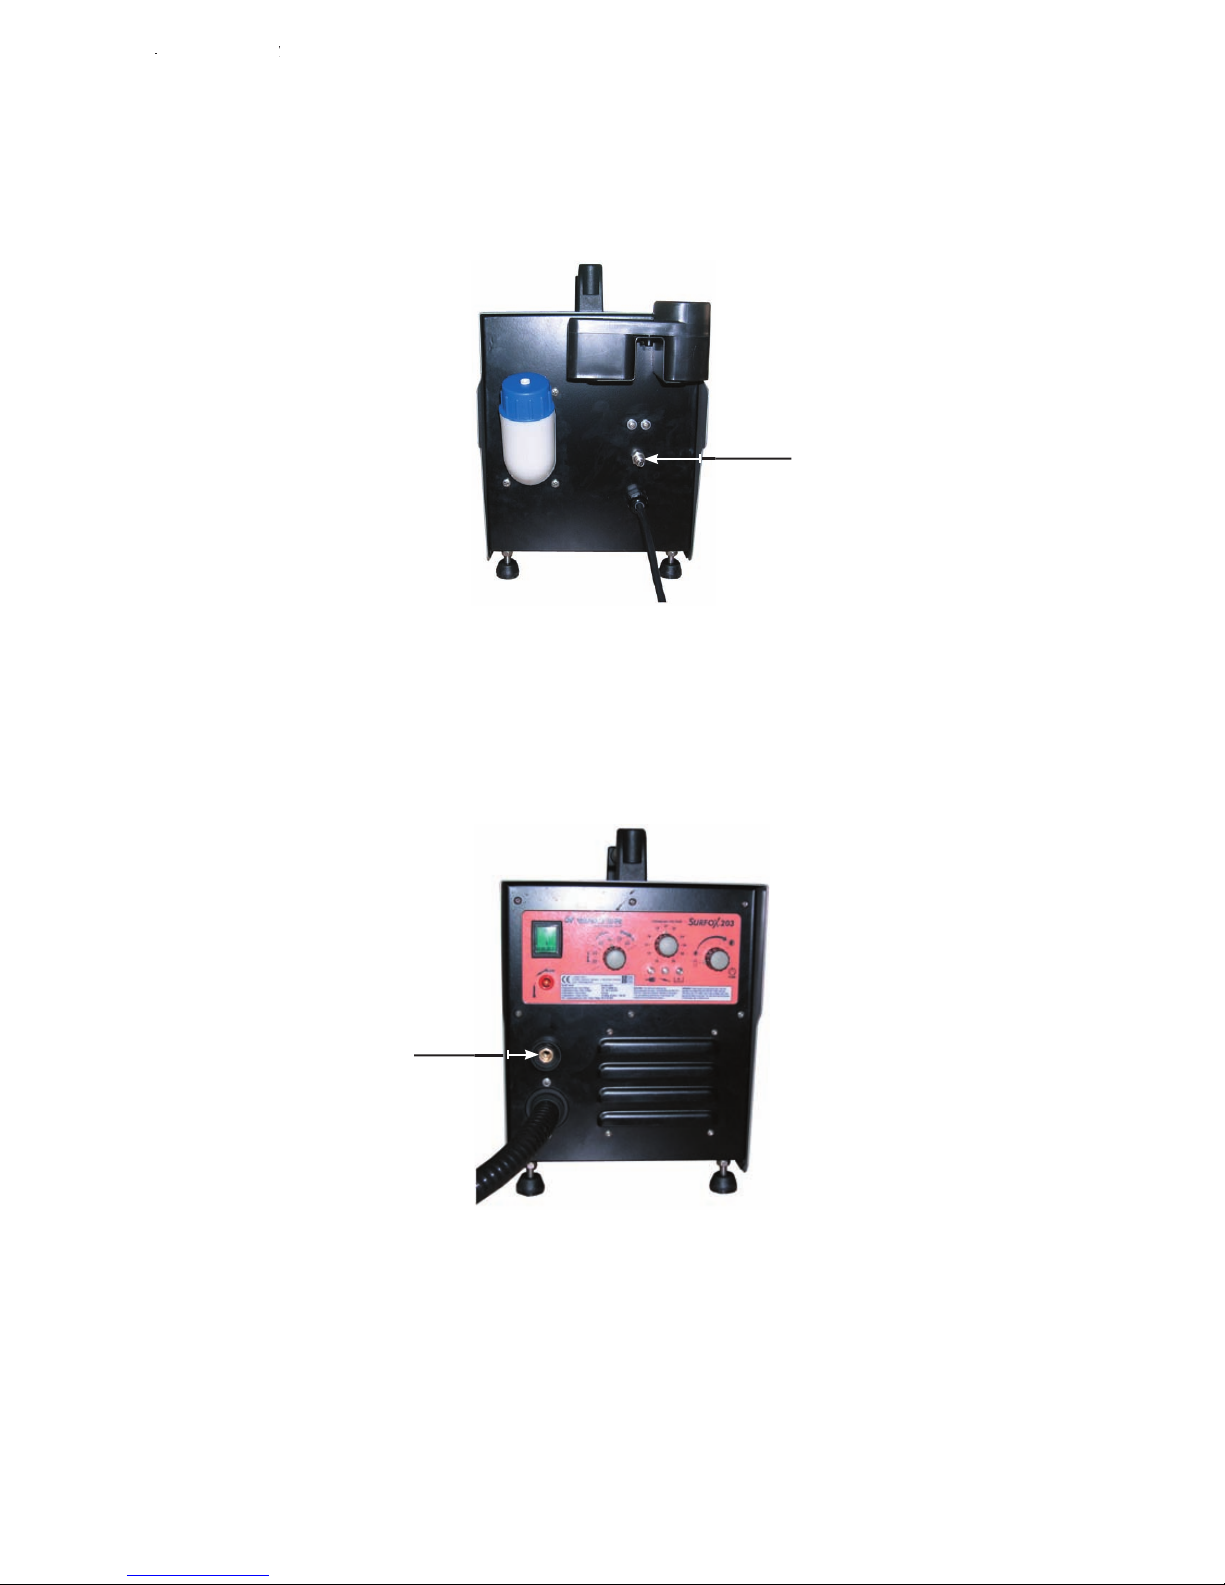
Connect the air supply at the back of the machine. Note that the maximum allowed pressure is 150 PSI max.,
80 PSI min. (1000KPa). If the air supply is not plugged into the machine, the machine will still work but there
will not be any fume elimination.
When an ext
for 50 to 100 feet (15 to 30 meters).
Plug the ground clamp at the
and passivating process will not work if the part is not properly grounded.
Page 14
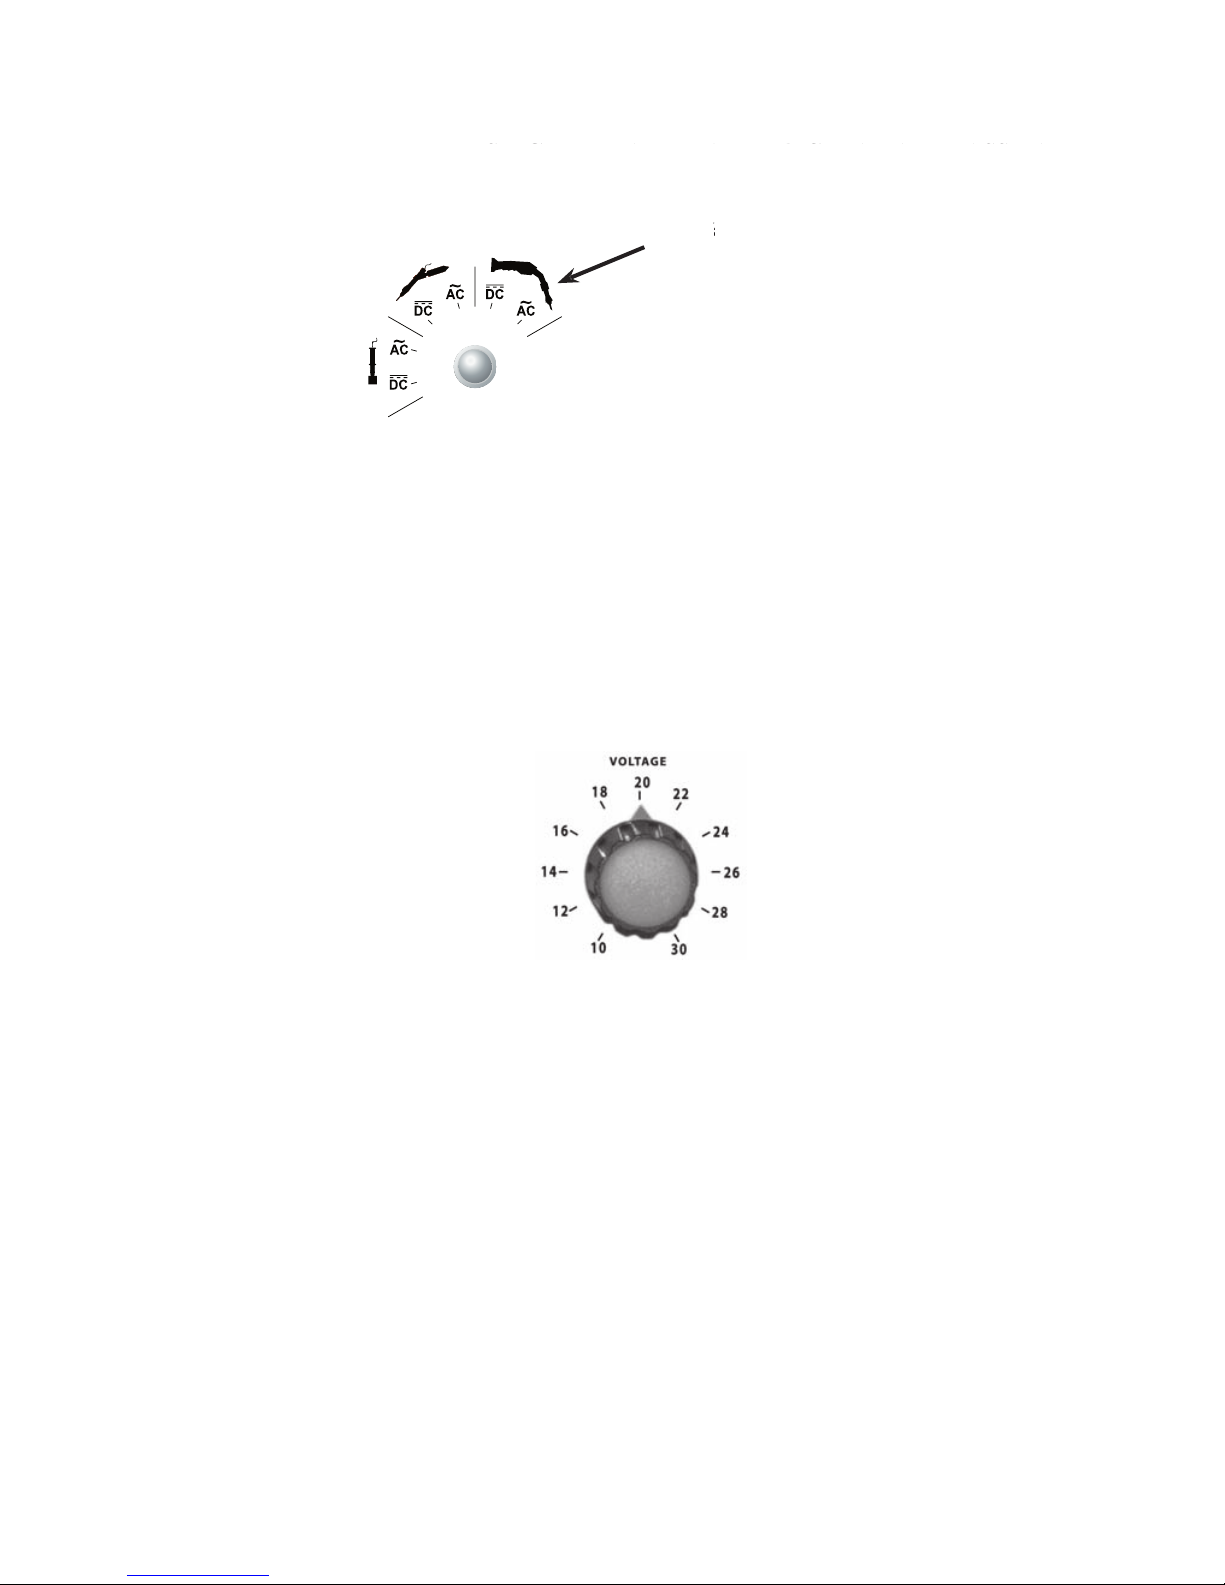
AC
for cleaning and passivating the weld.
DC
for cleaning, passivating and polishing the weld. The cleaning and passivating process takes longer in the
DC mode than in the AC mode.
WARNING!
DC mode is used to polish the weld bead to match the surface of the finish.
TIP!
When using the polishing mode (DC), use plenty of Surfox-T solution.
AC mode for cleaning and passivating:
working on delicate surfaces, mirror finish or very thin gauge, lower the voltage.
Example: Mill finish 14 gauge 26 volts
Polished finish 16 gauge 18 volts
Mirror finish 16 gauge 12 volts
If uncertain of the material type, start at a lower voltage and increase as necessary. If the
voltage is too high, it can alter the surface by leaving a white halo effect.
DC mode for cleaning, passivating and polishing:
mill finish parts, use a lower voltage.
Example: Mill finish 14 gauge 12 volts
Polished finish 16 gauge 18 volts
Mirror finish 16 gauge 28 volts
Note:
the Surfox-T solution will become slightly yellow or darken.
Page 15
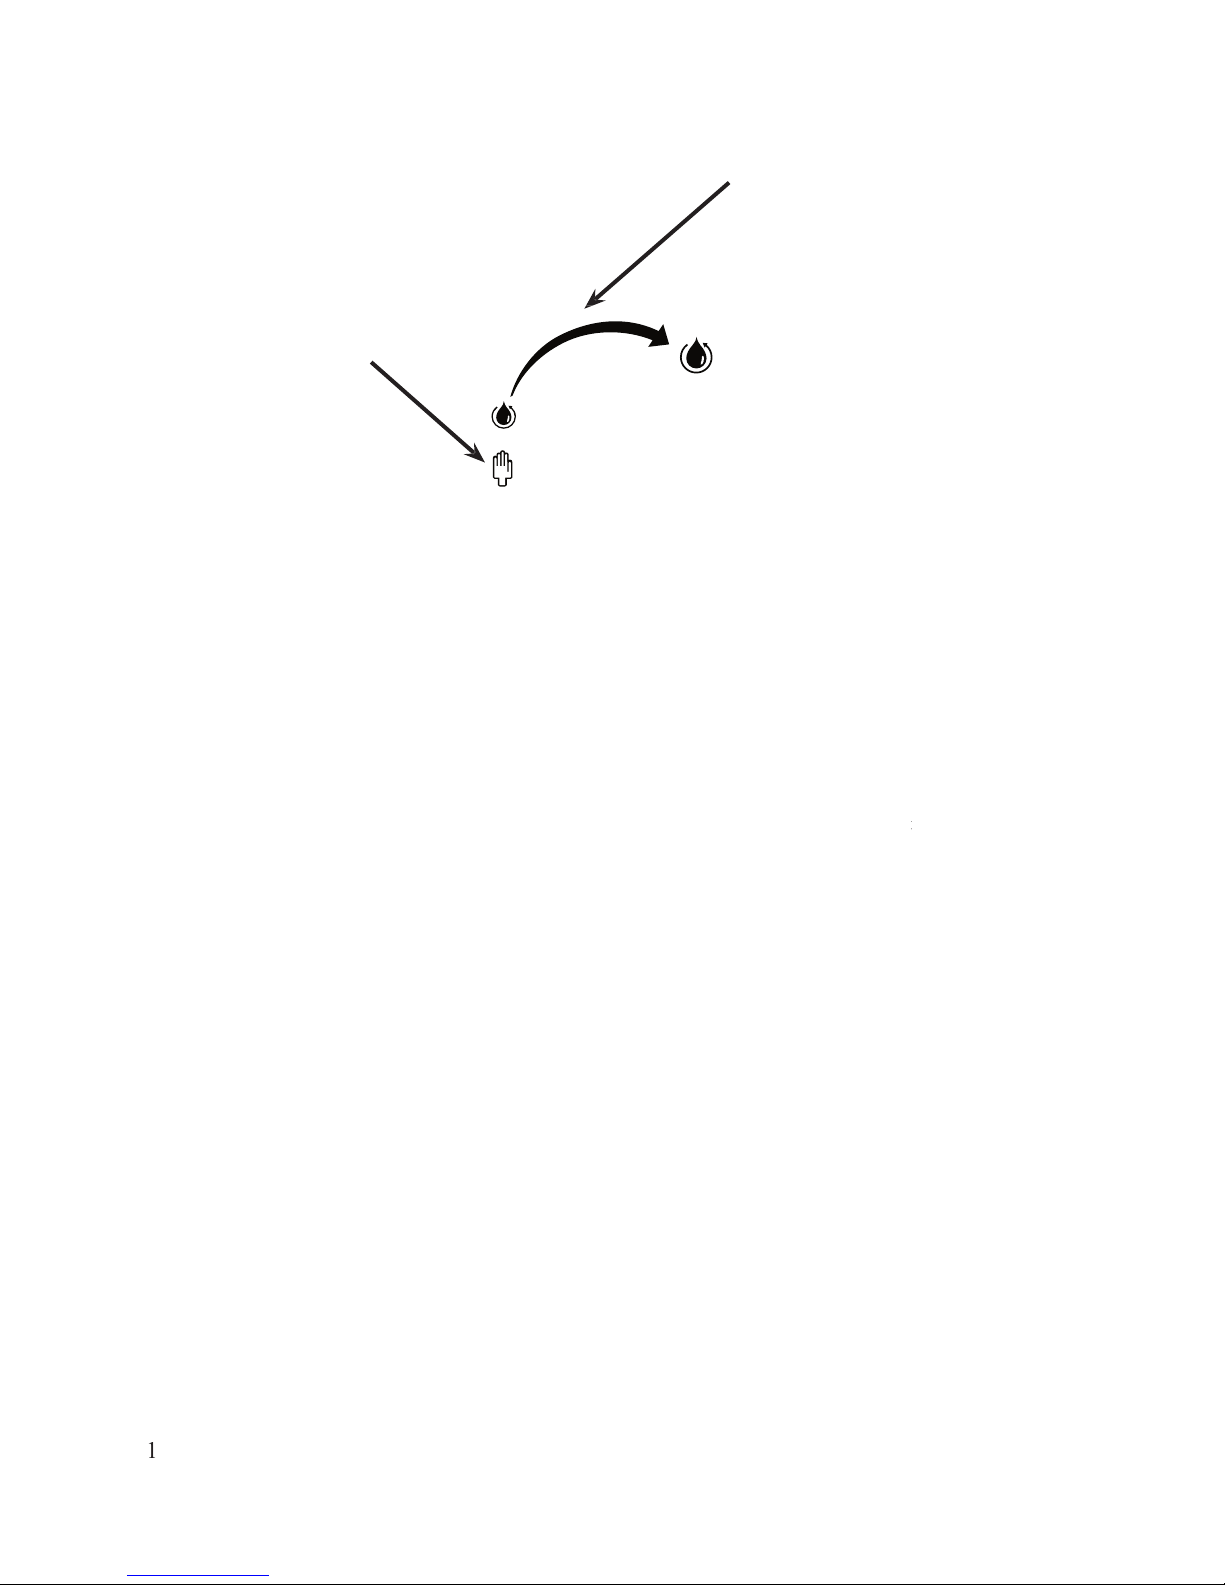
Choose the manual pumping mode to control the amount of solution pumping to the
tip. Hold the Hand Wand ON button down to pump solution to the tip. Release the ON button to stop the
pumping cycle. Always use enough solution to keep the cleaning pad wet. Too little solution will reduce the
cleaning pad life.
Automatic pumping mode.
To start the automatic pumping mode, press the ON button on the wand. Once it is
activated, it will automatically pump the liquid. The quantity of liquid can be selected from less to more.
It is best to use the manual mode at first, until you become familiar with the
To clean an
urated with
Surfox-T solution
before starting to work. If the cleaning pad is too dry, it will wear prematurely. Star
working when solution dr
Do not press hard, let the electrochemical process do the work. Do not use the cleaning pad like an abrasive
pad.
W
testing. Let 1 or 2 ounces drip into a disposal cup before cleaning.
2- Spray Surfox
3- Wipe dry with anot
Page 16
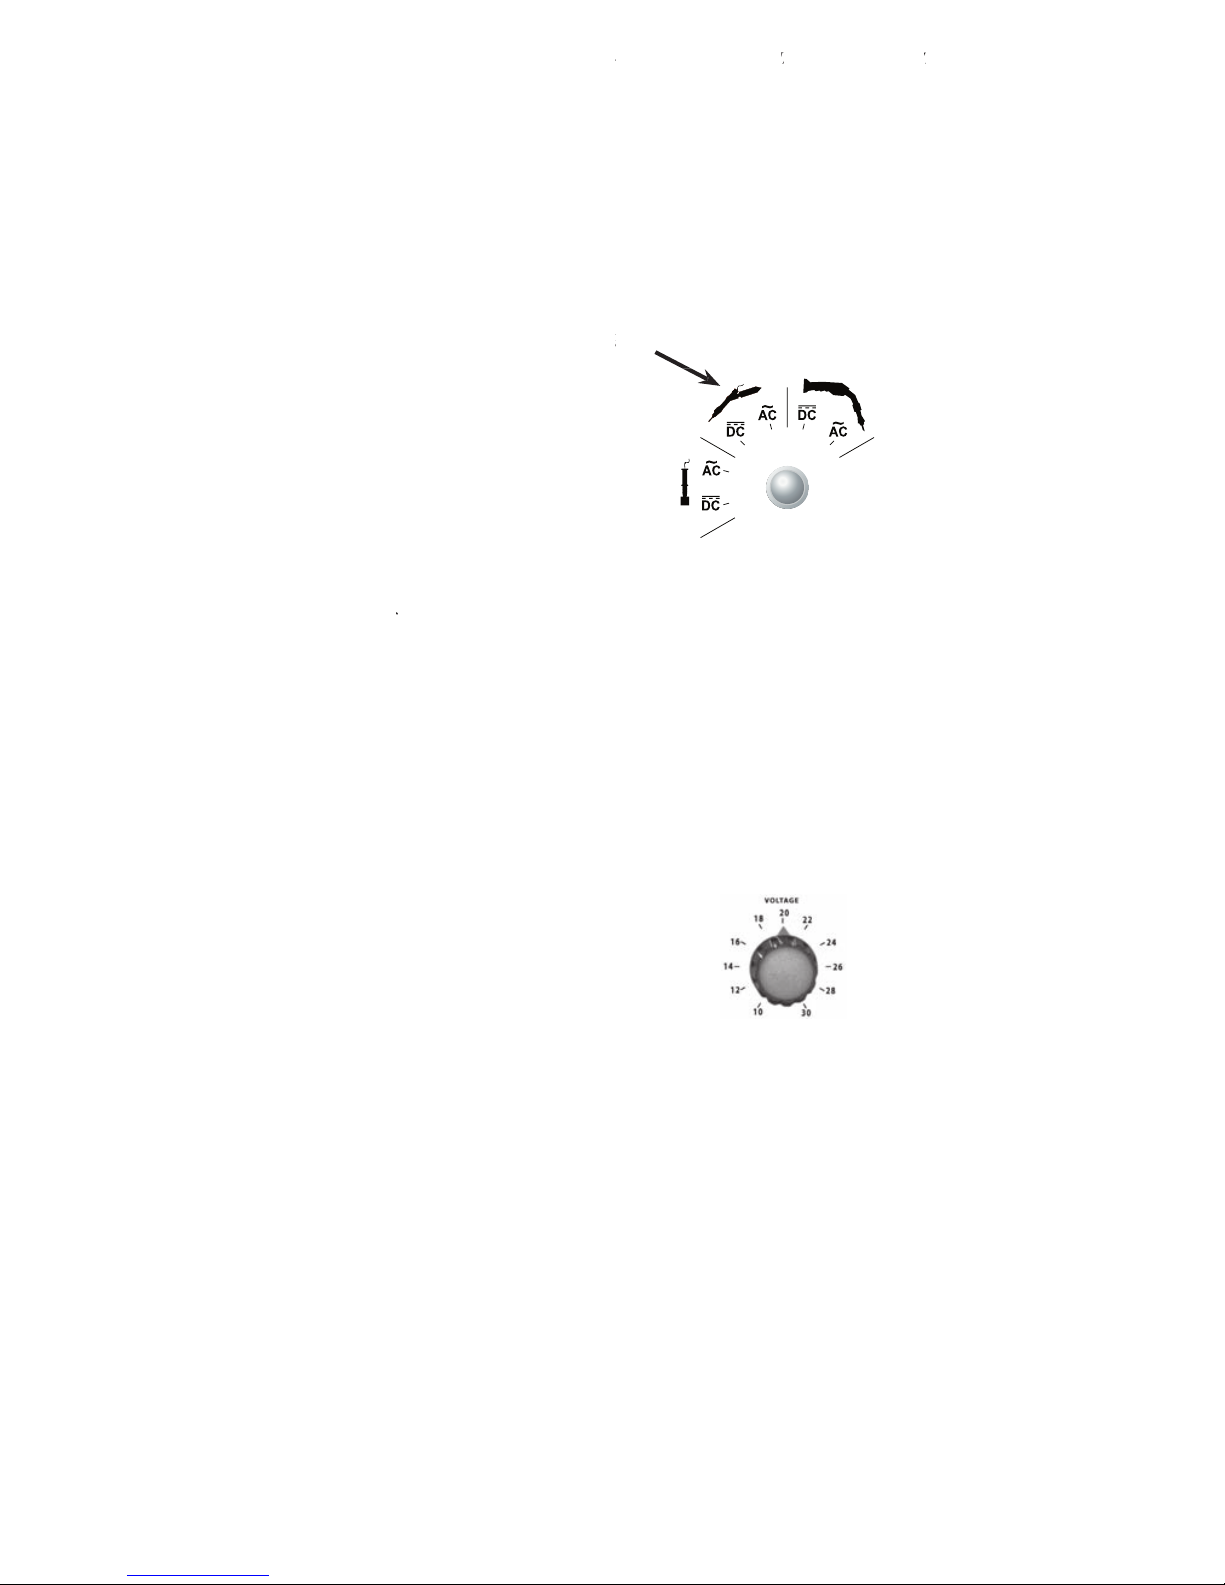
fume
connected) from operating. Only power is provided to the Mini Wand/Marking
Wand outlet. Be sure work piece is grounded.
for cleaning and passivating the weld.
for cleaning
the
DC mode tha
DC m
W
Recommended voltage settings:
AC mode for cleaning and passivating:
working on delicate surfaces, mirror finish or very thin gauge, lower the voltage.
Example: Mill finish 14 gauge 26 volts
Polished finish 16 gauge 18 volts
Mirror finish 16 gauge 12 volts
If uncertain of the material type, start at a lower voltage and increase as necessary. If the
voltage is too high, it can alter the surface by leaving a white halo effect.
DC mode for cleaning, passivating and polishing:
mill finish parts, use a lower voltage.
Example: Mill finish 14 gauge 12 volts
Polished finish 16 gauge 18 volts
Mirror finish 16 gauge 28 volts
W
D (OPTIONAL) TO C
Page 17
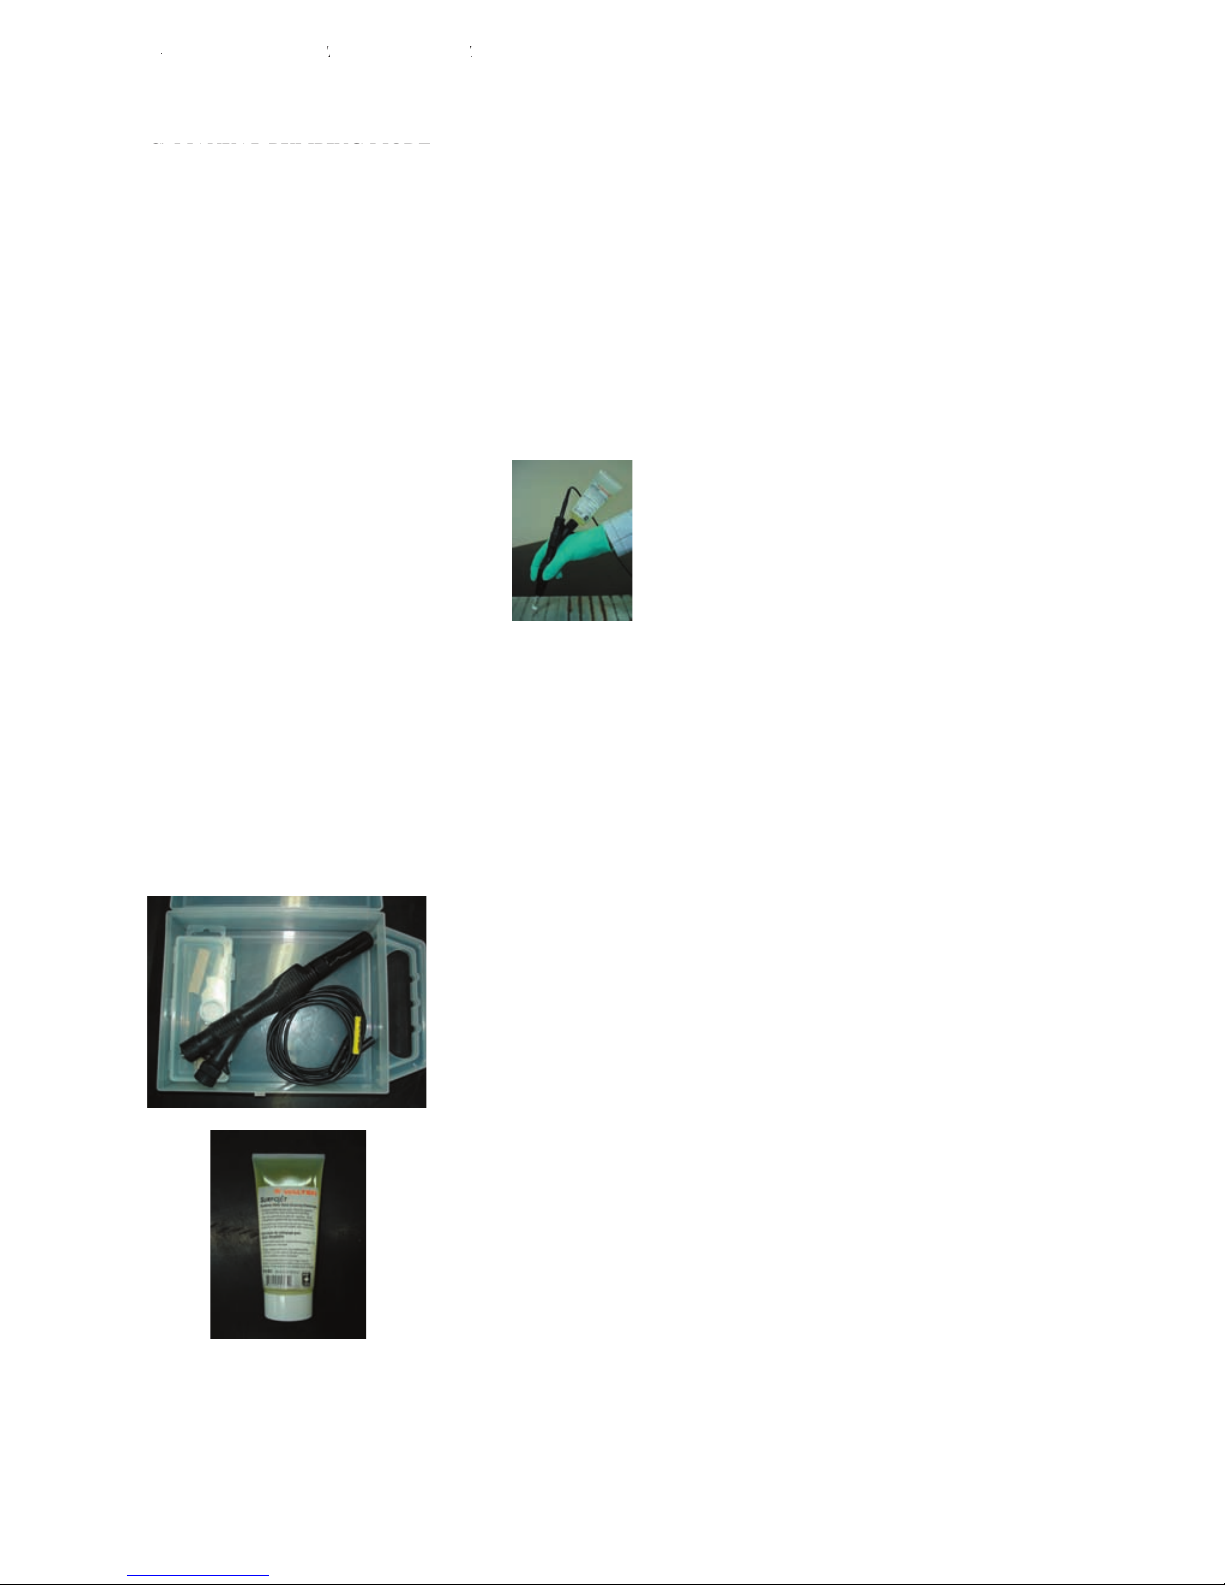
The Mini Wand uses a manual pumping mode only. One (1) press equals one (1) pump. To pump more liquid,
press repeatedly. See Mini Wand instructions for more information.
Screw in Surfox-T solution 100ml tube onto the Mini Wand. Make sure the cleaning pad is saturated with
Surfox-T solution before starting to work. If the cleaning pad is too dry, it will wear prematurely. Start
working when solution drips from the cleaning pad.
Do not press hard, let the electrochemical process do the work. The cleaning pad is a bridge between the
machine and the weld. Do not use the cleaning pad like an abrasive pad.
1- Remove any excess Surfox-T solution using a soft clean cloth
2- Spray Surfox-N on the surface
3- Wipe dry with another soft clean cloth
Mini Wand kit part no.: 54-B 033
D (OPTIONAL) TO C
Page 18
When this mode is s
Be sure the work piece is grounded.
for ma
for marking
The voltage is automatically fixed at 12V in AC or
Marking Wand mode.
1- Di
p the Marking Wand in Surfox
until the pad is satura
Surfox-T, which is used in the cleaning and passivating process. Surfox-M is part number 54-B 053.
3- Ground the
4- Rub the Marking Wand over the top of the stencil with a firm, but light pressure. You can also use a technique of
dabbing the Marking Wand on the stencil.
D (OPTIONAL)
Page 19
For best results, always tape the stencil in place using masking tape before marking.
cardboard and keep in a dry place.
D (OPTIONAL)
Page 20
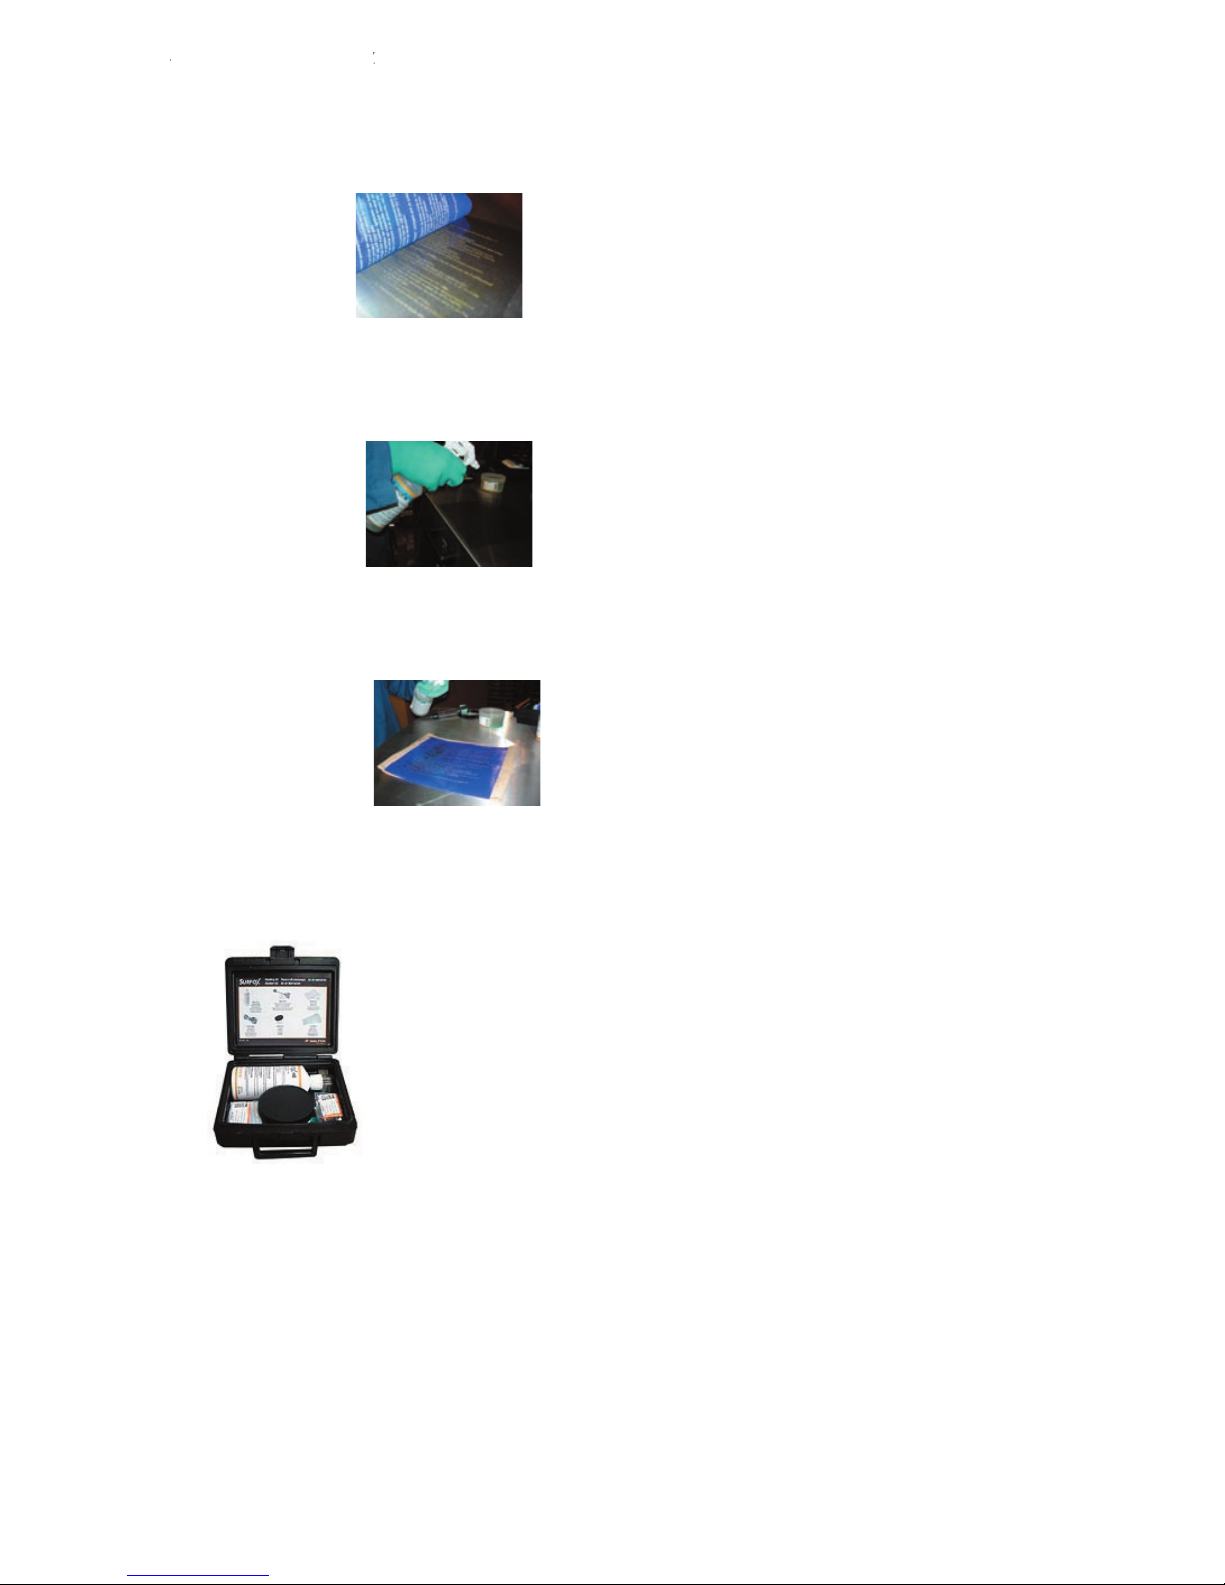
ution. It is a powerful ready-t
utralizing Sur
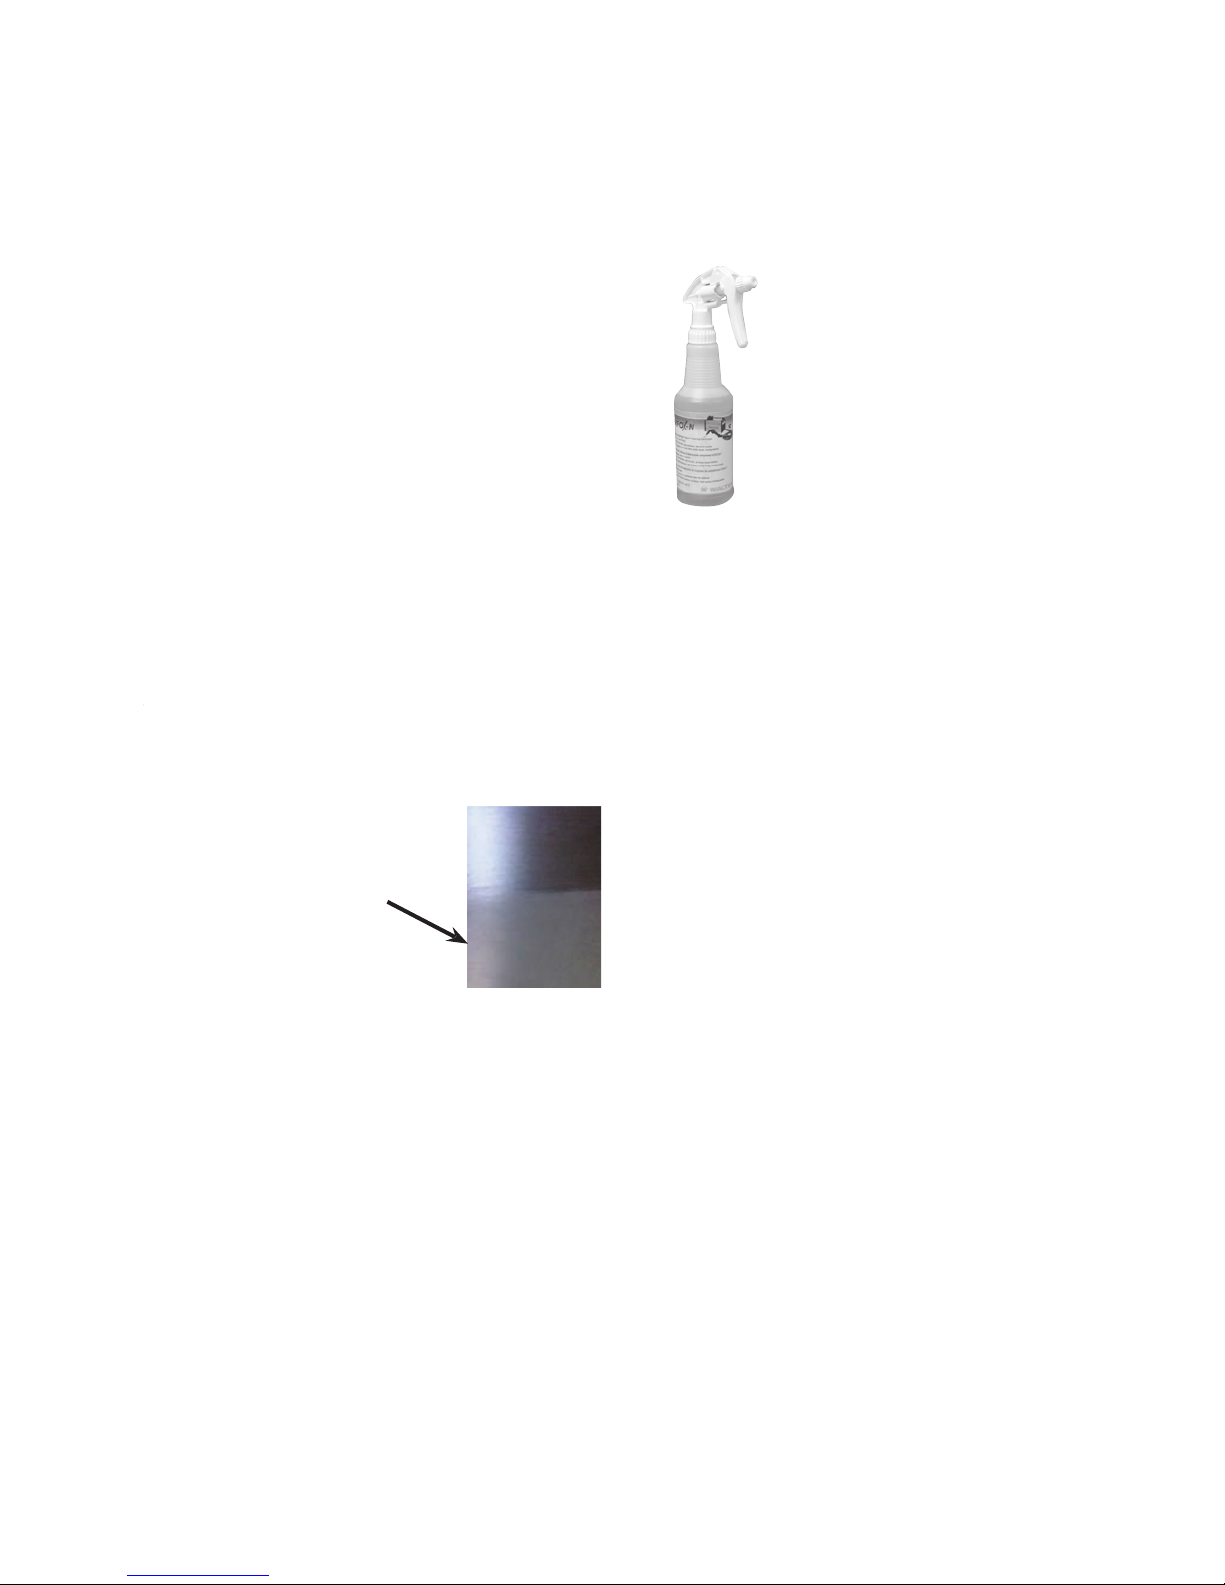
Be sure to wipe off all excess Surfox-T from the surface and neutralize
otherwise the inorganic s
IX - NEUTRALIZING
Page 21
They are made from high
quality Tungsten allo
the harsh environment created by the electrochemical process.
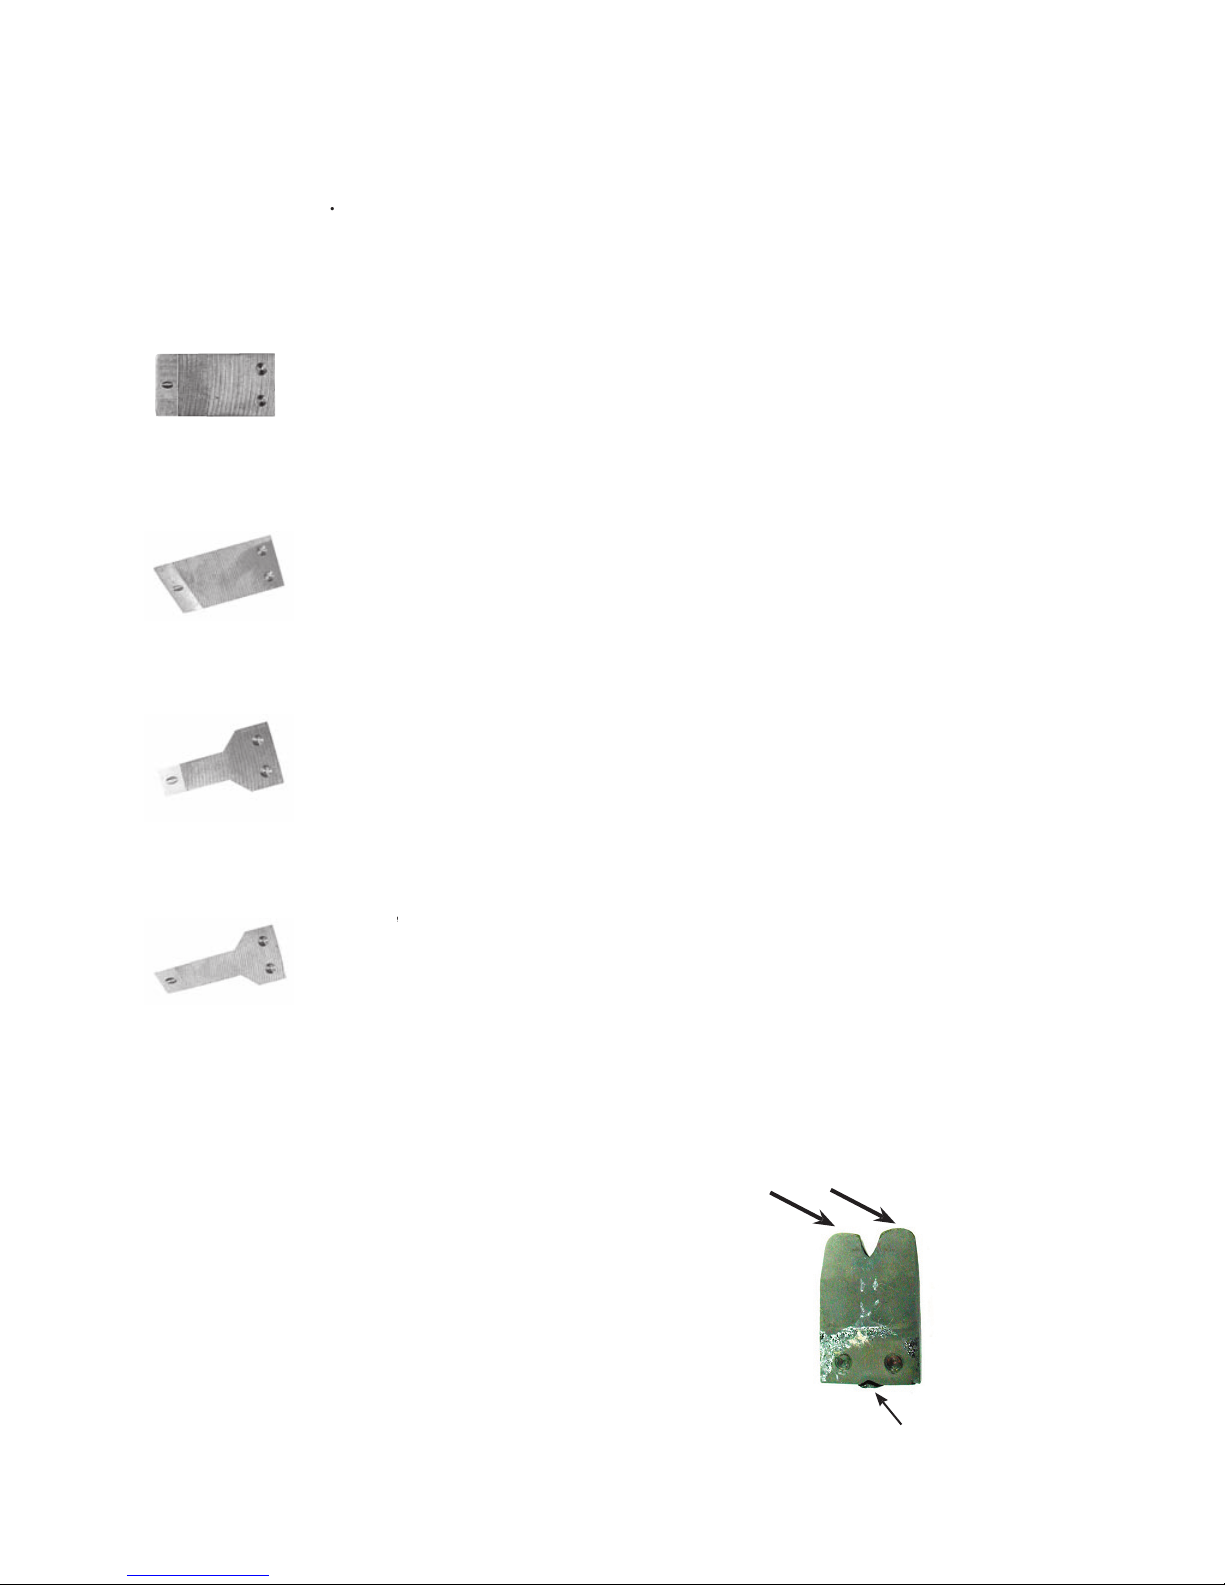
Cleaning tips are available in several different shapes and sizes:
For large flat surfaces and external angles.
Part number 48-R 133.
To be used with cleaning pad 54-B 001 (and clamp ring 54-B 002);
OR
To be used with cleaning boot 54-B 005 for internal corners
For large internal surfaces and corners.
Part number 54-B 016.
To be used with cleaning boot 54-B 006. Easier to get into tight internal corners with the
60º insert than with the standard 90º insert.
For narrow flat surfaces and external angles.
Part number 54-B 017.
To be used with cleaning pad 54-B 023 (and narrow clamp ring 54-B 020);
OR
To be used with cleaning boot 54-B 007 for internal corners.
For narrow internal surfaces and corners.
Part number 54-B 018.
To be used with cleaning boot 54-B 008. It is easier to get into tight internal corners
with the 60º insert than with the standard 90º insert.
WARNING!
When the insert is too worn, it can cause damage to the cleaning pads.
In this example of a worn insert, there are only two (2) contact points. All the current comes out of these two
(2) points. Because of the lower available cross section, the temperature will be higher at the two (2) points and
the cleaning pads may become damaged or wear out prematurely.
TIP!
Resurface the insert using a bench grinding wheel or angle grinder.
Be sure to install the O-ring located at the back of the insert
whenever they are changed.
X - ACCESSORIES
Page 22
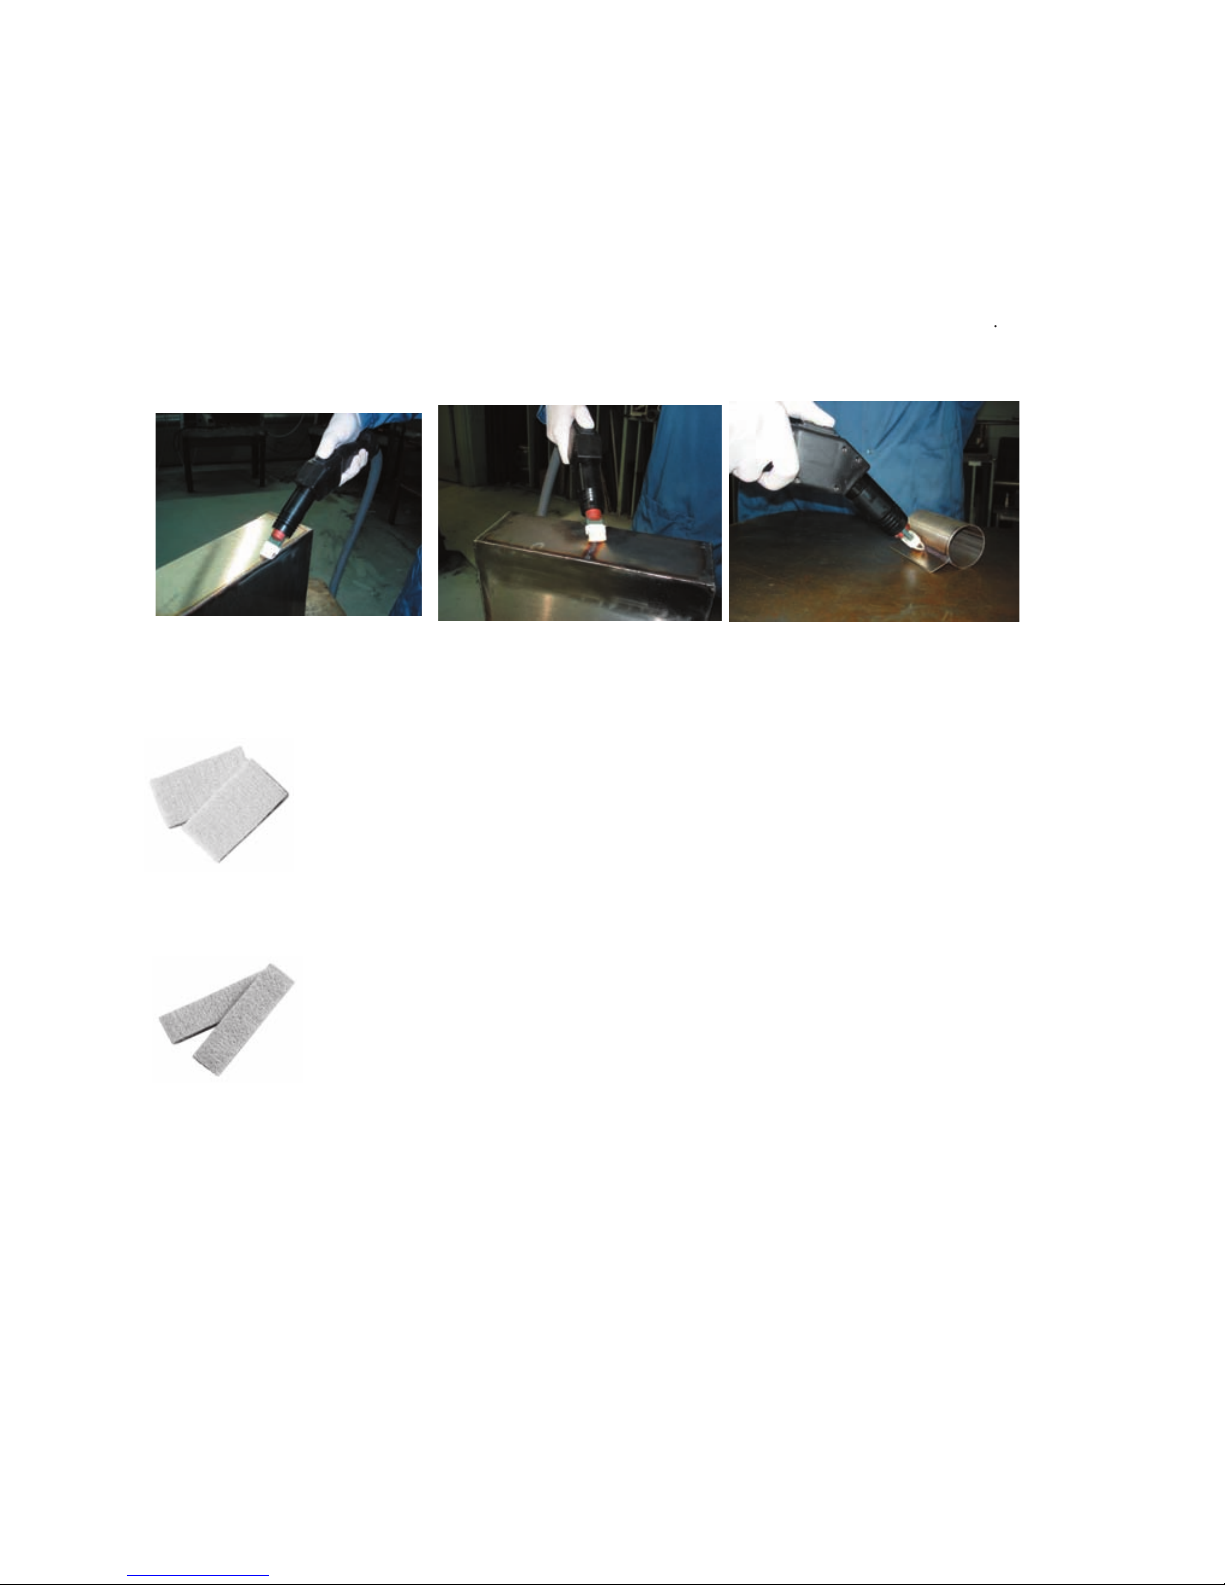
internal corners or as a first step, as they clean much faster than cleaning boots.
The cleaning pads are made from specially engineered polymer comprised of two (2) separate layers: one
internal rigid layer which is in contact with the insert for increased heat and chemical resistance, and one soft
external layer which is soft so that it will not damage or scratch the work piece during the cleaning operation.
For longer life, remove the cleaning pad and neutralize with Surfox-N
Cleaning pads are available in two (2) sizes:
For large flat surfaces and external angles.
Part number 54-B 001.
To be used with tungsten insert 48-R 133 (and clamp ring 54-B 002).
For narrow flat surfaces and external angles.
X - ACCESSORIES
Page 23
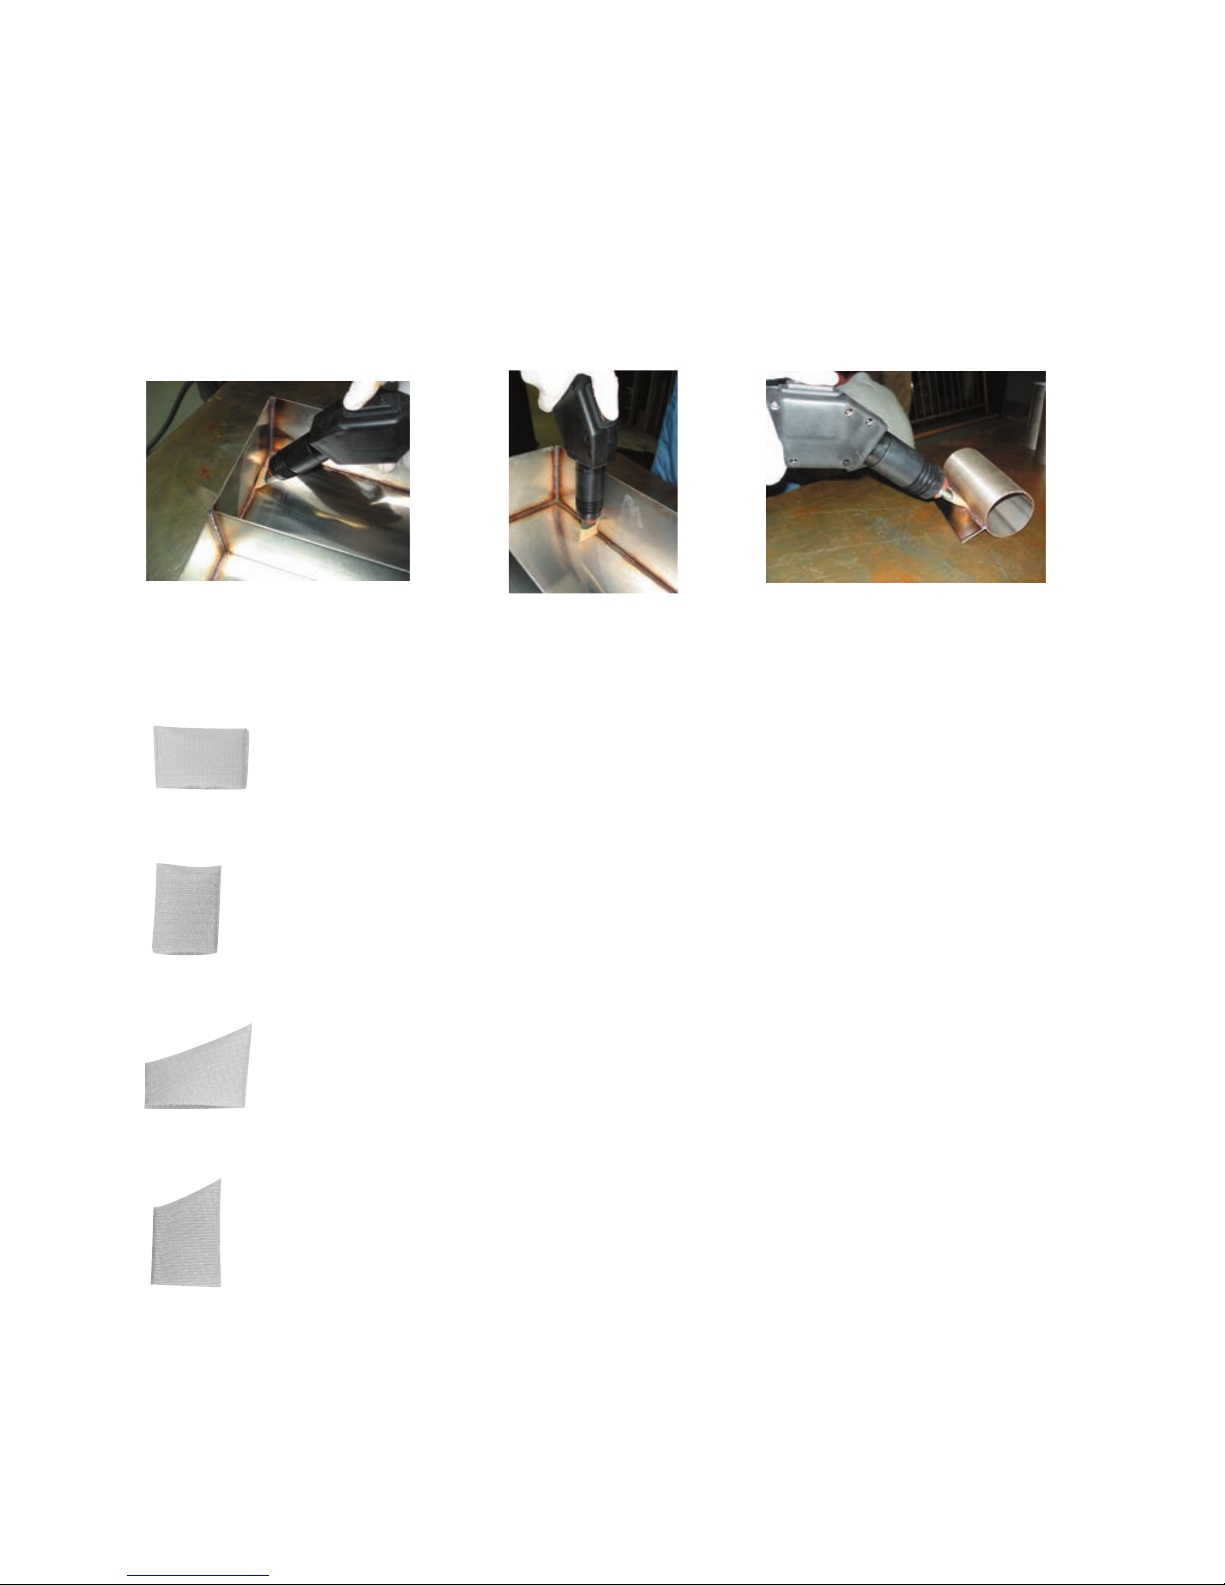
Cleaning
boots are made from a specially engineered polymer. They are composed of
one rigid layer which is very thin and durable, but not very absorbent (does not hold liquid). This may require
additional Surfox-T solution to keep the boot wet during cleaning.
They are used for internal angles or tight corners because they are thinner
Since they
Several shapes and sizes are available:
For large flat internal surfaces or angles.
Part number 54-B 005.
To be used with tungsten insert 48-R 133.
For narrow flat internal surfaces or angles.
Part number 54-B 007.
To be used with tungsten insert 54-B 017.
For large internal corners or angles.
Part number 54-B 006.
To be used with tungsten insert 54-B 016.
For narrow internal corners or angles.
Part number 54-B 008.
To be used with tungsten insert 54-B 018.
X - ACCESSORIES
Page 24
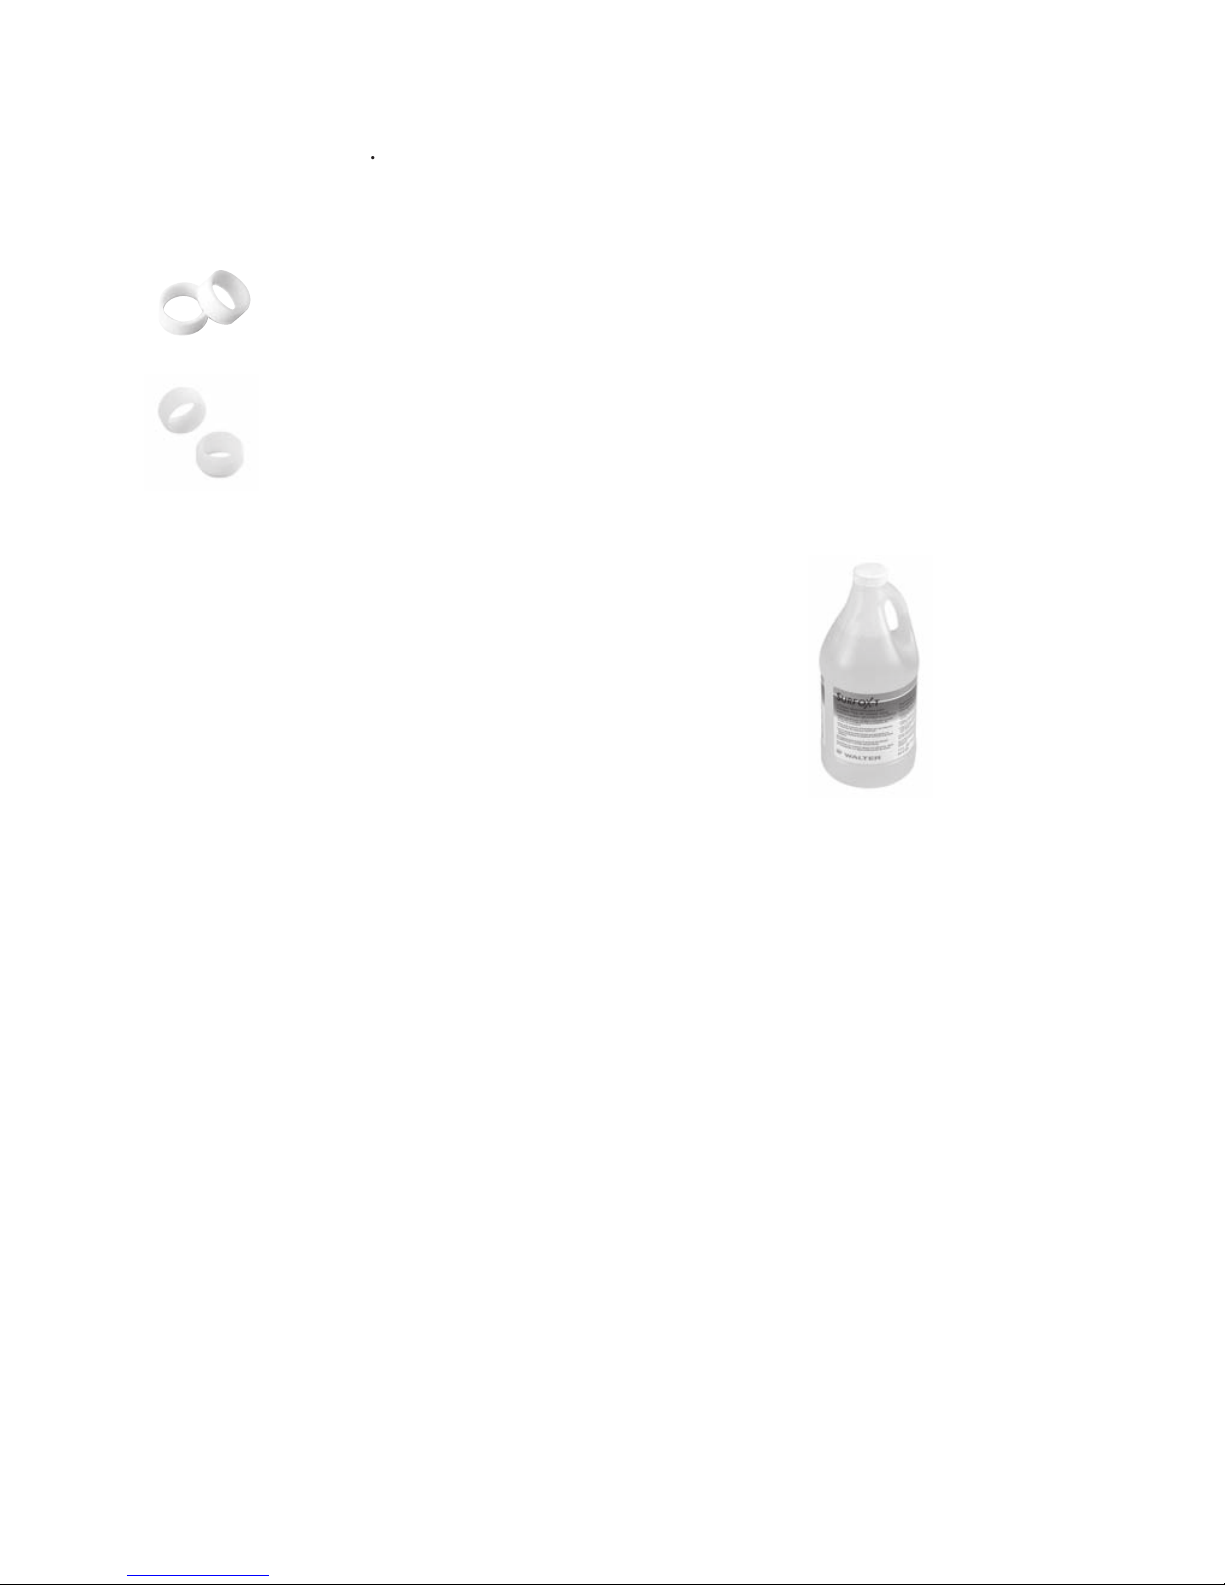
PTFE clamp rings are designed to hold the cleaning pads on the tungsten inserts.
They are available in two (2) sizes:
Clamp ring:
Part number 54-B 002.
To be used with tungsten insert 48-R 133 and cleaning pad 54-B 001.
Part number 54-B 020.
To be used with tungsten insert 54-B 017 and cleaning pad 54-B 023.
designed to be used only in
WARNING!
Do not reuse Surfox-T solution after it has gone through the Surfox unit for cleaning. Used
solution loses its cleaning effectiveness, while the "waste" liquid can become contaminated with dirt and
particles. If these unwanted particles are put back into the unit, they can cause mechanical failure to the
pump, check valve and other internal components.
X - ACCESSORIES
Page 25
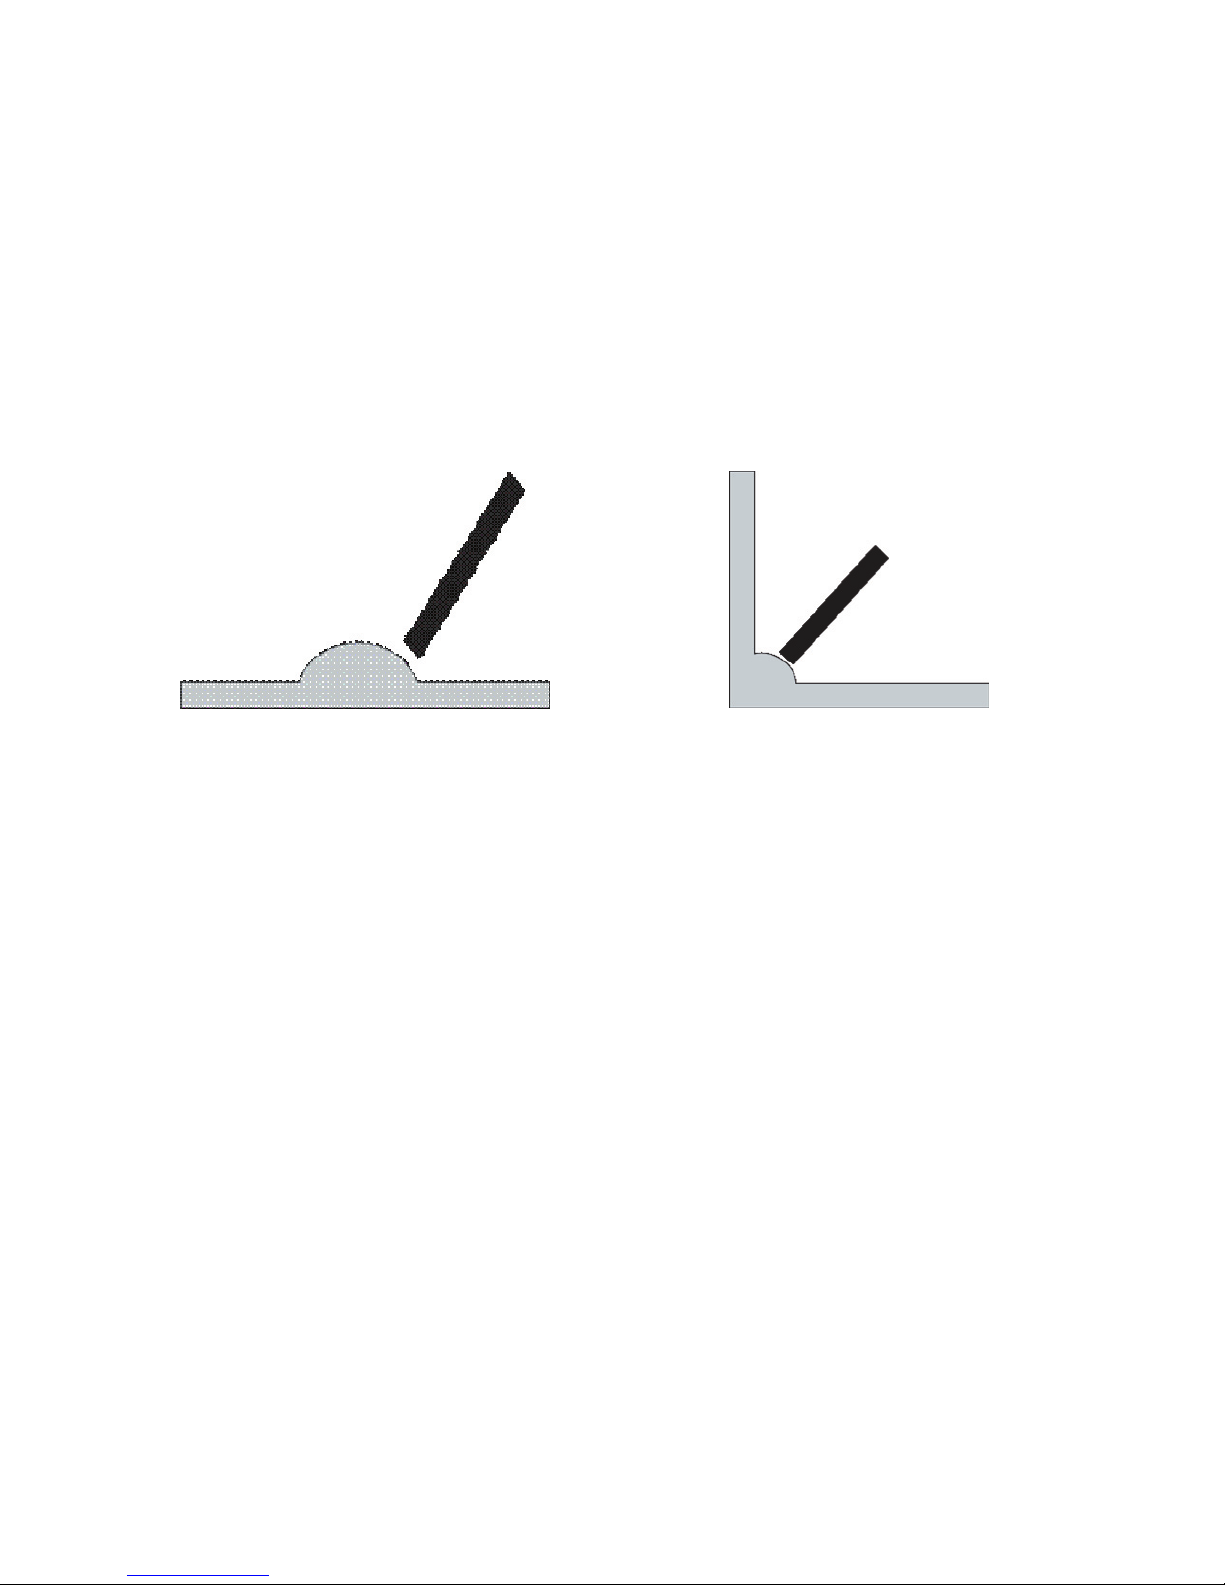
To avoid short circuits (arcing), the machine automatically stops when the insert touches the work piece (metal
to metal contact). There is an inverter board that monitors the voltage every millisecond. If the voltage sharply
increases creating a short, the system will automatically cut the power to the tip to avoid any damage to the
equipment.
To restart the machine, simply press the Hand Wand ON button.
WARNING!
To avoid drawing too much amperage and automatically stopping the power to the tip, make sure
that you touch only one surface at a time. The machine is set to work at a maximum of 10 Amps. If the
amperage goes above 10 Amps, the machine automatically shuts down.
To protect the internal components of the machine, there are temperature sensors inside the machine. If the
operating temperature is too high, the machine will shut down and restart by itself when the temperature
reaches an acceptable level. There is an internal fan inside the machine to keep all the components cool.
WARNING!
The inside temperature can increase for many reasons: high ambient temperature, lack of proper
air circulation around the machine, fluctuations in voltage, electrical set-up in the shop, etc.
XI - SAFETY FEATURES
Page 26
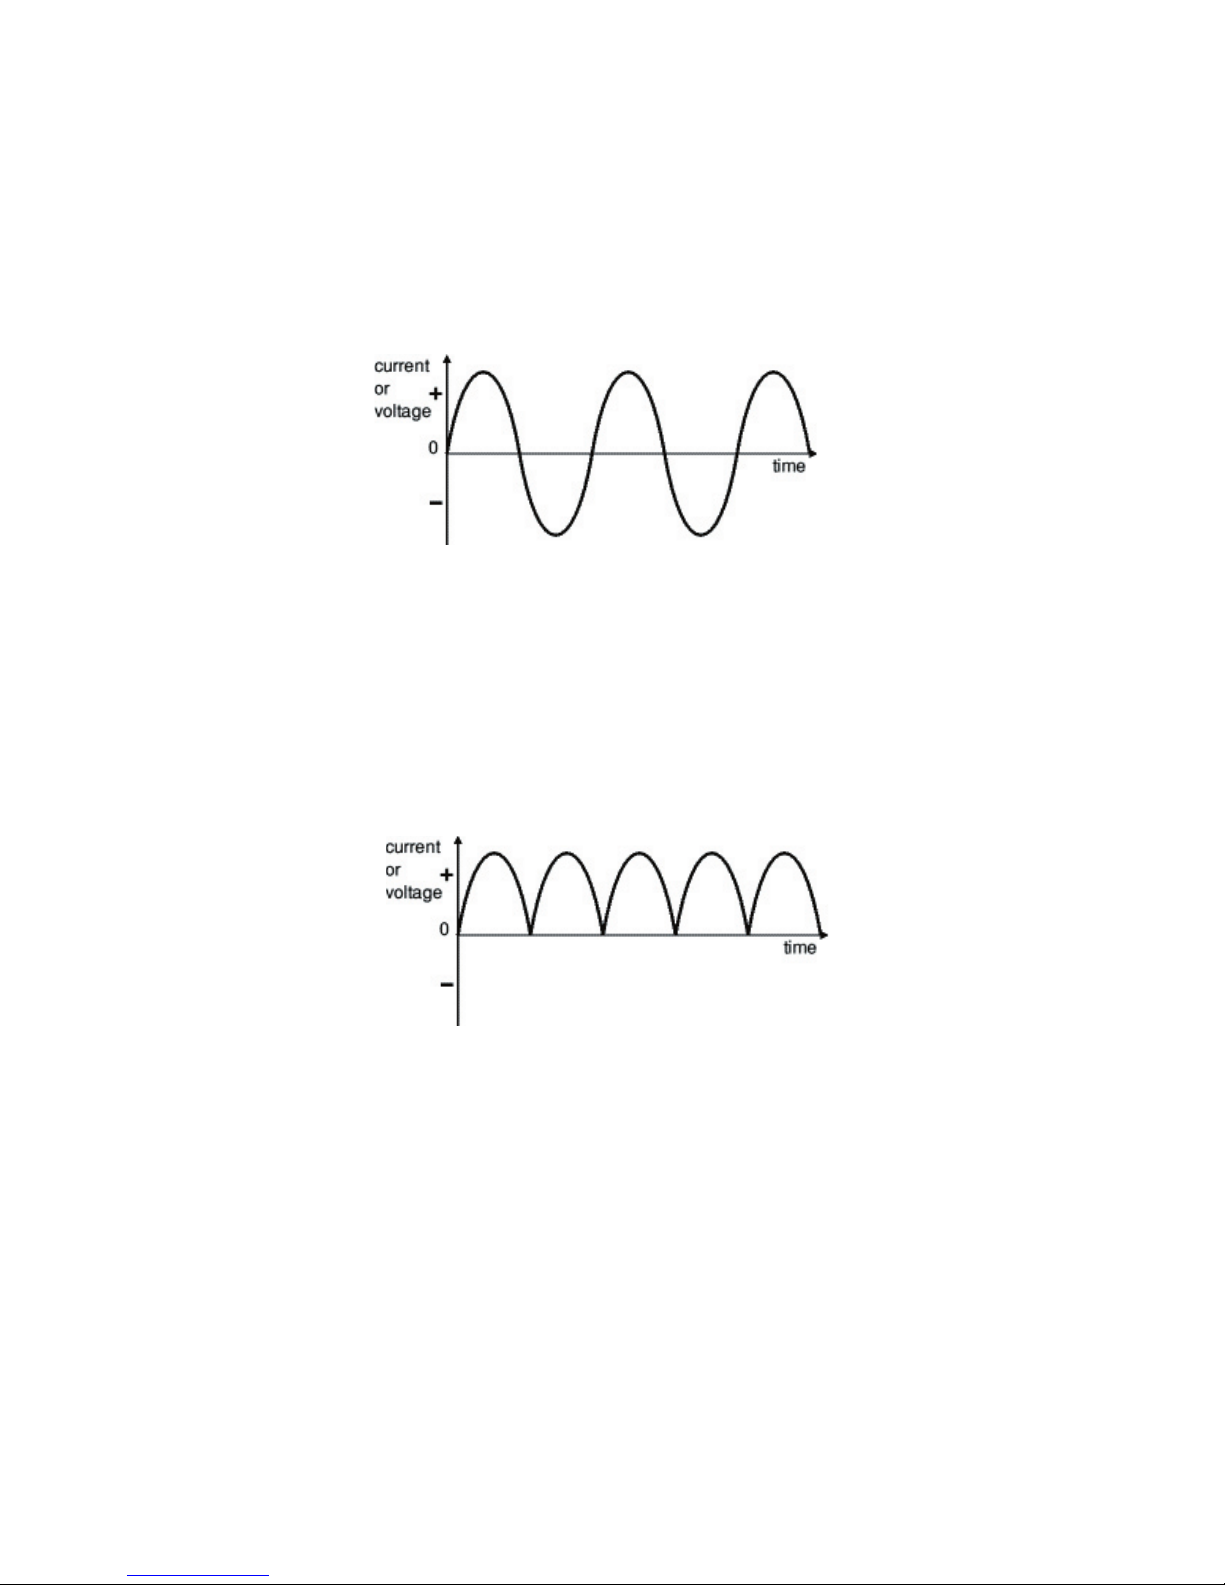
Alternating Current (AC).
direction. An AC voltage is continually changing between positive (+) and negative (-).
decrease. A DC voltage is always positive, but may increase and decrease.
XI - SAFETY FEATURES
Page 27
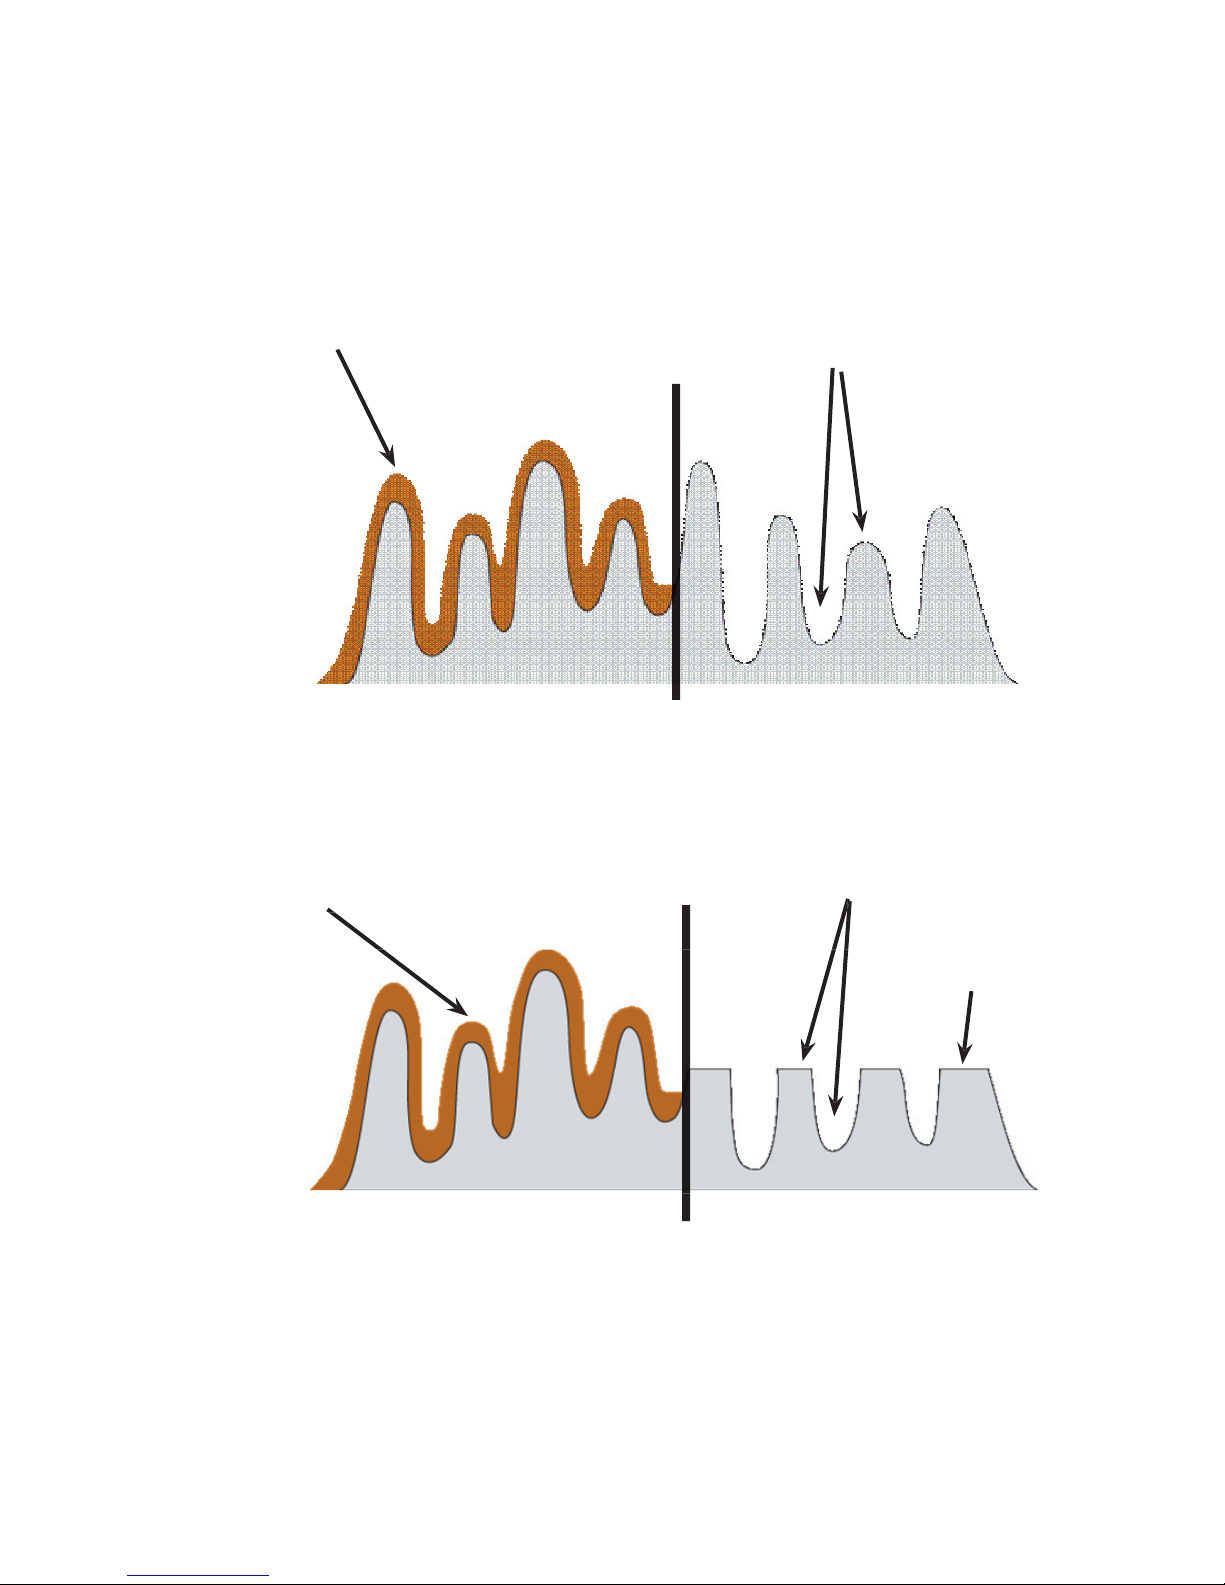
Example of cleaning and passivation with Surfox in DC mode:
Microscopic view
Microscopic view
XI - SAFETY FEATURES
Page 28

the material, the Surfox system cannot work.
If there are two (2) w
areas ma
The quality of the weld is critical
XI - SAFETY FEATURES
Page 29

(18.5" x 15" x 9.75")
XII - TECHNICAL DATA
Page 30

All
Surfox cleaning systems and accessories are inspected and tested before shipment and are
warranted to be free from any defect in material and faulty workmanship. Should any malfunction occur within
six (6) months from the date of original purchase, return the complete system prepaid with proof of purchase,
to the nearest
Factory or Authorized Service Center. If an examination shows that the malfunction
was caused by defective material or faulty workmanship,
will repair (or at our option, replace the
unit) without charge. This warranty does not apply when; normal maintenance is required, repairs or
replacements have been made or were attempted by anyone other than
authorized service personnel,
and does not cover any damage caused by accidents, modifications, use of improper accessories, abuse or
misuse, which also includes overloading the tool beyond its rated capacity as well as its continued use after
partial failure. No other warranty, written or verbal, is authorized.
In no event shall
be liable for any indirect, incidental or consequential damages from the sale of the
product. This disclaimer applies both during and after the term of this warranty.
This warranty gives you specific rights. The provisions contained in this warranty are not intended to limit,
modify, take away from, disclaim or exclude any warranties set forth in any Provincial or State legislation. To
the extent required by law, the provisions in any Provincial, State or Federal legislation with respect to
warranties take precedence over the provisions in this warranty.
Pointe-Claire, QC H9R 1C1 Fax: (514) 630-2825
Mississauga, ON L5T 2L1 Fax: (905) 795-8558
Delta, BC V3M 6M2 Fax: (604) 540-4778
141 Locust Street Fax: (860) 560-7300
Hartford, CT 06114-1504
81-10-91-81
XII - WARRANTY AND SERVICE
 Loading...