

Walter MINI SURFOX User Manual
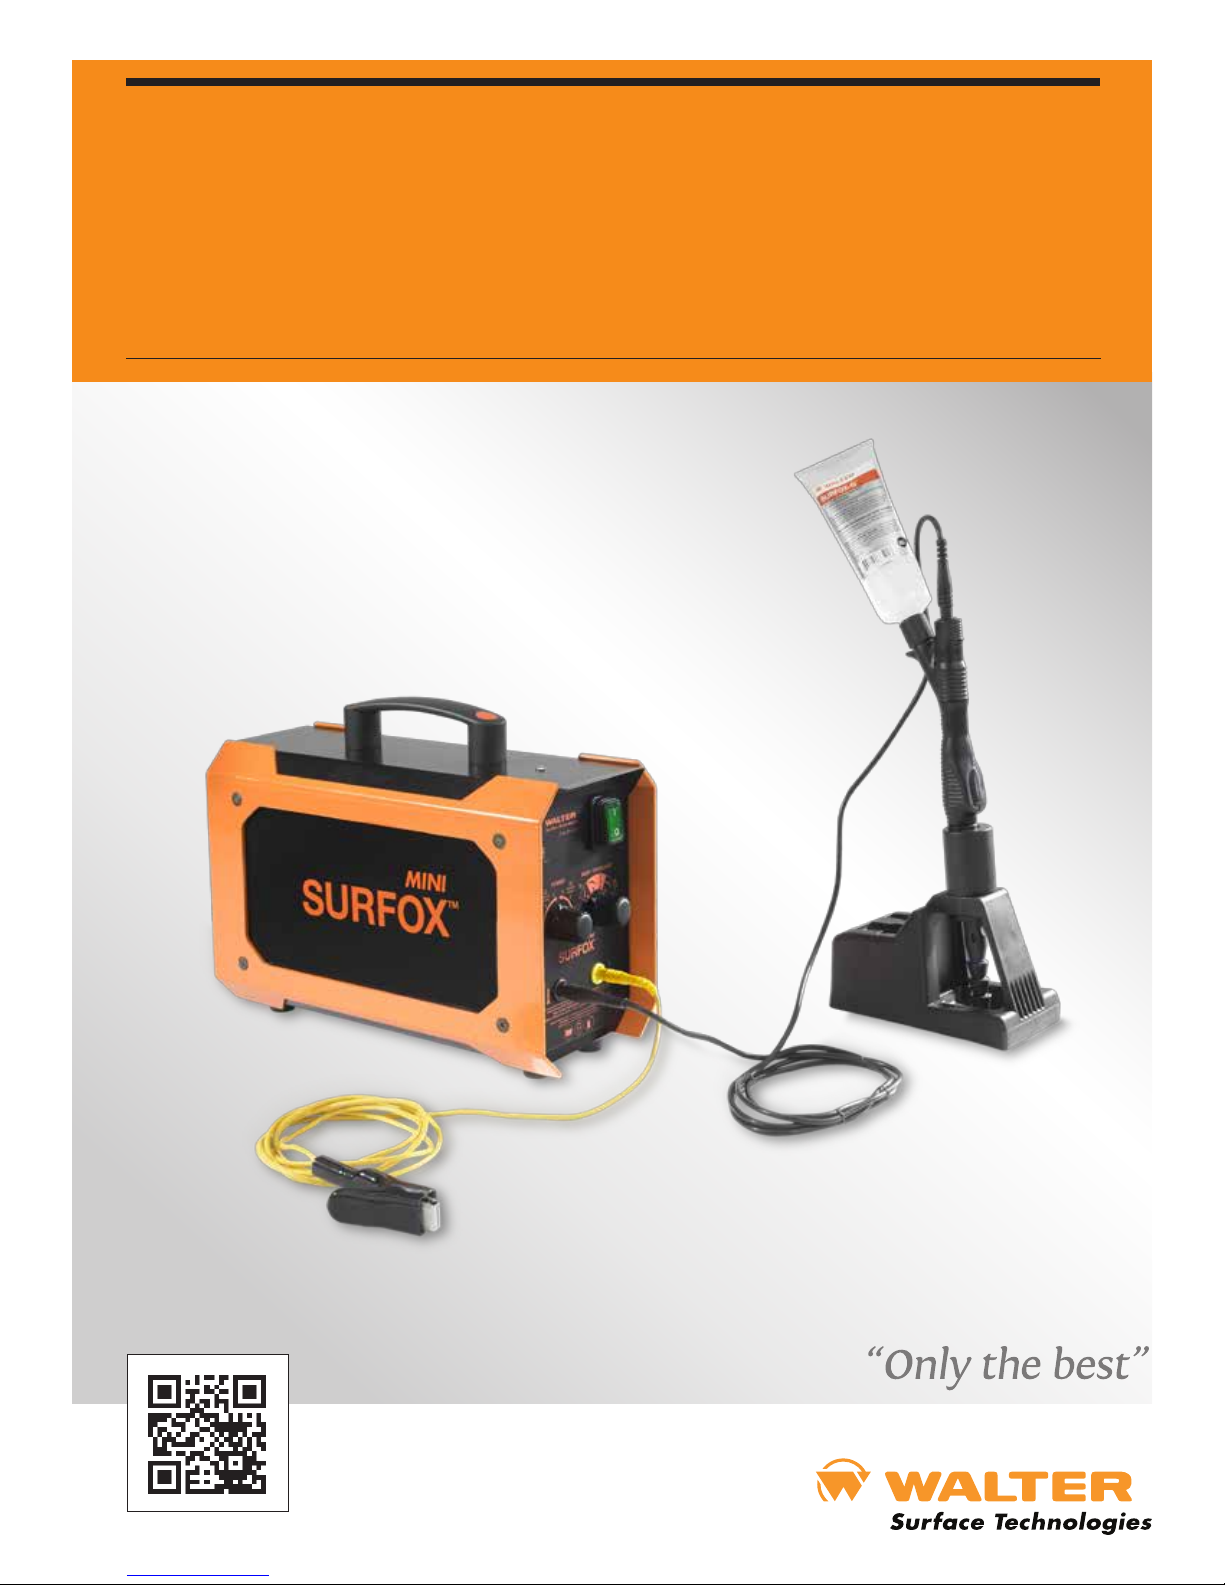
MINI SURFOX
User’s guide
Manuel de l’utilisateur
Manual de usuario
Manual do Usuário
SURFOX website
(Link to surfox.com)

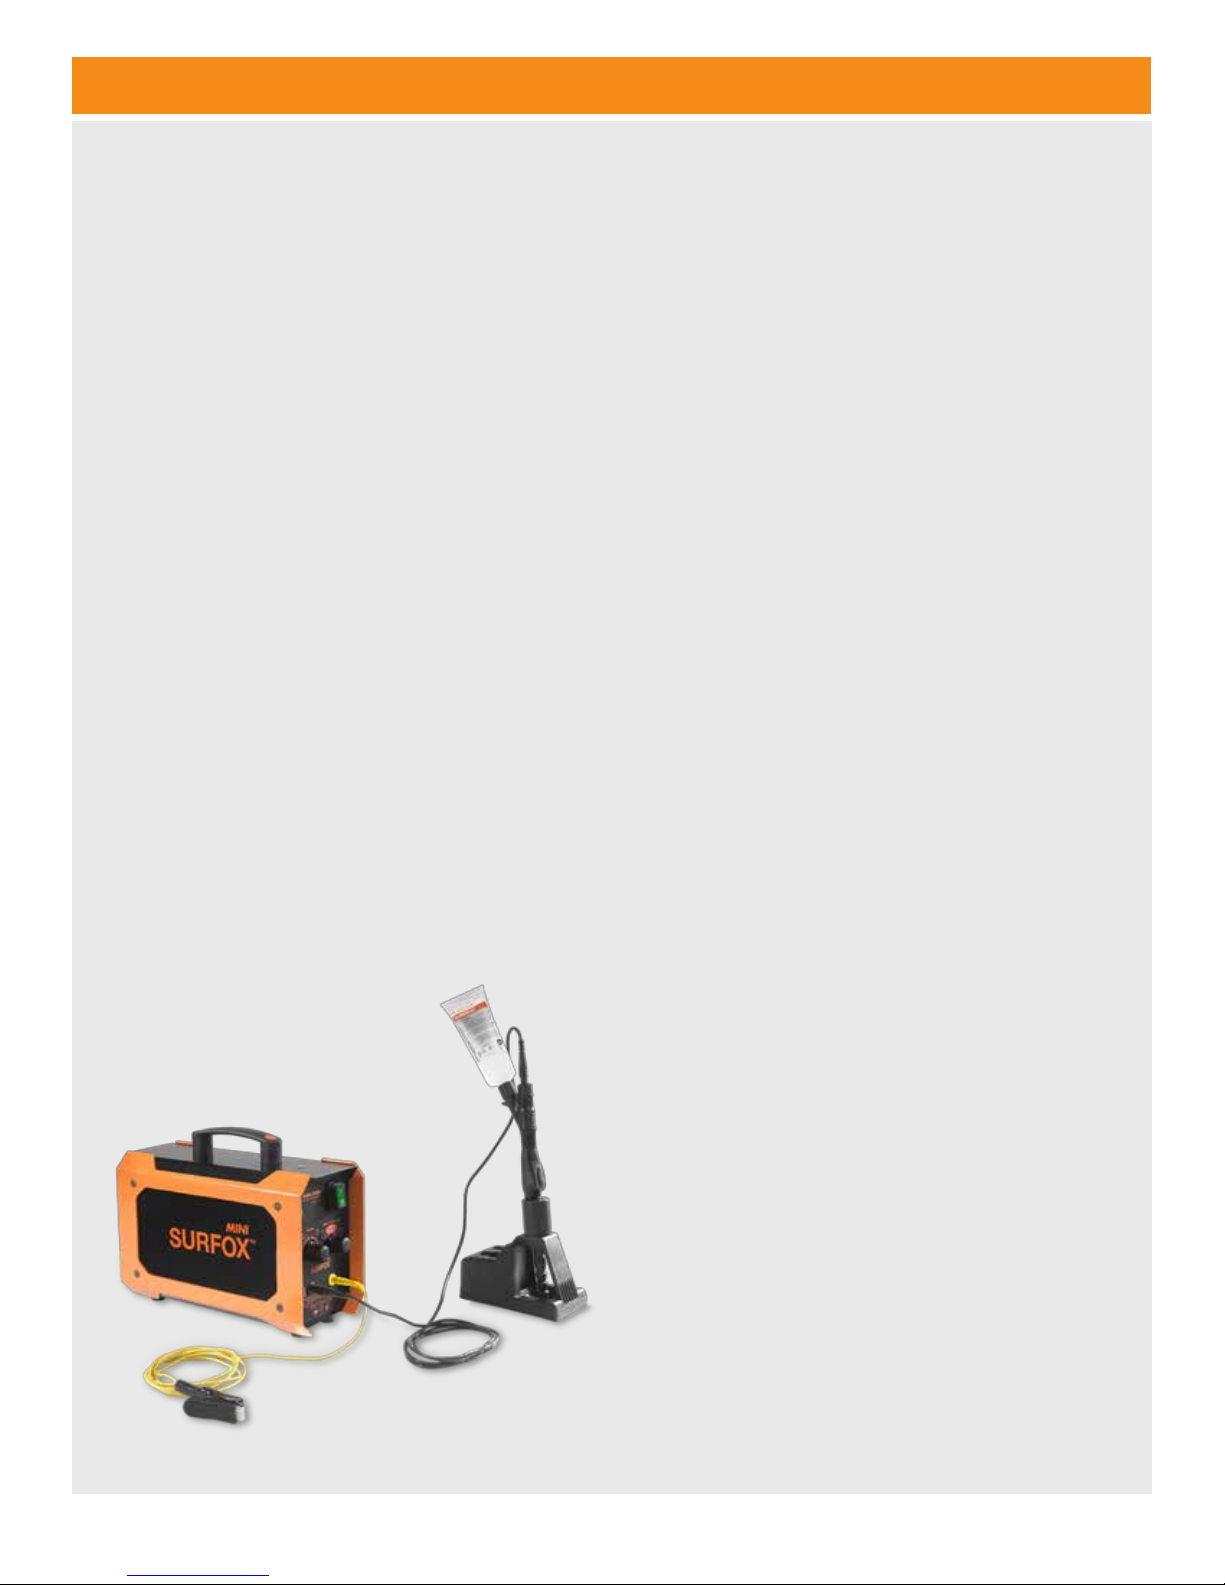
Table of contents
Table of contents
1 Introduction 4
2 Safety Instructions 5
3 Equipment controls 6
Control panel pictograms 6
4 General Overview 8
5 Front view of the machine 8
6 Start-up procedures 9
A) Instructions 9
B) Mounting and cleaning pad 10
7 Neutralizing 10
Directions for neutralizing SURFOX electrolyte
cleaning solutions 10
8 Accessories 11
A) Cleaning inserts and micro-wand kit 11
B) Electrolyte solutions 11
C) Cleaning pads 12
D) PTFE clamp rings 12
E) Carbon fiber brush and micro-wand kit 12
F) Large graphite insert 12
9 Marking kits and testing devices 13
A) Marking kits 13
B) SURFOX testing devices 13
10 Technical Data 14
11 Safety Features 14
A) Sparks on the tip/work piece 14
B) Internal temperature 14
C) AC/DC current basics 14
12 Warranty and service 15
A) Warranty policy 15
B) Repair and service 15
Version française 16
Versión española 31
Versão Português 45
User’s Guide SURFOX MINI 3

Introduction
1
Introduction
Congratulations on purchasing the finest electrochemical
weld cleaning and passivation equipment available today.
WALTER’s SURFOX
easily and cost effectively removes the heat tint from heat
affected zones on stainless steel and aluminum while
completely passivating the stainless steel surface.
SURFOX machines are equipped with self-regulating
inverter boards, automatically monitoring and adjusting
the current so as to ensure maximum cleaning effectiveness without loss of productivity.
Before starting, please read the SURFOX owner’s manual
completely as we take you step-by-step through the
start-up, operating and maintenance procedures of your
new SURFOX equipment. Your new SURFOX machine has
been built with extra durability to stand up to the heavy
demands of industrial use. However, like any piece of
electrical equip-ment, care and safety should always be
taken when using and maintaining this valuable investment.
With proper care and maintenance your SURFOX equipment will provide years of dependable service.
To learn more about the other WALTER products,
visit our website: walter.com.
TM
weld cleaning equipment quickly,
Operation
The SURFOX machine works by an electrochemical
process to clean and passivate welds on stainless steel.
SURFOX electrolyte solutions are phosphoric acid based,
approved for food industry, and are activated by an
electrical cur-rent to clean welds. The process takes only
a few seconds without damaging or scratching the surface
of the parts to be cleaned.
Your SURFOX machine can clean:
• TIG welds
• Plasma welds
• Laser welds
• Spot welds
• MIG welds (with Pulse technology)
Basics of passivation:
• The cleaning of the welds is not only for aesthetic
purposes but most importantly for passivation.
• Passivation is the treatment of stainless steel surfaces
to remove contaminants and promote the formation of
a thick and durable protective chromium oxyde layer.
• This passive layer will insure the corrosion resistance
of stainless steel.
• If passivation is not done properly, stainless steel and
heat affected zones may start to rust.
4
Safety instructions
Safety instructions
2
WALTER weld cleaning machines are produced in accor-
dance with applicable standards governing the manufacture, performance and safety of industrial products.
WARNING: When using these machines, basic safety
precautions should always be observed to reduce the risk
of electrical shocks and personal injuries.
Before using this machine, read all Safety and
Operating Instructions carefully and save this owner’s
manual for future reference.
1. Read this owner’s manual to familiarize yourself with
this unit’s operation, its particular features, applications
and limitations.
2. This unit is equipped with a 3-conductor power cord
and 3-prong electrical plug, it must be connected to
a correspondingly grounded receptacle.
3. Allow a minimum of 8” clearance around the unit to
keep all air openings clear of any obstruction. Free
through the vent openings is required to
prevent the unit from overheating.
Keep work area clean and well lit. A cluttered environ-
4.
ment invites accidents. Remove any material that
may be ignited by sparks. Do not use this tool when
liquids or gases are present. Keep handles
clean, dry and free from cleaning solution, oil and
grease. Do not use in rain, damp or wet locations.
5. Keep children and other persons at a safe distance
from the work. Make sure no one is under you when
working in high places. Do not let unqualified persons
handle this machine.
6. When working, always wear appropriate clothing
and safety gear, such as suitable and safety approved
chemical resistant gloves, overalls, safety shoes, etc.
7. Always wear approved safety goggles.
8. During the cleaning process, the wand tip and work
piece can reach very high temperatures, allow to cool
before coming in contact with exposed skin.
9. Avoid inhalation of vapors, use only in well ventilated
areas. Use a respirator, if necessary.
10. All electric shocks can be potentially dangerous.
11. Should you encounter an electrical problem, do not
use the unit until qualified personnel have inspected
the equipment.
12. Never operate the unit with its protective cover
removed.
13. Stay alert at all times when handling this unit. Watch
what you are doing. Use common sense. Do not
operate the tool when you are tired. Never leave it
running unattended.
14. Make sure the switch is in its OFF position before
plugging in or when moving the unit to avoid uninten tional starting.
15.
Hold the wand firmly. Do not overreach, maintain good
footing and balance at all times.
16. Before use, all parts should be carefully examined to
determine that the unit will operate properly and
perform its intended function.
17. Parts that are damaged or defective should be properly
repaired or replaced by a WALTER Factory Service
Center or a WALTER Authorized Service Center.
18. Do not use the unit if the switch does not turn ON
and OFF.
19. Use only the accessories recommended for this
system. Always check accessories before starting to
work and do not use if damaged.
20. CAUTION: WALTER SURFOX-T electrolyte weld
cleaning solution contains phosphoric acid and may
cause burns when not handled properly. Avoid skin
contact.
First aid Wash affected area with water.
Eye contact Flush with water for 15 minutes lifting
eyelids occasionally. Contact physician if necessary.
Ingestion DO NOT induce vomiting. Rinse mouth,
drink plenty of water and get medical attention.
Refer to WALTER product MSDS for complete
safety data information.
21. Use only WALTER SURFOX electrolyte weld cleaning
solutions with this unit and NEVER mix it with any other
products.
22. Store solutions in their original containers and in a safe
place, out of the reach of children and other unquali-
persons. Keep container contents clean. Do not
reuse SURFOX electrolyte cleaning solutions.
23. Do not touch the wand tip or work piece while working
or immediately after use, they may be extremely hot
and could cause serious burns.
24. Do not abuse the power cord. Never pull or lift this unit
by its cord or yank to disconnect it from the receptacle.
Keep the cord away from heat, oil and sharp edges.
Inspect the cord periodically, if damaged, have it re placed by a WALTER Factory Service Center or a
WALTER Authorized Service Center.
25.
When not in use, switch OFF and unplug the electrical
cord and air hose. It must also remain unplugged
when replacing cleaning pads and other accessories,
while performing maintenance and before servicing.
26.
Store the unit in a dry safe place, out of the reach of
children and other unqualified persons.
User’s Guide SURFOX MINI 5
Safety instructions
Equipment controls
2
Amperage
Before connecting this unit, check that the amperage
shown on the rating plate is the same as the power supply.
Operating this unit on an amperage other than on
its rating plate may result in personal injury to the user and
damage the unit.
Preventive maintenance
After use, allow the tip to cool and remove the cleaning pad
Neutralize with SURFOX-N and rinse the cleaning pad and
wand tip with water and dry. Clean dust and dirt deposits
from the exterior of the unit. Keep all
free of any obstructions. Clean the power cord to prevent
deterioration and check for possible damage to cord and
plug.
Note: Damaged cords must be replaced immediately by
personnel only. Refer to Spare Parts List for the
ordering number.
vent openings
3
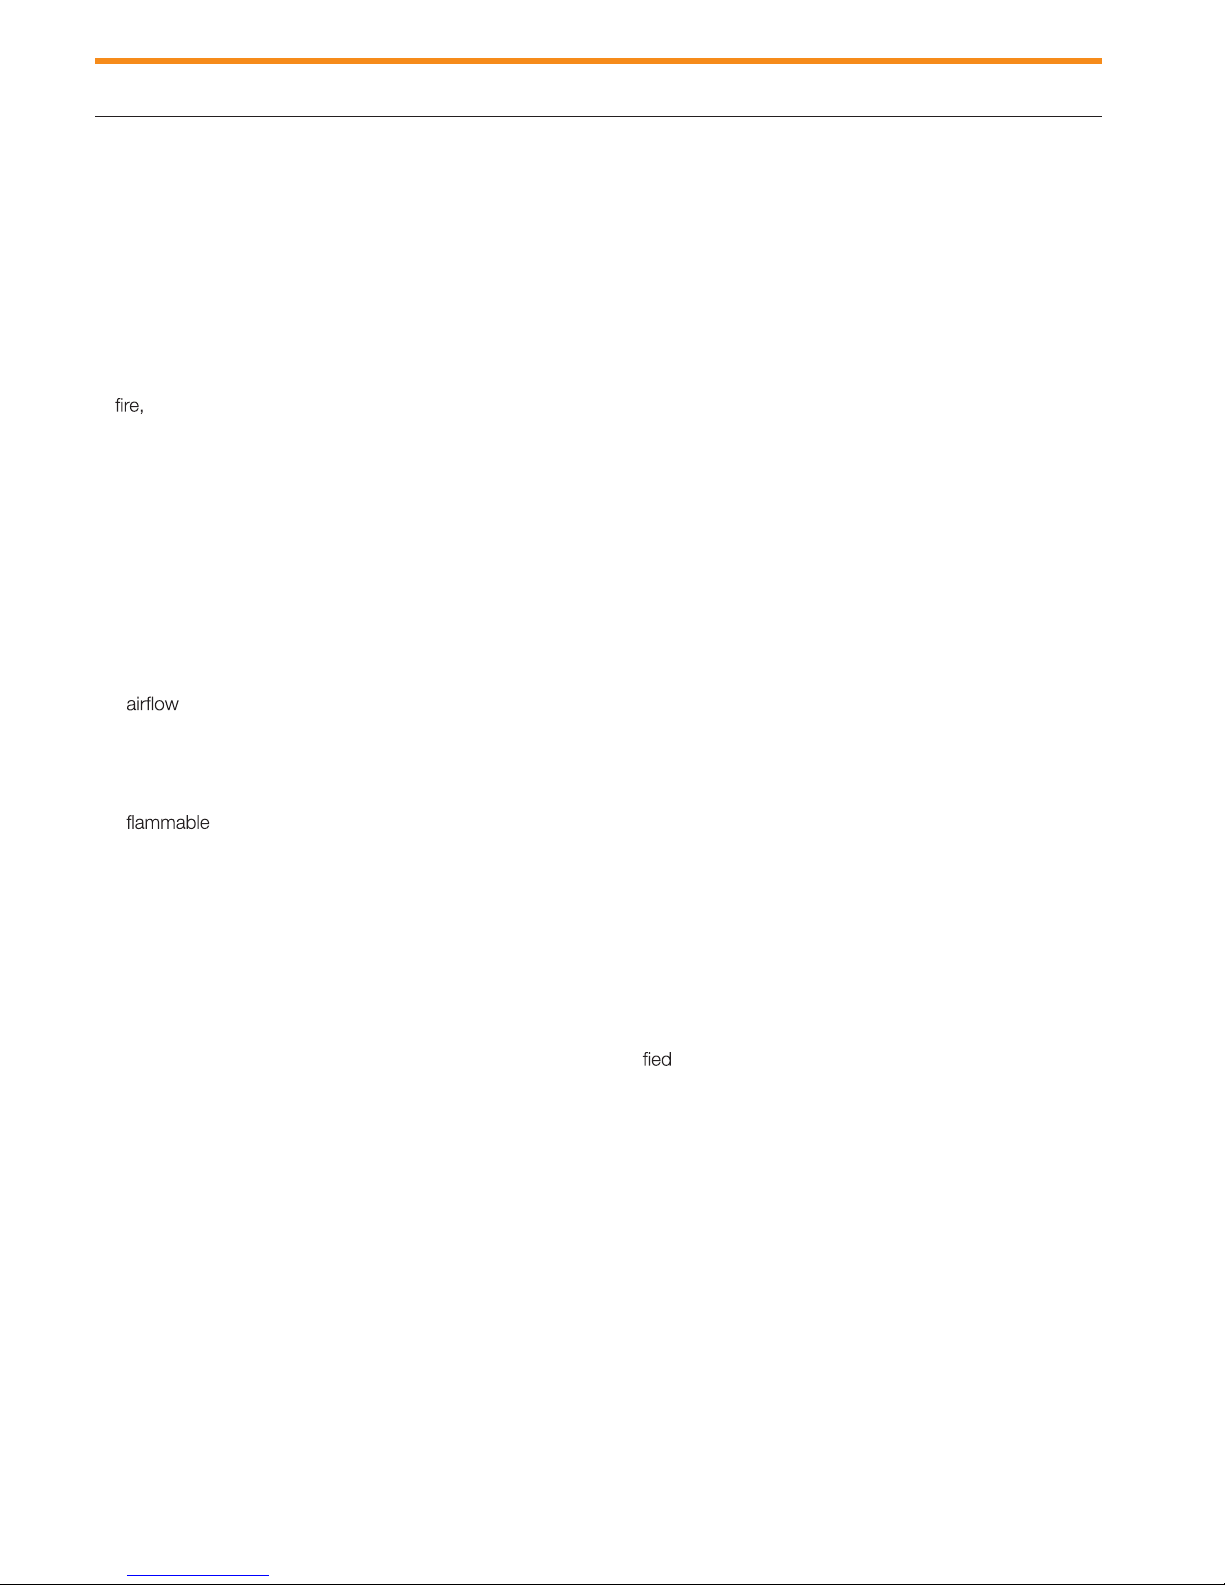
Equipment controls
Control panel pictograms
POWER
3
3
2
1
Cleaning
Marking
.
2
1
Polishing
Etching
INOX / STAINLESS
U
L
A
Application selectorPower selector
Ti
Transportation
Before transporting the machine, remove the electrolyte
solution cartridge and make sure all connecting lines are
disconnected. The machine must be carefully packed in a
suitable container and properly protected. WALTER will
not be held responsible for any damages resulting from
leaked cleaning solution or rough handling.
Storage
If the machine is to be stored for any length of time, the
solution cartridge and cleaning pad must be removed
(neutralized, rinsed and left off) and the insert neutralized,
rinsed and dried. Store in a dry safe place to avoid damage,
especially to the electronic components.
Waste disposal
Dispose of residual waste in compliance with Federal,
Provincial, State and local environmental regulations. Refer
to WALTER Material Safety Data Sheet of the SURFOX
electrolyte cleaning solutions.
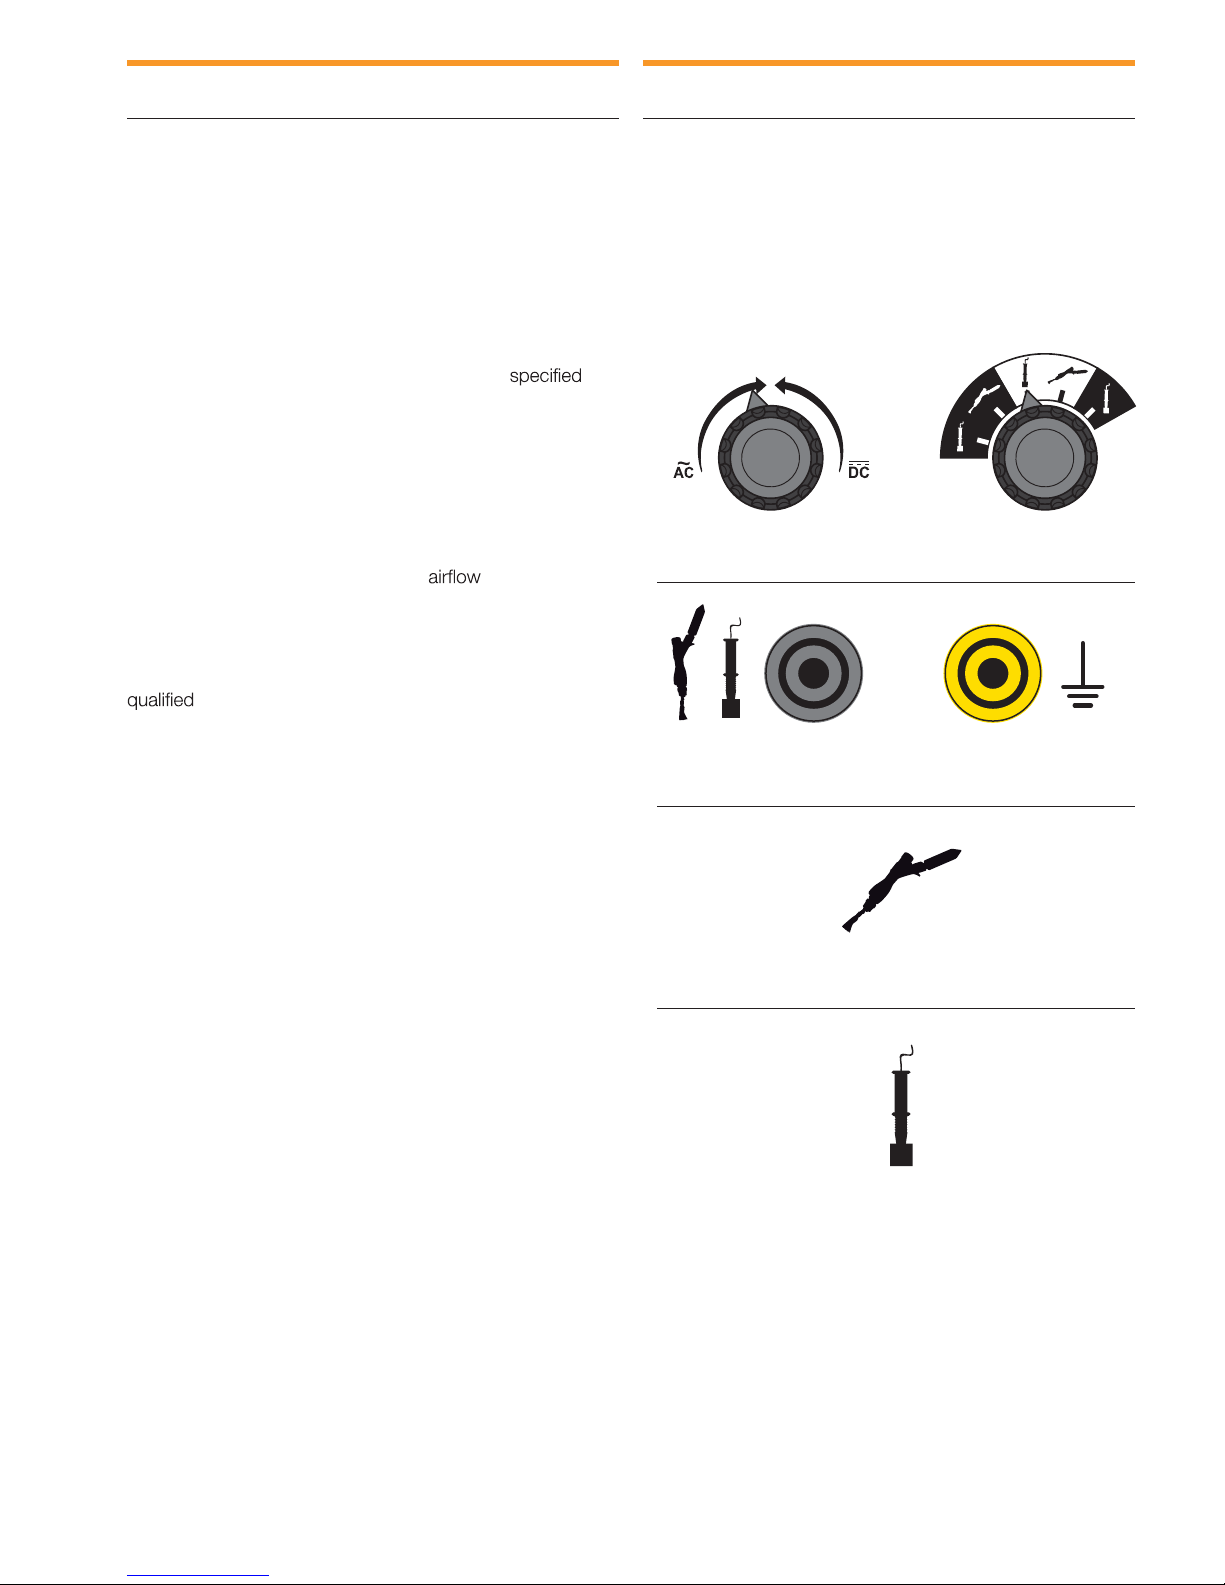
Extension cord
Outlet for micro-wand
or marking wand
Micro-wand selector
Marking wand selector
Outlet for ground connector
When an extension cord is needed, use wire size 14 (AWG)
for up to 50 feet (15 meters) and size 12 (AWG) for 50 to
100 feet (15 to 30 meters).
6
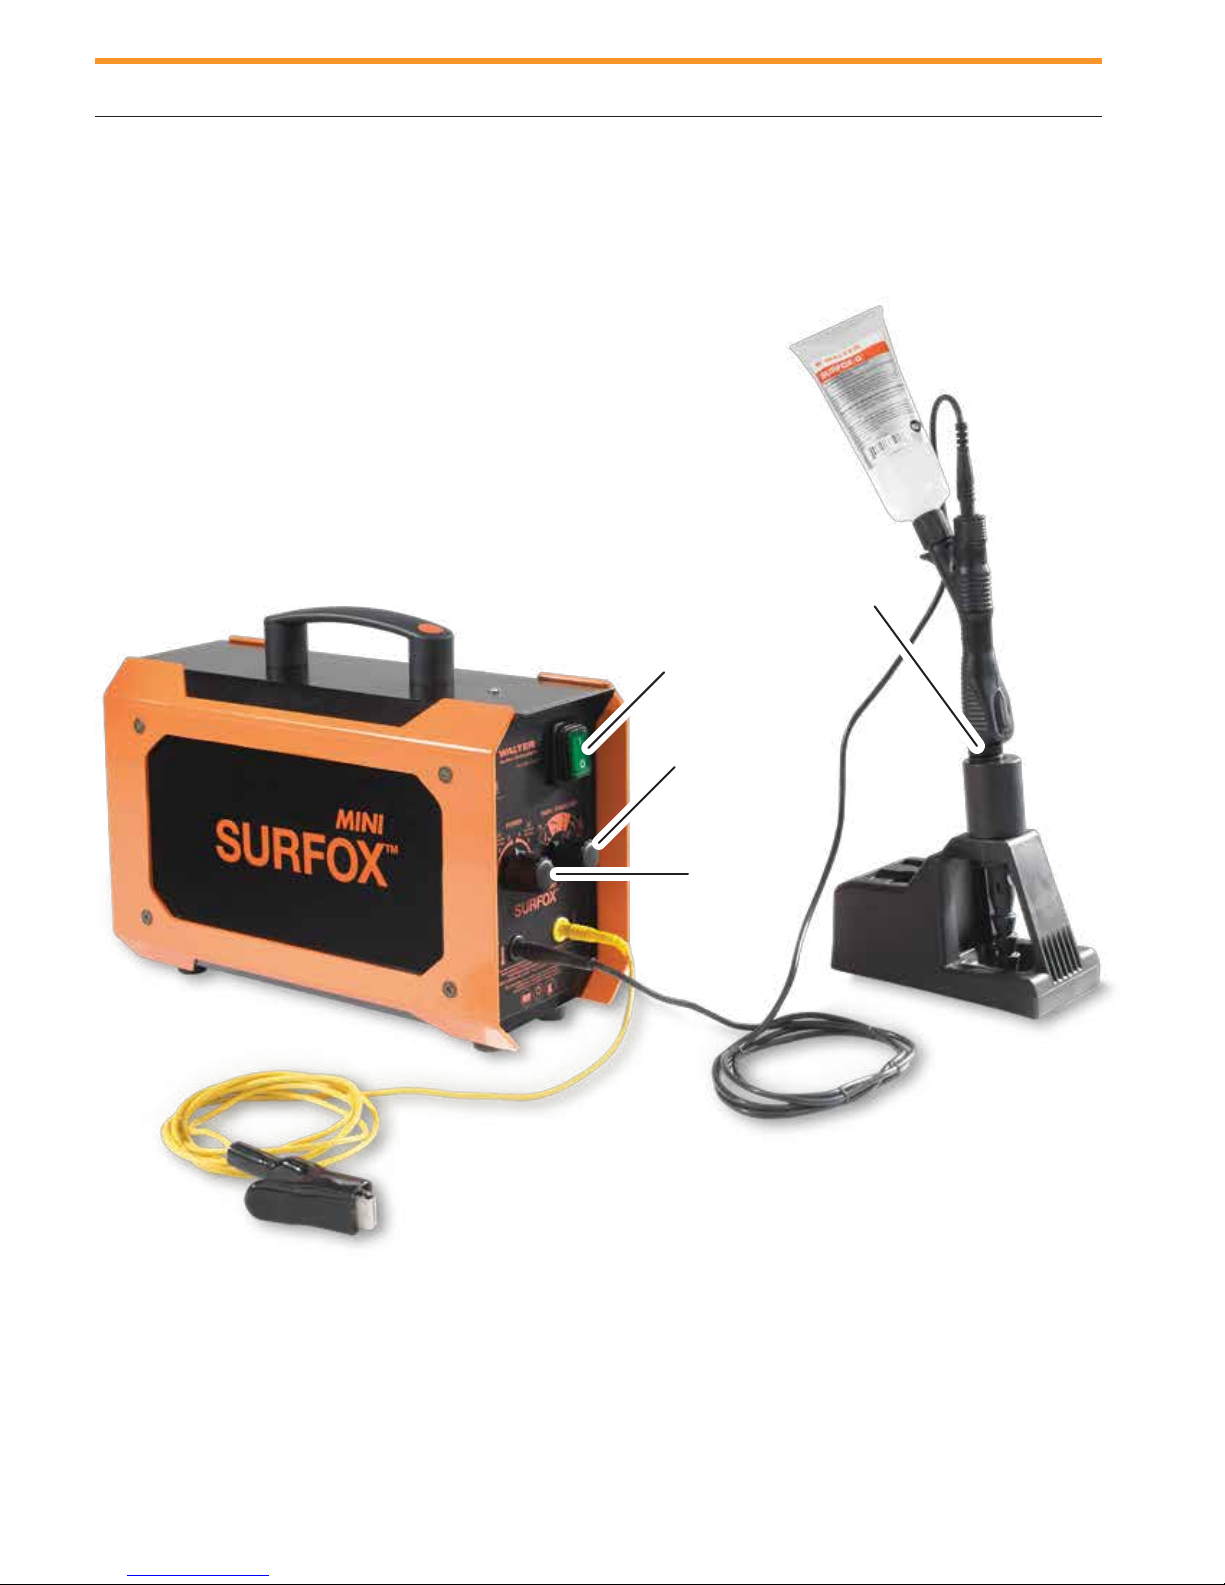
General Overview
General Overview
4
SURFOX
electrolyte solution
100 ml cartridge
Micro-wand
ON/OFF
button
Ground cable
with clamp
Application
selector
Power
selector
SURFOX wand
power cable
User’s Guide SURFOX MINI 7
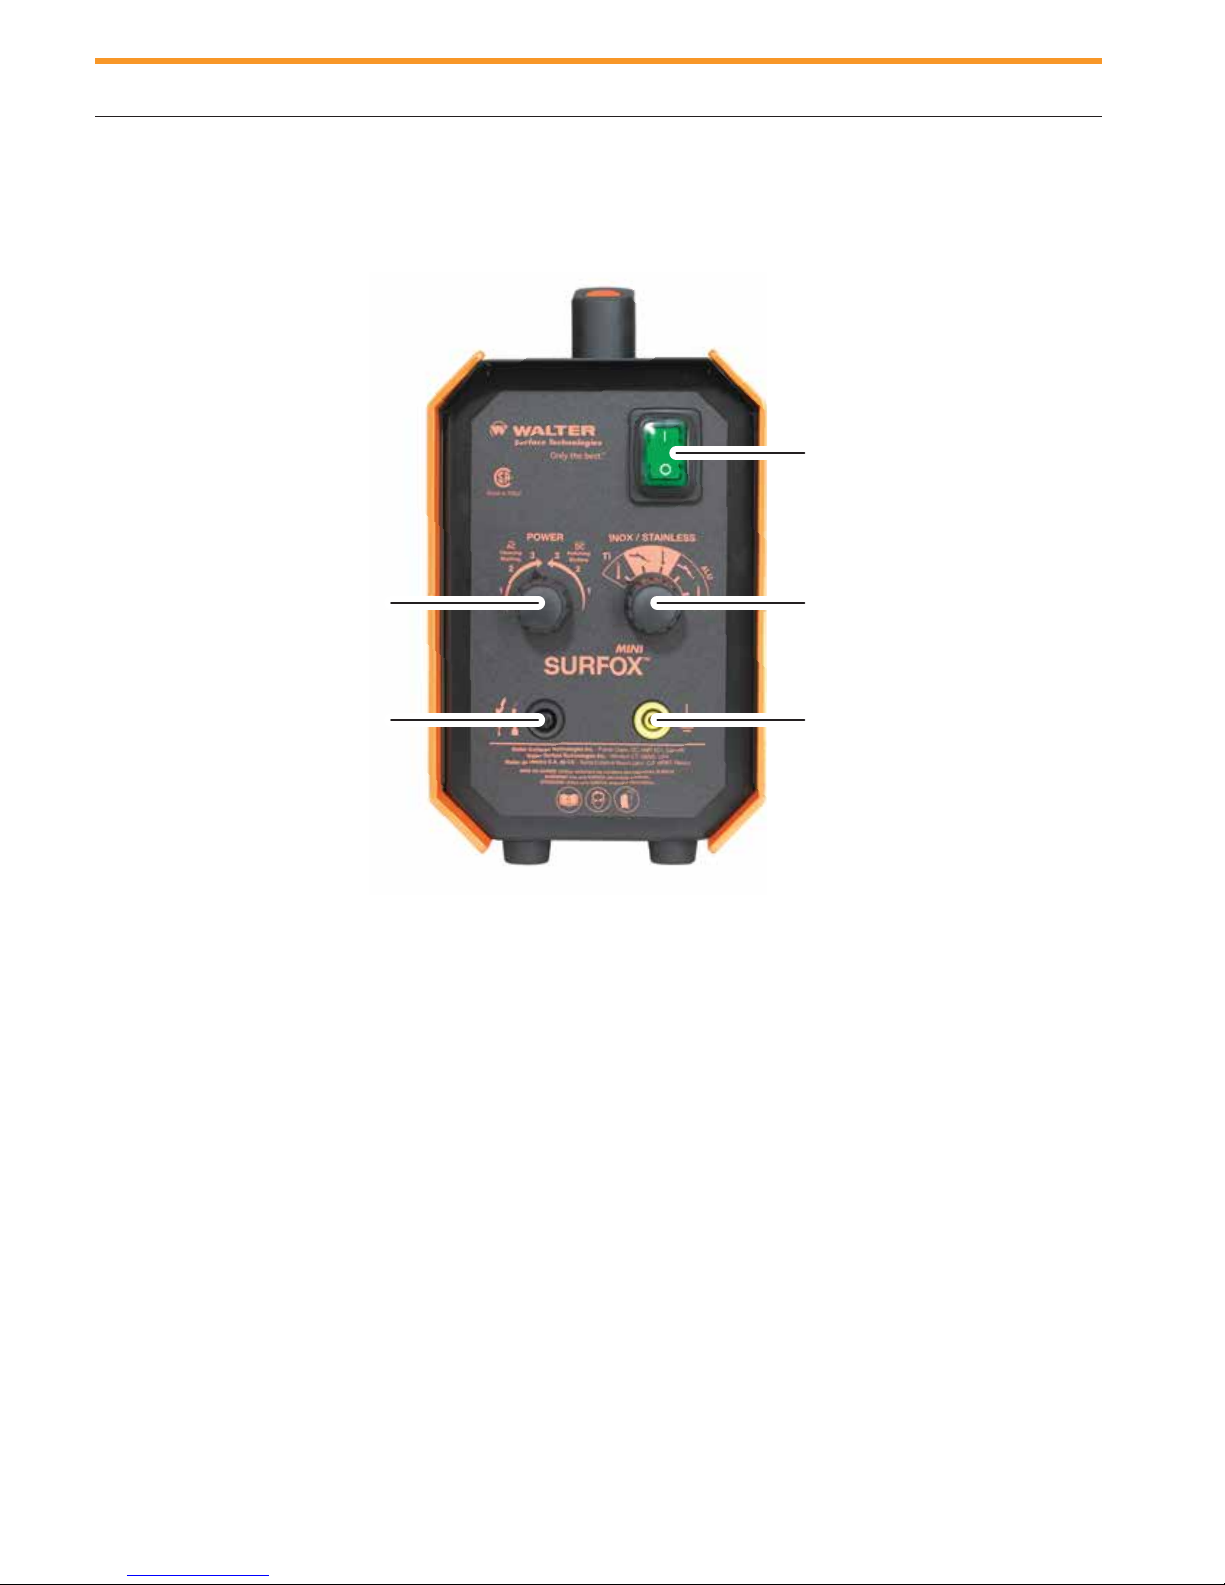
Front view of the machine
5
Front view of the machine
Power selector Application selector
ON/OFF button
Power cable connector for
cleaning wand and optional
marking wand
ELECTROCHEMICAL CLEANING: Select this setting
when using the mini wand attached to the SURFOX unit.
Select AC and 1, 2 or 3 depending on the amount of
heat tint to remove and the type of material that is
being cleaned.
ELECTROCHEMICAL POLISHING: This mode is
used for cleaning, passivating and polishing the weld.
The cleaning and passivating process takes longer in
the DC mode than in the AC mode. DC mode is used to
polish the weld bead to match the surface of the finish.
Select DC and 1, 2 or 3. Stainless Steel only.
Ground connector
ELECTROCHEMICAL MARKING: Select this setting
when using a marking/etching wand which has been
plugged into the power cable connector. Select AC
mode and 1, 2 or 3 for stainless steel, aluminum and
titanium. Use SURFOX-M for Stainless Steel and
Titanium; SURFOX-M ALU for Aluminum.
ELECTROCHEMICAL ETCHING: Select this setting
when using a marking/etching wand which has been
plugged into the power cable connector. Select DC
mode and 1, 2 or 3. Stainless steel and Aluminum only.
Use SURFOX-E.
8
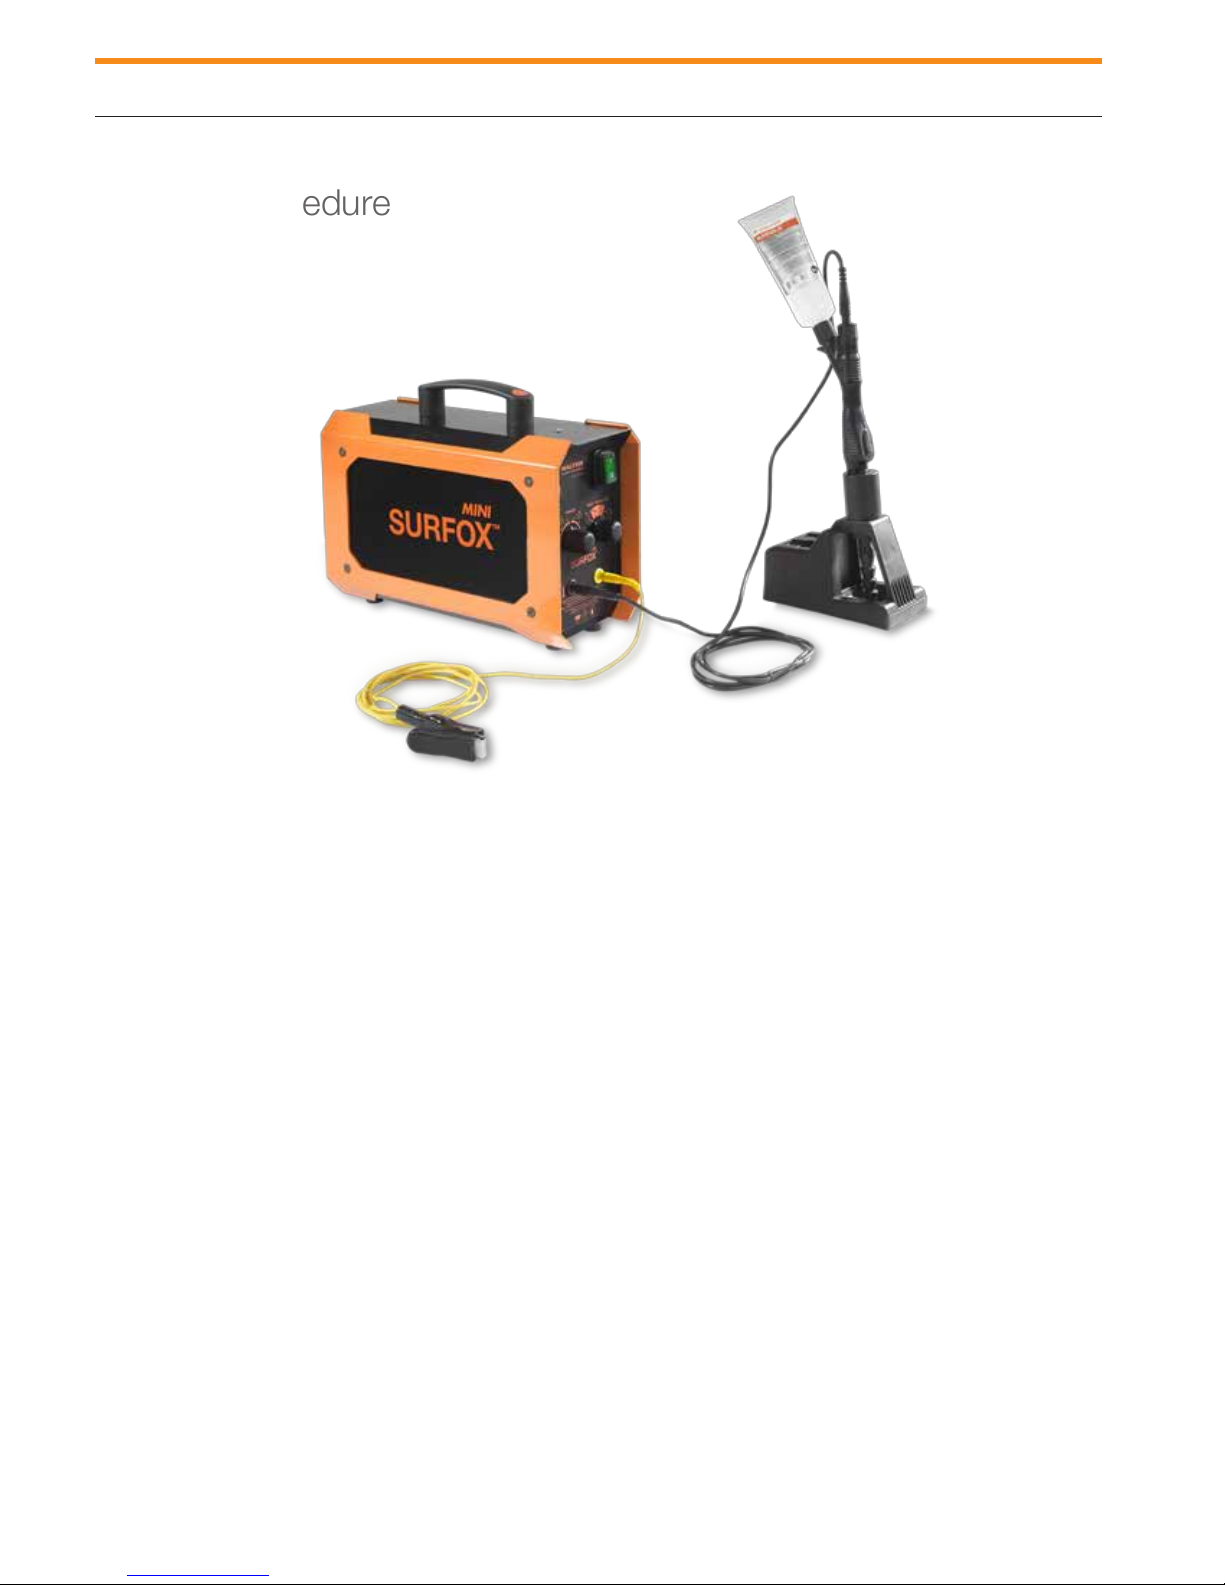
Start-up procedure
Start-up procedure
6
A) Instructions
1. Place the unit on a flat stable surface, in a well
ventilated area where you will be working.
2. Connect ground cable to ground connector and attach
grounding clamp to work piece.
3. Connect power cable to power connector.
4. Mount the insert and cleaning pad or the brush.
SURFOX cleaning pads are made from highly heat
resistant polymers for extra long service life. The cleaning
pad must be replaced regularly.
Note: Never use the wand insert without a mounted
cleaning pad. If the pad must be replaced while working,
please observe the following:
• During the cleaning process, the wand tip and work
piece can reach very high temperatures.
Before replacing a worn cleaning pad or a brush, switch
the unit OFF and disconnect from power supply, allow
the wand tip to cool. The use of protective gloves is
recommended.
5. Screw on disposable SURFOX electrolyte solution
cartridge to wand. Press the top of the wand with your
finger to pump solution to the pad.
6. With switch in the OFF position, connect the unit to a
proper power supply as described under AMPERAGE.
7. Flip switch to the ON position.
8. Selecting the proper setting.
Select low or high depending on the amount of heat
tint to remove and the type of material that is being
cleaned. Brush option and large insert can also
be selected.
9. Make sure the cleaning pad or brush is saturated with
SURFOX electrolyte solution before starting to work.
If the cleaning pad or brush is too dry, it will wear
prematurely. Start working when solution drips from
the cleaning pad or brush.
Do not press hard, let the electrochemical process do
the work. The cleaning pad is a bridge between the
machine and the weld. Do not use the cleaning pad like
an abrasive pad and scrub. Doing this will shorten the
life of the pad.
10. When done, place wand in holder and switch unit off.
User’s Guide SURFOX MINI 9
Start-up procedure
Neutralizing
6
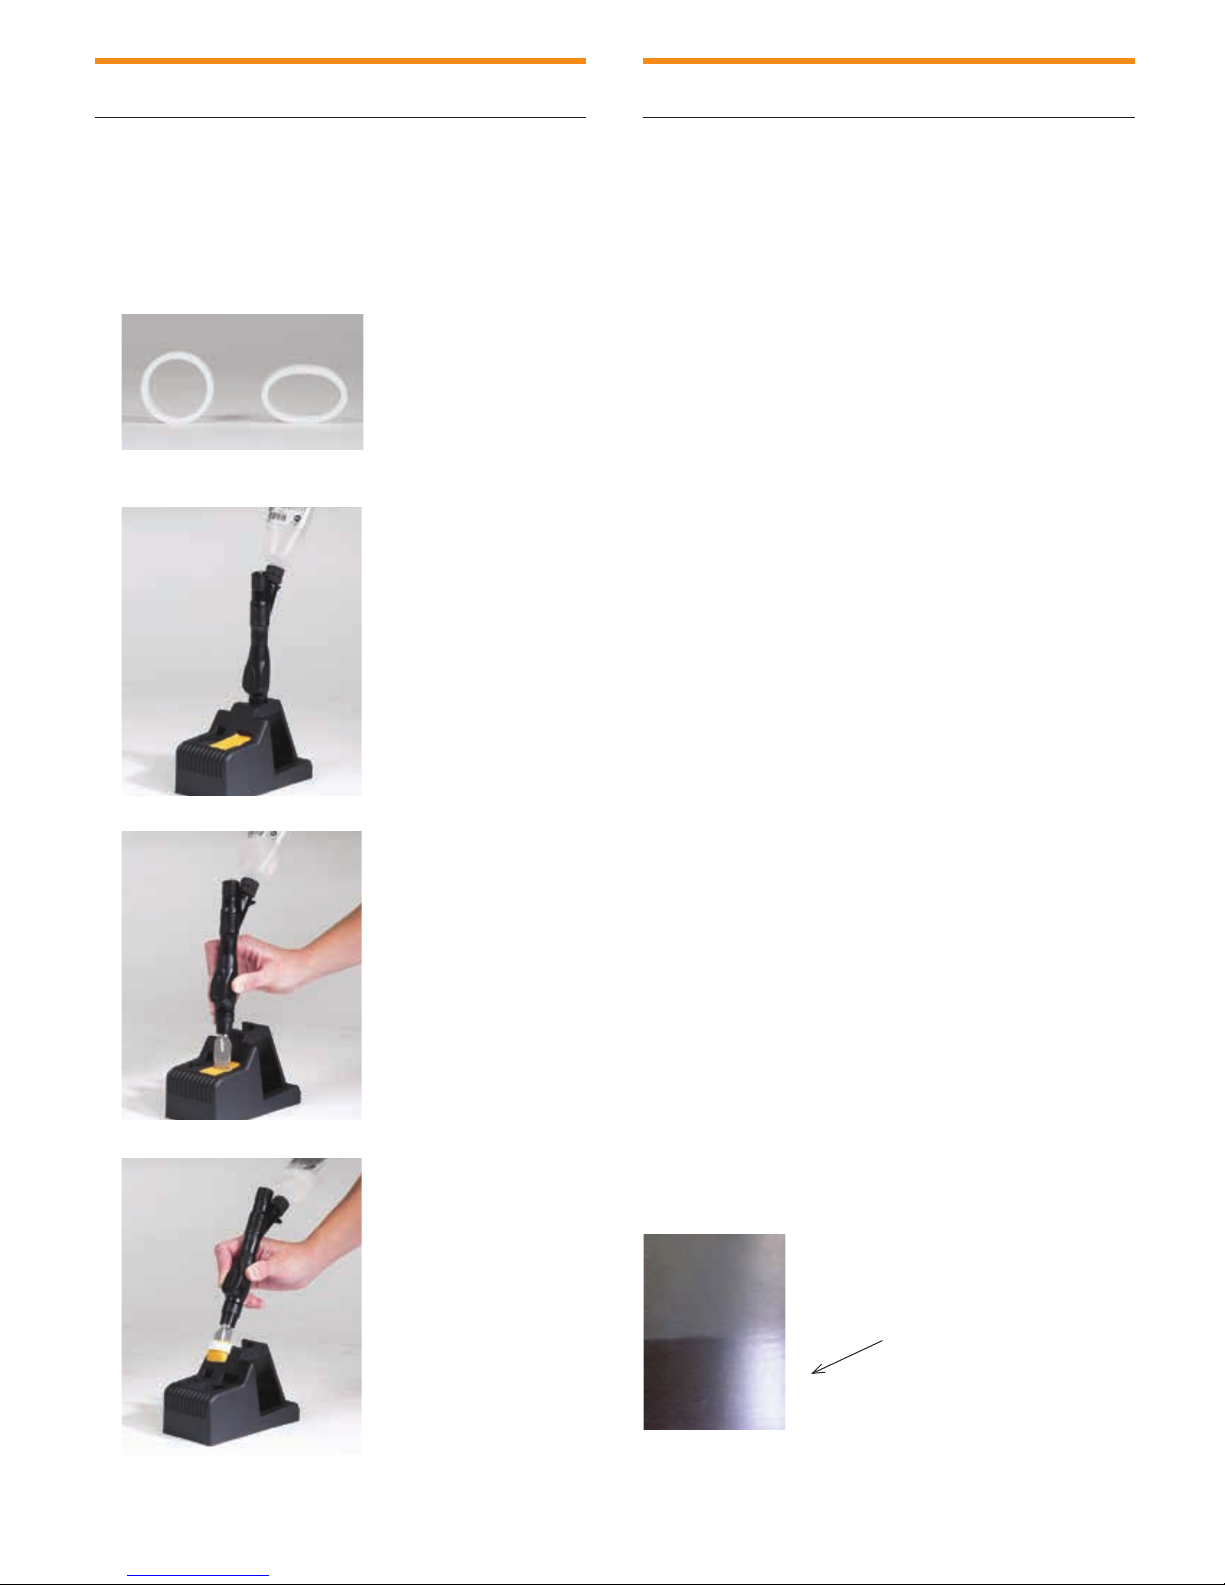
B) Mounting and cleaning pad
Squeeze and insert clamp ring
7
Neutralizing
The SURFOX-N liquid is a specially formulated cleaner
and neutralizer for the SURFOX electrolyte solutions. It is a
powerful ready-to-use formula which leaves no residue, is
non-toxic, solvent free, water-based and biodegradable.
Directions for cleaning and neutralizing
SURFOX electrolyte cleaning solutions:
1. Remove any excess SURFOX-T electrolyte solution
using a soft clean cloth. (This step is not required with
SURFOX-G)
2. Spray SURFOX-N on the surface.
3. Wipe dry with a SURFOX POWERCLOTH.
For more information about this product, refer to product
MSDS.
WARNING! When using SURFOX-T, be sure to wipe off all
excess from the surface and clean/neutralize to prevent salt
residues.
Insert cleaning pad
Press in wand tip
Clean the weld using the SURFOX machine and SURFOX
electrolyte solutions. Work only 2 feet at a time.
Note: the cleaning pad/brush should be kept moist –
not dripping.
1. After weld cleaning, use a clean cloth or paper towel
and wipe the affected area in a squeegee action from left
to right. Then discard the cloth or paper towel. (This step
is not required when using SURFOX-G)
After cleaning the weld with the SURFOX weld cleaning
machine, the electrolyte solution must be cleaned and
neutralized.
1. Spray the affected area with SURFOX-N cleaner and
neutralizer. Allow to sit for 15 seconds on the surface.
2. Use a SURFOX POWERCLOTH and wipe the affected
area in a squeegee action from left to right.
Note: failure to neutralize or neutralize properly the
SURFOX-T electrolyte solution will result in clouding, hazing
and dulling of the surface.
Remove tip with installed pad
10
SURFOX-T electrolyte
deposit due to unproper
neutralization and rinsing.
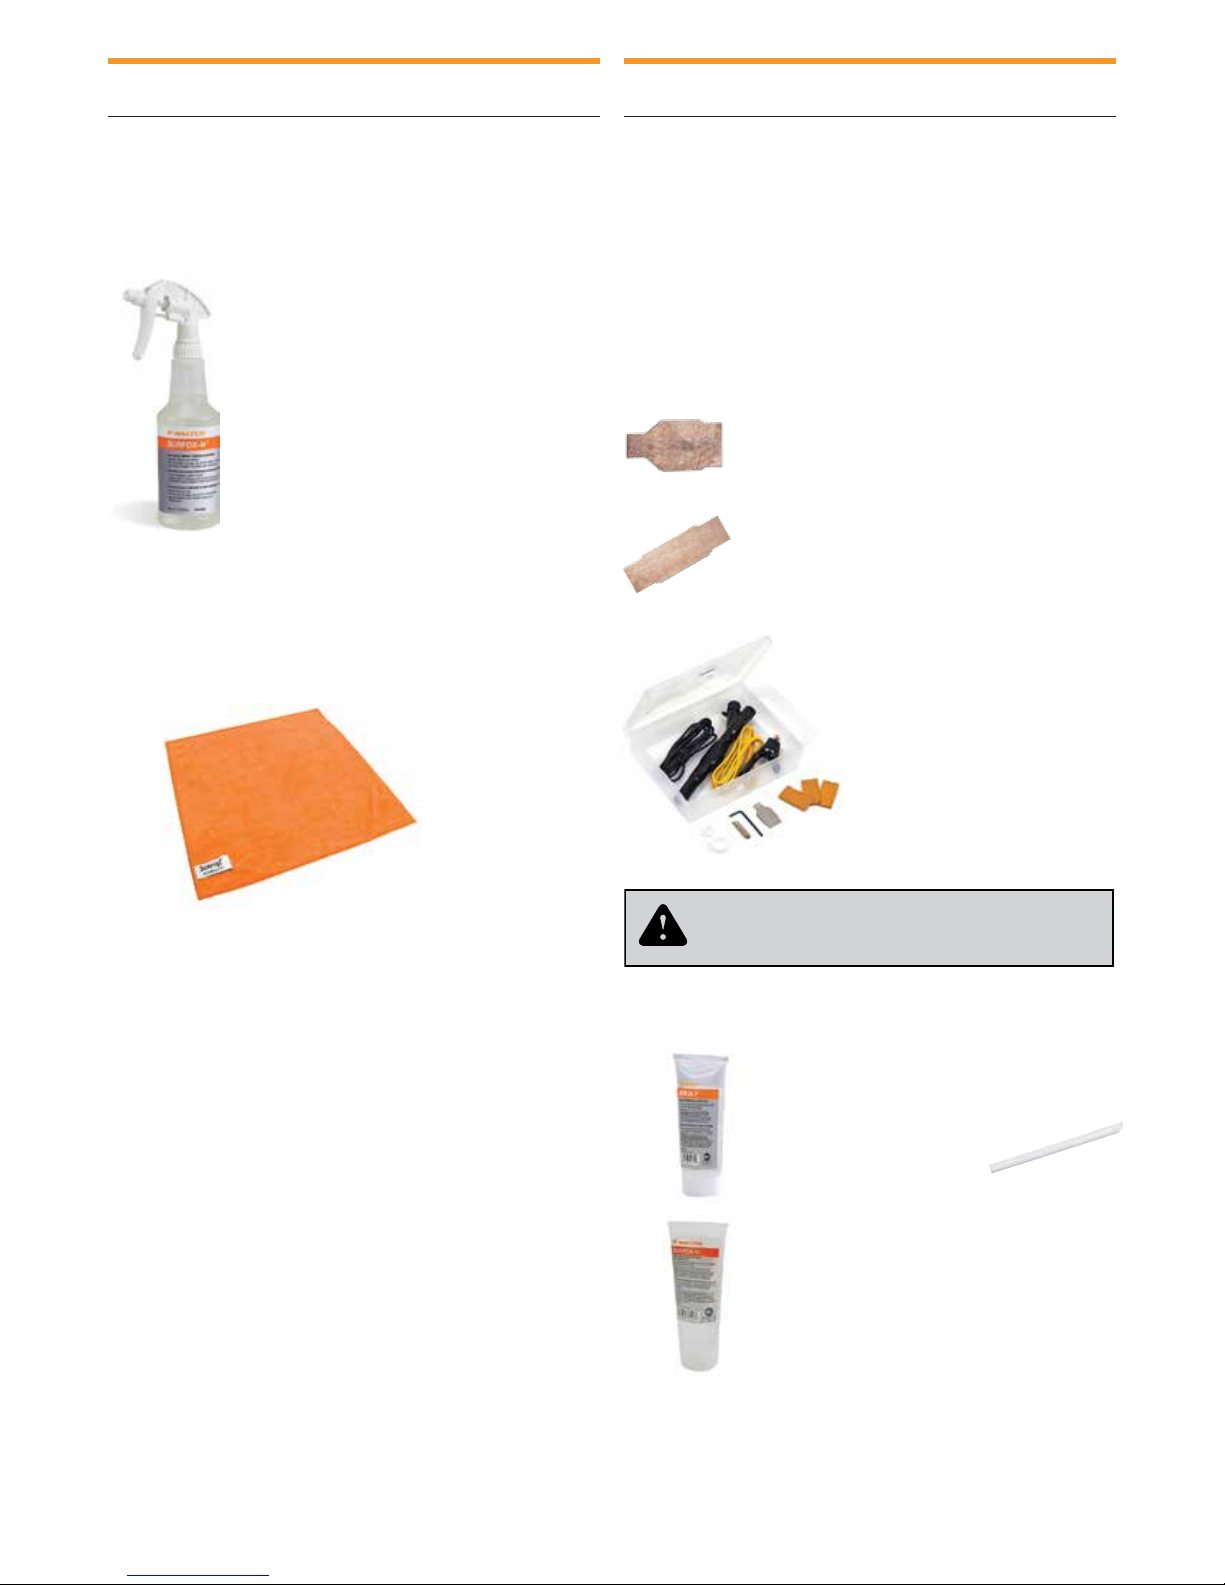
SURFOX-N cleaner
and neutralizer Part No.
500 ml 54-A 023
5 L 54-A 026
20 L 54-A 027
208 L 54-A 028
AccessoriesNeutralizing
87
Accessories
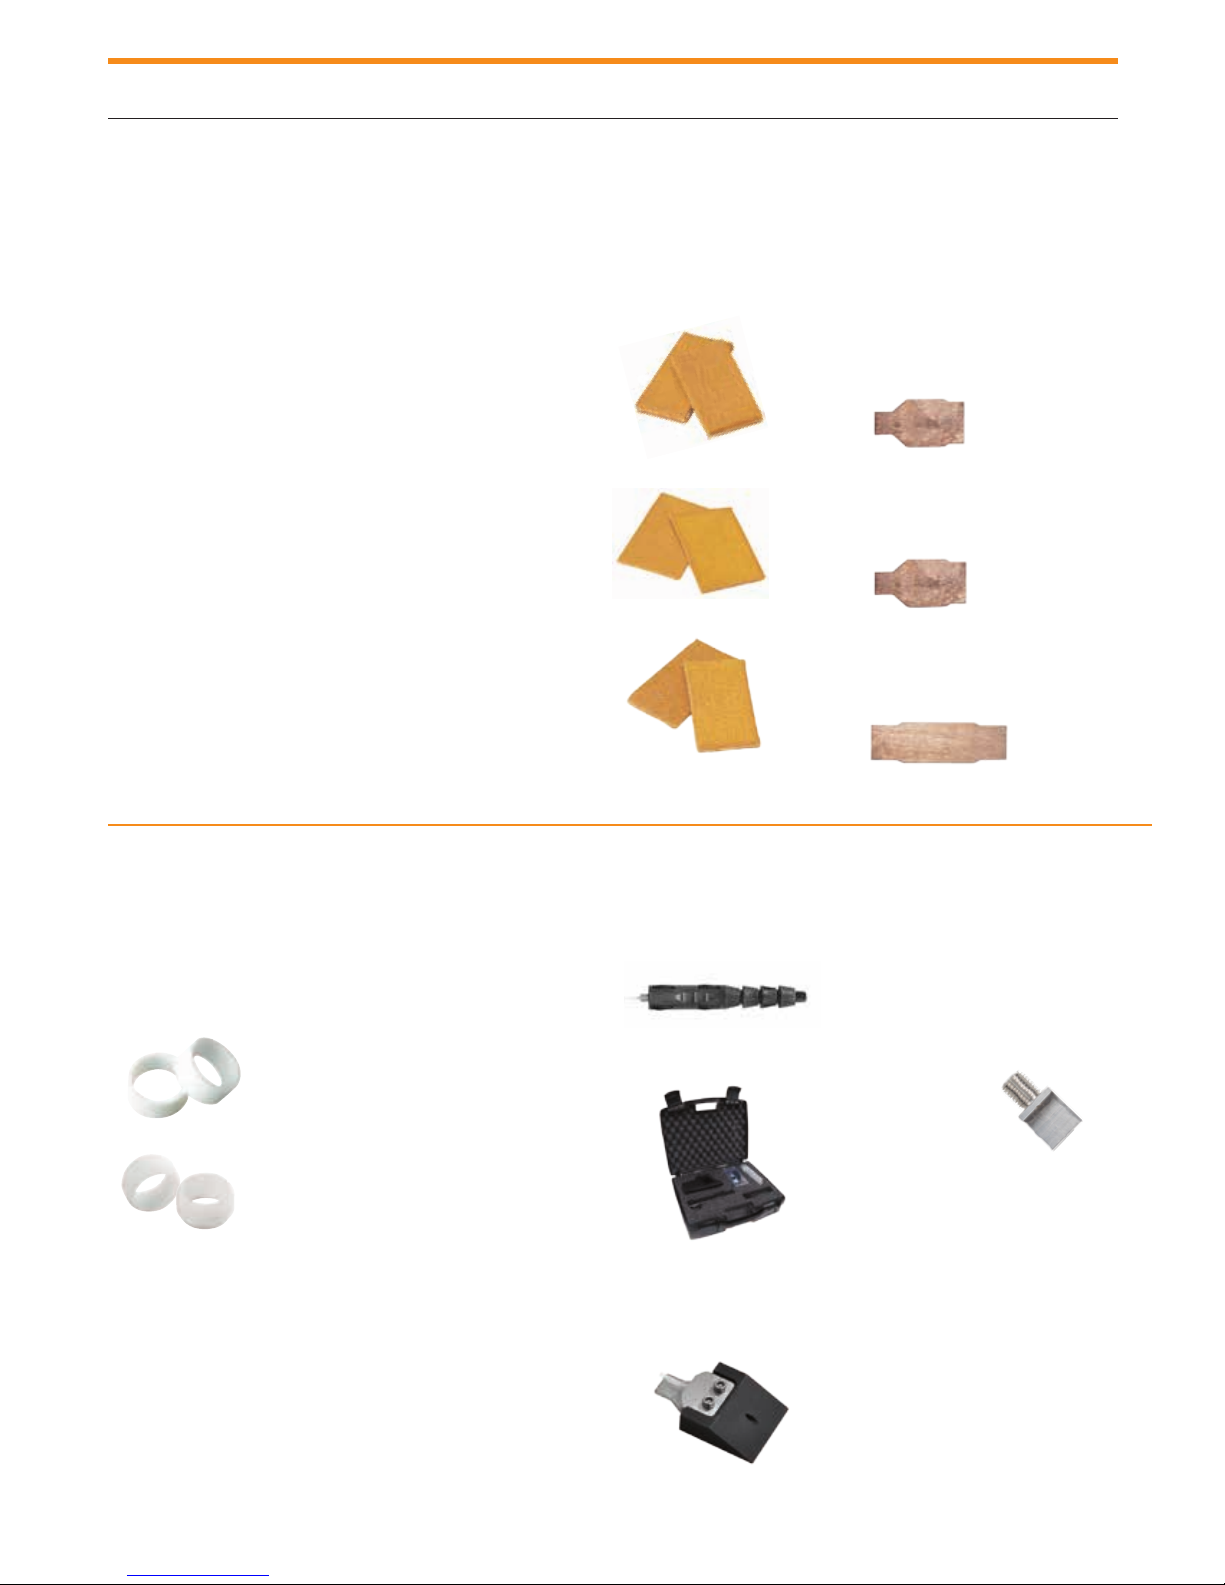
A) Cleaning inserts and micro-wand kit
They are made from high quality tungsten.
Cleaning inserts are available in several different shapes
and sizes:
Tungsten insert 90° No: 54-B 036
Use with cleaning pad 54-B 026 or 54-B 027
and clamp ring 54-B 002. 10 per package.
Narrow tungsten insert 90° No: 54-B 038
Use with cleaning pad 54-B 028
and clamp ring 54-B 020. 10 per package. .
SURFOX POWERCLOTH
Part No. 54-B 090
Replacement
Micro-wand kit
No: 54-B 033
WARNING! When the insert is too worn, it can
cause damage to the cleaning pads.
B) Electrolyte solutions
SURFOX-T electrolyte cleaning solution
No: 54-A 001
100 ml cartridge, 6 per package.
Electrolyte straw
No: 48-R 294
10 per package.
SURFOX-G electrolyte cleaning solution
No: 54-A 061
100 ml cartridge, 6 per package.
User’s Guide SURFOX MINI 11
Accessories
8
C) Cleaning pads
Cleaning pads are made of a complex blend of highly
conductive synthetic polymer which is very resistant to wear
and which offers excellent thermal stability. For longer life,
remove the cleaning pad and neutralize with SURFOX-N at
the end of each working day.
Features
• Flexible: Can be folded many ways
• Soft on surfaces
• Can be used both sides
• Long lasting
• Highly conductive (4x more conductive
than previous generation)
Cleaning pads are available in three sizes:
Standard cleaning pad
No: 54-B 026
Dimensions: 46 mm L x 24 mm W x 4 mm T
USE WITH:
54-B 036
Inside corner cleaning pad
No: 54-B 027
Dimensions: 60 mm L x 38 mm W x 2 mm T
USE WITH:
54-B 036
Narrow cleaning pad
No: 54-B 028
Dimensions: 46 mm L x 24 mm W x 2 mm T
USE WITH:
54-B 038
D) PTFE clamp rings
PTFE clamp rings are designed to hold the cleaning pads on
the tungsten inserts.
They are available in two sizes:
Narrow clamp ring for narrow pads
No: 54-B 020
Use with narrow inserts. 10 per package.
Clamp ring for cleaning pads
No: 54-B 002
Use with standard inserts. 10 per package.
E) Carbon Fiber brush and micro-wand kit
with carbon fiber brush
Carbon fiber brush
No: 54-B 157
To be mounted
on Micro-wand
5 per package.
Micro-wand kit
No: 54-B 133
With carbon fiber brush
for cleaning corners and
intricate areas.
Spare Adaptor
For mini-wand carbon
fiber brush
No: 54-B 150
F) Large graphite insert
No: 54-B 048
For small surface renewing and
cleaning the back of MIG welds.
Use with inside corner cleaning pad.
No: 54-B 051
Pad for large graphite insert.
12
Marking kits and testing devices
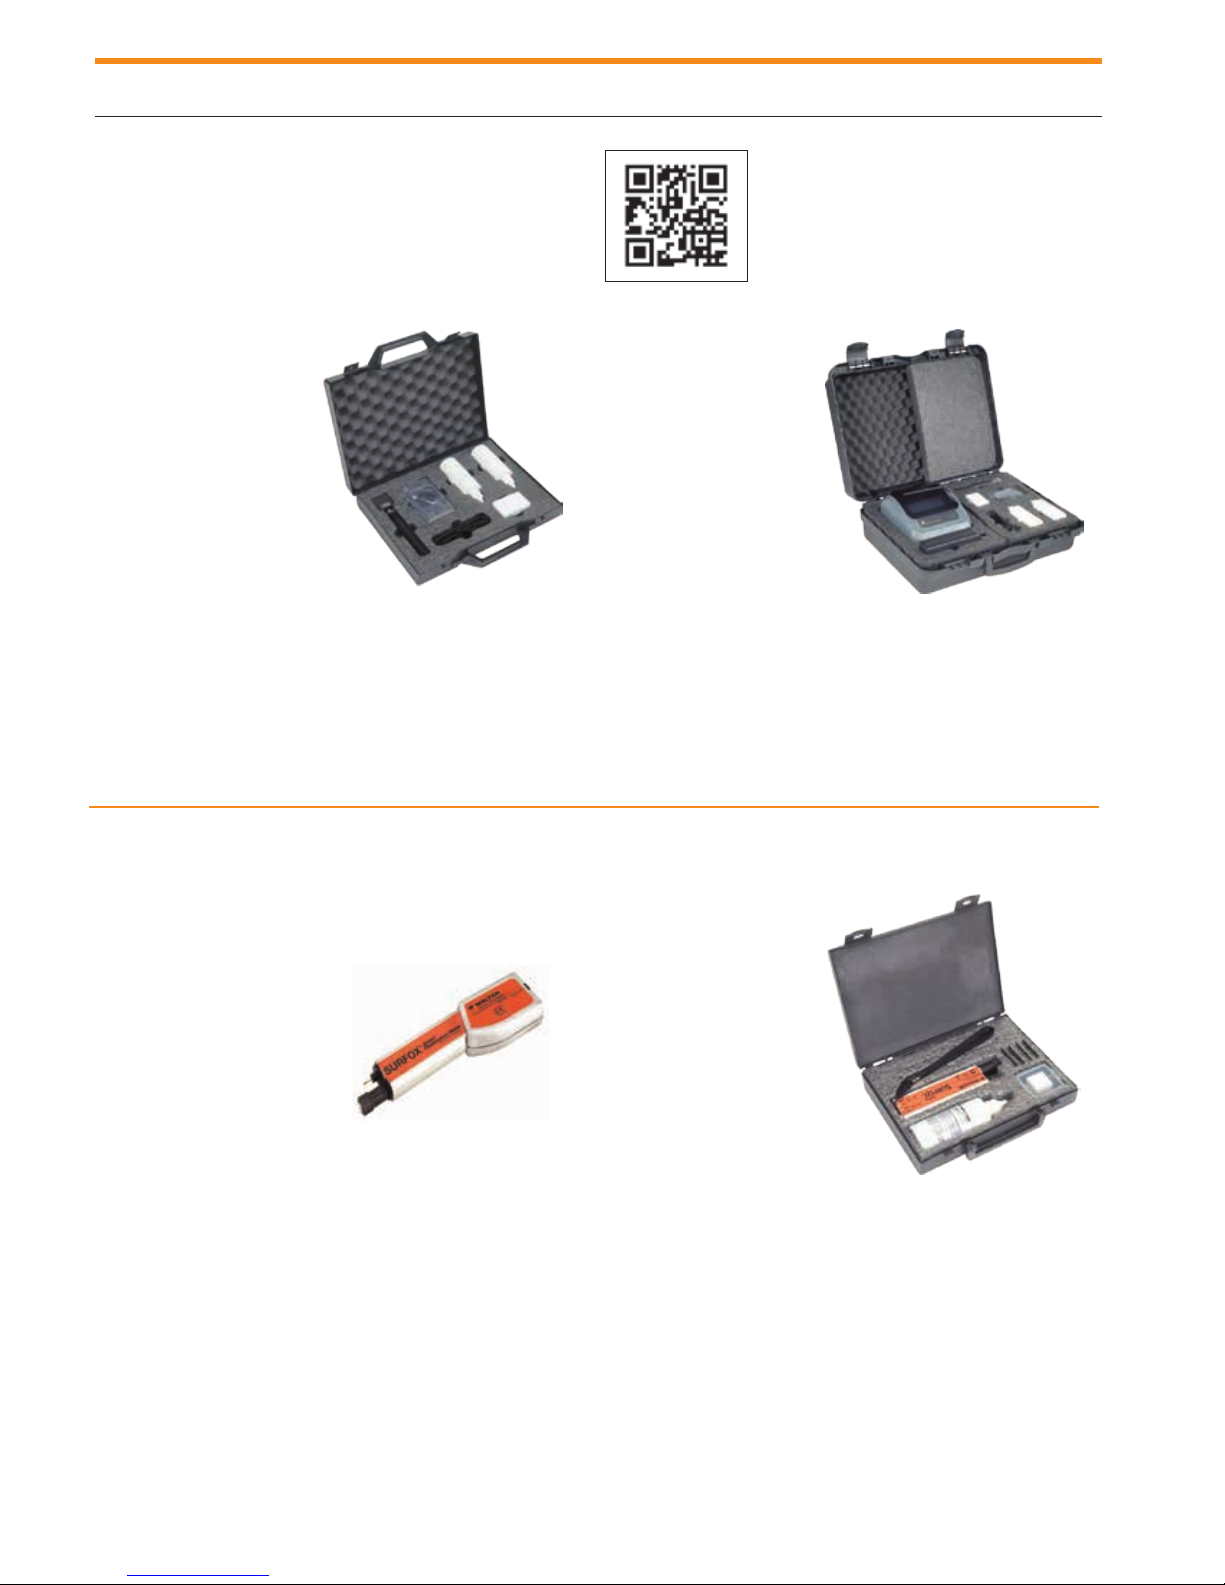
A) Marking kits
Marking kits and testing devices
9
Standard kit
No: 54-B 080
• 1 marking wand with
graphite insert
• 35 mm X 10 mm
and connecting cable
• 20 marking pads
• 5 O-Rings
• 1 SURFOX-M,
100 ml solution
• 1 SURFOX-E,
100 ml solution
The standard kit requires the use of permanent stencils.
* Also available, SURFOX-M 5 L to refill the squeeze
bottles. No: 54-A 036
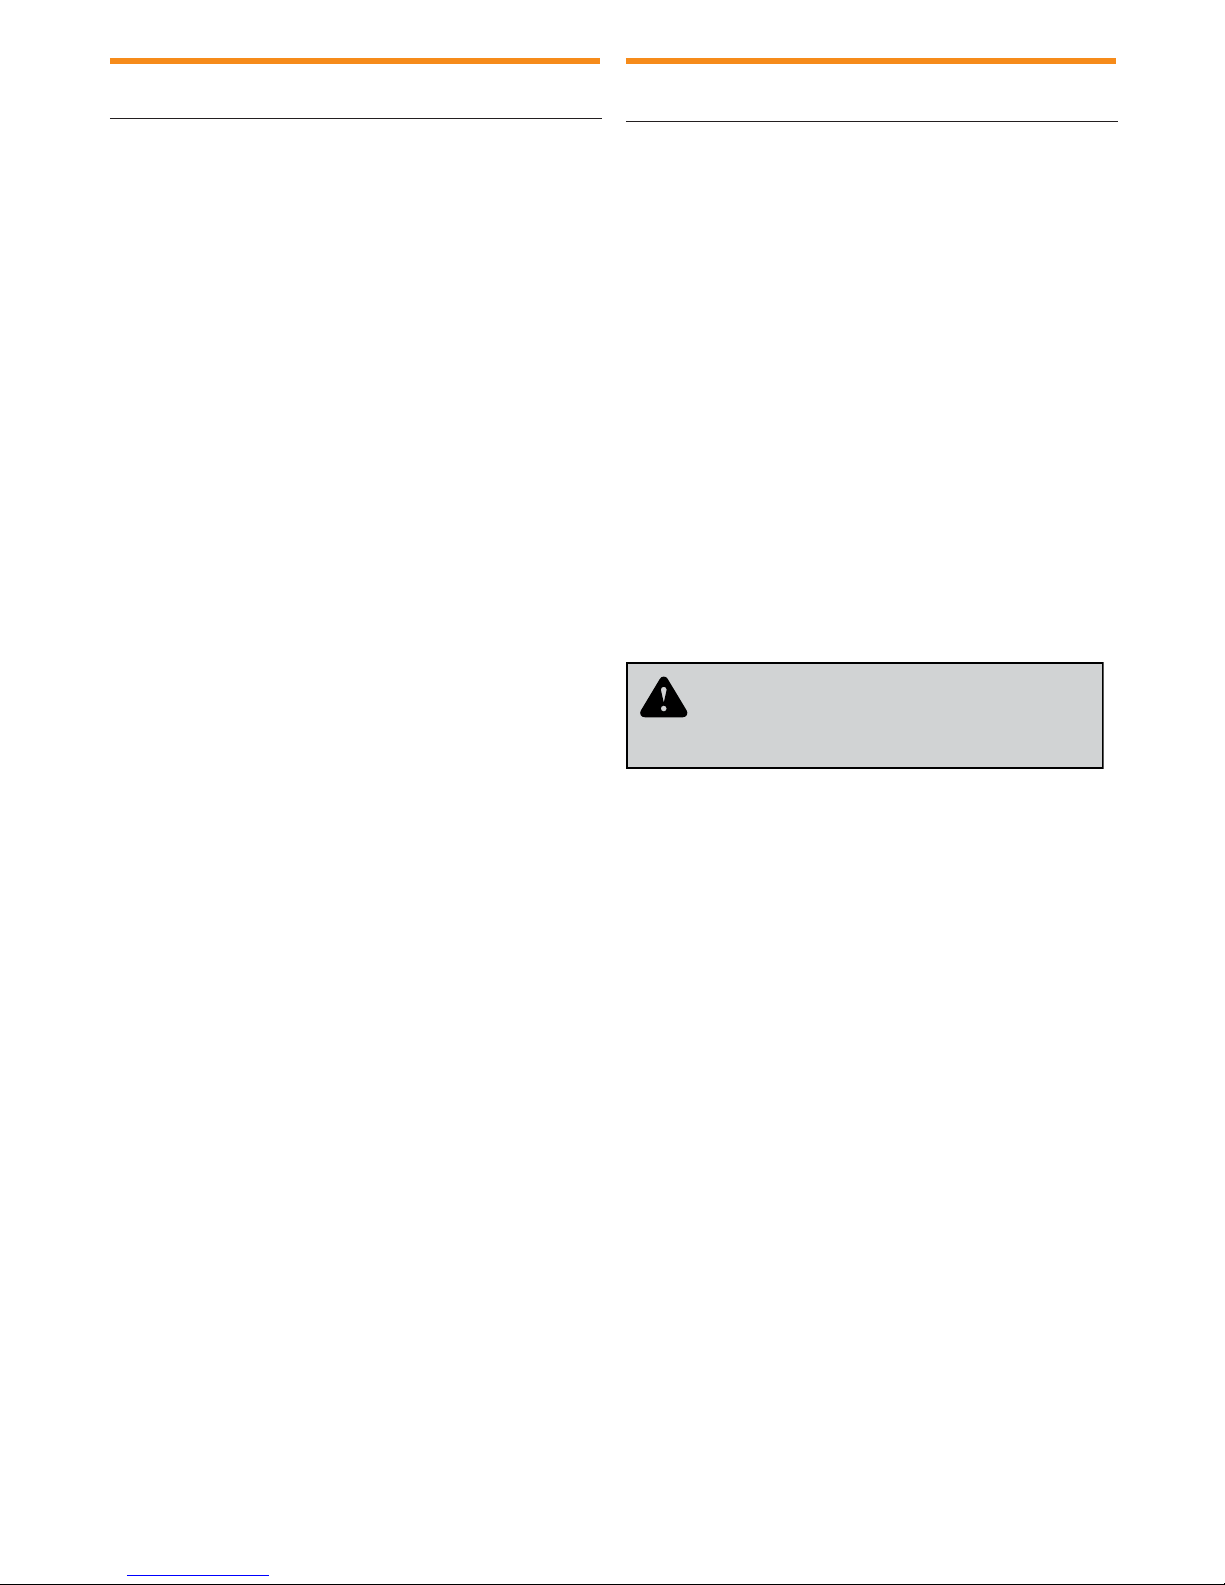
B) SURFOX testing devices
PRO kit
No: 54-B 081
• 1 marking wand with
graphite insert
• 35 mm X 10 mm
and connecting cable
• 20 marking pads
• 5 O-Rings
• 1 SURFOX-M,
100 ml solution
• 1 Stencil printer and software
• 1 Stencil paper roll 100 mm (W) X 20 m (L)
The PRO kit is offered with a stencil thermo printer for the
printing of disposable stencils to permanently mark stainless
steel surfaces. The printer comes with software that allows
the creation of stencils for barcodes, serial numbers, lot
and batch numbers, text, company logos, and more.
SURFOX Smart Passivation Tester
(54-T 011)
To monitor the state of
corrosion protection and
to ensure proper passivation of the workpiece.
Corrosion resistance of
stainless steel is significantly reduced near
welds as a result of the heating cycle. Visually,
this can be seen as a darkened zone next to the
weld. When electro-chemical cleaning is performed
on the weld, corrosion risk is reduced but the
treated zone still has to be passivated for 24-48
hours before the corrosion protection is fully
restored.
Stainless steel grade
Identification tester
No: 54-T 001
There are countless
types of stainless steels,
mainly grouped in 3
categories or grades:
200, 300 and 400.
Since it is visually impossible
to differentiate between
200, 304, 316 and 400 grade stainless steel, WALTER
provides a test kit that allows customers to instantly
identify the grade of stainless steel.
Product description
◆ Testing device
◆ Molybdenum reagent, 100 ml
◆ Blotting paper
User’s Guide SURFOX MINI 13
Safety featuresTechnical data
1110
Technical data
MODEL: MINI SURFOX
PART NUMBER: 54–D 055
INPUT AMPERAGE: 120V, 50/60 Hz
OUTPUT AMPERAGE:
INPUT CURRENT: 4 Amps
OUTPUT CURRENT: MAX 15 Amps
10-30 V, AC/DC
Safety features
A) Sparks on the tip/work piece
To avoid short circuits (arcing), the machine automatically
stops when the insert touches the work piece (metal to
metal contact). There is an inverter board that monitors
the amperage every millisecond. If the amperage sharply
increases creating a short, the system will automatically cut
the power to the tip to avoid any damage to the equipment.
B) Internal temperature
To protect the internal components of the machine, there
are temperature sensors inside the machine. If the operating temperature is too high, the machine will shut down and
restart by itself when the temperature reaches an acceptable
level. There is an internal fan inside the machine to keep all
the components cool.
WARNING! The inside temperature can increase for
many reasons: high ambient temperature, lack of
proper air circulation around the machine, fluctuations
in amperage, electrical set-up in the shop, etc.
C) AC/DC current basics
Alternating Current (AC) flows one way, then the other way,
continually reversing direction. An AC amperage is continually
changing between positive (+) and negative (-).
Direct Current (DC) always flows in the same direction, but it
may increase and decrease. A DC amperage is always positive,
but may increase and decrease.
14

Warranty and service
12
Warranty and service
A) Warranty policy
All WALTER SURFOX cleaning systems and accessories are
inspected and tested before shipment and are warranted to
be free from any defect in material and faulty workmanship.
Should any malfunction occur within six (6) months from the
date of original purchase, return the complete system prepaid
with proof of purchase, to the nearest WALTER Factory or
Authorized Service Center. If an examination shows that the
malfunction was caused by defective material or faulty
workmanship, WALTER will repair (or at our option, replace
the unit) without charge. This warranty does not apply when;
normal maintenance is required, repairs or replacements have
been made or were attempted by anyone other than
WALTER authorized service personnel, and does not cover
any damage caused by accidents, modifications, use of
improper accessories, abuse or misuse, which also includes
overloading the tool beyond its rated capacity as well as its
continued use after partial failure. No other warranty, written
or verbal, is authorized.
In no event shall WALTER be liable for any indirect, incidental
or consequential damages from the sale of the product.
This disclaimer applies both during and after the term of
this warranty.
This warranty gives you specific rights. The provisions
contained in this warranty are not intended to limit, modify,
take away from, disclaim or exclude any warranties set forth in
any Provincial or State legislation. To the extent required by
law, the provisions in any Provincial, State or Federal legislation with respect to warranties take precedence over the
provisions in this warranty.
B) Repair and service
When shipping:
• Remove the SURFOX electrolyte solution cartridge from
the wand and drain the wand
• Use original shipping case
• Use sufficient packing
• Ship on a small pallet
• Give detailed description of the problem as well as
company name, address, phone and fax numbers and
contact person.
User’s Guide SURFOX MINI 15

MINI SURFOX
Manuel de l’utilisateur

Table des matières
Table des matières
1 Introduction 18
2 Directives de sécurité 19
3 Panneau de commande 20
Pictogrammes 20
4 Aperçu général 21
5 Vue avant de l’appareil 22
6 Procédures de démarrage 23
A) Directives 23
B) Installation d’un tampon de nettoyage 24
7 Neutralisation 25
Directives pour la neutralisation des solutions 25
de nettoyage électrolytiques SURFOX
8 Accessoires 25
A) Embouts de nettoyage et trousse de rechange 25
pour micro baguette
B) Solutions de nettoyage électrolytiques 25
C) Tampons de nettoyage 26
D) Bagues de serrage en PTFE 26
E) Brosse en fibre de carbone et trousse de
micro baguette avec brosse en fibre de carbone 26
F) Embout large en graphite 26
9 Trousses de marquage et appareils de test 27
A) Trousse de marquage 27
B) Appareils de test SURFOX 27
10 Données techniques 28
11 Éléments de sécurité 28
A) Étincelles sur la buse ou la pièce de travail 28
B) Température interne 28
C) Rudiments du courant CA/CC 28
12 Garantie et service 29
A) Politique de garantie 29
B) Réparation et service 29
Manuel de l’utilisateur SURFOX MINI 17

Introduction
1
Introduction
Opérations
Félicitations pour l’achat de l’équipement de nettoyage et
de passivation électrochimique de soudure le plus avancé
techniquement sur le marché. L’équipement de nettoyage
de soudures SURFOX
facilement et économiquement la décoloration thermique
des zones affectées par la chaleur sur l’acier inoxydable et
l’aluminium tout en passivant complètement la surface en
acier inoxydable.
Les machines SURFOX sont équipées de cartes inverseur
auto-régulatrices qui surveillent et ajustent automatiquement
le courant afin d’assurer une efficacité de nettoyage
maximale sans perte de productivité.
Avant de commencer, veuillez lire complètement le manuel
du propriétaire de SURFOX pour vous guider pas à pas
dans le démarrage, l’exploitation et l’entretien de votre
nouvel équipement SURFOX.
Votre nouvelle machine SURFOX a été construite avec une
durabilité supérieure pour répondre aux exigences demandantes d’une utilisation industrielle. Cependant, comme
toute pièce d’équipement électrique, il faut en prendre soin
et s’assurer de son utilisation pour maintenir cet investissement précieux. Avec des soins et une maintenance
appropriés, votre équipement SURFOX offrira des années
de service fiable.
Pour en savoir plus sur les autres produits WALTER,
visitez notre site web: walter.com
TM
de WALTER élimine rapidement,
La machine SURFOX fonctionne selon un procédé
électrochimique pour nettoyer et passiver les soudures en
acier inoxydable. Les solutions électrolytes SURFOX sont
à base d’acide phosphorique, approuvées pour l’industrie
alimentaire, et sont activées par un courant électrique pour
nettoyer les soudures. Le processus ne prend que
quelques secondes sans endommager ni égratigner la
surface des pièces à nettoyer.
Votre machine SURFOX peut nettoyer :
• Soudures TIG
• Soudures plasma
• Soudures au laser
• Soudures par points
• Soudures MIG (avec technologie pulsée)
Notions de passivation :
• Le nettoyage des soudures n’est pas uniquement à
des fins esthétiques, mais surtout pour la passivation.
• La passivation est le traitement des surfaces en acier
inoxydable pour éliminer les contaminants et favoriser
la formation d’une couche d’oxyde de chrome de
protection épaisse et durable.
• Cette couche passive assure la résistance à la
corrosion de l’acier inoxydable.
18
• Si la passivation n’est pas effectuée correctement,
l’acier inoxydable et les zones affectées par la chaleur
peuvent commencer à rouiller
 Loading...