

WallyHome 810-00008, 810-00011 Product Manual
Product Manual
Version 1.0
WELCOME TO
Wally allows you to monitor the moisture,
temperature and humidity levels throughout your
entire home. We are excited that you have
decided to protect your home with Wally.
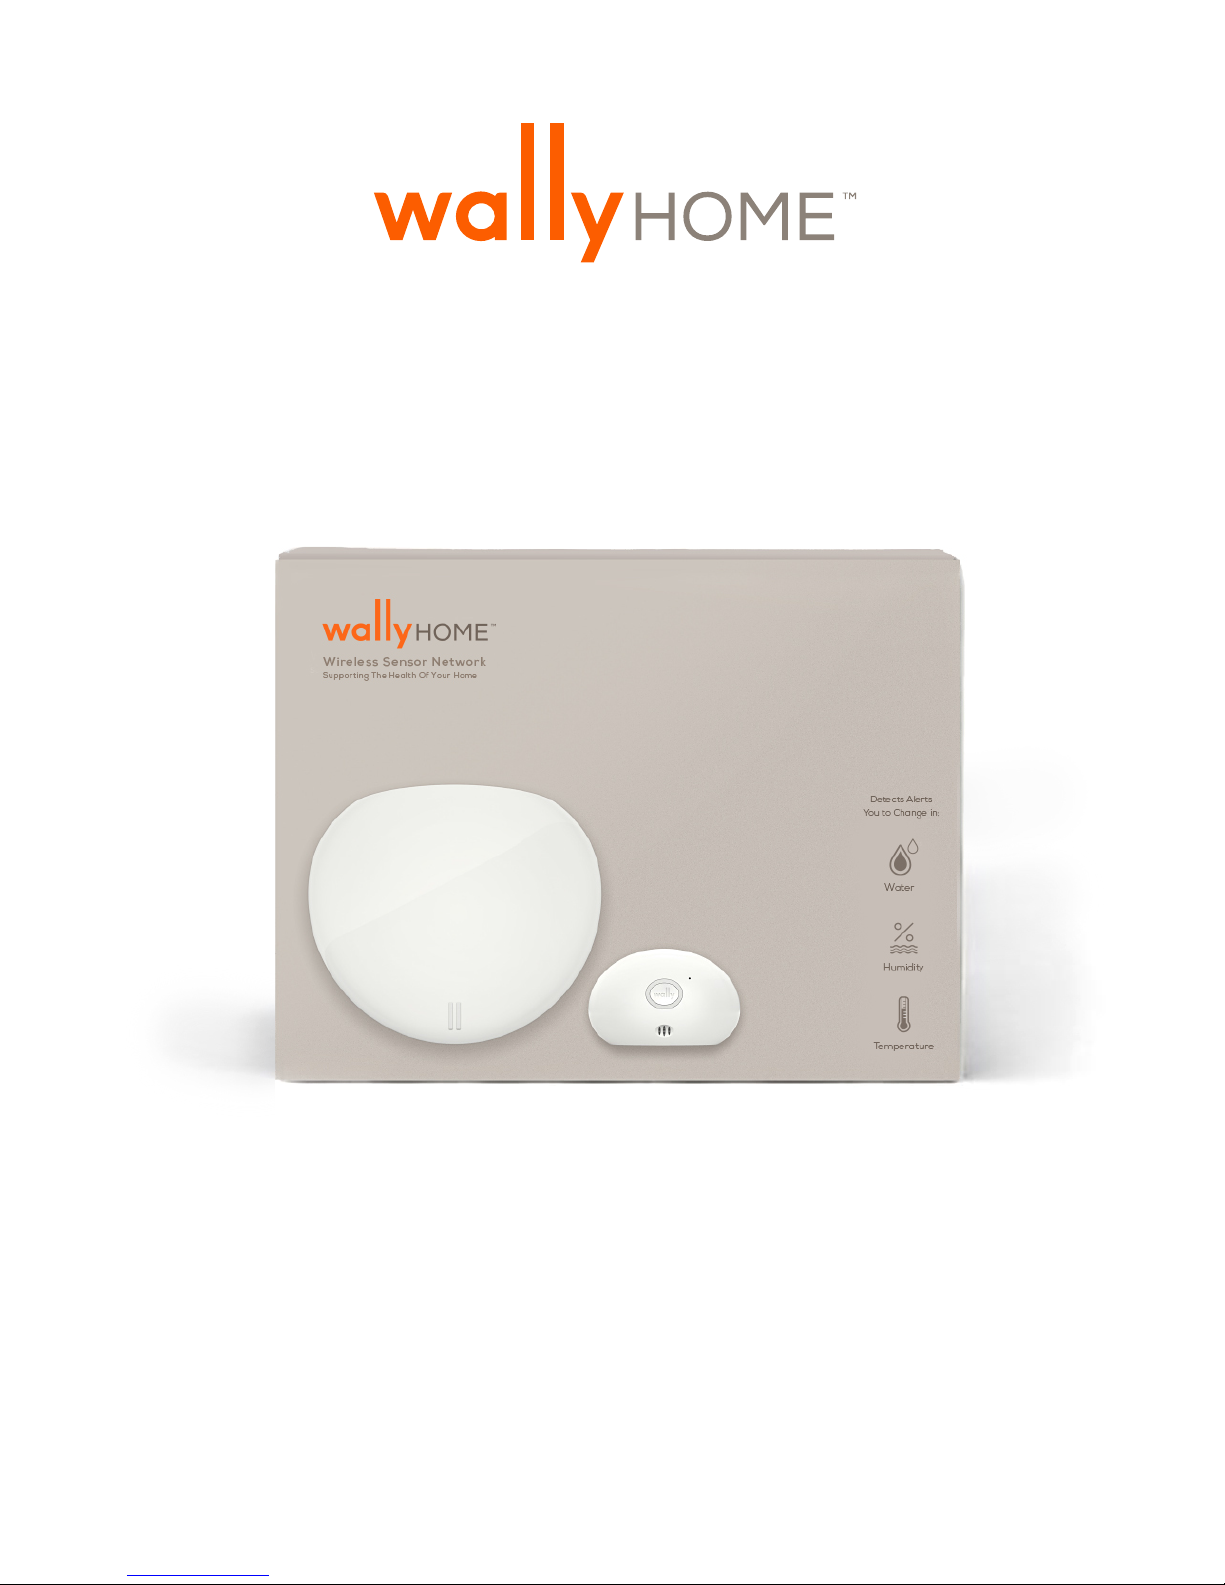
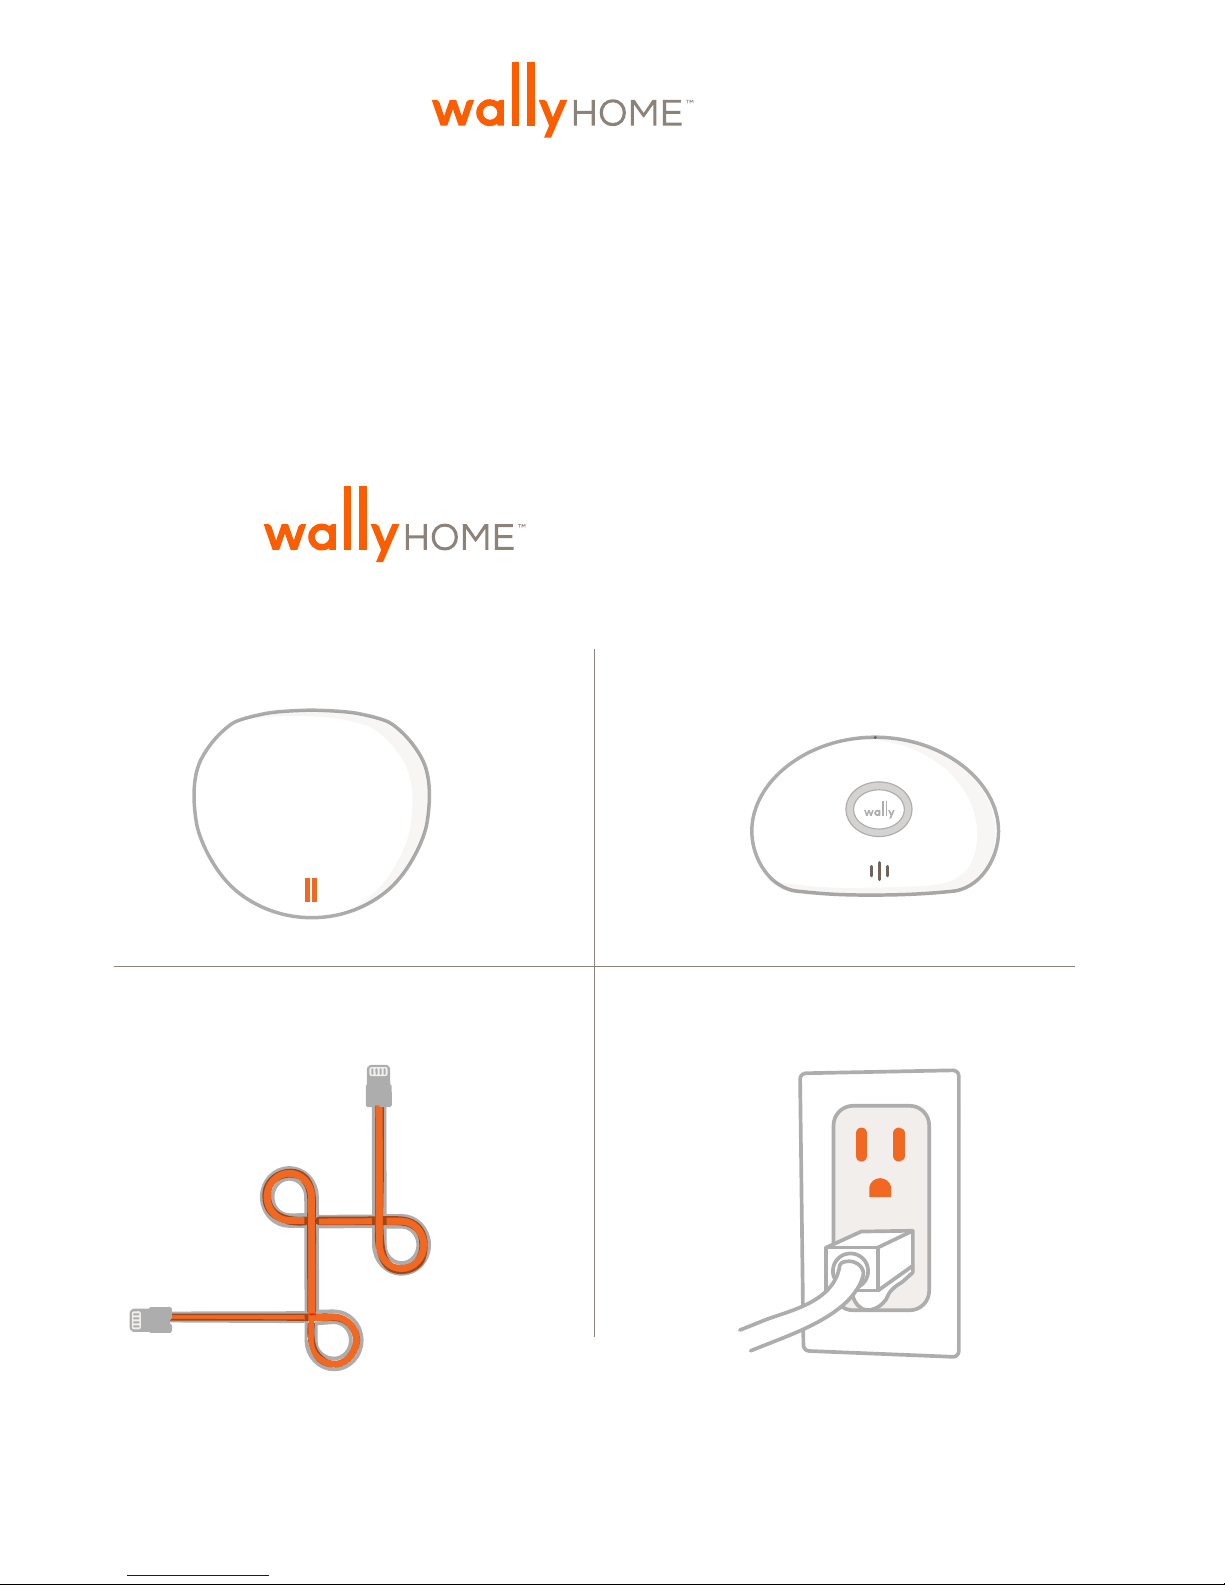
YOUR WALLYHOM SYSTEM INCLUDES:
Hub x 1 Sensor x 6
Model: 810-00008
Ethernet cord x 1
These pieces are all you need to get started. If you wish to purchase additional
Hubs or sensors, visit www.wallyhome.com/buy.
Model: 810-00011
Power cord x 1
1

Compatibility:
Wallyhome is compatible with Internet Explorer 10+ and the most recent versions
of Chrome, Firefox and Safari. To download the most recent version of your
browser, visit www.wallyhome.com/unsupported
Requirements:
This Requirements Policy is part of the Terms of Use between you and SNUPI (the
“Terms”). Capitalized terms used in this Requirements Policy have the meaning
given in the Terms.
1. Wally is intended for indoor use only.
2. Wally should be used in temperatures ranging from 0°F to 140°F.
Prolonged exposure of Wally to extreme temperatures will degrade its
performance and lifespan.
3. Wally requires a working DSL/cable modem, or LAN-based, always-on,
high-speed Internet connection in your home that is positioned to communicate
reliably with the Wally DEVICES. If your modem is not a modem/router
combination, you should install a router between your modem and your
computer, to share the Internet connection with your Wally Hub. Visit
www.wallyhome.com/support/ for a solution to limited access to Ethernet ports.
4. Wally requires that you establish an account at https://my.wallyhome.com/
5. Some Wally functionality requires mobile clients, such as a supported
phone or tablet.
6. Wally requires an Ethernet or WiFi (if supported – check the online FAQ at
http://www.wallyhome.com/help/does-my-hub-support-wifi/) connection to
your router or other Internet connection.
7. Wally must be connected directly to a 120v grounded wall outlet.
2
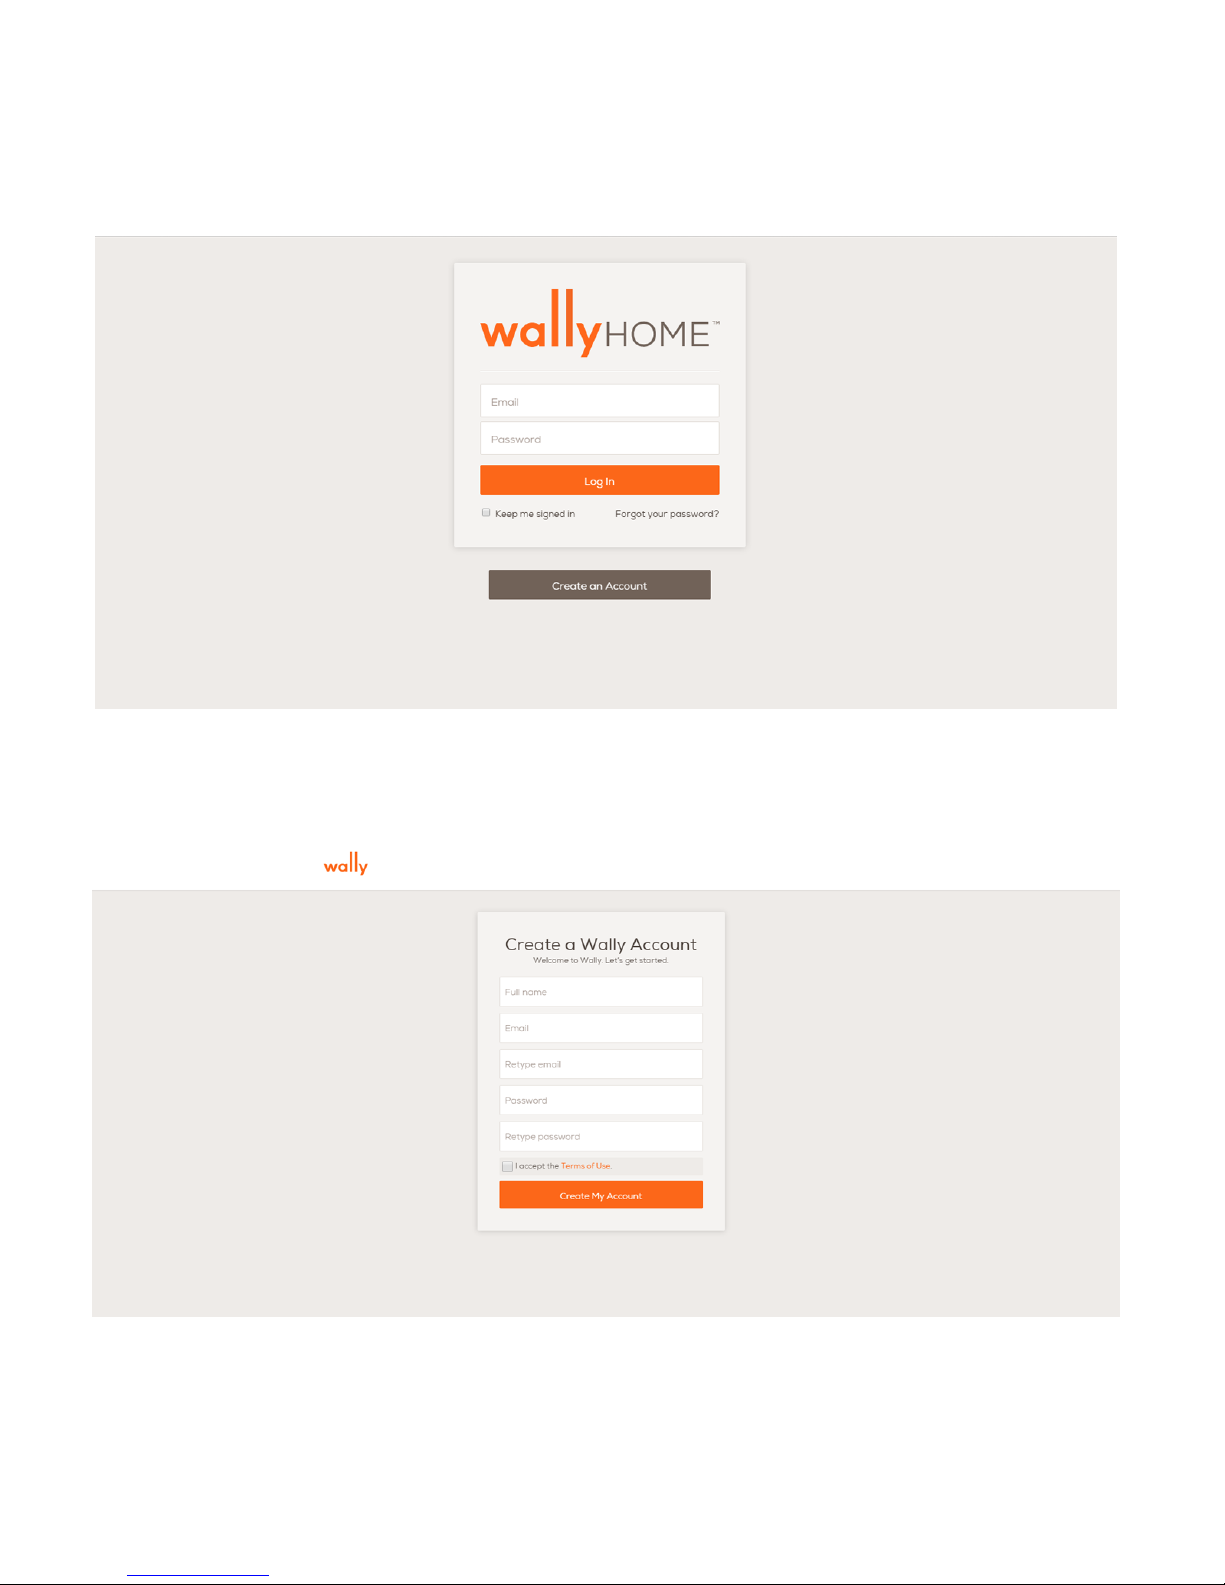
To Begin:
Open a web browser on your computer and go to
https://my.wallyhome.com/. You will be presented with the following page:
Click on the “Create an Account” button.
Enter in your information and then continue by clicking the
“Create an Account” button.
3
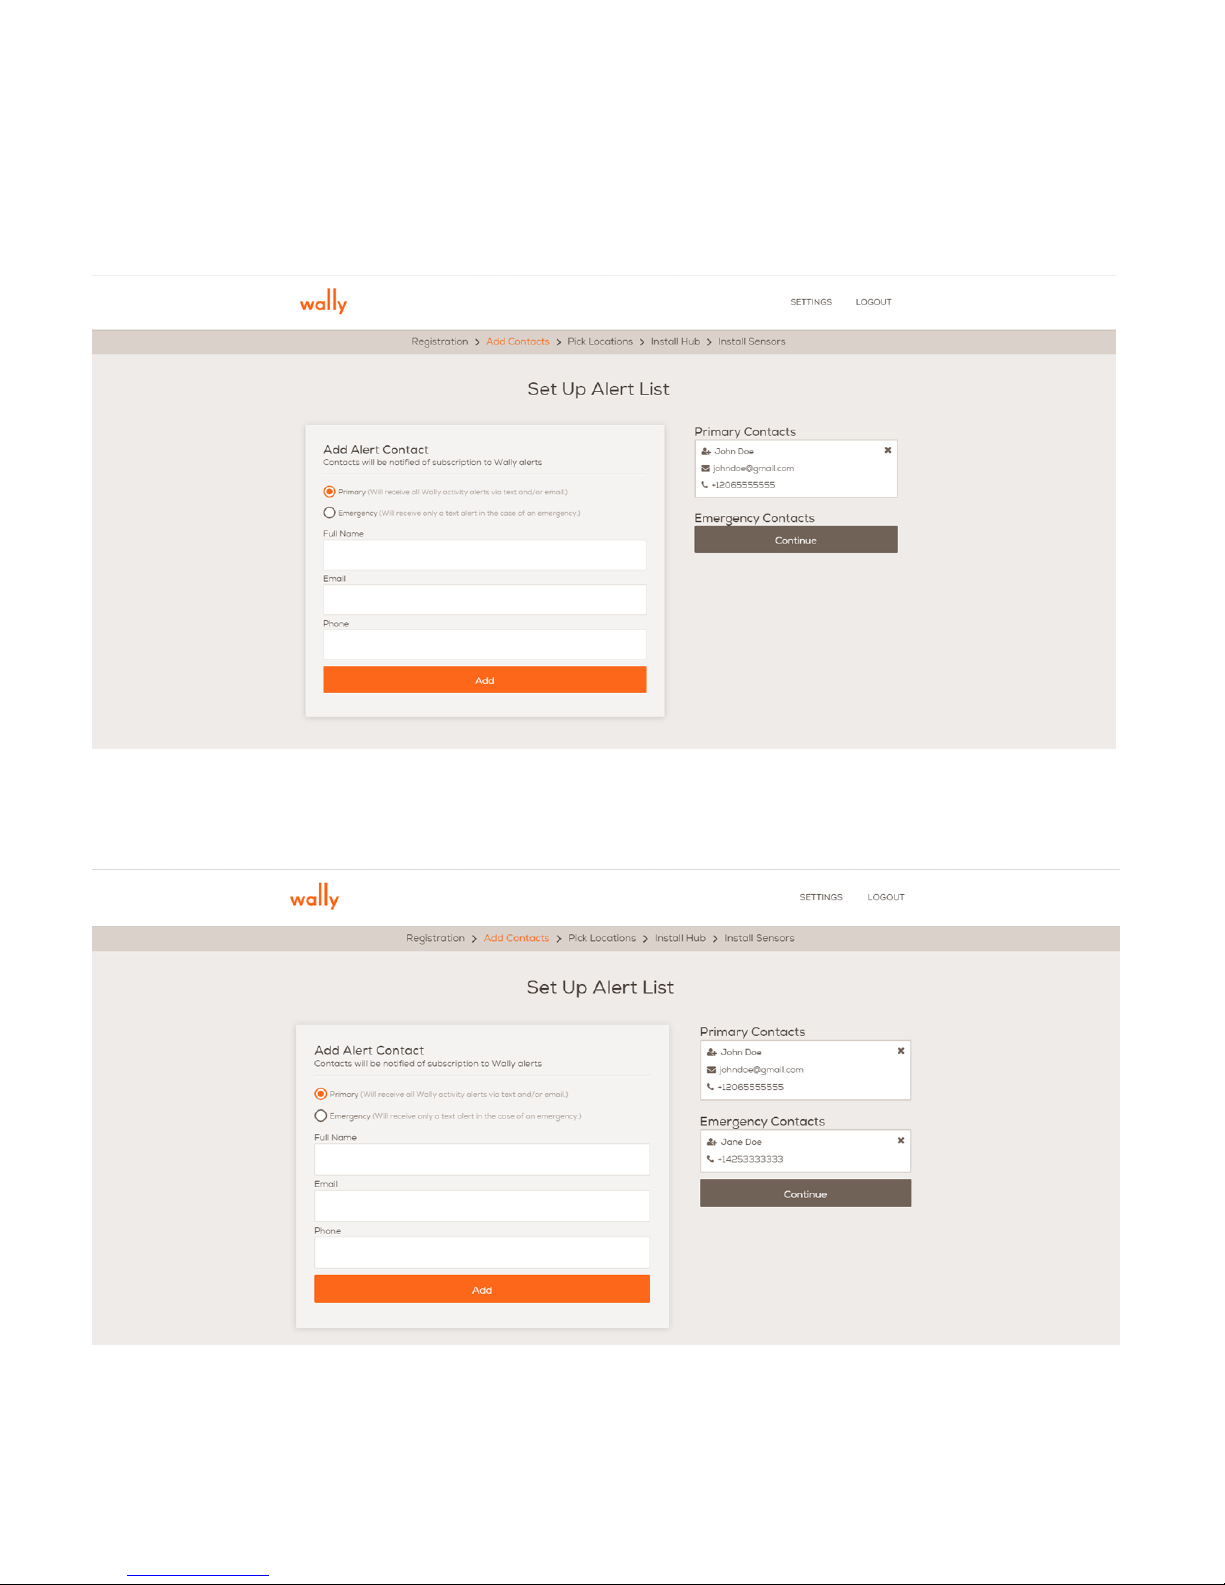
Set Up Alert List
Add any additional contacts that you would like alerted should Wally detect a
hazard or conditions that require maintenance. You have the option to designate
contacts as “Primary” or “Emergency.”
Primary contacts: may be alerted via email, text or push
notification for both urgent and preventative care.
Emergency contacts will only receive text messages if a sensor
detects moisture.
4

Plan of Attack
Next, you will have the opportunity to “Plan Your Attack.” On this set-up page,
you will be able to designate where each sensor will go within your home. Simply
click on the icon of each area where you’d like to place a sensor and then use the
drop down menus to designate the floor and room for each sensor.
Use this page to plan where each of your sensors will be placed in your home.
Simply click on one of the tiles and
then customize the floor in specific
room to make the reading applicable
to your home.
Finish by clicking the orange “Add to
My Locations” button. This will add the
tile to the right column titled “My
Locations”
Once you have added all locations to “My Locations”, click the brown “Continue”
button to finish planning your attack
5
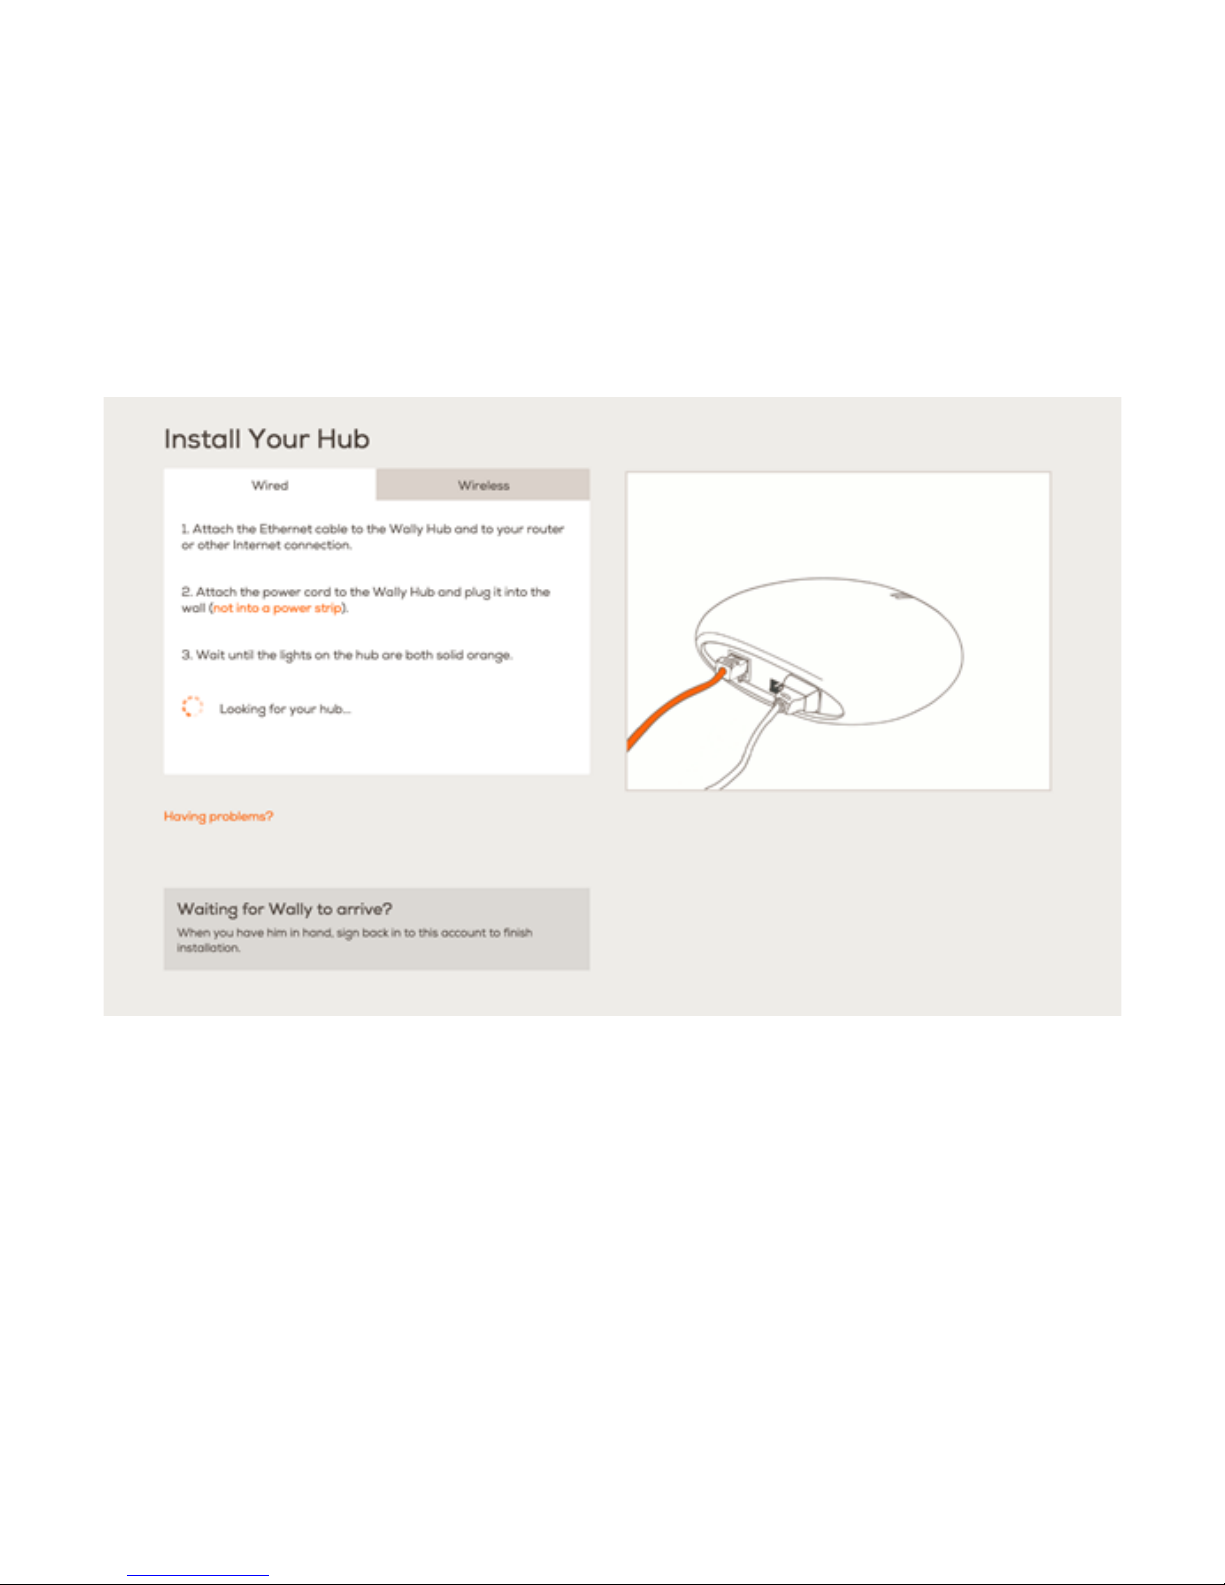
Connect Your Hub
Now that you have planned your attack, you are ready to connect your Hub to
your network.
Ethernet Installation
Click on the “Wired” tab and follow the step-by-step instructions.
WiFi Installation
Click on the “Wireless” tab and follow the step-by-step instructions.
6
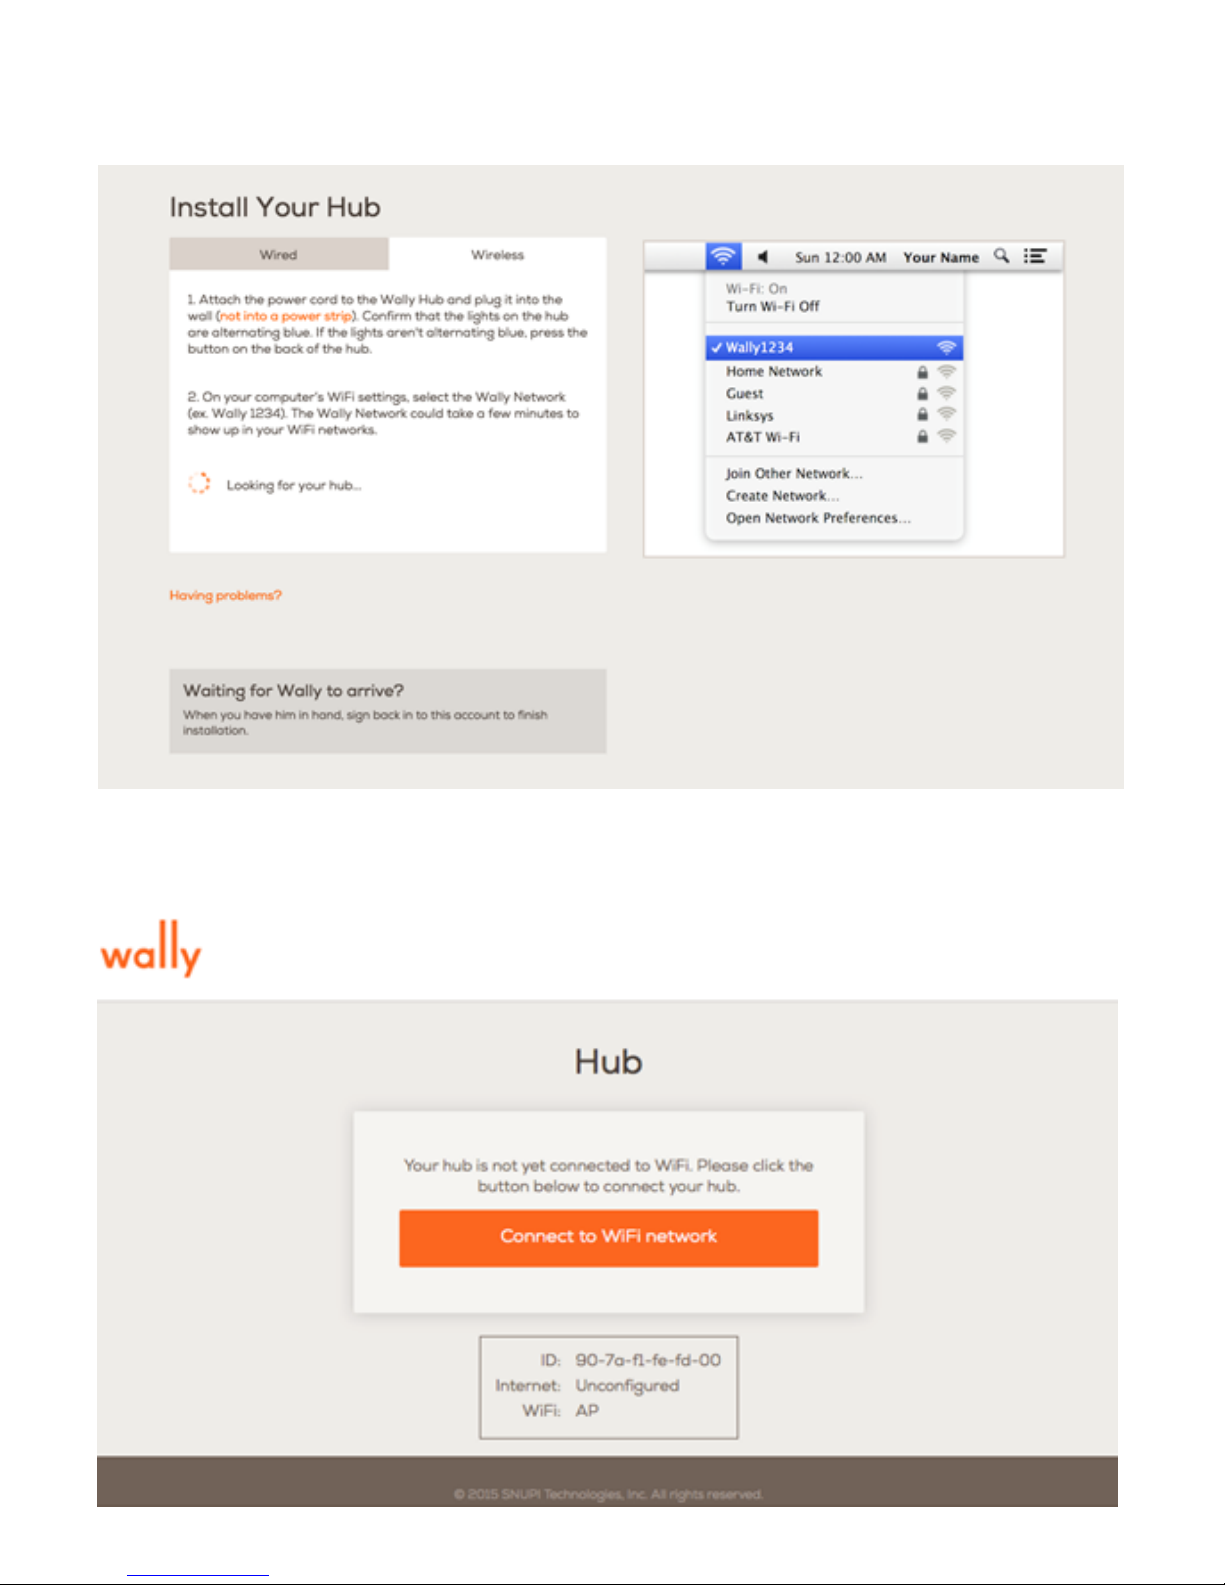
WiFi Installation (cont’d)
Once you’ve connected to the Wally Network, a screen will pop
up and prompt you to connect to your Hub’s WiFi network.
7

Click the orange “Connect to WiFi network” button. On the following two screens
select the home WiFi network you want to connect your Hub to and the password
for this network.
After you click the orange “Connect” button, your hub will disconnect from your
computer and attempt to connect to the home WiFi network.
Re-connect your computer to your home WiFi network. If your hub has
successfully connected to your WiFi network, both hub lights will become solid
orange. If this does not happen and the hub lights return to alternately flashing
blue, the hub has not connected to your home WiFi network and you will need to
press the button on the back of your hub and re-attempt the process. If you
continue to be unsuccessful, try some of the tips in the troubleshooting section of
the support page (http://www.wallyhome.com/support/) or contact customer
service (support@wallyhome.com).
After your computer is connected to your home network and both of the hub lights
are solid orange, click the orange “Continue” button to complete installing your
hub.
8
 Loading...