

Page 1
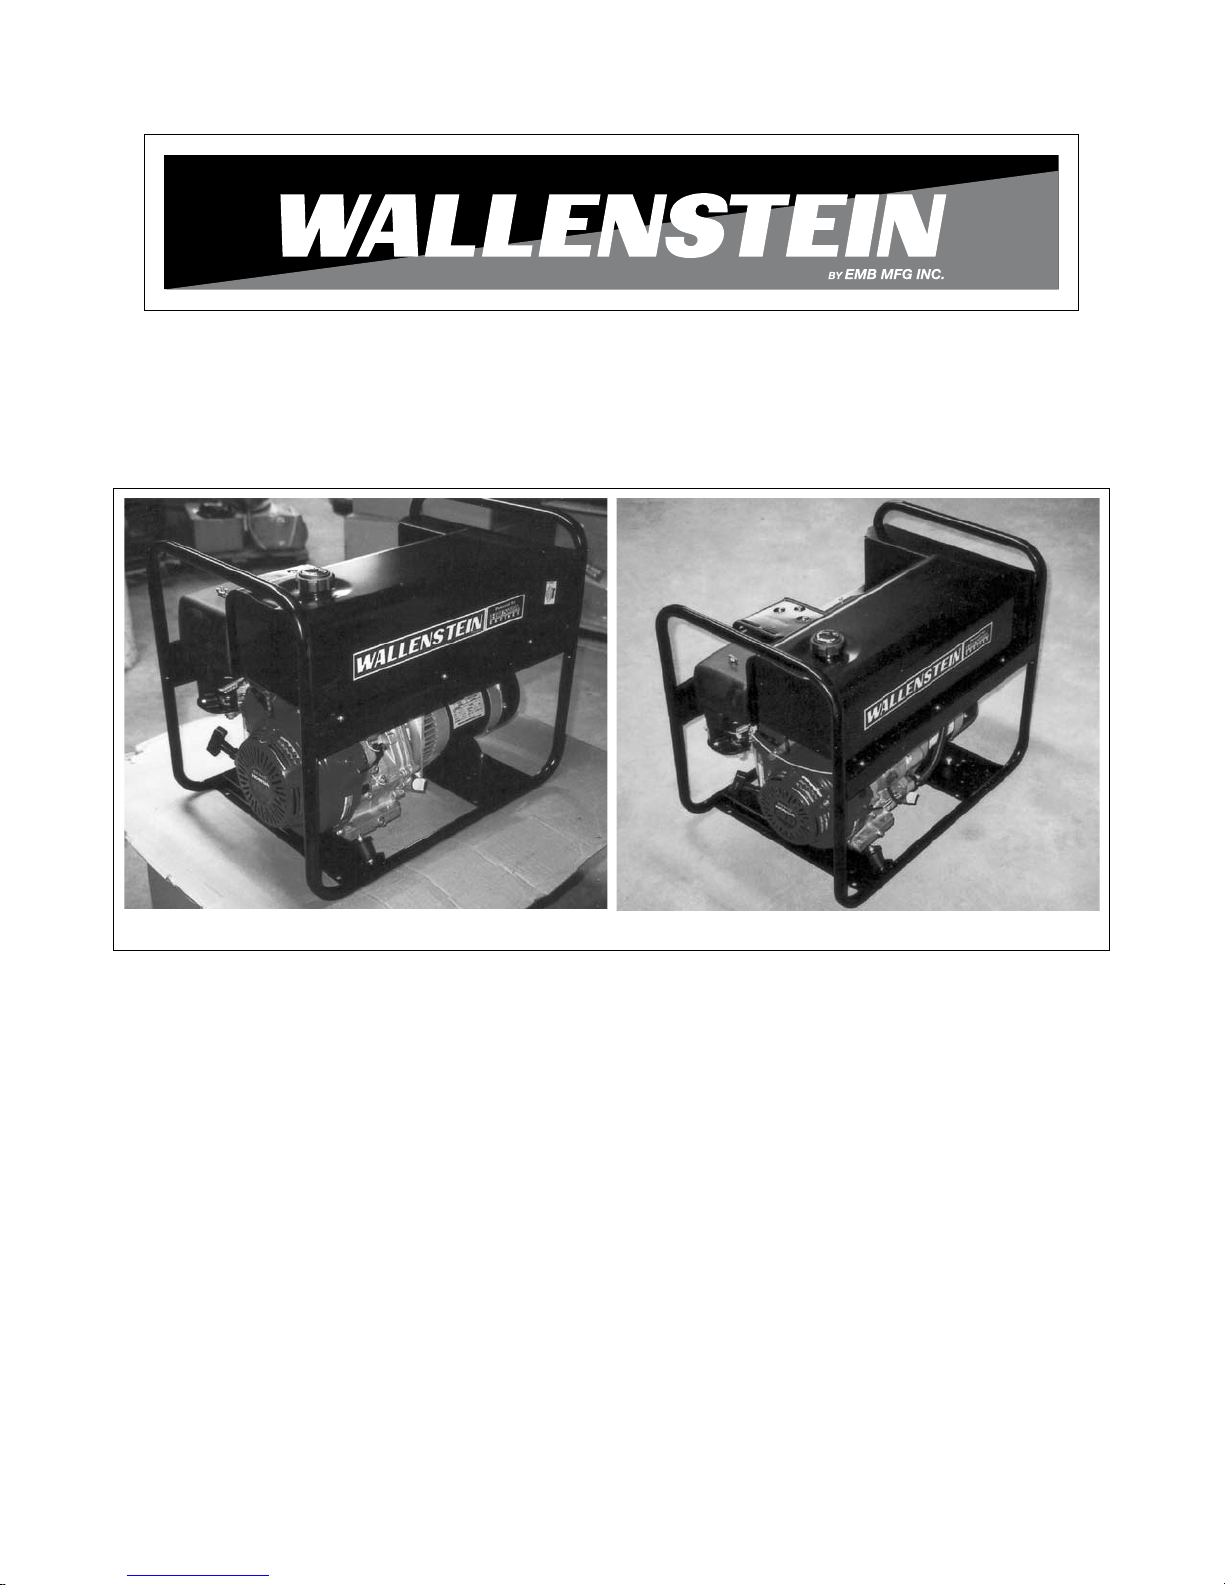
EU7200E EU5000E
PORTABLE GENERATOR
MODEL EU7200E, EU6000 &
EU5000E
OPERATOR'S MANUAL
Page 2

WALLENSTEIN
PORTABLE GENERATOR
WARRANTY
This product is warranted to be free of defects in materials and workmanship under normal use and
service, for a period of two years from the date of purchase, when operated and maintained in accordance
with the Operating and Maintenance Instructions supplied with this unit. This warranty does not cover misuse
or negligence.
Under no circumstances will the manufacturer be liable for any consequential damage or expense
of any kind, including loss of prots. The manufacturer is under no circumstances liable for tractor damage
of any kind. The manufacturer is not liable for the maintenance of the product.
This warranty is extended only to the original purchaser. Warranty is void if repairs are attempted
by anyone other than an Authorized Service Centre.
If a difculty develops with the product, you should contact your nearest Authorized Repair Centre,
or distributer. Only these locations are authorized to make repairs to the product or affect the replacement
of defective parts, which will be done at no charge within a reasonable time after the receipt of the product.
Unit or parts should be returned at the customer's expense to the nearest repair location or Authorized
Service Centre. Damage in-transit is not covered by warranty. Include original purchase receipt with any
claim (keeping a copy for your les).
The distributer's liability under warranty is limited to repair of the product and/or replacement of parts
and is given to the purchaser in lieu of all other remedies including incidental and consequential charges.
There are no warranties, expressed or implied other than those specied herein. For the nearest Authorized
Service Centre call the manufacturer. For Honda engine service contact your local Honda dealer or www.
honda.ca.
EMB Manufacturing Inc.
4144 Boomer Line
St. Clements, ON
N0B 2M0 Canada
Phone: 519-699-9283
Fax: 519-699-4146
WARRANTY VOID IF NOT REGISTERED
Page 3
WALLENSTEIN
PORTABLE GENERATOR
WARRANTY REGISTRATION FORM & INSPECTION REPORT
WARRANTY REGISTRATION (please print)
This form must be lled out by the dealer and signed by both the dealer and the customer at the time of delivery.
Customer’s Name Dealer Name
Address Address
City, State/Province, Code City, State/Province, Code
Phone Number ( ) Phone Number ( )
Contact Name
Model
Serial Number
Delivery Date
DEALER INSPECTION REPORT
____ Fasteners Tight
____ Check Electrical Connections
____ Check Engine Fluid Levels
SAFETY
____ All Decals Installed
____ Guards and Shields Installed and Secured
____ Review Operating and Safety Instructions
I have thoroughly instructed the buyer on the above described equipment which review included the Operator’s Manual content, equipment care, adjustments, safe operation and applicable warranty policy.
Date Dealer’s Rep. Signature
The above equipment and Operator’s Manual have been received by me and I have been thoroughly
instructed as to care, adjustments, safe operation and applicable warranty policy.
Date Owner's Signature
EMB MFG., INC
WHITE
YELLOW
DEALER
PINK
CUSTOMER
Page 4
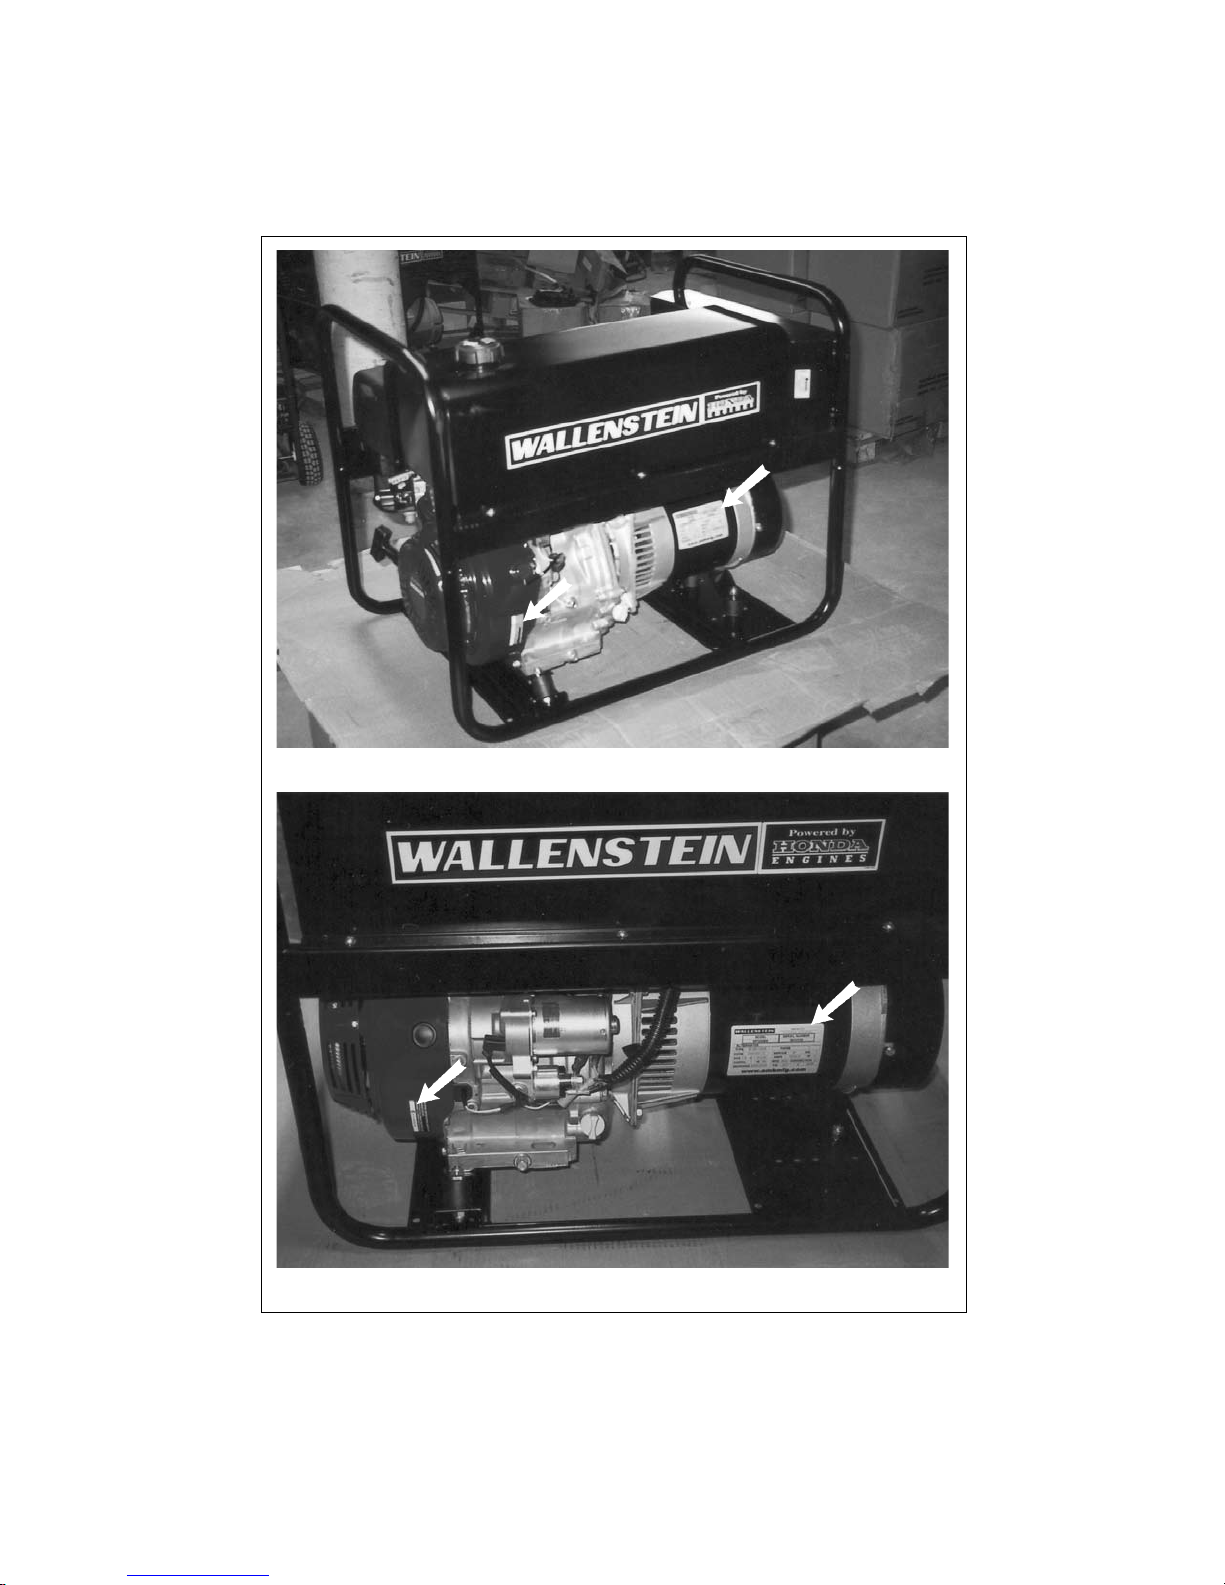
SERIAL NUMBER LOCATION
Always give your dealer the serial number of your Wallenstein Portable Generator when ordering parts or
requesting service or other information.
The serial number plates are located where indicated. Please mark the numbers in the spaces provided
for easy reference.
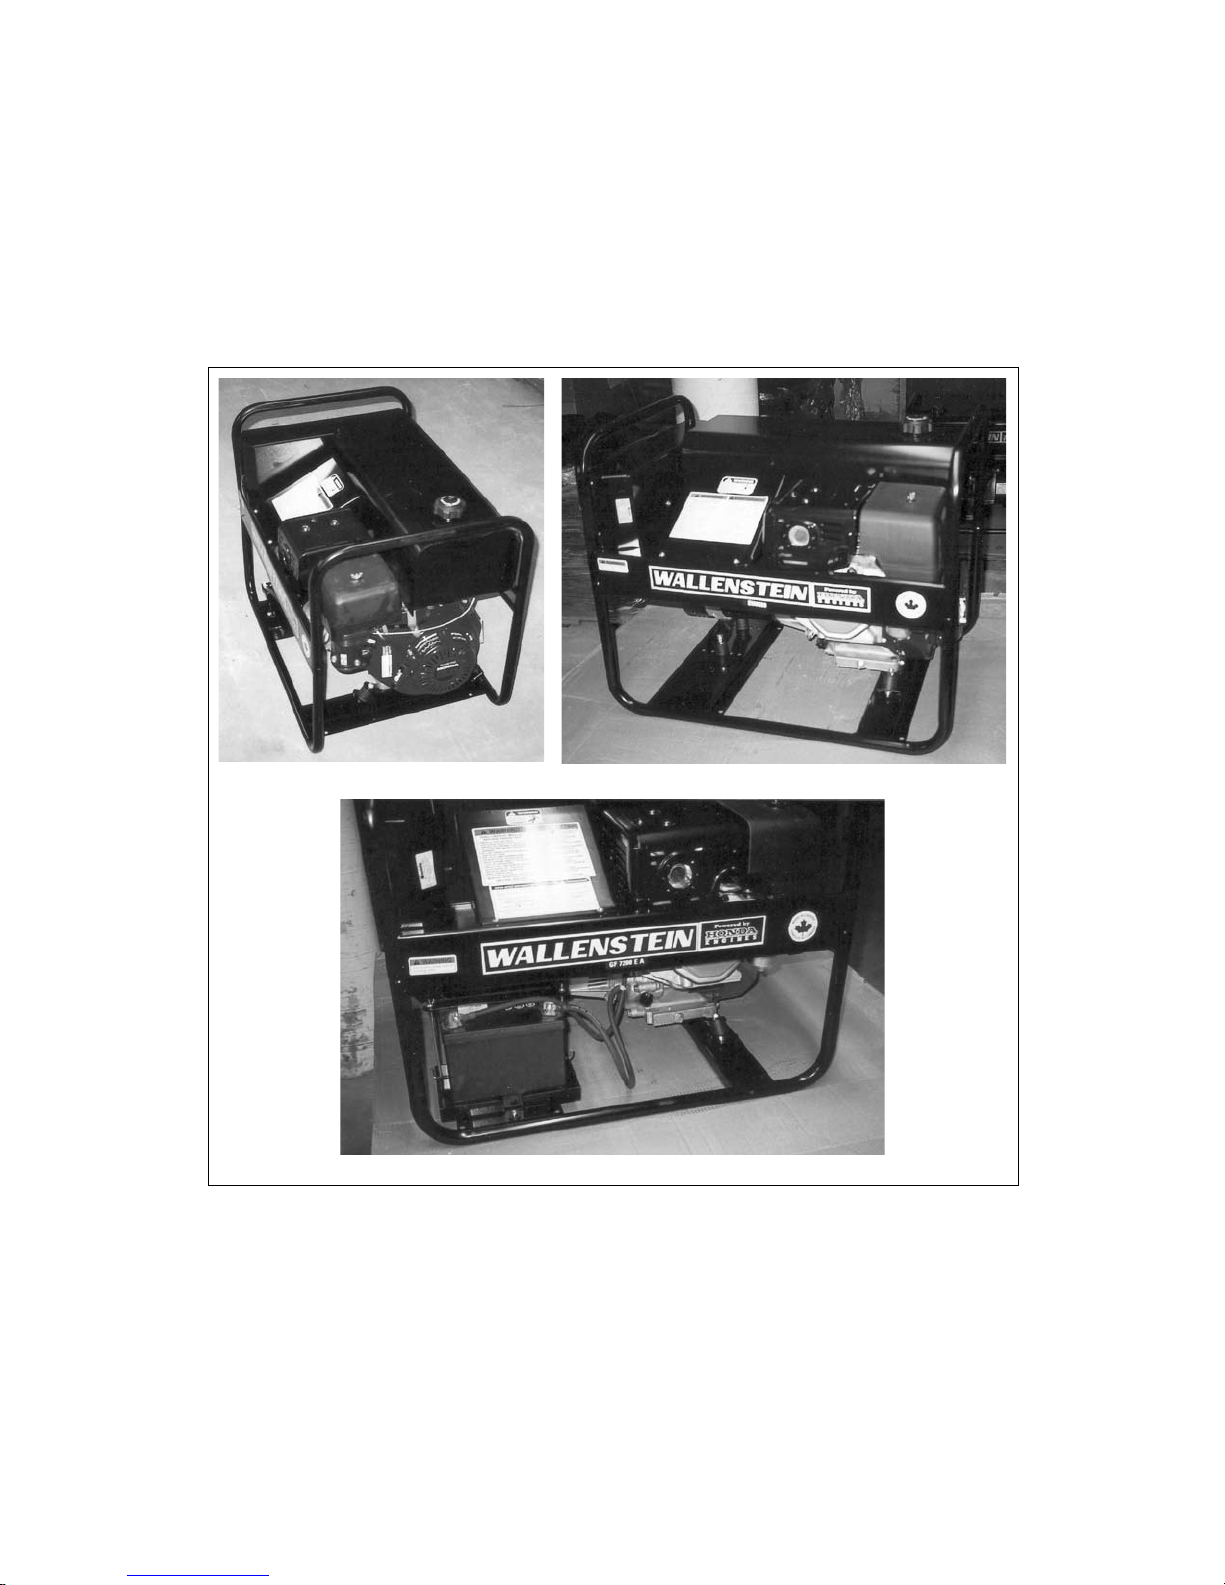
EU5000E
EU6000
SERIAL NUMBER LOCATION
Model Number ____________________________________________________
Generator Serial Number ___________________________________________
Engine Serial Number _____________________________________________
Page 5

TABLE OF CONTENTS
SECTION DESCRIPTION PAGE
1 Introduction ......................................................... 1
2 Safety ................................................................... 2
2.1 General Safety .....................................................
2.2 Equipment Safety Guidelines ..............................4
2.3 Safety Training ..................................................... 5
2.4 Safety Signs ......................................................... 5
2.5 Preparation ..........................................................6
2.6 Maintenance Safety .............................................
2.7 Operation Safety .................................................. 7
2.8 Refueling Safety ..................................................7
2.9 Storage Safety ..................................................... 7
2.10 Battery Safety ......................................................
2.11 Gas Motor Safety .................................................
2.12 Employee Sign-Off Form ..................................... 9
3 Safety Sign Locations ........................................ 10
4 Assembling ........................................................12
5 Operation ........................................................... 14
5.1 To the New Operator or Owner .......................... 14
5.2 Machine Components ........................................ 15
5.3 Machine Break-In ............................................... 16
5.4 Pre-Operation Checklist ..................................... 16
5.5 Controls .............................................................17
5.6 Field Operation ..................................................19
5.7 Moving ...............................................................24
5.8 Storage ..............................................................25
6 Service and Maintenance ..................................26
6.1 Service ............................................................... 26
6.2 Maintenance ......................................................31
7 Troubleshooting ................................................. 33
8 Specications ..................................................... 34
8.1 Mechanical ......................................................... 34
8.2 Bolt Torque ......................................................... 35
9 Index .................................................................. 36
3
6
7
8
Page 6
1 INTRODUCTION
Congratulations on your choice of an Wallenstein Portable Generator to compliment your operation. This
equipment has been designed and manufactured to meet the needs of a discerning person, operator or
industry that needs portable electrical power.
Safe, efcient and trouble free operation of your Wallenstein Portable Generator requires that you and
anyone else who will be using or maintaining the generator, read and understand the Safety, Operation,
Maintenance and Trouble Shooting information contained within the Operator's Manual.
EU5000E EU6000
EU7200E
This manual covers the Wallenstein Portable Generator Models EU5000, EU5000E, EU6000, EU6000E
and EU7200E. Use the Table of Contents or Index as a guide to locate required information.
Keep this manual handy for frequent reference and to pass on to new operators or owners. Call your
Wallenstein dealer or the Distributer if you need assistance, information or additional copies of the manuals.
OPERATOR ORIENTATION - The directions left, right, front and rear, as mentioned throughout this
manual, are determined when standing and looking at the electrical panel.
1
Page 7

2 SAFETY
SAFETY ALERT SYMBOL
This Safety Alert symbol means
ATTENTION! BECOME ALERT!
YOUR SAFETY IS INVOLVED!
Why is SAFETY important to you?
3 Big Reasons
SIGNAL WORDS:
Note the use of the signal words DANGER,
WARNING and CAUTION with the safety
messages. The appropriate signal word for
each message has been selected using the
following guide-lines:
The Safety Alert symbol identies
important safety messages on the
Wallenstein Portable Generator and
in the manual. When you see this
symbol, be alert to the possibility of
personal injury or death. Follow the
instructions in the safety message.
Accidents Disable and Kill
Accidents Cost
Accidents Can Be Avoided
DANGER - Indicates an imminently hazardous
situation that, if not avoided, will
result in death or serious injury. This
signal word is to be limited to the
most extreme situations typically for
machine components which, for functional purposes, cannot be guarded.
WARNING - Indicates a potentially hazardous
situation that, if not avoided, could
result in death or serious injury, and
includes hazards that are exposed
when guards are removed. It may
also be used to alert against unsafe
practices.
CAUTION - Indicates a potentially hazardous
situation that, if not avoided, may
result in minor or moderate injury. It
may also be used to alert against
unsafe practices.
If you have any questions not answered in this manual or require additional copies or the manual is damaged, please contact your dealer or Wallenstein, 4144 Boomer Line, St. Clements, ON, N0B 2M0. Phone
(519) 669-9283 or Fax (519) 699-4146.
2
Page 8
SAFETY
2.1 GENERAL SAFETY
YOU are responsible for the SAFE operation and
maintenance of your Wallenstein Portable Generator. YOU must ensure that you and anyone else
who is going to use, maintain or work around the
Portable Generator be familiar with the using and
maintenance procedures and related SAFETY
information contained in this manual. This manual
will take you step-by-step through your working
day and alerts you to all good safety practices that
should be used while using the Portable Generator.
Remember, YOU are the key to safety. Good
safety practices not only protect you but also the
people around you. Make these practices a working part of your safety program. Be certain that
EVERYONE using this equipment is familiar with
the recommended using and maintenance procedures and follows all the safety precautions. Most
accidents can be prevented. Do not risk injury or
death by ignoring good safety practices.
• Portable Generator owners must give operating instructions to operators or employees
before allowing them to operate the machine,
and at least annually thereafter.
• The most important safety device on this
equipment is a SAFE operator. It is the operator’s responsibility to read and understand
ALL Safety and Operating instructions in the
manual and to follow these. Most accidents
can be avoided.
• A person who has not read and understood all
using and safety instructions is not qualied
to use the machine. An untrained operator
exposes himself and bystanders to possible
serious injury or death.
1. Read and understand the Operator’s Manual and all safety
signs before using, maintaining, adjusting or cleaning the
Portable Generator.
2. Have a rst-aid kit available
for use should the need arise
and know how to use it.
3. Have a re extinguisher available for
use should the need arise and know
how to use it.
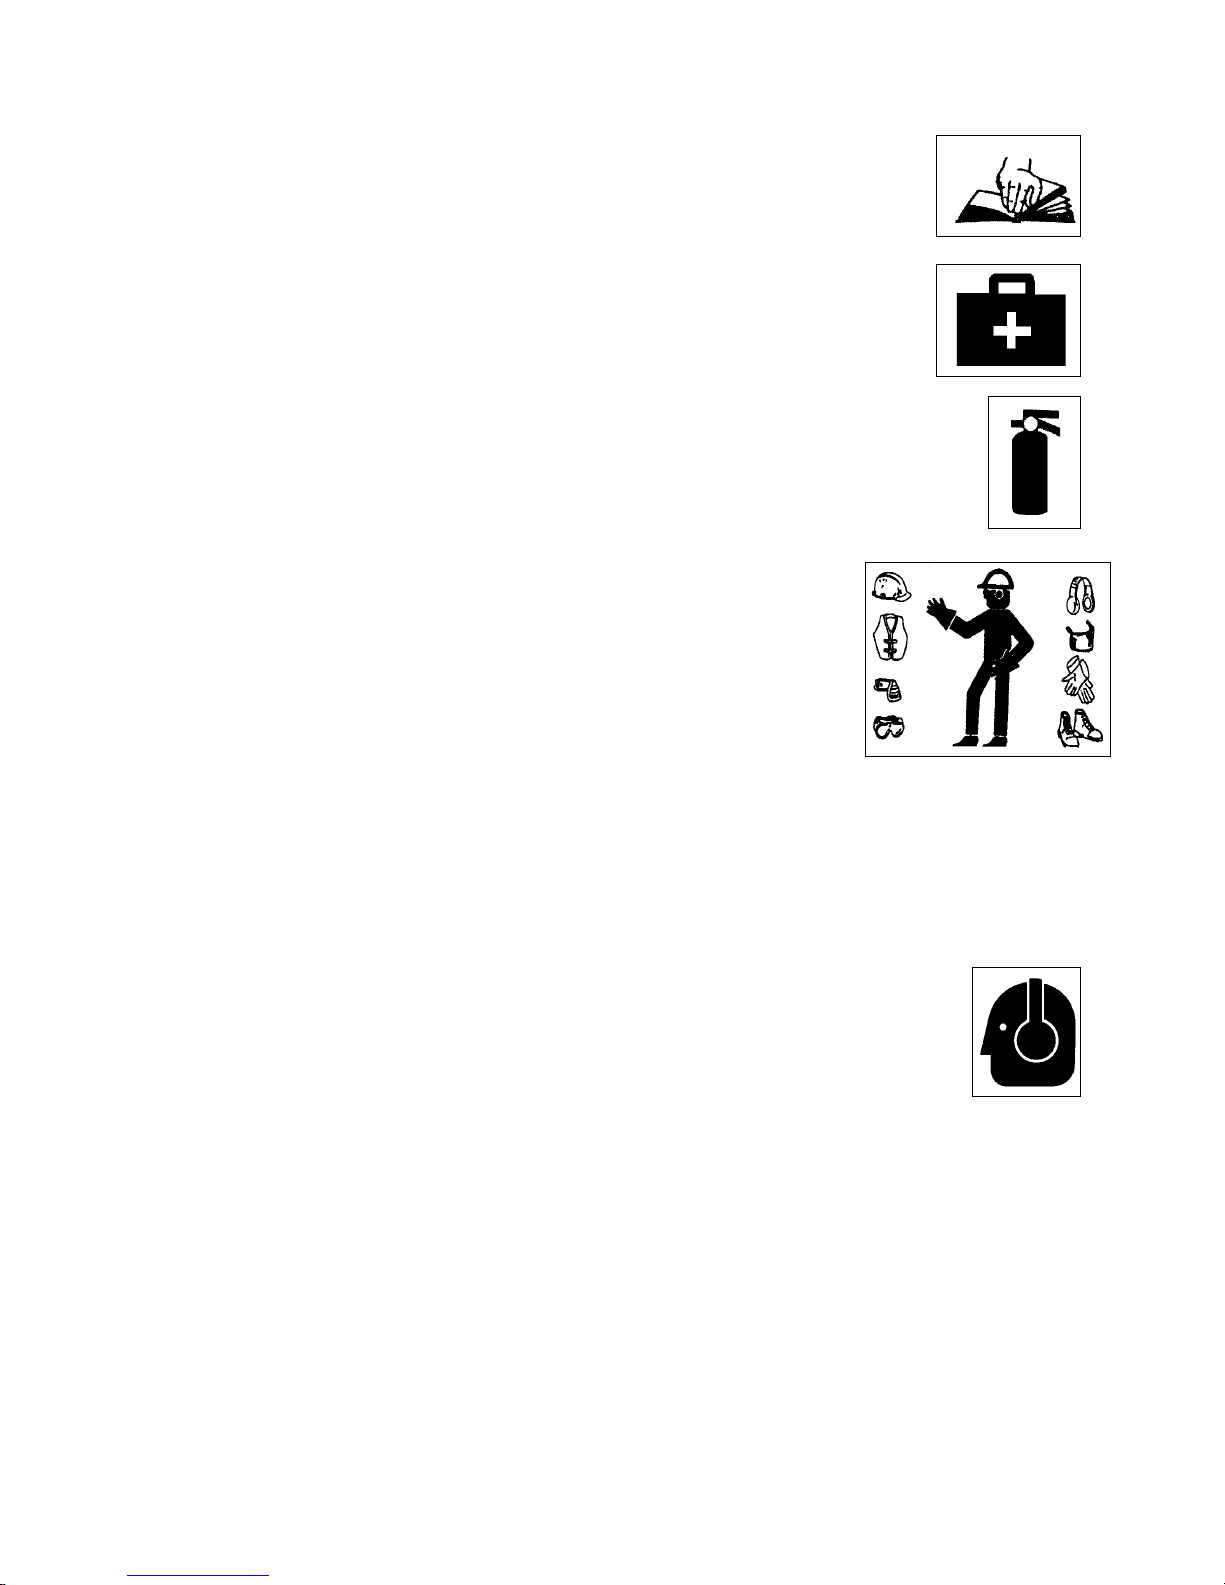
4. W e ar a p pro p r iat e
protective gear. This
list includes but is not
limited to:
- A hard hat
- Protective
shoes with slip
resistant rubber
soles
- Protective glasses,
goggles or face shield
- Heavy gloves
- Hearing Protection
5. Install and secure all guards before starting.
6. Wear suitable ear protection
for pro l ong e d e x posu r e t o
excessive noise.
• Do not modify the equipment in any way.
Unauthorized modication may impair the
function and/or safety and could affect the life
of the equipment.
• Think SAFETY! Work SAFELY!
7. Stop and disable engine, remove ignition key
and place in your pocket and wait for all moving
parts to stop before servicing, adjusting or
repairing.
8. Clear the area of people, especially small
children, before using the unit.
9. Review safety related items annually with all
personnel who will operating or maintaining the
Portable Generator.
3
Page 9

2.2 EQUIPMENT SAFETY GUIDELINES
1. Safety of the operator and bystanders is one
of the main concerns in designing and developing equipment. However, every year
many accidents occur which could have been
avoided by a few seconds of thought and a
more careful approach to handling equipment.
You, the operator, can avoid many accidents
by observing the following precautions in this
section. To avoid personal injury or death,
study the following precautions and insist
those working with you, or for you, follow
them.
2. In order to provide a better view, certain
photographs or illustrations in this manual
may show an assembly with a safety shield
removed. However, equipment should never
be used in this condition. Keep all shields in
place. If shield removal becomes necessary
for repairs, replace the shield prior to use.
3. Replace any safety sign or instruction sign
that is not readable or is missing. Location of
such safety signs is indicated in this manual.
7. Never exceed the limits of a piece of machinery. If its ability to do a job, or to do so safely,
is in question - DON'T TRY IT.
8. Do not modify the equipment in any way. Un-
authorized modication may result in serious
injury or death and may impair the function
and life of the equipment.
9. In addition to the design and conguration of
this implement, including Safety Signs and
Safety Equipment, hazard control and accident prevention are dependent upon the
awareness, concern, prudence, and proper
training of personnel involved in the operation,
transport, maintenance, and storage of the
machine. Refer also to Safety Messages and
operation instruction in each of the appropriate sections of the engine and machine manuals. Pay close attention to the Safety Signs
afxed to the engine and the machine.
4. Never use alcoholic beverages or drugs which
can hinder alertness or coordination while using this equipment. Consult your doctor about
using this machine while taking prescription
medications.
5. Under no circumstances should young
children be allowed to work with this
equipment. Do not allow persons to use or
assemble this unit until they have read this
manual and have developed a thorough
understanding of the safety precautions
and of how it works. Review the safety
instructions with all users annually.
6. This equipment is dangerous to children and
persons unfamiliar with its operation. The
operator should be a responsible, properly
trained and physically able person familiar
with machinery and trained in this equipment's
operations. If the elderly are assisting with
work, their physical limitations need to be
recognized and accommodated.
4
Page 10

2.3 SAFETY TRAINING
2.4 SAFETY SIGNS
1. Safety is a primary concern in the design and
manufacture of our products. Unfortunately,
our efforts to provide safe equipment can
be wiped out by a single careless act of an
operator or bystander.
2. In addition to the design and conguration of
equipment, hazard control and accident prevention are dependent upon the awareness,
concern, prudence and proper training of
personnel involved in the operation, transport,
maintenance and storage of this equipment.
3. It has been said, "The
best safety feature is an
informed, careful operator." We ask you to be that
kind of an operator. It is the
operator's responsibility to read and understand ALL Safety and Using instructions in the
manual and to follow these. Accidents can be
avoided.
4. Working with unfamiliar equipment can
lead to careless injuries. Read this manual
before assembly or using, to acquaint
yourself with the machine. If this machine
is used by any person other than yourself,
or is loaned or rented, it is the machine
owner's responsibility to make certain that
the operator, prior to using:
1. Keep safety signs clean and legible at all
times.
2. Replace safety signs that are missing or have
become illegible.
3. Replaced parts that displayed a safety sign
should also display the current sign.
4. Safety signs displayed in Section 3 each have
a part number in the lower right hand corner.
Use this part number when ordering replacement parts.
5. Safety signs are available from your authorized Distributor or Dealer Parts Department or
the factory.
How to Install Safety Signs:
• Be sure that the installation area is clean and
dry.
• Be sure temperature is above 50°F (10°C).
• Determine exact position before you remove
the backing paper.
• Remove the smallest portion of the split backing paper.
a. Reads and understands the operator's
manuals.
b. Is instructed in safe and proper use.
5. Know your controls and how to stop engine
and machine quickly in an emergency. Read
this manual and the one provided with your
engine.
6. Train all new personnel and review instructions frequently with existing workers. Be
certain only a properly trained and physically
able person will use the machinery. A person
who has not read and understood all using
and safety instructions is not qualied to use
the machine. An untrained operator exposes
himself and bystanders to possible serious injury or death. If the elderly are assisting with
the work, their physical limitations need to be
recognized and accommodated.
• Align the sign over the specied area and
carefully press the small portion with the exposed sticky backing in place.
• Slowly peel back the remaining paper and
carefully smooth the remaining portion of the
sign in place.
• Small air pockets can be pierced with a pin
and smoothed out using the piece of sign
backing paper.
5
Page 11
2.5 PREPARATION
2.6 MAINTENANCE SAFETY
1. Never use the engine and machine until you
have read and completely understand this
manual, the Engine Operator's Manual and
each of the Safety Messages found on the
safety signs on the engine and machine.
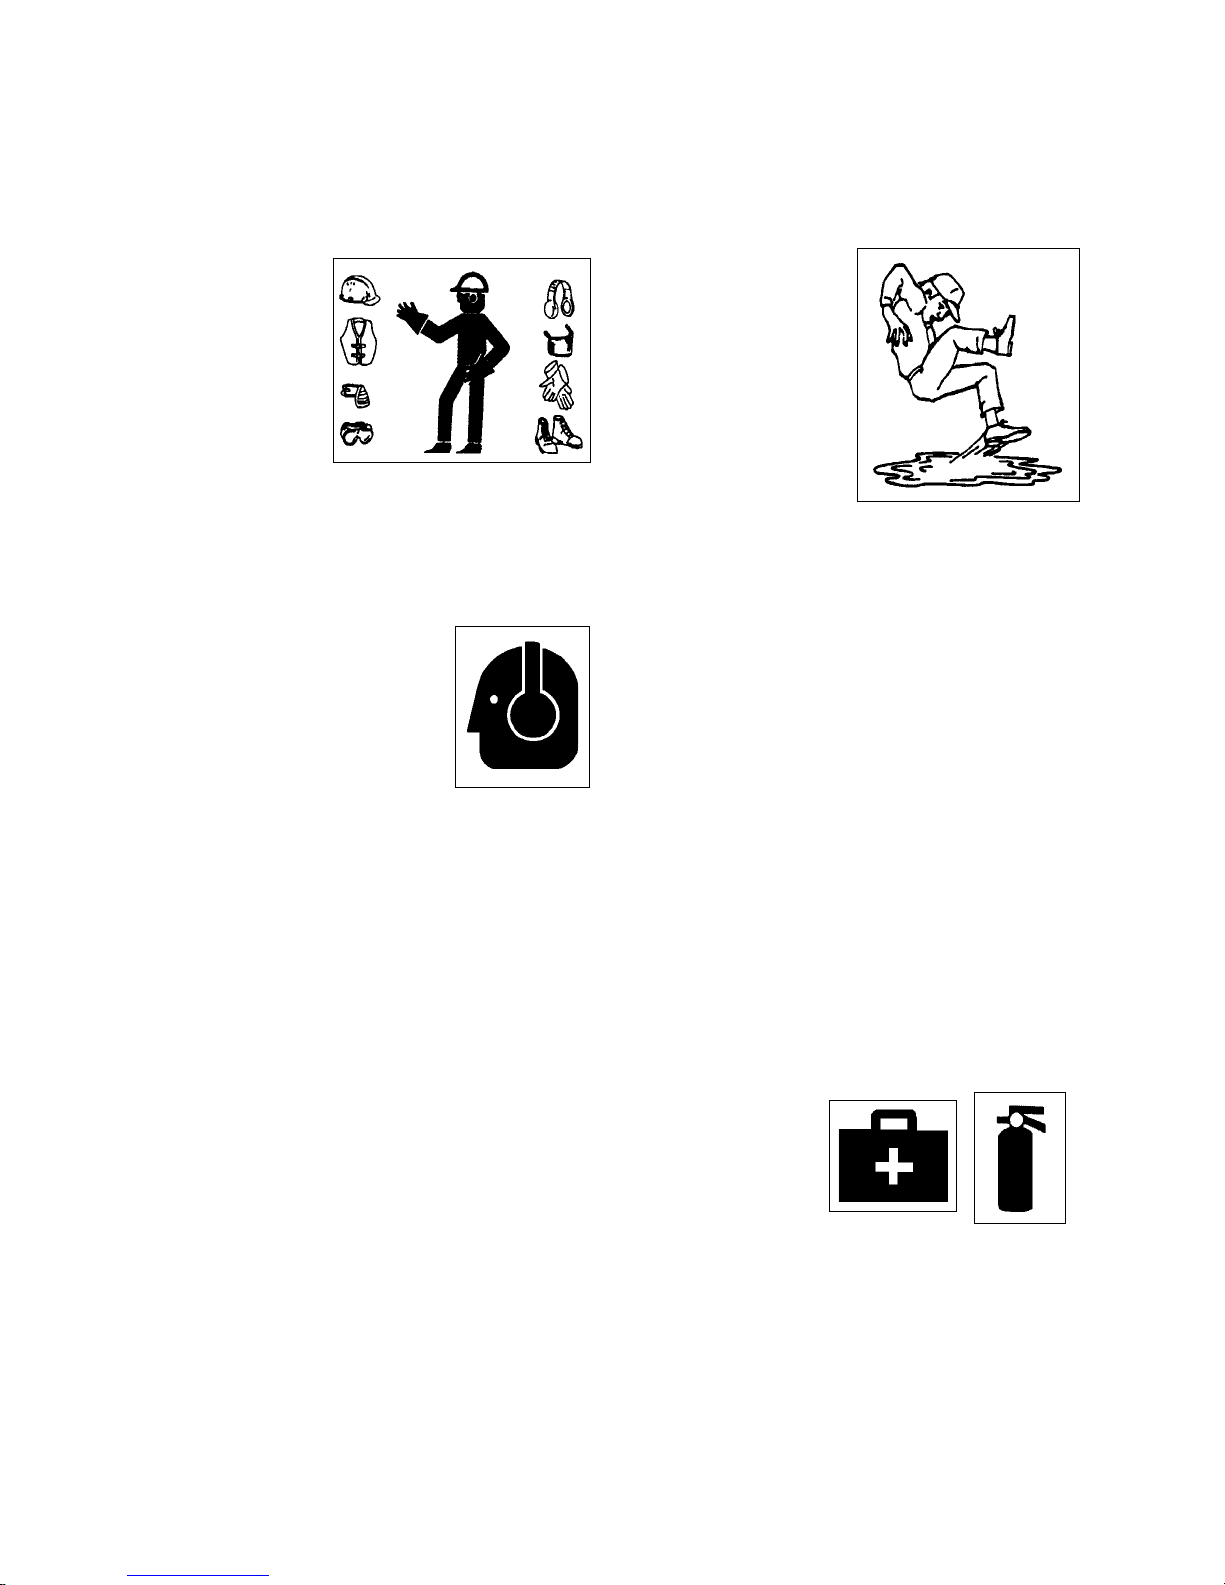
2. Personal protection equipment including
hard hat, safety
glasses, safety
shoes, and
gloves are recommended during assembly,
installation, operation, adjustment, maintaining, repairing, removal, cleaning, or moving
the unit. Do not allow long hair, loose tting
clothing or jewellery to be around equipment.
3. PROLONGED EXPOSURE
TO LOUD NOISE MAY
CAUSE PERMANENT
HEARING LOSS!
Power equipment with or
without equipment attached
can often be noisy enough
to cause permanent, partial
hearing loss. We recommend that you wear
hearing protection on a full-time basis if the
noise in the Operator's position exceeds 80db.
Noise over 85db on a long-term basis can
cause severe hearing loss. Noise over 90db
adjacent to the Operator over a long-term basis may cause permanent, total hearing loss.
NOTE: Hearing loss from loud noise (from
tractors, chain saws, radios, and other such
sources close to the ear) is cumulative over a
lifetime without hope of natural recovery.
4. Clear working area of stones, branches or
hidden obstacles that might be hooked or
snagged, causing injury or damage.
5. Use only in daylight or good articial light.
6. Be sure machine is properly positioned, adjusted and in good operating condition.
7. Ensure that all safety shielding and safety
signs are properly installed and in good condition.
1. Good maintenance is your responsibility. Poor
maintenance is an invitation to trouble.
2. Follow good shop practices.
- Keep service
area clean and
dry.
- Be sure electrical
outlets and tools
are properly
grounded.
- Use adequate
light for the job at
hand.
3. Make sure there is
plenty of ventilation. Never operate the engine of the towing vehicle in a closed building.
The exhaust fumes may cause asphyxiation.
4. Before working on this machine, shut off the
engine and turn fuel valve off.
5. Never work under equipment unless it is
blocked securely.
6. Always use personal protection devices such
as eye, hand and hearing protectors, when
performing any service or maintenance work.
7. Where replacement parts are necessary for
periodic maintenance and servicing, genuine
factory replacement parts must be used to
restore your equipment to original specications. The manufacturer will not be responsible for injuries or damages caused by use of
unapproved parts and/or accessories.
8. A re extinguisher and rst aid kit should be
kept readily
accessible while
performing maintenance on this
equipment.
9. Periodically tighten all bolts,
nuts and screws and check that all electrical
and fuel connections are properly secured to
ensure unit is in a safe condition.
10. When completing a maintenance or service
function, make sure all safety shields and
devices are installed before placing unit in
service.
6
Page 12

2.7
OPERATING SAFETY
2.8 REFUELING SAFETY
1. Read and understand operator's manual before
starting. Review safety instructions annually.
2. Stop and disable engine, remove ignition key
and place in your pocket and wait for all moving parts to stop before servicing, adjusting or
repairing.
3. To prevent electrical shocks, do not operate
this generator in the rain or with wet hands. It
should be grounded in damp or highly conductive conditions.
4. Close and secure all guards, deectors and
shields before starting and operating.
5. Do not connect the generator to a commercial
power line.
8. Do not operate with damaged or defective
extension cords, or power cords. Never operate any electrical equipment with damaged or
defective cords.
9. Do not operate this generator in areas with poor
ventilation. The exhaust fumes contain carbon
monoxide, a poisonous, odorless, invisible gas.
Prolonged exposure can lead to unconsciousness and death.
1. Handle fuel with care. It is highly ammable.
2. Allow engine to cool for 5 minutes before refuelling. Clean up spilled fuel before restarting
engine.
3. Do not refuel the machine
while smoking or when
near open ame or sparks.
4. Fill fuel tank outdoors.
5. Prevent res by keeping machine clean of accumulated trash, grease and debris.
2.9 STORAGE SAFETY
1. Store the unit in an area away from human
activity.
2. Do not allow children to play on or around the
stored machine.
3. Store the unit in a dry, level area. Support the
frame with planks if required.
10. Do not refuel the engine while it is in operation or still hot. Do not refuel the engine near
open ames, pilot lights or sparking electrical
devices (e.g. power tools, welders or grinders).
Do not operate the generator near ammable
products.
11. The engine should be refueled in a well-lit area.
Avoid fuel spillage.
12. Never allow children or unauthorized people to
operate or be around this machine.
13. Keep the working area clean and free of debris to prevent tripping. Operate only on level
ground.
14. Do not cover the generator while in operation.
Overheating can result in damaged equipment.
15. For storage, do not cover the generator until it
has cooled down completely.
16. The ambient temperature should not exceed
100° F/40° C.
2.10 BATTERY SAFETY
1. Keep all sparks and ames away from batteries, as gas given off by electrolyte is explosive.
2. Avoid contact with battery electrolyte: wash
off an spilled electrolyte immediately.
3. Wear safety glasses when working near batteries.
4. Do not tip batteries more than 45°, to avoid
electrolyte loss.
5. To avoid injury from spark or short circuit, disconnect battery ground cable before servicing
any part of the electrical system.
7
Page 13

2.11 GAS MOTOR SAFETY
BEFORE STARTING ENGINE, READ
AND UNDERSTAND THE OPERATING
AND MAINTENANCE INSTRUCTIONS
THAT CAME WITH YOUR ENGINE.
14. DO NOT crank engine with spark plug removed.
If engine is ooded, crank until engine starts.
15. DO NOT strike ywheel with a hard object or
metal tool as this may cause ywheel to shatter in
operation. Use proper tools to service engine.
WARNING: DO NOT
1. DO NOT run engine in an enclosed area. Exhaust gases contain carbon monoxide, an odourless and deadly poison.
2. DO NOT place hands or feet near moving or
rotating parts.
3. DO NOT store, spill, or use gasoline near an
open ame, or devices such as a stove, furnace,
or water heater which use a pilot light or devices
which can create a spark.
4. DO NOT refuel indoors where area is not well
ventilated. Outdoor refuelling is preferred.
5. DO NOT refuel while engine is running. Allow
engine to cool for 5 minutes before refuelling.
Store fuel in approved safety containers.
6. DO NOT remove fuel tank cap while engine is
running.
7. DO NOT operate engine if gasoline is spilled.
Move machine away from the spill and avoid
creating any ignition until gasoline has evaporated.
8. DO NOT smoke while lling fuel tank.
9. DO NOT choke carburetor to stop engine. Whenever possible, gradually reduce engine speed
before stopping.
10. DO NOT run engine above rated speeds. This
may result in injury.
16. DO NOT operate engine without a mufer. Inspect
periodically and replace, if necessary. If engine
is equipped with a mufer deector, inspect periodically and replace, if necessary with correct
deector.
17. DO NOT operate engine with an accumulation of
grass, leaves, dirt or other combustible materials
in the mufer area.
18. DO NOT use this engine on any forest covered,
brush covered, or grass covered unimproved land
unless a spark arrester is installed on the mufer.
The arrester must be maintained in effective working order by the operator. In the state of California
the above is required by law (Section 4442 of the
California Public Resources Code). Other states
may have similar laws. Federal laws apply on
federal land.
19. DO NOT touch hot mufer, cylinder or ns because contact may cause burns.
20. DO NOT run engine with air cleaner or air cleaner
cover removed.
WARNING: DO
1. ALWAYS DO remove the wire from the spark plug
when servicing the engine or equipment to prevent accidental starting. Disconnect the negative
wire from the battery terminal if equipped wit a 12
volt starting system.
2. DO keep cylinder ns and governor parts free of
grass and other debris which can affect engine
speed.
11. DO NOT tamper with governor springs, governor links or other parts which may increase the
governed speed.
12. DO NOT tamper with the engine speed selected
by the original equipment manufacturer.
13. DO NOT check for spark with spark plug or spark
plug wire removed.
8
3. DO examine mufer periodically to be sure it is
functioning effectively. A worn or leaking mufer
should be repaired or replaced as necessary.
4. DO use fresh gasoline. Stale fuel can gum carburetor and cause leakage.
5. DO check fuel lines and ttings frequently for
cracks or leaks. Replace if necessary.
Page 14

2.12 SIGN-OFF FORM
Wallenstein follows the general Safety Standards specied by the American Society of Agricultural and
Biological Engineers (ASABE) and the Occupational Safety and Health Administration (OSHA). Anyone who
will be using and/or maintaining the Portable Generator must read and clearly understand ALL Safety, Usage
and Maintenance information presented in this manual.
Do not use or allow anyone else to use this generator until such information has been reviewed. Annually
review this information before the season start-up.
Make these periodic reviews of SAFETY and OPERATION a standard practice for all of your equipment. We
feel that an untrained operator is unqualied to use this machine.
A sign-off sheet is provided for your record keeping to show that all personnel who will be working with the
equipment have read and understand the information in the Operator’s Manual and have been instructed in
the operation of the equipment.
SIGN-OFF FORM
DATE
EMPLOYEES SIGNATURE EMPLOYERS SIGNATURE
9
Page 15

3 SAFETY SIGN LOCATIONS
The types of safety signs and locations on the equipment are shown in the illustrations that follow. Good
safety requires that you familiarize yourself with the various safety signs, the type of warning and the
area, or particular function related to that area, that requires your SAFETY AWARENESS.
• Think SAFETY! Work SAFELY!
A
• Read and understand operator's manual
before starting. Review safety instructions annually.
• Stop and disable engine, remove ignition
key and place in your pocket and wait for all moving parts
to stop before servicing, adjusting or repairing.
• To prevent electrical shocks, do not operate this generator in the rain or with wet hands. It should be grounded
in damp or highly conductive conditions.
• Close and secure all guards, deectors and shields
before starting and operating.
• Do not connect the generator to a commercial power
line.
• Do not operate with damaged or defective extension
cords, or power cords. Never operate any electrical
equipment with damaged or defective cords.
• Do not operate this generator in areas with poor ventilation. The exhaust fumes contain carbon monoxide, a
poisonous, odorless, invisible gas. Prolonged exposure
can lead to unconsciousness and death.
• Do not refuel the engine while it is in operation or still hot.
Donotrefueltheenginenearopenames,pilotlightsor
sparking electrical devices (e.g. power tools, welders or
grinders).Donotoperatethegeneratornearammable
products.
• The engine should be refuelled in a well-lit area. Avoid
fuel spillage.
• Never allow children or unauthorized people to operate
or be around this machine.
• Keep the working area clean and free of debris to prevent
tripping. Operate only on level ground.
• Do not cover the generator while in operation. Overheating can result in damaged equipment.
• For storage, do not cover the generator until it has cooled
down completely.
• The ambient temperature should not exceed 100° F/40° C.
B
Z94073
Z94074
REMEMBER - If safety signs have been damaged, removed, become illegible or parts replaced without
safety signs, new signs must be applied. New safety signs are available from your authorized dealer.
10
Page 16

The types of safety signs and locations on the equipment are shown in the illustrations that follow. Good
safety requires that you familiarize yourself with the various safety signs, the type of warning and the
area, or particular function related to that area, that requires your SAFETY AWARENESS.
• Think SAFETY! Work SAFELY!
B
A
A
EU5000E EU6000
B
A
B
REMEMBER - If safety signs have been damaged, removed, become illegible or parts replaced without
safety signs, new signs must be applied. New safety signs are available from your authorized dealer.
EU7200E
11
Page 17

4 ASSEMBLING
The m a chine c om es f r o m the factor y
in a shipping c arton and configuration.
Always use tools equipment and forklifts of
appropriate size and capacity for the job.
Always use 2 men when lifting, moving and
assembling the machine.
W h e n t h e m a c h i n e i s s h i p p e d ,
follow this procedure when preparing for the
customer:
1. Clear the area of bystanders especially
small children before starting.
2. Move the machine to the assembly area. Be
sure there is sufcient clearance to access
the machine from all sides.
3. Open the carton.
Fig. 1 TYPICAL
4. Use a hoist or a crane to lift the unit out of
its carton.
12
Open
Out
Fig. 2 UNPACKING
Page 18

5. Install battery:
a. Remove cables, clamps and brackets
from their shipping position.
b. Bring a battery to the machine.
c. Lay out components.
d. Position battery in its tray.
Shipping
Lay-Out
e. Install the anchor posts and top brack-
ets. Snug up tightly.
f. Attach cables to battery posts and
tighten to their specied torque.
Battery
Posts & Bracket
Cables
Fig. 3 BATTERY (Typical)
13
Page 19

5 OPERATION
OPERATING SAFETY
• Read and understand operator's manual before
starting. Review safety instructions annually.
• Stop and disable engine, remove ignition key
and place in your pocket and wait for all moving parts to stop before servicing, adjusting or
repairing.
• To prevent electrical shocks, do not operate
this generator in the rain or with wet hands. It
should be grounded in damp or highly conductive conditions.
• Close and secure all guards, deectors and
shields before starting and operating.
• Do not connect the generator to a commercial
power line.
• Do not operate with damaged or defective
extension cords, or power cords. Never operate any electrical equipment with damaged or
defective cords.
• Do not operate this generator in areas with poor
ventilation. The exhaust fumes contain carbon
monoxide, a poisonous, odorless, invisible gas.
Prolonged exposure can lead to unconsciousness and death.
• Do not refuel the engine while it is in operation or still hot. Do not refuel the engine near
open ames, pilot lights or sparking electrical
devices (e.g. power tools, welders or grinders).
Do not operate the generator near ammable
products.
• The engine should be refuelled in a well-lit area.
Avoid fuel spillage.
• Never allow children or unauthorized people
to operate or be around this machine.
• Keep the working area clean and free of debris to prevent tripping. Operate only on level
ground.
• Do not cover the generator while in operation.
Overheating can result in damaged equipment.
• For storage, do not cover the generator until it
has cooled down completely.
• The ambient temperature should not exceed
100° F/40° C.
5.1 TO THE NEW OPERATOR OR OWNER
The Wallenstein Portable Generators are designed to provide portable electrical power to
equipment that is not connected to the electrical
grid system.
It is the responsibility of the owner or operator to read this manual and to train all other
operators before they start working with the
machine. Follow all safety instructions exactly. Safety is everyone's business. By following recommended procedures, a safe working
environment is provided for the operator,
bystanders and the area around the work site.
Untrainedoperatorsarenotqualiedtouse
the machine.
14
Follow all safety instructions exactly. Safety
is everyone's business. By following recommended procedures, a safe working environment is provided for the operator, bystanders
and the area around the work site. Untrained
operatorsarenotqualiedtooperatethe
machine.
Many features incorporated into this machine are
the result of suggestions made by customers like
you. Read this manual carefully to learn how
to use the Generator safely and how to set it to
provide maximum eld efciency. By following
the using instructions in conjunction with a good
maintenance program, your Portable Generator
will provide many years of trouble-free service.
Page 20

5.2 MACHINE COMPONENTS
The Wallenstein EU Portable Generator consists of a 9,
11 or 13 hp Honda engine driving a 12,000 watt electrical
generator. All control and power outlets are
m o u n t ed on th e e n d o f t h e f r a m e f or
convenient access and operation.
A Engine
B Fuel Tank
C Battery
D Control Panel
E Pull Start
F 120 V Outlets
G 240 V Outlets
H Circuit Breaker
J Generator
K Ignition Switch
The unit is designed to provide 120 V or 240 V 60 Hz
power as a back up power supply at a remote location.
Each outlet is designed with a circuit breaker to protect
against overload. The generator is neutral bonded to
the frame. The battery and fuel tank are mounted in
the frame for convenient access.
B
D
K
H
G
F
F
A
J
B
E
C
Fig. 4 PRINCIPLE COMPONENTS
A
J
15
Page 21

5.3 MACHINE BREAK-IN
5.4 PRE-OPERATION CHECKLIST
Although there are no operational restrictions on the
Portable Generator when used for the rst time, it is
recommended that the following mechanical items
be checked:
A. After operating for 1 hour:
1. Re-torque all fasteners and hardware.
2. Check condition of all electrical connections.
3. Check uid levels. Top up as required.
B. After operating for 10 hours:
1. Repeat steps 1 through 3 listed above.
(Section A)
2. Change engine oil.
3. Go to the normal servicing and maintenance schedule as dened in the Maintenance Section.
Efcient and safe operation of the Wallenstein Portable Generator requires that each operator reads
and understands the using procedures and all
related safety precautions outlined in this section.
A pre-operation checklist is provided for the operator. It is important for both the personal safety and
maintaining good mechanical condition that this
checklist is followed.
Before operating Portable Generator and each time
thereafter, the following areas should be checked
off:
1. Check engine uid levels. Top up as required.
2. Check all electrical connections. Replace, repair or clean as required.
3. Make sure that all guards and shields are in
place, secured and functioning as designed.
16
Page 22

5.5 CONTROLS
Before starting to work, all operators should familiarize themselves with the location and function of controls.
1. Engine:
Read the engine manufacturers operator's
manual before starting for more detailed
instructions.
a. Ignition Switch:
This key operated switch controls the
electric power to the engine.
OFF Turn key fully counter-clockwise
to stop the electrical system power
and turn the engine off.
RUN Turn clockwise on detent to the run
position. This is the position
where the engine will continue to
run.
a
b
EU5000E
START Turn fully clockwise to the last
spring-loaded detent position to
engage the starter solenoid and
start the engine. Release the key
when the engine starts and it will
return to the RUN position.
b. Choke:
This push/pull knob controls the position
of the choke. Pull the knob out to close
the choke for starting when the engine
is cold. Push the knob in to open the
choke as the engine warms. Always
push the knob fully in when operating the
machine.
c. Fuel Shut-Off Valve:
This valve controls the ow of fuel to the
engine. Turn the valve at right angles to
the fuel line to turn the fuel off and parallel
to turn the fuel on.
d. Starting Rope:
This retracting rope and T-bar is used to
turn the engine over for starting. Grasp
the T-bar rmly and pull the rope sharply
to start the engine.
a
b
EU7200E
c
d
EU6000
Fig. 5 ENGINE (typical)
17
Page 23

2. Electrical Controls:
a. 120 Volt, 20 Amp Outlets: This outlet is
used to provide 120 Volt, 20 Amp power to
the customer.
b. 120 Volt, 30 Amp Outlets: These outlets
are used to provide 120 Volt, 30 Amp power
to the customer.
c. 240 Volt Outlet: This outlet is used to
provide 240 Volt power to the customer
(EU5000/E - 240 V, 20 A, EU6000/E - 240
V, 25 A, EU7200E - 240 V, 30 A).
d. 120 Volt Circuit Breakers: These push
switches are used to reset the circuit breakers to the adjacent 120 Volt outlets. Push the
switch to reset the breaker if it is tripped.
IMPORTANT
A circuit breaker that trips
repeatedly may indicate a
problem.
e
c
Electric Start
c
e
b
a
b
a
d
a
a
d
e. Master Breaker: This two position switch
controls the master breaker for the generator. Move the switch up to engage the
breaker before starting or when the breaker
trips and down to disengage the breaker.
Manual Start
Fig. 6 ELECTRICAL CONTROLS
18
Page 24

5.6 FIELD OPERATION
OPERATING SAFETY
• Read and understand operator's manual before
starting. Review safety instructions annually.
• Stop and disable engine, remove ignition key
and place in your pocket and wait for all moving parts to stop before servicing, adjusting or
repairing.
• To prevent electrical shocks, do not operate
this generator in the rain or with wet hands. It
should be grounded in damp or highly conductive conditions.
• Close and secure all guards, deectors and
shields before starting and operating.
• Do not connect the generator to a commercial
power line.
• Do not operate with damaged or defective
extension cords, or power cords. Never operate any electrical equipment with damaged or
defective cords.
• Do not operate this generator in areas with poor
ventilation. The exhaust fumes contain carbon
monoxide, a poisonous, odorless, invisible gas.
Prolonged exposure can lead to unconsciousness and death.
• Do not refuel the engine while it is in operation or still hot. Do not refuel the engine near
open ames, pilot lights or sparking electrical
devices (e.g. power tools, welders or grinders).
Do not operate the generator near ammable
products.
• The engine should be refuelled in a well-lit area.
Avoid fuel spillage.
• Never allow children or unauthorized people
to operate or be around this machine.
• Keep the working area clean and free of debris to prevent tripping. Operate only on level
ground.
• Do not cover the generator while in operation.
Overheating can result in damaged equipment.
• For storage, do not cover the generator until it
has cooled down completely.
• The ambient temperature should not exceed
100° F/40° C.
Although the Portable Generator is easy to use, each
operator should review this section to familiarize
himself with the detailed safety and operating
procedures. When using this machine, follow this
procedure:
1. Clear the area of bystanders, especially small
children.
2. Review and follow the Pre-Operation Checklist
(see Section 5.4).
3. Position the generator in the following manner:
a. Level to minimize the chance of spilling
fuel.
b. In a dry area to prevent shocks and
shorts.
c. Away from all flammable liquids and
fumes.
d. With a ground to minimize the chance of
shocks and shorts.
19
Page 25

4. Starting the Generator:
a. Plug in power cords from appliances
or loads.
b. Turn all the appliances or electrical
loads off.
c. Refer to engine manual for detailed
engine starting procedure.
d. Use the ignition key to engage the
starter.
e. Pull out the choke if the engine is cold
or hasn't been run for awhile.
f. Run the engine until it warms and the
choke is completely closed.
g. Turn the appliance on or plug in the
electrical load.
5. Stopping:
a. Turn the appliance off or unplug the
electrical load.
Manual Start
b. Run the engine for approximately three
minutes to allow the engine to cool.
c. Turn engine off.
6. Emergency Stopping:
Turn the engine off if an emergency arises.
Correct the condition before resuming
work and re-starting the engine.
7. Terrain:
The generator works well in a wide variety
of operating conditions but it should always
be positioned on the level. When the frame
is level, fuel spillage is minimized and the
gas tank capacity is maximized. Do not
operate unless the frame is level.
Electric Start
Engine (Typical)
Fig. 7 STARTING/STOPPING
20
Page 26

8. Weather:
a. Do not operate in the rain or with wet hands.
Keep the generator and work area dry to
prevent shocks and shorts. Always ground
the frame when operating in damp or wet
conditions.
b. Do not operate at temperatures above
100° F (40° C) to prevent overheating of
the engine or generator. Always run for
approximately three minutes without an
electrical load to cool the components before shutdown.
9. Electrical Loads:
The generator is ideally suited to camping, boat-
ing, farm, household, workshop, construction
site or anywhere that back-up power is required.
In order to determine the power requirements
of your appliance, refer to Table 1. There are
approximations only. If the power draw for the
appliance exceeds the outlet capacity, the circuit breaker will be tripped. Reduce the current
draw and reset the breaker before resuming
operation.
Generator Usage Start Watts Running Watts EU5000 to
EU7200E
Refrigerator, Freezer 2500 700 Y
Toaster 1050 Y
Microwave 950 Y
Coffee Maker 1500 850 Y
Washing Machine 2000 750 Y
Furnace Fan 1400 700 Y
Sump Pump 2500 600 Y
TV 350 Y
Circular Saw 1500 750 Y
Drill 1000 250 Y
Sander 1000 375 Y
Y=WILL OPERATE
PLEASE NOTE THAT THIS TABLE REPRESENTS A SAMPLE OF APPLICATIONS ONLY
Fig. 8 TABLE 1
10. Electrical Component Condition:
Always use electrical components that are in
good condition. Do not use electrical cords,
plugs and connectors that are frayed, damaged,
cracked or not in good condition. Electrical
components that are not in good condition can
lead to shocks, shorts or sparking. Any of these
conditions can create and lead to an undesirable or unsafe situation.
21
Page 27

11. Electrical Hazards:
The generator is designed to generate an
electrical current at a high enough power
level to get meaningful work done. However, power at these levels also includes
the possibility of electrical hazards. Some
things to remember about electrical hazards include but are not limited to:
a. Keep all electrical components in good
condition.
b. Do not operate with frayed, cracked or
damaged parts.
c. Ground the frame if operating in damp
or wet conditions.
d. Do not operate with wet hands.
12. Circuit Breakers:
Each set of outlets on the electrical panel
is designed with a circuit breaker to prevent overloading the circuit. If a breaker
trips, reduce the load before re-setting the
breaker.
a. 120 Volt.
b. 240 Volt.
IMPORTANT
A circuit breaker that trips
repeatedly may indicate a
problem.
Manual Start
Electric Start
Fig. 9 CONTROL PANEL
22
Page 28

13. Operating Hints:
a. Position frame on a level area to
minimize the chance of spilling fuel and
maximize the fuel capacity of the tank.
Spilled fuel can be ignited by a spark
from the electrical power system.
b. Do not refuel while the engine is running.
Wait until the unit has cooled before refuelling.
c. Keep the working area neat and clean
to prevent slipping and tripping. Prevent
accidents at the work site.
d. Always ground the frame to minimize the
chance of sparks, shocks or shorts. This
is very important in damp, wet or rainy
conditions.
e. Position the generator under cover to
protect it from rain or bad weather.
f. Do not operate when the ambient temper-
ature exceeds 100° F (39° C) to prevent
overheating.
Manual Start
g. Do not cover the unit during operation to
prevent overheating.
Electric Start
Engine (Typical)
Fig. 10 GENERATORS
23
Page 29

5.7 MOVING
The generator is designed to be easily moved
from one location to another. Review the following details on how the unit can be moved:
1. Frame Handles:
The frame is designed with 2 frame handles
that provide a location to attach to the frame
for moving with an A frame, forklift, crane or
other lifting system.
2. Wheel Kit:
A wheel kit is available to move the genera-
tor. Place the frame into the wheel kit and
move to the new location.
Fig. 11 FRAME HANDLES
3. Transporting:
When transporting from location to location,
follow this procedure:
a. Run the engine (use the generator)
until the fuel tank is empty or nearly
empty.
b. Turn the fuel line off.
24
Fig. 12 WHEEL UNIT
Fig. 13 FUEL VALVE (Typical)
Page 30

5.8 STORAGE
5.8.2 REMOVING FROM STORAGE
OPERATING SAFETY
• Store the unit in an area away from human
activity.
• Do not permit children to play on or around
the stored machine.
• Store the unit in a dry, level area. Support the
frame with planks if required.
5.8.1 PLACING IN STORAGE
After the season's use or when the machine will not
be used for a period of time, completely inspect all
major systems of the Portable Generator. Replace
or repair any worn or damaged components to prevent any unnecessary down time at the beginning
of the next season.
Follow this procedure before storing:
1. Remove all plugs or electrical loads from the
electrical panel.
When removing this machine from storage, follow
this procedure:
1. Remove the tarpaulin if covered.
2. Install and connect the battery.
3. Bring the ignition key.
4. Review and follow the pre-operation checklist.
IMPORTANT
If the machine has been stored for more
than 6 months, warm the engine by
running it for 2-3 minutes and drain the
oil. Change the oil while the oil is warm
to remove any condensation. Refer to
Maintenance section.
2. Thoroughly clean the machine with a damp cloth
to remove all dirt, mud or debris.
3. Inspect all rotating parts for entangled material.
Remove all entangled material.
4. Turn fuel valve off.
5. Touch up all paint nicks and scratches to prevent
rusting.
6. Remove ignition key and store in a secure
place.
7. Remove the battery and store it in a cool, dry
area on wooden blocks or a wooden pallet.
Charge it monthly to maintain an adequate
charge.
8. It is best to store the machine inside. If that is
not possible, cover with a waterproof tarpaulin
and tie down securely.
9. Store in an area away from human activity.
Fig. 14 STORED (Typical)
10. Do not allow children to play around the stored
unit.
25
Page 31

6 SERVICE AND MAINTENANCE
MAINTENANCE SAFETY
6.1 SERVICE
6.1.1 FLUIDS AND LUBRICANTS
• Good maintenance is your responsibility.
Poor maintenance is an invitation to trouble.
• Follow good shop practices.
- Keep service area clean and dry.
- Be sure electrical outlets and tools are
properly grounded.
- Use adequate light for the job at hand.
• Make sure there is plenty of ventilation. Never operate the engine of the towing vehicle in
a closed building. The exhaust fumes may
cause asphyxiation.
• Before working on this machine, shut off the
engine, set the brake, and turn fuel valve
off.
• Never work under equipment unless it is
blocked securely.
• Always use personal protection devices
such as eye, hand and hearing protectors,
when performing any service or maintenance work. Use heavy gloves when
handling sharp components.
• Where replacement parts are necessary
for periodic maintenance and servicing,
genuine factory replacement parts must be
used to restore your equipment to original
specications. The manufacturer will not be
responsible for injuries or damages caused
by use of unapproved parts and/or accessories.
• A re extinguisher and rst aid kit should
be kept readily accessible while performing
maintenance on this equipment.
1. Grease:
Use an SAE multipurpose high temperature
grease with extreme pressure (EP) performance.
Also acceptable is an SAE multipurpose lithium
base grease.
2. Engine Oil:
Use an SAE 10W30 or 10W40 multi-viscosity oil
meeting the American Petroleum Institute (API)
classication of SF, SG, SH or SJ for normal
operating temperatures. Consult the engine
manual for unusual operating conditions. Do
not mix oil types or viscosities.
Crankcase Capacity:
9 hp - 0.8 L (.85 US qt)
11 hp - 1.0 L (1.05 US qt)
13 hp - 1.1 L (1.2 US qt)
3. Engine Gasoline:
Use a standard automotive super unleaded
gasoline for all operating conditions.
Fuel Tank Capacity:
21 L (5.5 US Gal) for all EU Series generators.
4. Storing Lubricants:
Your machine can operate at top efciency only
if clean lubricants are used. Use clean containers to handle all lubricants. Store them in an
area protected from dust, moisture and other
contaminants.
6.1.1 FLUIDS AND LUBRICANTS
Use the Maintenance Checklist provided to keep a
record of all scheduled maintenance.
1. Use a hand-held grease gun for all greasing.
• Periodically tighten all bolts, nuts and
screws and check that all electrical and fuel
connections are properly secured to ensure
unit is in a safe condition.
• When completing a maintenance or service
function, make sure all safety shields and devices are installed before placing unit in service.
26
2. Wipe grease tting with a clean cloth before
greasing, to avoid injecting dirt and grit.
3. Replace and repair broken ttings immediately.
4. If ttings will not take grease, remove and clean
thoroughly. Also clean lubricant passageway.
Replace ttings if necessary.
Page 32

6.1.2 SERVICING INTERVALS
The period recommended is based on normal
operating conditions. Severe or unusual conditions may require more frequent lubrication or
oil changes.
8 Hours or Daily
b
1. Check engine uids levels.
a. Oil level.
b. Fuel level.
a
EU5000E
b
a
EU6000
EU7200E
Fig. 15 DIP STICK (Typical)
a
27
Page 33

40 Hours or Weekly
1. Clean engine air cleaner.
EU6000
EU7200E
Fig. 16 AIR CLEANER (Typical)
100 Hours or Monthly
1. Change engine oil.
a. Drain plug.
b. Fill plug.
b
a
EU5000E
b
a
EU6000
28
b
a
EU7200E
Fig. 17 ENGINE
Page 34

100 Hours or Monthly
2. Replace engine air cleaner.
EU6000
Annually
1. Clean machine.
EU7200E
Fig. 18 AIR CLEANER (Typical)
EU6000
Fig. 19 MACHINE
EU7200E
29
Page 35

6.1.3 SERVICE RECORD
See Lubrication and Maintenance sections for details of service. Copy this page to continue record.
ACTION CODE CK CHECK CL CLEAN R REPLACE
CH CHANGE
HOURS
SERVICED
BY
MAINTENANCE
8 Hours or Daily
CK Engine Fluid Levels
40 Hours or Weekly
CL Air Cleaner
100 Hours or Monthly
CH Engine Oil
R Air Cleaner
Annually
CL Machine
30
Page 36

6.2 MAINTENANCE
By following a careful service and maintenance
program for your machine, you will enjoy many
years or trouble-free operation.
6.2.1 CLEANING AIR CLEANER
1. Review the Operator's Manual for the engine.
2. Place all controls in neutral, stop engine
and remove ignition key and place in pocket before maintaining.
3. Remove the cover over the air cleaner.
4. Remove the lter from the engine.
5. Use an air house to blow the dust and de-
bris out of the lter.
6. Install lter.
7. Install and secure the cover.
EU6000
EU7200E
Fig. 20 AIR CLEANER (Typical)
31
Page 37

6.2.2 CHANGING ENGINE OIL
1. Review the Operator's Manual for the engine.
2. Place all controls in neutral, stop engine
and remove ignition key and place in pocket before maintaining.
b
3. Allow the engine to cool before changing
the oil. Hot oil can cause burns if it contacts exposed skin. It is best to change
oil while the engine is warm to keep the
contaminants in suspension.
4. Place a pan under the drain plug.
5. Remove the drain plug and allow the oil to
drain for 10 minutes.
6. Install and tighten the drain plug.
7. Dispose of the used oil in an approved
container.
8. Fill the crankcase with the specied oil.
a. Drain Plug.
b. Fill Plug.
9. Run the engine for 1-2 minutes and check
for oil leaks.
a
EU5000E
b
a
EU6000
10. If leaks are found around the drain plug or
lter, tighten slightly. Repeat step 9.
11. Check engine oil level. Top up as required.
b
a
EU7200E
Fig. 21 ENGINE
32
Page 38

7 TROUBLE SHOOTING
The Wallenstein Portable Generator is designed to generate up to 10,000 continuous watts of power at
any type of remote location. It is a simple and reliable system that requires minimal maintenance.
In the following section, we have listed many of the problems, causes and solutions to the problems that
you may encounter.
If you encounter a problem that is difcult to solve, even after having read through this trouble shooting
section, please call your local distributor or dealer. Before you call, please have this Operator's Manual
from your unit and serial number ready.
PROBLEM CAUSE SOLUTION
Engine doesn't start. No fuel. Fill fuel tank.
Fuel lter plugged. Replace fuel lter.
Weak battery. Recharge or replace battery.
Loaded electrically. Remove electric load.
Breakers tripping. Electrical load too high. Reduce electrical load.
33
Page 39

8 SPECIFICATIONS
8.1 MECHANICAL
SPECIFICATIONS SUBJECT TO CHANGE WITHOUT NOTICE
34
Page 40

8.2 BOLT TORQUE
CHECKING BOLT TORQUE
The tables shown below give correct torque values for various bolts and capscrews. Tighten all bolts to
the torques specied in chart unless otherwise noted. Check tightness of bolts periodically, using bolt
torque chart as a guide. Replace hardware with the same strength bolt.
ENGLISH TORQUE SPECIFICATIONS
Bolt
Bolt Torque*
Diameter
"A"
1/4"
5/16"
3/8"
7/16"
1/2"
9/16"
5/8"
3/4"
7/8"
1"
METRIC TORQUE SPECIFICATIONS
SAE 2
(N.m) (lb-ft)
8
13
27
41
61
95
128
225
230
345
6
10
20
30
45
60
95
165
170
225
SAE 5
(N.m) (lb-ft)
12
25
45
72
110
155
215
390
570
850
Bolt Torque*
Bolt
Diameter
"A"
8.8
(N.m) (lb-ft)
(N.m) (lb-ft)
9
19
33
53
80
115
160
290
420
630
10.9
SAE 8
(N.m) (lb-ft)
17
36
63
100
155
220
305
540
880
1320
12
27
45
75
115
165
220
400
650
970
M3
M4
M5
M6
M8
M10
M12
M14
M16
M20
M24
M30
M36
Torque gures indicated above are valid for non-greased or non-oiled threads and heads unless otherwise specied. Therefore, do not grease or oil bolts or capscrews unless otherwise specied in this
manual. When using locking elements, increase torque values by 5%.
* Torque value for bolts and capscrews are identied by their head markings.
.5
3
6
10
25
50
90
140
225
435
750
1495
2600
.4
2.2
4
7
18
37
66
103
166
321
553
1103
1917
1.8
4.5
9
15
35
70
125
200
310
610
1050
2100
3675
1.3
3.3
7
11
26
52
92
148
229
450
774
1550
2710
35
Page 41

9 INDEX
A
PAGE
Assembly .......................................................12
I
Index ..............................................................36
Introduction ......................................................1
O
Operation .......................................................14
Controls ....................................................17
Field Operation .........................................19
Machine Break-In .....................................16
Machine Components...............................15
Pre-Operation Checklist ...........................16
Moving ......................................................24
Storage .....................................................25
To the New Operator or Owner .................14
S
Safety ..............................................................2
Battery Safety .............................................7
Equipment Safety Guidelines .....................4
Gas Motor Safety........................................8
General Safety ...........................................3
Maintenance Safety ....................................6
Operating Safety.........................................7
Preparation .................................................6
Refuelling Safety ........................................7
Safety Signs ...............................................5
Safety Training............................................5
Sign-Off Form .............................................9
Storage Safety ............................................7
Safety Sign Locations ....................................10
Service and Maintenance ..............................26
Maintenance .............................................31
Service......................................................26
Specications ................................................34
Bolt Torque ...............................................35
Mechanical ...............................................34
T
Trouble Shooting ...........................................33
PAGE
36
Page 42

WALLENSTEIN
4144 BOOMER LINE
ST. CLEMENTS, ON
N0B 2M0 CANADA
PH: (519) 699-9283
FAX: (519) 699-4146
PRINTED IN CANADA
FEBRUARY 2009 PART NUMBER: Z97035
 Loading...