

Page 1
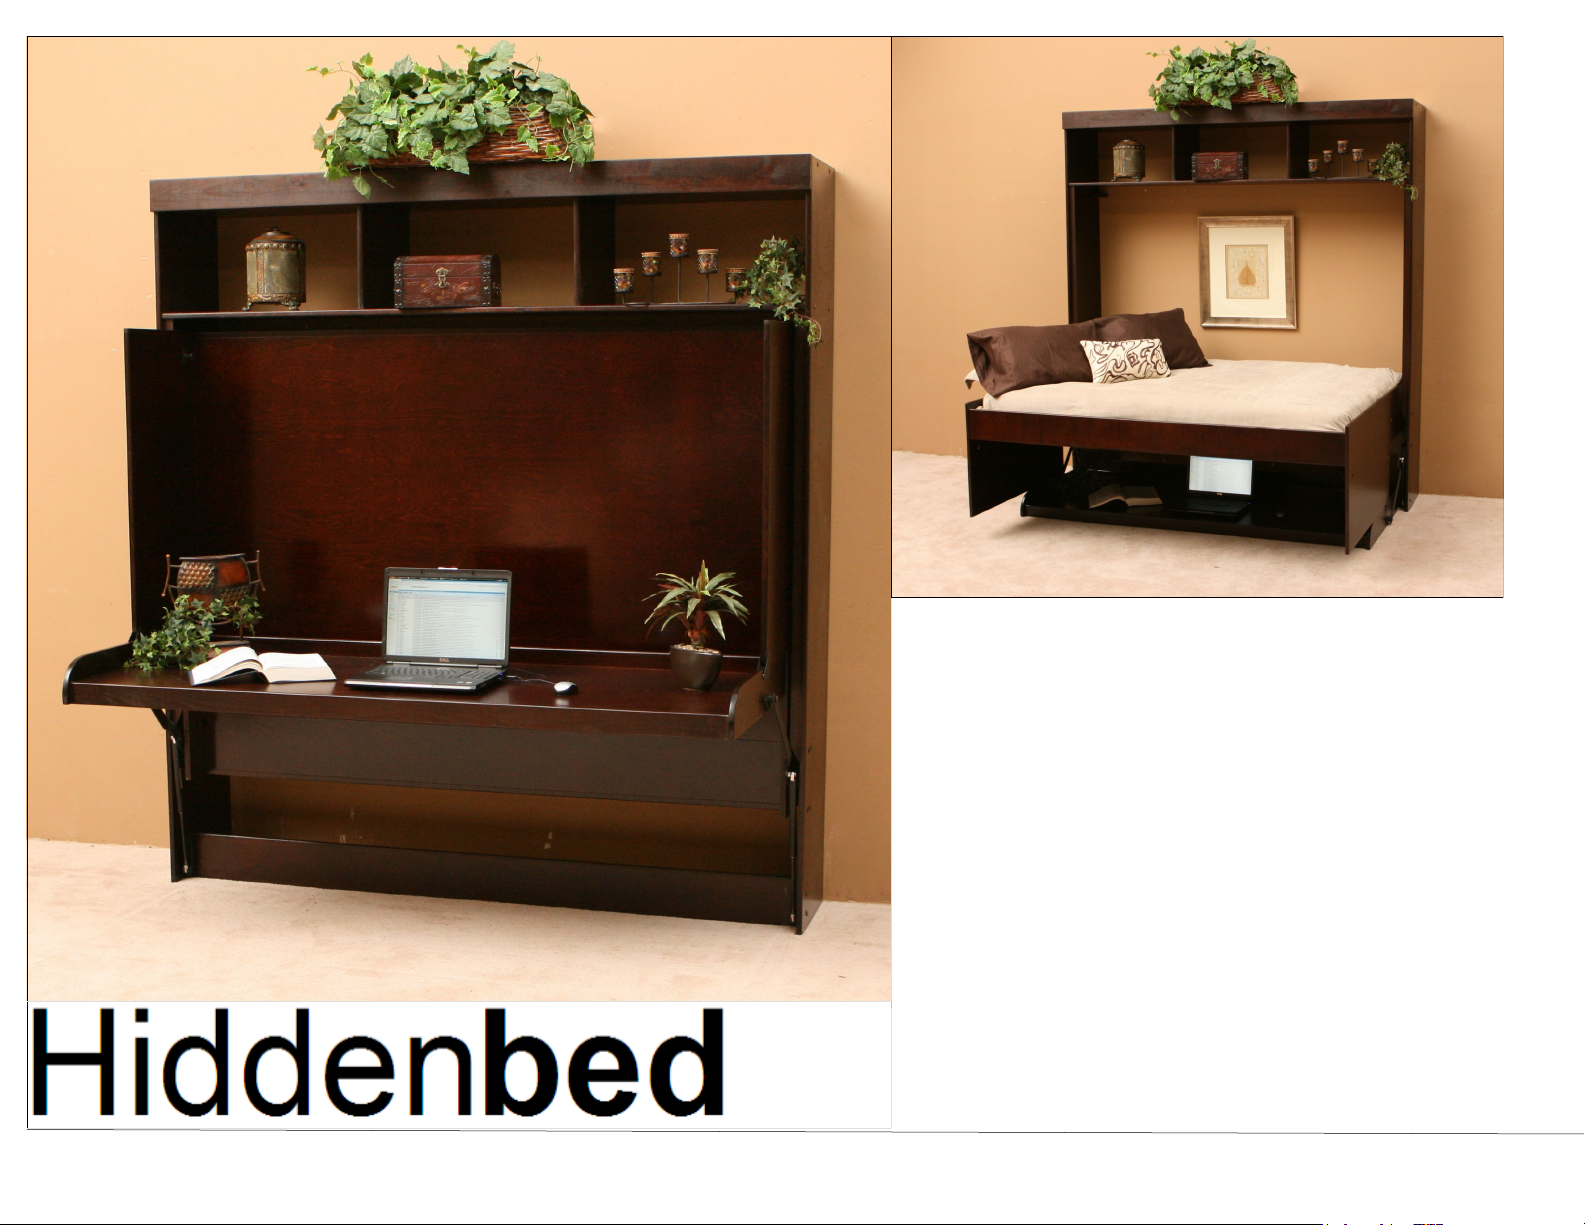
Models
CW and AW
Installation
Instructions
Please keep these instructions for future reference.
Hiddenbed must be dis-assembled before moving.
Page 2
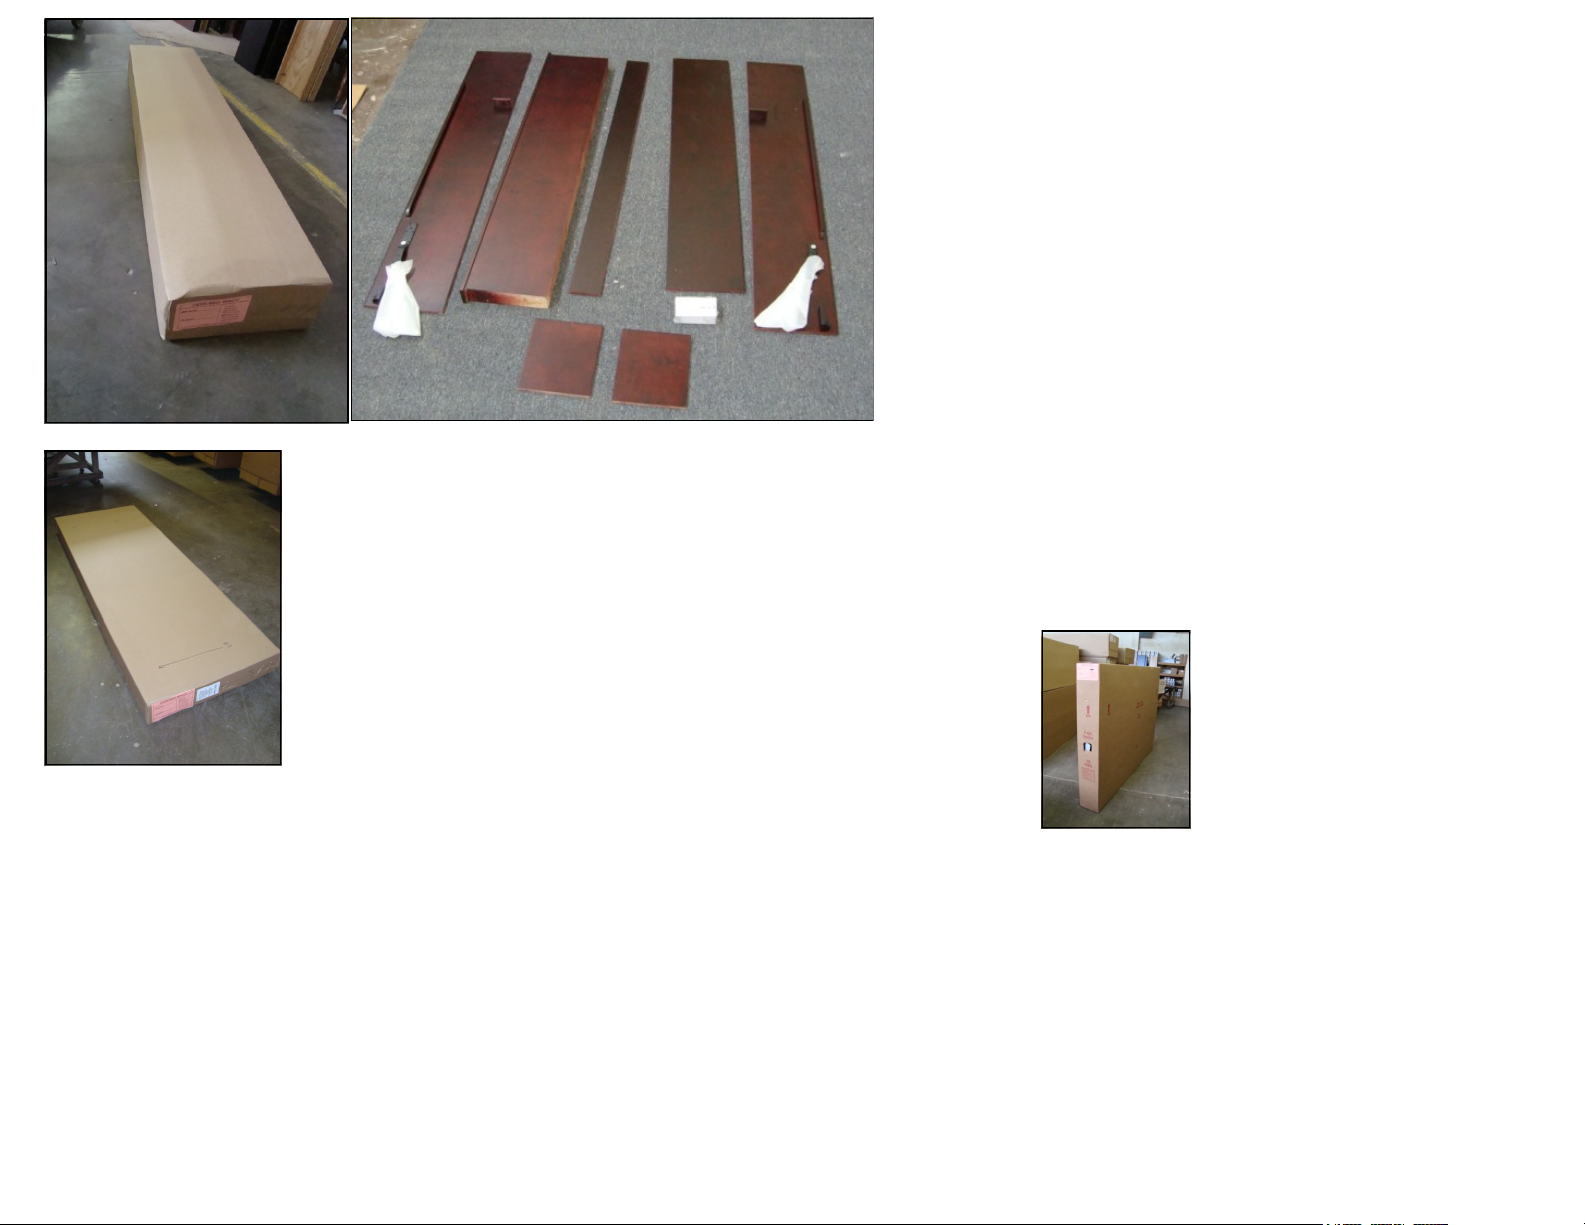
MODELS AW and CW HIDDENBED COMPONENTS
Take Inventory
Page 3
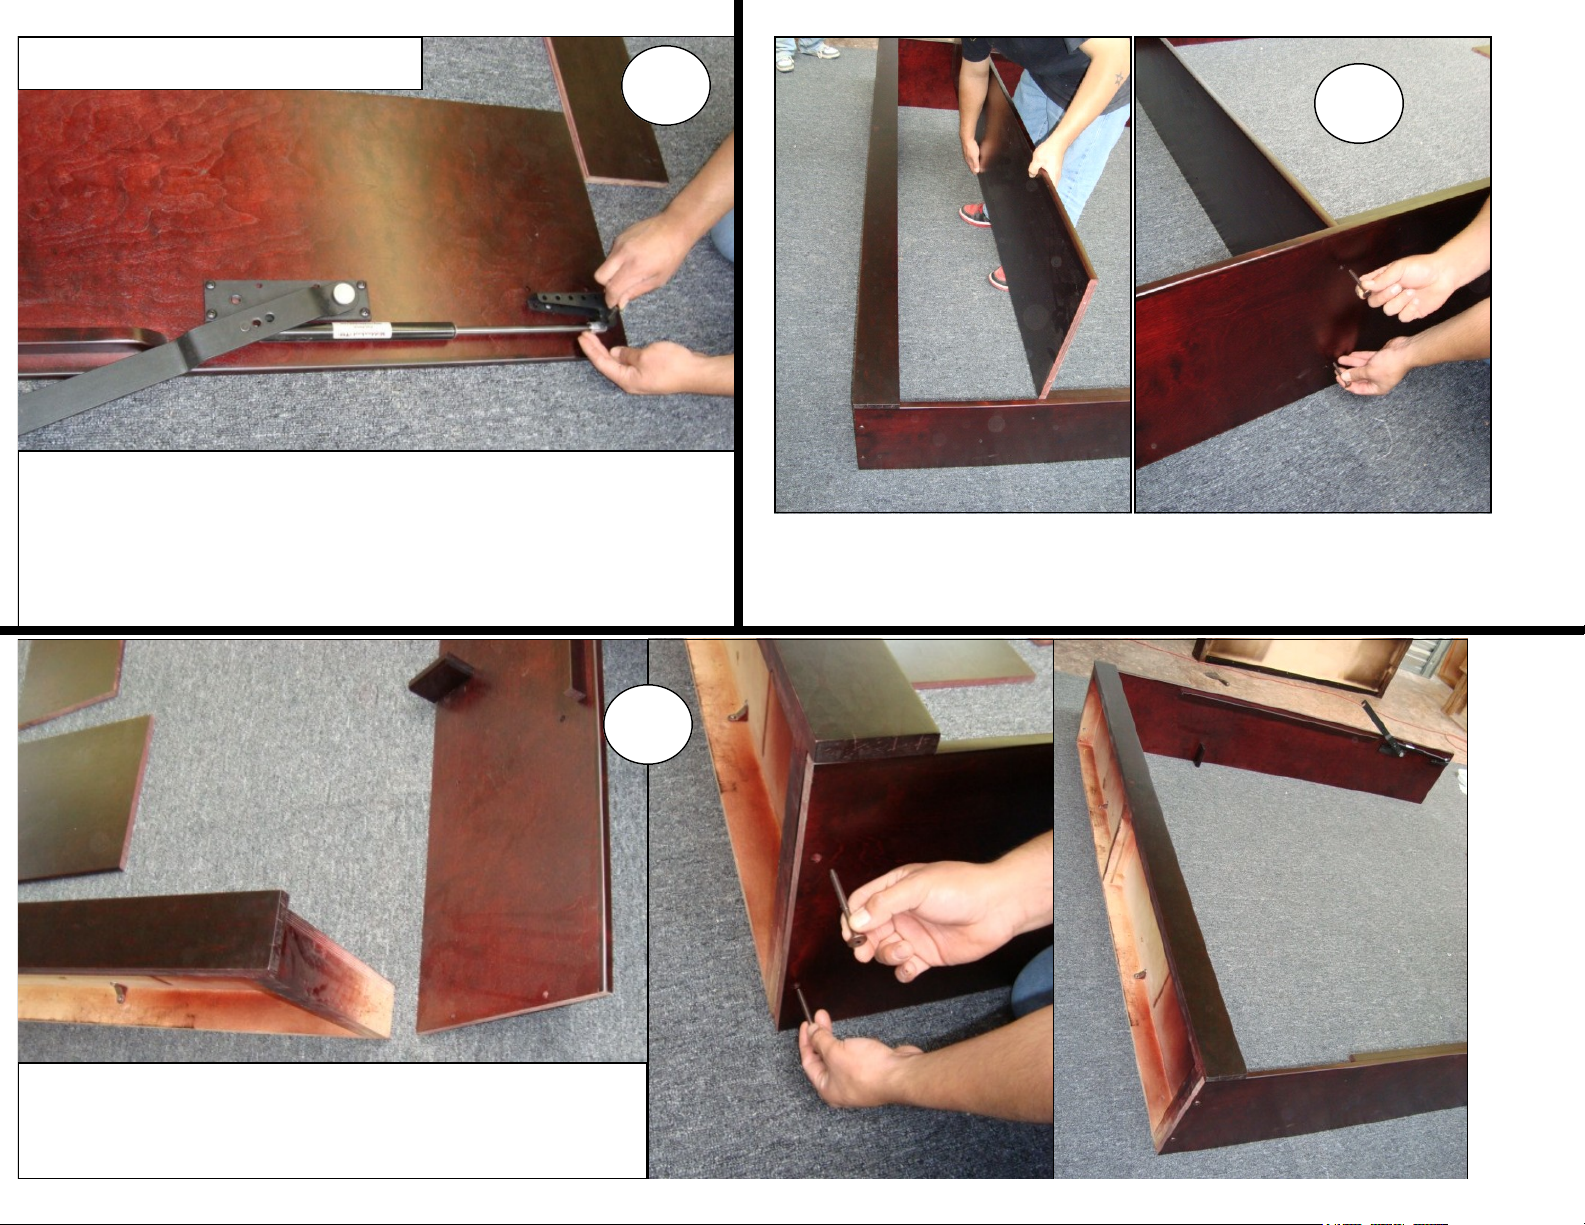
CABINET ASSEMBLY
1
Set up lever arm assembly on side panels by cutting
ties, rotating arm to the upper position and connecting
loose end of piston to bracket at bottom of leg with cotter
pin and key provided. Secure the cotter pin by bending
ends.
3
Attach Hutch Shelf with Lag Bolts
keeping finished edges to front.
2
Assemble cabinet sides to crown assembly with
machine bolts & top panel (finished edges to
front) with lag bolts.
Page 4
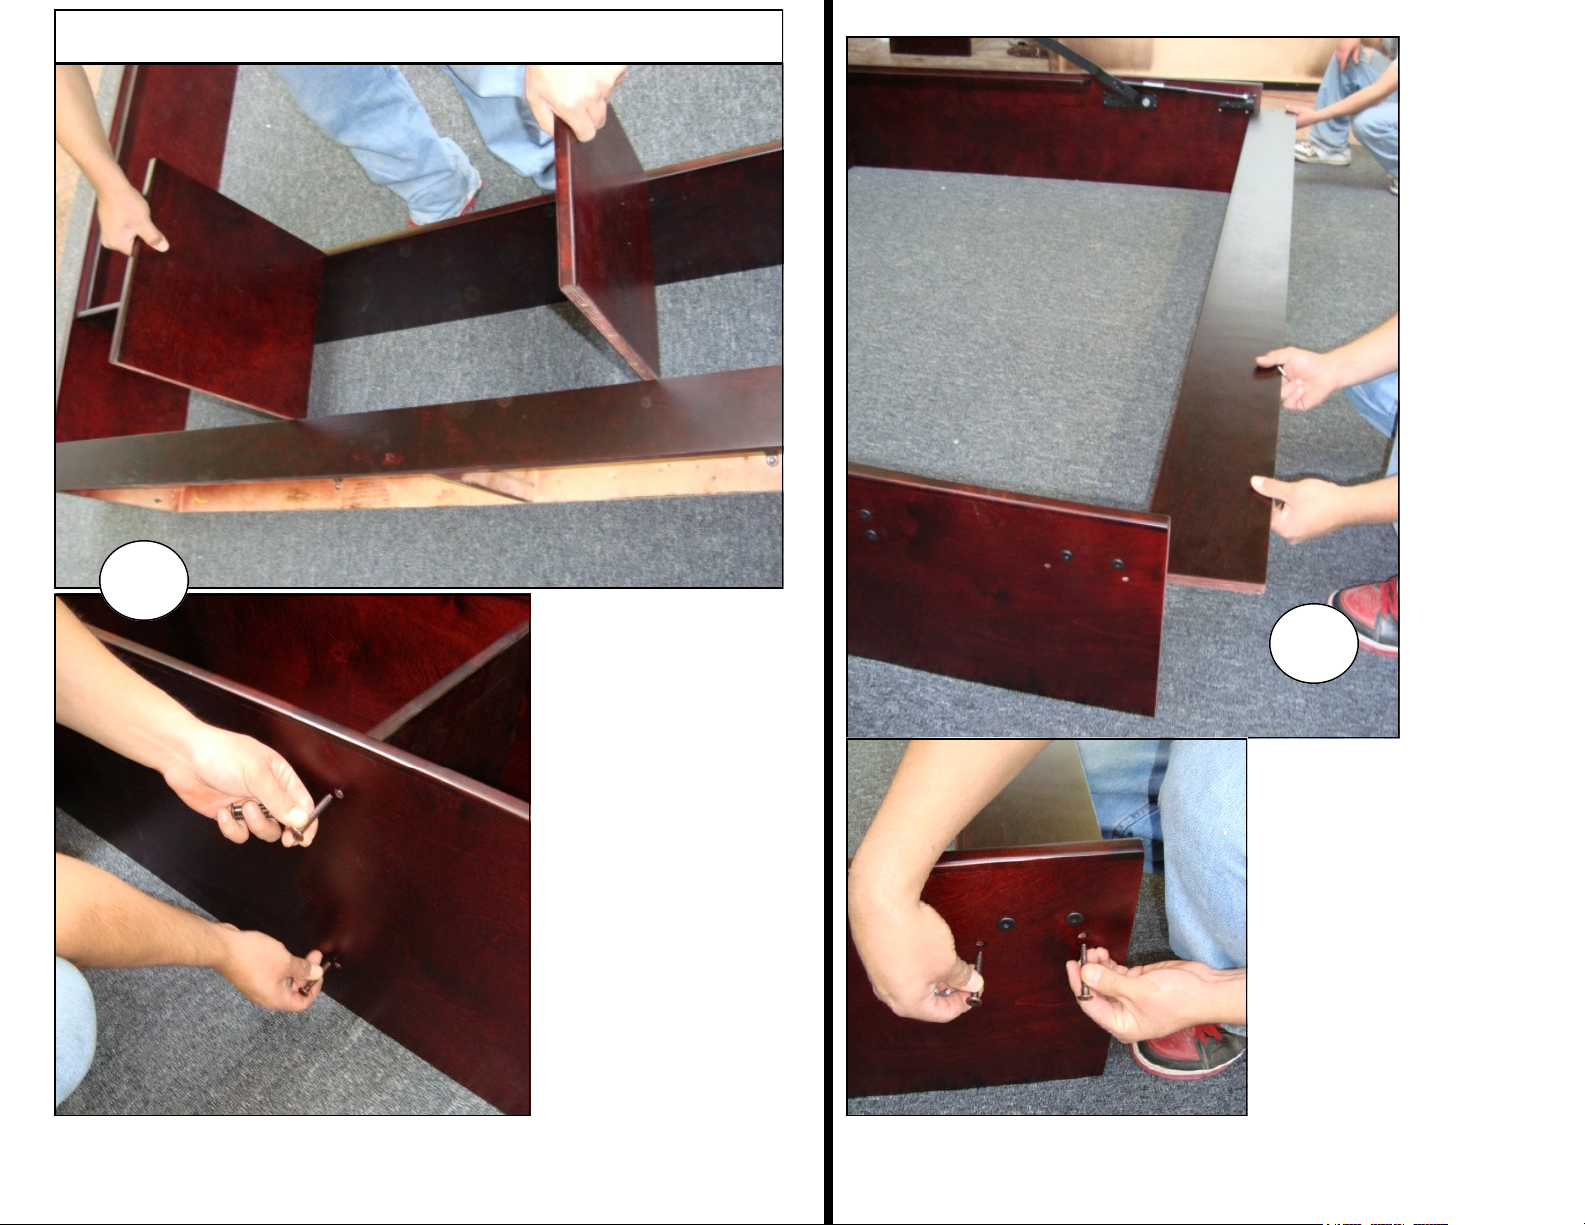
ADJUST THE CROWN POSITION
4
Assemble vertical
partitions between
crown and top panel,
shelf holes towards
sides, with lag bolts.
Adjust the crown
position so that the
top panel is level
and straight. The top
panel alignment will
be determined by the
partitions fixed to
the top crown.
5
Attach
lower
strong back
between
sides
with
lag bolts finished
edge up.
Page 5
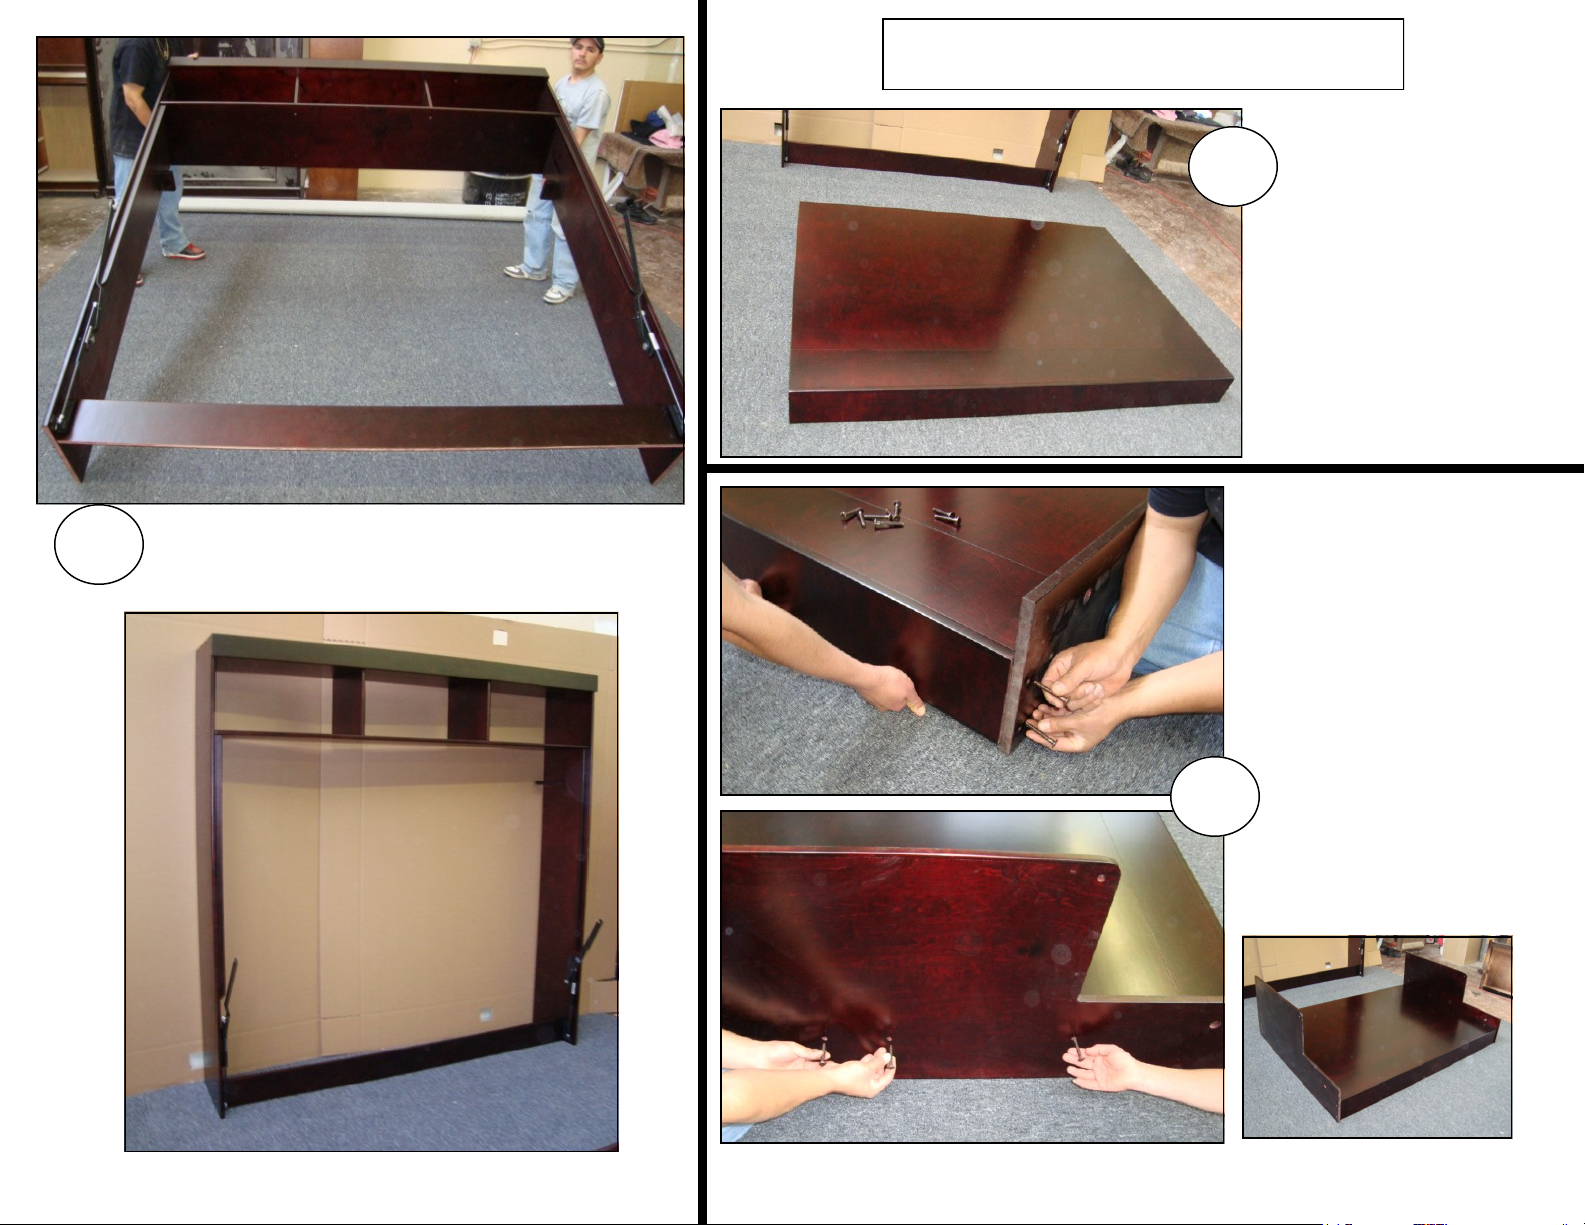
6
MATTRESS TRAY ASSEMBLY
7
Place tray
on floor
finished
face up.
Stand assembled cabinet up in front of
but out away’s from wall.
8
Mount
Tray Ends
to Tray
with
Lag Bolts.
Page 6
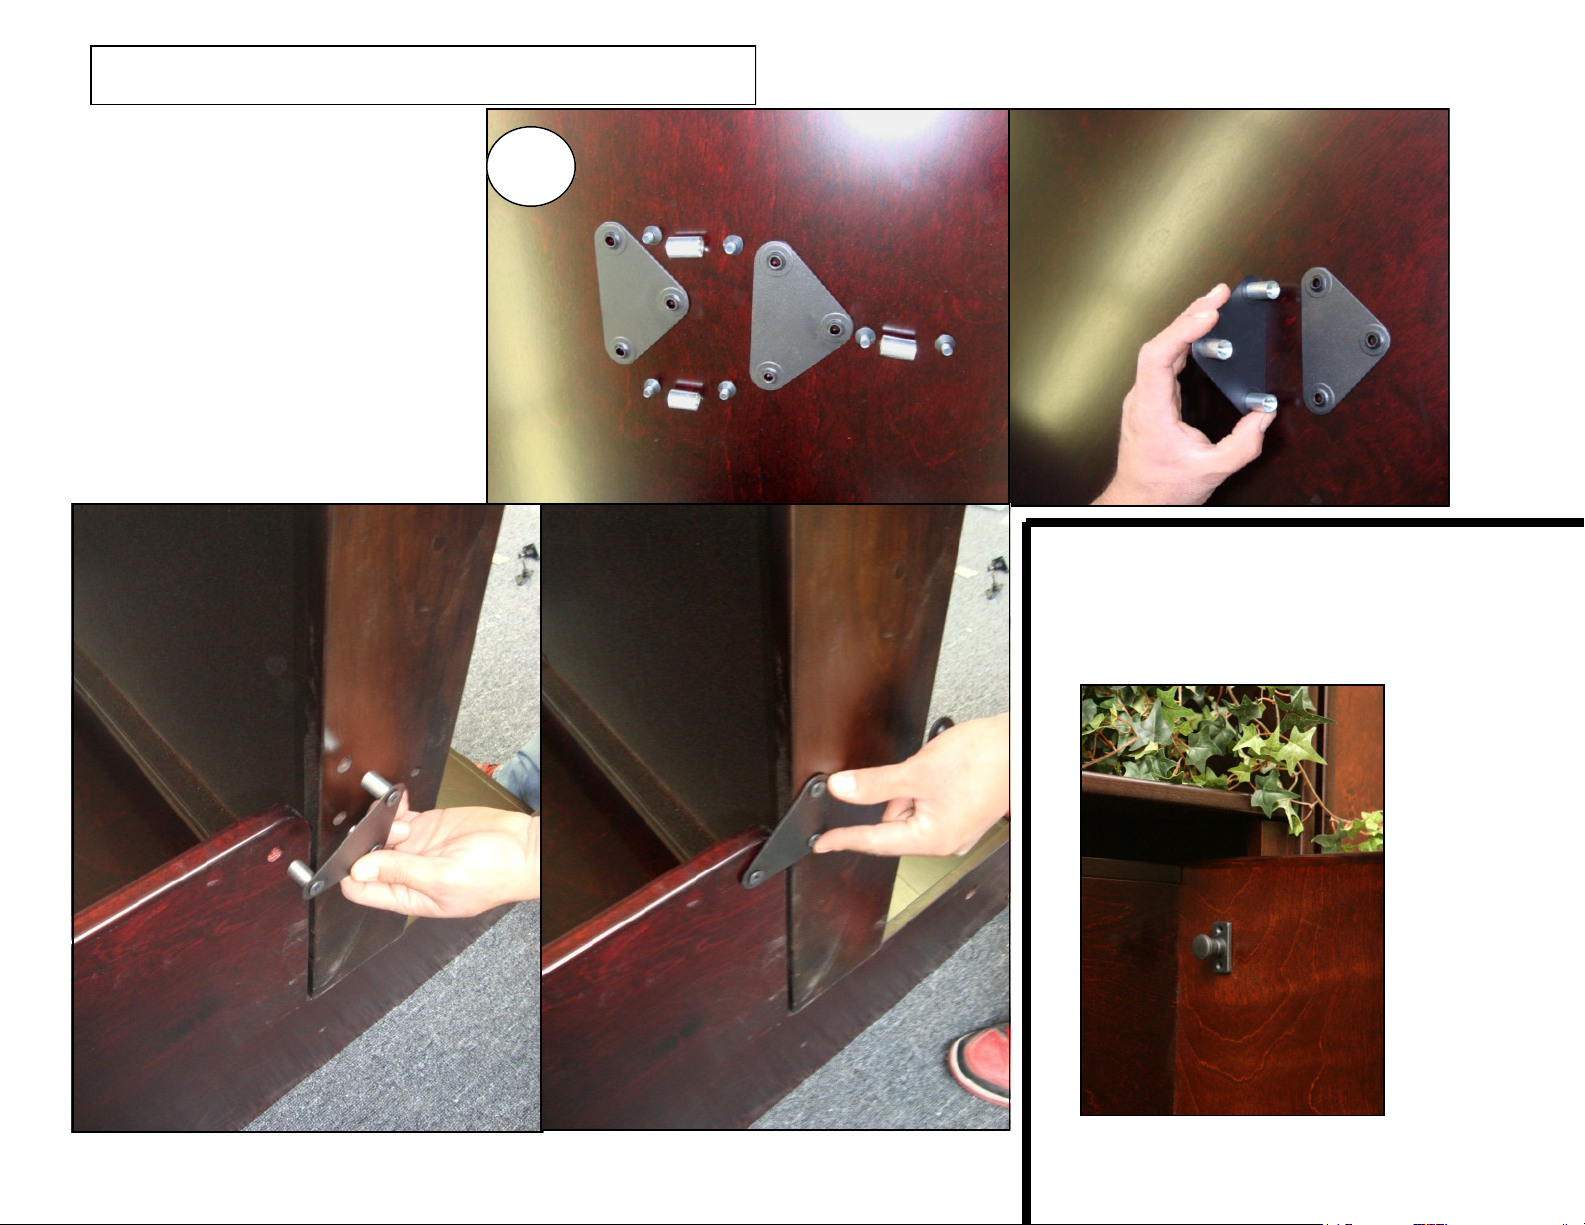
DESK TRAY ASSEMBLY
Place desk tray vertically on
mattress tray assembly and
attach with triangle hinge plates,
sleeves & bolts on both ends.
Loosen assembled sleeve &
bolts to plate, insert in holes,
attach remaining bolts, then
tighten all.
9
9
Attach Black locking assembly to the
inside on the bed end panels in
holes provided, using screw. Retract
the pins for assembly clearance.
Page 7
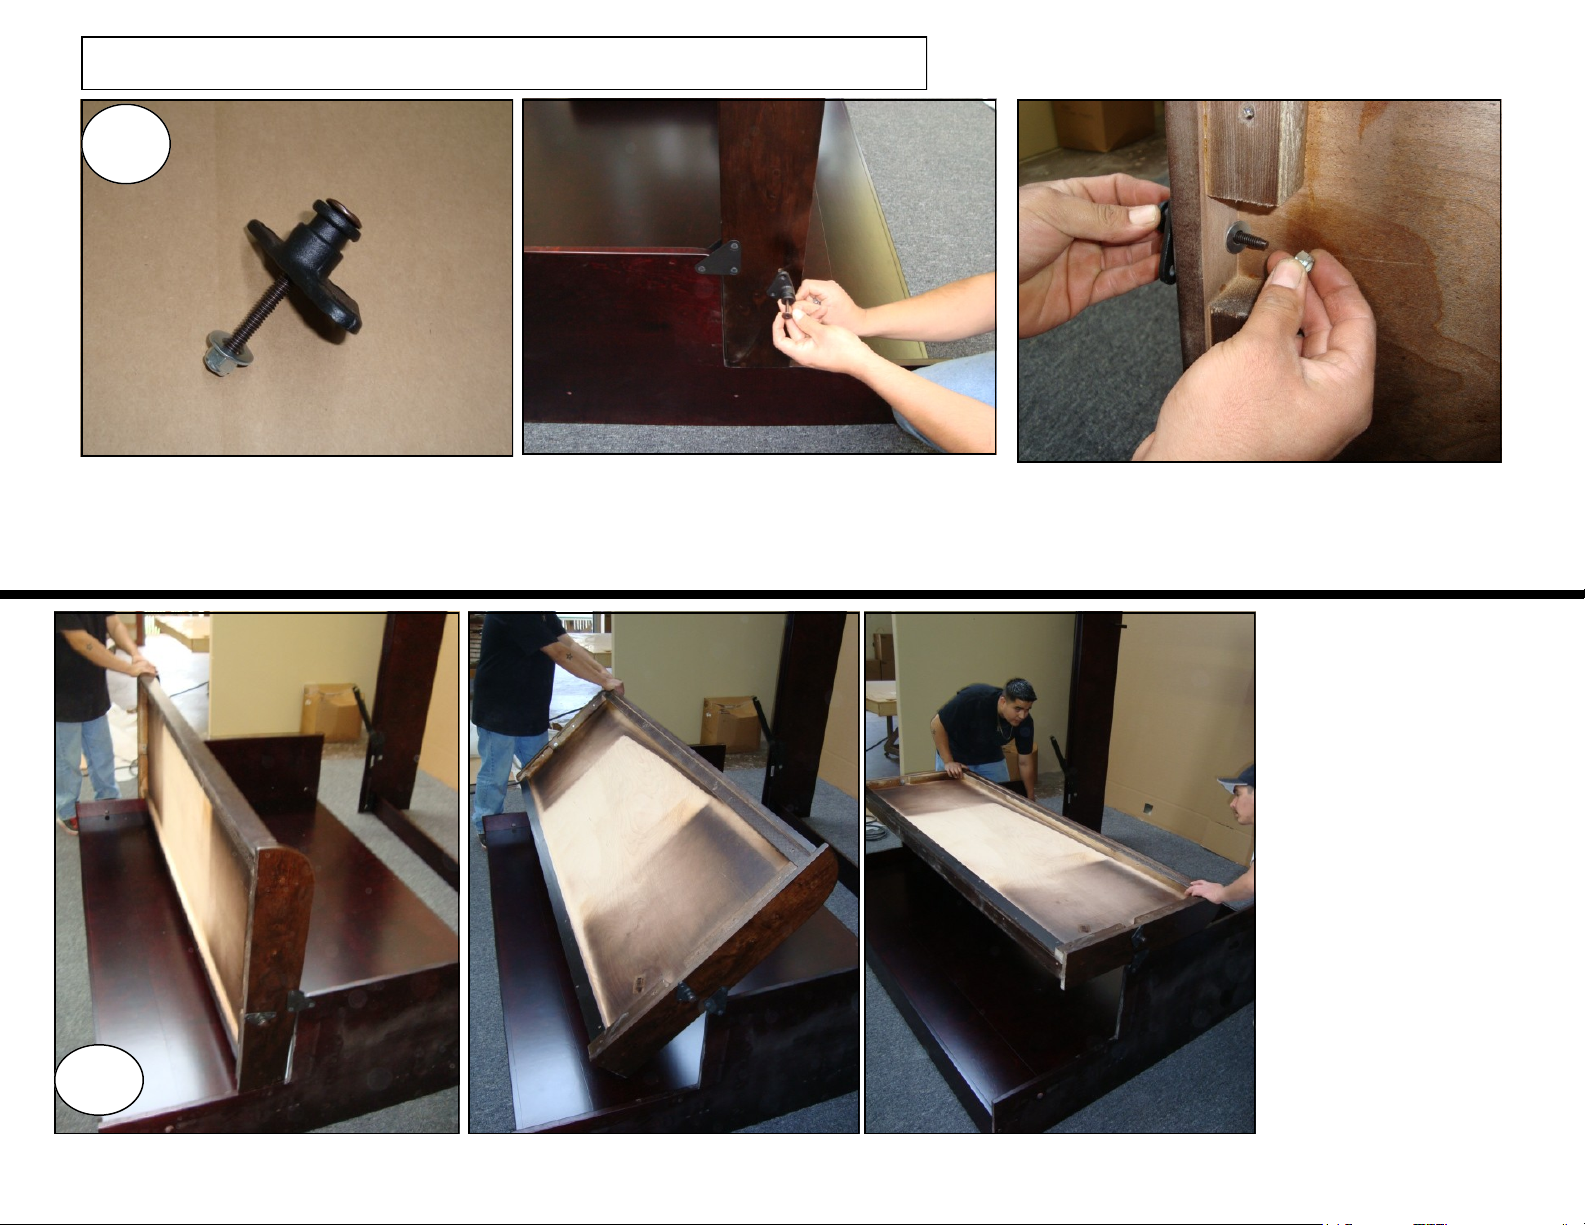
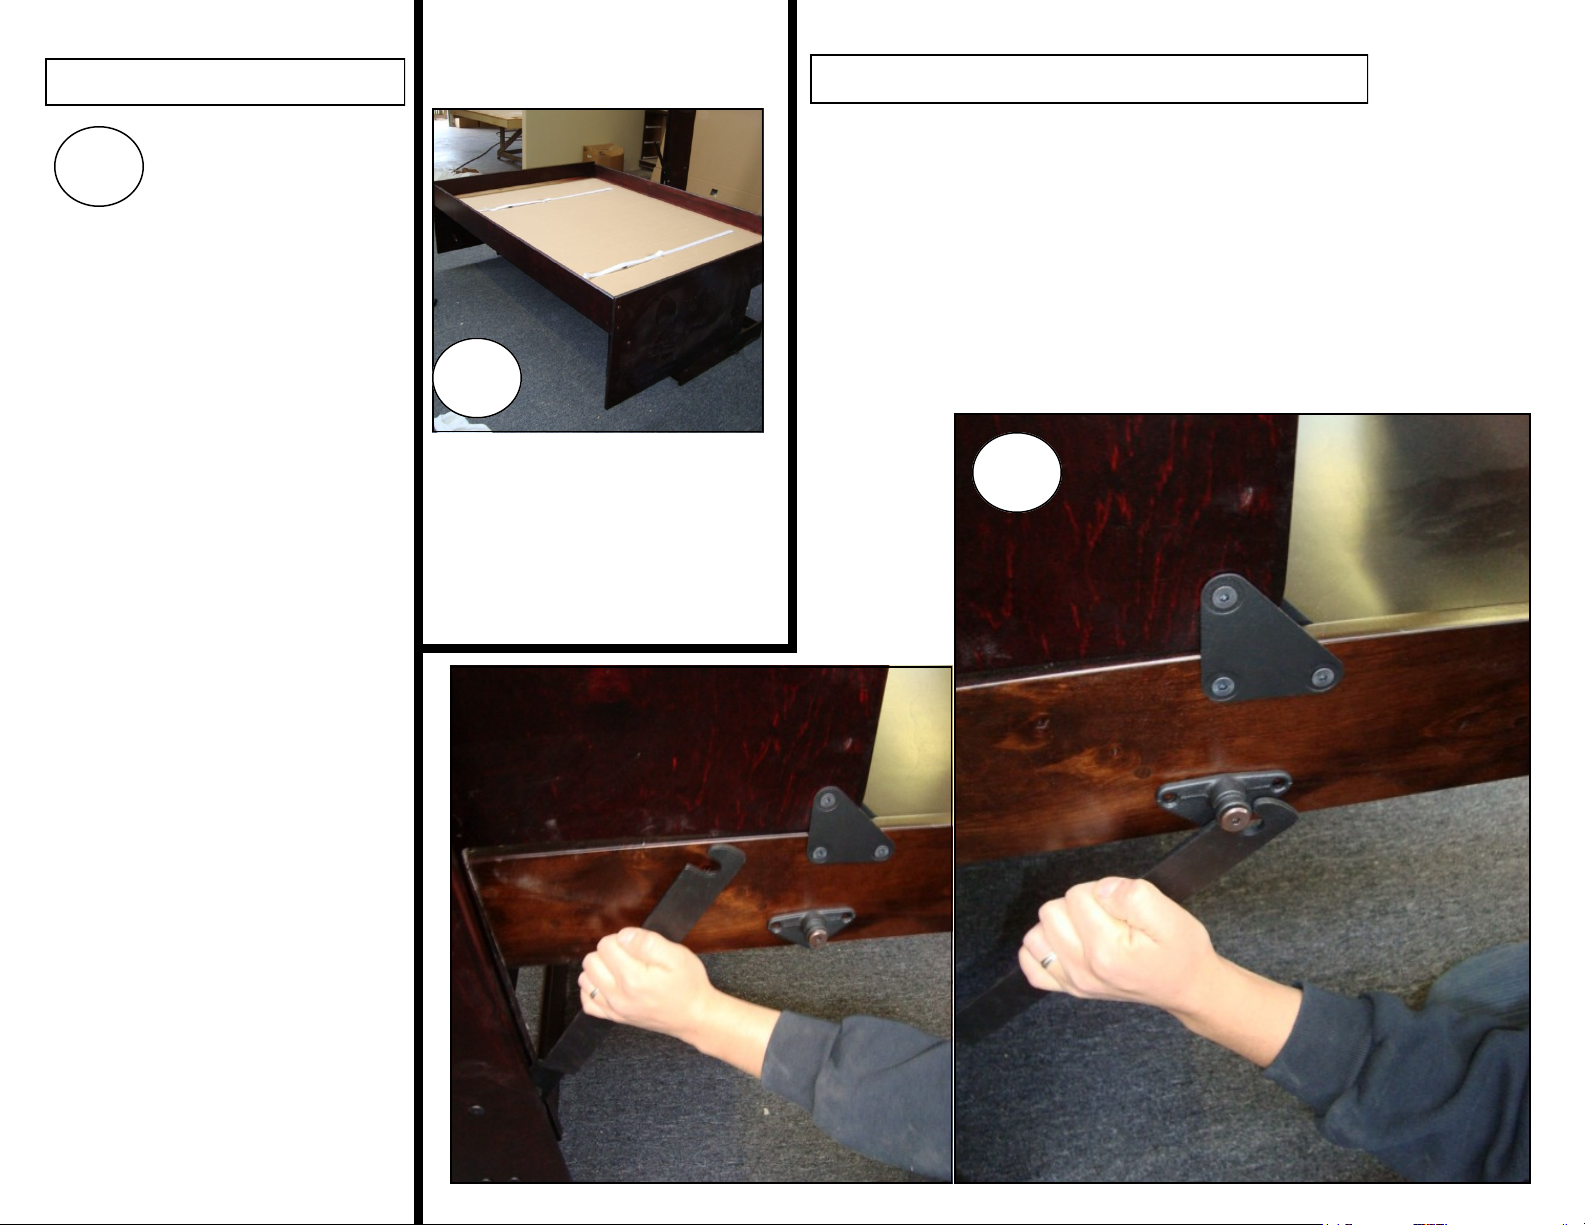
CONNECTING DESK TRAY TO MATTRESS TRAY
10
bearer assembly
Attach bearer assembly (bolt, bearer through wood to T-nut, reversed so tangs point away from wood) to each end
of the desk. Tighten firmly, but leave enough slack to slightly adjust the position later. DO NOT apply screws to the
flange holes now.
Fold the desk
down over the
finished bottom
of the mattress
tray.
11
Page 8
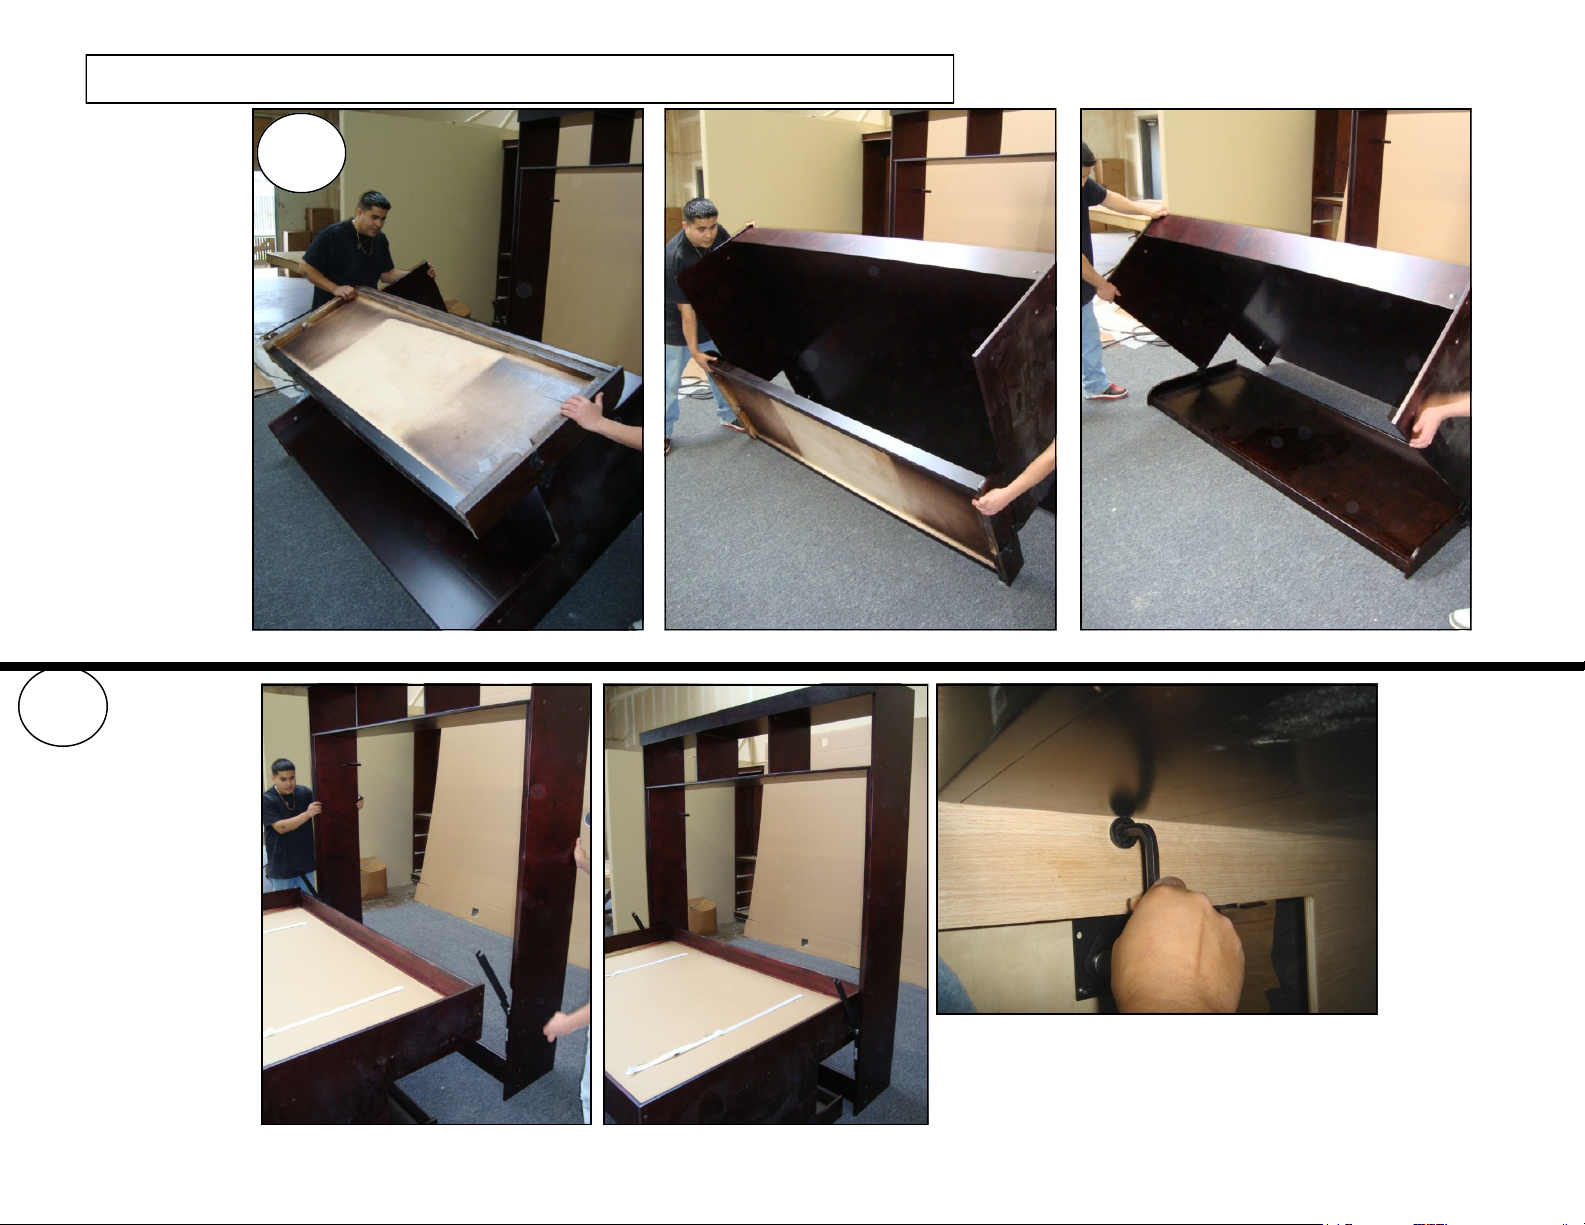
ATTACHING DESK/BED TRAYS TO THE CABINET
12
Roll the
entire
assembly
over
so the
desk
bottom
is on
the floor
and the
mattress
bed tray is
facing up.
13
into the standing
cabinet. Line up
the trunion hole
in the bed tray
with the connect-
ing threaded hole
at the upper end
on the lever arm
bracket mounted
to the side panel.
Slide the
DESK/
BED tray
From behind
the unit,
slide the
trunion
sleeve and
bolt through
the hole in
the lever
arm bracket.
Once both
trunions are
in place, use the 10mm allen wrench to firmly
tighten the trunion bolts.
Page 9
MOUNT TO THE WALL
CONNECTING THE LEVER ARM
Using a studfinder,
locate three wall
14
the center of the bed, and
one on each side). Draw a
vertical pencil line that will
appear above and below
the top assembly. Move the
Hiddenbed to the desired
location and lift and lock the
bed in the up position.
(CAUTION-The unit is unstable and may try to fall
over. DO NOT leave unattended in this position!)
Push some folded cardboard between the cabinet
sides and bed tray on each
side to assure even spacing. Mark the wall at each
upper corner of the cabinet,
then cautiously unlock and
lower the bed. Attach to the
wall studs by driving 2 1/2”
screws through the top assembly backrail, close to
the top, at the stud points
marked for alignment.
YOU MUST HIT STUDS,
as sheetrock or paneling
will not hold the bed up!
studs to be attached to (one near
15
INSERT MATTRESS-
Strap and buckle your
mattress (10” thick or
less) into the tray and
tuck the excess strap-
ping under one side.
Raise and LOCK the bed in the up position. Hold the
desk wing and pull the lever arm down to the bearer,
then release to connect gently with the bearer. Verify that
the desk is sitting fully up to the side panel. If it is not,
slightly loosen the bearer bolts allowing it to do so, then
retighten securely. Then apply screws to each of the
three flange holes of the bearer fittings on each end of
the desk. One lever arm at a time may be released for
screw access.
16
Page 10
USE TIPS
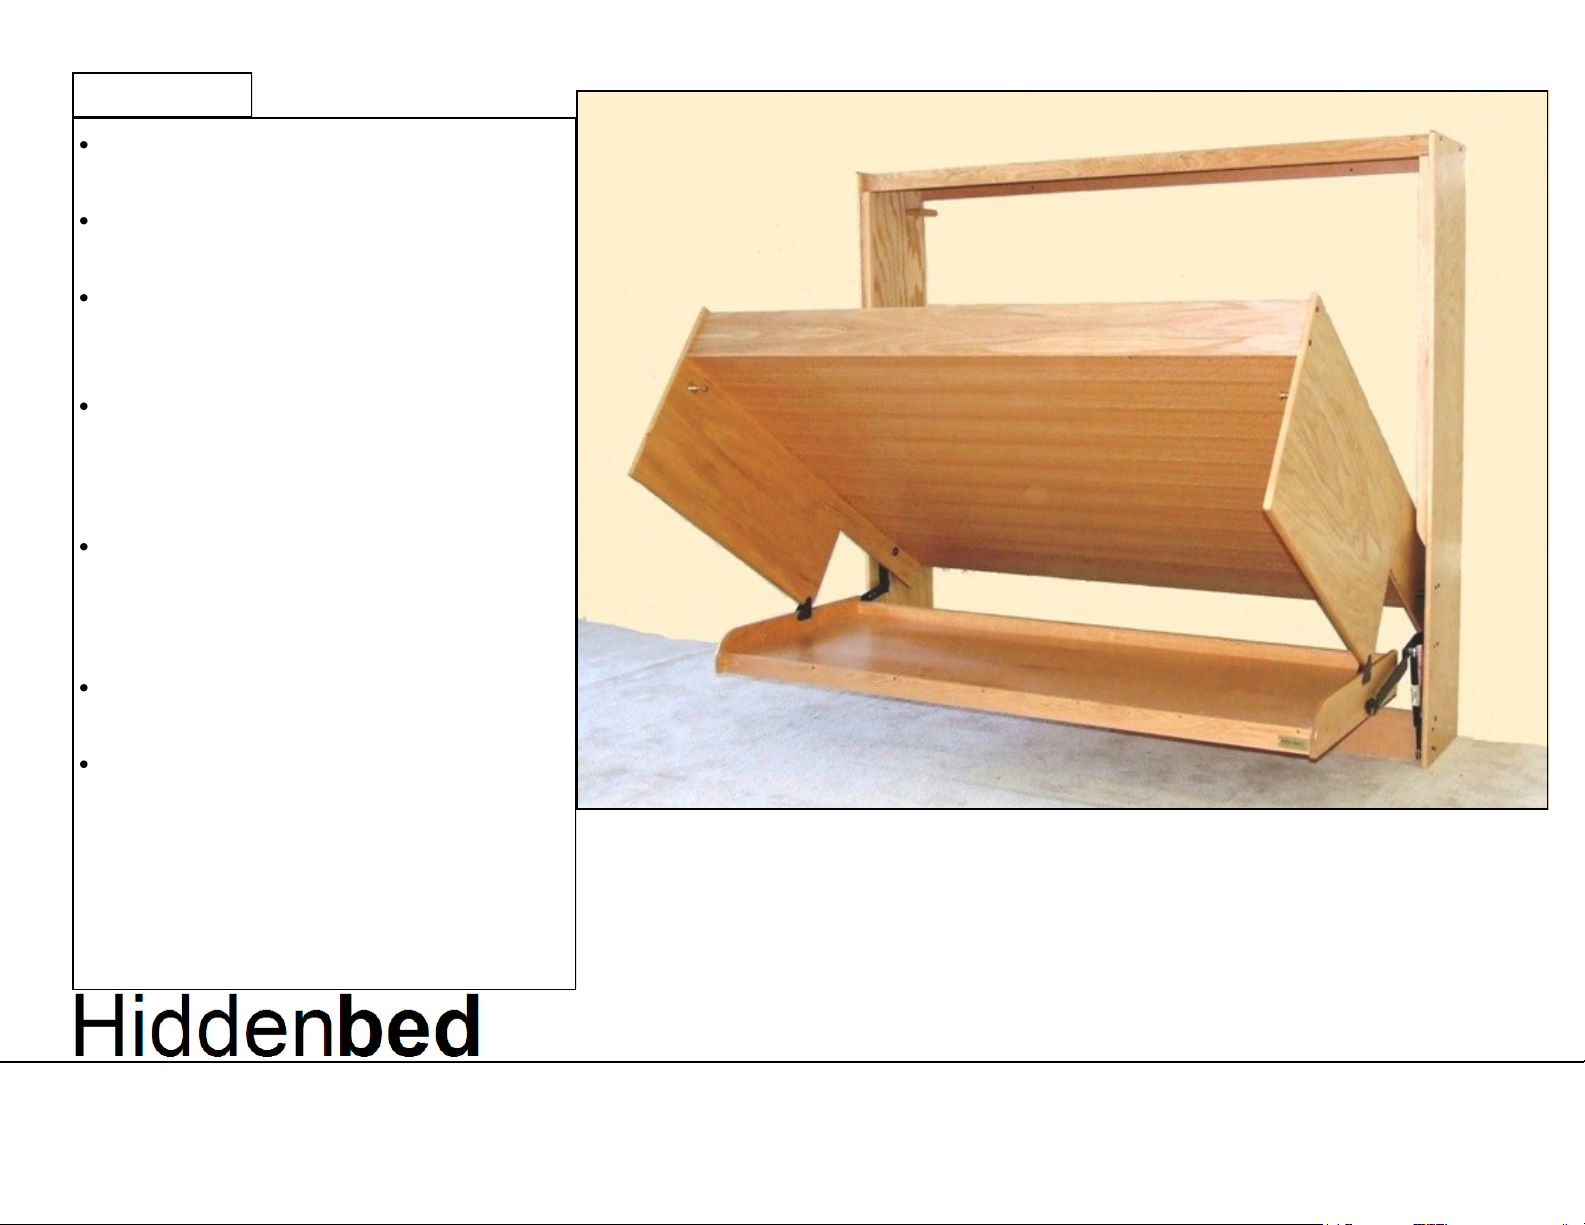
This product is designed to hold
mattresses up to 10” thick.
Lift pistons should never be lubricated
Movement will be affected by the
weight on the work surface. A load
limit of 50lbs is recommended.
Although the bed will remain closed
by itself under most loads, the locks
should be used to assure a steady
and safe work surface.
Operation is done by releasing the
locks and pulling down on the upper
corner of the desk wing, NOT by
pushing on the work surface.
The work surface is not a safe seating area!
The wood furniture is finished with a
seven step stain and catalyzed lacquer process, providing excellent resistance to most fluids and abrasion.
It is best cared for with a non-water
or alcohol based polish applied with
a soft cloth.
Please keep these instructions for future reference.
Moving the fully assembled unit is NOT recommended.
 Loading...