

Page 1
Item #:
BQATT
Revised 10/2020
Page 2

Page 3
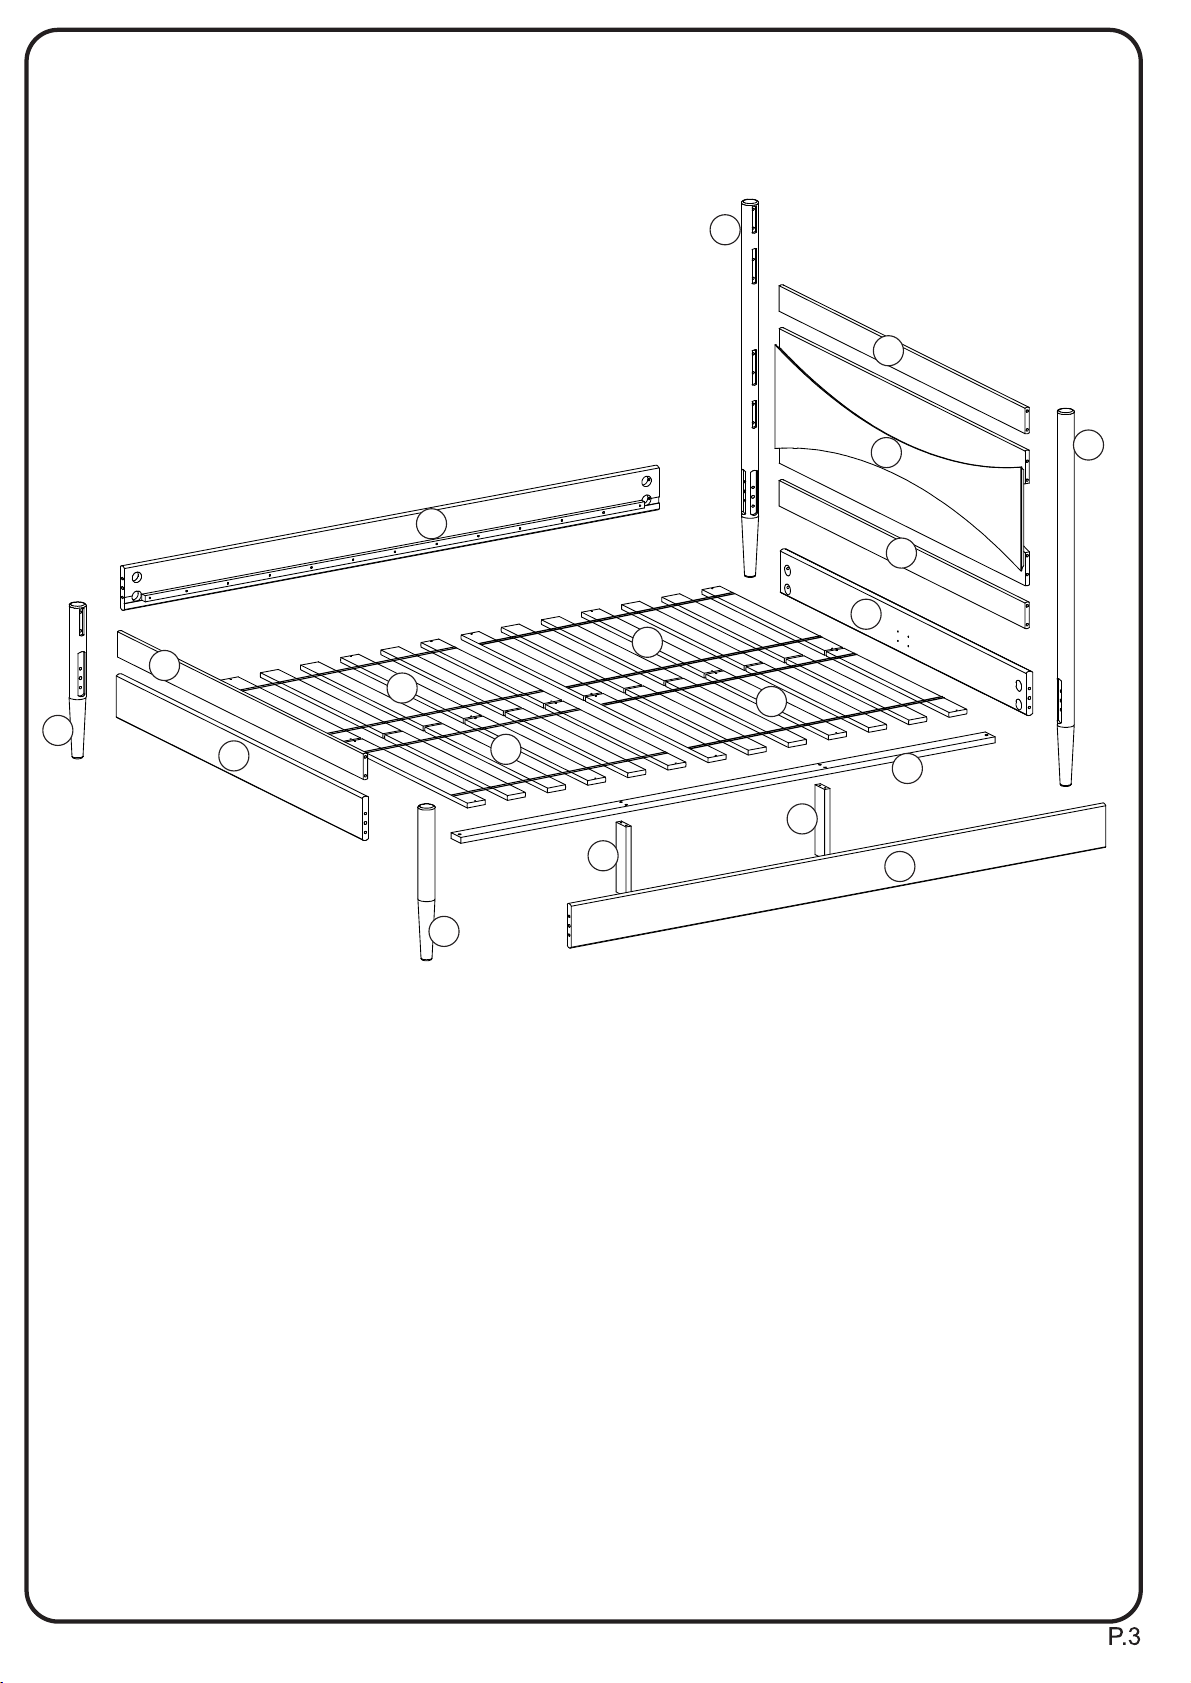
Parts List
08
06
10
06
04
12
0303
11
12
07
02
02
07
04
01
09
06
05
0303
Part 1: Headboard Panel
Part 2: Slat Set (7 slats)
Part 3: Side Rail
Part 4: Down Rail
Part 5: Cross Bar
Part 6: Up Rail
Part 7: Legs
Part 8: Headboard Lefth Feet
Part 9: Headboard Rigth Feet
Part 10: Footboard Lefth Feet
Part 11: Footboard Rigth Feet
Part 12: Slat Set (6 slats)
Page 4
A
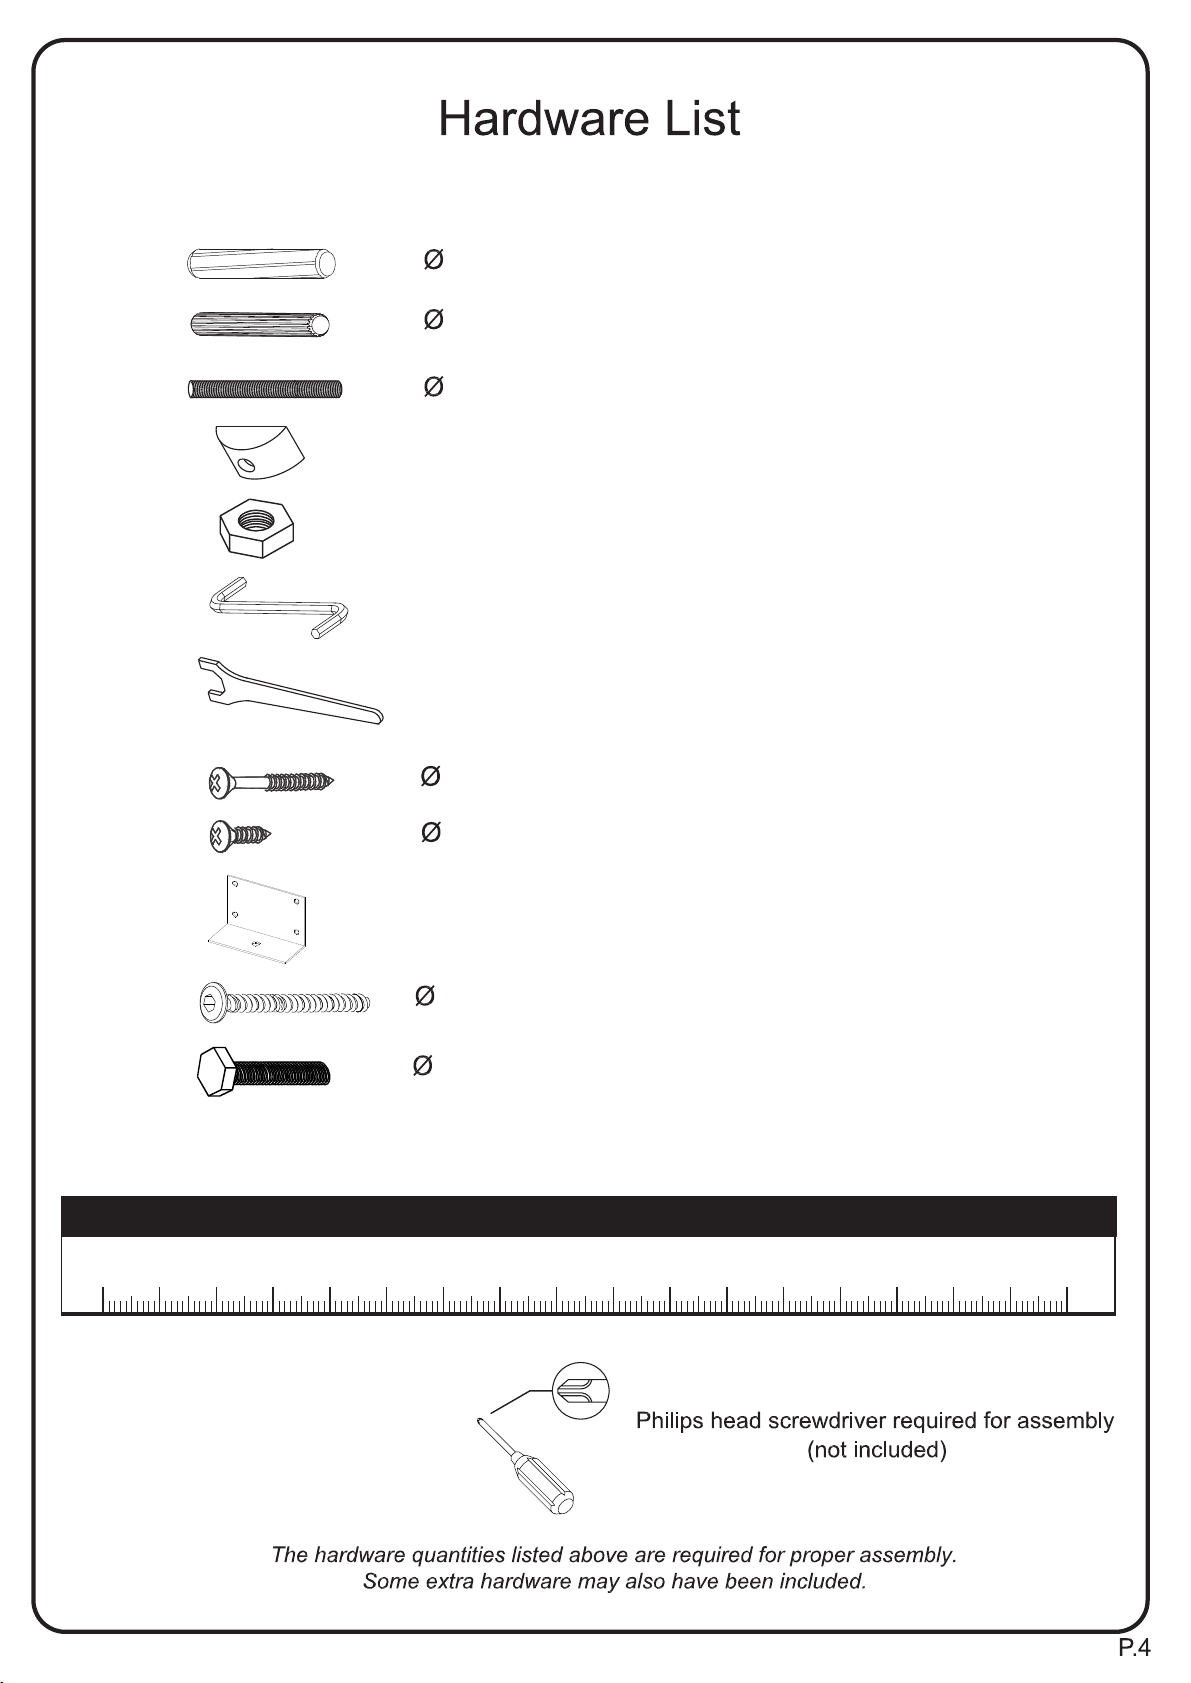
10x40 mm Wood dowel 08 pçs
B
C
D
E
F
G
H
I
08x40 mm Wood dowel 16 pçs
1/4"x70 mm Headless bolt 20 pçs
Washer 20 pçs
Nut 22 pçs
Hex Key 01 pçs
Spanner 01 pçs
3,5x35mm Screw 24 pçs
4,0x16mm Screw 08 pçs
J
K
L
Ruler- Use this ruler to help correctly identify the screws
5
0
10 15 20 25 30 35 40
45
Metal Support 02 pçs
7,0x50mm Bolt 04 pçs
1/4"x40mm Bolt 02 pçs
55
50
60 65 70
75
80 85 90 95 100 105 110 115 120 125 130 135 140 145 150 155 160 165 170
Page 5

Step 1
A
A
A
0303
0303
A
04
A
A
A
A
04
Insert wood dowels (A) into parts (03 and 04).
Step 2
B
A
A
B
B
B
01
06
B
B
B
B
B
B
B
06
06
Insert wood dowels (B) into parts (01 and 06).
B
B
B
B
B
B
B
P.5
Page 6

Step 3
C
C
08
09
C
C
C
C
C
C
C
C
10
C
C
C
C
C
C
11
Insert Headless (C) into parts (08,09,10 and 11).
C
C
C
C
C
C
P.6
Page 7

Step 4
08
06
09
01
06
04
PLEASE , Check the holes position
PLEASE , Check the holes position
CAREFULLY
CAREFULLY
Assemble the parts 06, 01 and 04 on the feet 08 and 09.
Step 5
E
D
G
D
E
G
D
E
G
Insert washer (D) and nut (E) as in the picture. After use Spanner (G) to
tighten. Repeat the same process at both sides.
P.7
Page 8

Step 6
Rotate the Headboard 180 degrees.
Step 7
D
G
E
D
E
G
D
Insert washer (D) and nut (E) as in the picture. After use Spanner (G) to
tighten. Repeat the same process at both sides.
P.8
Page 9

Step 8
11
PLEASE , Check the holes position
PLEASE , Check the holes position
CAREFULLY
CAREFULLY
06
04
10
Assemble the parts 06 and 04 on the feet 10 and 11.
Step 9
D
G
D
E
D
E
G
Insert washer (D) and nut (E) as in the picture. After use Spanner (G) to
tighten. Repeat the same process at both sides.
P.9
Page 10

Step 10
I
16mm
J
Use screews (I) to fix (J) hardware.
Repeat this process at two parts.
Step 11
F
I
I
J
I
I
K
50mm
F
K
K
05
07
07
Attach central support 05 to feet 07 using wood joint connectors (K).
P.10
Page 11

Step 12
D
E
G
1st
0303
3rd
G
D
D
E
E
0303
2nd
E
E
D
D
G
4th
Assemble the parts 03 on the Headboard (1st)
Insert washer (D) and nut (E) as in the picture(2nd). After use Spanner
(G) to tighten.
Assemble the Footboard (3rd) and Insert washer (D) and nut (E) as in the
picture(4th). After use Spanner (G) to tighten.
P.11
Page 12

Step 13
E
L
L
E
G
Insert Bolt (L) and nut (E) as in the picture. After use Spanner (G) to
tighten. Repeat the same process at both sides.
Step 14
2x
02
12
InVisually identify the two sets of slats.
2x
P.12
Page 13

Step 15
H
35mm
1st
2nd
12
02
02
12
02
12
3rd
H
Position the set slat 02 and align as shown in picture (1st)
Position the set slat 12 and align as shown in picture (2nd)
Repeat this process at two sides.
Use screews (H) to fix all indicated slats.
P.13
 Loading...