

HHHH33 UUsseerr’’ss GGuuiidde
e
WalkAbout Computers
1501 Northpoint Pkwy, #103-104
West Palm Beach, FL 33407
Main Office: 561-712-1200
Sales: 888-925-5226 or 614-882-0015
Tech Support: 888-872-1100 or 561-712-8787
a
a
m
m
m
meerr
h
h
eea
a
d
d
Thank You
WalkAbout Computers HAMMERHEAD 3 User’s Guide – v021101
2
Thank You!
We at WalkAbout Computers wish to thank you for purchasing the
WalkAbout HAMMERHEAD 3 computer. Great care has been taken to
provide you with a unique product designed to provide years of reliable
service. The HAMMERHEAD 3 is the fifth generation of
HAMMERHEAD rugged tablet computers. Each generation builds on
the strengths of the previous generations to provide you with a state-ofthe-art product designed to meet the real world needs of mobile users.
This guide provides basic information that you will need to take full
advantage of your HAMMERHEAD 3 computer. The HAMMERHEAD
3 is a tool that is often configured to meet the precise needs of a
specific application. As a result, there are many configuration options
available and often, custom features are provided for large-scale
applications. If you do not find illustrations identical to the equipment
you have purchased or do not find needed information after having
reviewed the User’s Guide, please feel free to contact WalkAbout
Customer Care toll-free at 888-872-1100. You may also wish to visit
our web site at www.walkabout-comp.com for updated information.
This guide is intended to provide basic information on the features,
operation, care, and maintenance of the HAMMERHEAD 3. It is not
offered as a technical resource to deal with larger integration issues.
WalkAbout and its many partners will be happy to work closely with you
in resolving any challenges that you might face.
Elements of this guide are available electronically for those customers
wishing to develop their own training or technical support materials.
Requests for electronic copies can be made through the general
information request link at the WalkAbout web site.
Again, the employees of WalkAbout Computers thank you for
purchasing the WalkAbout HAMMERHEAD 3. We look forward to
getting to know you and to assisting you in any way we can to make
your use of the HAMMERHEAD 3 as rewarding as possible.

Notices
WalkAbout Computers HAMMERHEAD 3 User’s Guide – v021101
3
Notices
Copyright
WalkAbout Computers
1501 Northpoint Parkway, Suite 103-104
West Palm Beach, FL 33407
Phone (561) 712-1200
FAX (561) 712-4761
Disclaimer
All rights reserved
This publication is protected by copyright and all rights are
reserved. No part of it may be reproduced or transmitted by
any means or in any form, without prior consent in writing from
WalkAbout Computers.
The information in this guide has been carefully checked and is
believed to be accurate. However, WalkAbout Computers
assumes no responsibility for any inaccuracies that may be
contained in this manual. In no event will WalkAbout
Computers be liable for direct, indirect, special, incidental, or
consequential damages resulting from any defect or omission
in this manual, even if advised of the possibility of such
damages.
In the interest of continued product development; WalkAbout
Computers reserves the right to make improvements in this
manual and the products it describes at any time, without
notice or obligation.
Notices
WalkAbout Computers HAMMERHEAD 3 User’s Guide – v021101
4
Trademark Acknowledgments
PhoenixBIOS™ 4.0 is a trademark of Phoenix Technologies
Ltd.
Microsoft® Windows® 95 is a registered trademark of
Microsoft Corporation.
Microsoft® Windows CE is a registered trademark of MicroSoft
Corporation.
Microsoft® Windows NT Workstation 4.0 is a registered
trademark of MicroSoft Corporation.
Microsoft® Windows® 2000 is a registered trademark of
MicroSoft Corporation.
Microsoft® Windows have been licensed to WalkAbout
Computers.
Pentium® II Processor is a registered trademark of Intel
Corporation.
Pentium® III Processor is a registered trademark of Intel
Corporation.
All other trademarks and registered trademarks are the
property of their respective holders.

Notices
WalkAbout Computers HAMMERHEAD 3 User’s Guide – v021101
5
Radio Frequency Emissions Statement
Federal Communications Commission (FCC) Statement
Note: This equipment has been tested and found to comply with
the limits for a Class B digital device pursuant to Subpart J, Part 15
of the FCC rules. These limits are designed to provide reasonable
protection against harmful interference in a residential installation.
This equipment generates, uses, and can radiate radio frequency
energy and, if not installed and used in accordance with the
instructions, may cause harmful interference with radio
communications. However, there is no guarantee that interference
will not occur in a particular installation. If this equipment does
cause harmful interference to radio or television reception, which
can be determined by turning the equipment off and on; the user is
encouraged to try to correct the interference by one or more of the
following measures:
• Reorient or relocate the receiving antenna.
• Increase the separation between the equipment and receiver.
• Connect the equipment into an outlet on a circuit different from
the receiver.
• Consult WalkAbout Computers at (888) 872-1100 for additional
information and help.
Properly shielded, grounded cables and connectors have been
provided with this equipment and must be used to insure proper
functionality and compliance with FCC rules. Unauthorized changes or
modifications could void the user's authority to operate the equipment.
Replacement cables and connectors are available from:
WalkAbout Computers
1501 Northpoint Parkway, Suite 103
West Palm Beach, FL 33407
This device complies with Part 15 of the FCC Rules. Operation is
subject to the following two conditions:
1. This device may not cause harmful interference, and
2. This device must accept any interference received, including
interference that may cause undesired operation.
Notices
WalkAbout Computers HAMMERHEAD 3 User’s Guide – v021101
6
If necessary, the user should consult an experienced radio/television
technician for additional suggestions. The user might find the following
book prepared by the Federal Communications Commission helpful:
"How to Identify and Resolve Radio-TV Interference Problems"
This booklet is available from the following:
Public Contact Branch Consumer Assistance and Small
Business
Room 725 Division - Room 254
1919 M St. NW 1919 M St. NW
Washington, DC 20554 Washington, DC 20554
(202) 634-1940 (202) 632-7000
Canadian Department of Communications Compliance Statement
This equipment does not exceed Class B limits per radio noise
emissions for digital apparatus, set out in the Radio Interference
Regulation of the Canadian Department of Communications.

Table of Contents
WalkAbout Computers HAMMERHEAD 3 User’s Guide – v021101
7
Table of Contents
CHAPTER 1: INTRODUCTION ......................... 9
Before you Begin ..............................................................10
Standard Features ...........................................................11
Hardware Options ............................................................12
Exterior Features ..............................................................12
Connectivity ................................................................16
Port Replicators ................................................... 16
Desktop Docking Station .....................................19
Vehicle Docking .................................................. 20
CHAPTER 2: HARDWARE OPERATION .........21
Turning on the Unit............................................................ 21
Use and Care ................................................................ 21
Pen Operations 22
Pen Maintenance .............................................................. 23
Touch Operations.............................................................. 24
Batteries and Changing Procedures .................................25
Battery Status Indicators......................................25
Recharging Batteries ...........................................25
Installing New Batteries .......................................26
Battery Use/Care..................................................26
Charging Batteries ...............................................27
Removable Hard Drive...................................................... 27
Accessories and Options ..................................................27
Heater Package ...................................................28
PCMCIA Cards..................................................... 28
CHAPTER 3: SOFTWARE OPERATION........... 30
HHUtility Program .............................................................30
Batteries Tab........................................................ 31
Primary Tab.......................................................... 32
Secondary Tab..................................................... 34
Properties Tab...................................................... 35
Advanced Tab ......................................................37
Calibrate Tab........................................................ 38
Special Instructions for
Cold Weather Operation ......................................40
Table of Contents
WalkAbout Computers HAMMERHEAD 3 User’s Guide – v021101
8
HHVideo Program .............................................................42
Accessing HHVideo from the System Tray ..........43
Adjusting the Brightness & Contrast ....................44
CHAPTER 4: FAQ’S .......................................... 46
CHAPTER 5: WARRANTY INFORMATION ...... 53
What is covered by this warranty ......................................53
Length of warranty.............................................................53
Terms and Conditions .......................................................53
How to obtain warranty service .........................................54
What is not covered...........................................................55
Additional Information........................................................56
Company Information and return address.........................56
Customer Service ..............................................................57

Chapter 1 - Introduction
WalkAbout Computers HAMMERHEAD 3 User’s Guide – v021101
9
1Introduction
Your HAMMERHEAD 3 tablet computer gives you the power of a
desktop computer, yet it also provides the portability and durability
needed to gather and work with information in the field. The
HAMMERHEAD 3 is designed for use on foot, in a vehicle, or in an
office. It is ideal for highly mobile applications in the most demanding
environments. Most users are from the utility, transportation,
logistics/distribution, public safety, and field services industries.
However, users from a wide range of other fields are continuously
discovering the advantages of the HAMMERHEAD 3.
About This Manual
This manual is divided into the following chapters:
Chapter 1 – Introduction
This chapter covers unpacking and setting up your HAMMERHEAD
computer system, describes the various features of the system, locates
all the controls and exterior aspects of the design, and covers the
various docking options available.
Chapter 2 – Hardware Operation
This chapter describes the basic operation of the HAMMERHEAD
hardware.
• Turning the unit on and off
• Operating the Pen or Touch hardware
• Installing, removing and charging batteries
• Working with the removable hard drive
• Accessories and Options
Internal Display Heater
Installing or removing PCMCIA cards
Chapter
Chapter 1 - Introduction
WalkAbout Computers HAMMERHEAD 3 User’s Guide – v021101
10
Chapter 3 – Software Operation
This chapter describes how to use the HAMMERHEAD control
programs HHUtility and HHVideo.
Chapter 4 – Frequently Asked Questions
Contains the most common questions from users regarding the
HAMMERHEAD system.
Chapter 5 – Warranty Information
Explains coverage, terms and conditions of WalkAbout Computer’s
Limited Warranty and how to obtain warranty service.
Before You Begin
Your HAMMERHEAD 3 tablet computer includes the following items.
When the computer is unpacked, confirm that all items are present.
Contact your HAMMERHEAD 3 sales representative if any item is
missing or damaged.
• HAMMERHEAD 3 Computer
• User’s Guide
Most but not all systems will also include:
• AC adapter with power cord
• Port replicator or docking station
Microsoft Windows (’98 or 2000), Paragraph’s Calligrapher handwriting
recognizer, PenOffice control program and My-T-Pen onscreen
keyboard program are installed on the HAMMERHEAD 3 at the factory
and registered to you. WalkAbout Computers often pre-installs
application software for its customers. In most cases user access to
operating systems or other software is restricted.
Save the HAMMERHEAD 3 packaging, it might be needed for possible
return shipments. The serial number will be on the box and on the bar
code label; located on the right,
front side of the product. Keep the
serial number handy; it will be required should the unit need repairs.

Chapter 1 - Introduction
WalkAbout Computers HAMMERHEAD 3 User’s Guide – v021101
11
Standard Features
Your HAMMERHEAD 3 includes the following features at a minimum:
• Fully sealed (vacuum tested) aircraft-grade aluminum
housing
• Intel Mobile Pentium III 400 MHz processor
• At least 64 MB main memory
• 256K L2 cache
• 2 MB video memory
• 9.5” 640 x 480 backlit transflective LCD display for direct
sunlight use or 10.4” 800 x 600 TFT active matrix color
display
• Removable shock-mounted 10 GB or larger hard disk drive
(optional flash drives)
• Type III PCMCIA expansion slot (two Type II devices)
• IrDA (Std 1.1) port
• Sound card for a variety of tonal alerts as well as voice
input and synthesis
• Long-lasting 1800 mAh Li-Ion battery (dual battery option)
• Built-in light sensor for automatic backlight control
• HHUtility Control Program
• HHVideo Control Program for adjustable brightness and
Automatic contrast adjustment
• Phoenix BIOS
• Microsoft Windows ’98 (Windows 2000 optional)
• Calligrapher, PenOffice and My-T-Pen installed
• One pen stylus for use with electromagnetic proximity
sensing digitizer (not included with touch-screen option)
• One year warranty on all parts and labor
• Direct line technical support by WalkAbout Computers
technical support staff
Chapter 1 - Introduction
WalkAbout Computers HAMMERHEAD 3 User’s Guide – v021101
12
Hardware Options
The following upgrades and add-ons are available:
• Hard drive
• Memory
• Touch screen on monochrome and color displays
• Color screen enhancement for outdoor viewing
• Wired and wireless LAN communications
• CDPD and public RF radio modem(s)
• 2
nd
antenna
• Integrated GPS receiver
• LCD and hard drive heater package (Windows 2000)
• Custom integration of components upon request
• Additional batteries
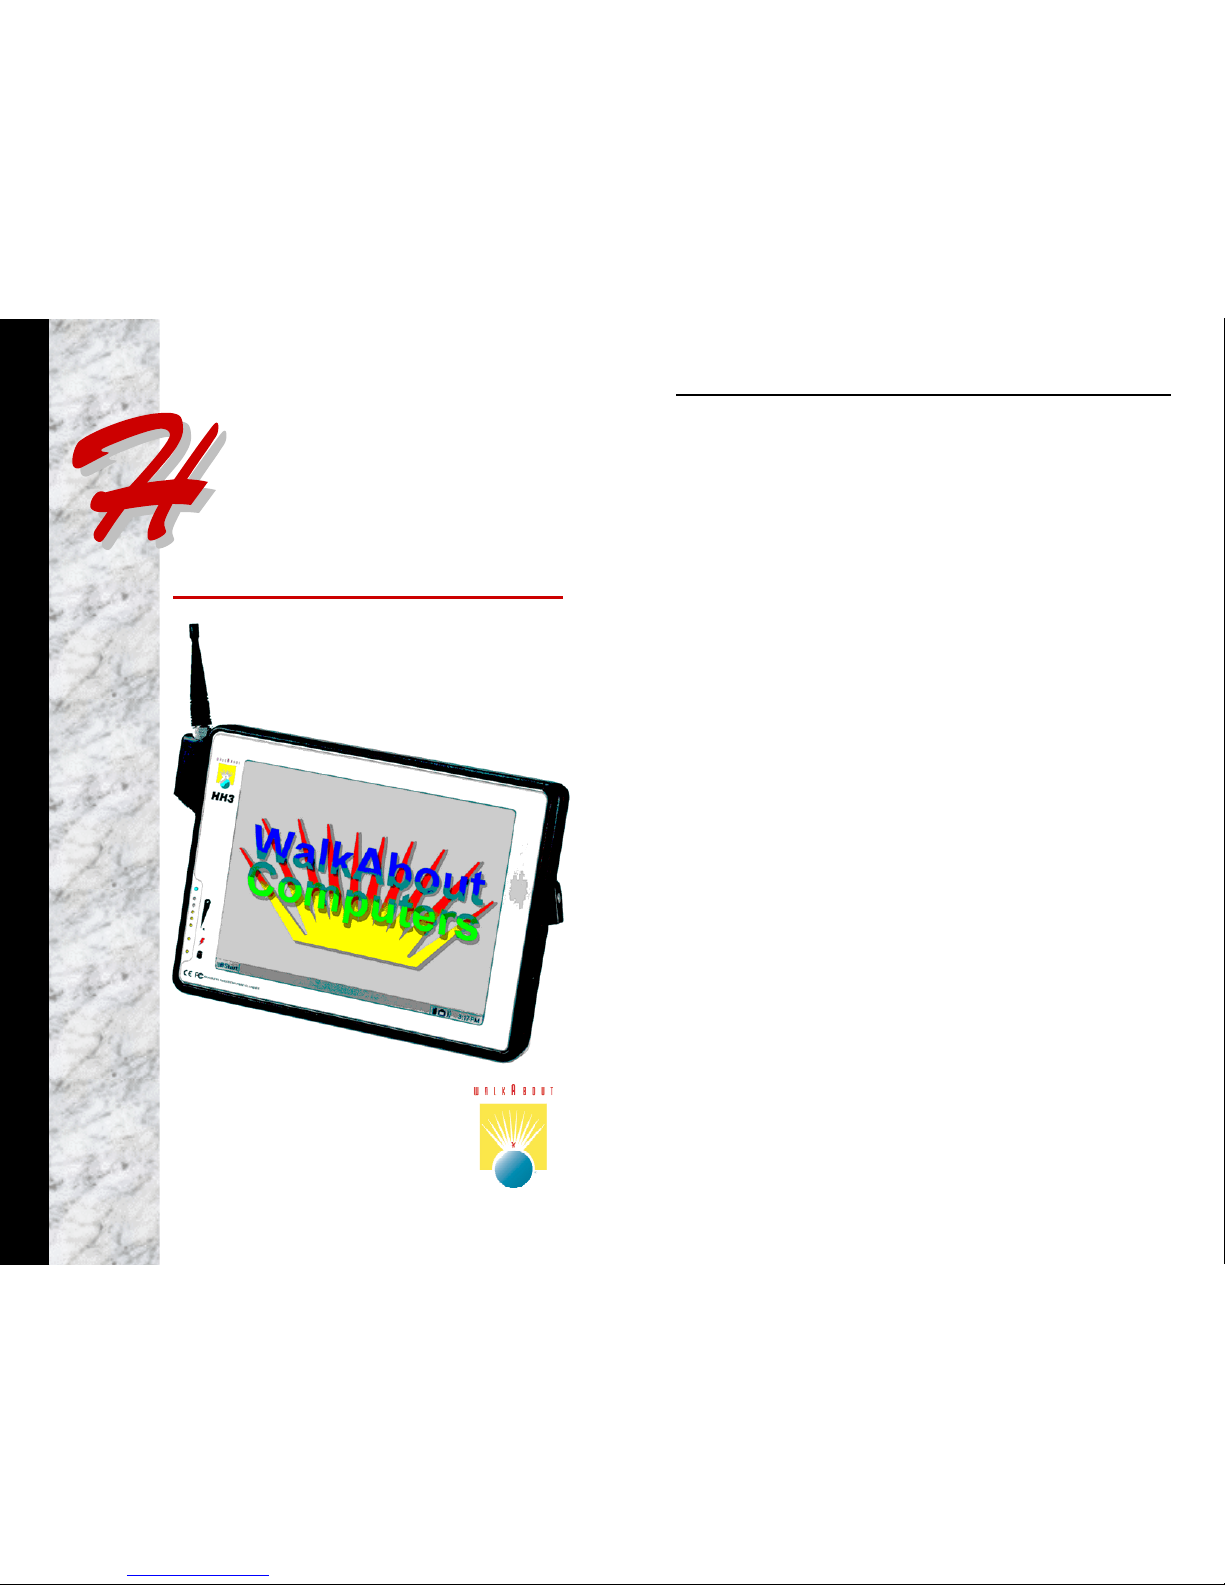
Exterior Features
Front View
Battery Status Indicators:
This is the gauge for the battery, which indicates the
approximate charge remaining. When all five lights are lit, the
battery charge is full. As you use the battery, the lights will turn
off from top to bottom, indicating the amount of charge that
remains. Each light represents approximately 20% of the full
charge.
Charge Status Indicator:
The charge status indicator is lit whenever external power is
available. It blinks as the battery charges and remains a
constant green when the batteries are fully charged. The
indicator identifies a positive connection when the
HAMMERHEAD 3 is in the docking station with an external
Chapter 1 - Introduction
WalkAbout Computers HAMMERHEAD 3 User’s Guide – v021101
13
power source. The indicator will be green when external power
is connected.
Hard Disk Drive Indicator:
The indicator flashes as the internal hard disk drive is
accessed.
Backlight Control Sensor:
The backlight control sensor automatically turns the backlight
off when adequate external light is available. Be sure it
remains uncovered.
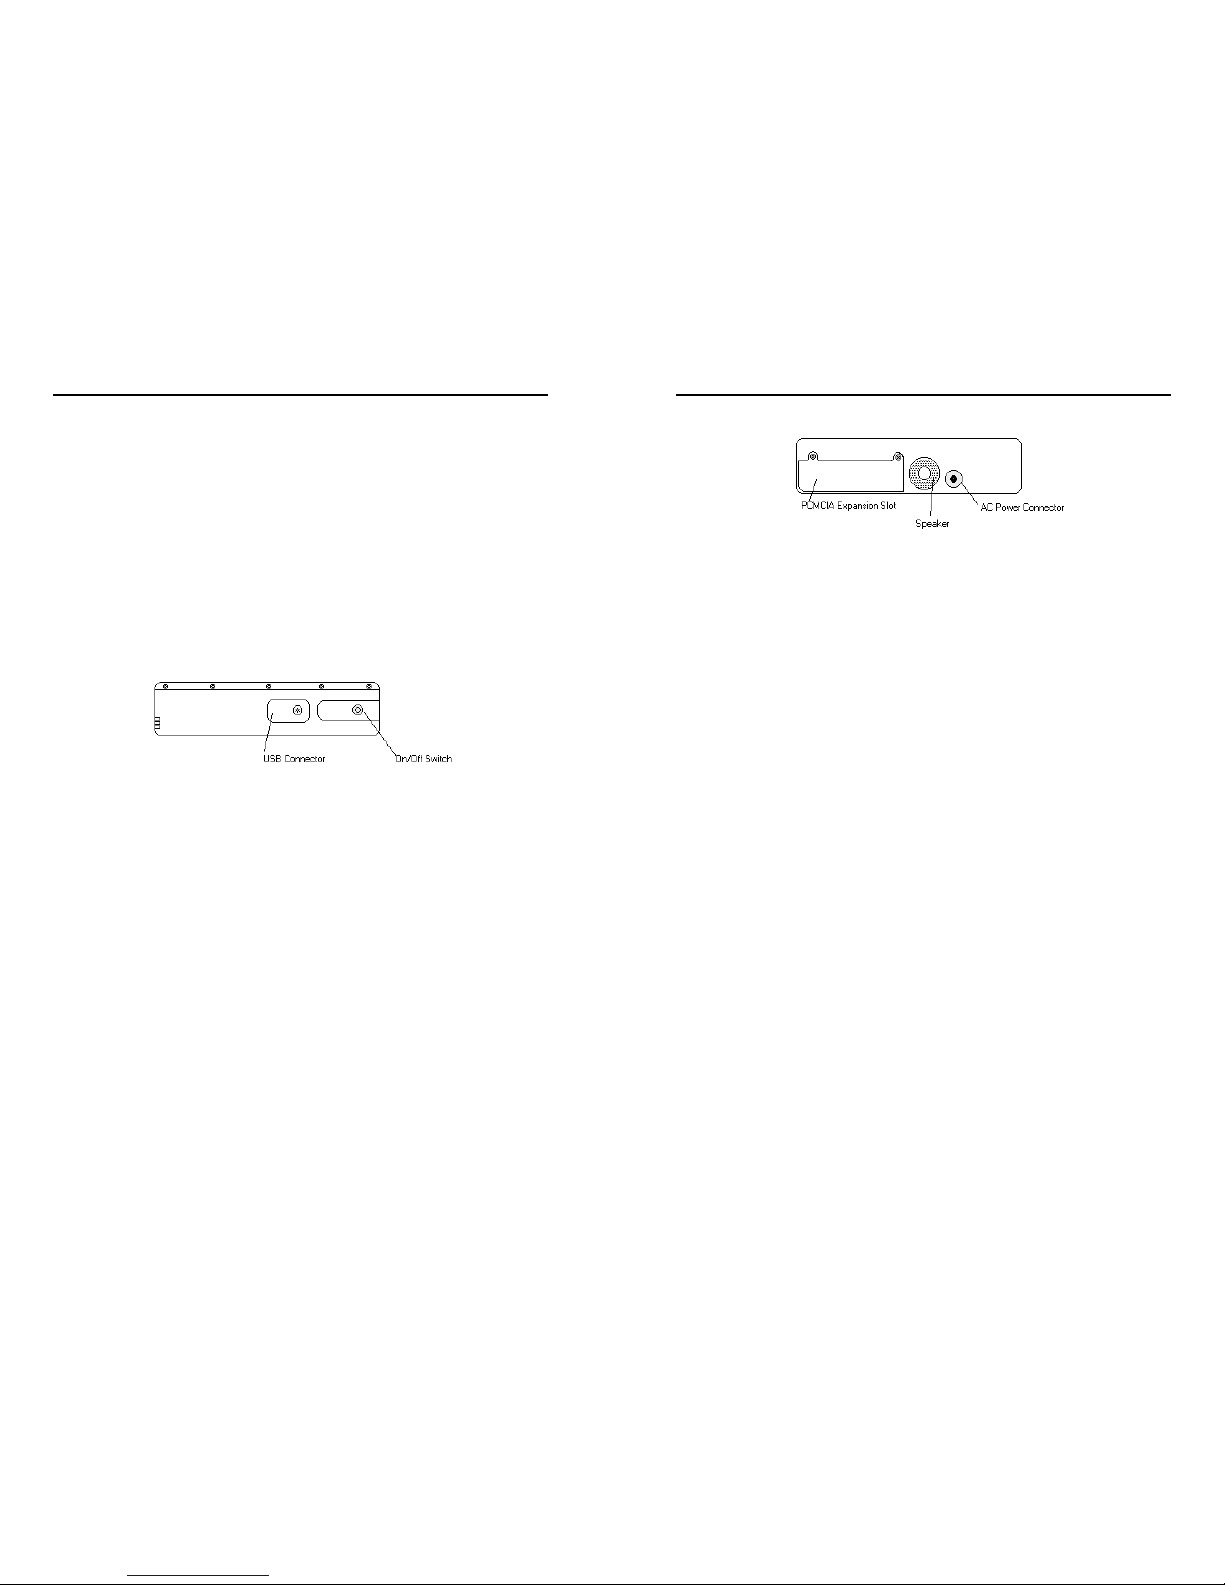
Right Side View
On/Off switch:
Turn the computer on by pressing the on/off switch once.
When used to turn the HAMMERHEAD 3 off, the switch will
cause the unit to automatically follow proper Windows
shutdown procedures. The on/off switch can be set to toggle
between other functions including an orderly Microsoft
Windows shutdown and a “doze” low power state. See
SideSwitch Function in Chapter 3: Software Operation for more
detailed instructions.
USB Connector:
The Universal Serial Bus is a hot swappable, daisy chainable
serial port with a maximum speed of 12 Mbps. It can be used
for devices like keyboards, mice, floppy drives, CD-ROM or
DVD drives, cameras, modems, scanners, etc. The
HAMMERHEAD 3 supports booting from bootable USB
devices such as floppy drives and CD-ROM drives. Devices
can be connected to the HAMMERHEAD 3 with the computer
turned on, without requiring a reboot. There is a limit of 128
concurrent devices per USB port. The HAMMERHEAD 3 can
supply up to .5 amps of current through the USB port. External
USB hubs are available that will supply power to external
devices without using the HAMMERHEAD 3’s power supply.
Chapter 1 - Introduction
WalkAbout Computers HAMMERHEAD 3 User’s Guide – v021101
14
Left Side View
PCMCIA Expansion Slot:
The PCMCIA expansion slot is sealed behind a hatch plate
held in place by two Phillips head screws. The hatch plate
must be removed to access the PCMCIA slot. Several hatch
plates are available that will accommodate various PCMCIA
devices with features that extend beyond the housing of the
computer. These hatch plates keep the unit as sealed as
possible and are available for many frequently used PCMCIA
devices. The PCMCIA compartment is sealed from the internal
components of the HAMMERHEAD 3 to prevent dust and
moisture from entering the computer. Cardbus cards are not
supported. Forcing Cardbus cards in the PCMCIA expansion
slot could cause damage.
Speaker:
There is a monaural speaker in the left side of the housing.
The speaker will play windows sounds as well as post error
codes.
AC Power Connector (15 volt input):
This connector allows the user to plug the AC power supply
directly into the HAMMERHEAD 3 to charge and operate the
unit. The unit may also be charged through a port replicator or
docking station.
Chapter 1 - Introduction
WalkAbout Computers HAMMERHEAD 3 User’s Guide – v021101
15
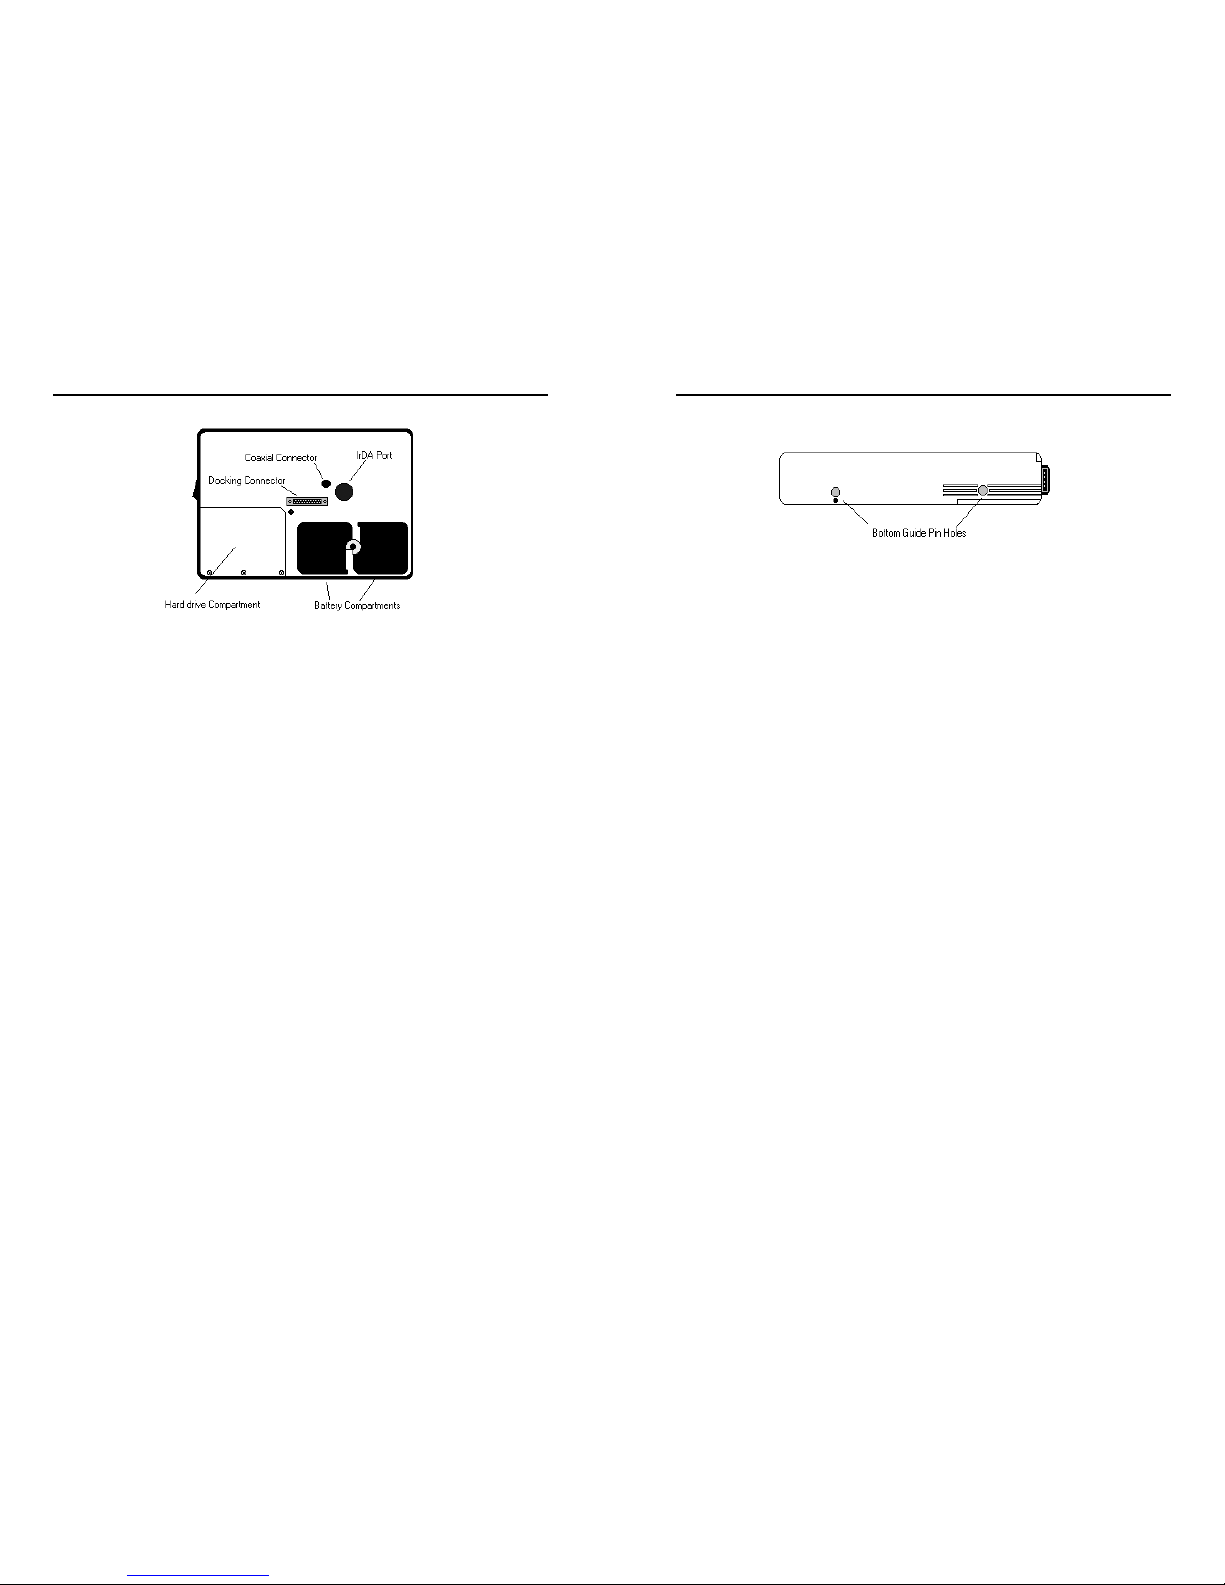
Back View
IrDA Port:
Industry standard 1.1 infrared communications port for use with
other infrared equipped devices. The IrDA port is configured
through the Microsoft Windows Control Panel or by double
tapping on the IrDA icon located on the task bar in the lower
right hand corner of the desktop.
Coaxial Connector:
Depending on the machine configuration, there may be a
coaxial antenna connection on the upper right hand side of the
housing. The coaxial connector will allow you to connect an
external antenna to an internal radio or GPS solution.
Docking Connector:
The docking connector provides for all external
communications with the unit. It connects to a port replicator or
docking station.
Battery Compartments:
There are two battery compartments designed for convenient,
hot swappable battery replacement while in the field. See the
Batteries and Charging Procedures section of Chapter 2:
Hardware Operation for instructions on changing batteries.
Hard Drive Compartment:
The hard drive compartment allows field upgrades or repairs
without opening the HAMMERHEAD 3. Some customers may
have IT Departments that will be trained to replace hard drives
at the customer location. You should not open the hard
drive compartment without the proper training from
WalkAbout Computers. Any tampering of the hard drive
will result in a void warranty.
Chapter 1 - Introduction
WalkAbout Computers HAMMERHEAD 3 User’s Guide – v021101
16
Bottom View
Bottom Guide Pin Holes:
The bottom guide pin holes are used to align the computer
when placed in either a vehicle, desktop, or wall-mount docking
station. Simply insert the computer onto the gauge ball guide
pins and tilt the computer back until the docking connectors
engage.
Connectivity
Most often connectivity with the HAMMERHEAD 3 is via the docking
connector on the backside of the unit. Most units ship with a port
replicator, DESKDOCK, or HAMMERDOCK vehicle dock that provides
standard ports for communications, keyboard, and power supply. Port
replicators and docking stations may be customized to your
requirements and may not be configured exactly as described below.
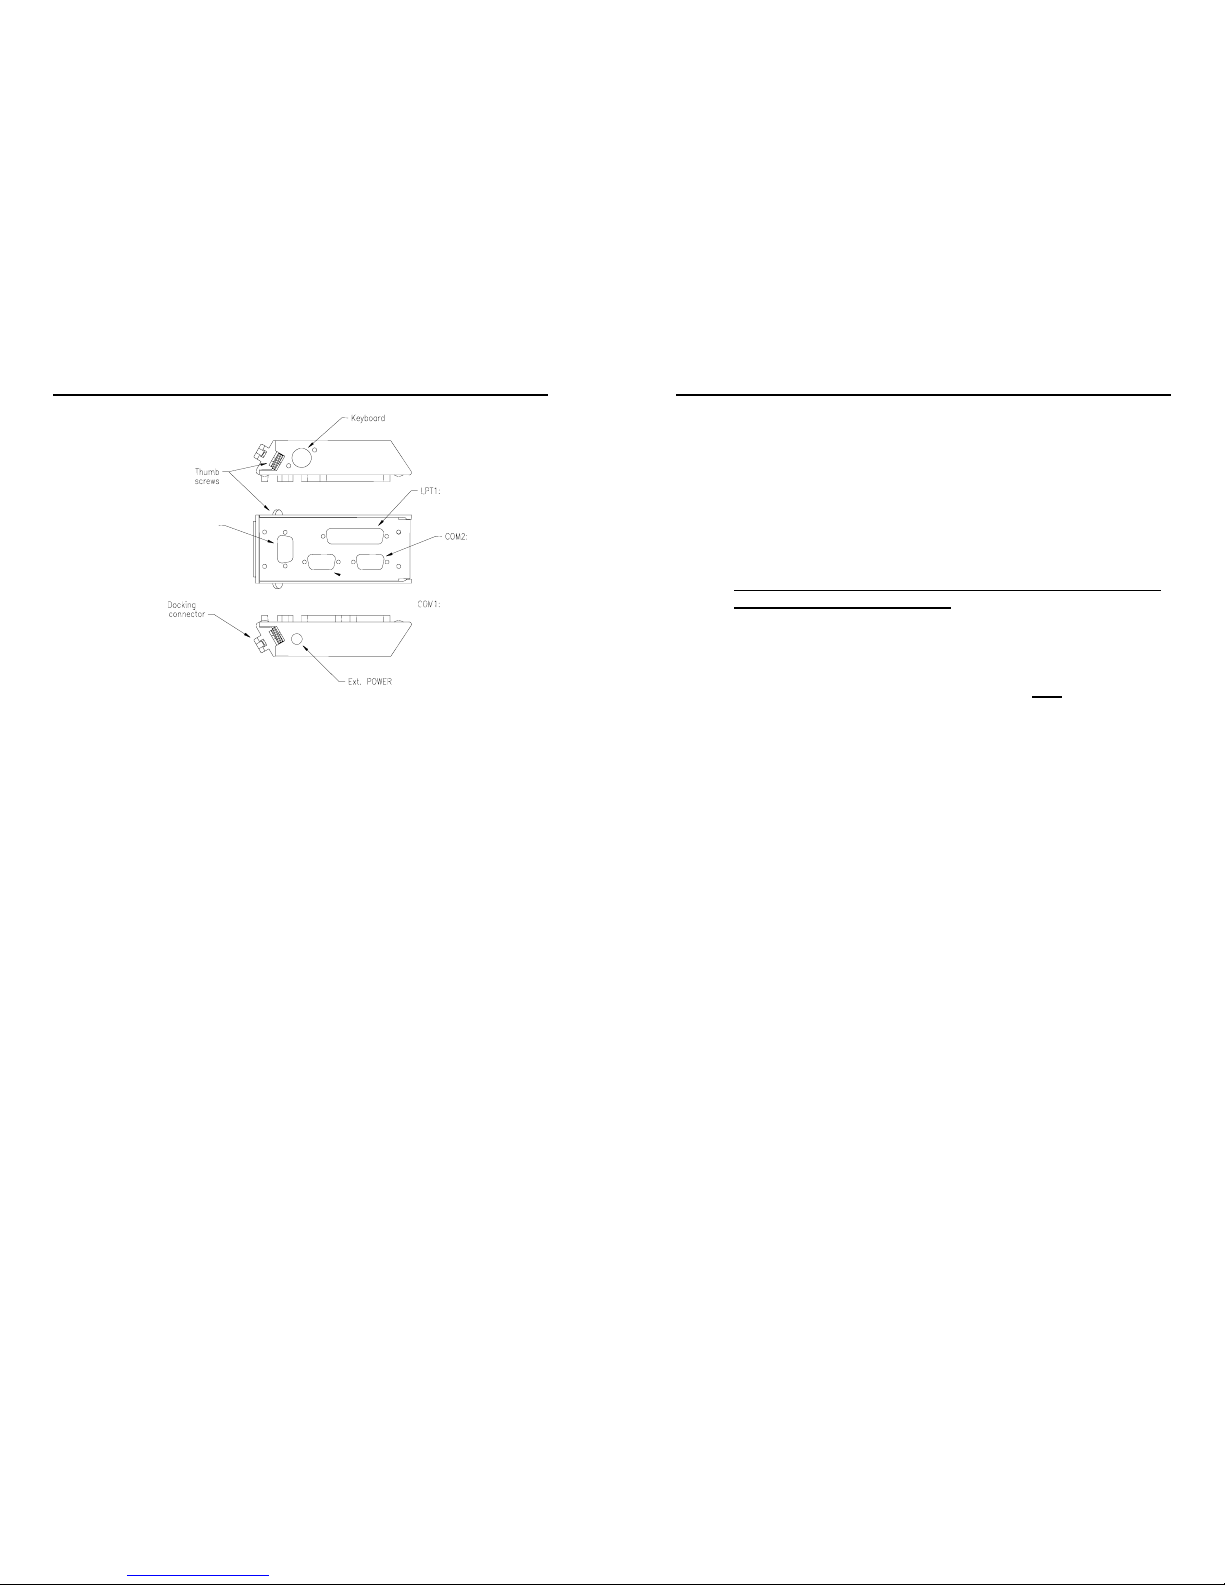
Port Replicators
There are several variations of port replicators (flat, angled,
custom, etc.) New connectivity options are constantly in
development. The following features are available on the
standard port replicator.
Chapter 1 - Introduction
WalkAbout Computers HAMMERHEAD 3 User’s Guide – v021101
17
Male Docking The male docking connector is inserted into
the
Connector: female docking connector on the back of the
computer to activate all ports in the port
replicator.
Power: Connector for AC or DC power. Use only the
power supplies provided especially for the
HAMMERHEAD 3.
Keyboard: Industry standard 5 din PS2 style keyboard
connector.
LPT 1: Industry standard 25-pin Centronics
compatible parallel connector.
COM 1: Industry standard DB-9 serial connector.
COM 2: COM 2 on most docking solutions is a full,
nine-pin DB-9 serial connector, although only a
subset of standard signals are supported.
Thumb Thumbscrews secure a positive connection.
Screws: Insert the port replicator fully before engaging
thumbscrews. Be careful not to over tighten
thumbscrews.
COM3
or
VGA
Chapter 1 - Introduction
WalkAbout Computers HAMMERHEAD 3 User’s Guide – v021101
18
The standard port replicator also doubles as a desktop stand
for the HAMMERHEAD 3. Simply press the male docking
connector on the port replicator into the female docking
connector on the back of the unit. The connectors are correctly
oriented and only fit in one direction. It is impossible to join
them incorrectly. Make sure the connector is fully inserted
confirming the port replicator fits snuggly against the back of
the computer. Turn the thumbscrews in a clockwise direction
to insure a reliable, positive connection. Do not over tighten.
Do not connect the port replicator to the computer while power
is attached to the port replicator. Attach the port replicator and
then attach the power to the port replicator.
Flat port replicators and custom cable sets are available when
connectivity is needed while the unit is mobile. External power
should be connected to the port replicators after
being firmly
connected to the HAMMERHEAD 3. Some custom
configurations provide access to ports in the computer
housing.

Chapter 1 - Introduction
WalkAbout Computers HAMMERHEAD 3 User’s Guide – v021101
19
Desktop Docking Station
FRONT VIEW
BACK VIEW
The Desktop Docking Station (DESKDOCK) provides complete
connectivity and integrated options (e.g. LAN adapter,
fax/modem, etc.) for using the HAMMERHEAD 3 on a desktop.
The DESKDOCK offers the following connectors for the
connection of external devices:
• Two RS-232 serial ports (COM1 and COM2 – 3-wire serial)
• One Centronics-compatible parallel port/floppy interface
• One keyboard port
• Power connector
• One USB port
• One SVGA video port
If the HAMMERHEAD 3 is equipped with video output
capabilities one COM port can be used as a VGA port. If a
DESKDOCK is equipped for communication with a network,
the connection is made through the USB port.
Chapter 1 - Introduction
WalkAbout Computers HAMMERHEAD 3 User’s Guide – v021101
20
Vehicle Docking
The HAMMERDOCK offers compact versatile mounting for a
variety of automobiles. The one-piece aluminum body ensures
sturdy docking with no adjustments. The HAMMERDOCK has tilt
swivel functionality, a built-in keyboard tray, and a push button key
lock. A break-out box with a 3-foot or 6-foot cable provides
convenient installation for permanent connections.
SIDE VIEW
FRONT VIEW
Noise reduction circuitry, surge protection, reverse polarity
protection, and power conditioning circuitry are built into the
HAMMERDOCK. In some cases a GPS receiver may also be
included. Connectivity on the rear of the HAMMERDOCK includes
a power connector, keyboard connector, and USB connector.
Connectors in the “break out box” at the end of a 3’ or 6’ cable
include 1 keyboard, 2 COM ports, 1 USB and 1 parallel port.
No adjustments are ever required to assure precision insertions of
the docking connector. The tension of the tilt/swivel functions and
the angle of the keyboard tray are the only adjustments available
on the HAMMERDOCK. All tension adjustments are made at the
time of installation with an Allen key provided with each docking
system. The keyboard tray is removable.
The computer can be secured in position by turning down the
spring-loaded red retention latch. Once the latch is turned
completely down the push button lock can be depressed to
prevent unauthorized removal. Security keys for fleet users are
identical to eliminate logistic problems.
The HAMMERDOCK cannot be installed without a base to mount
it in the vehicle. Contact WalkAbout for a current list of vehicle
mount providers.

Chapter 2 – Hardware Operation
WalkAbout Computers HAMMERHEAD 3 User’s Guide – v021101
21
2Hardware Operation
Turning on the unit
All units are shipped ready for operation with a lithium ion battery
freshly installed at the factory. Turn the computer on by pressing the
on/off button on the upper right-hand side. The button is recessed to
prevent accidentally turning the unit on or off. The HAMMERHEAD 3
will perform its self-check routines during the start up process. All units
are configured at the factory to automatically boot to the Microsoft
Windows Desktop unless a custom configuration has been requested.
Use and Care
The HAMMERHEAD 3 is a hardened field computer, but it is an
electronic device and reasonable precautions should be taken:
• Avoid severe impacts, especially on the display glass.
• Don’t throw the computer anywhere, even on the seat of a car.
• Don’t subject the computer to extreme heat by placing it on the
dashboard of a vehicle with the display facing the sun.
• Don’t leave the computer in temperatures below -25°F.
• Don’t pile tools or heavy objects on top of the computer.
• Don’t place the unit on the hood or roof of any vehicle, as it
might be left behind.
Chapter
Chapter 2 – Hardware Operation
WalkAbout Computers HAMMERHEAD 3 User’s Guide – v021101
22
• Don’t try to take the computer apart. Special tools are required
to disassemble the computer.
• Don’t use excessive force when inserting PCMCIA cards in the
PCMCIA slots, as they may break.
• Don’t use BIOS files interchangeably between color and
monochrome units. This will result in system damage and the
unit will have to be returned to technical support.
Pen Operations
The pen is the primary screen navigation and data entry tool for the
HAMMERHEAD 3. Without a keyboard attached, the pen is the
only means of communicating with the computer. Do not lose or
misplace the pen. The pen is usually tethered to its carrying case.
Attaching the tether to one of the zippers on the carrying case with a
split ring allows the tether to be anchored on either side of the
computer. By shifting the position of the zipper, the tethered pen is
convenient for right or left-handed users. All users are encouraged to
purchase a spare pen as a backup.
The pen functions like a two-button mouse. There are two switches in
the pen, one in the pen tip and another on the barrel of the pen. The
tip switch performs the same functions as the left button on a mouse
and the barrel switch performs like the right mouse button. Very few
applications require the use of the pen’s barrel button. Do not depress
the barrel switch when writing on the display; it will adversely affect
handwriting recognition. To activate the tip switch, simply press the tip
of the pen against the display. This is similar to clicking the left button
of a mouse. Double clicking is accomplished by double tapping with
the pen. Move an icon by pressing the pen directly overhead and
dragging it to the desired destination, keeping the pen in constant
contact with the display. Attributes related to use of the pen (e.g. tap
speed) can be adjusted in MS Windows’ Control Panel in the
Handwriting directory.
The HAMMERHEAD 3 utilizes a proximity-sensing electromagnetic
digitizer. This component tells the computer the pen’s exact position.
The computer senses the pen as it nears the display and the cursor
appears when the pen is approximately an inch away. This allows

Chapter 2 – Hardware Operation
WalkAbout Computers HAMMERHEAD 3 User’s Guide – v021101
23
visibility of the exact location of input before making actual contact with
the display.
The location of the cursor on the display is the location of input
regardless of the location of the pen tip. The cursor and the pen tip
should be closely aligned when the pen is in contact with the display. If
the pen and the cursor are out of alignment, realignment is
accomplished by following the instructions provided in the pen directory
of the MS Windows Control Panel. The pen will appear to be out of
alignment if the display settings have been changed from 640 x 480
resolution or 800 x 600 for color displays. Confirm the display is on the
appropriate setting before attempting to realign the pen.
Tapping the pen requires only light to moderate pressure. It is possible
to damage the pen by pounding the tip against the display with force.
Most problems using the pen are related to tapping speed and the
tapping area size. Both of these functions can be adjusted and tested
using the handwriting control software in the MS Windows Control
Panel. The width of the line created by the pen is also defined in the
Control Panel.
Pen Maintenance
The pen is powered by a 1.5 volt, alkaline, AAAA battery that can be
purchased in retail stores. Replacement batteries are manufactured by
several companies, the comparable part numbers follow:
Eveready E96
Varta 4061 101501
Duracell AAAA battery
Radio Shack 23-559
To replace the battery, unscrew the top and bottom sections of the pen
at the silver ring just above the barrel switch. The battery is installed
with the flat, negative (-) terminal entering the pen barrel first. The
nominal voltage supplied to the pen electronics is 1.5 volts, but the pen
will operate with the battery voltage in the range of 1.1 to 1.6 volts. The
pen electronics will not be destroyed or compromised in any way if the
battery is inserted in reverse.
Chapter 2 – Hardware Operation
WalkAbout Computers HAMMERHEAD 3 User’s Guide – v021101
24
Touch Operations
Touch Screen Operation
The touch screen replaces a mouse in normal Windows
operation. Wherever you touch the screen with your finger or
stylus, the computer interprets it as a mouse click. Due to the
nature of the touch screen, it is sometimes hard to drag objects
across the screen and it is also hard to move the pointer
around the screen without selecting the object below the
cursor. This should be taken into account when applications
are being developed for touch screen devices.
In Windows 98, there is a right click button which can be
moved around on the desktop while the control panel
application for the ELO touch screen is open. The right click
button emulates a right click with a standard mouse. To use
this function, you click on the right click button, then click on
what you want to right click with the stylus.
Caring for the Touch Screen
With minimal maintenance, the touch screen will last many
years. When using the touch screen, you should not use an
abrasive or metallic pointer. You can use your finger or a
plastic tipped stylus, etc. The touch screen is easily scratched
if an abrasive stylus is used. Be careful not to let sand or grit sit
on the screen. Cleaning of the touch screen can be done with a
regular plastic cleaner such as Plexus.

Chapter 2 – Hardware Operation
WalkAbout Computers HAMMERHEAD 3 User’s Guide – v021101
25
Batteries and Charging Procedures
Battery Status Indicators
The green LED’s on the lower left front of the unit indicate the
power status of the battery. At full charge, all five LED
indicators will light. As the battery power availability
decreases, the LED’s will turn off from top to bottom. Each
LED represents approximately 20% of the total charge. So if
three LED’s are lit, an estimated 60% of the total battery
charge remains.
The last LED indicator will begin to flash when approximately
three to five minutes of battery power remain. When the
remaining battery power becomes critical, all data should be
saved and the HAMMERHEAD 3 must be turned off or placed
in the standby mode. Failure to do so may result in lost data!
Replace one of the batteries with a fresh battery or recharge
the unit. See Installing New Batteries below.
When the HAMMERHEAD 3 is turned off, the battery status
indicators will also turn off after a delay of a few seconds.
When the unit is placed in standby mode, the battery status
indicators will remain lit as a reminder the unit is on standby.
Actual battery life is dependent on several factors including
temperature, backlight requirements and computer usage. The
use of power management may significantly extend this time.
Recharging Batteries
The HAMMERHEAD 3’s batteries automatically fast charge
any time the HAMMERHEAD 3 is connected to an external
power source (AC or DC). When charging, the green charge
indicator light will flash while the unit is recharging. When
charging two batteries, the first battery will charge to 80% of full
charge, then the second battery will charge to 80%. After both
batteries reach 80%, the first battery will then charge the
remaining 20%, after which the second battery will complete its
recharging process. This method provides the best ratio of
charge time to run time for short battery charge cycles.
Chapter 2 – Hardware Operation
WalkAbout Computers HAMMERHEAD 3 User’s Guide – v021101
26
When batteries are fully charged, the charge indicator light will
stop flashing and remain a constant green.
Installing New Batteries
The HAMMERHEAD 3 has the capability to run on one or two
batteries in the field. The unit does not require both batteries to
run. The two-battery design allows users to hot swap batteries
without turning the computer off. To install or replace a new
battery, turn the round knob on the back of the unit. The knob
holds the batteries in place and is designed so the batteries
cannot be taken out at the same time. Simply turn the knob
until the quarter piece exposes the corner of the battery that is
to be replaced. A lip on the battery aids for easy removal.
Install the new battery by placing it into the compartment and
turning the knob to cover the edges of both batteries. When
power runs down in one battery, a warning message will
display to report the status of the charge in each battery.
Battery Use/Care
The HAMMERHEAD 3 uses long lasting lithium ion batteries
that are custom made for WalkAbout Computers. Do not
substitute any other batteries. Substituting batteries may result
in a void warranty.
Lithium ion batteries are smart batteries that do not need to
discharge then recharge to view the charge status on the
computer. They have a low self-discharge rate and a long shelf
life. Keep them dry and store them at room temperature. The
battery is not considered hazardous waste by EPA regulations,
however local regulations may require specific methods of
disposal. We strongly encourage recycling
. WalkAbout will be
happy to recycle batteries for you. To order additional batteries,
contact your area representative.

Chapter 2 – Hardware Operation
WalkAbout Computers HAMMERHEAD 3 User’s Guide – v021101
27
Charging Batteries
To recharge the battery using the AC adapter, plug the circular
connector of the AC adapter into the AC connector in the
HAMMERHEAD 3 or in the power supply port on the replicator.
Charging begins automatically as the unit is docked when
using a vehicle docking mount, desktop docking station or a
wall mount docking station. The HAMMERHEAD 3 is fully
functional as it charges. Using the unit as it charges will only
slightly lengthen the recharging process. The HAMMERHEAD
3 requires at least 13 v DC for fast charging. Do not use any
external power source other than the AC or DC adapters
provided with the HAMMERHEAD 3; permanent damage to the
battery or computer may occur.
Removable Hard Drive
Please contact WalkAbout technical support 888-872-1100 before
removing the cover plate of the hard drive compartment. Any tampering
of the hard drive will result in a void warranty.
Accessories and Options
The following accessories are available for the HAMMERHEAD 3:
• Shock absorbing, dockable carrying case
• Universal AC power adapter 110-250 volts, 50-60 Hz
• Port replicator, standard, flat or custom cable sets
• Vehicle cradles and mounting solutions
• Desktop docking station with communications options
• Infrared LAN adapter
• Additional batteries
• Battery charger
• Wired and wireless LAN communications
• CDPD and Public RF radio modem(s)
• Integrated differential ready GPS receiver
• Internal display & hard drive heater package
• External bar code reader/scanner
• External CD ROM (USB)
• External 1.44 MB 3.5”bootable floppy disk drive (USB)
• Keyboard(s)
• Portable printer
• Custom integration of components upon request
Chapter 2 – Hardware Operation
WalkAbout Computers HAMMERHEAD 3 User’s Guide – v021101
28
Heater Option
The HAMMERHEAD 3 supports an optional heater package
including a LCD heater that greatly improves display readability
in colder environments and a hard drive heater that prevents
drive freezing. You can enable the heaters to automatically
activate while your machine is running, booting or even while it
is turned off. If enabled, the heaters will automatically activate
each time the ambient temperature falls below a predetermined
level.
PCMCIA Cards
PCMCIA cards can be purchased and inserted into the card
slot by the user.
The PCMCIA compartment is sealed from the internal
components of the HAMMERHEAD 3 to prevent dust and
moisture from entering the computer. To insert the PCMCIA
card, take off the hatch plate by removing the two Phillips
screws that hold the PCMCIA hatch cover. The PCMCIA cards
are inserted upside down (i.e. the up arrow on the card should
point toward the back of the HAMMERHEAD 3). Do not apply
excessive pressure when loading cards. They should slide
in easily. Remove the card in the same manner. Cardbus
cards are not supported. Forcing Cardbus cards in the
PCMCIA expansion slot could cause damage.
Many PCMCIA devices require connections for
communications (RJ-11 or RJ-45) or antenna for wireless
activity (wireless modems, GPS) or some other external
function. Most PCMCIA devices are too fragile for direct
connections in field environments. In response, WalkAbout
provides a variety of hatch plates with a milled cavity or “lump”
containing combinations of connectors and the cable
assemblies needed to connect to common PCMCIA devices.
For example, a “lump” to accommodate a PCMCIA fax/modem
and network connection includes a RJ-11 and RJ-45
connector. A “lump” for a CDPD modem and wire-line
fax/modem would include an antenna mount and RJ-11. The
“lumps” serve two purposes: 1) they provide for a sturdy and
highly reliable connection not possible when connecting
directly to a PCMCIA device, and 2) they maintain the

Chapter 2 – Hardware Operation
WalkAbout Computers HAMMERHEAD 3 User’s Guide – v021101
29
environmental integrity of the HAMMERHEAD 3 by fully sealing
the PCMCIA compartment while providing the needed
connectivity. “Lumps” are available only for those PCMCIA
devices that have been tested and recommended by
WalkAbout. Custom “lumps” may be available for large
purchases.
Chapter 3 – Software Operation
WalkAbout Computers HAMMERHEAD 3 User’s Guide – v021101
30
3Software Operation
HHUtility Control Program
HHUtility is a program to allow you to set preferences on your
HammerHead computer and to read more information about the state
of the batteries.
The HHUtility program can be started from the Start Programs menu.
Go to Start, Programs, HHUTIL.
Chapter

Chapter 3 – Software Operation
WalkAbout Computers HAMMERHEAD 3 User’s Guide – v021101
31
Batteries Tab
Once you start the HHUtility program, the initial screen displays basic
information about the charge of the batteries.
Status:
Shows you whether the batteries are Charging,
Fully Charged, Discharging or Idle.
DC:
Displays the voltage of applied external power.
Battery Level:
Indicates the total remaining charge from the
batteries. If there is one battery in the unit, this is
the total charge remaining on that battery. If
there are two batteries in the unit, this is the total
charge remaining from a combination of both
batteries.
Individual Battery Levels:
Primary (inner)
battery:
The percentage power available from the
primary battery.
Secondary
(outer) battery:
The percentage power available from the
secondary battery.
Time Estimates:
Time to Full
Charge:
Estimated time to fully charge the charging
battery.
Time to Empty:
Estimated time to discharge the active battery.
Chapter 3 – Software Operation
WalkAbout Computers HAMMERHEAD 3 User’s Guide – v021101
32
Primary Tab
This screen provides more detailed information about the Primary
(inner) battery.
Status:
Shows you whether the battery is Charging,
Discharging, Idle or Fully Charged.
DC:
Displays the voltage of externally applied power
(nominally 15V).
Battery Level:
Indicates the total remaining charge from this
battery.
Manufacturer:
The name of the battery manufacturer.
Serial Number:
An identification number of this battery.
Chemistry:
The type of chemicals used in this battery.
Mfg Date:
The date the battery was manufactured.
Time to Full:
If you are charging the battery, this box will display
the estimated time to fully charge this battery.
Time to Empty:
If the battery is discharging, this box will show the
estimated time to fully discharge this battery.
Flags:
Internal indicators of battery functions.
Status:
Internal indicators of battery functions.
Mode:
Internal indicators of battery functions.

Chapter 3 – Software Operation
WalkAbout Computers HAMMERHEAD 3 User’s Guide – v021101
33
Capacity:
The estimated capacity of this battery when fully
charged.
Voltage:
The voltage at the battery terminals.
Charge State:
The percentage power remaining in this battery.
Current Draw:
Positive is the charging current, Negative is the
current being used.
Max Error:
Displays accuracy of the capacity and battery level
estimates. A value greater than 2% indicates that
the battery should be calibrated.
EDV1:
End Discharge Voltage - voltage when the
computer will stop using the battery.
EDVF:
End DischargeVoltage Final – the voltage when
the battery will disconnect itself.
Cycles:
The number of charge/discharge cycles the battery
has experienced.
Temperature:
The temperature inside the battery. A temperature
too high will cease charging to prevent damaging
the battery. A temperature too low will decrease
the battery capacity.
Chapter 3 – Software Operation
WalkAbout Computers HAMMERHEAD 3 User’s Guide – v021101
34
Secondary Tab
If you have two batteries installed, this screen provides more
information about the Secondary (outer) battery.
Refer to the table under the “Primary Tab” for more information on
these indicators.

Chapter 3 – Software Operation
WalkAbout Computers HAMMERHEAD 3 User’s Guide – v021101
35
Properties Tab
This screen allows you to make changes to preset functions.
Side Switch Functions: The side switch function controls the
pushbutton switch on the side of the machine. NOTE: Only one
selection can be made.
On/Off:
This uses the side switch as a simple on or off
function.
Backlight:
When selected, the side switch will turn the backlight
on or off.
Disable:
When selected, the side switch will turn on the unit
only. The side switch will be entirely disabled once
the machine is running.
Suspend:
When selected, the side switch will toggle the unit in
or out of suspend mode.
Delay:
The number represents the length of time required
for the switch press to be recognized (approximately
½ second increments). If the switch is held down for
less than this length of time, the action is ignored.
Chapter 3 – Software Operation
WalkAbout Computers HAMMERHEAD 3 User’s Guide – v021101
36
Heaters (optional feature): This controls the LCD and Hard Drive
heater functions for cold weather operation. Multiple selections may be
made.
Standby:
When enabled, causes the heaters to operate even if
the unit is off. This avoids turn on delays if the unit is
cold, but will only operate if external power is
supplied from a stable AC source. (See Special
Instructions for Cold Weather Operation on page 40.)
Pre:
When enabled, the heaters will active when the
machine is first turned on. When cold, the machine
may pre-heat for up to 15 minutes before proceeding
to boot. In extremely cold weather, the machine may
have to go through more than one cycle. If you are
noticing long delays, you may want to change the
setting to Standby. This feature will work only if
external power is supplied from a stable AC source.
Run:
When enabled, allows the heaters to operate while
the machine is running.
OEM Module:
When enabled, this activates power to an optional
module.
LPT Port: Only one selection may be made. The unit must be restarted
for a new selection to become active.
Floppy:
Uses the LPT port as a floppy disk controller.
Printer:
Uses the LPT port as a printer controller.

Chapter 3 – Software Operation
WalkAbout Computers HAMMERHEAD 3 User’s Guide – v021101
37
Advanced Tab
This screen provides version information.
Versions:
Bios:
The version of the system BIOS.
SMU:
The version number (3008) and check number
(628a) of the SMU processor.
PPIC:
The version number (3006) and check number
(ee21) of the PPIC processor.
HHUtil:
The version number of this program.
OS:
The type of operating system running in this unit.
OS Ver:
The version number of the operating system.
Ambient Light:
An indicator of the amount of light shining on the
unit. This may be used on some systems to control
the Auto-backlight function.
Hammerhead
Temperature:
This indicates the internal temperature of the unit.
On monochrome units this is used to adjust the
contrast range of the display.
PIC Upload:
This is a utility for service personnel for upgrading
software in the SMU and PPIC processors. It is
normally disabled.
Chapter 3 – Software Operation
WalkAbout Computers HAMMERHEAD 3 User’s Guide – v021101
38
Calibrate Tab
Periodically, the batteries should be recalibrated. A calibration cycle
should be performed whenever the Max Error is greater than 2%. You
can determine the Max Error of the battery by looking in the Max Error
box. The “Primary” column refers to the inner battery and the
“Secondary” column refers to the outer battery. Only calibrate your
batteries when they need it. Calibrating a battery unnecessarily will
increase the cycle count and thereby reduce the battery life.
Cal Status:
Indicates of the state of the calibration cycle.
S/N:
The serial number of the battery in the Primary or
Secondary position.
Last Cal
date:
The date when a calibration cycle was last performed
on the battery.
Max Error:
Indicates the accuracy of the Capacity and percentage
charge of the battery. A calibration cycle should be
performed whenever the Max Error is greater than
2%.
Volts:
The voltage at the battery terminals.
Current:
A positive number shows the current flowing into and
charging the battery. A negative number shows the
current flowing out of and discharging the battery.

Chapter 3 – Software Operation
WalkAbout Computers HAMMERHEAD 3 User’s Guide – v021101
39
EDV1
Shows End Discharge Voltage, which is the voltage at
which the unit stops using the battery. The voltage
must drop below this value as part of the calibration
cycle.
TTE:
Time to empty, an estimate of the time to discharge
this battery.
TTF:
Time to full, an estimate of the time to fully charge this
battery.
Before calibrating your batteries, make sure your computer is hooked
up to an AC Power supply. You are now ready to press the Calibrate
button at the bottom of the screen. You should only perform this
function at a time when the unit is expected to be idle. This cycle must
be performed without interruption and may take over 4 hours for each
battery. During calibration, the batteries will be fully charged followed
by a full discharge and then fully charged again. Do not change or
remove batteries during this process. The battery calibration cycle will
continue until competed but can be cancelled at any time should it be
necessary to use the system.
Chapter 3 – Software Operation
WalkAbout Computers HAMMERHEAD 3 User’s Guide – v021101
40
Special Instructions for Cold Weather Operation
If your computer is equipped with an optional heater for cold
environments, you can change the settings by going to the HHUtility,
Properties Tab and checking the buttons as shown below. The heaters
will only operate when the power is supplied from a stable AC source,
irrespective of the preset settings.
Standby: (Activates heater while computer is off)
Check this box if you want the heater to operate even
when the machine is turned off.
If this option is checked, the LCD and Hard drive heaters will
turn on each time the temperature falls below 32
o
F and the
computer is turned off. The heaters will be activated long
enough to bring the unit to 40
o
F. Maintaining the unit at 32o F
will avoid the pre-heat delay when booting in a cold
environment but can drain even a car battery if left on for long
periods (such as over the weekend).
CAUTION: The standby heaters will cause a current draw of
1.8A (@ 15v)) when operating. The cycle period will depend
on the ambient temperature to maintain the unit above 32
o
F.
An additional 1.0A will draw if the batteries are also charging.
This can severely deplete a car battery if it is the source of
external power.
Pre: (Activates heater while computer is booting)
Check this box if you want the heater to operate when
the machine is first turned on.
If this option is checked, the LCD and Hard drive heaters will
turn on when you boot your machine if the temperature is
below 32
o
F. The heaters will operate for a time to bring the
unit up to 32
o
F before the main system is activated. During
this time, the LED display will blink in an alternating “police”

Chapter 3 – Software Operation
WalkAbout Computers HAMMERHEAD 3 User’s Guide – v021101
41
pattern while the unit is warming up. In extremely cold weather,
the machine may have to go through more than one cycle
before booting. If you need to bypass this pre-warming
process, just hold in the side button for approximately 5
seconds (3 cycles of the LED flashes) and the machine will
proceed to boot. If you continually experience long delays
when booting, you may want to change the setting to Standby.
Run: (Activates heater while the computer is running)
Check this box if you want the heater to operate while
the machine is running.
If this option is checked, the LCD and Hard drive heaters will
automatically activate each time the temperature falls below 52
o
F.
The heaters will operate for a time to bring the unit up to 60
o
F, at
which point they will shut off. This cycle will repeat each time the
temperature falls below 52
o
F.
To see if the heaters are running, look under the properties tab in the
Heaters section. If the heaters are running, “Heaters On” will appear to
the right of the check boxes. (See below)
Chapter 3 – Software Operation
WalkAbout Computers HAMMERHEAD 3 User’s Guide – v021101
42
HHVideo
HHVideo is a system utility that automatically runs in the system tray
and performs necessary system services. You can use HHVideo to
adjust the brightness and contrast of your unit. Additionally, it provides
icon images for the status of the batteries for quick reference and
displays the percentage charge when the cursor hovers over the icons.
The program may be started from the Start Programs menu. Go to
Start, Programs, StartUp, HHVideo.

Chapter 3 – Software Operation
WalkAbout Computers HAMMERHEAD 3 User’s Guide – v021101
43
Accessing HHVideo from the System Tray
If the program is running, icons will appear in the system tray in the
lower right corner of the screen.
Click on this icon to bring up the brightness control in color units
and brightness/contrast controls in monochrome units.
If this icon is present, the battery is charging.
If this icon is present, the battery is discharging.
If this icon is present, the battery has been removed.
This icon indicates the battery is fully charged.
The left battery icon represents the Primary (inner) battery and the right
icon represents the Secondary (outer) battery.
Hovering the cursor over the battery icon will display the remaining
percentage charge.
For example, this System Tray indicates there is no Primary (inner)
battery and the Secondary (outer) battery has 99% of its charge
remaining.
Chapter 3 – Software Operation
WalkAbout Computers HAMMERHEAD 3 User’s Guide – v021101
44
Adjusting the brightness and contrast
Clicking on the
icon will open the slider window for adjusting the
intensity of the back light. This will help improve visibility when bringing
the unit from inside to bright outdoor sunlight and vice versa.
Using the cursor, click on the slider bar and drag the pointer upwards
to reduce the back light intensity or downwards to increase the back
light intensity.

Chapter 3 – Software Operation
WalkAbout Computers HAMMERHEAD 3 User’s Guide – v021101
45
On monochrome units, the contrast may also be adjusted and the
function of Autobrightness enabled.
Autobrightness is a function that automatically turns the backlight on
or off depending on ambient light conditions. A photo sensor located on
the front of the unit monitors the amount of light falling on the display
and turns the backlight off when a certain level of ambient light is
available. This provides improved visibility and helps to prolong battery
life when the unit is used in a sunny disposition. To activate
Autobrightness, place a check in the Auto box.
Chapter 4 – Frequently Asked Questions
WalkAbout Computers HAMMERHEAD 3 User’s Guide – v021101
46
4 FAQ’s
Following is a list of common questions and answers that are
presented to WalkAbout’s telephone support technicians. If you don’t
see an answer to your question here, please contact Technical Support
at 888-872-1100 and one of our Representatives will be able to help
you.
What options are available for loading software into
the HammerHead?
• USB Floppy Drive
• USB CD-ROM
• Local Area Network
• Direct Cable Connection
How do I install drivers for peripheral devices sold
by WalkAbout?
• Device drivers for peripherals that WalkAbout distributes reside
on the HammerHead where they can be installed as needed.
• Contact Technical Support for assistance on any of these
installations at 888-872-1100.
How do I install drivers for peripheral devices not
sold by WalkAbout?
• Device drivers for peripherals not distributed by WalkAbout will
require loading via one of the options listed above.
• Contact WalkAbout Technical Support at 888-872-1100 for
loading device drivers for any variety of peripheral that may
need to be installed.
Chapter

Chapter 4 – Frequently Asked Questions
WalkAbout Computers HAMMERHEAD 3 User’s Guide – v021101
47
How can I manually toggle on or off the backlight?
• The HHUtility program supplied on your HammerHead, you
can configure the sideswitch to toggle the backlight on and off.
Please see Chapter 3 of this User’s Guide for more detailed
information.
How do I activate the “Screen Keyboard”?
• If you are using MS Pen services: From the Windows desktop,
navigate through the Start Menu to the Program group named
“Pen Services”. Click on the icon for the screen keyboard in
this group.
• If you are using My-T-Pen: From the Windows desktop,
navigate through the Start Menu to the Program group named
“My-T-Pen”. Click on the icon for “My-T-Pen” in this group.
Can I activate the “Screen Keyboard” automatically
when the unit boots?
• Yes, for MS Pen services, copy the screen keyboard shortcut
into the startup group. For My-T-Pen, there is a configuration
option in the My-T-Pen setup program to load at boot time.
How can Hand Writer Recognition be disabled?
• For MS Pen services, open the control panel applet for Hand
Writer Settings. There is an option located under the Personal
tab that will allow the user to set the time delay for “Switch from
Ink to Text Selection”. Set this adjustment to the extreme left
(0.0 seconds) to disable Hand Writer Recognition.
• For Calligrapher, the handwriting recognition is only active
when the calligrapher program is running.
How does the automatic contrast adjustment work?
• The HammerHead unit is manufactured with a thermal sensing
circuit that is tied into the contrast adjustment of the LCD
Display. This automatic adjustment is augmented with the
ability for the end user to tailor the settings using the HHVideo
Chapter 4 – Frequently Asked Questions
WalkAbout Computers HAMMERHEAD 3 User’s Guide – v021101
48
application. See Chapter 3 of this User’s Guide for more
detailed information.
What do I do if the unit locks up or freezes while under Windows?
• In the event that Windows locks up and you loose control of
screen activity, you can depress and hold the side power
button for a period of 15 seconds. This will force a “hardware
shutdown”.
• Note: Windows may restart in Safe Mode.
o If you see a Boot Menu that suggests Safe Mode,
depress the side button, which will shut down the unit.
o Depress the side button again to turn the unit on. It will
now boot the unit in Normal Mode.
How do I clean the champ connector on the back of the
HammerHead?
• A non-metallic bristle brush can be used to sweep out any dust
or foreign particles
How do I clean the glass on the face of the unit?
• On pen machines, a non-abrasive glass cleaner can be used
to wash the display glass.
• On touch screen machines, a plastic cleaner such as ‘Plexus’
can be used to clean the display.
What do I do when the pen / touch panel gets out of alignment?
• If you are using MS Pen services: In the Windows Control
Panel is an applet labeled Hand writer Settings (pen settings
on some machines), which has the pen alignment utility. You
may have to attempt alignment more than once to get the
desired result.
• If you are using Pen with Calligrapher: From the Windows
desktop, navigate through the Start Menu to the Program
group named “Fine Point” (“Mutoh pen system driver” on some

Chapter 4 – Frequently Asked Questions
WalkAbout Computers HAMMERHEAD 3 User’s Guide – v021101
49
units). In this group, click on the icon for “Recalibrate” and
follow the onscreen instructions.
• If you are using Touch with Calligrapher: In the Windows
Control Panel, open the ELO control panel applet. In the
applet, click on the calibrate button and follow the onscreen
instructions.
What if the pen still will not align?
• Check that the user has not altered the Windows Display
settings to a screen resolution other than factory default. If so,
adjust the setting to factory default, reboot the unit and attempt
pen alignment.
• See supporting documentation for instructions on reinstalling
the pen services software. This will typically cure problems
with damaged support files that impact the pen function.
What can I do when the “Start” button disappears?
• In pen computing, it is not uncommon for the user to
inadvertently resize the task bar so that it is not visible on the
screen.
• First, attempt to recover the start button and task bar by
moving around the edges of the display to see if you will get a
double arrow. If you get a double arrow, simply drag the task
bar to the size you need.
• If not, follow these directions (note: you will need a keyboard to
perform this function. Do not attempt to use the pen during this
process.
1. Press the <CTRL>, <ESC> keys in combination to display
the “Start” menu.
2. Press the <ESC> button and the menu will disappear. You
have now placed the focus on the “Start” button.
3. Press <ALT>, <SPACEBAR> keys in combination to display
a context menu.
4. Use the cursor keys to navigate in the context menu and
highlight “Size”.
Chapter 4 – Frequently Asked Questions
WalkAbout Computers HAMMERHEAD 3 User’s Guide – v021101
50
5. Press <ENTER> and the pointer will move to the middle of
the taskbar along the edge of the display and become a twoway arrow.
6. Using the cursor key, size the task bar until it is the size you
prefer.
7. Press the <ENTER> key to set the task bar size.
• To avoid this problem in the future, try sizing the task bar to be
larger than the default. This can be done at your discretion.
How long is the battery good for in the HammerHead unit?
• WalkAbout recommends replacing the HammerHead battery
annually.
What factors can influence the life of the battery charge?
• PCMCIA devices require power and are known to shorten
battery life.
• Constant reading and writing of the Hard Disk will shorten
battery life.
• Old batteries will begin to exhibit signs of “charge memory”
which results in shortened battery life.
What do I do when the battery discharges and will not charge in
the unit?
• There are several fused circuits in the HammerHead designed
to protect the core electronics. In the event that the unit will not
initiate the charge cycle, there may be a blown fuse in the
circuit.
Why doesn’t the HammerHead boot after I replace the battery and
place it on the Desktop Docking Station?
• When replacing the battery, the unit will perform a simple selftest by simultaneously lighting each LED on the front of the
unit. You must allow this test to complete before introducing
external power to the unit.

Chapter 4 – Frequently Asked Questions
WalkAbout Computers HAMMERHEAD 3 User’s Guide – v021101
51
What Modem solutions does WalkAbout provide?*
• Xircom RealPort 10/100 Ethernet & Modem Type II device
• Xircom Credit Card 56-GlobalACCESS
TM
Type II device
What networking solutions are available for use in the
HammerHead?*
• USB Network Communications at a peak rate of 8 Mbps with a
properly equipped Docking Solution. USB is only supported
under Windows 98 and 2000.
• Infrared Network Communications at a peak rate of 4 Mbps
with a properly equipped Docking Solution. Infrared is only
supported under Windows 95.
• PCMCIA Type II 16 bit fixed wire network adapters.
• PCMCIA Type II 16 bit wireless network adapters
What PCMCIA fixed wire network solutions does WalkAbout
provide?*
• Xircom RealPort 10/100 Ethernet & Modem Type II device
• Xircom Credit Card 10/100 Ethernet Type II device
What PCMCIA wireless network solutions does WalkAbout
provide?*
• Proxim RangeLAN2 7401 2.4 GHz 1.6 Mbps Wireless LAN Adapter
• Lucent WaveLAN Orinoco 2.4 GHz 11 Mbps Wireless LAN Adapter
• Cisco Aironet 340/350 series Wireless LAN Adapters
• Sierra Wireless AirCard 300/350 series CDPD WAN Adapter
How can USB networking be utilized in the HammerHead?
• WalkAbout manufactures Desk Dock and Wall Rack solutions
with USB network adapter that communicates to the
HammerHead via the docking connection and connects to the
network hub by way of standard network patch cabling.
• No network cable is connected directly to the HammerHead.
• USB functionality is only supported under Windows ‘98 & 2000.
* See www.walkabout-comp.com for modem and network solution updates.
What can Infrared be used for under Windows 98?
Chapter 4 – Frequently Asked Questions
WalkAbout Computers HAMMERHEAD 3 User’s Guide – v021101
52
• Infrared printing is supported under Windows 98.
How can USB be utilized in the HammerHead?
• The HammerHead can be manufactured with a single USB
connection on the side of the unit. This USB connection can
be used for a wide variety of USB type devices.
What are WalkAbout Technical Support’s hours of operation?
• WalkAbout staffs the Technical Support department Monday
through Friday 8:00 AM to 8:00 PM Eastern Standard Time.

WalkAbout Computers HAMMERHEAD 3 User’s Guide – v021101
53
Warranty Information
The standard WalkAbout Computers Limited Warranty is valid for one
year from the date of shipment. Extended warranty protection is
available for up to three years.
WALKABOUT COMPUTERS
LIMITED WARRANTY
1. WHAT IS COVERED BY THIS WARRANTY
WalkAbout Computers, Inc. warrants for the duration of this limited
warranty (“Warranty”) that WalkAbout Computers’ products, which are
comprised of the HAMMERHEAD 3 family of products, all accessories to
such Products manufactured or created by WalkAbout Computers
(“Accessories”), and all replacement Products and Accessories repaired or
replaced pursuant to the Warranty (“Replacement Products”) are free from
defects in material and workmanship under normal use and service subject
to the terms and conditions set out below.
2. LENGTH OF WARRANTY
The Warranty is valid for a period of one (1) year for Products and
Accessories, from the original date of sale from WalkAbout Computers
and/or a WalkAbout Computers Authorized Reseller. During any such
period, WalkAbout Computers will, at its option, either repair or replace
with new or “like new” used parts of any of the Products, Accessories or
Replacement Products sold by WalkAbout Computers which prove to be
defective, provided that such Products or Accessories are returned in
accordance with the terms of this Warranty.
3. TERMS AND CONDITIONS
(i) This Warranty applies to the retail purchaser or lessee of Products and
Accessories that have been properly installed, used and serviced
according to the specifications provided and practiced by WalkAbout
Computers.
(ii) Damage due to abuse, accident, misuse, modification, misapplication,
or damage as a result of shipment or improper service cancels all
obligations of WalkAbout Computers under this Warranty.
(iii) THIS WARRANTY IS IN LIEU OF ALL OTHER WARRANTIES OR
CONDITIONS, WHETHER ORAL OR WRITTEN, EXPRESSED OR
IMPLIED, WARRANTIES OR CONDITIONS OF MERCHANTABLE
QUALITY AND FITNESS FOR A PARTICULAR PURPOSE AND
WalkAbout Computers HAMMERHEAD 3 User’s Guide – v021101
54
THOSE ARISING BY STATUTE OR OTHERWISE IN LAW OR FROM
THE COURSE OF DEALING IN OR USAGE OF TRADE. SOME
JURISDICTIONS DO NOT ALLOW THIS LIMITATION, SO THE
ABOVE EXCLUSION MAY NOT APPLY TO YOU.
(iv) This Warranty and the statute of limitations shall run concurrently with
any acceptance period. No suit, litigations, or action shall be brought
based on the alleged breach of this Warranty or implied warranties
more than two (2) years after the date of purchase in those
jurisdictions allowing such a limitation, otherwise, no such action shall
be brought more than two (2) years after the expiration of this
Warranty.
4. HOW TO OBTAIN WARRANTY SERVICE
(i) Immediately notify WalkAbout Computers or a WalkAbout Computers
Authorized Reseller of problems encountered during the warranty
period. As appropriate, WalkAbout Computers will provide a return
merchandise authorization number (the “RMA” number) for the return
of your Products, Accessories and/or Replacement Products.
(ii) Label and/or include the following information with the
Products/Accessories shipping container:
a) your name, address and telephone number
b) the RMA number received from WalkAbout Computers,
c) a description of the problem, and
d) proof of the date of original purchase from WalkAbout
Computers, e.g., bill of sale or other evidence indicating the
date of original purchase.
(iii) Return the Products, Accessories and/or Replacement Products with
the above mentioned information, transportation and insurance costs
prepaid to WalkAbout Computers’ warranty repair facility at the
address noted below. WalkAbout Computers is not responsible for
loss or damage, which may occur in transit.
(iv) Once repaired or replaced under the terms specified in the Warranty,
WalkAbout Computers will return ship, pre-paid, the Products,
Accessories and/or Replacement Products to the originating party.

WalkAbout Computers HAMMERHEAD 3 User’s Guide – v021101
55
5. WHAT IS NOT COVERED
(i) This Warranty does not cover and WalkAbout Computers shall not be
liable for any loss resulting from:
a) parts and components of products, software and/or accessories
not supplied by WalkAbout Computers,
b) parts and components of Products, Accessories, and/or
Replacement Products and software related thereto supplied,
installed and/or distributed but not manufactured, created
and/or assembled by WalkAbout Computers, for which
WalkAbout Computers provides a warranty depot service only;
c) damage to Products, Accessories and/or Replacement Parts
caused by accident, fire, floods, or acts of God;
d) improper use or care of the Products. Accessories and/or
Replacement Parts or failure to use Product and/or Accessory
as stipulated in the owners manual supplied by WalkAbout
Computers;
e) defects or damage caused by mishandling, misuse, improper
testing or improper operation;
f) defects or damage caused by adjustments, alterations or
modifications of any kind;
g) repair by someone other than WalkAbout Computers or a
WalkAbout Computers Authorized Reseller for a defect or
malfunction covered by this Warranty; and
h) programming or service by anyone other than WalkAbout
Computers or a WalkAbout Computers Authorized Reseller.
(ii) WalkAbout Computers is not responsible for and shall not be liable for
transportation and insurance charges incurred in or damages resulting
from transporting the Products, Accessories and/or Replacement Products
to WalkAbout Computers for warranty service;
(iii) WalkAbout Computers shall not be responsible for consequential,
special, incidental or contingent damages or expenses of any nature
or kind whatsoever, including, without limitation, damages for any loss
of revenue, profits, property, information or use of any kind, such
damages and expenses are not recoverable under this Warranty, even
if WalkAbout Computers has been notified of the possibility thereof. In
any event, WalkAbout Computers’ liability for any breach shall be
limited to actual direct, provable damages not to exceed the amount
originally paid to WalkAbout Computers for the Product and/or
Accessories. These limitations apply to all causes of action, including
breach of contract or negligence. Some jurisdictions do not allow the
exclusion or limitation or certain remedies including damages, so the
above exclusion or limitation may not apply to you.
(iv) WalkAbout Computers is not responsible for any third party software
created for use in the integration and/or operation of any Products,
Accessories and/or Replacement Products whether or not such third
WalkAbout Computers HAMMERHEAD 3 User’s Guide – v021101
56
party software was installed by WalkAbout Computers. Maintenance
and support service for third party software is the sole responsibility of
the creator thereof.
6. ADDITIONAL INFORMATION
(i) The agents, dealers and employees of WalkAbout Computers are not
authorized to make any modifications to this Warranty, or additional
warranties binding on WalkAbout Computers about or for Products,
Accessories and/or products sold or supplied by WalkAbout
Computers. Additional statements, whether oral or written, except
signed written statements from an officer of WalkAbout Computers, do
not constitute warranties and should not be relied upon.
(ii) The Warranty gives you specific legal rights. You may also have other
rights which vary from one jurisdiction to another.
(iii) For certain non-WalkAbout Computers products, product components,
software and accessories supplied and/or distributed by WalkAbout
Computers which are expressly warranted by the manufacturer of
such products, WalkAbout Computers will provide a warranty depot
service. Where applicable, information with respect to this service will
be included.
7. COMPANY INFORMATION AND RETURN ADDRESS
All returns for warranty service should be made to:
WalkAbout Computers
1501 Northpoint Parkway, Suite 103
West Palm Beach, FL 33407
(888) 462-0300
(561) 712-0300
Customer Service
Toll-free technical support is available from 8:00 a.m. to 8:00 p.m. ET by calling
(888) 872-1100. Please call this number to receive return merchandise
authorization prior to returning any equipment for repairs of any type.

WalkAbout Computers HAMMERHEAD 3 User’s Guide – v021101
57
WalkAbout Computers HAMMERHEAD 3 User’s Guide – v021101
58

WalkAbout Computers HAMMERHEAD 3 User’s Guide – v021101
59
© 2002 WalkAbout Computers
WalkAbout Computers, Inc.
1501 Northpoint Parkway, Suite 103-104
West Palm Beach, FL 33407
www.walkabout-comp.com
 Loading...