

Walinga ULTRA-VEYOR SYSTEM Operator's Manual
ULTRA-VEYOR SYSTEM
OPERATOR'S MANUAL

ULTRA-VEYOR SYSTEM
Warranty Registration Form & Inspection Report
WARRANTY REGISTRATION (3 part form - please print)
This form must be filled out by the dealer and signed by both the dealer and the customer at the time of delivery.
Delivery Date: mm / dd / yyyy
COMPANY / CUSTOMER NAME
Phone:
Mobile phone:
Email: @
StreetAddress:
City: Prov/State
Postal/Zip Country
Machine Serial Number
DEALER INSPECTION REPORT
Blower and Airlock Turn Freely
Airline Connections Tight
Blower Serial No.
DEALER NAME
Phone
Mobile phone
Email: @
StreetAddress
City: Prov/State
Postal/Zip Country
Airlock Serial Number
SAFETY
Guards Installed and Secured
All Safety Signs Installed
Airline Intake Caps Secured
Drive Chains and Belts Tensioned and Aligned
Lubricate Machine
Check Oil Level in Reservoirs
Review Operating and Safety Instructions
Operating Manual Supplied
I have thoroughly instructed the buyer on the above described equipment which review included the Operator’s Manual
content, equipment care, adjustments, safe operation and applicable warranty policy.
Date ___________________ Dealer's Rep. Signature ____________________________________________
The above equipment and Operator’s Manual have been received by me and I have been thoroughly instructed as to
care, adjustments, safe operation and applicable warranty policy.
Date____________________ Owner’s Signature _______________________________________
3 Part Form Please Print
WHITE YELLOW PINK
WALINGA DEALER CUSTOMER


Dear Customer,
Thank you for choosing WALINGA PNEUMATIC CONVEYING SYSTEMS. For your convenience, should
you require any information related to Parts, Service or Technical Engineering, please contact one of the
following Walinga Personnel in Guelph at 1-888 925-4642 unless noted
TECHNICAL - ENGINEERING:
Duane Swaving 226-979-8227 duane.swaving@walinga.com
Ken Swaving 519 787-8227 (ext:100) ks@walinga.com
WARRANTY CLAIMS:
Canada: (ext:258) warranty.usa@walinga.com
USA: (800) 466-1197 (ext 8) warranty.can@walinga.com
SERVICE MANAGER:
Andy Nijenhuis (519) 763-7000 (ext:260) andy@walinga.com
SALES MANAGER:
Canada: Tom Linde (519) 787-8227 (ext 5) thl@walinga.com
USA: Peter Kingma (800) 466-1197 jpk@walinga.com
ORIGINAL PARTS SALES:
Ontario and Eastern Canada:
Scott Lodder spl@walinga.com (ext: 224) Parts Department Fax: (519) 824-0367
Manitoba and Western Canada:
Chad Yeo 204-745-2951 chad.yeo@walinga.com
USA:
John VanMiddlekoop (800) 466-1197 (ext 3) jvm@walinga.com
CORPORATE HEAD OFFICE:
5656 Highway 6N
RR#5, Guelph, Ontario Canada N1H 6J2
Tel: (888) 925-4642 Fax: (519) 824-5651
FACTORY DISTRIBUTION AND SERVICE CENTRES:
938 Glengarry Cres. Fergus, Ontario Canada N1M 2W7
Tel: (519) 787-8227 Fax: (519) 787-8210
1190 Electric Ave. Wayland, MI.USA 49348
Tel (800) 466-1197 Fax (616) 877-3474
70 3rd Ave. N.E. Box 1790 Carman, Manitoba Canada R0G 0J0
Tel (204) 745-2951 Fax (204) 745-6309
24 Molloy Street Toowoomba, Queensland Australia 4350
PRINTED IN CANADA

Walinga Inc.
Pneumatic Conveying System
Warranty Terms
Walinga Inc. is committed to providing a quality product that will meet or exceed your expectations for many
years to come. Our warranty terms and our warranty claim process has been designed to ensure that each
warranty claim will be resolved in an orderly, fair and timely manner.
The Warranty
Walinga Inc. (“Walinga”) warrants that all new pneumatic products sold by Walinga Inc. will be free from defects in
material and workmanship (the “Walinga Warranty”).
Warranty Period
The warranty period for the Walinga Warranty shall expire on the date that is the earlier of: two (2) years after the date of
delivery to the original customer; or upon the expiration of five hundred (500) hours of operation; whichever date comes
first.
Limitations of and exclusions from the Walinga Warranty
The Walinga Warranty applies to material and workmanship only.
With respect to any component parts that are supplied or manufactured by others, the warranty coverage on
such component parts will be strictly limited to the warranties of the manufacturers of such component parts.
The Walinga Warranty shall only be for the benefit of the original purchaser of the pneumatic products.
A Walinga Warranty may be transferable by the original purchaser to a third party for the balance of the
warranty period then remaining, provided that Walinga consents in writing to such transfer of warranty.
The Walinga Warranty is conditional upon proper storage, installation, use, maintenance, operation and
compliance with any applicable recommendations of Walinga.
Warranty Claim Procedure
Should you encounter any difficulties with your unit within its warranty period, please contact your local Walinga dealer
or sales representative, your local Walinga Service department or Walinga's Warranty Department to submit a warranty
claim application.
To speak with a Walinga Warranty Coordinator, contact:
Canada 1-888-WALINGA (ext 273)
International +1-519-824-8520 (ext 273)
Email – warranty.canada@walinga.com
USA 1-800-466-1197 (ext 8)
Email – warranty.usa@walinga.com
Australia 07-4634-7344
Email – mail@customvac.com.au
Required Warranty Claim information
The following information must be provided to Walinga in order for us to properly process and consider your warranty
application:
Customer name and contact information (email if available).
The equipment serial number and/or Vehicle Identification Number (if applicable).
Date of claimed failure.
Equipment hours of operation.
Details, description and photos (upon request) of the claimed failure and the corrective repairs attempted.
Warranty Conditions
Equipment must be registered within 30 days of being received by the buyer. It will be within the sole
and unfettered discretion of Walinga as to whether it will honour its warranty on non-registered
equipment.

Warranty Conditions (continued)
The buyer is responsible for promptly notifying Walinga of any defects to the equipment. The buyer is also
responsible for making the equipment available to Walinga or its authorized repair facility for evaluation and
repair.
Prior to making any repairs or parts replacements, a warranty application and any estimated associated costs
must be approved with the issuance of a claim number by an authorized Walinga representative. Undertaking
any work prior to receiving warranty authorization may result in a partial or complete loss of warranty coverage.
At Walinga's discretion, warranty repairs may be authorized to be completed at a repair facility convenient to the
buyer. In such situations the estimated labour time must be approved by Walinga prior to undertaking any work.
Labour hours will be reimbursed at the facilities posted hourly labour rate.
At Walinga's request, parts in question must be returned to the nearest Walinga service facility for evaluation. In
such situations a Returned Goods Authorization (RGA) number will be provided to the buyer. The returning
shipment must be clearly labeled with the assigned RGA number and include a copy of the RGA form. Unless
otherwise arranged, these parts are to be returned to Walinga within 30 days to ensure timely processing of
your warranty claim. Failure to return such parts may result in partial or complete loss of warranty coverage.
Replacement parts provided under warranty are covered for the remainder of the original equipment warranty
period.
Walinga reserves the right to use new, remanufactured or refurbished components when performing warranty
repairs and replacements.
Walinga is entitled to a reasonable amount of time and a reasonable number of attempts to assess the claim,
diagnose the problem, and perform any necessary repairs.
The warranty offered on used or refurbished equipment is limited to that specified on the purchase contract.
Where a warranty period has not been stipulated on the purchase contract., and where such equipment is
“used”, then such equipment is considered by Walinga to be sold “as is, where is” without the Walinga
Warranty. Where such equipment is refurbished, then the Walinga Warranty shall apply.
Without limitation, Walinga reserves the right to reject a warranty claim or for any one or more of the following
reasons:
The warranty claim information provided is insufficient.
The product evaluation does not substantiate the claim.
The unit has been operated above and beyond its capacity or not maintained or serviced properly, resulting in
damages incurred to major components.
If the unit was equipped with a factory installed hour meter which has been disconnected, altered or inoperative
for an extended period of time; with the result being that the equipment’s operating hours cannot be verified.
It is apparent that the operator’s manuals have not been followed.
The equipment is not registered.
Without limitation, Walinga’s Warranty does not cover:
Damage or deterioration due to lack of reasonable care or maintenance.
Damage caused or affected by unapproved modifications to the equipment.
Damage caused by negligence or misuse of the equipment.
Damage caused by using the equipment for purposes for which it was not designed or intended.
Walinga’s liability under this warranty, whether in contract or tort, is limited to the repair, replacement or adjustment of
defective materials and workmanship. In no event will Walinga be responsible for any direct, indirect, loss of time,
incidental or consequential expenses including, but not limited to, equipment rental expenses, towing, downtime,
inconvenience, or any losses resulting from the inability to use the equipment. Further, Walinga shall not be liable for
any damages or inconvenience caused by any delay in the supply or delivery of any equipment or component parts
thereof.
The selling Dealer/Sales Person makes no warranty of its own and has no authority to make any representation or
promise on behalf of Walinga, or to modify the terms or limitations of the Walinga Warranty in any way.
Punitive, exemplary or multiple damages may not be recovered unless applicable law prohibits their disclaimer.
Warranty related claims may not be brought forward as a class representative, a private attorney general, a member of a
class of claimants or in any other representative capacity.
The Walinga Warranty and all questions regarding its enforceability and interpretation are governed by the law of the
country, state or province in which you purchased your Walinga equipment. The laws of some jurisdictions limit or do not
allow the disclaimer of consequential damages. If the laws of such a jurisdiction apply to any claim against Walinga, the
limitations and disclaimers contained here shall be to the greatest extent permitted by law.
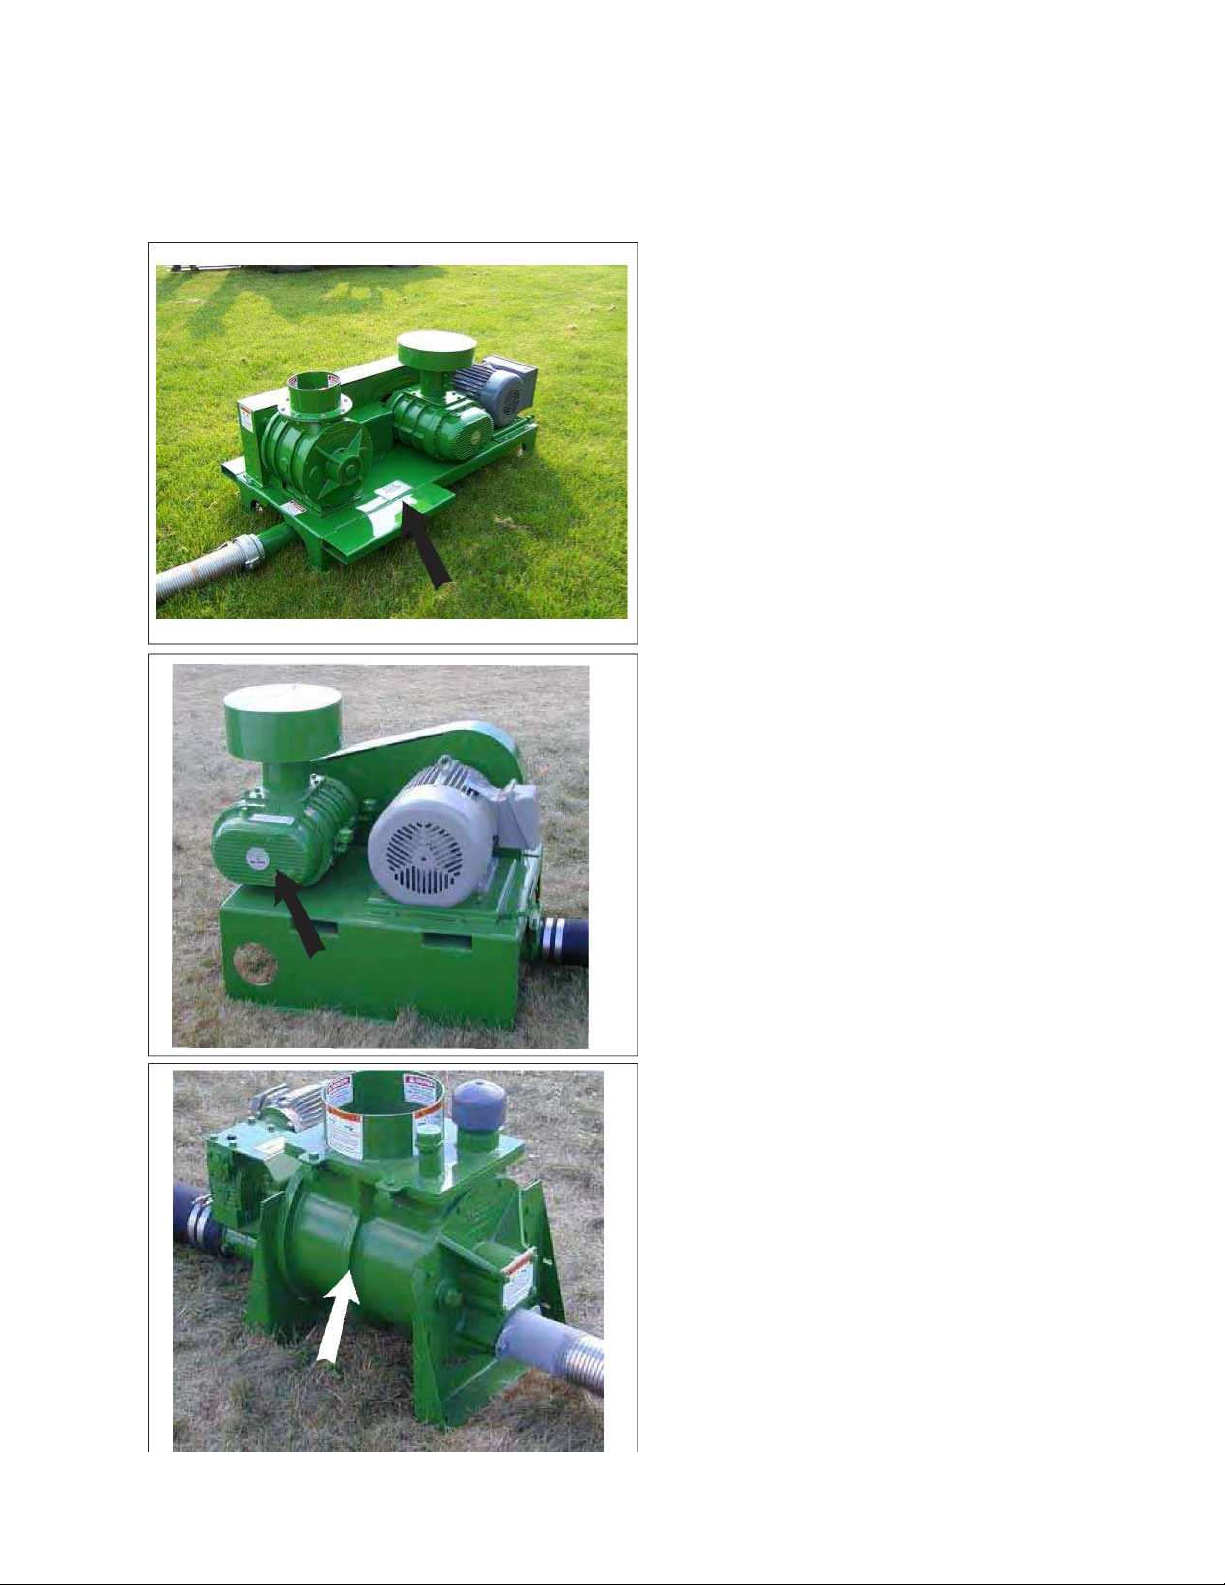
SERIAL NUMBER LOCATION
Machine Serial Number
Blower Serial Number
Airlock Serial Number
Always give your Dealer the Serial Number of your
Walinga Ultra-Veyor System when ordering parts
or requesting service or other information.
4

TABLE OF CONTENTS
1 Introduction..........................................................................8
Safety ....................................................................................9
2.1 General Safety.....................................................................10
2.2 Equipment Safety Guidelines ..............................................11
2.3 Storage Safety .....................................................................11
2.4 Safety Training.....................................................................12
2.5 Safety Signs.........................................................................12
2.6 Preparation ..........................................................................13
2.7 Installation Safety ................................................................13
2.8 Operating Safety ....................................................15
2.9 Maintenance Safety .............................................................14
2.10 Electical Safety ....................................................................15
2.11 Lock-Out Tag-Out Safety.....................................................15
2.12 Employee Sign-Off Form .....................................................16
3 Safety Sign Locations .......................................................17
4 Operation............................................................................21
4.1 To the New Operator or Owner ..........................................21
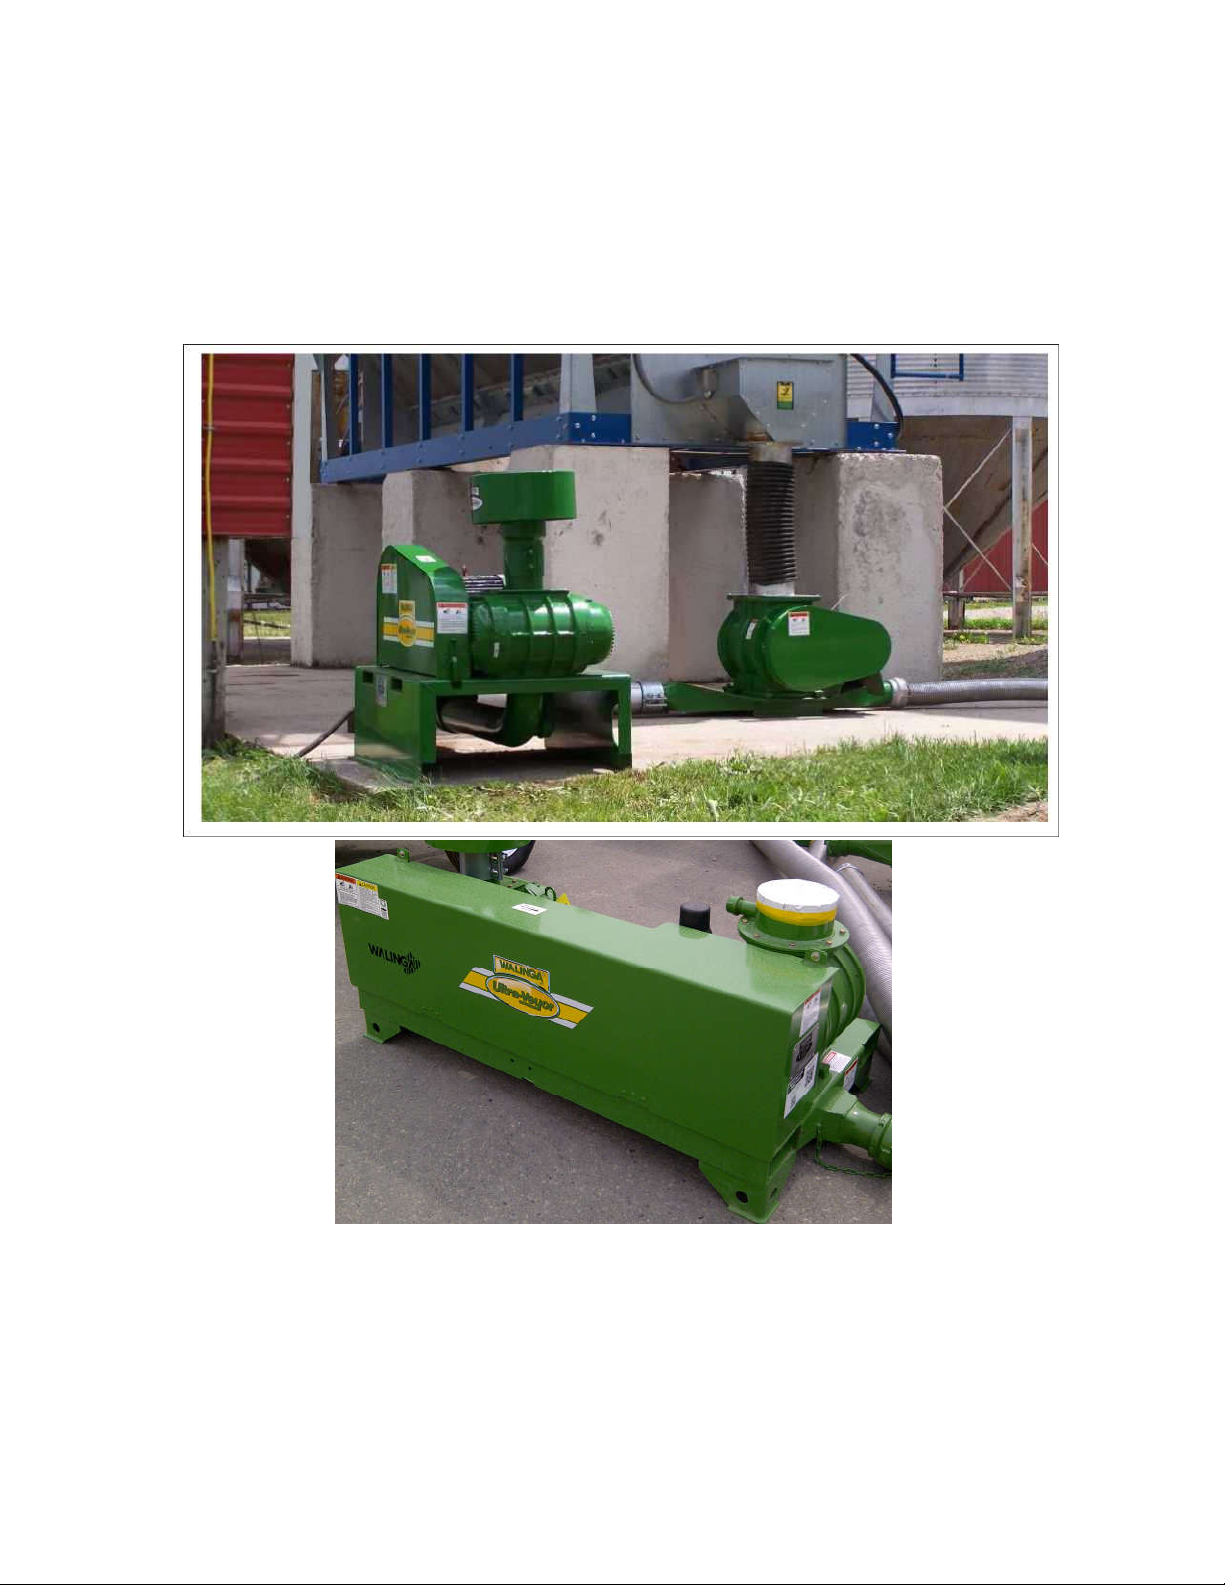
4.2 Machine Components .........................................................22
4.3 Machine Break-In ................................................................23
4.4 Pre-Operation Checklist .....................................................23
4.5 Controls ...............................................................................24
4.5.1 Standard Controls................................................................24
4.5.2 Smart-Flo Controls...............................................................25
4.6 Operating .............................................................................27
4.7 Storage ................................................................................31
5 Service and Maintenance..................................................32
5.1 Service.................................................................................32
5.1.1 Fluids and Lubricants...........................................................32
5.1.2 Greasing ..............................................................................32
5.1.3 Servicing Intervals ...............................................................33
5.1.4 Service Record ....................................................................36
5.2 Maintenance ........................................................................37
5.2.1 Belt Tension and Alignment.................................................37
5.2.2 Blower Oil and Breather Cleaning .......................................41
5.3.3 Airlock ..................................................................................43
5.2.4 Gear Box..............................................................................45
6 Trouble Shooting ...............................................................47
7 Specifications ....................................................................49
7.1 Mechanical...........................................................................53
7.2 Bolt Torque ..........................................................................54
8 Index ...................................................................................51
1 INTRODUCTION
Congratulations on your choice of a Walinga Ultra-Veyor System to complement your operation. This equipment
has been designed and manufactured to meet the needs of the discriminating buyer for the efficient moving of
granular or powder products.
Safe, efficient and trouble free operation of your Ultra-Veyor System requires that you and anyone else who will be
operating or maintaining the machine, read and understand the Safety, Operation, Maintenance and
Trouble shooting information contained within the Operator's Manual.
This manual covers all Ultra-Veyor Systems made by Walinga Inc. Many systems are custom designed for the
specific application. However they are all similar and specific differences are explained where appropriate.
Keep this manual handy for frequent reference and to pass on to new operators or owners. Call your Walinga
dealer if you need assistance, information or additional copies of the manual. Contact your dealer for a complete
listing of parts.
8

ATTENTION! BECOME ALERT! YOUR
Veyor System and in the
DANGER
ation that, if not avoided, could result in
SIGNAL WORDS:
2 SAFETY
SAFETY ALERT SYMBOL
This Safety Alert symbol means
SAFETY IS INVOLVED!
Why is SAFETY important to you?
3 Big Reasons: Accidents Disable and Kill Accidents Cost Accidents Can Be Avoided
Note the use of the signal words DANGER,
WARNING and CAUTION with the safety messages.
The appropriate signal word for each message has
been selected using the following guidelines.
The Safety Alert symbol identifies
important safety messages on the
Walinga® Ultramanual. When you see this symbol, be
alert to the possibility of personal injury
or death. Follow the instructions in the
safety message.
- Indicates an imminently hazardous
situation that, if not avoided, will result
in death or serious injury. This signal
word is to be limited to the most extreme situations typically for machine
components which, for functional purposes, cannot be guarded.
Keep this manual handy for frequent reference and to pass on to new operators or owners. Call your Walinga®
dealer if you need assistance, information or additional copies of the manual.
Contact your dealer for a complete listing of parts.
WARNING
CAUTION
- Indicates a potentially hazardous situ-
death or serious injury, and includes
hazards that are exposed when guards
are removed. It may also be used to
alert against unsafe practices.
- Indicates a potentially hazardous situation that, if not avoided, may result in
minor or moderate injury. It may also
be used to alert against unsafe practices.
9

SAFETY
2.1
GENERAL SAFETY
YOU
SAFE
Veyor System be familiar with the operating and
are the key to safety. Good safety
practices not only protect you but, also the people
ing part of
EVERYONE
operating this machine is familiar with the procedures
recommended and follows safety precautions.
Remember, most accidents can be prevented. Do not
sponsibility to read and understand ALL Safety
and Operating instructions in the manual and to
ed to
poses himself and bystanders to possible serious
tion
could affect the life of the
understand the
Operator’s Manual and all safety
signs before supplying power,
operating, maintaining , adjusting or
aid kit for use in
case of an accident. Store in a
re extinguisher for use in
case of an accident. Store in a highly
Install and properly secure all guards
7 Turn machine OFF, shut down and lockout power
fore
servicing, adjusting, maintaining, repairing,
ning or unplugging. (Safety lockout devices are
available through your Walinga® dealer parts
are responsible for the
maintenance of your Walinga® Ultra-Veyor System.
YOU
must ensure that you and anyone else who is
going to operate, maintain or work around the Ultra-
maintenance procedures and related
information contained in this manual. This manual will
take you step-by-step through your working day and
alerts you to all good safety practices while operating
the Ultra-Veyor System.
Remember,
around you. Make these practices a work
your safety program. Be certain that
YOU
operation and
SAFETY
risk injury or death by ignoring good safety practices.
• Ultra-Veyor System owners must give operating
instructions to operators or employees before allowing
them to operate the machine, and at least annually
thereafter.
• The most important safety device on this equip
ment is a SAFE operator. It is the operator’s re-
follow these. Most accidents can be avoided.
• A person who has not read and understood all op
erating and safety instructions is not qualifi
operate this machine. An untrained operator ex-
injury or death.
• Do not modify the equipment in any way.
Unauthorized modification may impair the func
and/or safety and
equipment.
• Think SAFETY! Work SAFELY!
1
Read and
.
unplugging.
2. Only trained, competent persons shall operate the
Ultra-Veyor System. An untrained operator is not
qualified to operate this machine.
3.
Provide a first-
highly visible place.
4.
Provide a fi
visible place.
5.
and shields before operating.
6. Wear appropriate protective gear. This list
includes but is not limited to:
- A hard hat
- Protective shoes
with slip resistant
soles
- Protective glasses or goggles
- Heavy gloves
- Wet weather gear
- Hearing protection
supply and wait for all moving parts to stop be
clea
department).
8. Know the emergency medical center number for
your area.
9. Wear appropriate hearing protection
when operating the machine.
10. Ground all lines, hoses and wands to prevent static
build-up and electrical discharge/shocks.
11. Review safety related items with all operators
annually.

2.2
1. Safety of the operator and bystanders is one of the main
concerns in designing and developing a machine.
However, every year many accidents occur which could
have been avoided by a few seconds of thought and a
more careful approach to handling equipment. You, the
operator, can avoid many accidents by observing the
following precautions in this section. To avoid personal
injury or death, study the following precautions and insist
those working with you, or for you, follow them.
2. In order to provide a better view, certain photographs or
illustrations in this manual may show an assembly with a
safety shield removed. However, equipment should
never be operated in this condition. Keep all shields in
place. If shield removal becomes necessary for repairs,
replace the shield prior to use.
3. Replace any safety sign or instruction sign that is not
readable or is missing. Location of such safety signs is
indicated in this manual.
4. Never use alcoholic beverages or drugs which can hinder
alertness or coordination while operating this equipment.
Consult your doctor about operating this machine while
taking prescription medications.
Under no circumstances should young children be
5.
EQUIPMENT SAFETY GUIDELINES
9. In addition to the design and configuration of this
implement, including Safety Signs and Safety
Equipment, hazard control and accident prevention are
dependent upon the awareness, concern, prudence, and
proper training of personnel involved in the operation,
transport, maintenance, and storage of the machine.
Refer also to Safety Messages and operation instruction
in each of the appropriate sections of the auxiliary
equipment and machine Manuals. Pay close attention to
the Safety Signs affixed to the auxiliary equipment and
the machine.
2.3 STORAGE SAFETY
1. Store the Ultra-Veyor System on a firm level
surface.
2. If required, make sure the unit is firmly blocked up.
3. Make certain that all mechanical locks are safely and
positively connected before storing.
allowed to work with this equipment. Do not allow
persons to operate or assemble this unit until
4. Store away from areas of human activity.
they have read this manual and have developed a
thorough understanding of the safety precautions
and of how it works.
with all users annually.
6. This equipment is dangerous to children and persons
unfamiliar with its operation. The operator should be a
responsible, properly trained and physically able person
familiar with farm machinery and trained in this
equipment's operations. If the elderly are assisting with
farm work, their physical limitations need to be
recognized and accommodated.
Review the safety instructions
5. Do not allow children to play on or around the stored
Ultra-Veyor System.
6. Lock out power by turning off master control panel or
junction box and padlocking the door shut to prevent
electrocution or unauthorized start up of the Ultra-
Veyor System.
7 Never exceed the limits of a piece of machinery. If its ability
to do a job, or to do so safely, is in question -
TRY IT.
8. Do not modify the equipment in any way. Unauthorized
modification may result in serious injury or death and
may impair the function and life of the equipment.
DON'T
11

2.4 SAFETY TRAINING
2.5 SAFETY SIGNS
1. Safety is a primary concern in the design and manufacture of our products. Unfortunately, our efforts to
provide safe equipment can be wiped out by a single
careless act of an operator or bystander.
2. In addition to the design and configuration of equipment,
hazard control and accident prevention are dependent
upon the awareness, concern, prudence and proper
training of personnel involved in the operation, transport,
maintenance and storage of this equipment.
It has been said, "The best safety feature is an
3.
informed, careful operator." We
ask you to be that kind of an
operator.
It is the operator's responsibility to
read and understand ALL
Safety and Operating instructions in the manual and to
follow these. Accidents can be avoided.
Working with unfamiliar equipment can lead to
4.
careless injuries. Read this manual, and the
manual for your auxiliary equipment, before
assembly or operating, to acquaint yourself with
the machines. If this machine is used by any
person other than yourself. It is the machine
owner's responsibility to make certain that the
operator, prior to operating:
a. Reads and understands the operator's
manuals.
b. Is instructed in safe and proper use.
5. Know your controls and how to stop the Ultra- Veyor
System and any other auxiliary equipment quickly in an
emergency. Read this manual and the one provided with
your other equipment.
6. Train all new personnel and review instructions
frequently with existing workers. Be certain only a
properly trained and physically able person will operate
the machinery. A person who has not read and
understood all operating and safety instructions is not
qualified to operate the machine. An untrained operator
exposes himself and bystanders to possible serious
injury or death. If the elderly are assisting with work, their
physical limitations need to be recognized and
accommodated.
1. Keep safety signs clean and legible at all times.
2. Replace safety signs that are missing or have become illegible.
3. Replaced parts that displayed a safety sign should
also display the current sign.
4. Safety signs are available from your authorized
Distributor or Dealer Parts Department or the factory.
How to Install Safety Signs:
• Be sure that the installation area is clean and dry.
• Be sure temperature is above 50°F (10°C).
• Determine exact position before you remove the
backing paper. (See Section 3).
• Remove the smallest portion of the split backing
paper.
• Align the sign over the specified area and carefully
press the small portion with the exposed sticky
backing in place.
• Slowly peel back the remaining paper and carefully
smooth the remaining portion of the sign in place.
• Small air pockets can be pierced with a pin and
smoothed out using the piece of sign backing paper.
How to Reorder Your Safety Signs:
1. Call you local dealer, or the factory branch nearest
you.
FACTORY DISTRIBUTION AND SERVICE CENTRES:
Head Office:
RR#5, Guelph, Ontario,N1H 6J2
PHONE (888) 925-4642
FAX (519) 824-5651
938 Glengarry Cres. Fergus, Ontario Canada N1M 2W7
Tel: (519) 787-8227 Fax: (519) 787-8210
70 3rd Ave. N.E. Box 1790 Carman, Manitoba
Canada R0G 0J0
Tel (204) 745-2951 Fax (204) 745-6309
1190 Electric Ave.Wayland, MI.USA 49348
Tel (800) 466-1197 Fax (616) 877-3474
24 Molloy Street Toowoomba, Queensland Australia 4350
Tel 07.4634.7344 Fax 07.4634.7606

2.6 PREPARATION
2.7
INSTALLATION
1. Never operate the Ultra-Veyor System and auxiliary
equipment until you have read and completely
understand this manual, the auxiliary equipment
Operator's Manual, and each of the Safety Messages
found on the safety signs on the and auxiliary equipment.
2. Personal protection equipment including hard hat, safety
glasses, safety shoes,
and gloves are
recommended during
assembly, installation,
operation, adjustment,
maintaining, repairing,
removal, or moving the
implement. Do not
allow long hair, loose
fitting clothing or jewelery to be around equipment.
PROLONGED EXPOSURE TO LOUD
NOISE MAY CAUSE PERMANENT
HEARING LOSS!
Motors or equipment attached can often be noisy
3.
enough to cause permanent, partial hearing loss. We
recommend that you wear hearing protection on a fulltime basis if the noise in the Operator's position
exceeds 80db. Noise over 85db on a long-term basis
can cause severe hearing loss. Noise over 90db
adjacent to the Operator over a long-term basis may
cause permanent, total hearing loss.
loss from loud noise (from tractors, chain saws, radios,
and other such sources close to the ear) is cumulative
over a lifetime without hope of natural recovery.
4. Clear working area of debris, trash or hidden ob-
stacles that might be hooked or snagged, causing
injury, damage or tripping.
NOTE:
Hearing
SAFETY
1. Disconnect and remove all mechanical locks, anchor
chains and any other transport devices that would hinder
or prohibit the normal functioning of the Ultra-Veyor
System upon start up. Serious damage to the machine
and/or personal injury to the operator and bystanders
may result from attempting to operate the machine while
mechanical locking devices are still attached.
2. Anchor the machine to firm, level ground before
operating.
3. Level the frame before using or loading.
4. Have at least one extra person available to assist when
elevating, moving or connecting to other equipment.
5. Make certain that sufficient amperage, at the proper
voltage and frequency (60Hz) is available before
connecting power for the electric model. Have a licensed
electrician provide power to the machine. Always follow
ANSI/NFPA 70 Standard and all local codes when
providing electrical power.
6. If using Ultra-Veyor System as part of material handling
system, anchor securely before starting.
7. Vent discharge air from blower to outside.
5. Operate only in daylight or good artificial light.
6. Be sure machine is properly anchored, adjusted and
in good operating condition.
7 Ensure that all safety shielding and safety signs are
properly installed and in good condition.
8. Before starting, give the machine a "once over" for any
loose bolts, worn parts, cracks, leaks, frayed belts and
make necessary repairs. Always follow maintenance
instructions.
13
2.8 OPERATING SAFETY 2.9 MAINTENANCE SAFETY
1. Read and understand the Operator’s Manual and
all safety signs before operating, maintaining, adjusting or repairing the Ultra-Veyor System.
1. Good maintenance is your responsibility. Poor
maintenance is an invitation to trouble. Follow all
operating, maintenance and operating instructions
in this manual.
2. Before servicing, adjusting, repairing or maintaining
unit, ensure that unit power source is completely
shut down and can not start up.
2. Support the machine with blocks of safety stands
when working beneath it.
3. Do not operate when any guards are damaged or
removed, Install and secure guards before starting.
4. Keep hands, feet, clothing and hair away from all
moving and/or rotating parts.
5. Clear the area of all bystanders, especially small
children, before starting.
6. Before supplying electrical power to the machine,
be sure you have adequate amperage at the proper phase and voltage to run it. If you do not know
or are unsure, consult a licensed electrician.
7 Wear appropriate ear protection when operating
machine.
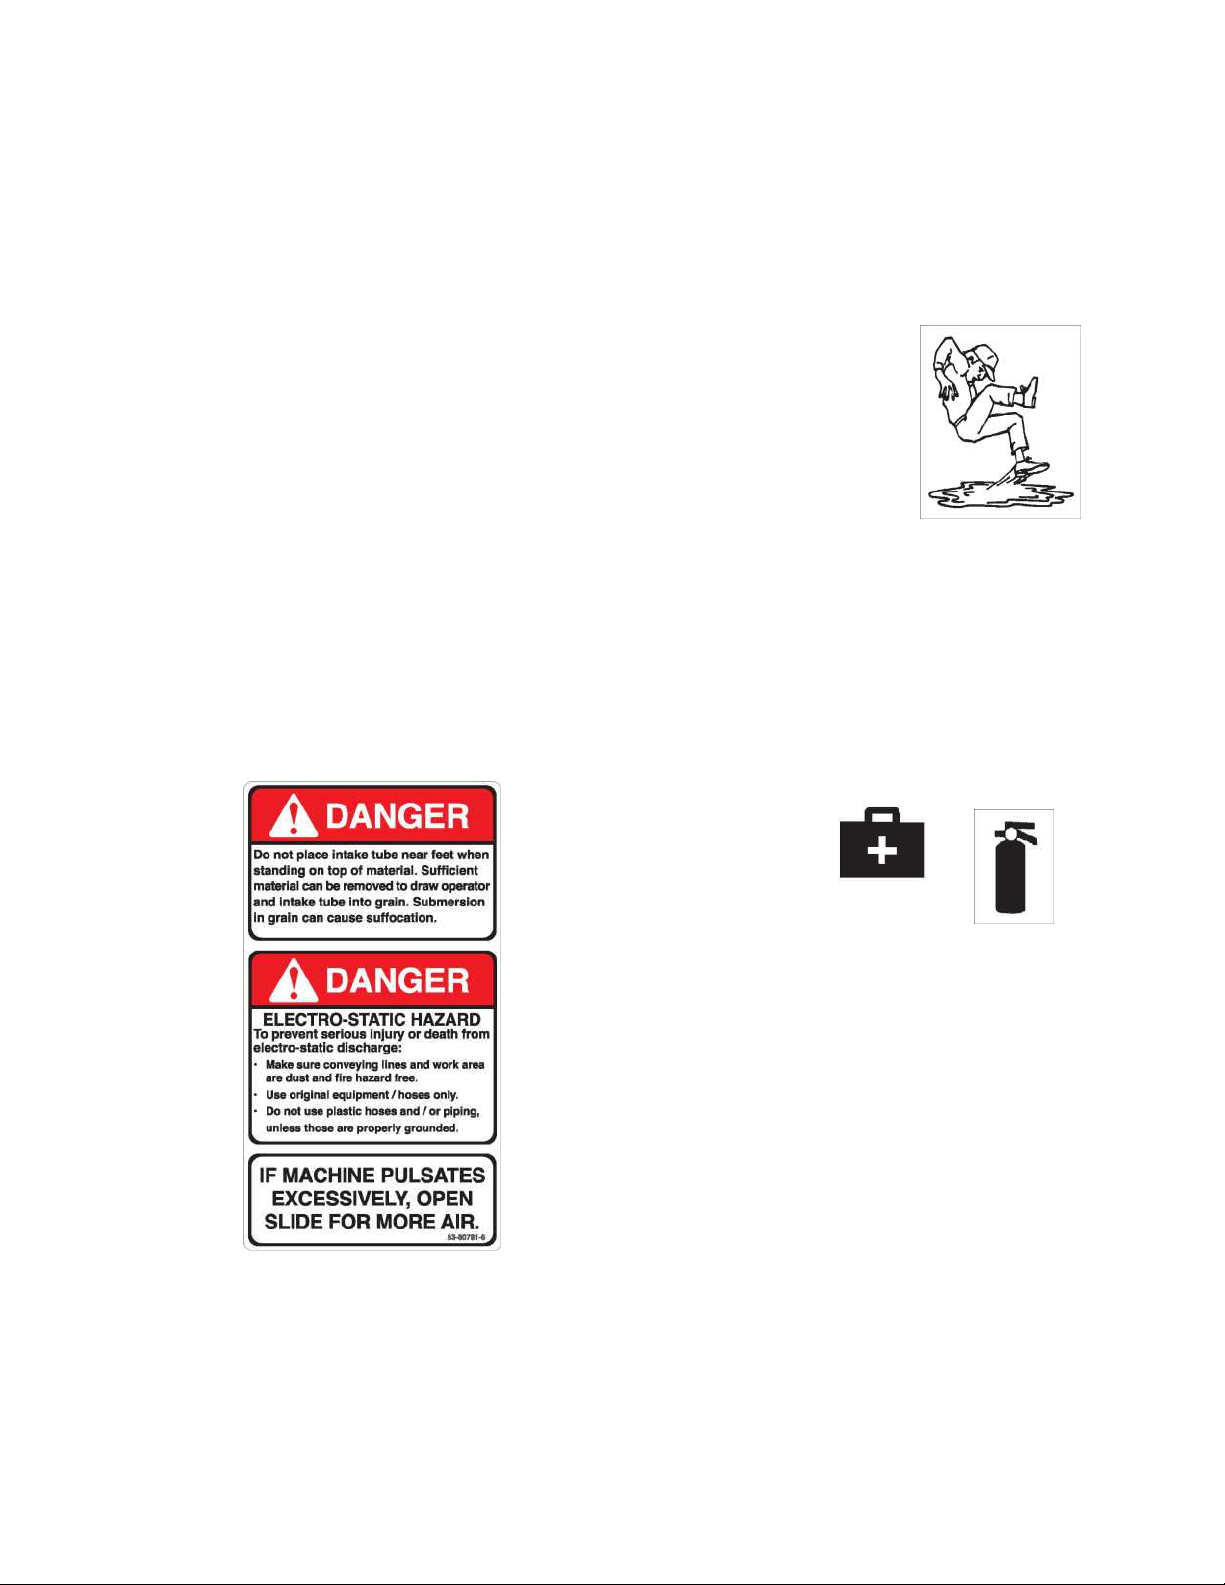
8. Do not place intake nozzle near feet when standing
on the top of grain.
3.
Follow good shop practices:
- Keep service area clean
and dry.
- Be sure electrical outlets
and tools are properly
grounded.
- Use adequate light for
the job at hand.
4. Use only tools, jacks or hoists of sufficient capacity
for the job.
5. Before servicing, adjusting, repairing or maintaining
unit, ensure that power source is completely shut
down and locked-out, tagged-out.
6. Always use personal protection devices such as
eye, hand and hearing protectors, when performing
any service or maintenance work.
7.
A fire extinguisher
and first aid kit
should be kept
readily accessible
while performing
maintenance on this
equipment.
8. Make sure all guards are in place and properly se-
cured when maintenance work is completed.
9. Keep hands, feet, hair and clothing away from all
moving and/or rotating parts.
10. Lock-out, tag-out master panel before performing
any maintenance work on machine or opening airlock access door.
11. Clear the area of bystanders, especially small chil-
dren, when carrying out any maintenance and/or
repairs or making any adjustments.
9. Review safety instructions with all personnel 12. Be sure all lines, hoses and wands are grounded
annually. when maintenance work is completed.

2.10 ELECTRICAL SAFETY
1. Have only a qualified licensed electrician supply power to the electric model by following ANSI/ NFPA 70 Wiring
Standard. Make certain that the Ultra-Veyor System is properly grounded at
the power source.
2. Install safety decals on Master Control panel as per Section 3 - Safety Sign Locations (pg 17)/
3. Make certain that all electrical switches are in the OFF position before plugging the Ultra-Veyor System in.
4. Turn machine OFF, shut down and lock out power supply (safety lockout devices are available through your
Walinga® dealer parts department) and wait for all moving parts to stop before servicing, adjusting, maintaining
or repairing.
5. Disconnect power before resetting any motor or breaker overload.
6. Replace any damaged electrical plugs,
cords, switches and components immediately.
7. Do not work on Ultra-Veyor System electrical system
unless the power cord is unplugged or the power
supply is locked-out tagged-out.
8. Check continuity of all couplings.
2.8 LOCK-OUT TAG-OUT SAFETY
1. Establish a formal Lock-Out Tag-Out program for
your operation.
2. Train all operators and service personnel before
allowing them to work around the Ultra-Veyor
System.
3. Provide tags at the work site and a sign-up sheet to
record tag out details.
4. Do not perform any service or maintenance work
unless motor is OFF and the power locked out.
15
 Loading...