


1
Copy of Instruction Manual
4-channel Remote Trigger Set TR-D4
Gewerbering 26
86666 Burgheim
Tel. +49 84 32 / 9489-0
Fax. +49 84 32 / 9489 - 8333
eMail: info@foto-walser.de
www.foto-walser.de

2
Content
1. How to understand the instruction manual................................... 4
1.1 Markings on the device ..................................................................... 4
1.2 Markings in this manual .................................................................... 4
2. Unpack and check the device ........................................................ 4
3. Overview about the parts ............................................................. 5
4. Quick-start guide ........................................................................... 5
5. Preparation for operation ............................................................. 5
5.1 Connect the receiver with studio flash and to power supply ............ 5
5.2 Adjust channel ................................................................................... 5
5.3 Connect the transmitter to the camera ............................................. 6
6. Operation of the device ................................................................ 6
6.1 Trigger test button ............................................................................. 6
7. Solve problems ............................................................................. 7
8. Maintenance ................................................................................. 7
8.1 Continuous inspections ..................................................................... 7
8.2 Cleaning ............................................................................................. 7
8.3 Change battery .................................................................................. 8
9. Accessories and options ................................................................ 8
10. Disposal and environment protection ........................................... 8
11. Technical specifications ................................................................. 9

3
Thank you very much for your confidence. We wish you much pleasure and
success with your new device.
The walimex 4-channel Remote Trigger Set TR-D4 consists of one
transmitter and one receiver. It is compatible with all studio flashes,
whereby a direct intervisibility is not necessary.
The main features of your device as follows:
− convenient working without cables
− no direct intervisibility necessary
− very lightweight
− maximal range: approx. 30m
− Please read these instructions carefully before using your device for
the first time. It includes everything you need to know to avoid
physical injuries and damages.
− Please pay attention to all safety notes in this instruction manual.
− Please keep this manual safe. In case of selling or leaving the device
to other persons, please don´t forget to hand this manual over as
well.
ADVICE: We reserve the right to make technical and optical modifications
in the course of product improvement.

4
1. How to understand the instruction manual
1.1 Markings on the device
This marking means, that your device meets the safety
requirements of all relevant European Directives.
This marking means, that your device should be disposed in
the local disposal points.
1.2 Markings in the manual
Marking Meaning
Indicates the handling and consequences of safety
notes.
ADVICE
: Indicates potentially physical damages and other
important information in connection with your
device.
2. Unpack and check the device
1. Unpack the delivery carefully.
2. Please check, if the delivery is complete:
• 4-channel Remote Trigger Set TR-D4
o 1 Receiver
o 1 Transmitter
o 1 Sync Cord
o 1 Adapter Jack Phone 3,5 mm
• Instruction Manual in German and English.
3. Please check, if the delivery is undamaged.
ADVICE: If the delivery should be incomplete or damaged, please
contact info@foto-walser.de or our service hotline with the telephone
number +49 84 32 / 9489-0.
9
Transmitter
Weight approx. 30g
Dimensions (H x W x L) approx. 3 x 4 x 7 cm
Permitted operation
temperature
-10 °C to + 40 °C
Frequency 433 MHz
Storage conditions Dry and dust-free in carton at
-20 °C to +50 °C
Reference to declaration of conformity:
„Herewith Foto-Walser GmbH & Co. KG declares, that the device TR-D4 is
conform to the basic requirements and the other respective regulations of
directive 1999/5/EC“. You can ask for the declaration of conformity by
writing to the following address: info@foto-walser.de.
8
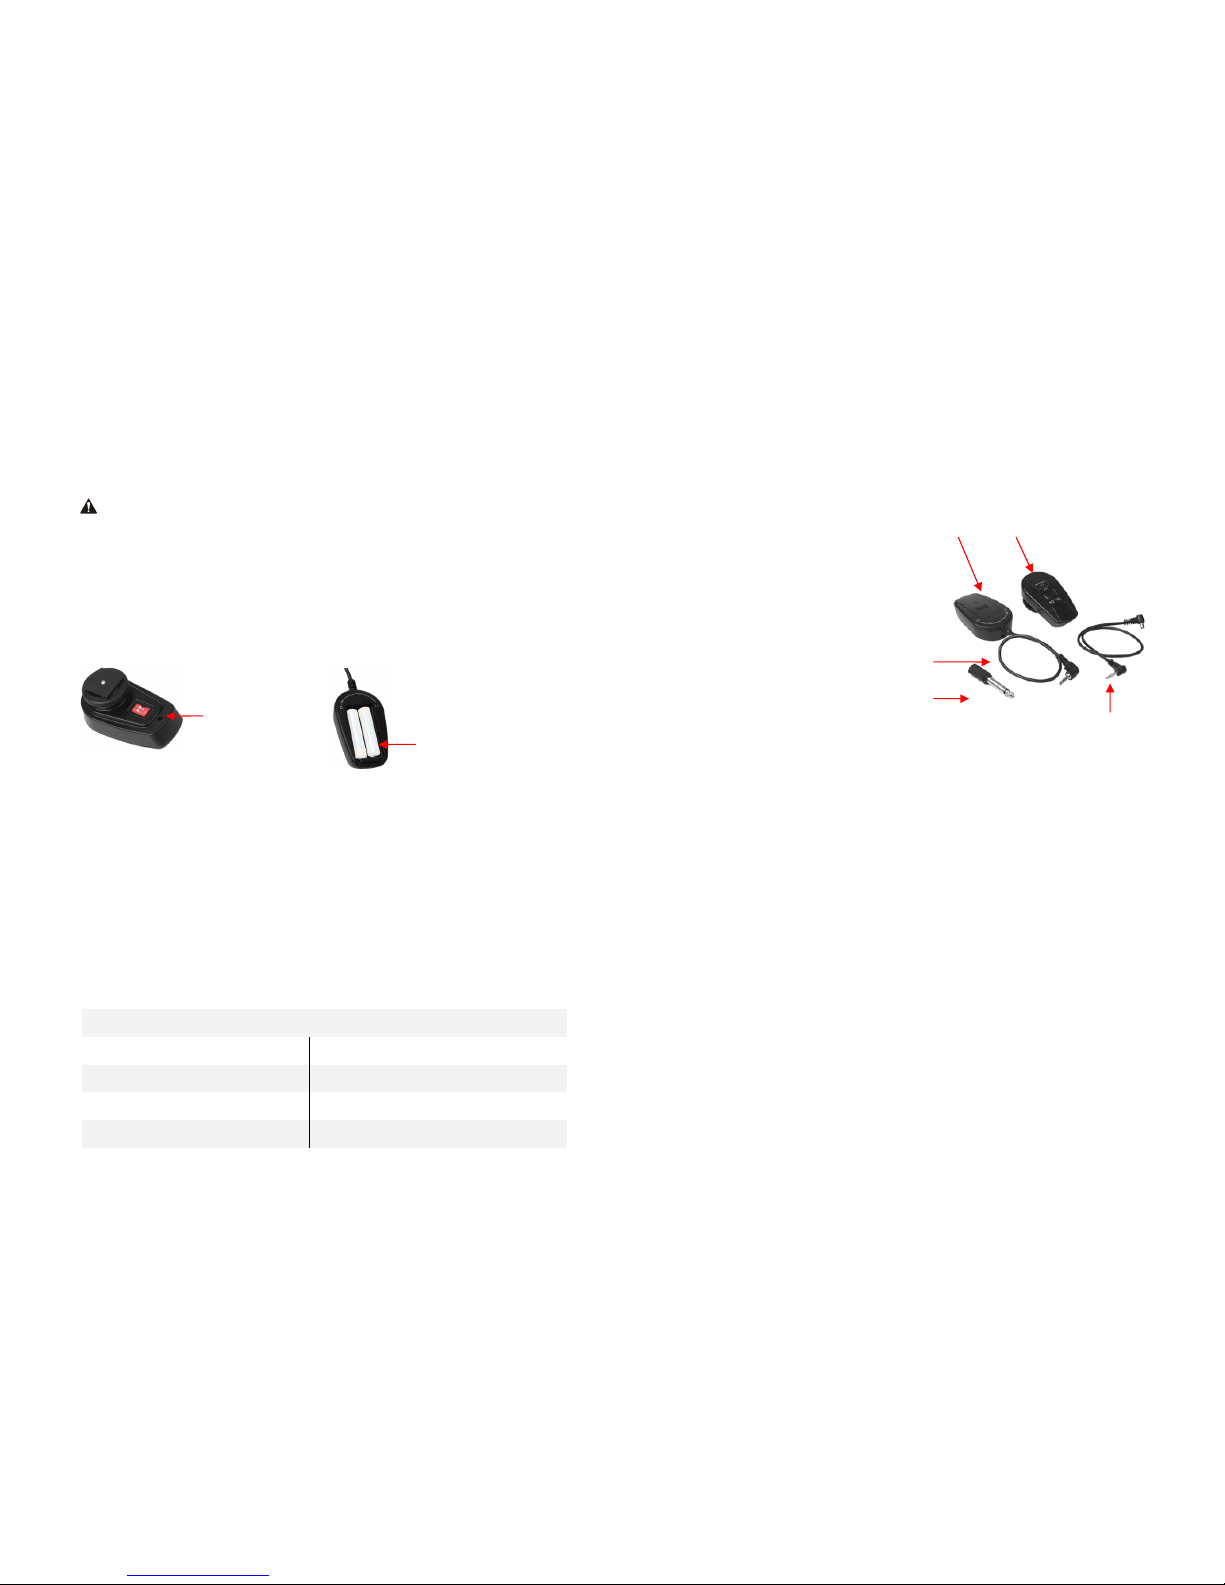
8.3 Change batteries
WARNING
Please just use batteries, which comply with the required specifications.
See Technical Specifications.
1. Use a Philips screwdriver to loose the screw on the bottom side of the
transmitter.
2. Take off the top side of the housing.
3. Change the battery. Pay attention to the right polarity.
4. Screw up the housing again.
9. Accessories and options
You can find extensive accessories for your device in our webshop.
10. Disposal and environment protection
Your device should be disposed free of charge at the local disposal points.
11. Technical specifications
Receiver
Power supply 2x1,5 AAA (not included)
Weight approx. 50g
Dimensions (H x W x L) approx. 2 x 4 x 7 cm
Sync output 6,3 mm adapter: 3,5mm
Transmitter
:
Screw for
opening the
housing
Receiver
:
Remove
battery cover
5
3. Overview about the parts
A Transmitter
B Receiver
C Sync Cord Flash
D 3,5 mm Adapter Sync Cord
E Sync Cord Camera/Transmitter
4. Quick-start guide
ADVICE:
The detailed instruction for the following operations can be found in the
respective chapters in this instruction manual.
Keep the sequences of the following operation steps when using the device
for the first time to avoid damages on the device.
• Connect the receiver on the studio flash.
• Adjust the channel.
• Connect the transmitter to the camera.
• Trigger the test button.
5. Preparation for operation
5.1 Connect the receiver with the studio flash
1. Switch off studio flash.
2. Insert the sync cord into the jack of the studio flash.
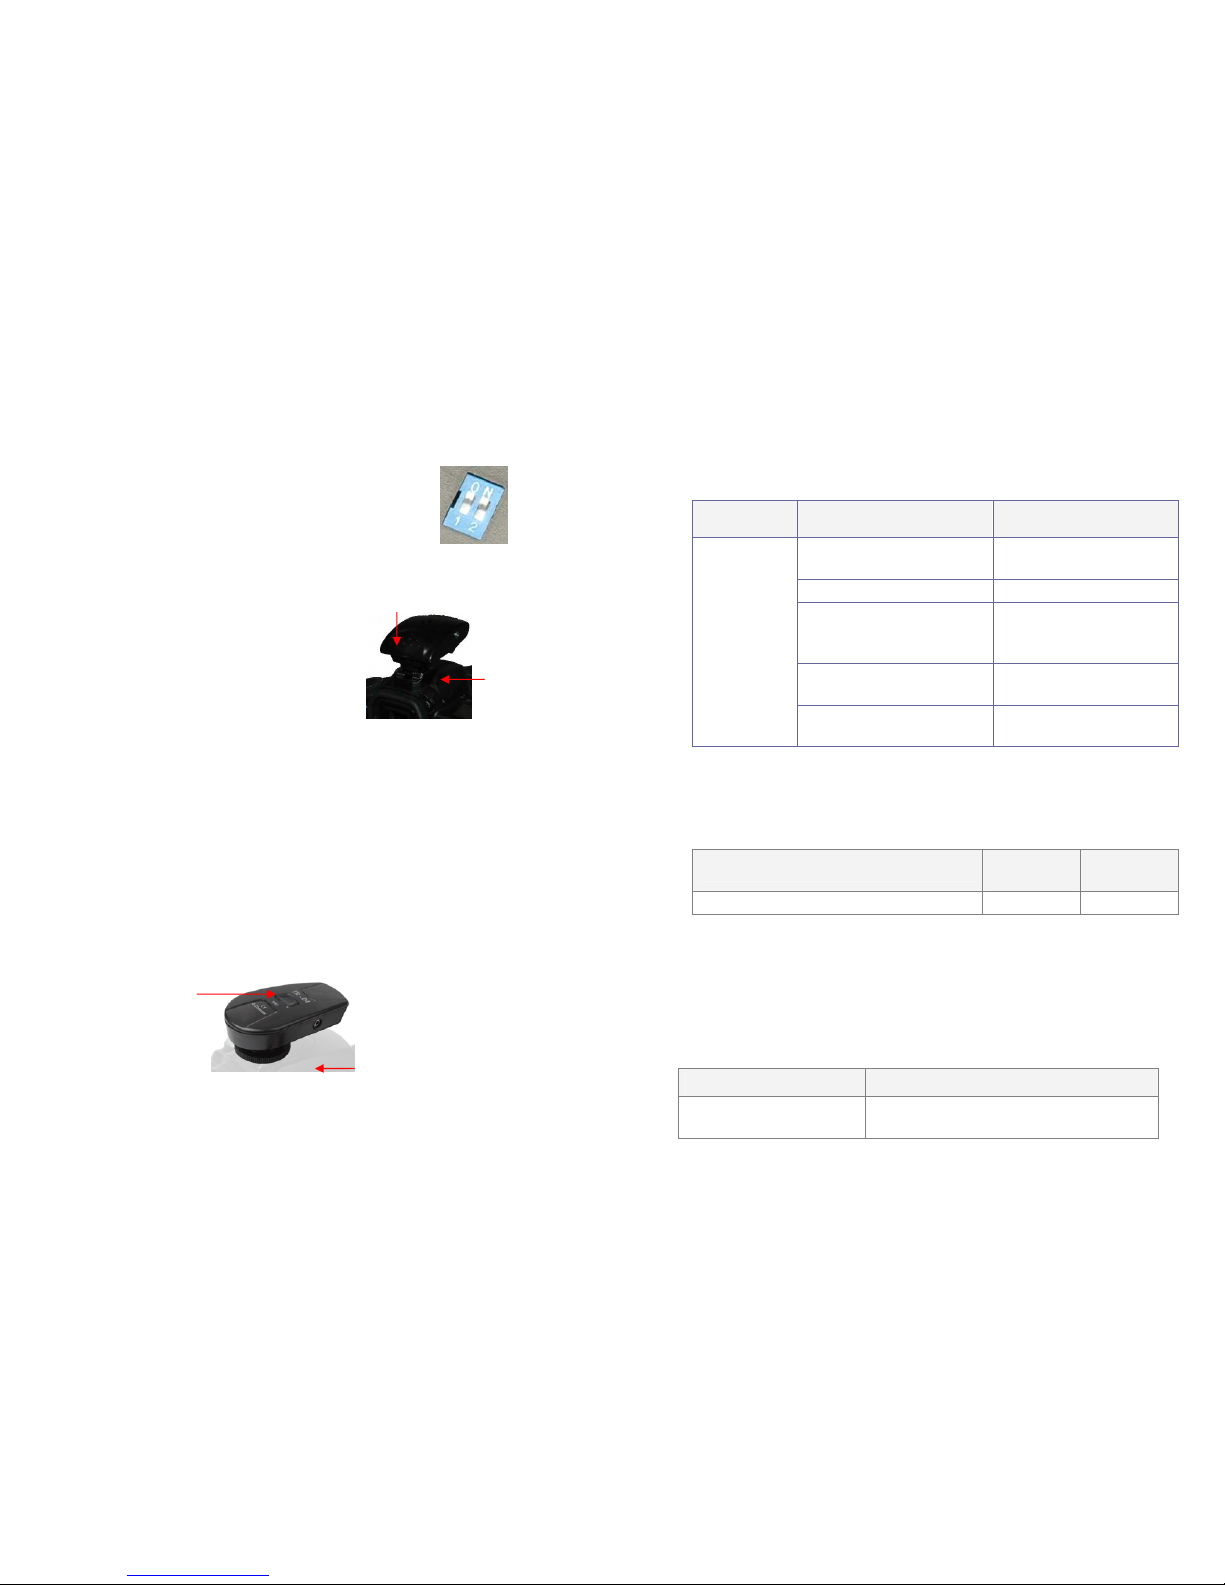
5.2 Adjust channel
You have the opportunity to operate the Remote Trigger with 4 different
channels. It is important, that you make the same adjustments for
transmitter and receiver as in the following sample.
A B
E
C
D
6
1. Adjust the channel on the backside of the
transmitter. Adjust the levers on e.g. O and N.
2. Adjust the channel on the backside of the
receiver. Adjust the levers on e.g. O and N.
5.3 Connect the transmitter with the camera
1. Put the transmitter with the shoe
on the flash socket of your
camera.
2. Mount the transmitter with the
locking wheel on the shoe.
3. If your camera should not have a
hot-shoe, please use the included sync cord (E) and connect the
transmitter with your camera or flash shoe.
6. Operation of the device
6.1 Trigger test button
1. Before starting your work, please check the function of your devices
and trigger your studio flash through the test button on the
transmitter.
Test button
Connection Socket for Sync
Cord Transmitter/Camera
Transmitter
with shoe
Camera
with flash
socket
7
7. Solve problems
Problem Possible reason Remedy
Remote
Trigger has
no function
Cables are not plugged in
firmly
Plug in all cables firmly
Studio flash is switched off Switch on studio flash
The channel of transmitter
and receiver is not the
same
Please adjust the same
channel on both devices,
see Adjust channel
Battery on transmitter is
too weak
Change battery, see
Change battery
Battery on receiver is too
weak
Change battery, see
Change battery
8. Maintenance
8.1 Continuous inspections
What you should do?
Before every
operation
With every
change
Check all cables and plugs for damages X
8.2 Cleaning
ADVICE: Please only use the following specified cleaning supplies.
The contact with moisture or water should be avoided.
Remote Trigger Cleaning
Housing
Use a microfiber cloth to remove light and
stubborn dirt
 Loading...