

Page 1
BROADCAST RADIO
USER’S MANUAL
Page 2

Table of Contents
Broadcast Radio—Top View pg 1
A. Overview of Modes pg 1
1. Set-up Mode
2. Volume Mode
3. Lock-out Mode
B. Record a Message pg 2
1. Using a microphone
2. Using a computer pg 3
C. Select a Broadcast Station pg 3
D. Lock-out the Broadcast Radio pg 4
E. Broadcast a Live Message pg 4
F. Warranty pg 4
FCC Notice
This device complies with Part 15 of the FCC Rules.
Operation is subject to the following two conditions:
(1) This device may not cause harmful interference,
and (2) this device must accept any interference
received, including interference that may cause
undesired operation.
Page 3
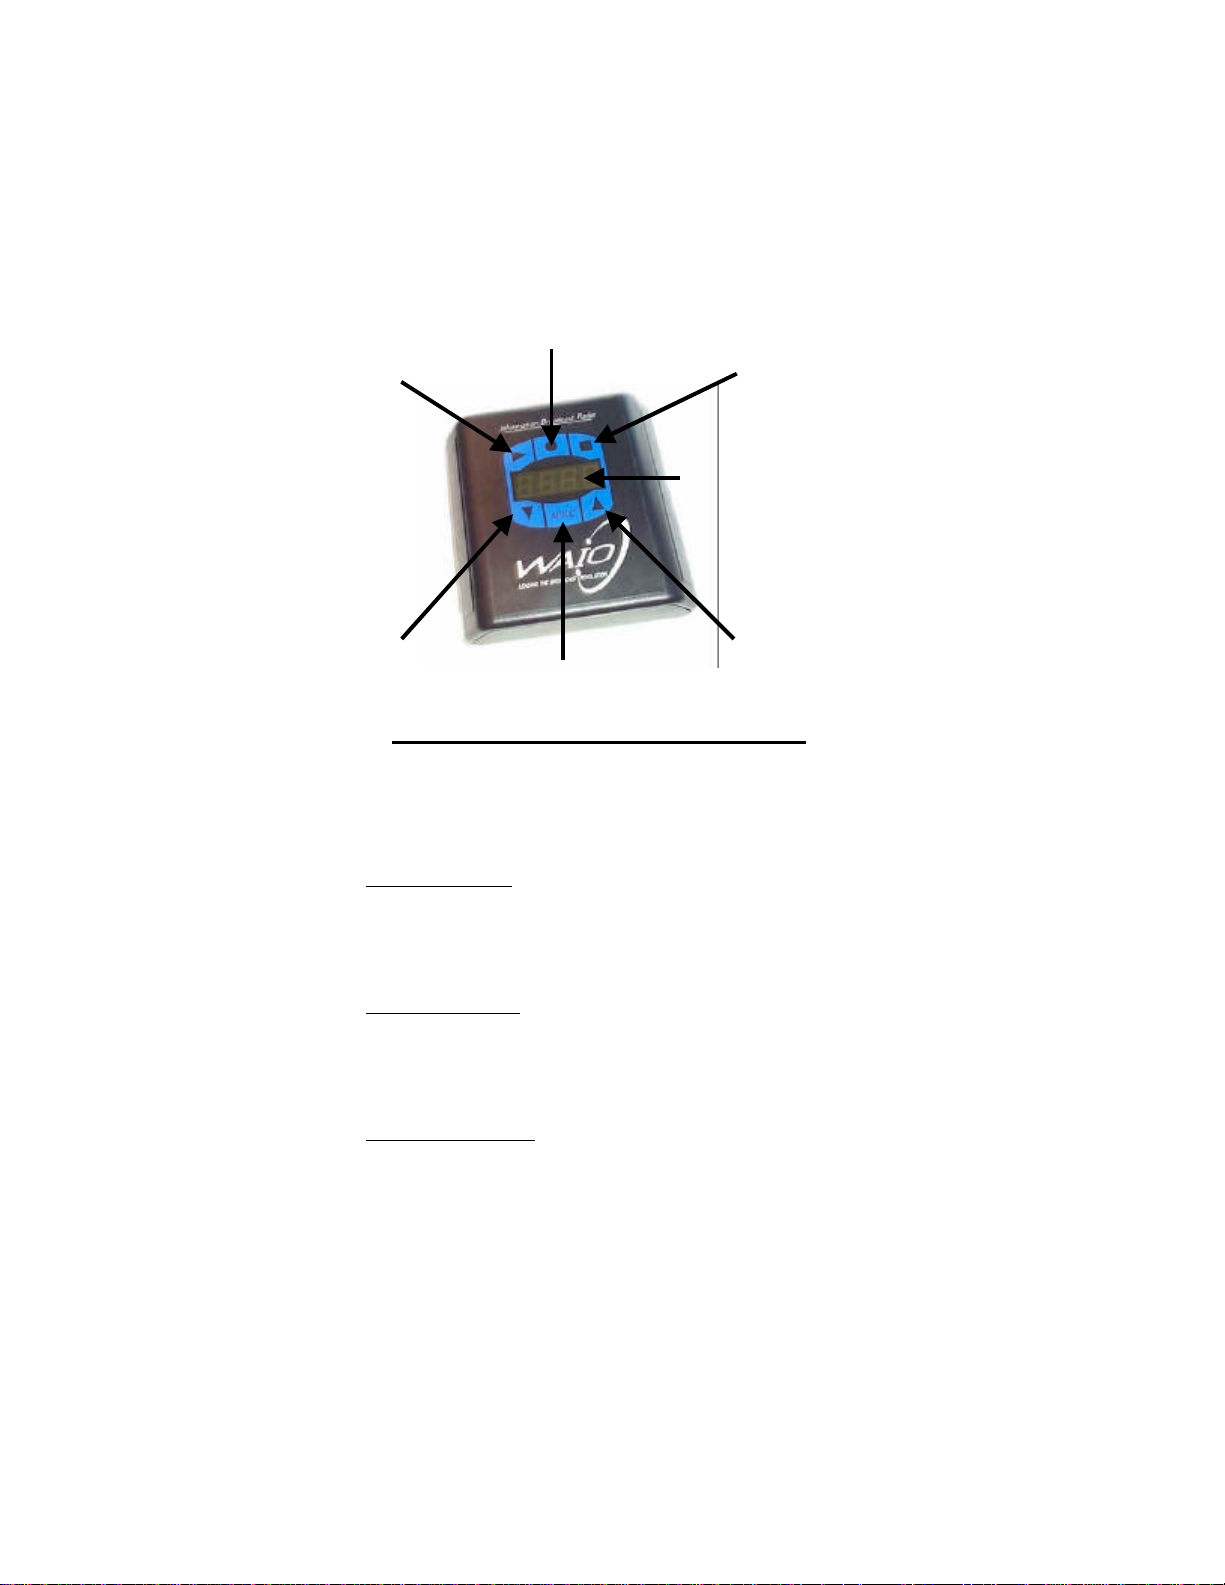
message and to select a broadcast frequency.
g over a message.
Record Button
Play Button
Stop Button
Display Window
Down Button
Mode Button
Broadcast Radio-Top View
A. OVERVIEW OF MODES
The following user modes are selected by pushing
the button labeled “MODE”:
1. Set-Up Mode - Allows User to play/record/stop a
This mode is indicated by a frequency (88.1-
107.9) being displayed in the Display Window.
2. Volume Mode - Used to adjust the volume level
(1-12) of the speaker output. This mode is indicated by a number (1-12) being displayed in the
Display Window.
2. Lock-out mode - Indicated by “LOC” text in display window. Activating the Lock-out mode by
pressing the up button locks out all the buttons
to prevent accidentally recordin
Press the up and down buttons simultaneously to
unlock the Broadcast Radio.
Up Button
1
Page 4
ew your message.
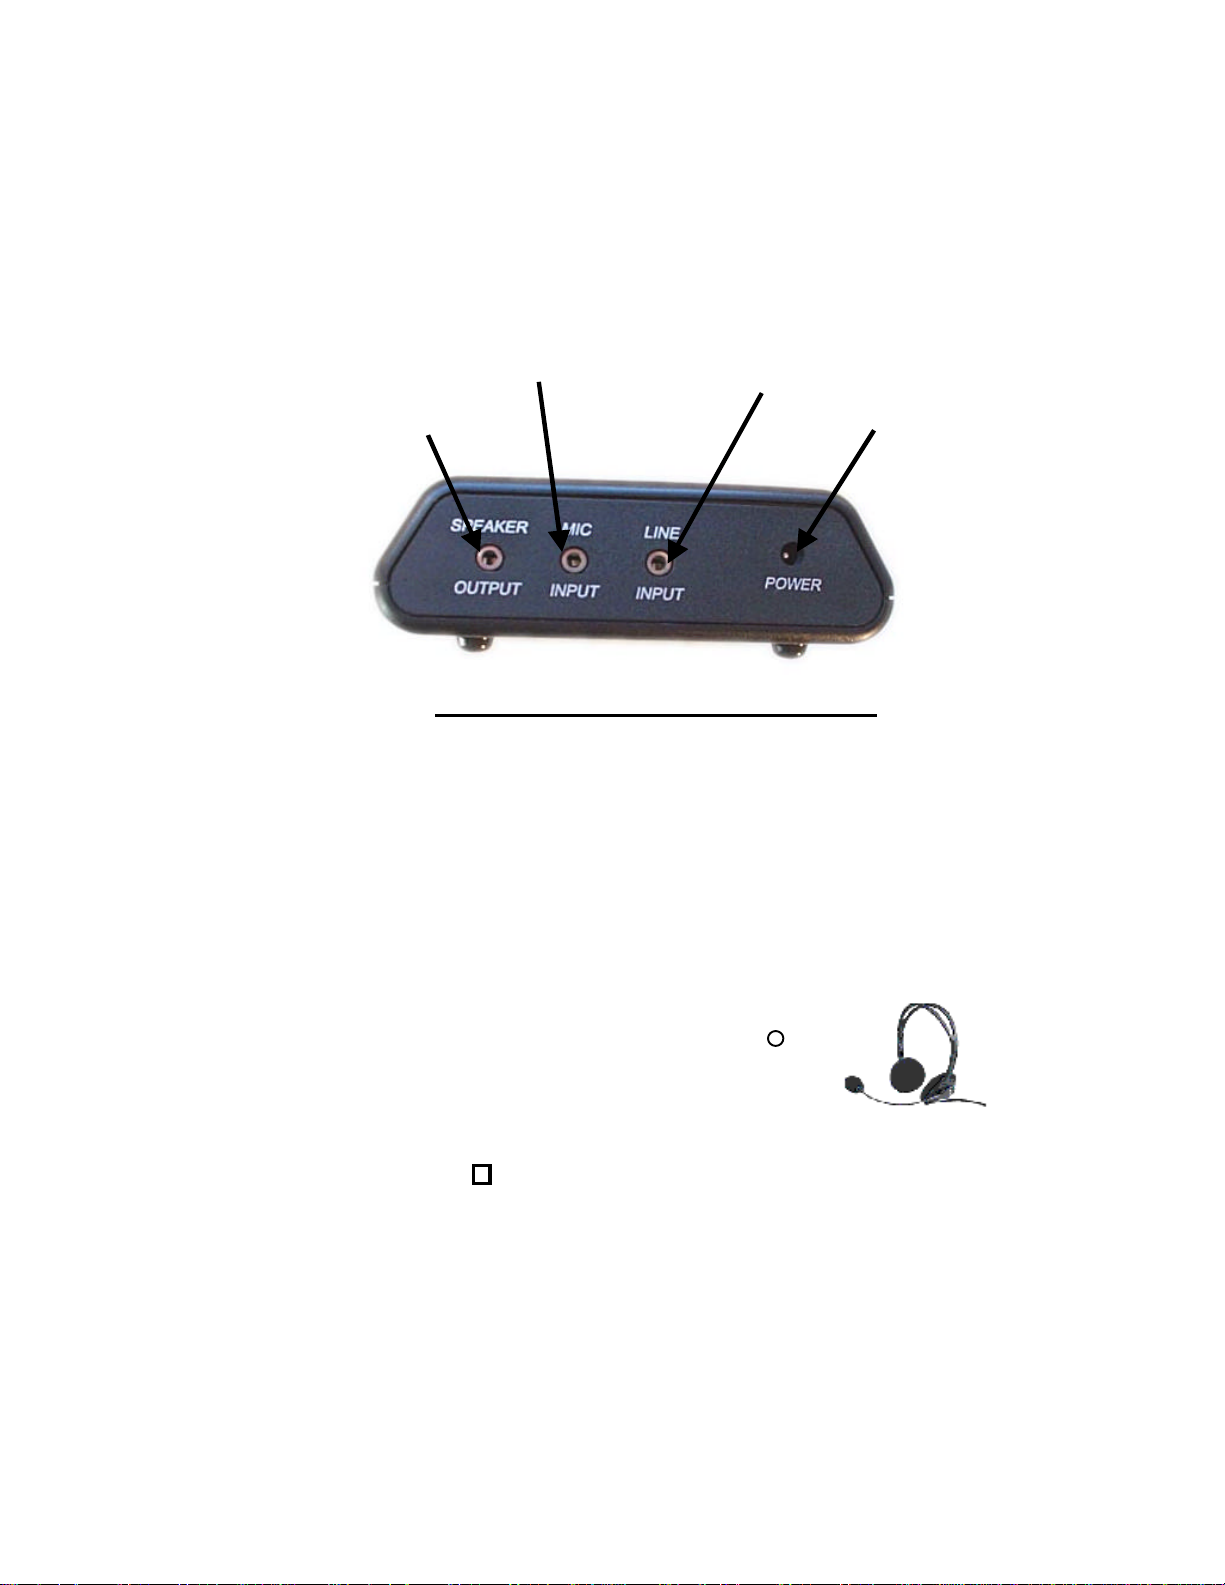
MicrophoneMicrophone
Input JackInput Jack
SpeakerSpeaker
Output JackOutput Jack
Line Input JackLine Input Jack
Power JackPower Jack
Broadcast Radio-Back View
B. RECORD A MESSAGE
cord a message up to 4 minutes duration. The Broadcast Radio will automatically repeat shorter messages so
there is no dead space).
(Note that you can re-
1. Using the microphone to record a message
A. Plug the microphone jack and speaker jack
of the headset provided into the microphone jack
and speaker jack of the broadcast radio.
B. Press the record button ( ) then
begin speaking your message into
the microphone. When you’ve finished speaking your message, press the stop button ( ). Note that background music can be
mixed into your message via the line input jack.
C. Press the play button to revi
Adjust the headset volume by pressing the up and
down buttons while in the volume mode.
2
Page 5

Plug the stereo cord provided into the jack
e Broadcast
Use the adhesive numbers provided to display
Press the play button on the Broadcast Radio to
2. Using a computer to record a message
A. Record a compelling message using a com-
puter. (Note: Waio recommends using Internet
Mix software from Acoustica Inc. (www.
acoustica.com) to creatively mix music and
sound effects into your message.)
B.
labeled “Line Input” on the Broadcast Radio and
the other end into the speaker output jack of
your computer.
C. Press the record button ( ) on the Broadcast
Radio then press the play button on the computer. When the message is done playing, press
the stop button ( ) on the Broadcast Radio.
D. Plug the speaker jack of the headset provided into the speaker output jack of the Broadcast Radio. Press the play button on the Broadcast Radio to review your message. Adjust the
headset volume by pressing the up and down
buttons while in the volume mode.
C. SELECT A BROADCAST STATION
1. Tune your car radio to 88.1 FM then advance to
88.3, 88.5, 88.7 etc until you hear a station that is
static only. This empty frequency is available for
you to broadcast your message.
2. Press the up or down button on th
Radio until the available frequency is displayed.
3.
the frequency on a sign advising people to tune in.
4.
begin broadcasting your message.
3
Page 6

Press the mode button on the Broadcast Radio
ture. The bottom left corner and bottom right
corner light segments will illuminate to indicate
unlock the Broadcast Radio, simultaneously
press the up and down buttons. Once unlocked,
D. LOCK-OUT THE BROADCAST RADIO
Prevent accidentally recording over your message or
adjusting the broadcast station by locking out the
Broadcast Radio.
1.
until “LOC” appears in the window display.
2. Press the up button to activate the lock-out fea-
that the unit is locked out.
3. To
the unit will be in set-up mode.
E. BROADCAST A LIVE MESSAGE
1. Plug the live source (microphone, TV, computer, CD player etc.) into the “Line Input”
jack of the Broadcast Radio.
2. Adjust the volume level of the output source to
a medium range or until the audio broadcast
from the Broadcast Radio sounds best.
3. Select an FM station as described in Step C
above.
F. WARRANTY
Waio provides a 2 year warranty on parts and
labor. In addition, there's a 30 day money
back guarantee that allows a customer to return their product for any reason.
4
Page 7

responsible for compliance could void the user’s authority to
USER NOTES
Note: Changes or modifications not expressly approved by the
party
operate the equipment.
5
Page 8

CONTACT US
888.950.WAIO (9246)
Waio, Inc.
PO Box 100398
Denver, CO 80250
303.525.8723
www.waio.com
 Loading...