

WAHSON
WS-8932AS Office Chair
User’s Manual
Contents
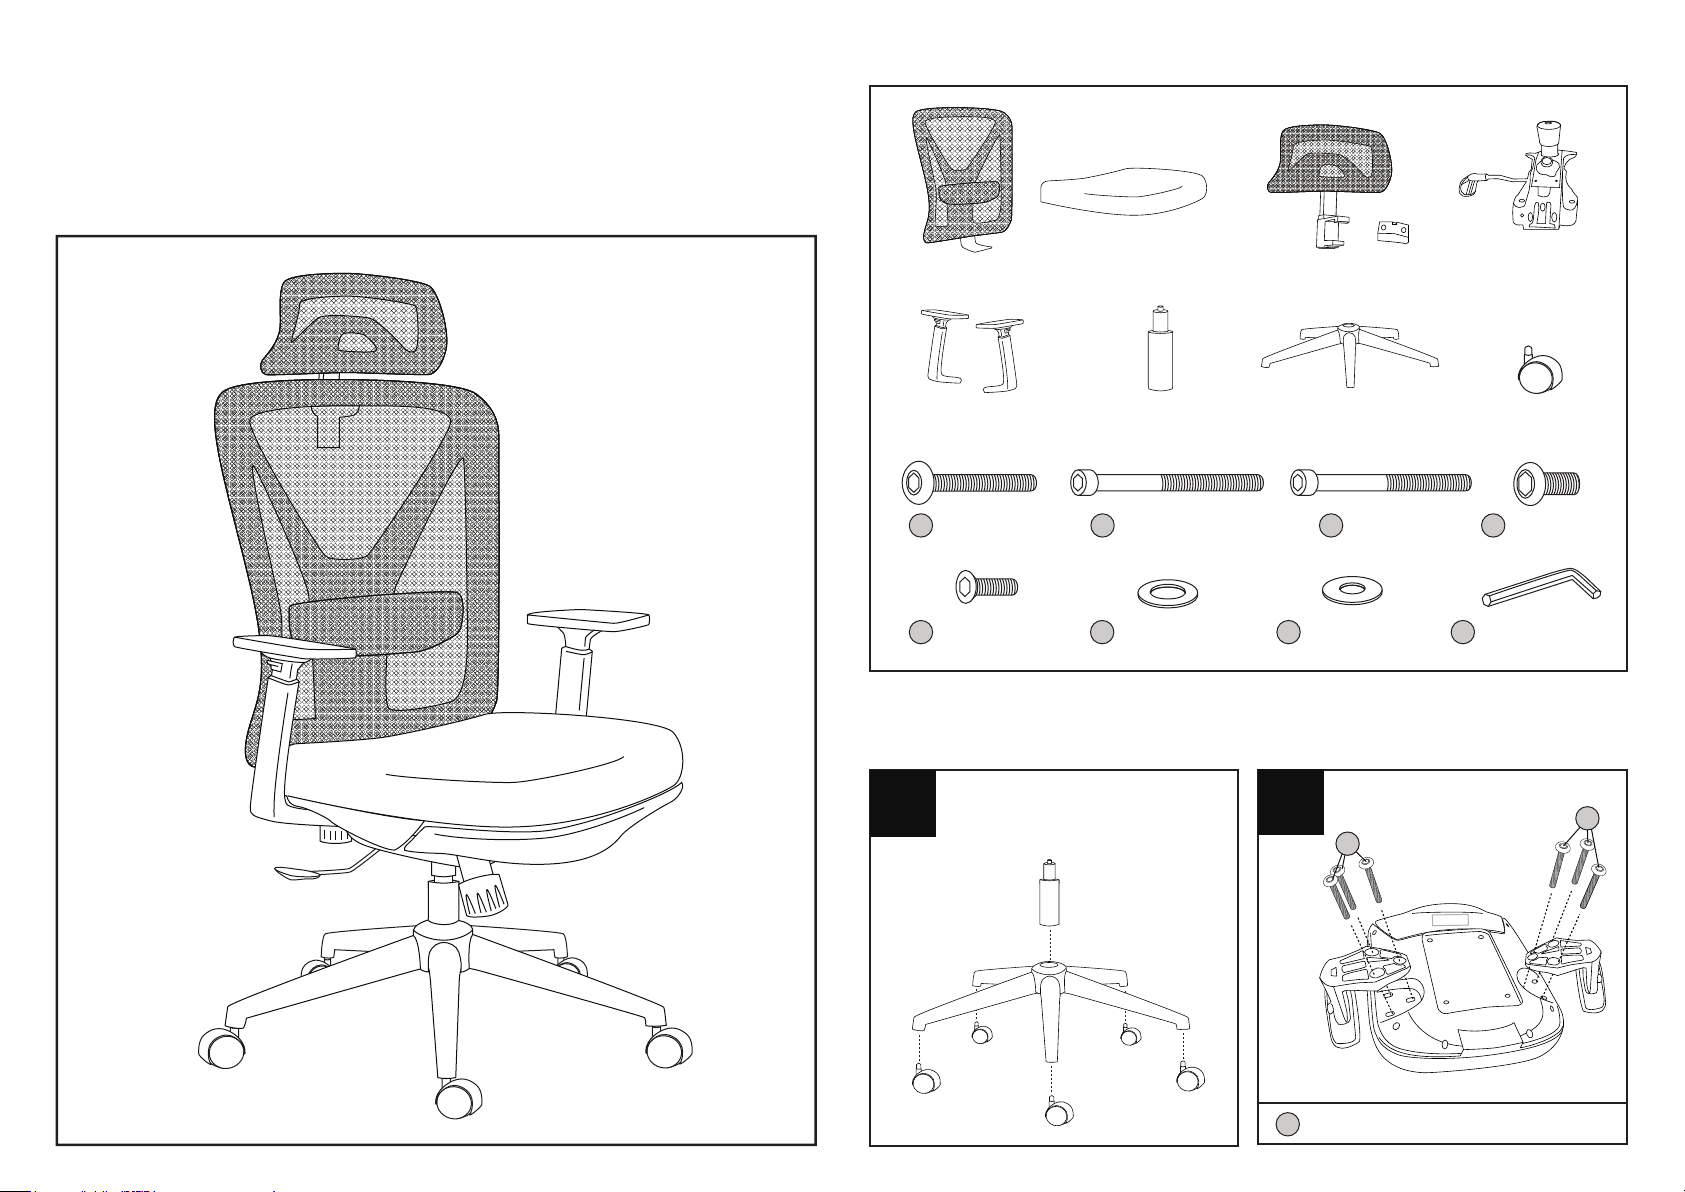
back(x1) seat cushion(x1) headrest set(x1)
arms(x1 L, x1 R)
A
6*50mm(x6)
6*18mm(x2)
E F G
gas lift(x1)
6*75mm(x2)
B C D
star base(x1) caster(x5)
Assembly Instructions
Press the casters into the holes at the end of
each base leg.
Insert the gas lift into the center hole of the
1
star base.
2
seat plate(x1)
6*70mm(x2)
washer(x4)washer(x3)
Attach the arms to the seat cushion.
A
H
8*20mm(x3)
allen wrench(x1)
A
1 2
FRONT
A
X6
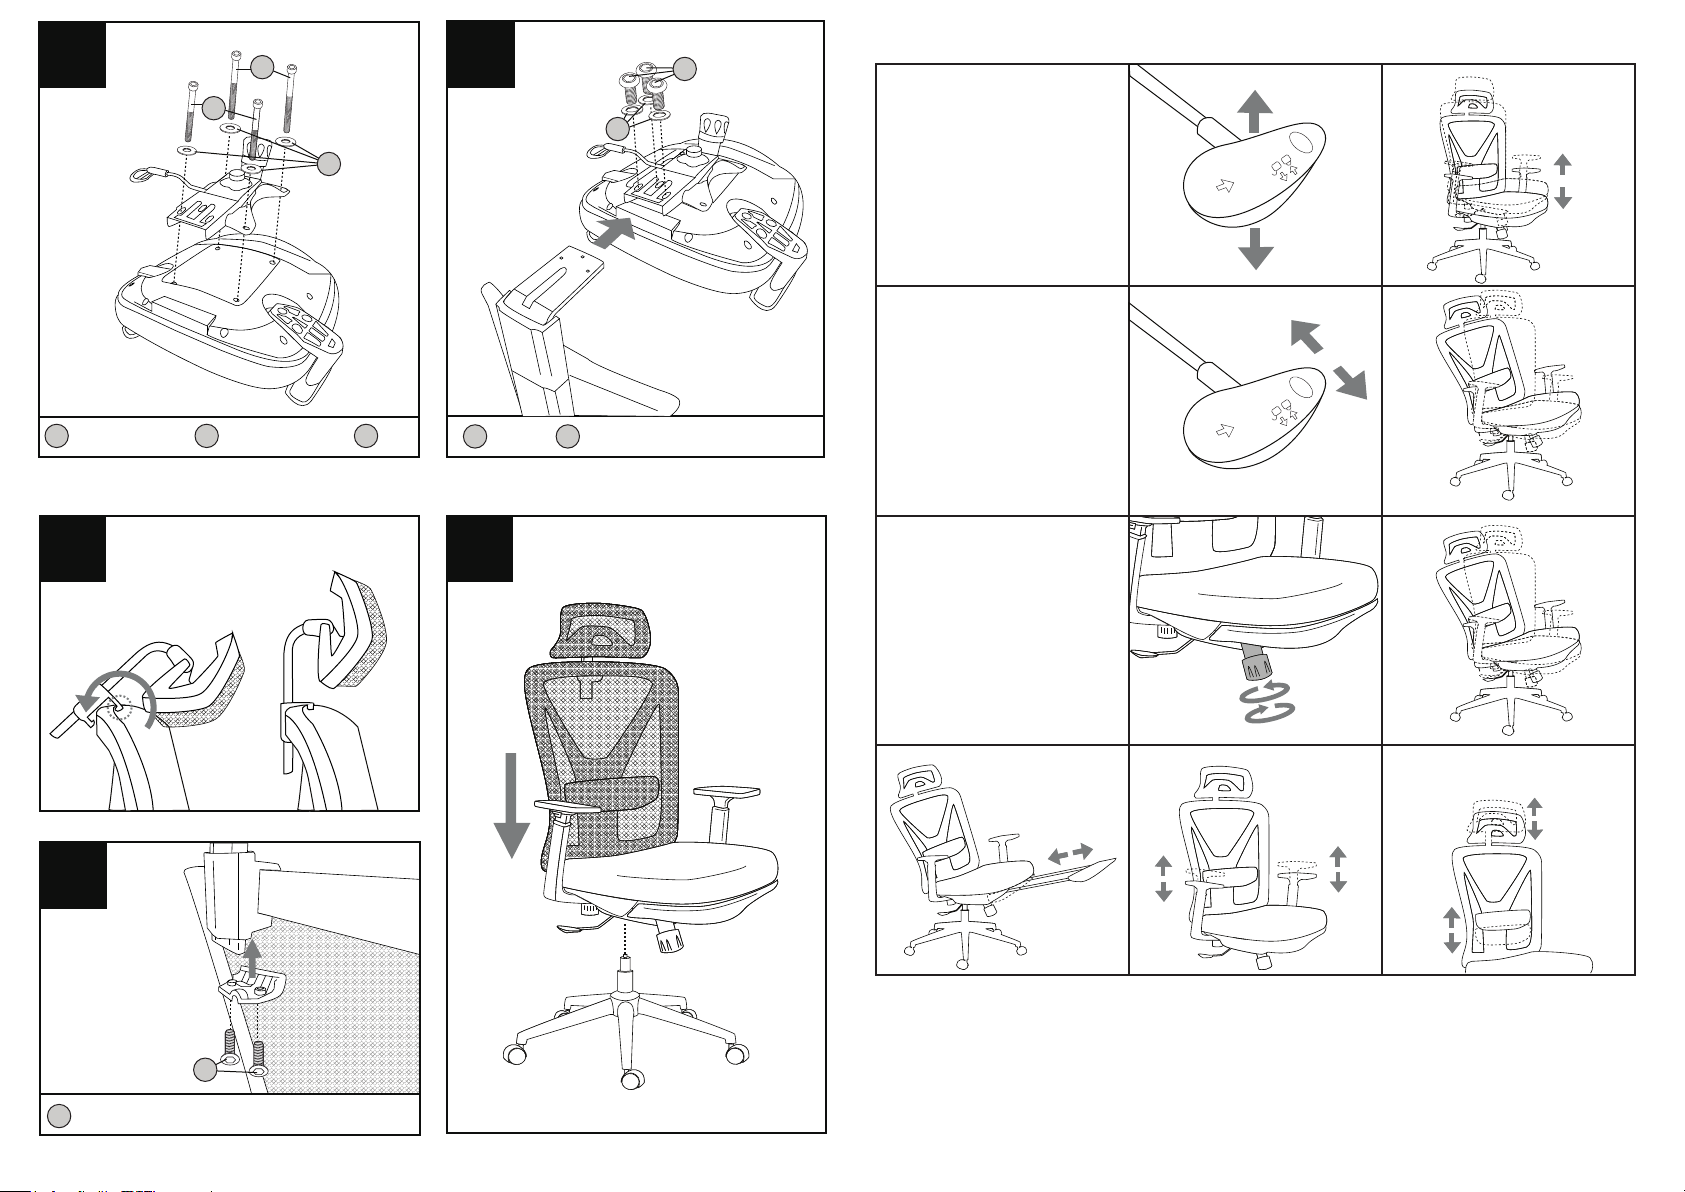
Attach the seat plate to the seat
3
cushion.
B
C
longer screw(X2) shorter screw(X2)
B
C
Insert the backrest.
4
D
F
G
(X4)
G
(X3) (X3)
D
F
Easy adjustment instructions
Seat height adjustment
Sitting in the seat, pull up on the
lever on the right side of the
seat.
Lower or raise the seat to your
desired height, then release the
lever to lock the seat height into
position.
Back tilt and lock
Sitting in the seat, lean back against
the backrest to adjust the back to
your desired angle, then, push in the
lever to lock the back into position.
Pull out the lever to release the lock,
then lean against the back to enable
the backrest goes back to upright
position.
Leaving the lever at unlock position
enables the backrest rock function.
Align the head rest at the center of
backrest frame and then rotate it into
5
position.
6
E
(X2)
E
Attach the chair to the base.
To secure seat into base, sit down on chair.
7
Tilt tension adjustment
*Note: This function is only available with
backrest unlocked.
Turn the tilt knob clockwise to
make it easier to rock your chair
backwards.
Turn the knob counter-clockwise
to make it harder to rock your
chair backwards.
Leg rest adjustment Armrest adjustment Head rest adjustment
Safety and Compliance
• Use care when handling.
• Please read the instructions completely before assembly.
• Remove all parts from the carton and ensure all parts are included prior to assembly.
• Assemble the chair on the carton or carpet to prevent scratching the chair.
• Be careful not to cross-thread screws.
• Do not use power tools
3 4
Lumbar support adjustment
 Loading...