


Speicher
Boiler
Keukenboiler
Chauffe-eau
15L
UTS15
√
DE: 15 Liter Druckspeicher
Betriebsanweisung
Störungstabelle & Garantiebedingungen
GB: 15 litre pressure boiler
User manual
Trouble shooting & Conditions of Guarantee
NL: 15 liter drukboiler
Gebruiksaanwijzing
Storingswijzer & Garantiebepalingen
F: Chauffe-eau sous évier 15 litres
Instructions de montage et d’utilisation
Conditions de garantie
D
E
F
G
A
B
C
D
C
2
UTS 15
A. B. (option)
C.
D.
E
N
L
Q
Q
Heating Element
Heating Indicator light
Thermal
Cut Out
Thermostat
Power
Indicator
Brown
Blue
Yellow/Green
11
5
3
7
4
10
1
2
6
9
8
Reset
3
DE GB NL FR
1. BENUTZUNG DER ANLEITUNG
Besten Dank, dass Sie sich für unser Wahlbach Druckspeicher entschieden haben.
Diese Bedienungsanleitung enthält wichtige Informationen
zur Betriebsfertigstellung, zum Einschalten und Warten. Um
Ihre eigene Sicherheit und die Sicherheit anderer zu gewährleisten, empfehlen wir Ihnen, sich diese Montage- und
Betriebsanleitung vor der ersten Inbetriebnahme gründlich
durch zu lesen. Bewahren Sie die Anleitung und die übrige
Dokumentation in der Nähe des Gerätes auf.
Dieses Gerät wurde entsprechend der festgesetzten Standards hergestellt und durch
zuständige Behörden getestet. Es hat das Sicherheitszertikat und das Zertikat der
elektromagnetischen Kompatibilität. Technische Daten des Gerätes nden Sie auf dem
Aufkleber zwischen den Einlauf- und Auslaufröhren.
Die Installation sollte von qualiziertem Personal durchgeführt werden. Alle Reparatur- und Wartungsarbeiten am
Gerät, zum Beispiel Beseitigung von Kalk- und Wassersteinablagerungen, sollen ausschließlich von autorisiertem Fachpersonal durchgeführt werden. Die geltenden Vorschriften
(DVGW, Technische Richtlinien für Wasserinstallation), sowie
regionale Bestimmungen sind stets einzuhalten!
Dieses Gerät ist für den Einsatz in modernen Familienhäusern, Hotels, WCs geeignet.
Sein modernes Design, ausgesuchte Materialien und ein verbesserter Fertigung gewährleisten eine hohe Güte.
Erklärung der Symbole
In dieser Anleitung und/oder am Gerät werden folgende Symbole verwendet:
Entspricht grundlegenden anwendbaren Sicherheitsnormen der europäischen
Richtlinien.
Nichtbeachten der damit gekennzeichneten Hinweise kann zur Gefährdung von
Personen führen.
Nichtbeachten der damit gekennzeichneten Hinweise kann zu Schäden am Gerät führen.
Zeigt eine vorhandene Spannung.
Nichtbeachten der damit gekennzeichneten Hinweise kann zu Schäden am Gerät führen.
Gebrauchsanweisung lesen
Schadhafte und/oder zu entsorgende elektrische oder elektronische Geräte
müssen an den dafür vorgesehenen Recycling-Stellen abgegeben werden.
4
DE GB NL FR
Das Gerät darf von Kindern ab 8 Jahren sowie von Personen, deren physische, sensorische oder geistige Fähigkeiten sowie Mangel an Erfahrung und Kenntnissen benutzt
werden, wenn sie beaufsichtigt werden oder bezüglich des
sicheren Gebrauchs des Gerätes unterwiesen wurden und
dass sie sich die Gefahren des Gebrauchs bewusst sind.
Kinder sind zu beaufsichtigen, sodass sie nicht mit dem Gerät spielen können. Reinigung und Benutzer- Wartung dürfen nicht von Kindern ohne Beaufsichtigung durchgeführt
werden.
Sie brauchen unbedingt eine Sicherheitsgruppe einzusetzen! Die Geräte sind druckfest!
Konformitätserklärung
Wahlbach erklärt hiermit, dass das Gerät die nachstehenden Richtlinien entspricht:
• 2006/95/EG Niederspannungs-Richtlinie
• 2004/108/EG Richtlinie zur elektromagnetischen Verträglichkeit (EMV)
• 2011/65/EC (RoHS II)
• 2009/125/EC Ecodesign
Das Gerät entspricht auch die folgenden harmonisierten EU-Normen:
• EN 60335-1:2012+A11:2012
• EN 60335-2-21:2003+A1:2005+A2:2008
• EN 62233:2008
• EN 55014-1:2006+A1:2009+A2:2011
• EN 55014-2:1997+A1:2001+A2:2008
• EN 61000-3-2:2014
• EN 61000-3-3:2013
Wahlbach, Gildestraat 13, 6883 DB Velp, Niederlande, 2015-12-01
2. MONTAGEANLEITUNG
Umwelt
Um Transportschäden zu verhindern, wird das Gerät in einer soliden Verpackung geliefert. Die Verpackung besteht weitgehend aus verwertbarem Material. Benutzen Sie also
die Möglichkeit zum Recyceln der Verpackung.
Installation
Das Gerät soll eingebaut werden laut der Skizze auf der ersten Seite dieser Gebrauchsanleitung. Jede andere Installationsposition kann zu ernsthaften Schäden an dem Gerät
führen. Die Installation soll so nah wie möglich zu den Kaltwasserleitungen stattnden.
Und an eine Stelle wo Frost keinen Einuss hat auf dem Gerät. (z.B. Wohnwagen, Gar-
tenhäuschen usw.).
5
DE GB NL FR
Verwenden Sie bei der Montage der Überwurfmuttern und
Klemmkupplungen immer 2 Gabelschlüssel, um ein Biegen
und Verdrehen von Leitungen und Armaturen zu vermeiden.
Frost
Im Falle von Frostgefahr in einem Raum, darf das Gerät
nicht in diesem Raum installiert werden. Indem trotzdem
das Gerät in einem Raum installiert ist wo Frostgefahr droht
soll das Gerät bevor die Gefahr entsteht, entleert werden.
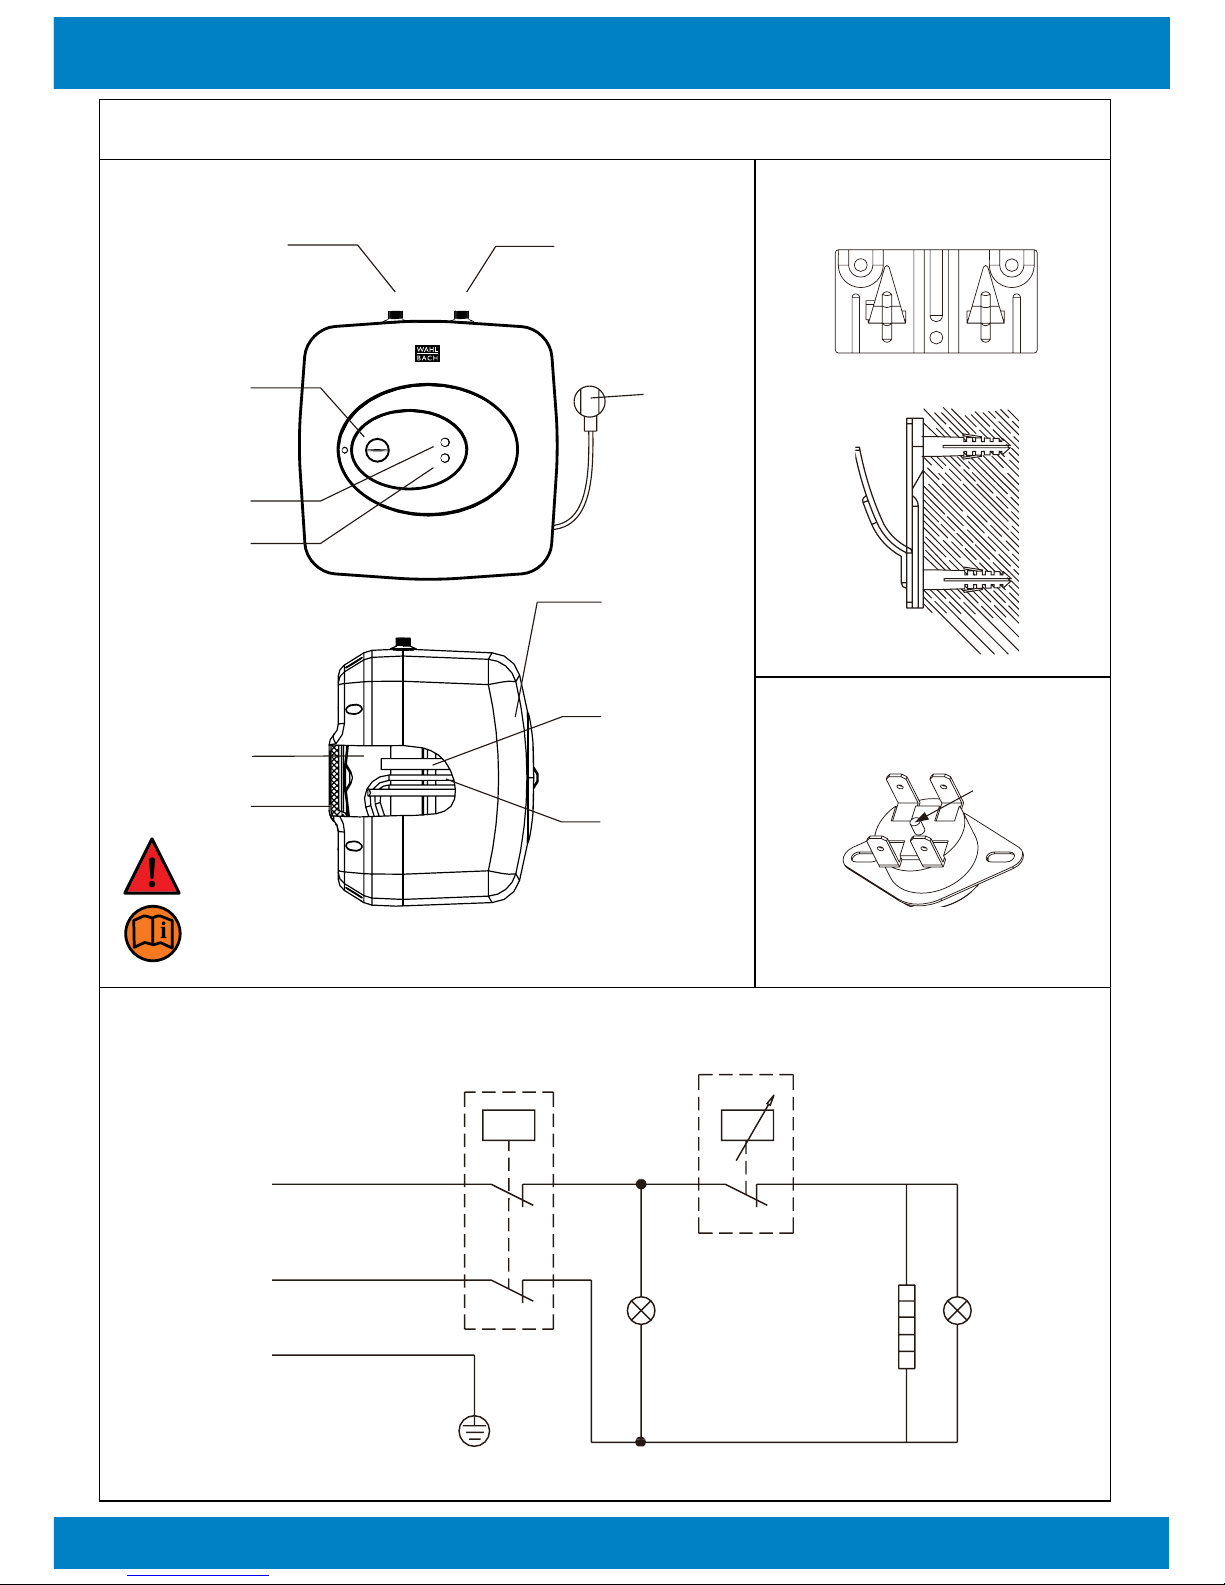
Legende
Abbildung A
Nummer Beschreibung
1 Gehäuse
2 Innenkessel
3 Isolation
4 Heizelement
5 Kaltwassereingang
6 Warmwasserausgang
7 Ein-/Aus-Knopf - Temperaturregler
8 Anzeige leuchtet, wenn das Gerät an das Stromnetz angeschlossen ist
9 Anzeige leuchtet, wenn das Gerät aufheizt
10 Anode
11 Stecker
Option:
Montage an der Wand
Abbildung B
•
Das Gerät muss an einer stabilen und massiven Wand montiert werden. Die Wand muss
mindestens das Gesamtgewicht eines gefüllten Speichers tragen können.
•
Legen Sie einen geeigneten Platz für den Speicher fest. Montieren Sie die Träger und
setzen Sie der Speicher auf die Träger.
Für die Installation muss immer eine Sicherheitsgruppe eingesetzt werden.
Anschließen an das Wassernetz
Abbildung A
•
Die Wasseranschlüsse sind 1/2“-Ausführungen.
•
Schließen Sie die Kaltwasserzufuhr an den Kaltwassereingang (5) an. Setzen Sie an
dieser Stelle eine Sicherheitsgruppe dazwischen.
•
Verwenden Sie immer die im Lieferumfang enthaltenen Gummi-Dichtringe mit Filter, um
Undichtigkeiten vorzubeugen.
•
Schließen Sie die Leitung für das warme Wasser an den Warmwasserausgang (6) an.

6
DE GB NL FR
WICHTIG: Sollte das Gerät dennoch an das Stromnetz angeschlossen worden sein, ohne dass dies mit
Wasser befüllt war, oder aus welchen Gründen auch
immer nach einer kurzen Inbetriebnahme aussetzen, ziehen Sie den Stecker aus der Wandsteckdose
und lassen Sie das Gerät abkühlen.
Anschluss an das Elektrizitätsnetz
Das Gerät ist mit Wasser zu befüllen. Erst dann die elektrische Verbindung herstellen
(Stecker in die Steckdose mit Erdung). Der Anschluss des Gerätes an das Stromversorgungsnetz muss in Übereinstimmung mit den Standards der elektrischen Installation
gemäß örtlichem Recht und Vorschriften durchgeführt werden.
Das Gerät soll direkt durch ein elektrisches Kabel mit einem
Stecker an das Stromversorgungsnetz (230V) angeschlossen
werden.
Gefahr durch beschädigte Spannungsversorgungskabel vermeiden. Bei Beschädigung muss das Gerät vom Hersteller
oder dessen Kundendienst oder gleichermassen qualizierten Person ersetzt werden.
Stellen Sie sicher dass wegen der Zufügung des Gerätes die
Elektrische Absicherung zureichend ist.
Innere Änderungen des Gerätes können Probleme verursachen, indem diese Arbeit nicht von autorisiertem Fachpersonal durchgeführt wird. Die Garantie gilt nur unter der Voraussetzung, dass das Gerät in keiner Weise geändert wird,
d.h. in unverändertem Zustand ist.
Um Gefahr durch unerwünschtes Zurücksetzen des Überhit-
zungsschutzes zu vermeiden, darf diese Einheit NICHT durch
ein externes Schalt Gerät (z.B. einen Zeitschalter) mit Strom
versorgt oder an einen Schaltkreis angeschlossen werden,
der vom Versorgungsbetrieb regelmäßig ein- und ausgeschaltet wird.
WICHTIG: Stecken Sie den Stecker nie in die Wandsteckdose, bevor das Gerät mit Wasser gefüllt ist!
7
DE GB NL FR
Technische Daten
Druckspeicher 15L
Montage Untertisch
Wandmontage Senkrecht
Betriebsdruck 0,75MPa
Temperatur Einstellbereich 7°C - 75°C
Abstand zwischen den Anschlüssen 100mm
Mindestiessdruck 0,1MPa
Maximal zulässiger Druck 0,5MPa
Abstand zwischen Rohrleitungen / Wand 115mm
Nennspannung 1/N/PE 230V
Frequenz 50Hz
Nennleistung 1500 W
Nominalvolumen 15L
Kabelmaß 3x 1,0mm²
Schutzklasse I
IP Schutztyp IPX4
Abmessung (H x B x T) 388x388x331 mm
Wasseranschluß G1/2”
Täglicher Stromverbrauch (Qelec) 3.068 KWh
Lastprol XXS
Schallleistungspegel (LWA) 15 dB
Warmwasserbereitungs-Energieefzienz (ηwh3) 29,50%
8
DE GB NL FR
3. GEBRAUCHSANLEITUNG
Vor Anschluss an das Stromversorgungsnetz ist das
Gerät unbedingt mit Wasser zu füllen!
Das Gerät muss immer mit Hilfe einer Sicherheitsgruppe angeschlossen werden.
So füllen Sie das Gerät: Öffnen Sie eine der WarmwasserAblassstellen, die an den boiler angeschlossen sind. Öffnen
Sie dann den Hahn der Sicherheitsgruppe. Wenn Wasser
aus dem Ablass zu laufen beginnt, ist der
Speicher gefüllt. Wasser gefüllt, schaltet sich das Gerät wegen der automatischen Sicherung ab (Siehe Störungshinweis).
Es ist bei der ersten Inbetriebnahme zu prüfen, ob die Temperaturanzeige (Kontrollampe) nach Erreichen der Temperatur erlischt (Das Gerät hat die eingestellte Temperatur
erreicht). Eine erneute Einschaltung erfolgt erst wieder, wenn diese Temperatur unterschritten wird (‚Nachheizen‘).
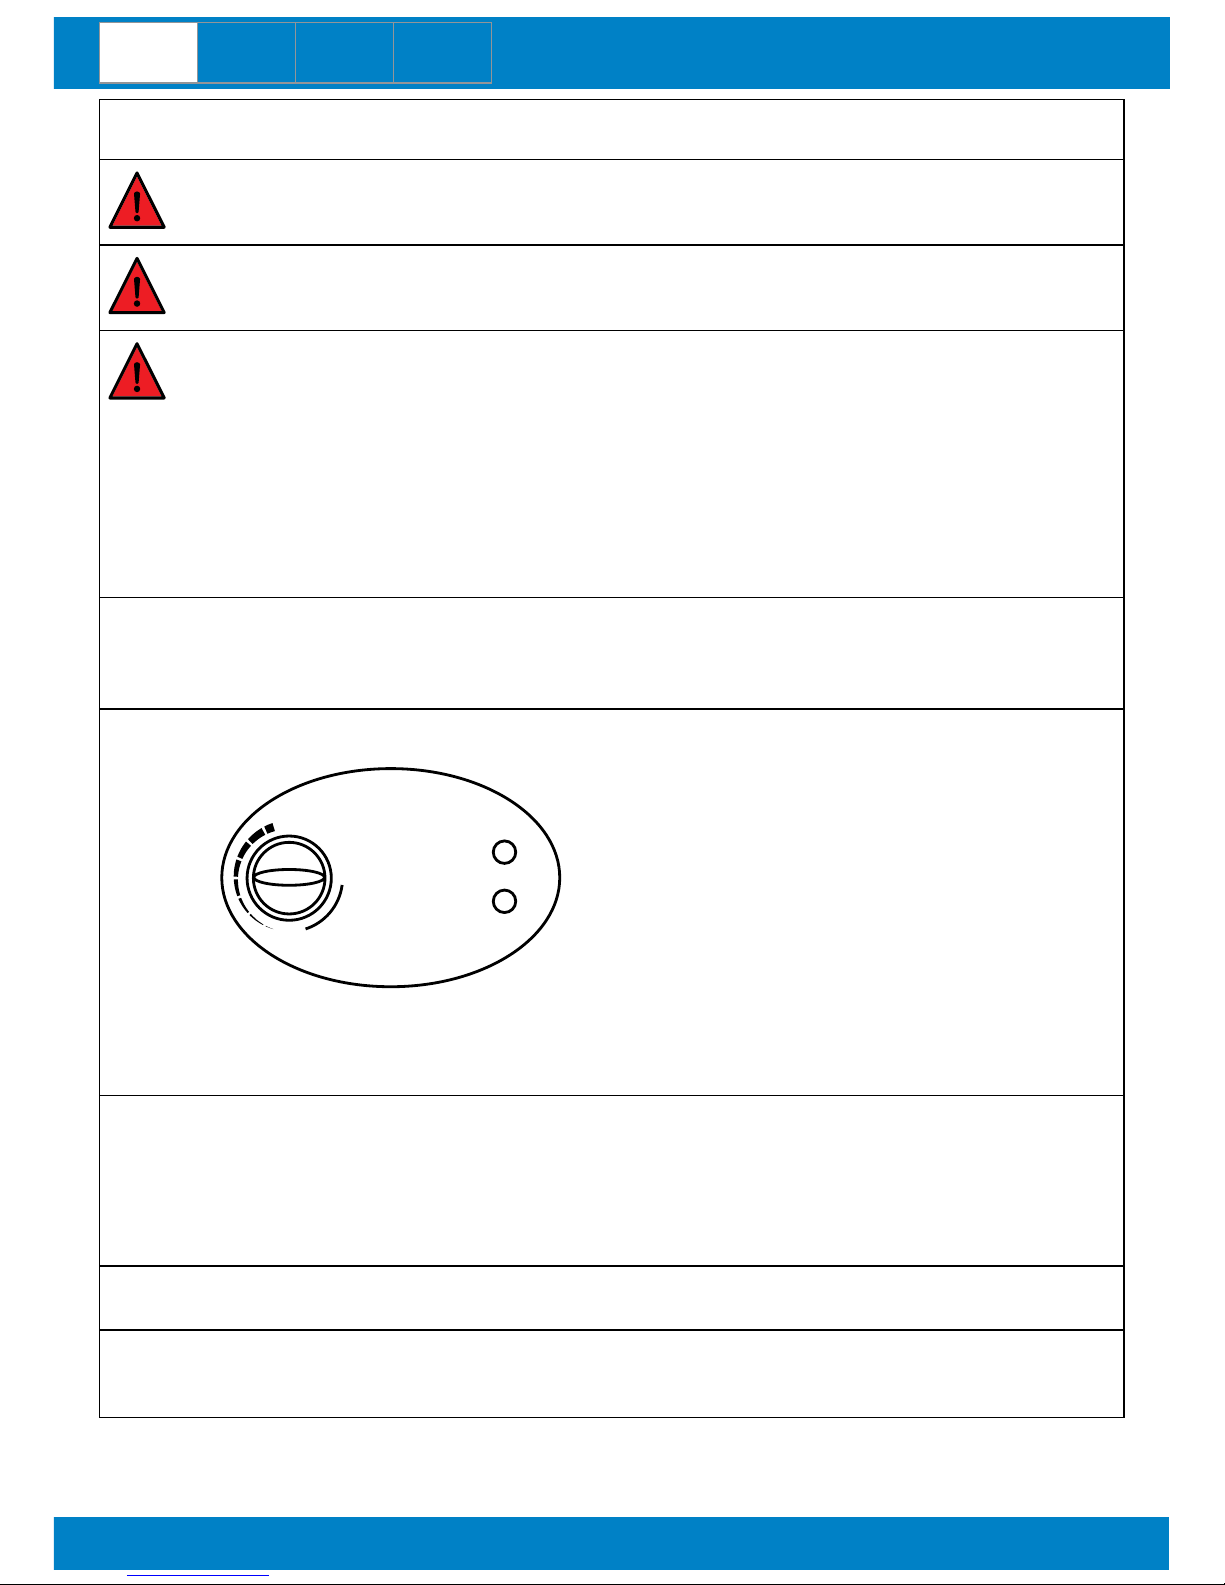
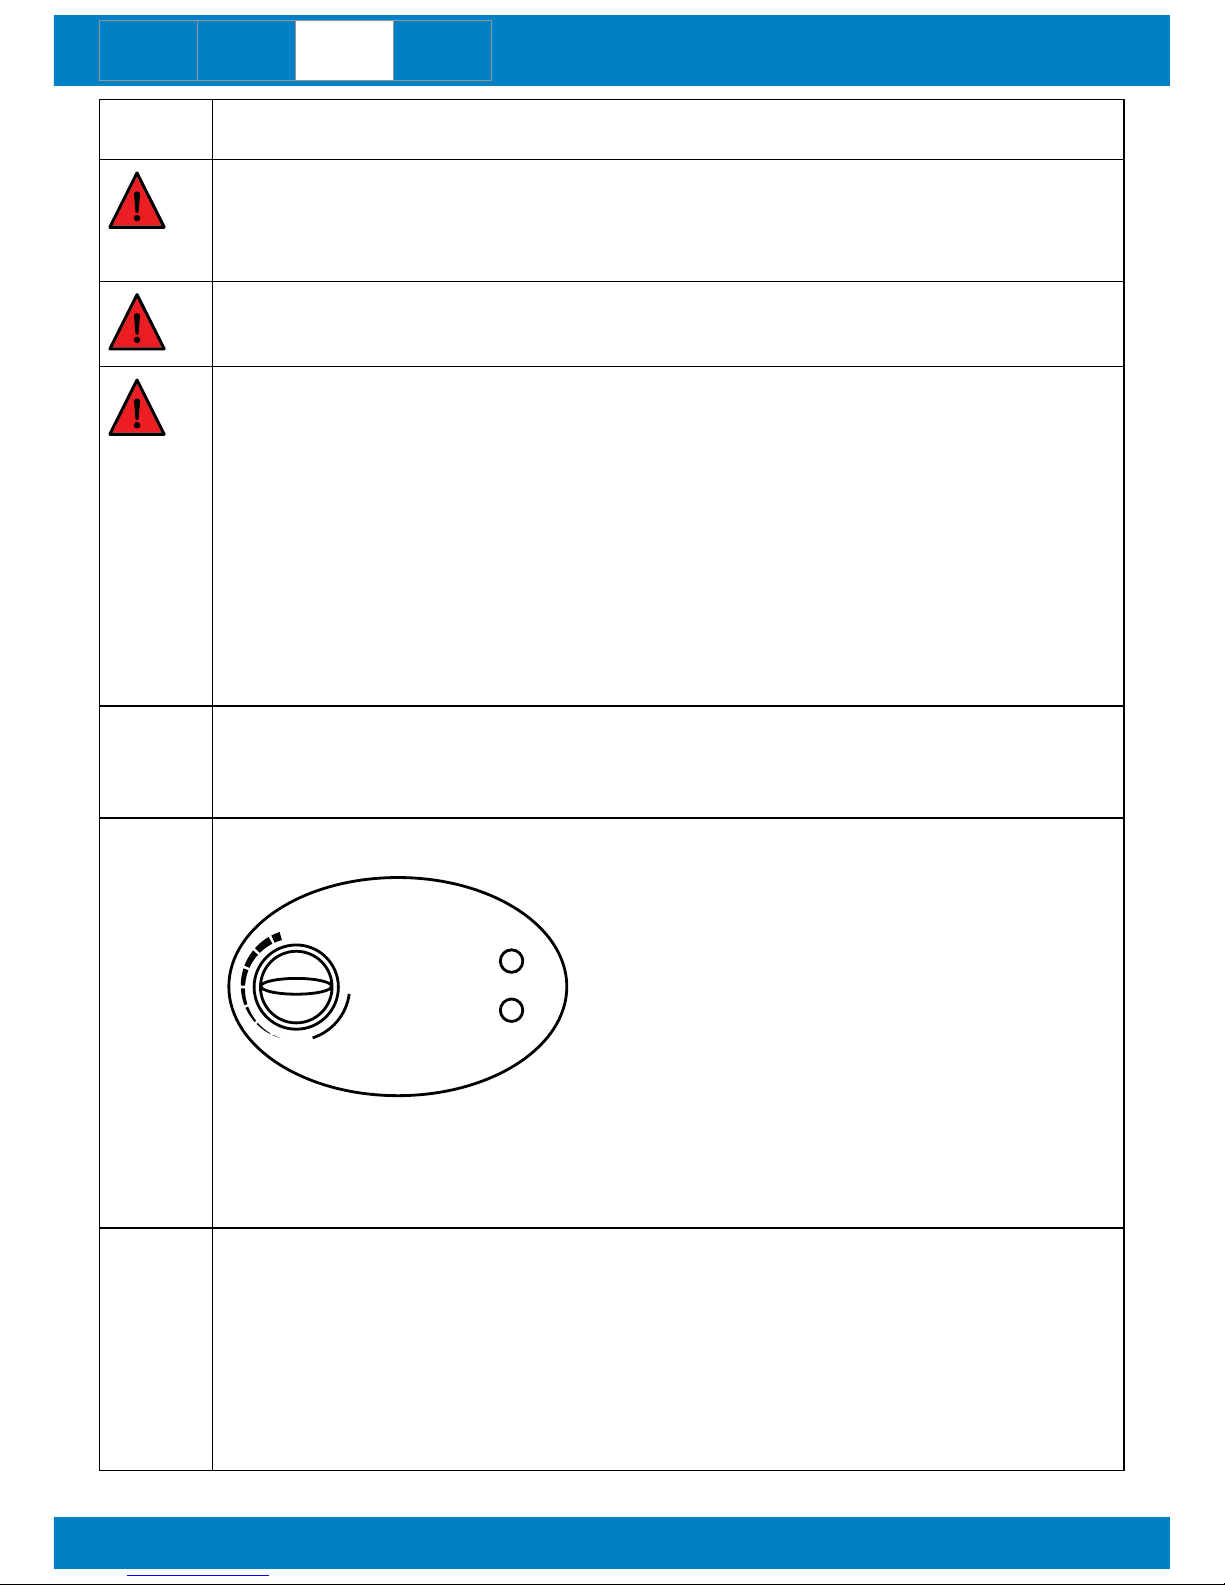
Temperaturwahl
OFF
HIGH
LOW
HEATING
POWER
Schalten Sie den Speicher mit dem Ein-/Aus-Knopf ein. Die Lampe „Power“ leuchtet auf.
Stellen Sie die gewünschte Temperatur ein, indem Sie den linker Knopf drehen. Jetzt
leuchtet die Lampe „HEATING“ auf.
Einsatz
Die Einstellung des Thermostatschalters entnehmen Sie bitte dem vorhergehenden Kapitel. Wir empfehlen die Position „E“, da dies eine maximale Energieeinsparung gewährleistet und weniger Kalkablagerung verursacht. In diesem Fall beträgt die Wassertemperatur zirka 55°C, Verkalkung und Wärmeverlust treten weit seltener auf als bei höheren
Temperaturen.
Das Funktionieren des Gerätes wird durch die Kontrolllampe angezeigt dass solange
leuchtet, bis die gewünschte Temperatur erreicht oder das Gerät ausgeschaltet wird.
Während des Erwärmens vergrößert sich das Wasservolumen im Gerät, was Ausströmen
von Wasser („Ausdehnungswasser“) bei der Sicherheitsgruppe verursacht. Das ist völlig
normal und sollte nicht verhindert werden.
9
DE GB NL FR
Frost
Wenn das Gerät längere Zeit nicht verwendet wurde, muss
es vor Frost geschützt werden. Im diesem Fall soll der
Strom nicht ausgeschaltet und der Thermostatknopf auf die
Position „LOW“ eingestellt werden. In dieser Position bewahrt das Gerät die Wassertemperatur bei zirka 25°C. Wenn
das Gerät von der Stromversorgung genommen wird, muss
das Gerät restlos entleert werden, um das Risiko des Einfrierens zu vermeiden.
4. WARTUNG
Dieses Gerät benötigt keine Wartung durch den Benutzer.
Professionelle Wartung sollte immer vom Fachmann vorgenommen werden.
Weil Wasser sich bei Erwärmung ausdehnt, wird im Behälter mit der/den angeschlossenen Warmwasserleitung(en) der Druck ansteigen. Um diesen Druckanstieg einzugrenzen,
ist eine Sicherheitsgruppe erforderlich. Das ist eine Kombination aus einem Einwegventil,
das verhindert, dass das Warmwasser im Gerät in das Kaltwasserzulaufrohr strömen
kann, einem Entlastungsventil, das den Druck im Gerät bis auf maximal 8 bar begrenzt,
und einem Absperrventil für das Einwegventil, so dass das Gerät vom Wasserleitungsnetz abgekoppelt werden kann.
Das Entlastungsventil ist mit einem Ablassschlauch zum Abführen des Expansionswassers vom Gerät in die Kanalisation versehen.
Zum nachhaltigen Schutz vor Korrosionsbildung ist der Vorratsbehälter aus Stahl mit einer Emailleschicht versehen. Falls die Emailleschicht beschädigt wird, sorgt eine im Vorratsbehälter montierte Magnesiumanode für den Schutz des darunter liegenden Stahls.
Die Magnesiumanode schützt den Tank vor Korrosion. Dies ist ein kathodischer Prozess,
bei dem sich die Anode langsam auöst. Daher muss die Anode alle zwei Jahre von ei-
nem anerkannten Fachbetrieb kontrolliert und bei Bedarf ausgetauscht werden.
Kontrollieren Sie die Funktion der Zuleitungskombination, indem Sie ein Mal im Jahr an
dem großen Knopf auf der Zuleitungskombination drehen, sodass Wasser herausießt
und ihn dann direkt wieder schließen. Damit wird vermieden, dass sich das Ventil in der
Zuleitungskombination festsetzt. Kontrollieren Sie auch den Abuss auf Verstopfung.
Reinigen Sie ihn bei Bedarf oder lassen Sie eine Reinigung durchführen.
Versuchen Sie nie, Fehler des Gerätes selbstständig
zu reparieren. Setzen Sie sich bitte mit dem nächsten Serviceunternehmen oder mit ihrer Verkaufsstelle in Verbindung.
10
DE GB NL FR
Entkalkung
Eine Service Inspektion sollte in jedem Jahr von autorisierten und qualizierten Personen durch geführt werden. Es wird empfohlen während der Service Inspektion das Gerät
zu entkalken. Besonders indem Sie in einer Gegend wohnen mit hartem Wasser, höher
wie 12°dH (Deutsche Härtestandard). Eine hohe Temperatur des Wassers wird die Kalkbildung verstärken. Es wird deshalb empfohlen die Temperatur des Gerätes einzustellen
auf 55°C (Energiesparmodus) in Gegenden mit extrem hartem Wasser >16°dH.
Pege
Zur Pege des Gehäuses genügt ein feuchtes Tuch. Keine scheuernden oder auösenden Reinigungsmittel verwenden!
Legionellen- Prävention
Bitte verwenden Sie aufgeheiztes Wasser nicht als Trinkwasser.
Nach längerer Abschaltung des Gerätes wie z.B. Während des Urlaubs, soll das Gerät vor
der Wiederinbetriebnahme vollständig bis auf die Maximaltemperatur aufgeheizt werden.
Es ist empfehlenswert die Leitungen eine Minute lang durchzuspülen.
5. STÖRUNGSBESEITIGUNG
Schauen Sie bei Störungen zunächst in der Störungstabelle nach!
Wenn das Wasser im Gerät nicht mehr aufgeheizt wird, kontrollieren Sie dann zunächst,
ob der Stecker gut in die Wandsteckdose gesteckt wurde und ob die Sicherung das Ge-
rätgruppe noch funktioniert. Alle weiteren Störungen nden Sie in der Störungstabelle.
Sollte das Gerät nicht funktionieren, weil es ohne Wasserbefüllung angeschlossen wurde, beachten Sie den Störungstabelle. Das Gerät wurde überhitzt und muss sich abkühlen.
Wenn das Gerät mehrmals zurückgesetzt wurde, aber noch
immer nicht funktioniert, nehmen Sie dann Kontakt mit Ihrem Händler auf.
11
DE GB NL FR
6. GARANTIEBEDINGUNGEN
Garantie
Die Rechte aus dieser Herstellergarantie treten neben die gesetzlichen
Rechte des Käufers. Die gesetzlichen Rechte des Käufers, insbesondere
gegen den Verkäufer, werden durch diese Garantie in keiner Weise beschränkt.
Berechtigung
Zur Geltendmachung von Rechten aus der Garantie ist die Vorlage der
entsprechenden Kaufquittung erforderlich.
Inhalt
Wahlbach steht als Hersteller dafür ein, dass dieses Produkt frei von
Material- und Herstellungsfehlern ist. Material- und Herstellungsfehler,
die sich innerhalb der Garantiefrist zeigen, begründen die Rechte aus der
Garantie. Fehler, die auf unsachgemäße Installation oder unsachgemäße
Inbetriebnahme, falsche Betriebsbedingungen oder fehlerhafte Wartungs- oder Reparaturarbeiten zurückgehen, begründen nicht die Rechte
aus der Garantie.
Normale Verschleißerscheinungen als auch Kalkbildung begründen ebenfalls nicht die Rechte aus der Garantie. Indem Fehler verursacht sind wegen extremes Trinkwasser (pH Wert nicht zwischen 7 und 9.5 und/ oder
Cl über 150mg/l und/ oder Fe über 0.2mg/l), begründen nicht die Rechte
aus Garantie.
Dauer
Die Garantiefrist beträgt 24 Monate. Die Garantiefrist beginnt mit dem
Tag des Kaufes des Gerätes. Erbrachte Garantieleistungen bewirken weder eine Verlängerung der Garantieperiode, noch setzen sie eine neue
Garantiefrist in Lauf.
Geltendmachung
Das fehlerhafte Produkt zusammen mit der Kaufquittung an die Verkaufsstelle zurückbringen.
Wahlbach haftet nicht für Transportschäden. Es steht im Ermessen von
Wahlbach, das Gerät zu reparieren oder durch ein neues Produkt auszutauschen. Das funktionsfähige Produkt wird dem Käufer daraufhin zugesandt. Ersetzte Teile oder Produkte gehen in das Eigentum von Wahlbach
über. Zu weiteren Leistungen, wie etwa einer Reparatur vor Ort, einem
Abbau von fehlerhaften Produkten, einem Abtransport von fehlerhaften
Produkten oder einer Installation von reparierten oder neuen Produkten
ist Wahlbach nicht verpichtet.
Erlöschen
Reparaturversuche, die vom Kunden oder einem Dritten, der nicht von
Wahlbach zur Reparatur autorisiert ist, vorgenommen werden, führen
zum Erlöschen der Garantie. Das Gleiche gilt, wenn Teile in das Gerät
installiert oder mit dem Produkt verbunden werden, die keine Originalteile
von Wahlbach sind.
Beschränkung
Diese Garantie beschränkt sich auf Nachbesserung und Nachlieferung.
Diese Garantie umfasst kein Recht auf Schadensersatz, Rücktritt, Minderung oder den Ersatz von Mangelfolgeschäden.
Für ausserhalb Deutschlands und die Niederlande erworbene Geräte gilt
diese Garantie nicht. Gesetzlichen Vorschriften und Lieferbedingungen
der Ländergesellschaft oder Importeurs sind zu folgen.

12
DE GB NL FR
Störungstabelle Beanstandung
Ursache Lösung
Anschlüsse
Wasser
Die Sicherheitsgruppeschläuche passen nicht.
Die Überwurfmuttern der Schläuche sind zu
kurz.
Im Wasser bendet sich eine weiße Substanz.
Im Behälter bendet sich viel Kalk-ablagerung. Demontieren und leeren.
Im Wasser bendet sich eine graue oder braune Sub-
stanz.
Die Magnesiumanode hat sich aufgelöst.
Wasser leckt.
Die Anschlüsse des Gerätes sind nicht gut fest-
geschraubt.
Fehlende Dichtungsringe zwischen den Schläu-
chen und das Gerät.
Defekte Dichtungsringe zwischen den Schläu-
chen und das Gerät.
Behälter leckt.
Die Verbindung zwischen dem Behälter und
dem Heizelement leckt.
Sicherheitsgruppe nicht gut befestigt. Festschrauben.
Sicherheitsgruppe sprüht Wasser. Abfuhr Sicherheitsgruppe anbringen.
Es kommt kein Wasser aus der Armatur.
Hauptventil geschlossen. Hauptventil öffnen.
Absperrventil geschlossen. Absperrventil öffnen.
Absperrventil Sicherheitsgruppe. Absperrventil öffnen.
Es kommt kein warmes Wasser aus der Armatur.
Der Stecker steckt nicht in der Steckdose. Stecker in Steckdose stecken.
Thermostatknopf nicht auf der richtigen Posi-
tion.
Heizelement defekt.
Kalk im Strahlregler. Strahlregler entkalken.
Das Wasser ist zu heiß.
Thermostatknopf zu hoch eingestellt.
Es kommt zu wenig Wasser aus der Armatur.
Wasserdruck zu niedrig. Haupt-/Absperrventil weiter öffnen.
Aus der Warmwasserarmatur tritt Dampf aus.
Thermostat und Sicherung defekt.
Das Gerät macht Kochgeräusche.
Zu viel Kalkablagerung im Gerät. Demontieren und leeren.
Nach der Installation macht der Armatur brodelnde Geräusche.
Es bendet sich Luft in den Leitungen.
Elektrischer
Anschluss
Die Sicherungen springen heraus.
Zu viele Geräte auf einer Gruppe geschaltet. Probieren Sie eine andere Gruppe aus.
Der FI-Schutzschalter schaltet sich ein.
Kurzschluss in der elektrischen
Verkabelung.
Kurzschluß
Kurzschluss im Element.
Kurzschluss im Thermostat.
„ON„ Lampe leuchtet nicht.
Der Stecker steckt nicht in der Steckdose. Stecker in Steckdose stecken.
Kein Wasser im Gerät und Stromunterbre-
chungsschutz wird eingeschaltet.
Hauptstrom ist unterbrochen. Gruppenschaltschrank kontrollieren.
Lampe ist defekt. Lampe austauschen.
„HEATING„ Lampe leuchtet nicht.
Thermostat ausgeschaltet Thermostatknopf weiter drehen.
Das Gerät ist bereits auf die gewünschte Tem-
peratur aufgeheizt.
13
DE GB NL FR
Ursache Lösung
Die Überwurfmuttern der Schläuche sind zu
kurz.
Verwenden Sie einen anderen Einlass-Set oder
andere Schläuche.
Im Behälter bendet sich viel Kalk-ablagerung. Demontieren und leeren.
Die Magnesiumanode hat sich aufgelöst.
Innerhalb der Garantiefrist mit
der Ankaufadresse Kontakt aufnehmen.
Die Anschlüsse des Gerätes sind nicht gut festgeschraubt.
Festschrauben.
Fehlende Dichtungsringe zwischen den Schläu-
chen und das Gerät.
Ringe anbringen.
Defekte Dichtungsringe zwischen den Schläu-
chen und das Gerät.
Ringe austauschen.
Behälter leckt.
Nehmen Sie mit der Ankaufadresse Kontakt
auf.
Die Verbindung zwischen dem Behälter und
dem Heizelement leckt.
Nehmen Sie mit der Ankaufadresse Kontakt
auf.
Sicherheitsgruppe nicht gut befestigt. Festschrauben.
Sicherheitsgruppe sprüht Wasser. Abfuhr Sicherheitsgruppe anbringen.
Hauptventil geschlossen. Hauptventil öffnen.
Absperrventil geschlossen. Absperrventil öffnen.
Absperrventil Sicherheitsgruppe. Absperrventil öffnen.
Der Stecker steckt nicht in der Steckdose. Stecker in Steckdose stecken.
Thermostatknopf nicht auf der richtigen Position.
Thermostatknopf weiter drehen.
Heizelement defekt.
Nehmen Sie mit der Ankaufadresse Kontakt
auf.
Kalk im Strahlregler. Strahlregler entkalken.
Thermostatknopf zu hoch eingestellt.
Thermostatknopf auf eine niedriger Position
drehen.
Wasserdruck zu niedrig. Haupt-/Absperrventil weiter öffnen.
Thermostat und Sicherung defekt.
Nehmen Sie mit der Ankaufadresse Kontakt
auf.
Zu viel Kalkablagerung im Gerät. Demontieren und leeren.
Es bendet sich Luft in den Leitungen.
Beide Hähne gut öffnen und entlüften
(Absperrventil, Küchenarmatur).
Zu viele Geräte auf einer Gruppe geschaltet. Probieren Sie eine andere Gruppe aus.
Kurzschluss in der elektrischen
Verkabelung.
Nehmen Sie mit der Ankaufadresse Kontakt
auf.
Kurzschluss im Element.
Nehmen Sie mit der Ankaufadresse Kontakt
auf.
Kurzschluss im Thermostat.
Nehmen Sie mit der Ankaufadresse Kontakt
auf.
Der Stecker steckt nicht in der Steckdose. Stecker in Steckdose stecken.
Kein Wasser im Gerät und Stromunterbrechungsschutz wird eingeschaltet.
Die folgende Handlung darf nur von Fachkräf-
ten ausgeführt werden: Ziehen Sie den Stek-
ker aus der Steckdose und lassen Sie das Ge-
rät 20 Minuten abkühlen. Demontieren Sie die
Platte an der Vorderseite. Von vorne gesehen,
bendet sich der Thermoschalter zum Zurück-
setzen (Reset) auf die Mitte. Drücken Sie den
Reset-Knopf. Bringen Sie die Platte wieder an.
Hauptstrom ist unterbrochen. Gruppenschaltschrank kontrollieren.
Lampe ist defekt. Lampe austauschen.
Thermostat ausgeschaltet Thermostatknopf weiter drehen.
Das Gerät ist bereits auf die gewünschte Temperatur aufgeheizt.
Nichts zu tun...

14
DE GB NL FR
1. USE OF THE MANUAL
Thank you for selecting our Wahlbach pressure boiler.
These instructions contain important information about
commissioning, operating the device and maintenance. To
ensure your safety and that of others we suggest that you
read these installation and operating instructions before us-
ing the device for the rst time. Please keep the instructions
and other documentation close to the device.
This device has been manufactured in accordance with the prescribed standards and
has been tested by the competent authorities. It has a Safety Certicate and a Certicate of Electromagnetic Compatibility. The technical data for the product is displayed on
the label between the inlet and outlet pipes.
The device should be installed by qualied persons. All repair and maintenance work on the device, for example the
removal of limestone and water scale deposits, may only be
carried out by duly authorised technical staff. The applicable
regulations and regional requirements must always be duly
observed!
This device has been designed for use in modern small apartment blocks, hotels and
toilets. Its modern design and the use of carefully selected materials and an improved
manufacturing process ensure high quality.
Symbols
The following symbols are used in these instructions/appear on the device:
Complies with the basic safety standards set by European Directives.
Failure to observe the instructions identied by this symbol may endanger persons.
Failure to observe the instructions identied by this symbol may lead to damage to the device.
Indicates a voltage that is present.
Failure to observe the instructions identied by this symbol may lead to damage to the device.
Read the manual.
Faulty and/or electrical or electronic appliances that are to be disposed of must
be handed in at the relevant recycling centres set up for this purpose.
15
DE GB NL FR
This appliance can be used by children aged from 8 years
and above and persons with reduced physical, sensory or
mental capabilities or lack of experience and knowledge if
they have been given supervision or instruction concerning
use of the device in a safe way and understand the hazards
involved.
Children shall not play with the device. Cleaning and user
maintenance shall not be made by children without supervision.
A safety unit must be used! The device is a pressure
boiler!
Statement of conformity
Wahlbach duly declares that the device complies with the following directives:
• 2006/95/EC Low Voltage Directive
• 2004/108/EC Electromagnetic Compatibility Directive (EMC)
• 2011/65/EC (RoHS II)
• 2009/125/EC Eco design
The product also conforms to the following harmonised European standards:
• EN 60335-1:2012+A11:2012
• EN 60335-2-21:2003+A1:2005+A2:2008
• EN 62233:2008
• EN 55014-1:2006+A1:2009+A2:2011
• EN 55014-2:1997+A1:2001+A2:2008
• EN 61000-3-2:2014
• EN 61000-3-3:2013
Wahlbach, Gildestraat 13, 6883 DB Velp, Netherlands, 2015-12-01
2. MOUNTING INSTRUCTIONS
Environment
This device is delivered in sturdy packaging in order to avoid damage during transport.
This packaging consists mainly of recyclable materials. We request that you dispose of
the packaging accordingly for recycling purposes.
Installation
The device should be installed in accordance with the drawing on the rst page of the
user manual. Any other installation position may result in serious damage to the device.
Installation should take place as close as possible to a cold water connection. The product should be protected from the effects of frost (for example in caravans, summer
houses, etc.).
When mounting swivels and squeezed joints, always use 2
open-end spanners in order to prevent bending and twisting
pipes and accessories.

16
DE GB NL FR
Frost
If there is the risk of frost in a room, the device should not
be installed in this room. If, despite this advice, the device is
installed in a room where there is a risk of frost, the device
should be emptied before the risk arises.
Legend
Figure A
Number Description
1 Housing
2 Inner container
3 Insulation
4 Heating element
5 Cold water inlet
6 Hot water outlet
7 On/off button - Temperature controller
8 Indicator when appliance is connected to the mains
9 Indicator when appliance heated up
10 Anode
11 Plug
A safety unit must be used for installation.
Optional:
Placement on the wall
Figure B
• The appliance must be tted on a stable and solid wall. The wall must be able to at
least bear the total weight of a full boiler.
• Determine a suitable place for the boiler. Mount the brackets to the wall and connect
the boiler to the brackets correctly.
IMPORTANT: In the unlikely event that the device is
connected to the mains power supply without being
lled with water, or if for some reason the device
switches off after a short while, please disconnect
the plug from the wall socket to allow the device to
cool down.
Connection to the water supply
Figure A
• The water connections are 1/2“.
• Connect the cold water supply to (5). Fit an inlet combination in between.
• Always use the rubber rings with lter supplied to prevent leaks.
• Connect (6) the piping for the hot water.

17
DE GB NL FR
Connection to the electricity supply
The device must be lled with water. Only then may the device be connected to the electricity supply (insert the plug in
the wall socket). Connection of the device to the power supply network must take place in accordance with electric installation standards and as specied by local laws and regulations. The device must be directly connected to the power
supply network (230V) via an electrical cable and plug.
Avoid danger from damaged power supply cables. In the
event of damage, the device must be replaced by the manufacturer or its customer service department, or by an equiv-
alently-qualied person.
Ensure that the addition of this device will not overload the
fuse protection in your mains.
Internal modications to the product may cause problems
if this work is not carried out by authorized and qualied
technical staff. The warranty only applies if the product has
not been modied in any way, i.e. subject to it being in unchanged condition.
In order to avoid creating an unsafe situation by inappropriate resetting of the maximum temperature safety device,
this unit may not be powered via an external switching device (a time switch for example) or connected to a circuit,
which is regularly switched on and off by the power supply
company.
Important: Never connect the plug to the wall
socket if the device is not yet lled with water!

18
DE GB NL FR
Technical specications
Description 15L
Mounting Under-sink
Wall mounting vertical
Operating pressure 0,75MPa
Temperature range 7°C - 75°C
Distance between connections 100mm
Min. pressure water mains 0,1MPa
Max. pressure water mains 0,5MPa
Distance pipe to wall 115mm
Nominal voltage 1/N/PE 230V
Frequency 50Hz
Nominal power rating 1500 W
Nominal capacity 15L
Cable size 3x 1,0mm²
Protection class I
Type of Protection IPX4
Dimensions 388x388x331 mm
Water connection G1/2”
Daily electricity consumption (Qelec) 3.068 KWh
Load prole XXS
Sound power level (LWA) 15 dB
Energy efciency (ηwh3) 29,50%
3. USER INSTRUCTIONS
The device must be lled with water before connection to the electrical supply!
The device should always be connected to a safety
unit!
To ll the appliance: Open one of the hot water draw-off
points connected to the boiler. Then open the tap in the
inlet combination. When the water starts to ow out of the
draw-off point the boiler has been lled. The device only
switches on again if the temperature falls below this setting.
(See troubleshooting)

19
DE GB NL FR
When lling for the rst time, the hot water valve in the low-pressure tap tting must
be open so that water can ow into the device. If the device is not lled with water be-
forehand during installation, the automatic safety device will activate and switch off the
device. (See troubleshooting instructions on how to act in the event of a fault.)
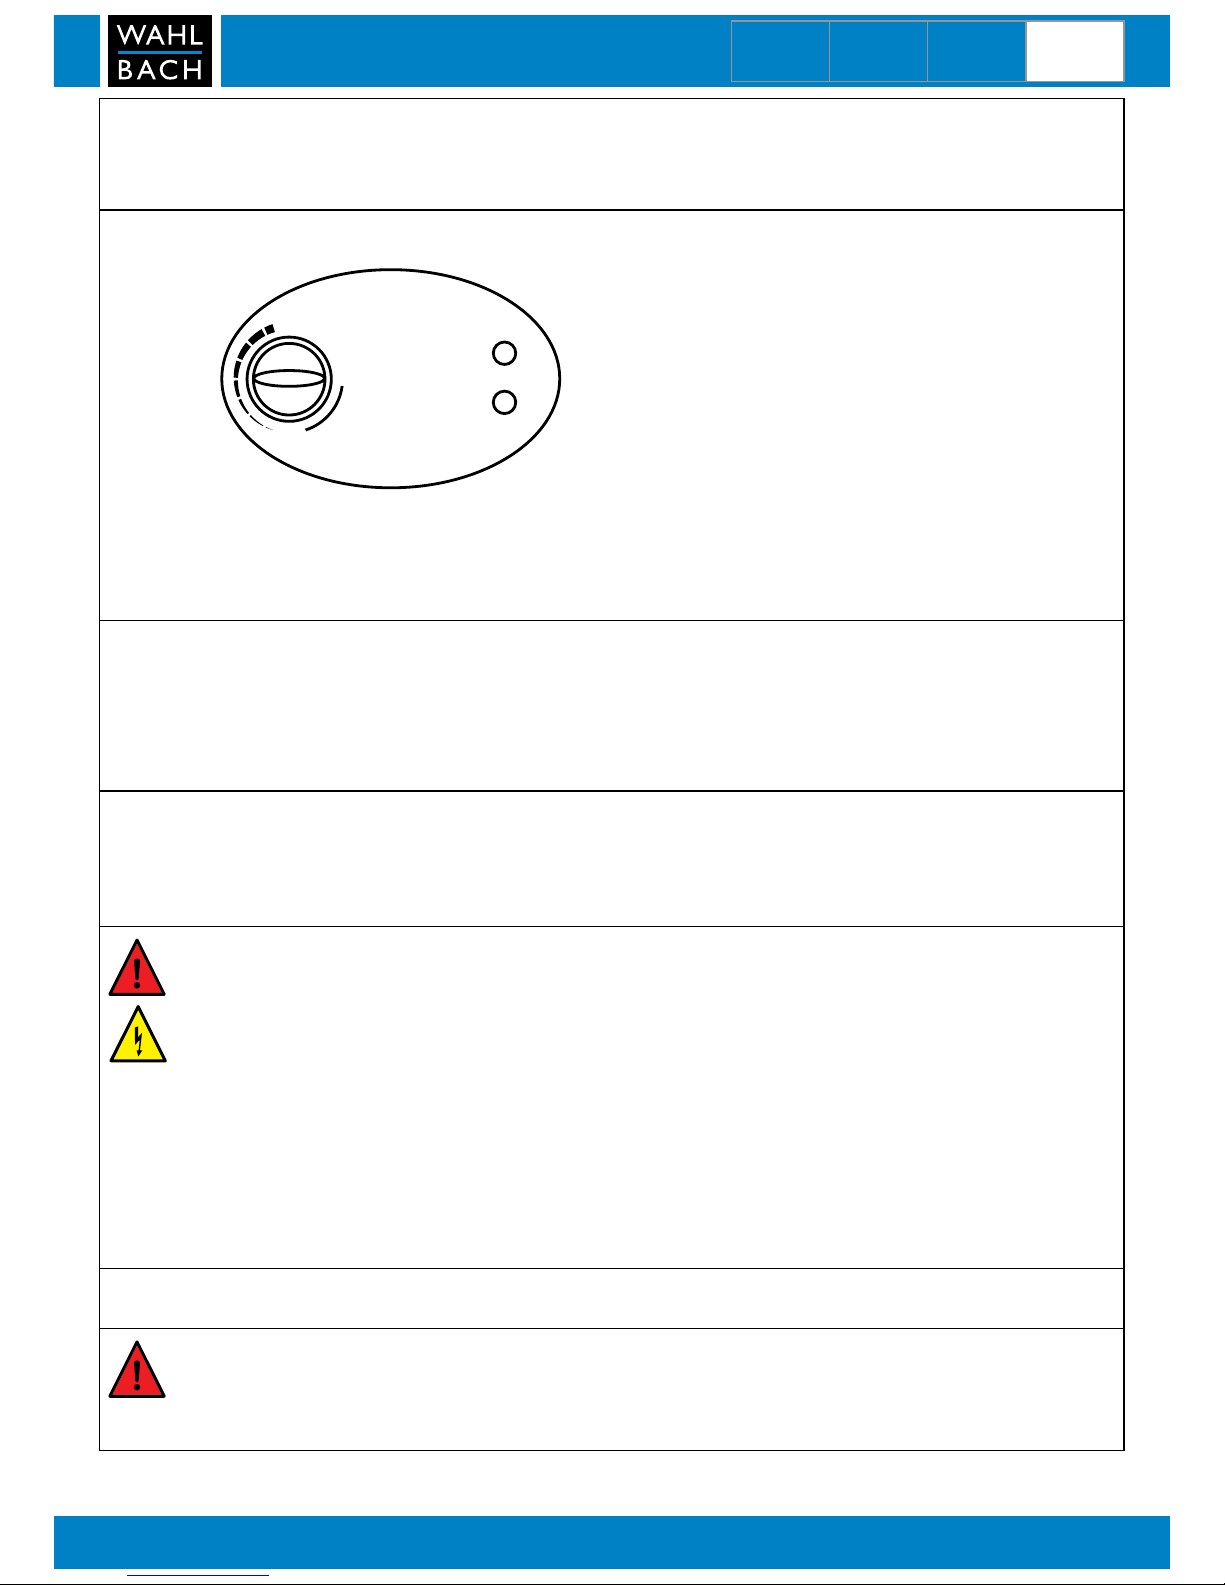
Temperature setting
OFF
HIGH
LOW
HEATING
POWER
Turn the on/off button to switch the boiler on. The ‘Power’ light comes on.
Turn the button on the left to set the required temperature. The ‘HEATING’ light will
come on until the water has been heated.
Usage and maintenance
Please refer to the previous section for details of the thermostat settings. We recommend you use position „E“ as this guarantees maximum energy efciency and the low-
est lime scale building. By maintaining the water temperature at approximately 55°C;
furthermore lime scale build-up and heat loss are much lower than at higher temperatures.
As the water that is used for washing the dishes has a temperature of approximately 45
to 50°C, cold water has to be mixed in to reach this temperature. At a water temperature of 60°C, you will be able to draw off about 14 litres of 45°C.
Operation of the device is indicated by the indicator light, which lights up when the device is on and extinguishes when the set temperature is reached or the device is turned
off.
During heating, the volume of the water in the device expands, causing a ow of water
(„expansion water“) from the safety unit. This is perfectly normal and no preventive action needs to be taken.
Frost
When the device has not been used for an extended period,
it must be protected against the effects of frost. Leave the
power supply on and set the thermostat knob to „LOW“.
When set to this position, the device maintains the water
temperature at approximately 25°C. If the device is to be
disconnected from the power supply, it must be emptied
completely in order to avoid the risk of damage caused by
freezing.

20
DE GB NL FR
4. MAINTENANCE
This device does not require any maintenance by the user.
Professional maintenance should always be carried out by
an expert.
As water expands when heated, the pressure will increase in the device vessel with the
connected hot water pipe(s). In order to limit this increase in pressure, a safety unit is
required. This is a combination of a check valve, which prevents hot boiler water from
owing into the cold supply pipe, with a relief valve that limits the pressure in the device
to a maximum of 8 bar, and a Stop valve in front of the check valve in order to be able
to disconnect the device from the water mains.
The relief valve is provided with a discharge hose for discharging expansion water from
the device to the sewer.
The steel storage vessel is provided with an enamelled layer that prevents the formation
of corrosion. In case of damage to the enamelled layer, a magnesium anode mounted in
the storage vessel will make sure that the underlying steel is protected.
The magnesium anode protects the tank against corrosion. This is a cathodic process,
during which the anode slowly dissolves. The anode should therefore be inspected, and
replaced if necessary, by a recognized tter every 2 years.
Check the functioning of the inlet combination by turning the large knob on the inlet
combination once a year, allowing water to ow out, and closing it immediately. This will
prevent the valve of the inlet combination from getting stuck. Also check the drain for
blockages. If it is blocked, unblock the drain or instruct a third party to do this.
If faulty, never try to repair the device yourself.
Please contact the nearest service specialist or the
party that supplied the device originally.
De-scaling
A service inspection should be performed by authorized and qualied technical staff
every year. De-scaling of the device during this inspection is highly recommended, especially when you live in an area with hard water exceeding 12°dH (German standard
of hardness). Higher water temperature will intensify calcication. It is therefore recommended to set the device at maximum 55°C (energy-saving setting) in areas with extremely hard water >16°dH.
Cleaning
The housing of the device can simply be cleaned with a damp cloth. Do not use aggressive cleaners or cleaners with a scouring effect!
Legionella prevention
Do not use heated water as drinking water.
After prolonged shutdown of the device for example due to holidays, the device should
be fully heated up to the maximum temperature (tap at minimum ow) before re-using.
It is recommended to ush the pipes for one minute.

21
DE GB NL FR
5. TROUBLE SHOOTING
Note: in case of problems, always consult the failure
guide!
If the water in the device is no longer heated, rst check whether the plug is properly
connected to the wall socket and whether the fuse of the device group is still working.
For all other failures, please consult the failure guide.
If the device no longer works because it was connected
without being lled with water rst, follow the troubleshooting guide. The device has overheated and needs to cool
down.
If the device has been reset several times, but still does
not work, please contact the party that supplied the device
originally.

22
DE GB NL FR
Failure guide Complaint
Cause Solution
Connections water
The safety unit hoses do not t
The swivels of the hoses are too short Get a different inlet set or different hoses
There is a white substance in the water
There is too much scale deposit in the tank Disassemble and drain
There is a grey or brown substance in the water
The magnesium anode has dissolved
Water leakage
Connections on the device have not
been tightened sufciently
Sealing rings between hoses and
device are missing
Sealing rings between hoses and
device are defective
Tank is leaking Contact the supplier of the device *
Connection between tank and
heating element is leaking
Safety unit is not properly attached Tighten
Safety unit is ejecting water Mount discharge of safety unit
No water
Main valve closed Open Main valve
Stop valves closed Open stop valves
Stop valve safety unit closed Open stop valve
No hot water
Plug is not connected Connect plug
Thermostat button not at the
right position
Heating element defective Contact the supplier of the device *
Scale deposits in the ow regulator De-scale the ow regulator
Water is too hot
Thermostat set too high Set thermostat lower
There is too little water coming from the tap
Water pressure too low Further open main/stop valves
There is steam coming out of the hot water tap
Thermostat and safeguard defective Contact the supplier of the device *
The device makes boiling noises
Too much scale deposit in the device Disassemble and drain
After installation, the tap makes bubbling noises
There is air in the pipes
Electricity
The fuses are blown
Too many appliances on 1 group Try a different group
The earth leakage circuit breaker is activated
There is a short-circuit in
the electrical wiring
Short-circuit
There is a short-circuit in the element Contact the purchase address
There is a short-circuit in the thermostat Contact the purchase address
The “ON“ lamp does not light
Plug is not connected Connect plug
No water in the device and safety
power interrupter is activated
Main power interrupted Check in group box
Lamp is defective Replace lamp
The “HEATING“ lamp does not light
Thermostat is off Turn the button further
The device is already at temperature Do nothing

23
DE GB NL FR
Cause Solution
The swivels of the hoses are too short Get a different inlet set or different hoses
There is too much scale deposit in the tank Disassemble and drain
The magnesium anode has dissolved
Contact the party that supplied
the device originally
within the warranty period *
Connections on the device have not
been tightened sufciently
Tighten
Sealing rings between hoses and
device are missing
Add rings
Sealing rings between hoses and
device are defective
Replace rings
Tank is leaking Contact the supplier of the device *
Connection between tank and
heating element is leaking
Contact the supplier of the device *
Safety unit is not properly attached Tighten
Safety unit is ejecting water Mount discharge of safety unit
Main valve closed Open Main valve
Stop valves closed Open stop valves
Stop valve safety unit closed Open stop valve
Plug is not connected Connect plug
Thermostat button not at the
right position
Turn the thermostat button further
Heating element defective Contact the supplier of the device *
Scale deposits in the ow regulator De-scale the ow regulator
Thermostat set too high Set thermostat lower
Water pressure too low Further open main/stop valves
Thermostat and safeguard defective Contact the supplier of the device *
Too much scale deposit in the device Disassemble and drain
There is air in the pipes
Properly open and vent both valves
(stop valve, kitchen tap)
Too many appliances on 1 group Try a different group
There is a short-circuit in
the electrical wiring
Contact the supplier of the device *
There is a short-circuit in the element Contact the purchase address
There is a short-circuit in the thermostat Contact the purchase address
Plug is not connected Connect plug
No water in the device and safety
power interrupter is activated
This work may only be carried out by
professionals: Pull out the plug and allow the
device to cool down for 20 minutes.
Disassemble the panel on the front side. The
reset thermal switch is on the middle seen
from the front. Press the reset button.
Assemble the panel.
Main power interrupted Check in group box
Lamp is defective Replace lamp
Thermostat is off Turn the button further
The device is already at temperature Do nothing

24
DE GB NL FR
6. WARRANTY CONDITIONS
Warranty
The rights under this manufacturer’s warranty shall apply in addition to
the buyer’s statutory rights. This warranty shall in no way restrict the
buyer’s statutory rights in particularly towards the seller.
Entitlement
The claiming of rights under this warranty shall be subject to the submission of the respective proof of purchase.
Content
Wahlbach shall guarantee as the manufacturer that this product is free
of material and manufacturing errors. Material and manufacturing errors
arising during the warranty period shall justify the rights under the warranty. This warranty shall not cover errors due to improper installation or
incorrect usage, incorrect operating conditions or defective maintenance
or repair work.
Normal wear and tear as for lime scaling shall also be excluded under this
warranty. The warranty will not be valid if the problem is caused by extreme values of drinking water (pH value not between 7 and 9.5 and/or Cl
above 150 mg/l and/or Fe above 0.2mg/l).
Duration
The warranty shall be valid for 24 months. The warranty period shall
commence on the day on which the product is purchased. Warranty
services provided shall neither prolong the warranty period nor initiate a
new warranty period.
Claims
The defective product should be sent together with the proof of purchase
to the place of purchase.
Wahlbach shall not be liable for transport damage. The product shall be
repaired or replaced at the discretion of Wahlbach. The functioning product shall then be sent to the buyer. Wahlbach shall acquire ownership of
replaced parts or products. Wahlbach shall not be obliged to provide other services such as repair on location, dismantling of defective products,
taking away defective products or installing repaired or new products.
Invalidity of
warranty
Attempted repairs carried out by a customer or third party that are not
authorized by Wahlbach shall invalidate the warranty. The same shall apply if parts are installed in the product or connected to the product that
are not original parts from Wahlbach.
Restriction
This warranty shall be restricted to rectication of the defect and subsequent delivery. This warranty shall not include compensation, withdrawal
from the agreement, reduction in price or any reimbursement for consequential loss due to defects.
This warranty does not apply to devices purchased outside Belgium,
France, United Kingdom, Germany and Holland. The statutory provisions
and delivery conditions of the national company or importers must be
observed.

25
DE GB NL FR
1. GEBRUIK VAN DE HANDLEIDING
Hartelijk dank voor de aanschaf van onze Wahlbach boiler.
Gelieve deze gebruiksaanwijzing goed te lezen alvorens het
apparaat te installeren en in gebruik te nemen!
Om uw eigen veiligheid en die van anderen te garanderen,
raden wij u aan om deze installatie-en bedieningsinstructies
voor het eerste gebruik goed door te lezen. Bewaar deze
handleiding en de andere documentatie in de nabijheid van
het apparaat.
Dit apparaat is geproduceerd volgens de geldende normen, en is getest door daartoe
bevoegde instanties, zoals aangegeven in het Veiligheidscerticaat en het Certicaat
voor Elektromagnetisch Compatibiliteit. De technische eigenschappen van het product
zijn weergeven op de sticker bovenop het apparaat tussen de water in- en uitlaatpijpen.
De installatie dient te worden uitgevoerd door daartoe gekwaliceerde personen. Alle reparatie- en onderhoudswerkzaamheden aan of in het apparaat, zoals kalkverwijdering,
dienen te worden uitgevoerd door een gekwaliceerd service en onderhoudsbedrijf. De lokaal geldende richtlijnen
dienen hierbij altijd in acht genomen te worden!
Dit apparaat is geschikt voor gebruik in moderne huizen, hotels, toiletten, etc. Het moderne ontwerp, de gebruikte materialen en het geavanceerde productieproces waarborgen de hoge kwaliteit van het product.
Uitleg van de symbolen
In deze handleiding en/of op het apparaat worden de volgende symbolen gebruikt:
Staat voor de standaard veiligheidsnormen van de relevante Europese richtlijnen.
Niet opvolgen van deze waarschuwing kan het apparaat schade toerichten.
Niet opvolgen van deze waarschuwing kan u of anderen in gevaar brengen.
Geeft aan dat er spanning op het apparaat kan zijn.
Niet opvolgen van deze waarschuwing kan u en/ of het apparaat schade toerichten.
Gebruiksaanwijzing lezen.
Schadelijke materialen en elektrische of elektronische apparaten moeten naar
een daarvoor bestemd recycle punt worden gebracht.
26
DE GB NL FR
Het apparaat mag gebruikt worden door kinderen vanaf
de leeftijd van 8 jaar en door personen met verminderde
fysieke, zintuiglijke of mentale capaciteiten of met gebrek
aan ervaring of kennis, indien zij onder het toezicht staan of
gebruiksinstructies voor het veilig gebruik van dit toestel gekregen hebben en de mogelijke gevaren begrijpen.
Er moet op worden toegezien dat kinderen niet met het apparaat spelen. Kinderen die niet onder toezicht staan, mogen dit toestel ook niet reinigen of onderhouden.
U dient voor aansluiting een inlaatcombinatie te gebruiken! Het apparaat is een drukboiler!
Conformiteitsverklaring
Wahlbach verklaart hierbij dat het apparaat in overeenstemming is met:
• 2006/95/EC Laagspanningsrichtlijn
• 2004/108/EC Elektromagnetische compatibiliteit richtlijn
• 2011/65/EC (RoHS II)
• 2009/125/EC Eco design
En tevens overeen komt met de volgende Europese geharmoniseerde normen:
• EN 60335-1:2012+A11:2012
• EN 60335-2-21:2003+A1:2005+A2:2008
• EN 62233:2008
• EN 55014-1:2006+A1:2009+A2:2011
• EN 55014-2:1997+A1:2001+A2:2008
• EN 61000-3-2:2014
• EN 61000-3-3:2013
Wahlbach, Gildestraat 13, 6883 DB Velp, Nederland, 2015-12-01
2. MONTAGEHANDLEIDING
Milieu
Om schade tijdens transport te voorkomen, wordt het product geleverd in een stevige
verpakking. Deze verpakking bestaat voor een groot deel uit herbruikbaar materiaal. Bewaar de verpakking om gebruik te maken van de mogelijkheden voor recycling.
Installatie
Dit apparaat dient te worden ingebouwd volgens het schema op de eerste pagina van
deze gebruiksaanwijzing. Elke andere locatie kan leiden tot ernstige schade aan het apparaat.
Het apparaat moet zo dicht mogelijk bij de wateraansluitingen worden geïnstalleerd op
een locatie en waar geen kans op vorst bestaat (bijvoorbeeld in tuinhuisjes en caravans).
Gebruik bij de montage van wartels en knelkoppelingen altijd 2 steeksleutels om buiging en wringing van leidingen en
appendages te vermijden.

27
DE GB NL FR
Vorst
Wanneer er in een ruimte kans op vorst bestaat, mag het
apparaat niet in deze ruimte worden geïnstalleerd. Wanneer
het apparaat desondanks wordt geïnstalleerd in een ruimte
waar kans op vorst bestaat, moet het apparaat worden geleegd voordat het gevaar ontstaat.
Legenda
Afbeelding A
Nummer Beschrijving
1 Behuizing
2 Binnenketel
3 Isolatie
4 Verwarmingselement
5 Koud wateringang
6 Warm wateruitgang
7 Aan/uit en temperatuurregeling
8 Indicatie als apparaat aangesloten is op stroomnet
9 Indicatie als apparaat opwarmd
10 Anode
11 Stekker
Optioneel:
Plaatsing aan de wand
Afbeelding B
• Het apparaat dient te worden gemonteerd aan een stabiele en massieve wand. De
wand dient minimaal het totale gewicht van een gevulde boiler te kunnen dragen.
• Bepaal een geschikte plaats voor de boiler. Plaats de montagestrip aan de muur en
plaats hier de boiler in.
Voor aansluiting dient immer een geschikte inlaatcombinatie te worden gebruikt.
Aansluiting op het waternet
Afbeelding A
• De wateraansluitingen zijn 1/2“.
• Sluit de koudwater toevoer aan op (5). Plaats hier een inlaatcombinatie
• Gebruik altijd de meegeleverde rubber ringen met lter om lekkage te voorkomen.
• Sluit op (6) de leiding voor het warme water aan.
Belangrijk: Mocht het apparaat onverhoopt toch aan
het elektriciteitsnet worden aangesloten zonder gevuld te zijn met water, of om enige andere reden afslaan na kortstondig gebruik, gelieve dan de stekker
uit de wandcontactdoos te halen en het apparaat te
laten afkoelen.
28
DE GB NL FR
Belangrijk: Steek nooit de stekker in de wandcontactdoos voordat het apparaat met water is gevuld!
Aansluiting op het elektriciteitsnet
Vul het apparaat met water. Pas dan mag het apparaat worden aangesloten op het elektriciteitsnet! Aansluiting van het
apparaat op het elektriciteitsnet dient te worden gedaan
volgens de normen voor elektrische installaties en de lokaal
geldende regels en wetten. Het apparaat dient rechtstreeks
te worden aangesloten op het elektriciteitsnet (wandcontactdoos) door middel van het snoer met stekker.
Gevaar door beschadigde elektriciteitskabels moet worden
vermeden. Bij beschadiging moet het apparaat door de
fabrikant, zijn klantenservice of een gelijkwaardig gekwaliceerde persoon worden vervangen.
Vergewis u ervan dat door toevoeging van het apparaat de
gebruikte groep in uw groepenkast niet wordt overbelast.
Elke aanpassing aan het product en de (interne) bedrading
kan zorgen voor defecten indien deze niet wordt uitgevoerd
door professionele vakmensen. De garantie is slechts geldig
indien het product in zijn originele staat is en dus op geen
enkele wijze is aangepast.
Om brandgevaar te voorkomen als gevolg van een onbedoelde nulstelling van de thermische uitschakeling dient u
dit toestel niet van stroom te voorzien via een extern schakelinstrument, zoals een timer, of op een stroomkring aan te
sluiten die regelmatig aan en uit wordt gezet door het elektriciteitsbedrijf.

29
DE GB NL FR
Technische specicaties
Drukboiler 15L
Montage onderbouw
Wandmontage vertikaal
Werkdruk 0,75MPa
Temperatuur instelbereik 7°C - 75°C
Afstand tussen aansluitingen 100mm
Minimale waterdruk 0,1MPa
Maximale waterdruk 0,5MPa
Afstand tussen aansluiting / muur 115mm
Elektrische aansluiting 1/N/PE 230V
Frequentie 50Hz
Nominaal vermogen 1500 W
Nominale inhoud 15L
Kabelmaat 3x 1,0mm²
Beschermingsklasse I
IP beschermingsklasse IPX4
Afmetingen 388x388x331 mm
Wateraansluiting G1/2”
Dagelijks elektriciteitsverbruik Q
elec
3.068 KWh
Capaciteitsprofiel
XXS
Geluidsvermogensniveau L
WA
15 dB
Energie-efficiëntie van waterverwarming η
wh3
29,50%
30
DE GB NL FR
3. GEBRUIKERSHANDLEIDING
Het apparaat dient absoluut met water gevuld te zijn
voordat deze wordt aangesloten op het elektriciteitsnet!
Het apparaat dient altijd aangesloten te worden met
een inlaatcombinatie!
Om het apparaat te vullen: Open één van de warmwater
tappunten aangesloten op de boiler. Open vervolgens de
kraan van de inlaatcombinatie. Zodra het water uit het tap-
punt begint te stromen is de boiler gevuld. Indien het apparaat in gebruik wordt gesteld zonder dat deze gevuld is met
water, dan zal het apparaat afslaan door de automatische
zekering. Het apparaat zal nu niet meer werken totdat deze
gereset wordt als gevolg van afkoeling van het apparaat.
(Zie storingswijzer)
Ga bij het eerste gebruik na of de temperatuurcontrole (het indicatielampje voor op het
apparaat) normaal werkt. Het verwarmingselement zal automatisch afslaan zodra de watertemperatuur het ingestelde punt heeft bereikt. Het apparaat zal het water weer opnieuw gaan opwarmen zodra de watertemperatuur weer onder het ingestelde punt zakt.
Temperatuurinstelling
OFF
HIGH
LOW
HEATING
POWER
Draai de aan/uit knop om de boiler in te schakelen. Het ‘Power’ lampje zal gaan branden.
Draai de linkerknop om de gewenste temperatuur in te stellen. Het ‘HEATING’ lampje
zal gaan branden, totdat het water is opgewarmd.
Gebruik
Het instellen en aanpassen van de thermostaatschakelaar is hierboven beschreven.
Gebruik van het apparaat met de schakelaar op positie ‚E‘ wordt aangeraden. Dit is de
meest economische stand, en door de watertemperatuur van ongeveer 55°C zal het
warmteverlies aan de omgeving en de aanzet van kalk lager zijn dan bij gebruik van het
apparaat in een hogere stand.
Het functioneren van het apparaat wordt aangegeven door het controlelampje, dat
brandt totdat het water de met de thermostaatschakelaar ingestelde temperatuur heeft
bereikt.

31
DE GB NL FR
Het verwarmen van het water zorgt ervoor dat het volume van het water in de tank
wordt vergroot. Hierdoor kan er water uit de inlaatcombinatie druppelen. Dit is volkomen
normaal en mag niet worden verhinderd.
Vorst
Indien het apparaat gedurende langere tijd niet wordt gebruikt, dient het te worden beschermd tegen vorst. In dit
geval mag de stroom niet worden afgesloten en moet de
knop van de thermostaat op de positie „LOW“ worden gezet. In deze stand zal het apparaat het water op een temperatuur van ca. 25°C houden.
Indien u de stekker van het apparaat uit het stopcontract
verwijdert, dient het water uit het apparaat te worden gehaald om bevriezing te voorkomen.
4. ONDERHOUD
Dit apparaat bevat geen onderdelen die door de gebruiker
moeten of kunnen worden onderhouden. Professioneel onderhoud dient altijd vakkundig te worden uitgevoerd.
Omdat water bij verhitting uitzet, zal in het boilervat met de aangesloten
warmwaterleiding(en), de druk toenemen. Om deze drukverhoging te begrenzen is een
inlaatcombinatie noodzakelijk. Dit is een combinatie van een keerklep, die verhindert dat
het warme boilerwater in de koude toevoerleiding kan stromen, met een ontlastventiel
dat de druk in het apparaat begrenst tot maximaal 8 bar en een stopkraan voor de keerklep voor het af kunnen koppelen van het apparaat van het waterleidingnet.
Het ontlastventiel is voorzien van een afvoerslang voor het lozen van het expansiewater
van het apparaat naar de riolering.
Het stalen voorraadvat is voorzien van een emaillaag die corrosievorming verhindert. In
geval van een beschadiging in de emaillaag zorgt een in het voorraadvat gemonteerde
magnesium anode voor bescherming van het onderliggende staal.
De magnesium anode beschermd de tank tegen corrosie. Dit is een kathodisch proces,
waarbij de anode langzaam oplost. Daarom dient u de anode elke 2 jaar door een erkend installateur te laten controleren en indien nodig te laten vervangen.
Controleer de werking van de inlaatcombinatie door 1x per jaar aan de grote knop op
de inlaatcombinatie te draaien, zodat er water uitstroomt en sluit hem dan weer direct.
Hiermee wordt voorkomen dat de klep in de inlaatcombinatie vast gaat zitten. Controleer
dan ook of de afvoer niet verstopt is. Is dat wel het geval, ontstop dan de afvoer of laat
dit doen.
Probeer nooit het apparaat zelf te repareren! Schakel in geval van een storing het dichtstbijzijnde service- of onderhoudsbedrijf in, of de winkel waar u
het apparaat hebt gekocht.

32
DE GB NL FR
Kalk
Een service inspectie dient elk jaar door geautoriseerde en gekwaliceerde personen
te worden uitgevoerd. Het wordt aanbevolen tijdens deze inspectie het apparaat te
ontkalken. In het bijzonder als u in een omgeving woont met hard water die de 12°dH
overschrijdt (Duitse hardheidsstandaard). Een hoge watertemperatuur zal kalkvorming
versterken. Het is daarom raadzaam het apparaat in te stellen op een maximum van
55°C (energiebesparende stand) in gebieden met extreem hard water >16°dH.
Reiniging
De buitenzijde van het apparaat kan worden schoongemaakt met een licht vochtige
doek met schoonmaak- of afwasmiddel. Oplosmiddelen of schuurmiddelen dienen niet te
worden gebruikt.
Legionella preventie
Gebruik verwarmd water niet om te drinken.
Bij langdurige uitschakeling van het apparaat, bijvoorbeeld i.v.m. vakantie, dient u het
apparaat vóór het eerste gebruik volledig tot de maximale temperatuur op te warmen.
Het wordt aanbevolen om de leidingen gedurende 1 minuut door te spoelen.
5. STORINGSWIJZER
Let op! Raadpleeg bij problemen altijd de storingswijzer op de volgende pagina’s!
Indien het water in het apparaat niet meer opwarmt, controleer dan eerst of de stekker
goed in de wandcontactdoos zit en of de zekering van de groep, waarop het apparaat is
aangesloten, nog functioneert. Voor alle verdere storingen raadpleeg de storingswijzer.
Mocht het apparaat niet functioneren, omdat deze is aangesloten zonder hem met water te vullen, volg dan de storingswijzer. Het apparaat is overhit geraakt en zal moeten
afkoelen.
Indien het apparaat meerdere keren is gereset, maar nog
steeds niet functioneert, neem dan contact op met uw aankoopadres.

33
DE GB NL FR
6. GARANTIEBEPALINGEN
Garantie
De rechten uit deze fabrieksgarantie zijn een aanvulling op de wettelijke
rechten van de koper. De wettelijke rechten van de koper, met name ten
opzichte van de verkoper, worden op geen enkele wijze door deze garantie beperkt.
Rechten
Bij een claim van rechten op grond van deze garantie moet het desbetreffende aankoopbewijs worden meegeleverd.
Inhoud
Wahlbach, Nederland staat er als producent voor in dat dit product vrij is
van materiaal- en productiefouten. Materiaal- en productiefouten die zich
binnen de garantieperiode openbaren, geven recht op garantie. Er bestaat geen recht op garantie als de fouten het gevolg zijn van onkundige
installatie, onkundige ingebruikname, onjuiste gebruikscondities of onjuist
uitgevoerde onderhouds- of reparatiewerkzaamheden.
Ook normale slijtage, waaronder verkalking geeft geen recht op garantie.
Het recht op garantie komt te vervallen als het probleem is veroorzaakt
door extreme drinkwater waarden (pH waarde niet tussen 7 en 9.5 en/of
Cl boven 150 mg/l en/of Fe boven 0.2mg/l).
Duur
De garantieperiode bedraagt 24 maanden. De garantieperiode gaat in op
de dag van aankoop van het product. Verleende garantie leidt niet tot
een verlenging van de garantieperiode en start ook geen nieuwe garantieperiode.
Claimen
Breng het defecte apparaat samen met het aankoopbewijs terug naar het
verkooppunt.
Wahlbach is niet aansprakelijk voor transportschade. Wahlbach bepaalt
of het product gerepareerd of vervangen wordt. Het functionerende apparaat wordt vervolgens naar de koper gezonden. Vervangen onderdelen
of producten worden eigendom van Wahlbach. Wahlbach is niet verplicht
meer diensten te verlenen zoals reparatie ter plaatse, uitbouw van defecte producten, afvoer van defecte producten of installatie van gerepareerde of nieuwe producten.
Vervallen
van garantie
Reparatiepogingen door de klant of door derden die daartoe niet door
Wahlbach zijn geautoriseerd, maken de garantie ongeldig. De garantie
vervalt ook als er onderdelen in het product worden aangebracht of
ermee worden verbonden, die geen originele onderdelen van Wahlbach
zijn.
Beperking
Aan deze garantie kunnen geen andere rechten worden ontleend dan reparatie of vervanging van het product. Deze garantie geeft geen recht op
schadevergoeding, ongedaan maken van de koop, korting of compensatie
voor vervolgschade.
Deze garantie geldt niet voor apparaten die buiten Frankrijk, België, Verenigd Koninkrijk, Duitsland en Nederland zijn aangeschaft. De wettelijke
voorschriften en de leveringsvoorwaarden van de landelijke verkooporganisatie of de importeur moeten in acht worden genomen.

34
DE GB NL FR
Storingswijzer Klacht
Oorzaak Oplossing
Aansluitingen water
De inlaatcombinatie slangen passen niet
De wartels van de slangen zijn te kort Haal een andere inlaatset of slangen
Er zit een witte substantie in het water
Er is te veel kalkafzetting in de tank Demonteren en legen
Er zit een grijze of bruine substantie in het water
De magnesiumanode is opgelost
Lekkage van water
Aansluitingen op het apparaat zijn niet goed
aangedraaid
Afdichtingsringen tussen slangen en apparaat
missen
Afdichtingsringen tussen slangen en apparaat
zijn defect
Tank lekt Neem contact op met het aankoopadres
Verbinding tussen tank en verwarmingsele-
ment lekt
Inlaatcombinatie niet goed bevestigd Aandraaien
Inlaatcombinatie spuwt water Afvoer van inlaatcombinatie aanbrengen
Er komt geen water
Hoofdkraan dicht Hoofdkraan opendraaien
Stopkranen dicht Stopkranen opendraaien
Stopkraan inlaatcombinatie dicht Stopkraan opendraaien
Er komt geen warm water
Stekker zit er niet in Stekker erin doen
Thermostaatknop niet op de juiste stand Thermostaatknop verder doordraaien
Verwarmingselement kapot Neem contact op met het aankoopadres
Kalk in de straalregelaar Ontkalk de straalregelaar
Water is te heet
Thermostaat te hoog ingesteld Thermostaatknop lager zetten
Er komt te weinig warm water uit de kraan
Waterdruk te laag Hoofd-/stopkranen verder openen
Er komt stoom uit de warmwaterkraan
Thermostaat en beveiliging kapot Neem contact op met het aankoopadres
Het apparaat maakt kookgeluiden
Te veel kalkafzetting in het apparaat Demonteren en legen
Na installatie maakt kraan pruttelende geluiden
Er zit lucht in de leidingen
Elektra
De stoppen slaan door
Te veel apparaten op 1 groep Probeer op andere groep
De aardlekschakelaar treedt in werking
Er zit sluiting in de elektrische bedrading Neem contact op met het aankoopadres
Kortsluiting
Er zit sluiting in het element Neem contact op met het aankoopadres
Er zit sluiting in de thermostaat Neem contact op met het aankoopadres
“ON“ lampje brandt niet
Stekker zit er niet in Stekker erin doen
Geen water in het apparaat en beveiliging
stroomonderbreking treedt in
Hoofdstroom is onderbroken Controleer in groepenkast
“HEATING“ lampje brandt niet
Apparaat staat uit Linker knop draaien
Apparaat is al op temperatuur Niets doen

35
DE GB NL FR
Oorzaak Oplossing
De wartels van de slangen zijn te kort Haal een andere inlaatset of slangen
Er is te veel kalkafzetting in de tank Demonteren en legen
De magnesiumanode is opgelost
Binnen garantietermijn contact opnemen met
het aankoopadres of gekwaliceerde monteur
nieuwe anode laten plaatsen.
Aansluitingen op het apparaat zijn niet goed
aangedraaid
Aandraaien
Afdichtingsringen tussen slangen en apparaat
missen
Ringen toevoegen
Afdichtingsringen tussen slangen en apparaat
zijn defect
Ringen vervangen
Tank lekt Neem contact op met het aankoopadres
Verbinding tussen tank en verwarmingsele-
ment lekt
Neem contact op met het aankoopadres
Inlaatcombinatie niet goed bevestigd Aandraaien
Inlaatcombinatie spuwt water Afvoer van inlaatcombinatie aanbrengen
Hoofdkraan dicht Hoofdkraan opendraaien
Stopkranen dicht Stopkranen opendraaien
Stopkraan inlaatcombinatie dicht Stopkraan opendraaien
Stekker zit er niet in Stekker erin doen
Thermostaatknop niet op de juiste stand Thermostaatknop verder doordraaien
Verwarmingselement kapot Neem contact op met het aankoopadres
Kalk in de straalregelaar Ontkalk de straalregelaar
Thermostaat te hoog ingesteld Thermostaatknop lager zetten
Waterdruk te laag Hoofd-/stopkranen verder openen
Thermostaat en beveiliging kapot Neem contact op met het aankoopadres
Te veel kalkafzetting in het apparaat Demonteren en legen
Er zit lucht in de leidingen
Beide kranen goed openen en ontluchten
(stopkraan, keukenkraan)
Te veel apparaten op 1 groep Probeer op andere groep
Er zit sluiting in de elektrische bedrading Neem contact op met het aankoopadres
Er zit sluiting in het element Neem contact op met het aankoopadres
Er zit sluiting in de thermostaat Neem contact op met het aankoopadres
Stekker zit er niet in Stekker erin doen
Geen water in het apparaat en beveiliging
stroomonderbreking treedt in
(Afbeelding C)
Deze handeling mag alleen door professionals
worden uitgevoerd: Trek de stekker er uit en
laat het apparaat 20 minuten afkoelen. De-
monteer het paneel aan de voorzijde. Vanaf
de voorkant gezien bevindt de reset thermi-
sche schakelaar zich in het midden. Druk de
reset knop in. Monteer het paneel.
Hoofdstroom is onderbroken Controleer in groepenkast
Apparaat staat uit Linker knop draaien
Apparaat is al op temperatuur Niets doen

36
DE GB NL FR
1. UTILISATION DE LA NOTICE
Nous vous remercions pour l’achat de notre chauffe-eau à
pression 15 litres Wahlbach.
Ces instructions de service contiennent des informations importantes sur la mise en service, le démarrage et l‘entretien.
Pour votre propre sécurité et pour la sécurité d‘autrui, nous
vous recommandons de lire attentivement cette notice d‘utilisation et de montage avant la première mise en service.
Veuillez conserver la notice ainsi que les autres documents à
proximité de l‘appareil.
L’appareil a été produit suivant les normes en vigueur et a été testé par les instances
compétentes, tel qu’indiqué dans le Certicat de sécurité et le Certicat de Compatibilité électromagnétique. Les propriétés techniques du produit gurent sur l’autocollant
apposé en haut d’appareil, entre les tuyaux d’arrivée et de sortie d’eau.
L’installation doit être effectuée par des personnes qualiées
en la matière. Tous les travaux d’entretien ou de réparation à effectuer dans ou sur l’appareil, comme le détar-
trage, doivent être exécutés par un service qualié et une
entreprise d’entretien. Les directives en vigueur localement
doivent toujours être prises en compte!
L’appareil convient pour une utilisation dans des maisons modernes, des hôtels, des toilettes, etc. Sa conception moderne, les matériaux utilisés et le processus de production
avancés garantissent le haut niveau de qualité du produit.
Explication des symboles
Dans le présent manuel et/ou sur l’appareil, les symboles suivants sont utilisés:
Fait référence aux normes de sécurité standard des directives européennes
pertinentes.
Ne pas respecter cet avertissement peut entraîner un danger, pour vous
comme pour votre entourage.
Ne pas respecter cet avertissement peut engendrer des dégâts pour l’appareil.
Indique que l’appareil peut être sous tension.
Ne pas respecter cet avertissement peut être préjudiciable pour vous comme
pour l’appareil.
Lire le mode d‘emploi.
Les matériaux nuisibles ainsi que les appareils électriques ou électroniques
doivent être amenés en un lieu de recyclage prévu à cette n.

37
DE GB NL FR
Cet appareil peut être utilisé par des enfants de plus de 8
ans ainsi que par des personnes dont les capacités physiques, sensorielles ou mentales sont réduites, ou des personnes dénuées d’expérience ou de connaissance s‘ils ont
eu connaissance de l‘utilisation en toute sécurité de l‘appareil et s‘ils ont conscience des dangers de son utilisation.
Les enfants doivent être surveillés an qu‘ils ne jouent pas
avec l‘appareil. Le nettoyage et la maintenance par l‘utilisateur ne doivent pas être effectués par des enfants sans
surveillance.
Vous devez utiliser un groupe de sécurité! Cet appareil est un chauffe-eau à pression!
Déclaration de conformité
La société Wahlbach déclare que l’appareil est conforme aux directives ci-dessous:
• 2006/95/CEE Directive Basse Tension
• 2004/108/CEE Directive de compatibilité électromagnétique
• 2011/65/EC (RoHS II)
• 2009/125/EC Eco design
Le produit est aussi conforme aux normes UE harmonisées suivantes:
• EN 60335-1:2012+A11:2012
• EN 60335-2-21:2003+A1:2005+A2:2008
• EN 62233:2008
• EN 55014-1:2006+A1:2009+A2:2011
• EN 55014-2:1997+A1:2001+A2:2008
• EN 61000-3-2:2014
• EN 61000-3-3:2013
Wahlbach, Gildestraat 13, 6883 DB Velp, Les Pays-Bas, 2014-12-01
2. NOTICE DE MONTAGE
Environnement
Pour empêcher les dommages liés au transport, l‘appareil est livré dans un emballage
solide. L‘emballage se compose en grande partie de matériels récupérables.
Utilisez également la possibilité de recyclage de l‘emballage.
Installation
L’appareil doit être monté selon le schéma situé à la première page de cette notice d‘utilisation. Toute autre position d‘installation peut entraîner des dommages graves à l‘appareil. L‘installation doit se trouver le plus près possible des conduites d‘eau froide et dans
un endroit où le gel n‘a aucune inuence sur l‘appareil (par example caravane, cabane
de jardin, etc.).

38
DE GB NL FR
Utilisez toujours 2 clés à fourche pour le montage d’écrous
à raccord et de raccords rapides an d’éviter le pliage ou la
torsion des canalisations et des accessoires.
Gel
L‘appareil ne doit pas être installé dans une pièce où il existe
un risque de gel. Si l‘appareil est tout de même installé dans
une pièce où il existe un risque de gel, l‘appareil doit être
vidangé avant que le danger ne se présente.
Légende
Illustration A
Nombre Description
1 Carter
2 Chaudière interne
3 Isolation
4 Élément de chauffe
5 Arrivée d‘eau froide
6 Sortie d'eau chaude
7 Bouton marche/arrêt - Régulateur de température
8 Indication lorsque l‘appareil est relié au réseau électrique
9 Indication lorsque l‘appareil chauffe
10 Anode
11 Prise
Optionnel:
Placement sur le mur
Illustration B
• L’appareil doit être monté sur un mur stable et massif. Le mur doit pouvoir supporter au
minimum le poids total d’un chauffe-eau rempli.
• Déterminez un endroit approprié pour le chauffe-eau. Placez le barrette de montage sur
le mur et placez l‘appareil.
Un groupe de sécurité adapté doit être utilisé pour le
raccordement de l’appareil.
Raccordement sur le réseau de distribution
d’eau
Illustration A
• Les raccordements d’eau ont un diamètre de 1/2“.
• Branchez l’alimentation en eau froide sur (5). Placez un tube d’expansion entre les
deux.
• Utilisez toujours les joints en caoutchouc avec ltre accompagnant le produit, an
d’éviter toute fuite.
• Branchez sur (6) la conduite pour l’eau chaude.

39
DE GB NL FR
Important: Si par malheur l’appareil serait connecté au réseau d’électricité sans être rempli d’eau,
ou qu’il se déclencherait inopinément pour une rai-
son ou une autre, veuillez retirer la che de la prise
de courant et laisser refroidir l’appareil.
Raccordement au réseau d’électricité
Remplissez l’appareil. L’appareil ne peut être raccordé au
réseau de distribution d’électricité qu’après cette étape!
Le raccordement de l’appareil au réseau d’électricité doit
être effectué suivant les normes d’installation électrique et
les lois et règlements en vigueur localement.
L’appareil doit être raccordé au réseau d’électricité à l’aide
d’un cordon muni d’une che.
Prévenir tout danger lié à des câbles électriques endomma-
gés. Si un câble est endommagé, l’appareil doit être remplacé par le fabricant, son service à la clientèle ou une per-
sonne de qualication équivalente.
Assurez-vous que la protection électrique soit sufsante, du
fait de l‘ajout de l‘appareil.
Toute adaptation apportée au produit et à son câblage (in-
terne) peut être à l’origine de défauts si elle n’est pas exécu-
tée par du personnel qualié. La garantie n’est valable que si
le produit se trouve dans son état d’origine, sans la moindre
adaptation.
An d’éviter les risques liés à une remise à zéro accidentelle
de l’interrupteur à relais thermique, cet appareil ne doit pas
être alimenté par un dispositif de marche/ arrêt externe
(minuterie) ni branché sur un circuit régulièrement allumé et
éteint par le fournisseur d’énergie.
Important: Ne jamais encher la che dans la prise
avant que l’appareil soit rempli d’eau!

40
DE GB NL FR
Spécications techniques
Description 15L
Montage vers le bas
Montage mural vertical
Pression de travail 0,75MPa
Plage de réglage de la température 7°C - 75°C
Écart entre les conduites 100mm
Min. pression d’eau 0,1MPa
Max. pression d’eau 0,5MPa
Distance entre raccordement / mur 115mm
Raccordement électrique 1/N/PE 230V
Fréquence 50Hz
Puissance nominale 1500 W
Contenance 15L
Dimensions du câble 3x 1,0mm²
Classe de protection I
Classe de protection IP IPX4
Dimensions 388x388x331 mm
Raccordement d’eau G1/2”
Consommation journalière d’électricité (Qelec) 3.068 KWh
Prol de soutirage XXS
Niveau de puissance acoustique (LWA) 15 dB
Efcacité énergétique (ηwh3) 29,50%
3. INSTRUCTIONS D’UTILISATION
L’appareil doit absolument être rempli d’eau avant
d’être raccordé au réseau électrique!
Ne jamais utiliser l’appareil sans groupe de sécurité!
Pour remplir l’appareil : ouvrez l’un des points de soutirage
d’eau chaude raccordés sur le chauffe-eau. Ouvrez ensuite
le robinet du tube d’expansion. Dès que de l’eau commence
à s’écouler du point de soutirage, le chauffe-eau est rempli.
L’appareil réchauffera à nouveau l’eau dès que la température de cette dernière retombera sous le niveau réglé.
41
DE GB NL FR
Pour remplir l’appareil, le bouton d’eau chaude sur le robinet basse pression doit être
ouvert. Si l’appareil est mis en service sans être rempli d’eau, il s’arrêtera sous l’action
du fusible automatique. Il ne pourra ensuite plus être utilisé avant d’avoir été réinitialisé
suite au refroidissement de l’appareil.
Réglage de la température
OFF
HIGH
LOW
HEATING
POWER
Tournez le bouton marche/arrêt pour allumer le chauffe-eau. Le voyant « POWER » va
s’allumer.
Tournez le bouton gauche pour régler la température souhaitée. Le voyant « HEATING »
va s’allumer, jusqu’à ce que l’eau soit chaude.
Utilisation et entretien
Le réglage et l’adaptation de l’interrupteur thermostatique sont décrits plus haut. Il est
recommandé d’utiliser l’appareil en plaçant l’interrupteur en position ‘E‘. Il s’agit de la
position la plus économique, et à une température de l’eau d’environ 55°C, la déperdition de chaleur vers l’extérieur ainsi que le dépôt de calcaire sont inférieurs aux valeurs
atteintes en cas d’utilisation d’appareil dans une position supérieure.
Le chauffage de l’eau implique une augmentation du volume de l’eau dans le réservoir.
Par conséquent, il se peut que de l’eau s’égoutte par le robinet basse pression. C’est
tout à fait normal et ne peut être évité. Vous ne pourrez empêcher quelques gouttes de
s’échapper du robinet basse pression en le serrant davantage, mais vous pourriez toutefois endommager le robinet.
Gel
Si l’appareil n’est pas utilisé durant une longue période, il
doit être protégé contre le gel. Pour cela, le courant doit
être coupé et l’interrupteur thermostatique doit être mis sur
„LOW“. Dans cette position, l’appareil maintiendra une température d‘eau d‘environ 25°C. Si la che d‘alimentation en
courant de l‘appareil est retirée, l‘appareil doit être vidangé
pour éviter le risque de gel.
4. MAINTENANCE
Cet appareil ne nécessite aucune maintenance de la part de
l‘utilisateur. Les travaux de maintenance doivent toujours
être effectués par un spécialiste.
42
DE GB NL FR
Comme l’eau se dilate lors de chauffage, la pression de la cuve de l’appareil avec son ou
ses tuyaux d’eau chaude augmentera. Il est de ce fait nécessaire de placer un groupe de
sécurité pour limiter cette augmentation de pression.
Cette groupe de sécurité se compose d’un clapet de retenue qui empêche l’eau chaude
de l’appareil de couler dans la conduite d’alimentation d’eau froide, d’un détendeur qui
limite la pression dans l’appareil à 8 bars au maximum, et d’un robinet de sûreté pour le
clapet de retenue pour pouvoir déconnecter l’appareil du réseau de distribution d’eau.
Le détendeur est pourvu d’un tuyau d’évacuation pour évacuer l’eau de l’appareil à
l’égout.
La cuve en acier est pourvu d’une couche d’émail qui empêche la formation de corrosion. En cas d’endommagement dans la couche d’émail de la cuve, une anode magnésium montée dans la cuve assure la protection de la couche en acier sous-jacente.
L’anode en magnésium protège le réservoir contre la corrosion. Il s’agit d’un proces-
sus cathodique par lequel l’anode se dissout lentement. Par conséquent, l’anode doit
être contrôlée tous les deux ans par un installateur agréé et elle doit être remplacée si
nécessaire.
Une fois par an, vériez le fonctionnement du groupe de sécurité en tournant le gros
bouton qui se trouve sur le groupe de sécurité, jusqu’à ce que de l’eau s’écoule, puis
refermez-le immédiatement. Cette manipulation permet d’éviter un blocage de la sou-
pape dans le groupe de sécurité. Vériez également que l’évacuation n'est pas obstruée.
Si c'est le cas, débouchez ou faites déboucher l’évacuation.
Ne jamais essayez la réparation vous-même.
En cas de panne contactez le service après-vente,
une entreprise de service qualiée ou le point de
vente le plus proche.
Anticalcaire
Un contrôle régulier de l’appareil assurera un parfait fonctionnement et une longue durée de vie du produit. Nous recommandons de faire exécuter le premier contrôle par une
entreprise qualiée après environ deux ans d’utilisation. Ce faisant, il est recommandé
de faire détartrer l’appareil. Surtout quand vous habitez dans une zone d‘eau dure plus
de 12°dH (standard allemand de dureté). Température de l‘eau supérieure va intensier
calcication. Il est donc recommandé de régler l‘appareil au maximum de 55°C (position
d‘économie d‘énergie) dans les zones d‘eau extrêmement dure> 16°dH.
Entretien
La face extérieure d’appareil peut être nettoyée à l’aide d’un chiffon légèrement humide
et d’un détergent. Les dissolvants et produits abrasifs ne doivent pas être utilisés.
Prévention de la légionelle
N‘utilisez pas l‘eau chauffée comme eau potable.
Après un très long arrêt de l‘appareil, par exemple pendant les vacances, l‘appareil doit
être complètement chauffé jusqu‘à la température maximale avant la remise en service.
Il est recommandé de rincer les conduites pendant une minute.

43
DE GB NL FR
5. ÉLIMINATION DES DÉFAUTS
Attention! Pour toutes les dysfonctionnements, s’il
vous plaît consulter la guide de perturbation!
Si l’eau dans l’appareil ne réchauffe plus, contrôlez d’abord si la che est bien enchée
dans la prise et si le fusible du groupe de l’appareil fonctionne bien. Pour toutes les
autres dysfonctionnements, s’il vous plaît consulter la guide de perturbation.
Si l’appareil ne fonctionne pas parce qu’il a été raccordé
sans être rempli d’eau, suivez le guide de dépannage. L’appareil a surchauffé et il doit refroidir.
En cas l’appareil ne pas fonctionne conséquent à plusieurs
reprises, contactez le point de vente.
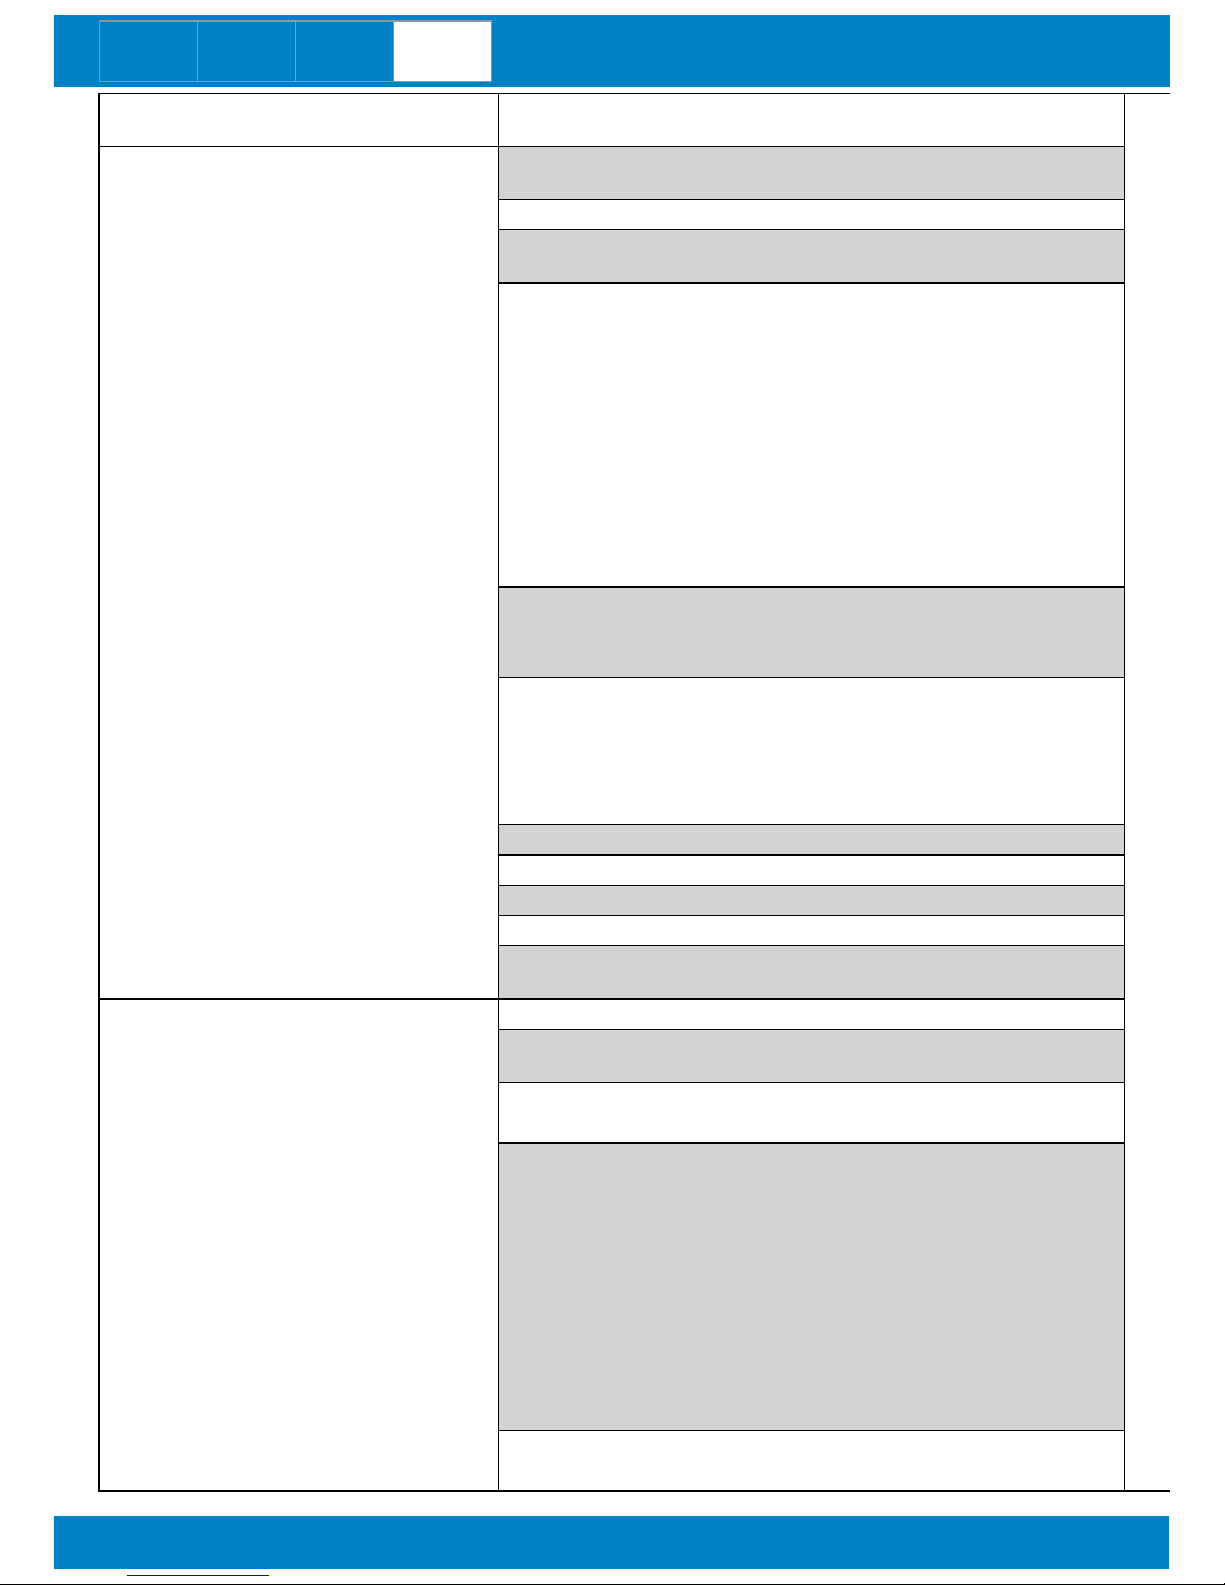
44
DE GB NL FR
Guide de perturbation Réclamation
Cause Solution
Connections d‘eau
La tuyauterie exible du tube d'expansion ne s'emboîtent
pas
Manchons de serrage de la tuyauterie sont trop
court
Il y a une substance blanche dans l'eau
Trop de calcinose dans le réservoir Démontez et videz
Il y a une substance grise ou brune dans l'eau
L'anode magnésium s'est dissoudré
Fuite d'eau
Branchements sur l’appareil ne sont pas bien ser-
rés
Bagues obturatrice manquent entre la tuyauterie
et l’appareil
Bagues obturatrice entre la tuyauterie et l’appareil
sont défectueux
Le réservoir coule Contactez le point de vente
Jointoyage entre le réservoir en l'élément chauf-
fant coule
Tube d'expansion n'est pas bien xé Serrez-le
Tube d'expansion crache d'eau Appliquez le drain du tube d'expansion
Il n‘y a pas d‘eau
Robinet d'arrêt principal est fermé Ouvrez le robinet d'arrêt principal
Robinet d'arrêt est fermé Ouvrez le robinet d'arrêt
Robinet d'arrêt du tube d'expansion est fermé Ouvrez le robinet d'arrêt
Il n‘y a pas d‘eau chaude
Il y a de calcinose dans le mousseur Démontez et videz le mousseur
La che n'est pas dans la prise Branchez la che
Bouton du thermostat n'est pas sur la position
correcte
L'élément chauffage ne fonctionne pas Contactez le point de vente
L'eau trop chaude
Thermostat positionné trop élevé Tournez le bouton du thermostat en bas
Robinet donne pas assez d'eau chaude
Charge d'eau trop bas Ouvrez plus les robinets d'arrêts
Robinet d'eau chaude donne de la vapeur
Thermostat en sécurité sont brisés Contactez le point de vente
L’appareil fait un son d'ébullition
Trop de calcinose dans l’appareil Démontez et videz
Après l'installation le robinet grogne
L'air dans la canalisation
Connections d‘électricité
Plombs ont sauté
Trop d'appareils sur une onde pilote Essayez une autre onde pilote
L'interrupteur à courant différentiel résiduel entre en
vigueur
Fermeture dans réseau de distribution de bord Contactez le point de vente
Court-circuit
Fermeture dans l'élément Contactez le point de vente
Fermeture dans le thermostat Contactez le point de vente
«ON» Lampe ne fonctionne pas
Pas de che dans la prise Branchez la che
Pas d'eau dans l’appareil et la sécurité se mets en
marche
Courant principal est interrompu Contrôlez l'interrupteur différentiel
Lampe est en panne Remplacer la lampe
«HEATING» Lampe ne fonctionne pas
Thermostat n'est pas allumé Tournez plus le bouton
L’appareil a déjà la température juste Ne faites rien
45
DE GB NL FR
Cause Solution
Manchons de serrage de la tuyauterie sont trop
court
Prenez un autre tube d'expansion ou tuyau-
terie
Trop de calcinose dans le réservoir Démontez et videz
L'anode magnésium s'est dissoudré
Dans la période de garantie, contactez le
point de vente
Branchements sur l’appareil ne sont pas bien serrés
Serrez-les
Bagues obturatrice manquent entre la tuyauterie
et l’appareil
Ajoutez les bagues
Bagues obturatrice entre la tuyauterie et l’appareil
sont défectueux
Remplacez les bagues
Le réservoir coule Contactez le point de vente
Jointoyage entre le réservoir en l'élément chauf-
fant coule
Retournez l’appareil au point de vente
Tube d'expansion n'est pas bien xé Serrez-le
Tube d'expansion crache d'eau Appliquez le drain du tube d'expansion
Robinet d'arrêt principal est fermé Ouvrez le robinet d'arrêt principal
Robinet d'arrêt est fermé Ouvrez le robinet d'arrêt
Robinet d'arrêt du tube d'expansion est fermé Ouvrez le robinet d'arrêt
Il y a de calcinose dans le mousseur Démontez et videz le mousseur
La che n'est pas dans la prise Branchez la che
Bouton du thermostat n'est pas sur la position
correcte
Tournez un peu plus le bouton du thermostat
L'élément chauffage ne fonctionne pas Contactez le point de vente
Thermostat positionné trop élevé Tournez le bouton du thermostat en bas
Charge d'eau trop bas Ouvrez plus les robinets d'arrêts
Thermostat en sécurité sont brisés Contactez le point de vente
Trop de calcinose dans l’appareil Démontez et videz
L'air dans la canalisation
Ouvrez bien les deux robinets et dégazez-les
(le robinet d’arrêt/ cuisine)
Trop d'appareils sur une onde pilote Essayez une autre onde pilote
Fermeture dans réseau de distribution de bord Contactez le point de vente
Fermeture dans l'élément Contactez le point de vente
Fermeture dans le thermostat Contactez le point de vente
Pas de che dans la prise Branchez la che
Pas d'eau dans l’appareil et la sécurité se mets en
marche
Cette opération peut être effectuée unique-
ment par des professionnels : débranchez la
prise et laissez l’appareil refroidir pendant 20
minutes. Démontez le panneau situé sur la
devant. Le disjoncteur thermique de réinitia-
lisation se trouve sur le côté front, vu à partir
de l’avant. Appuyez sur le bouton de réinitia-
lisation. Remontez le panneau.
Courant principal est interrompu Contrôlez l'interrupteur différentiel
Lampe est en panne Remplacer la lampe
Thermostat n'est pas allumé Tournez plus le bouton
L’appareil a déjà la température juste Ne faites rien

46
DE GB NL FR
6. CONDITIONS DE GARANTIE
Garantie
Les droits découlant de la garantie fabricant s‘appliquent en sus des
droits légaux de l‘acheteur. Les droits légaux de l‘acheteur, notamment à
l‘égard du vendeur, ne sont aucunement limités par la présente garantie.
Bien-fondé
Pour faire valoir les droits découlant de la garantie, la présentation de la
quittance d‘achat correspondante est nécessaire.
Contenu
Wahlbach répond du fait que ce produit est exempt de défauts de fabrication et de matériaux. Les défauts de fabrication et de matériaux qui
apparaissent pendant la période de garantie justient les droits découlant
de la garantie. Les défauts qui sont attribués à une installation incorrecte ou à une mise en service incorrecte, à de mauvaises conditions
de fonctionnement ou à erreurs dans des travaux de maintenance ou
de réparation ne justient pas les droits découlant de la garantie. Les
signes d‘usure normale ne justient pas non plus les droits découlant de
la garantie.
Des signes normaux d‘usure, tout comme la formation de calcaire, n‘en-
gendrent pas de droits issus de la garantie. Des défauts causés par une
eau potable extrême (pH non compris entre 7 et 9,5 et/ou Cl supérieur à
150 mg/l et/ou Fe supérieur à 0,2 mg/l) n‘engendrent pas de droits issus
de la garantie.
Durée
La période de garantie est de 24 mois. La période de garantie commence
le jour de l‘achat du produit. Les prestations de garantie fournies n‘entraînent aucune prolongation de la période de garantie et une nouvelle
période de garantie ne commence pas à courir.
Conversion
en valable
Ramener le produit défectueux ainsi que la facture d‘achat au point de
vente.
Wahlbach n‘est pas responsable des dommages liés au transport. Il est à
l‘appréciation de Wahlbach de réparer le produit ou de le remplacer par
un nouveau produit. Suite à cela, l‘appareil qui fonctionne sera expédié à
l‘acheteur. La propriété des pièces ou du produit remplacés est transférée
à Wahlbach. Wahlbach n‘est pas tenu à d‘autres prestations, comme par
exemple une réparation sur place, un démontage des produits défectueux, un transport des produits défectueux ou une installation des produits réparés ou des nouveaux produits.
Extinction de
la garantie
Des essais de réparation qui sont effectués par le client ou par un tiers
qui n‘est pas autorisé par Wahlbach pour effectuer une réparation, entraînent l‘extinction de la garantie. Il en est de même si des pièces qui ne
sont pas des pièces originales de Wahlbach sont installées sur le produit
ou sont raccordées au produit.
Limitation
La présente garantie se limite à une réparation ou à une livraison supplémentaire. La présente garantie n‘englobe aucun droit à dommages-intérêts, aucune renonciation, aucune diminution ou aucun droit à remplacement pour dommages consécutifs à un défaut.
La garantie ne s‘applique pas aux appareils achetés hors de France, l‘Alle-
magne, Belgique, Grande-Bretagne et les Pays-Bas. Les directives légales
et les conditions de livraison de la société du pays ou de l‘importateur
doivent être respectées.

47

WB V1 2016-01
WWW.WAHLBACH.COM
 Loading...