

Page 1
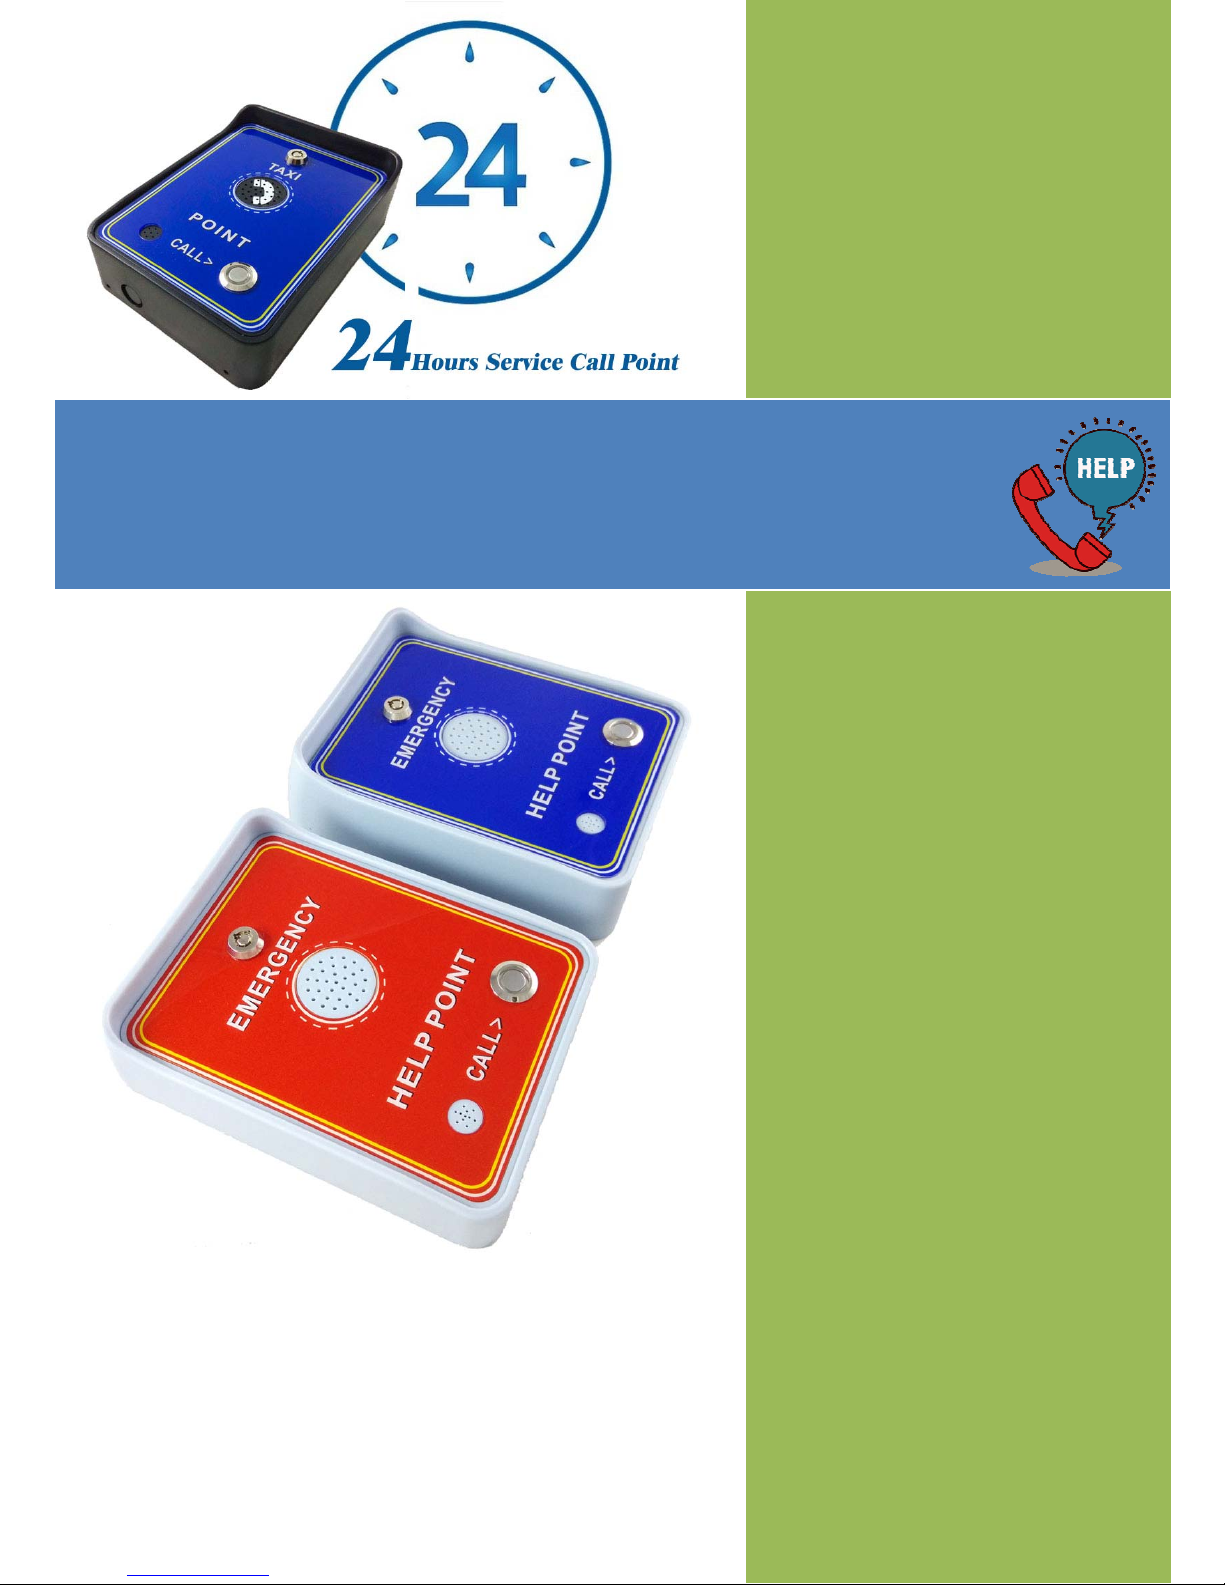
For Community security system !
For Gate access system !
For Emergency help call point !
For Taxi or other service call point !
Multi Built-in working functions !
Double Alarm input !
GSM-HELP
HELP & EMERGENCY
Fast User Manual
Ver 2. 1
GSM-HELP
Date Issued: 2017-03-25
All rights reserved
Page 2
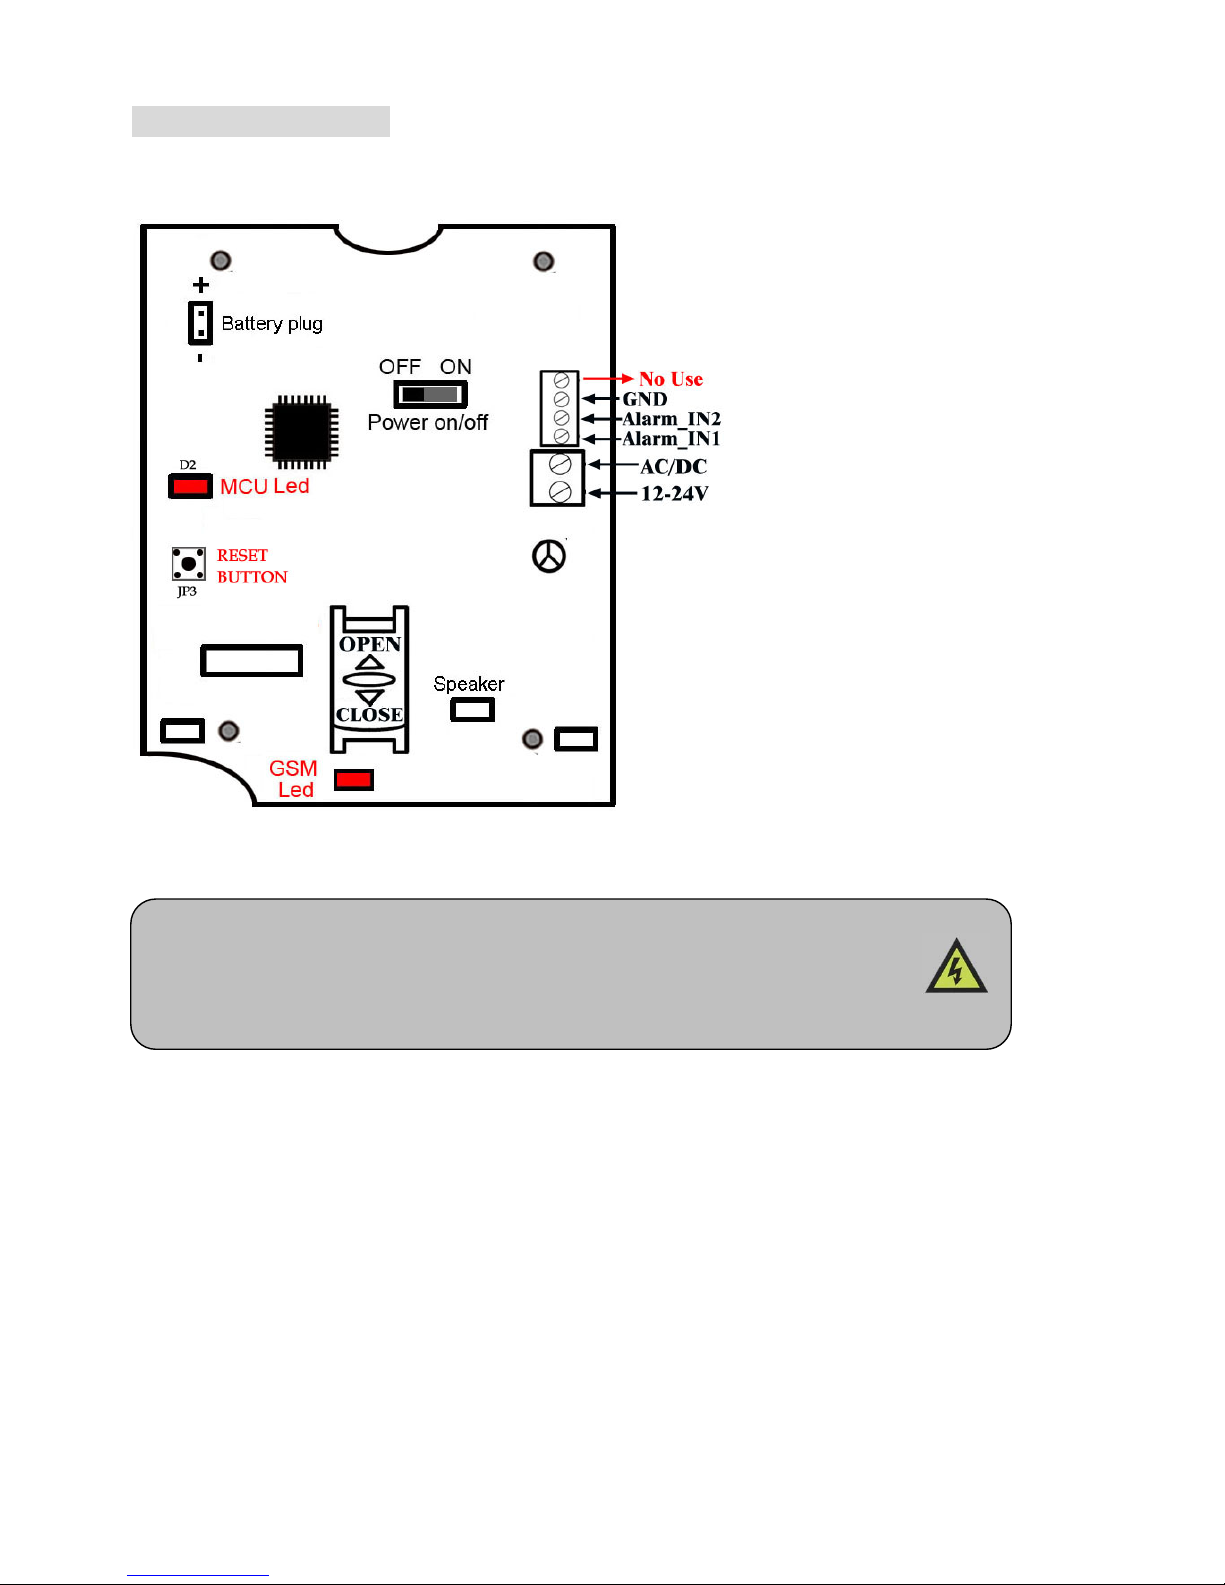
SYSTEM OVERVIEW:
The GSM-HELP Emergency Phones are basically designed and installed to provide quick and reliable
handsfree communication to help people in emergency as early as possible.
When the “HELP” / “CALL” button is
pressed, the Connected LED
momentarily flashes during dialing.
and the GSM-HELP phone goes
off-hook and dials the
pre-programmed telephone numbers.
In the event that the line is busy or
there is a ring-no-answer, the unit can
be programmed to call another phone
numbers. The phone then cycles
through up to five emergency contact
call numbers until the call is answered.
When the call is answered, handsfree
communication to emergency or help
personnel is established.
GSM-HELP also built-in the “Dial to
Listen” function.
Except for the intercom talking
function, GSM-HELP has two alarm
input port,these can be used for
security alarm.User can select the
SMS alarm or Phone calling alarm.
START TO USE:
To install the GSM-HELP, User only need to simply power on the device with AC/DC12-24V power
line. Do not need to distinguish between positive and negative.
Inside the box,there is a rechargeable lion battery (3.7V) for power off alarm and working.When the
normal power supply back to work,then will charge the battery automatically.
Of course GSM-HELP should be installed in a place where there have good GSM signal coming
from the operator you want to use. Check the SIM card with a phone before proceeding with the
installation.
You should then insert the SIM Card of the operator you want to use with the right direction,
After powered on,the LED on the Push Button will start with fast flash around Once every second,
Normally after around 10 seconds, After device connected to the GSM Net,then the LED will turn to slow
flash around Once every 3 seconds.If the LED always flash quickly,then try to power off and Check the
SIM card if that is insert in the right direction and insert again and test until the LED flash slowly.
Try to use your mobile phone to call it if the device can pickup your calling or reject your calling,that
means that is already connected to the GSM net successfully. Then go ahead to do the following steps to
start to enjoy the GSM-HELP features.
Please read this entire manual before installation !Note!
z Take EXTREME care with the Power line installation
z In case of fault, Power off the box immediately.
z The GSM unit requires mounting carefully for proper operation.
Page 3
1. “Press the CALL Button to Dial” Funtion:
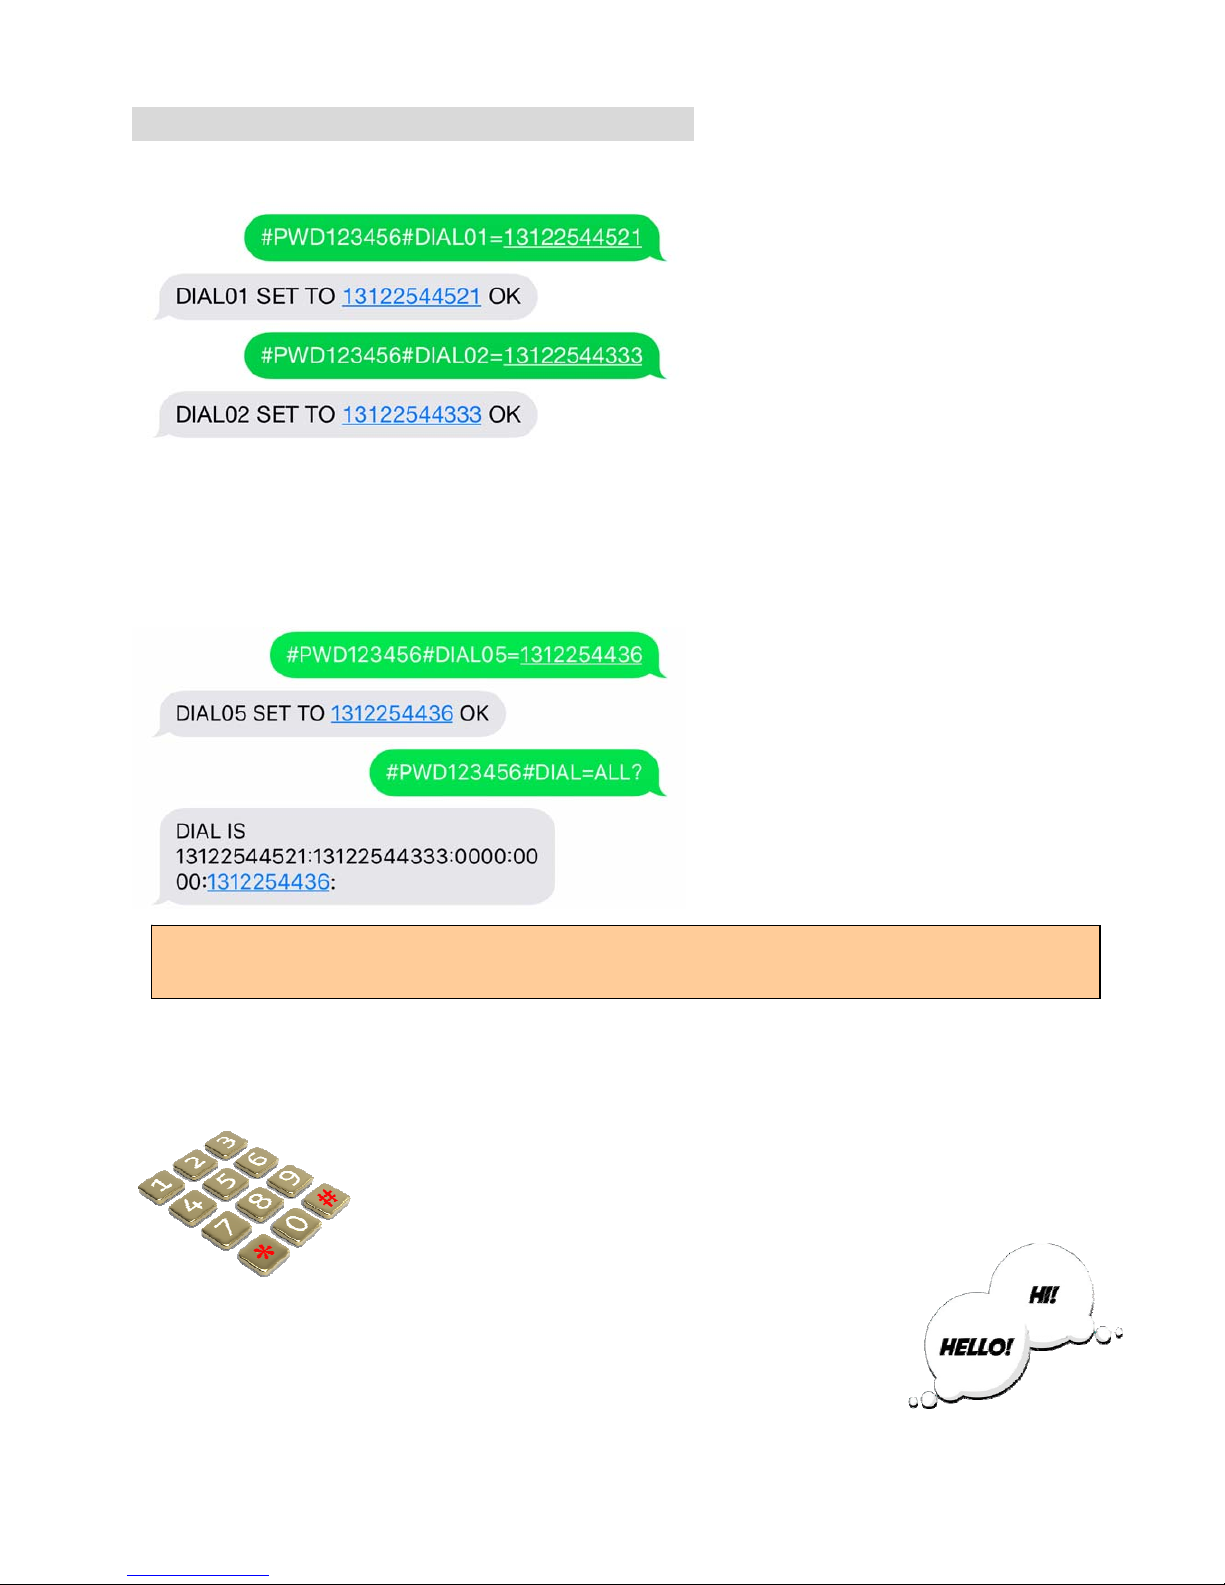
1.1 Use the SMS command to Add Five DIAL contact phone number for GSM-HELP
(13122544521 and 1312254333 are only
for samples and you need to replace it with
your mobile phone number)
When visitor press the “Call button”,
device would start to call the Dial01 and if
Dial02 number cann’t be reached, then
would continue to call the Dial02 number
(Note: ALL must use the Capital word
and Totally ,we can preset five numbers for press to dial)
(Note: Totally GSM-HELP will try to call five times totally,that means if you only program one dial
number,then it will repeat to call it five times,and if you program five number,then it will call every
number one time until any one pickup the phone)
1.2 How to check all the dial contact numbers inside the memory?
After we programmed the numbers with
SMS command from DIAL01 to DIAL05
(Maybe we don’t need to program all
DIAL numbers, then just keep it as 0000)
Then we can use the command:
#PWD123456#DIAL=ALL?
to check all the numbers in the Dial
number group.
1.3 How to Adjust the voice volume for speaker
During voice talking with GSM-HELP box,Press the * or # on your mobile phone keypad to Increase or
Decrease the speaker sound volume.
Press * : Increase
Press #: Discrease
Only simply finished the above two steps,then now,then you can now try to Press the front Button to
call the Dial numbers.
Page 4
2. “DIAL Number call back to the GSM-HELP” Function
#PWD123456#M1
#PWD123456#M2
#PWD123456#M3
With this function and work together with the alarm input,then would be very useful,And GSM-HELP box
will work as an 24 Hour Site Safety Guard
For example,when alarm SMS received,then you can call back to the GSM-HELP box and Secretly
monitor the sound of the scene.
We suggest the working mode as following: (you can try each mode and select your suitable mode)
z Working with gate security person: M1
z Working for company service center: M1
z Working with warehouse security gard: M2
z Working for taxi service point: M2
z Working for home security gard: M3
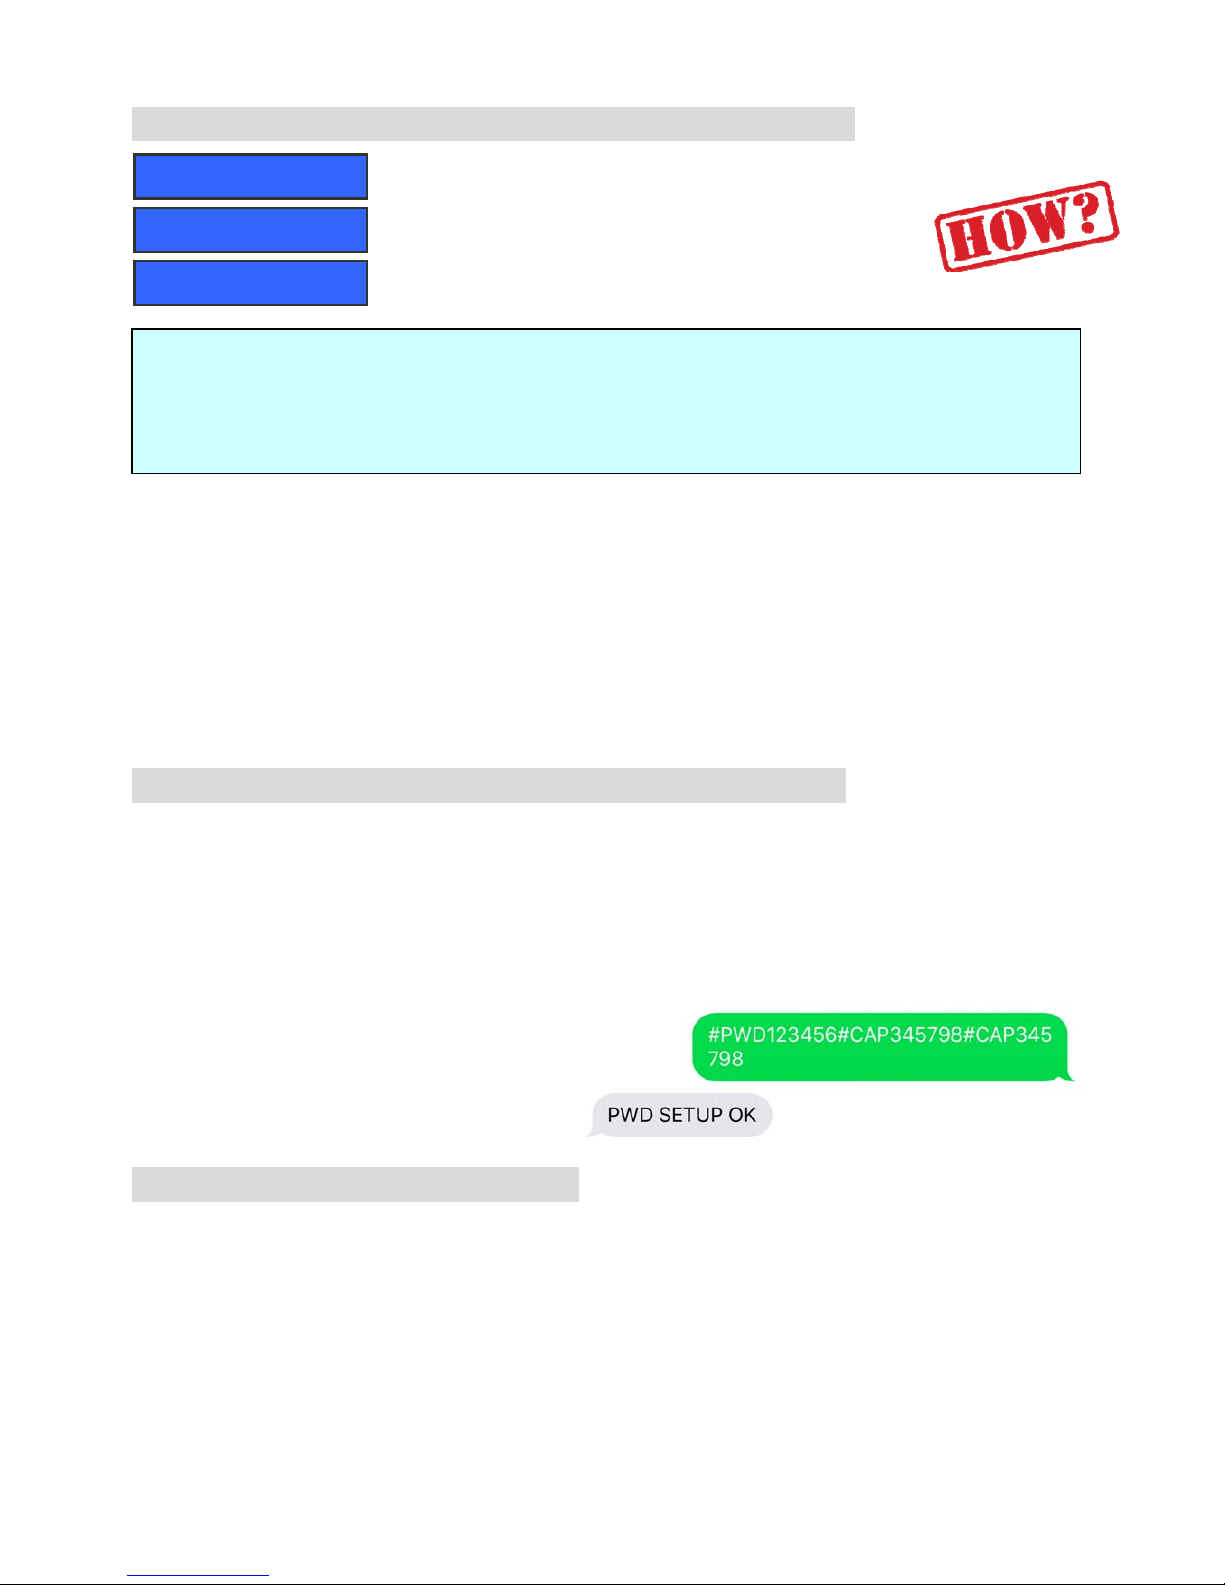
3. How to change the password for security programming
For sample command #PWD123456#DIAL01=13122544521
(the number 123456 is the password,you can change it with your password number)
The standard default one, when the device comes from the factory, is 123456.
User can use the #CAP command with old password to change it to another 6 digits as a password.
For example, to change the password 123456 to the new password 333444 ,user send the SMS command:
#PWD123456#CAP333444#CAP333444
Acknowledge SMS: PWD SETUP OK
4. How to RESET the GSM-HELP?
Press and hold the JP3 RESET Button, then D4 Led will be ON,after 6 seconds later, the D4 Led will
start to flash,then release the RESET button.
This operation will reset the password to default 123456 and all the DIAL and ALARM numbers will be
lost and the working mode will go to M2
M1: If Dial in and the GSM-HELP box need to press the button to pickup the phone,then select M1
M2: If Dial in and go to site spy listener directly,you can hear the site voice,Only when you press any keypad
button of your phone twice,then the person near the GSM-HELP box can hear your voice and talk with you,then
select M2
M3: If Dial in and go to voice talking directly,then select M3
Page 5
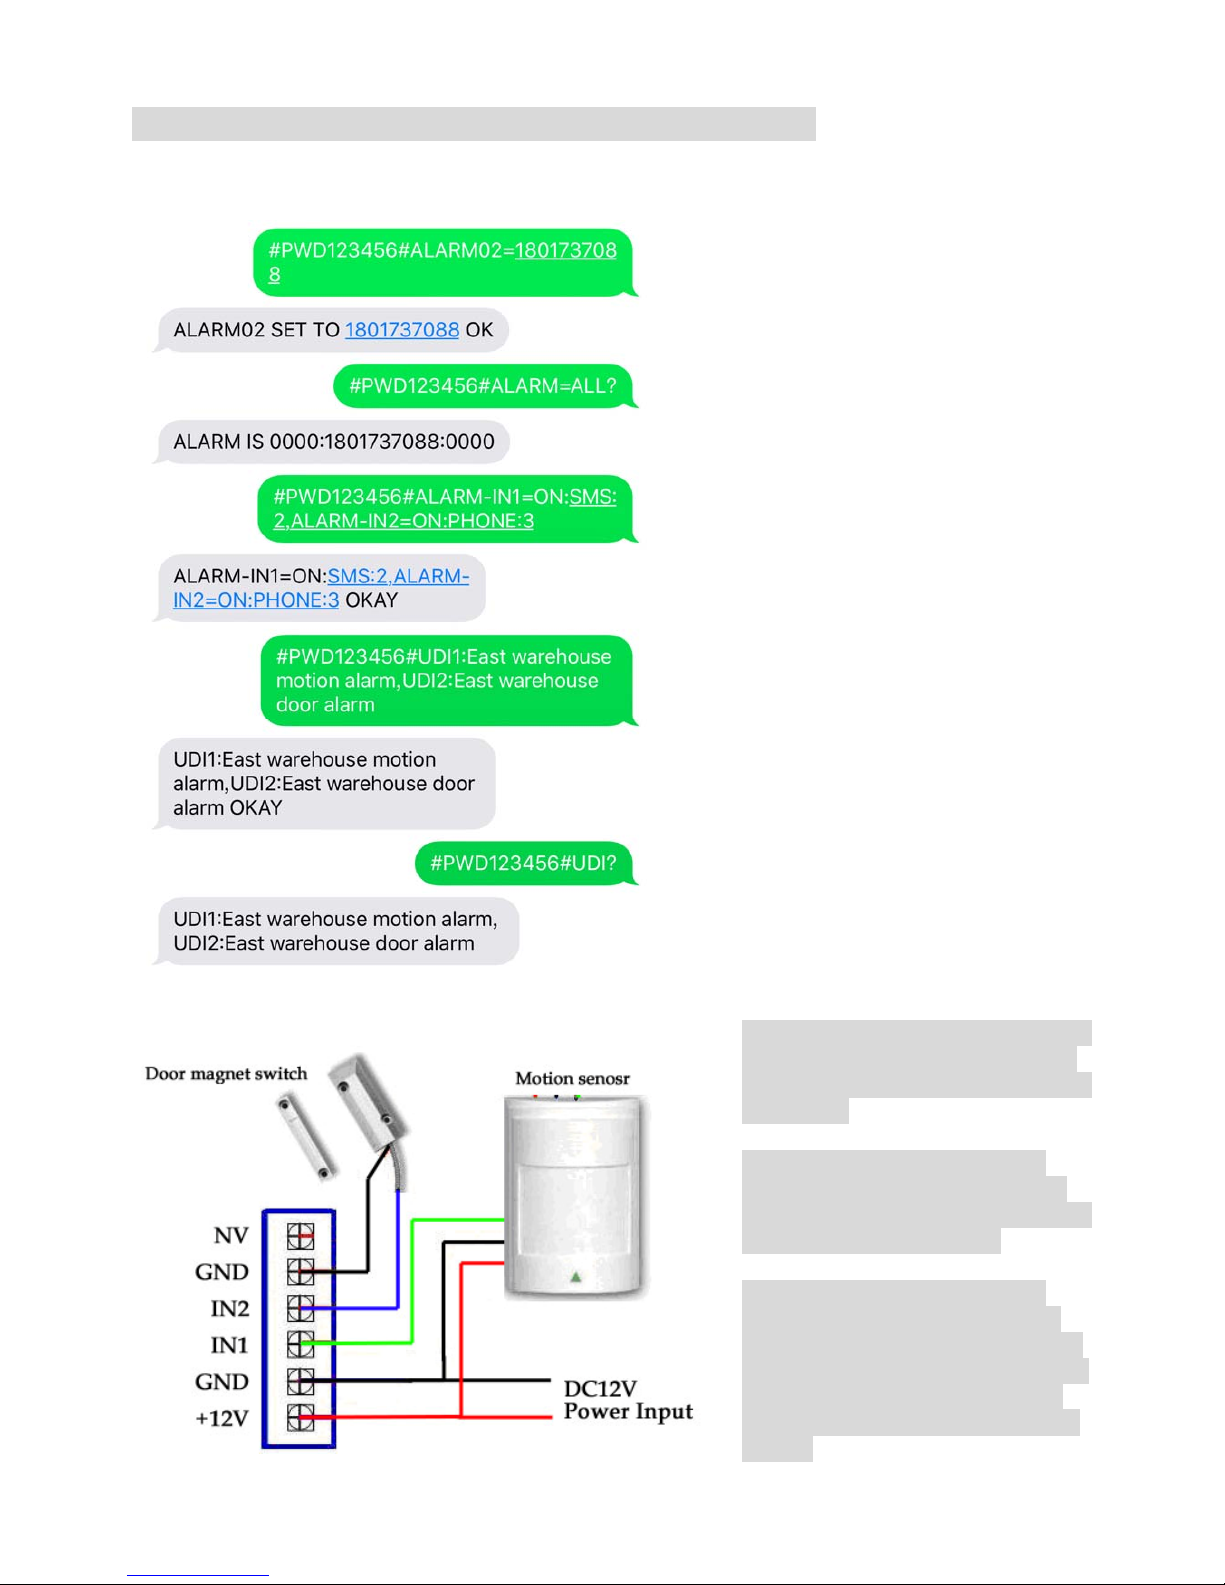
5. How to Use the alarm input port: Alarm In1 and In2
GSM-HELP Box has two alarm input. When the input is shorted to GND ,then will trigger the alarm and
send the predefined SMS to Alarm numbers (Maximum 3 numbers to receive the alarm SMS or Calling)
5.1 Setup the alarm numbers:
#PWD123456#ALARM02=1801737088
(Of course, change the 1801737088 to your
number)
5.2 Read back all the alarm numbers
# PWD123456#ALARM=ALL?
5.3 Setup the alarm method with SMS or
Phone calling.
#PWD123456#ALARM-IN1=ON:SMS:2,AL
ARM-IN2=ON:PHONE:3
The digital number 2 or 3. that means ,when
alarm input is shorted to GND, and how long
to delay to send the SMS
You can select PHONE or SMS to report
alarm
5.4 This UDI SMS is used to Customize the
SMS Text content when alarm happen
#PWD123456#UDI1:text01,UDI2:text02
(Every alarm SMS content must be less
than 25 characters)
5.5 Check the Alarm SMS text setting
#PWD123456#UDI?
Sample picture of how to connect the sensor to Alarm input:
For example1, you can connect a Push
Button to the Alarm1 and GND,then
this can be working as the Guard Tour
Site Report.
For example2, you can connect a
Door magnet switch to the Alarm1,
then when the door is opened,you will
receive the SMS notification
For example3, you can connect a
Person motion sensor to the Alarm
input port, then will have the Burglar
Security Alarm function,and then you
can call in to listen the site and can
even speak Loudly to scare away the
burglar.
Page 6

6. Important information
z Please read the User Manual carefully before you install and use the GSM-HELP.
z Suggest to test all function of GSM-HELP to know well.
z Avoid getting water into the GSM-HELP.
z Have a secure connection to the main power supply.
7. Maintenance
z In case of failure, please contact the distributor or manufacturer.
z If the GSM-HELP works but fail to send SMS texts, switch the power off and on again after one
minute. Test it after few minutes later,or ensure and check the settings are correct and the cellular
signal strong enough.
z If the GSM-HELP works well with Call button but cannot send SMS texts, please change a SIM
Card from another Mobile Operator’s, and then testing again.
z Please contact the distributor or manufacturer if the problem can’t solved.
8. Warranty
z The GSM-HELP is warranted to be free of defects in material and workmanship for one year
from the date of purchase.
z This warranty does not extend to any defect, malfunction or failure caused by abuse or misuse by
the Operating Instructions. In no event shall the manufacturer be liable for any alarm system
altered by purchasers.
z Warranty service doesn’t include free shipping charge.Need to ship the box to distributor or
manufacture.
z Please contact the distributor or manufacturer if the problem can’t solved.
9. OEM and ODM service
z We provide the OED service, design and manufacture the controller for you with your idea.
z We provide the customized front panel and print with your company LOGO.
 Loading...