

WAFA Hylas 2 Installation Manual
Hylas 2 - freedomsat
Installation Guide
www.wafa.ae

Contents
1. Equipment Preparation
2. Modem Configuration
3. Registration Details
4. Verifying Modem Operation
5. Troubleshooting
6. Status LED’s
Appendix
Please read this entire document before attempting your first installation. If you are unsure of any part of
this procedure contact our technical support team for further advice.
1. Equipment Preparation
The Hughes 9000 series modems are integrated receive and transmit units with single LAN interface.
Power specification of these ODUs is 1 Watt.
IF cables: RG6 type for transmission and reception, two separate cables are required. It is important that
the right quality cable is used in order to achieve the right signal levels depending on the cable length
(attenuation). Please review the table attached in Appendix B at the back of this document.
You need a valid configuration sheet for the site for the site to be commissioned. Ensure you have this
before attending site. This contains details of IP addresses, satellite parameters and other settings that are
needed for your modem to function.
Ensure your antenna is installed and accurately aligned before you start to configure the modem.
(From
LNB)
(From
BUC)

Do you have a valid configuration sheet?
Before continuing with the installation, do make sure to submit the Activation Form. Only after
receiving
this can we send you the configuration
details
Link to Activation Form –
Or email us the ESN on support@wafa.ae
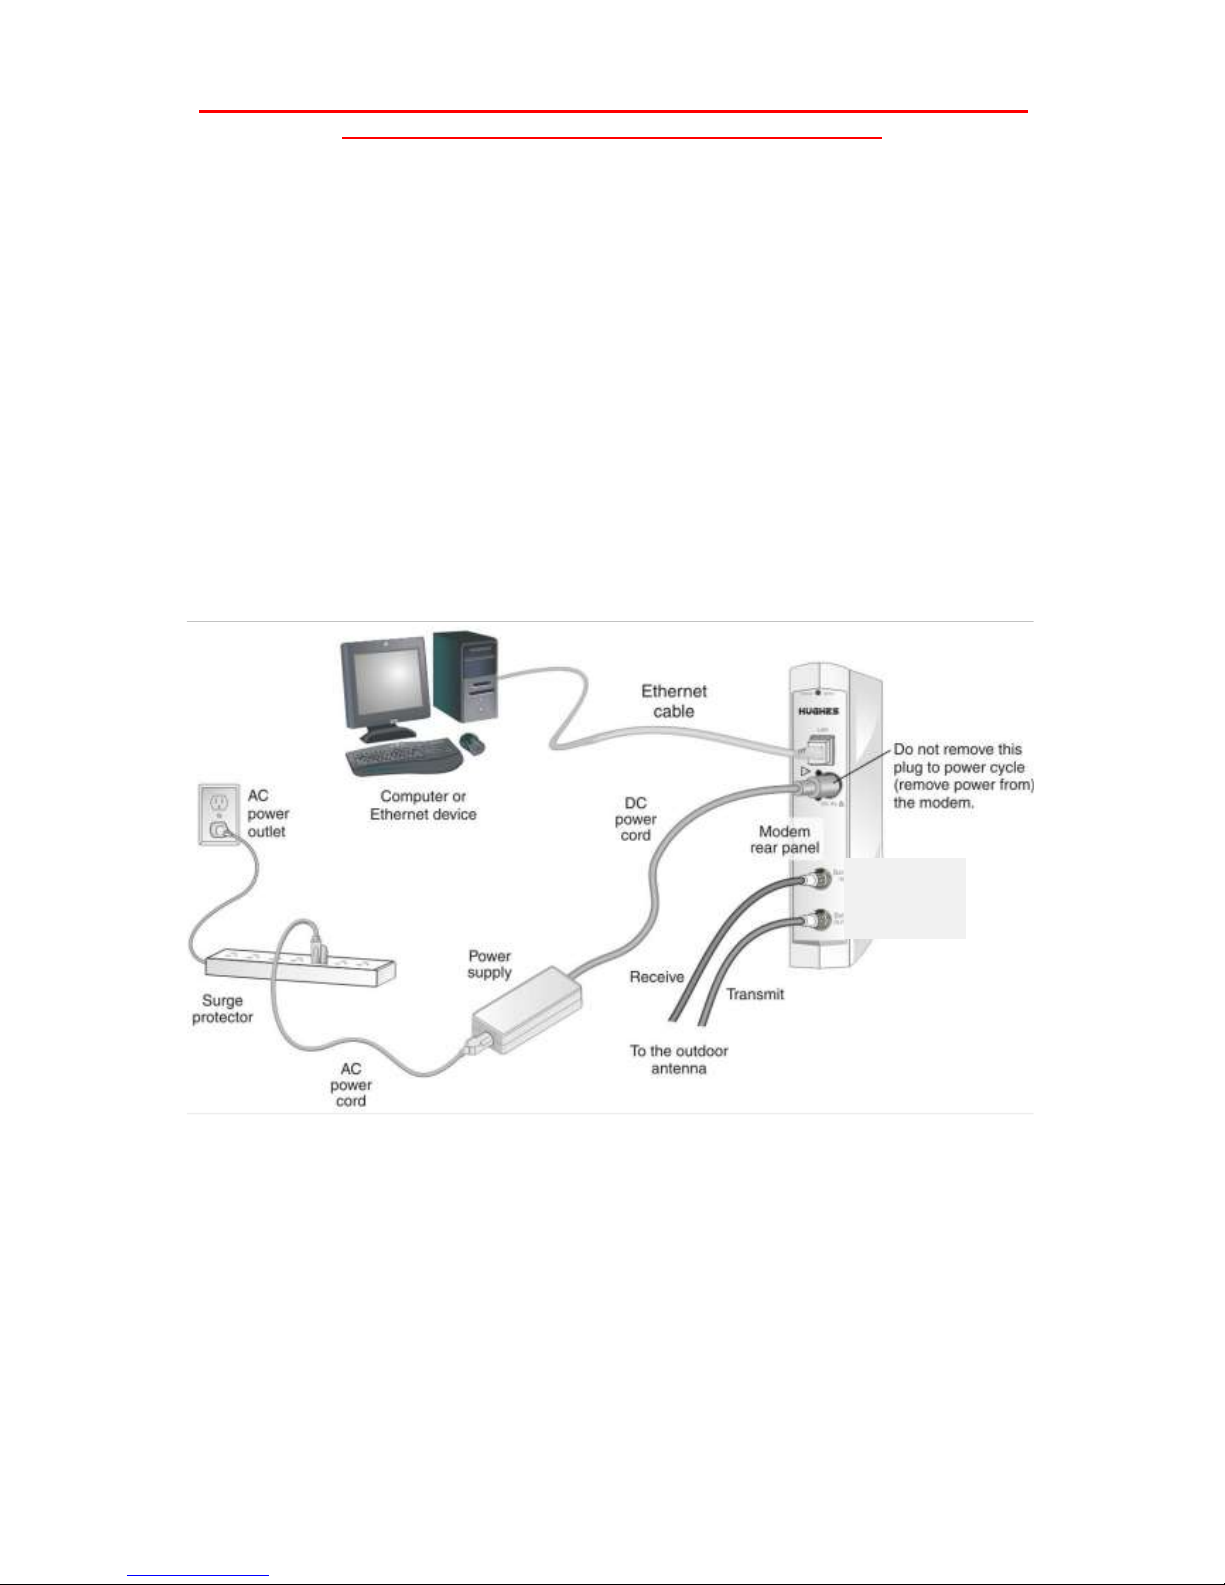
Connecting Modem and PC for configuration of boot parameters
a) Attach the Ethernet cable between your PC and the MODEM.
Note: The Modem auto detects the type of cables you have (crossover or Straight cable).
The modem’s IP address is preset to 192.168.0.1. If your PC’s network card to set for DHCP,
the modem will automatically allocate you the IP address of 192.168.0.2 (DHCP is also
enabled for normal operation on a commissioned system, you will see your own unique
IP’s after commissioning is complete).
After this ensure the Computer is set to “Obtain an IP address automatically”.
Changing LAN Settings/Assigning Static IP Addresses:
Windows Vista/7:
Firstly you will need to navigate to the Control Panel> Network & Internet Tab> View Network Status & Tasks>
Change Network Adapter Settings> Right Click on your LAN Connection> Properties.
Windows XP:
Navigate to Control Panel> Network Connections> Right Click on your LAN Connection> Properties.
You will always make use of IPv4.
Once IPv4 is selected, click ‘Properties’.
By default, your IP settings will be set to ‘Obtain an IP Address automatically’.
They should remain this way.
The same applies to obtaining a DNS Server.
 Loading...