

Page 1
SIDE TABLE
Thank you for purchasing the SIDE TABLE!
Before you st
1.We suggest you spend a short time reading through this leaflet and then follow the simple step by step
instructions.
2.Owing to the size and weight of the side table, we recommend that it is assembled by two adults, on a
carpeted or padded area, in the room that it is intended for. Approx assembly time: 30 minutes.
3.Please do not use any tools other than those provided or recommended in these instructions.
4.Please do not throw away any of the packaging or the instruction until you have checked all the components and
hardware and the furniture is fully assembled. Please ensure that the packaging is disposed of in a safe
environmentally friendly way.
5.Assemble all components loosely until advised to tighten. Depending on use, it may be necessary to tighten the
components from time to time, so please save the tools that has been provided.
6.Please keep all fitting out of reach of children.
art, here is some helpful advice:
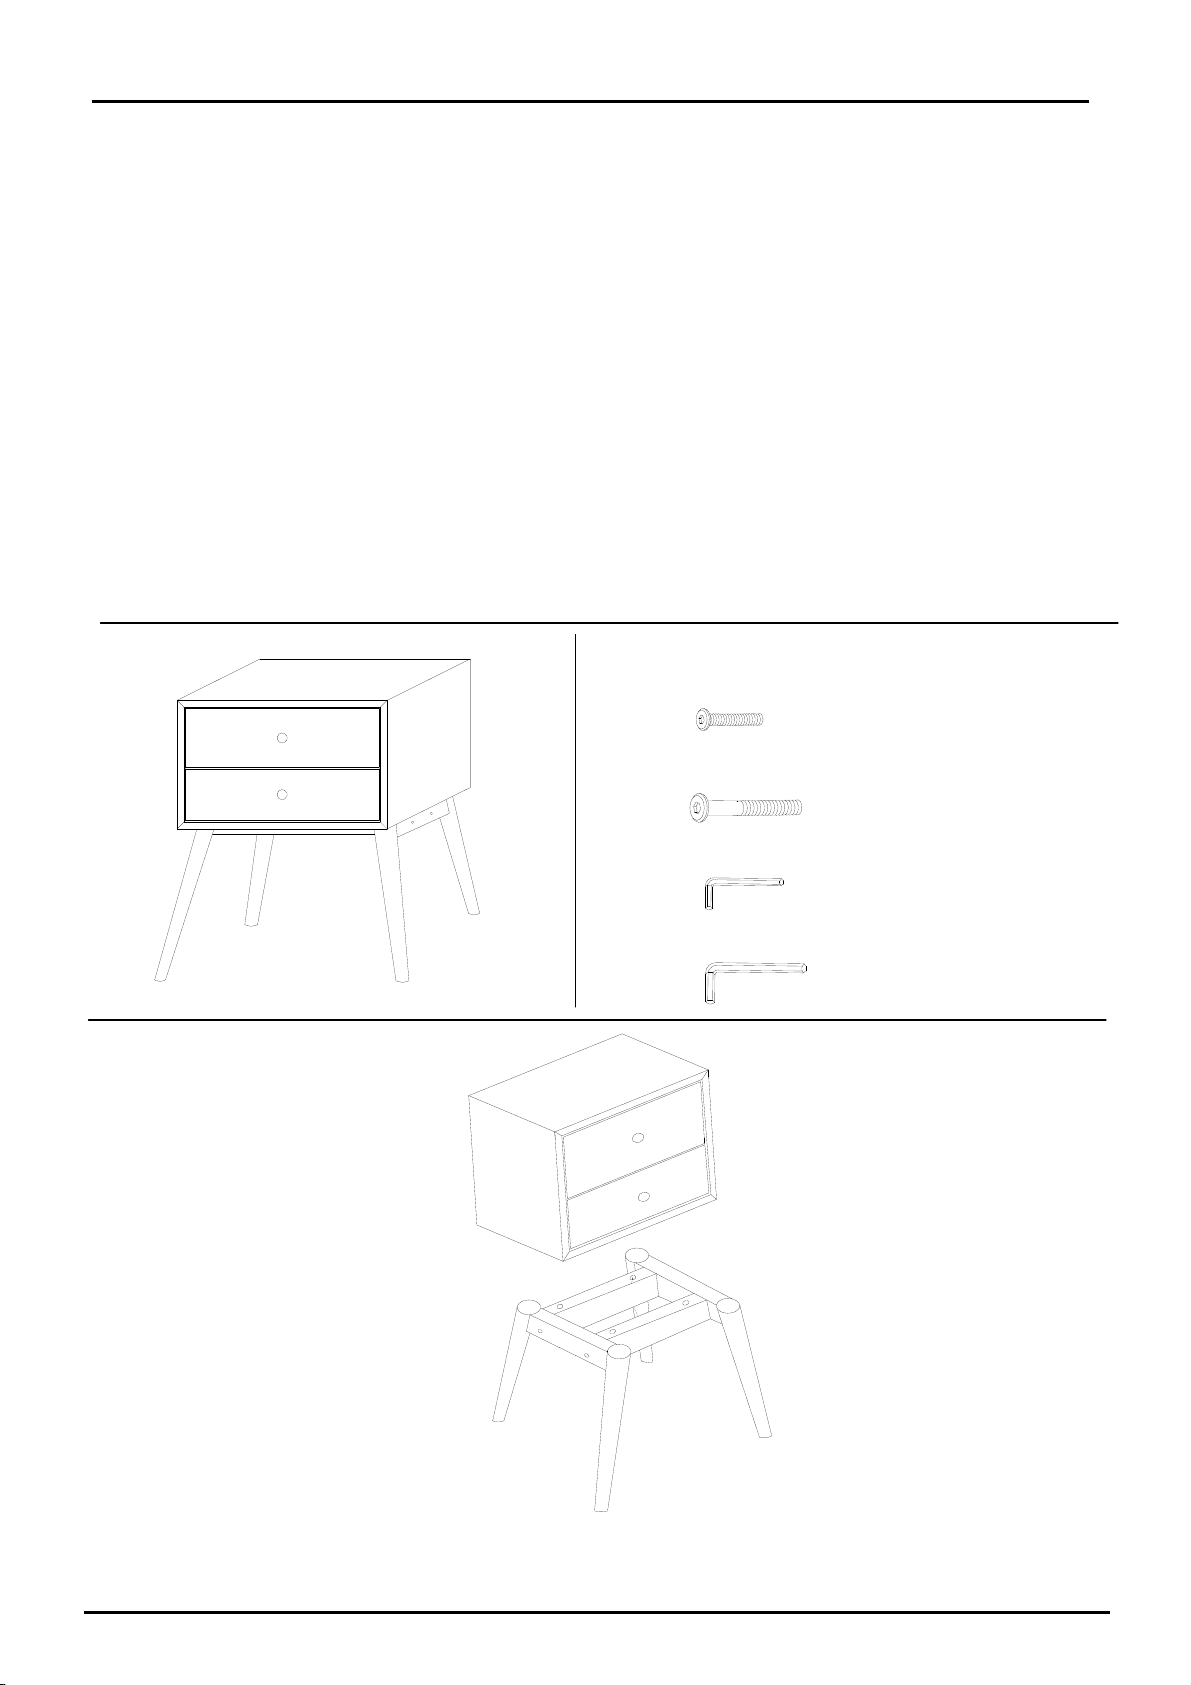
Hardware:
A
Short Bolt M6x30mm x4
Component:
1
4
B
C
D
4
Long Bolt M8x50mm x4
Allen Wrench M4 x1
Allen Wrench M5 x1
3
Side Table Body x1
1
Right Leg x1
3
2
Left Leg x1
2
Rail x2
4
Page 1 of 2
Page 2
SIDE TABLE
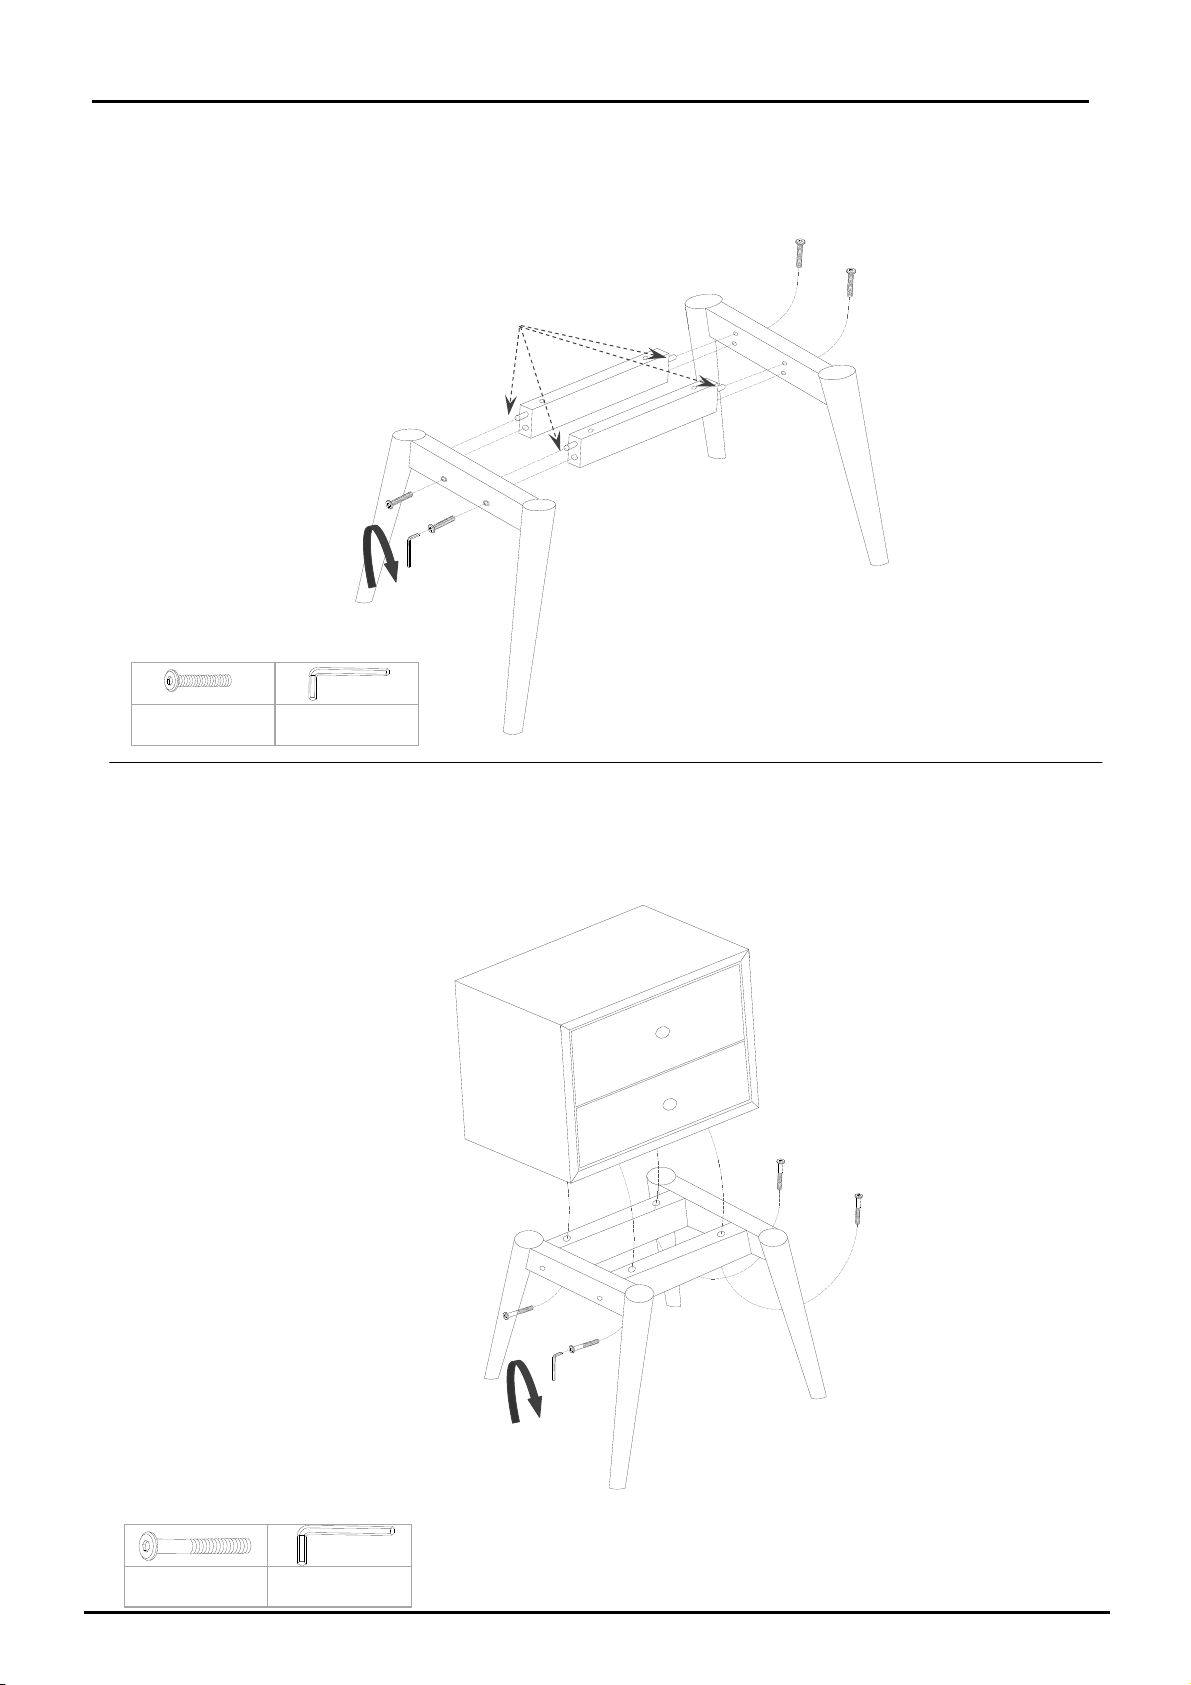
STEP 1:
Two person are needed for this step.
Insert pre-installed Dowels on each end of Rails (4) into the top pre-drilled holes on Left Leg (2) as shown.
Insert 2 pieces of Short Bolt (A) from outside of Left Leg (2) into the pre-drilled holes on the end of Rails (4).
Repeat the same steps for Right Legs (3).
Use Allen Wrench (C) to tighten Short Bolts (A) clockwise until secure.
A
A
Pre-installed Dowels
4
4
3
A
A
C
2
Ax4 Cx1
STEP 2:
Position Side Table Body (1) to the assembled Legs (2&3) and Rails (4).
Align the corresponding pre-drilled holes on Rails (4) and the bottom of Side Table Body (1) as shown.
Attach by using 4 pieces of Long Bolt (B).
Use Allen Wrench (D) to tighten Long Bolts (B) clockwise until secure.
Hardware & Tool required
1
B
B
4
Bx4 Dx1
4
B
D
B
3
2
Assembly is completed. Your side table is ready to enjoy now!
Hardware & Tool required
Page 2 of 2
 Loading...