

Page 1
ASSEMBLY AND INSTALLATION
INSTRUCTIONS
TO AVOID RISK OF ELECTRICAL SHOCK, BE SURE TO SHUT OFF
WARNING:
NOTES: 1. Before installing, consult local electrical codes for wiring and grounding requirements.
2. READ AND SAVE THESE INSTRUCTIONS.
POWER WHILE INSTALLING OR SERVICING THIS FIXTURE.
Warning: LED electronics can be damaged by electro static discharge (ESD)shock. Before
installation, discharge yourself by touching a grounded bare metal surface to remove this
hazard. To avoid damage, do not touch the LED module.
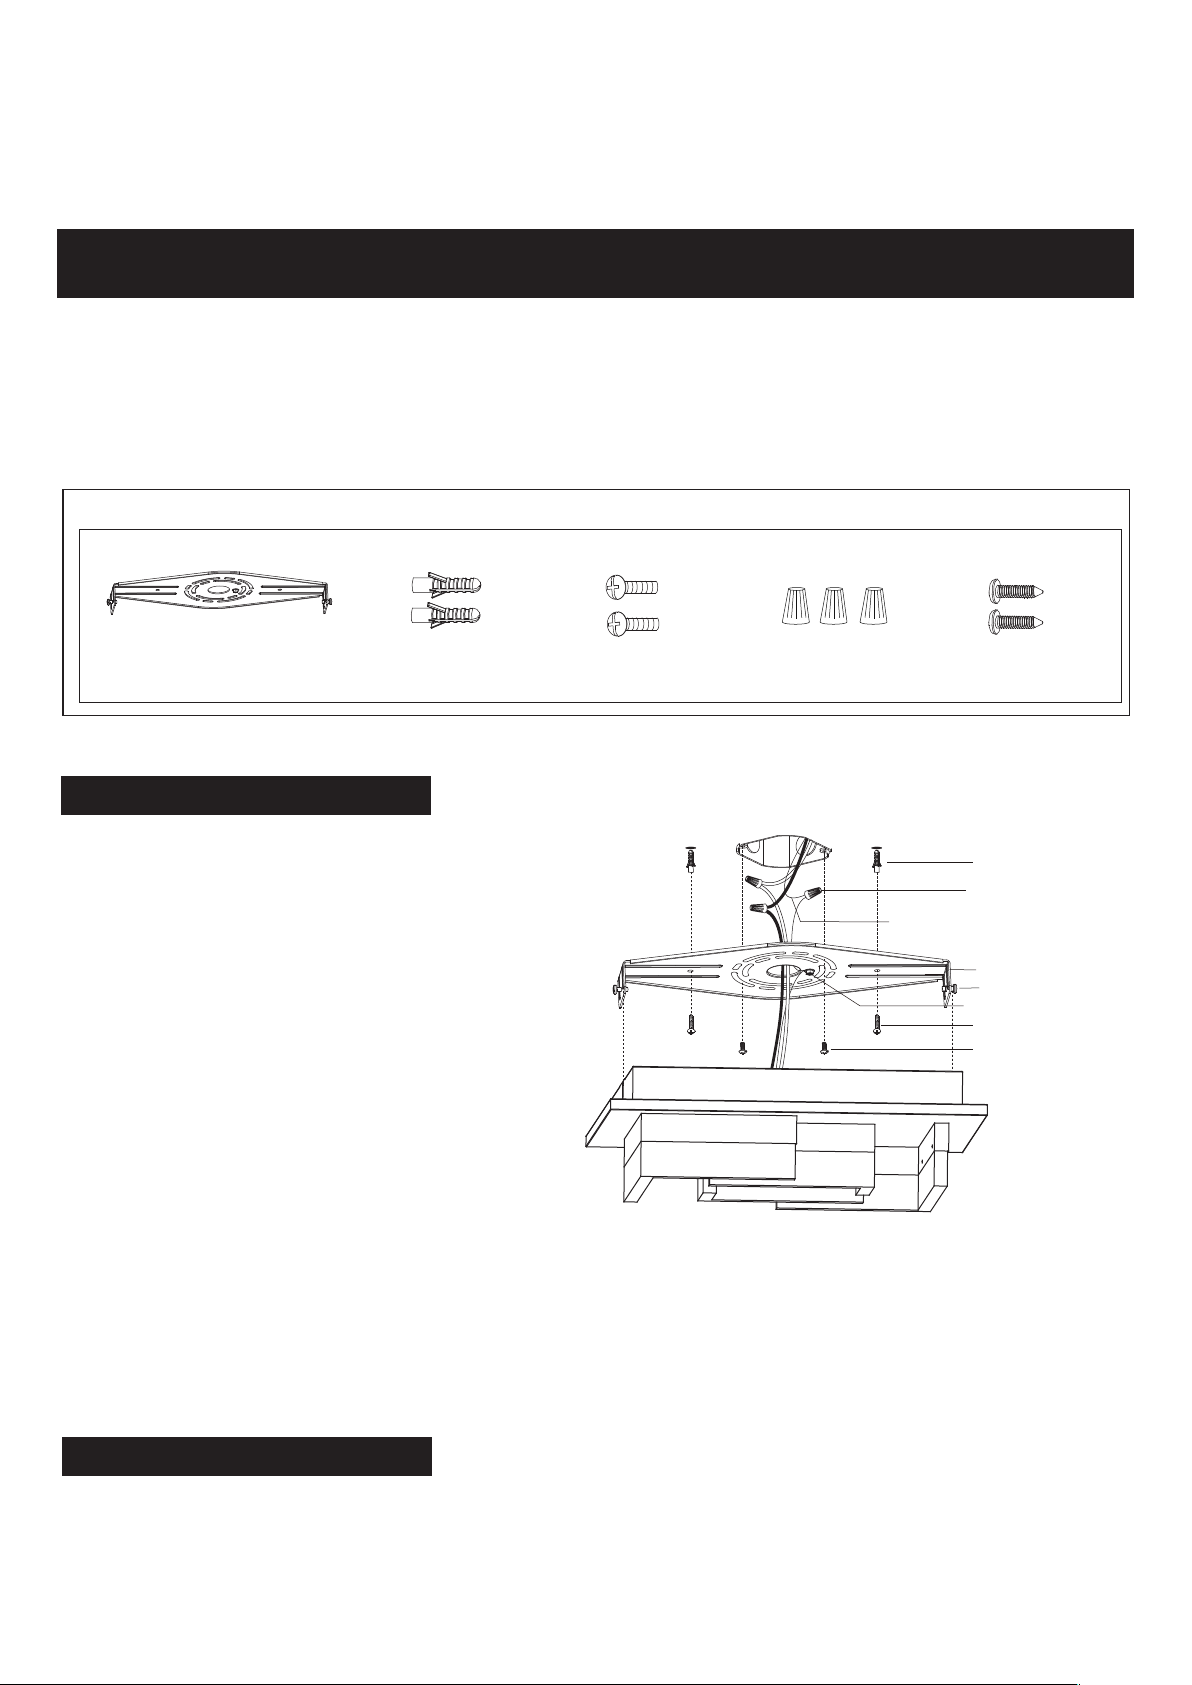
Hardware Package (included):
Anchor (B) Mounting Screw (C)
Drywall Screw (E)Wire Connector (D)Mounting Bracket(A)
Installation Steps
Turn off the power at fuse or circuit box.
1. Loosen two side set screws in part way, and then remove
the mounting bracket from the fixture.
2. Attach the mounting bracket to the outlet box using the
two mounting screws,and mark the location on each
side for the two anchors to secure mounting bracket
on to the ceiling.Remove the mounting bracket and drill
holes at the two anchor location. Hammer the anchors
into the hole tightly.Re-attach the mounting bracket to
outlet box using the two mounting screws, and then
secure it with dry wall screws.
House Grounding Wire
Anchor (B)
Wire Connector (D)
Mounting Bracket(A)
Set Screw
Green Grounding Screw
Drywall Screw (E)
Mounting Screw (C)
3. Pull out the source wires from the outlet box. Make
wire connections using wire connectors as follows:
---Connect the hot wire (usually black insulation) from
the fixture to the black wire from the power source.
---Connect the neutral wire (usually white insulation) from the fixture to the white wire from the power source.
---Connect the fixture grounding wire (usually green/yellow insulation or bare wire) to the mounting bracket by securing
it with the preinstalled grounding screw, and then connect it to the house grounding wire with the wire connector.
Carefully tuck the wires back into the outlet box.
4. Attach the fixture to the mounting bracket by inserting two side set screws into “L” slots in fixture, and then tighten two
set screws.
Turn on the power at fuse or circuit box.
Page 2
This fixture is dimmable with a forward phase electronic dimmer. Dimmers tested to be compatible with this
fixture are the Lutron: DVWCL-153PH, MACL-153MH, SCL-153PH, TGCL-153P.
If you are unfamiliar with electrical installations, it is recommended you have a qualified electrician for your
installations.
The following parts are available for re-order if damaged or missing.
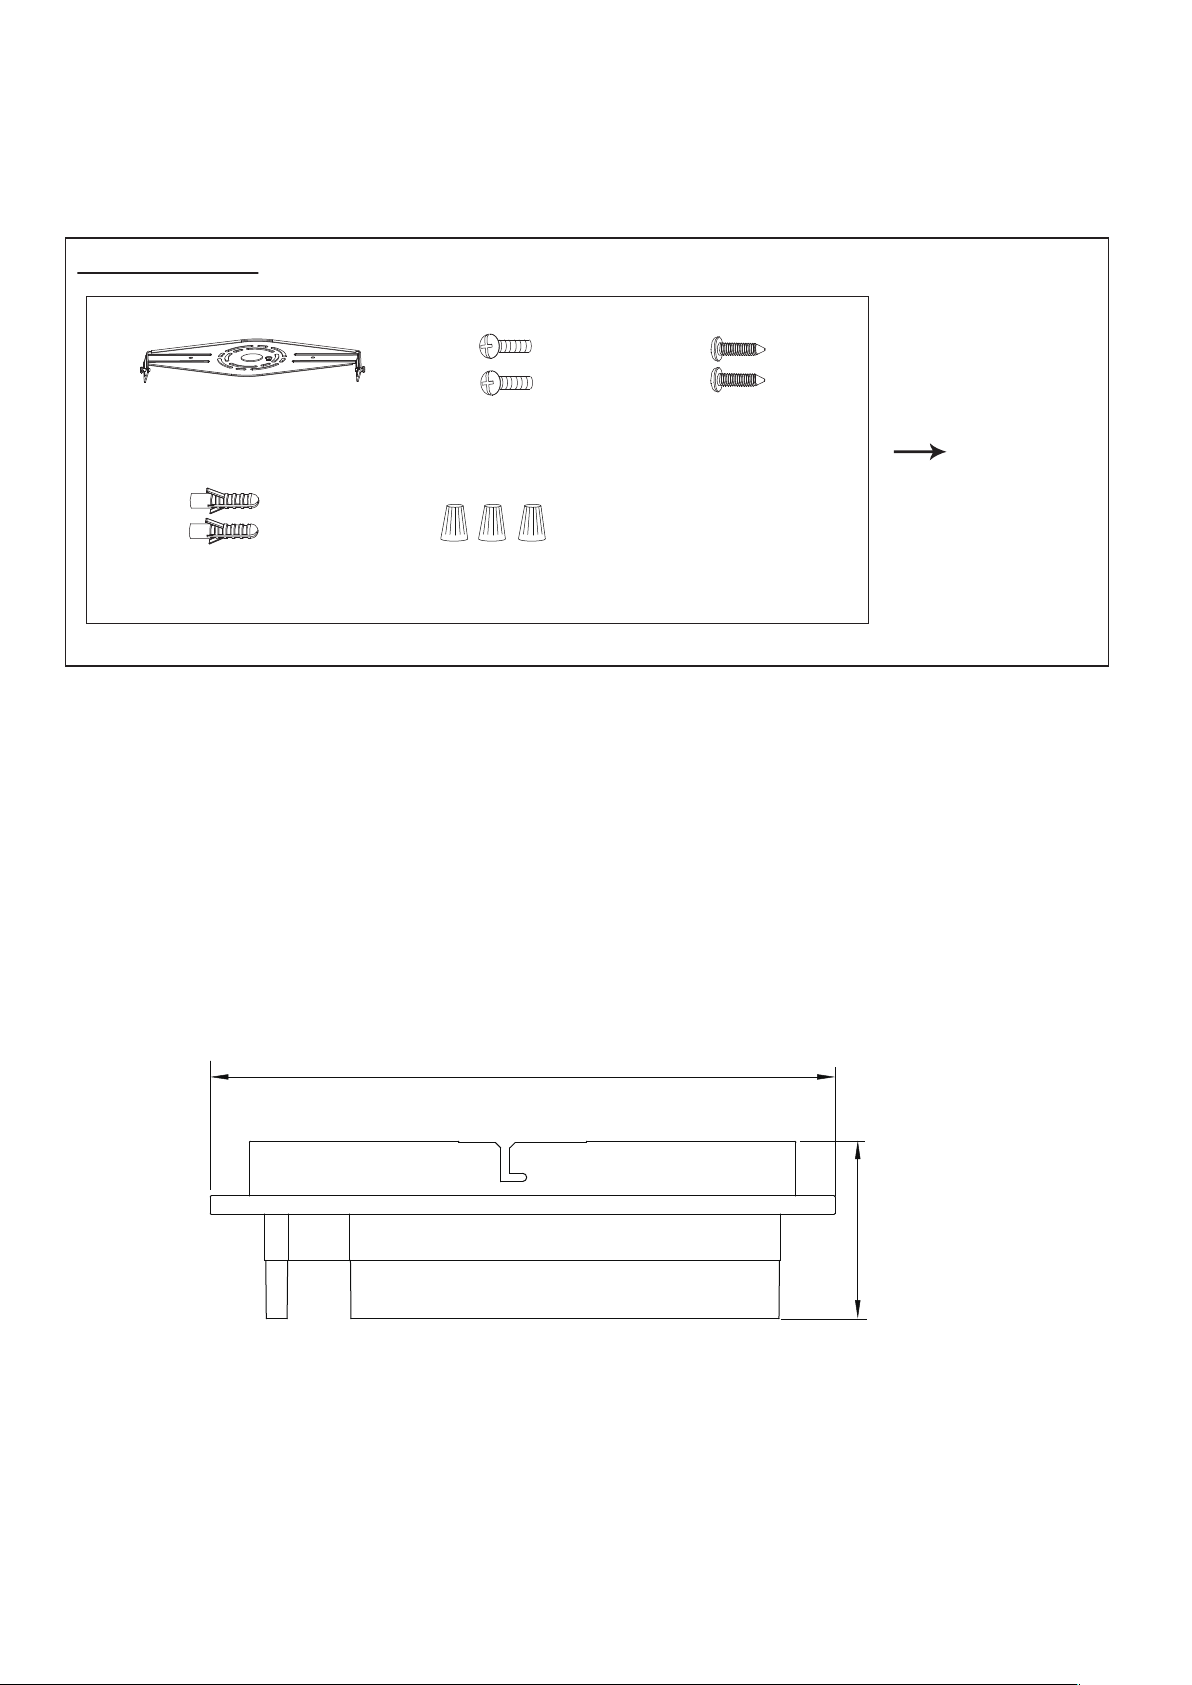
Spare Parts List:
Mounting Bracket(A)
Anchor (B)
5-YEAR LIMITED WARRANTY:
All products are warranted to be free of defects in material and workmanship for five (5) years from date of
purchase. This warranty is limited to the correction of any such defect, or the replacement of any such defective
item(s), provided that: (a) we are properly notified and consent to return of the item(s) in question:(b) the item (s)
is / are returned with proof of purchase date; and (c) it is found upon inspection by us that the item (s) is / are defective
as noted above. This warranty dose not cover labor costs, consequential damages, nor dose it apply to any item(s) that
have been improperly installed, overloaded, altered, or otherwise abused by the customer, its agent(s) or emplyee(s).
Finishes are specially excluded from the terms of this warranty since they are subject to environmental maintenance
deemed beyond our control. Other than the described obligation, we assume no further liability with respect to the sale
or use of our products.We make no warranty, express or implied, and disclaim any warranty of merchantability or fitness
for a particular purpose.
Mounting Screw (C)
Wire Connector (D)
Drywall Screw (E)
Assembly Kit
(1 SET)
A
A: 13-1/2"
B: 3-5/8"
B
 Loading...