

Page 1
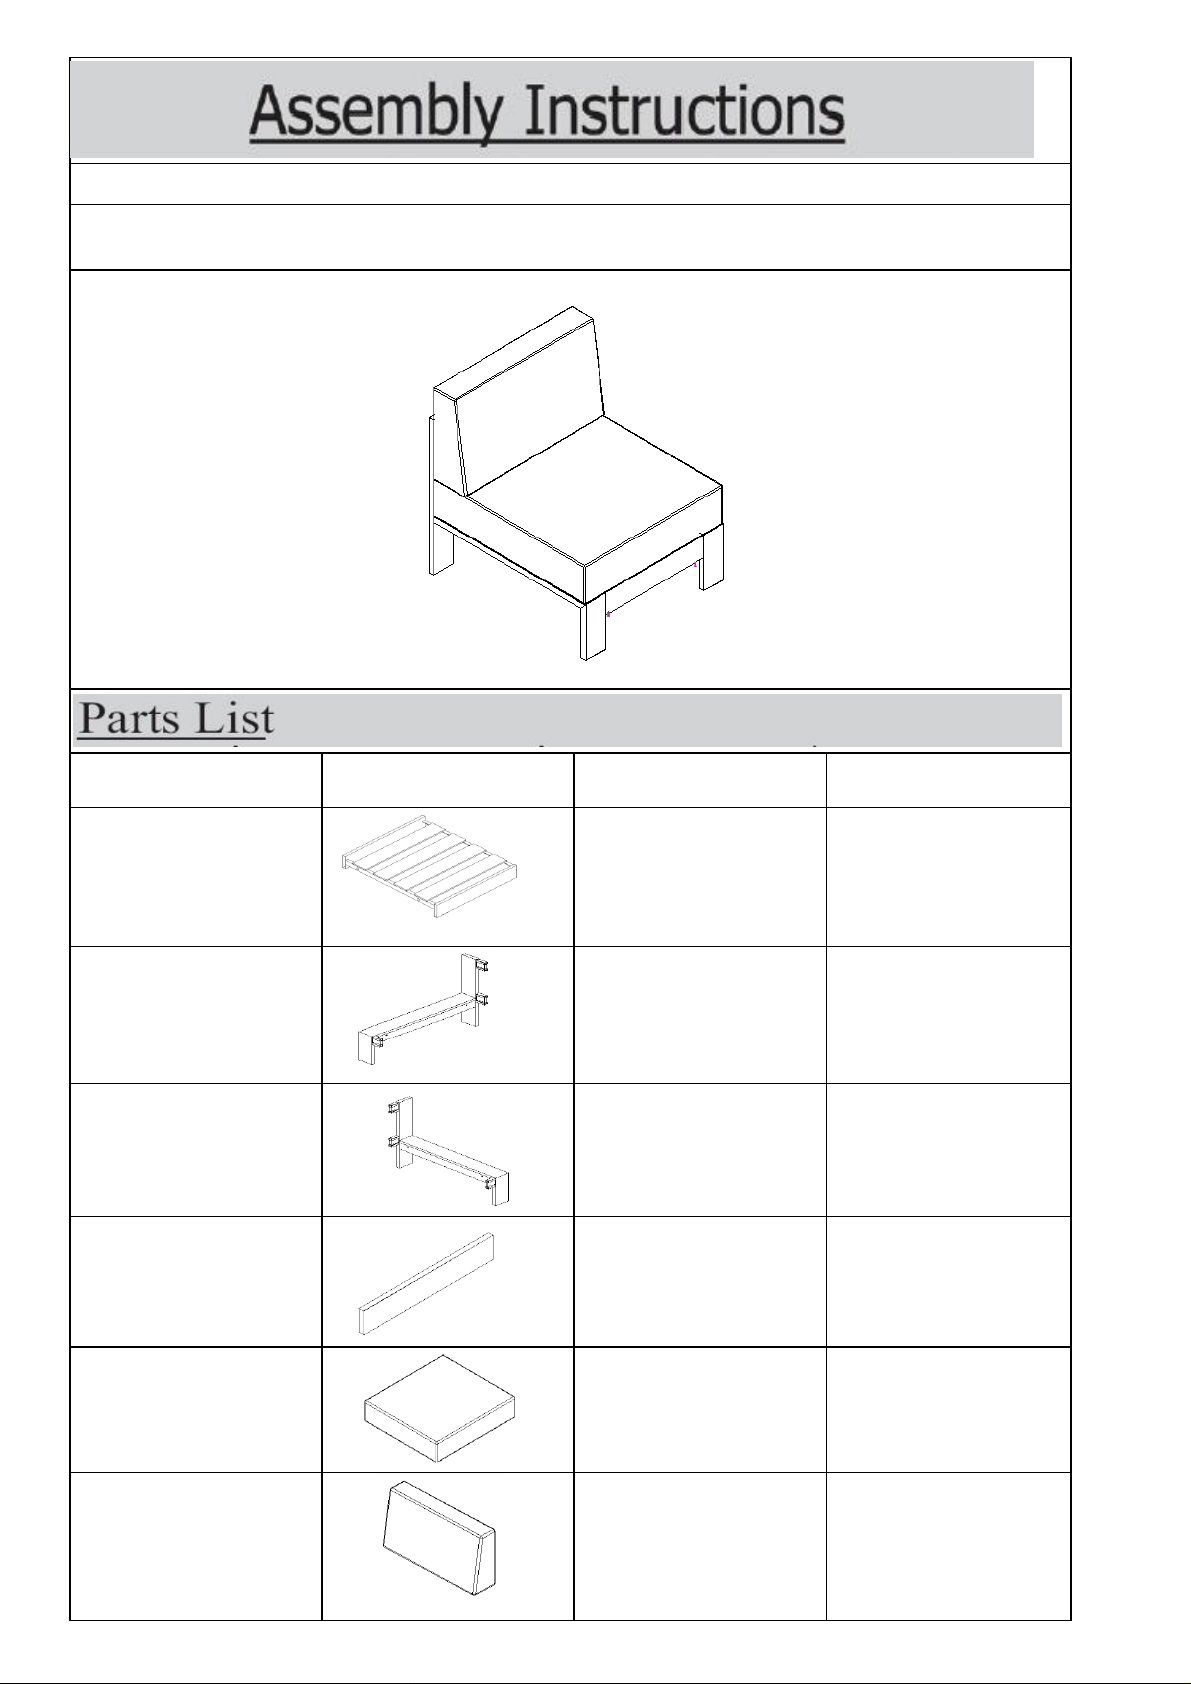
Label Picture Description QTY
A Seat 1
B Left Side Panel 1
C Right Side Panel 1
D Backrest 1
E Seat Cushion 1
F Back Cushion 1
Caution : You must read this before you proceed
Leisure Chair
Page 1 OF 5
Page 2
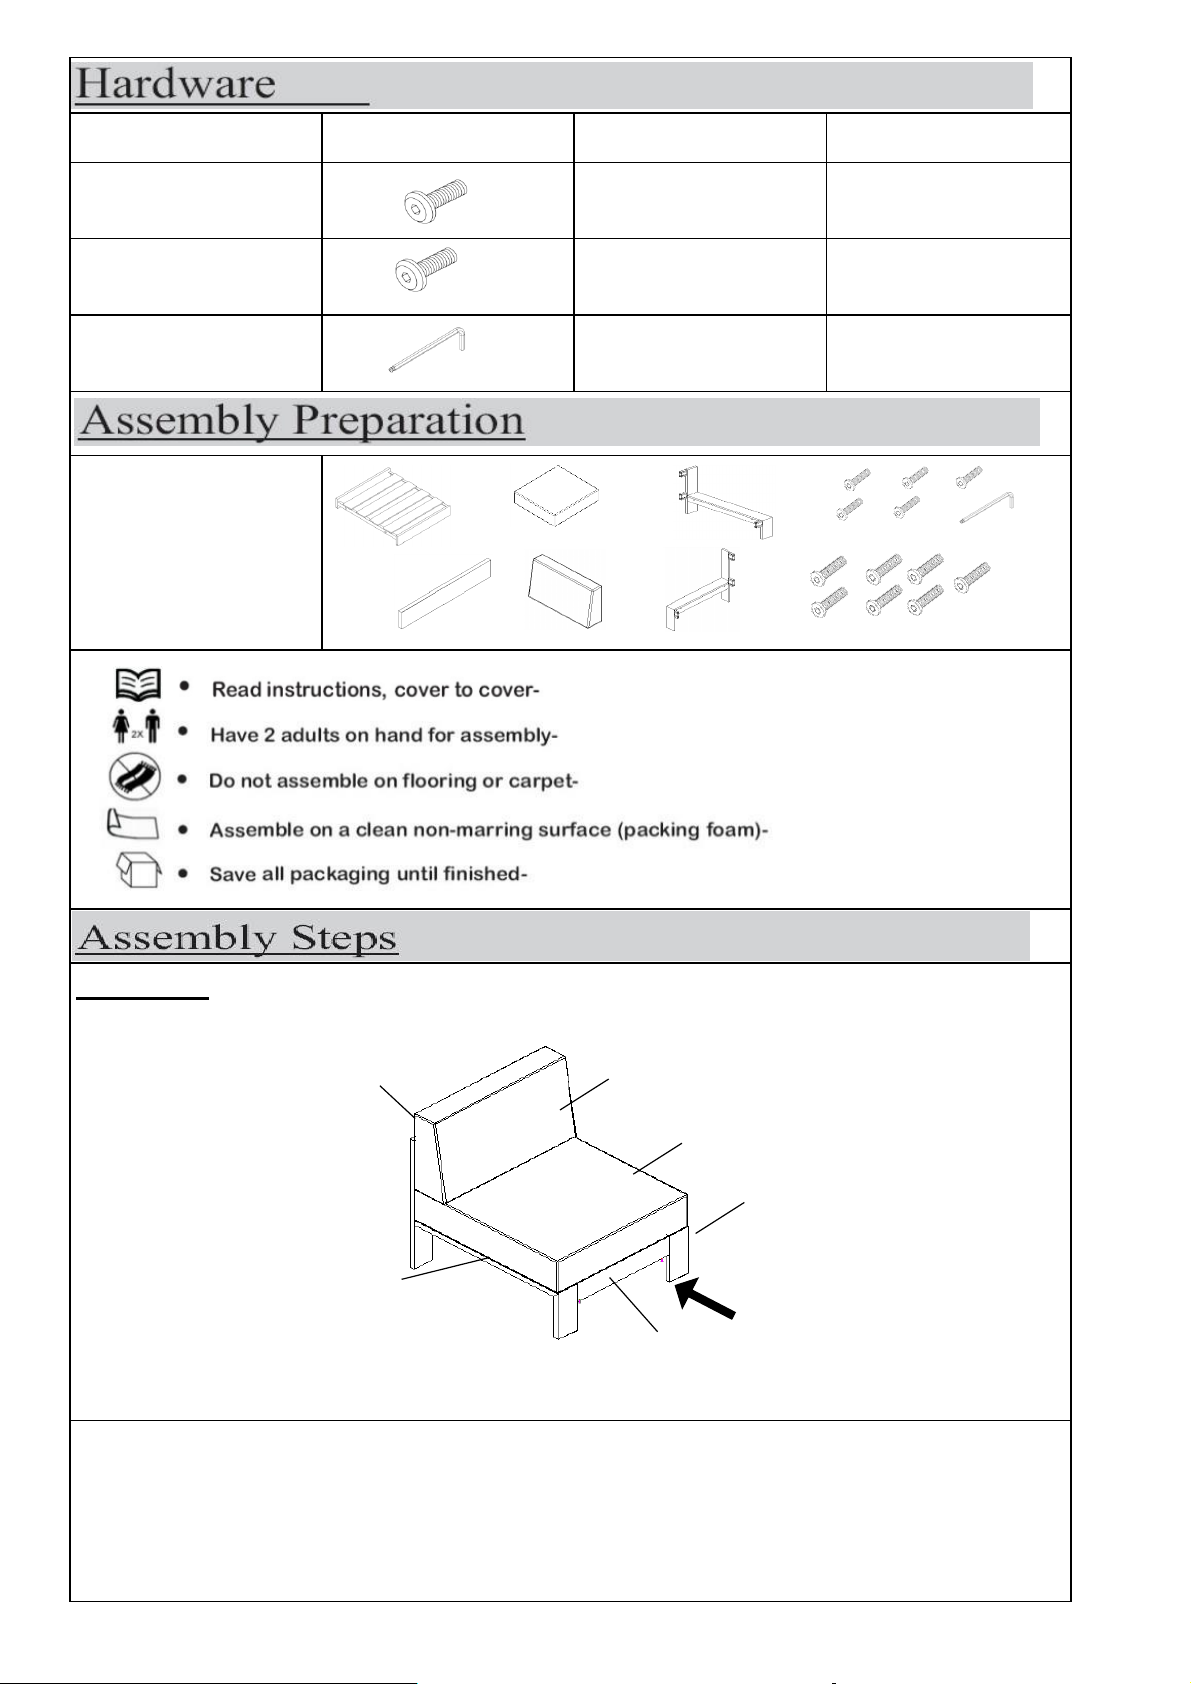
Label Picture Description QTY
① Bolt (M6*20MM) 5
② Bolt (M6*25MM) 7
③ Allen Key 1
Overview
This Leisure Chair has multiple parts and may require up to 30 minutes to assemble.
To give you an overview of the Leisure Chair parts, the above picture is to help you put
the various parts into perspective. Please read through the instructions below to
familiarise yourself with the parts and steps before assembly.
Before Beginning
Assembly:
FRONT FACING
Right Side Panel(C)
Left Side Panel(B)
Seat(A)
Backrest(D)
Seat Cushion(E)
Back Cushion(F)
Page 2 OF 5
Page 3
Step 1
Step 2
Step 3
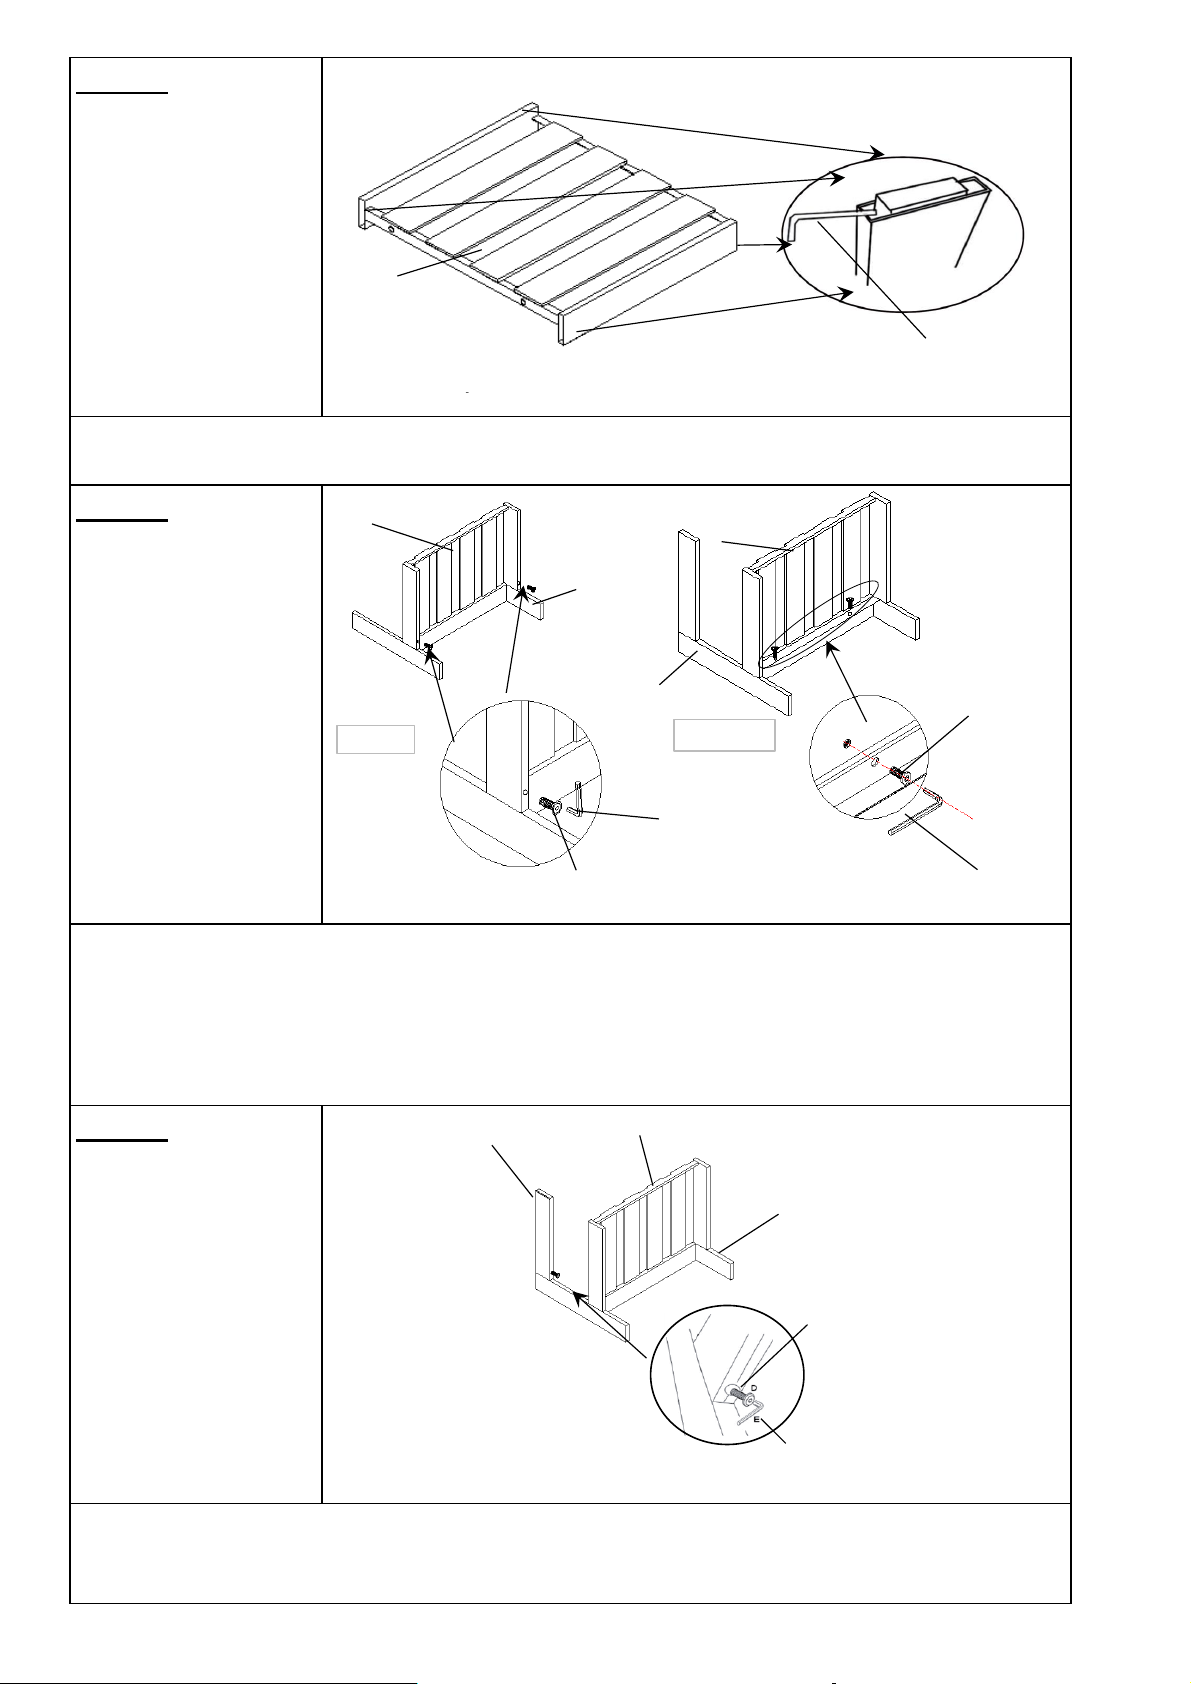
Open the carton and place all the parts onto a clean, non-marring surface. Take out the silders in the four ends of the
Seat(A ) using Allen Key( ③).
Place the Right Side Panel (C) facedown.
Step2.1:Attach Seat(A) to Right Side Panel(C) using Bolts(②) with Allen Key(③) as shown above.
Step2.2:Attach Seat(A) to Right Side Panel(C) using Bolts(①)with Allen Key(③) as shown above.
Do not fully tighten the Bolts.
Attach Backrest(D) to Right Side Panel(C) using Bolts(②) with Allen Key(③) as shown above.
Do not fully tighten the Bolts.
C
A
setp2.2
①
setp2.1
②
③
A
C
A
②
③
D
C
③
A
③
Page 3 OF 5
Page 4
Step 4
Step 5
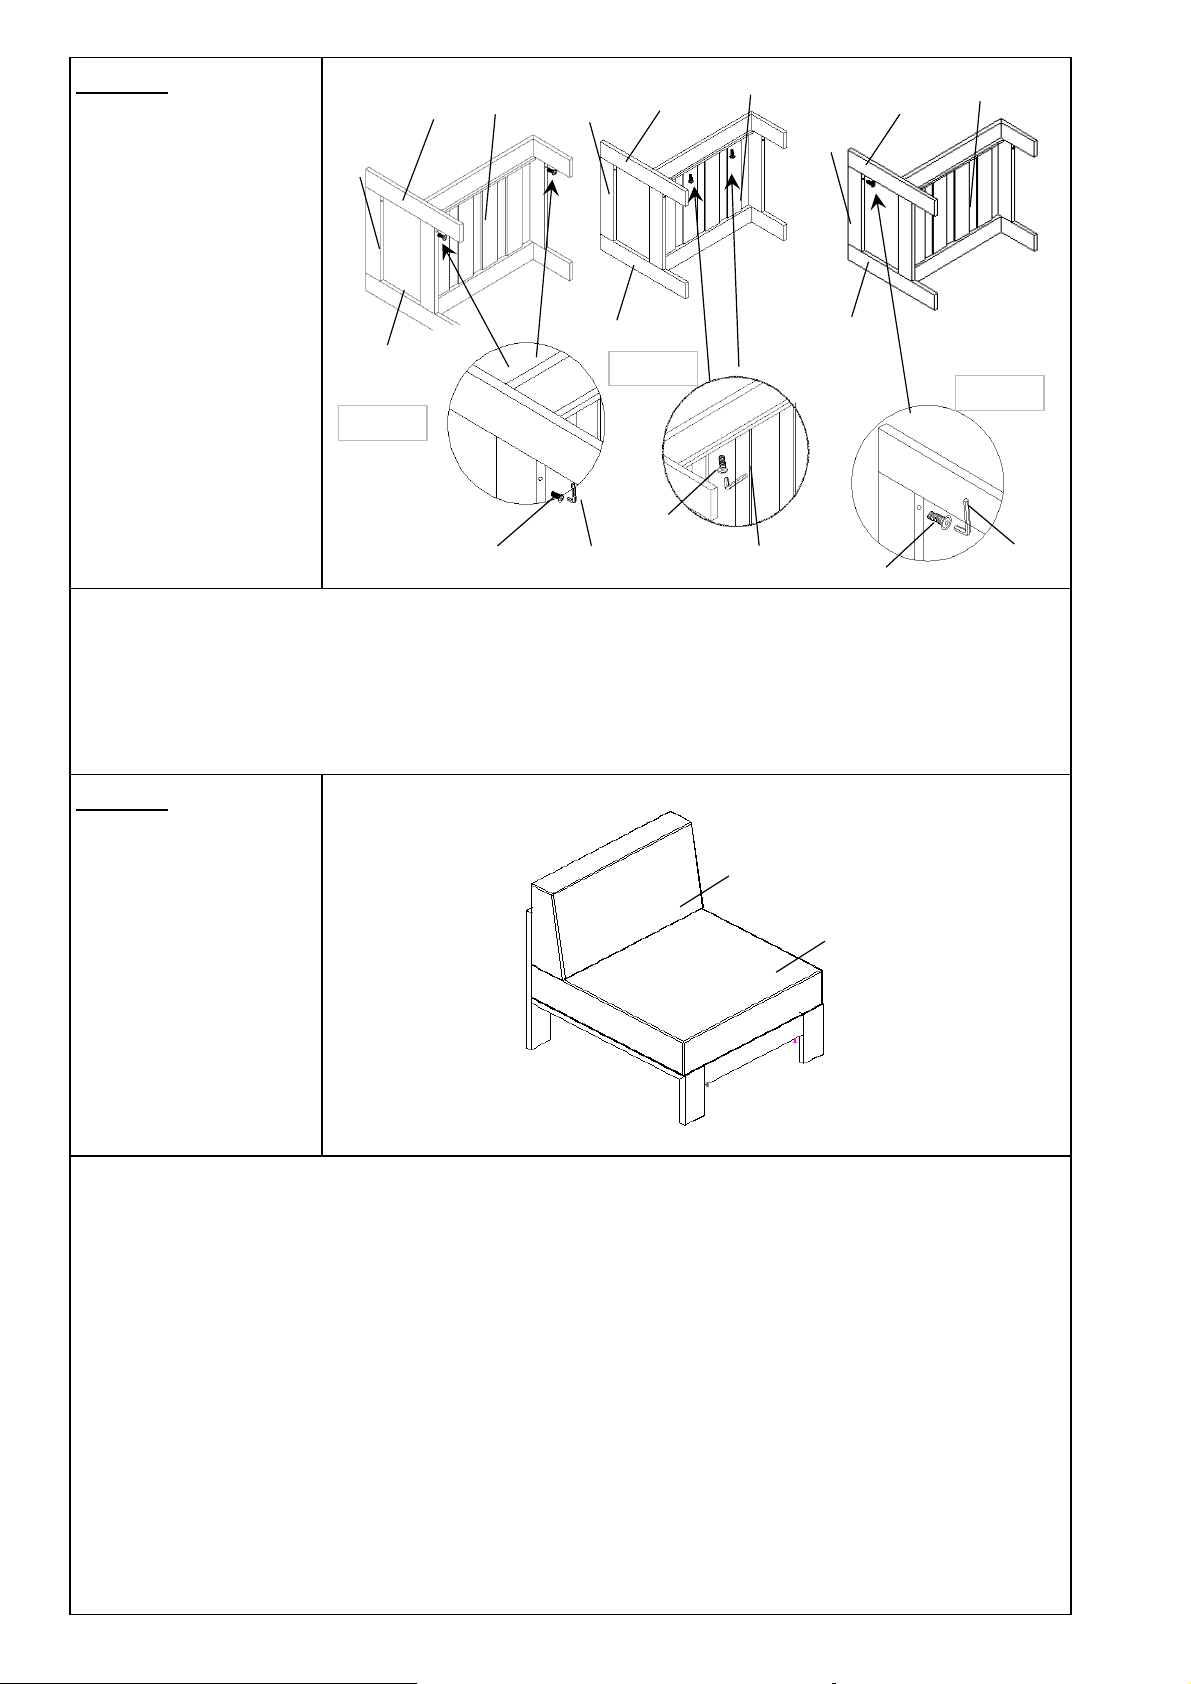
Step4.1:Attach Seat(A) and Backrest (D)to Left Side Panel(B) using Bolts(②) with Allen Key(③
) as shown above.
Step4.2:Attach Seat(A) and Backrest (D)to Left Side Panel(B) using Bolts(①) with Allen Key(③
) as shown above.
Step4.3:Attach Seat(A) and Backrest (D)to Left Side Panel(B) using Bolts(②) with Allen Key(③
) as shown above.
Do not fully tighten the Bolts.
Stand the Leisure Chair up.
Put Back Cushion(F) and Seat Cushion(E) on the Chair, stick the velcro from Back Cushion to Seat
Cushion.
Place the Leisure Chair on a LEVEL SURFACE.
Inspect it and make sure all parts are adequately connected.
Gently and carefully sit onto the Leisure Chair.
This will help to align all parts at all joints.Then get off the Leisure Chair, and in a sequential
manner, proceed to tighten all Bolts.
When tightening the Bolts, tighten sequentially.
DO NOT tighten any Bolt fully and then move on to the next one.
This may cause the frame to warp.
If there are still wobbles, loosen the Bolts and execute this same process.
Note: This step is done best with the assistance of a second adult.
Your Leisure Chair is ready for use.
This Leisure Chair can only be used on a flat, level surface.
B
A
C
D
setp4.1
③
A
B
D
C
③
C
D
B
A
setp4.2
setp4.3
③
E
F
②
①
②
Page 4 OF 5
Page 5
Page 5 OF 5
 Loading...