

Page 1
ASSEMBLY AND INSTALLATION
INSTRUCTIONS
TO AVOID RISK OF ELECTRICAL SHOCK, BE SURE TO SHUT OFF
WARNING:
NOTE: 1. Before installing, consult local electrical codes for wiring and grounding requirements.
2. READ AND SAVE THESE INSTRUCTIONS.
Warning: LED electronics can be damaged by electro static discharge (ESD)shock. Before
installation, discharge yourself by touching a grounded bare metal surface to remove this
hazard. To avoid damage, do not touch the LED module.
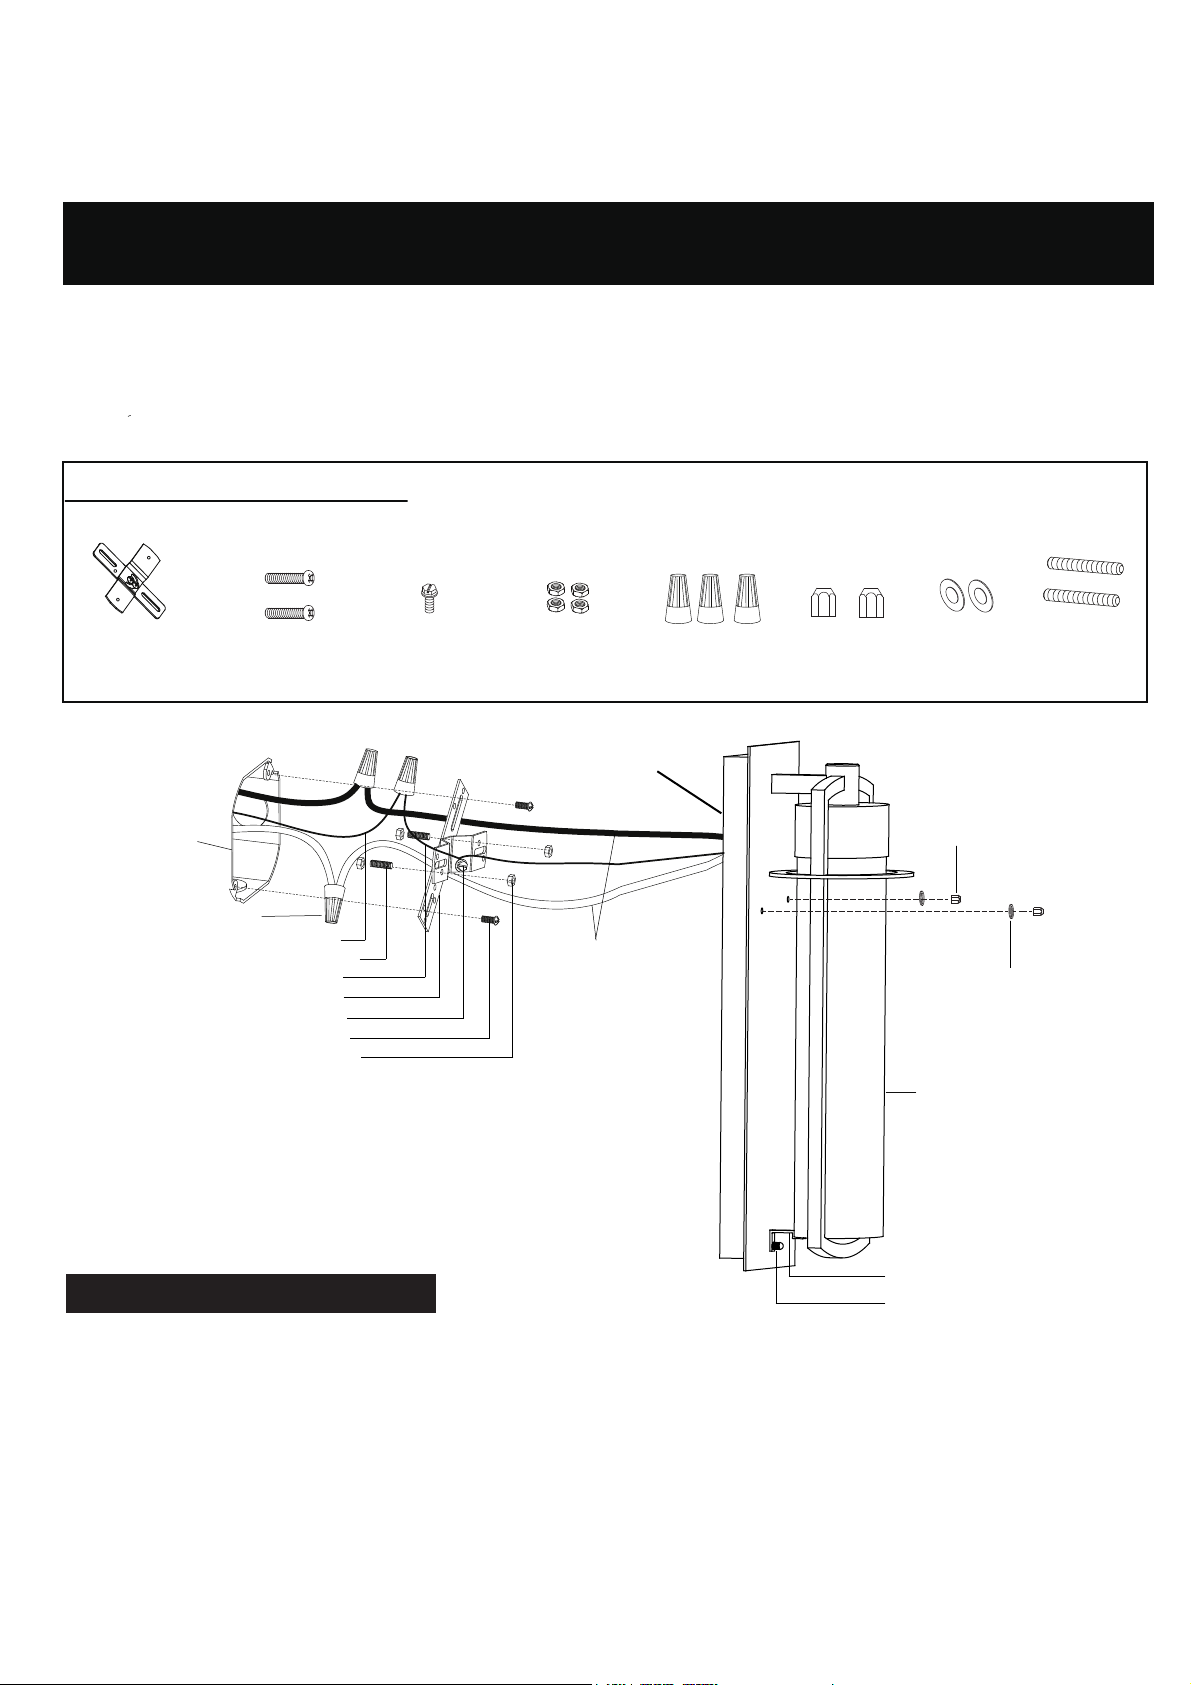
Hardware Package (included):
POWER BEFORE INSTALLING OR SERVICING THIS FIXTURE.
Cross Bar (A)
Outlet Box
Wire Connector (E)
Green Grounding Screw (C)
Mounting Screw (B)
House Grounding Wire
Headless
Fixture Grounding Wire
Mounting Screw (B)
Screw (H)
Cross Bar (A)
Lock Nut
(D)
Green Grounding
Screw (C)
Lock Nut (D)
Back Plate
Fixture Wire
Wire Connector (E)
Ball Nut (F)
Rubber Pad (G)
Ball Nut (F)
Rubber Pad (G)
Glass
Headless
screw (H)
Installation Steps
Turn off the power at fuse or circuit box
1. Thread two headless screws (H) through the cross bar (A), then secure them with
four lock nuts (D) ( two on each side of the cross bar (A) ). Adjust the length of the
headless screws (H) if necessary ).
Note: Make sure that the headless screws (H) are lined up horizontally, to ensure that
the fixture will be level.
2. Attach the cross bar (A) to the outlet box by using two mounting screws (B).
Glass Holder
Ball Nut
Page 2
4. Pull out the outlet wires and house grounding wire from the outlet box. Make wire connections (E) using the
wire connectors (E):
---Connect the black wire from the fixture to the black wire from the power source.
---Connect the white wire from the fixture to the white wire from the power source.
---Attach the fixture grounding wire to the cross bar with the green grounding screw (C). Then connect it to the
house grounding wire with a wire connector (E).
Carefully put the wires back into the outlet box.
5. Attach the fixture to the cross bar (A) by inserting the headless screw (H), then secure it with two rubber pads (G)
and two ball nuts (F).
6. Loosen glass holder use ball nut, after change the glass, secure the glass holder by ball nut again.
Turn on the power at fuse or circuit box.
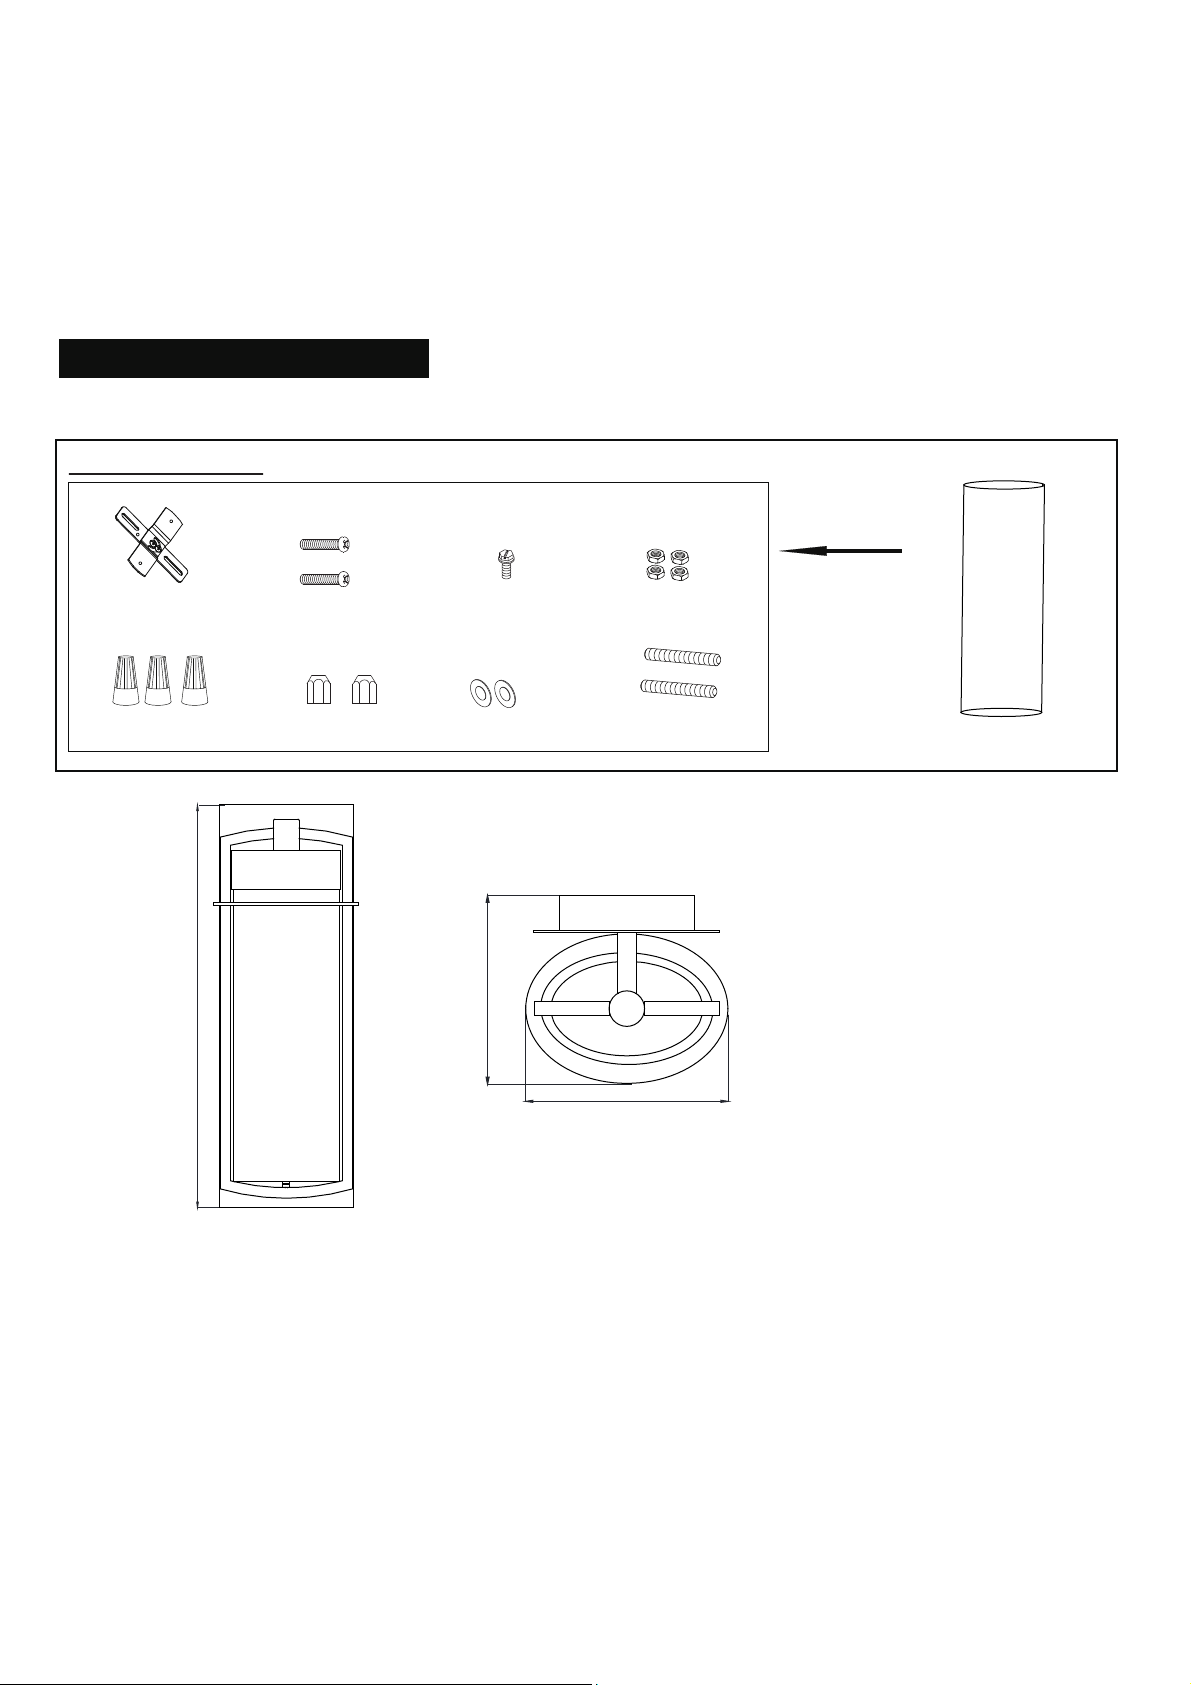
The following parts are available for re-order if damaged or missing.
Spare Parts List:
Mounting Hardware
Cross Bar (A)
Mounting Screw (B)
Green Grounding
Screw (C)
Lock Nut (D)
(1 SET)
Wire Connector (E)
A
Ball Nut (F)
Rubber Pad (G)
C
Headless Screw (H)
Glass
A: 15-1/2”
B: 5-1/2”
C: 5-1/4”
B
 Loading...