

Page 1
Page 1 of 4
EASY
DIFFICULT
ASSEMBLY RATING
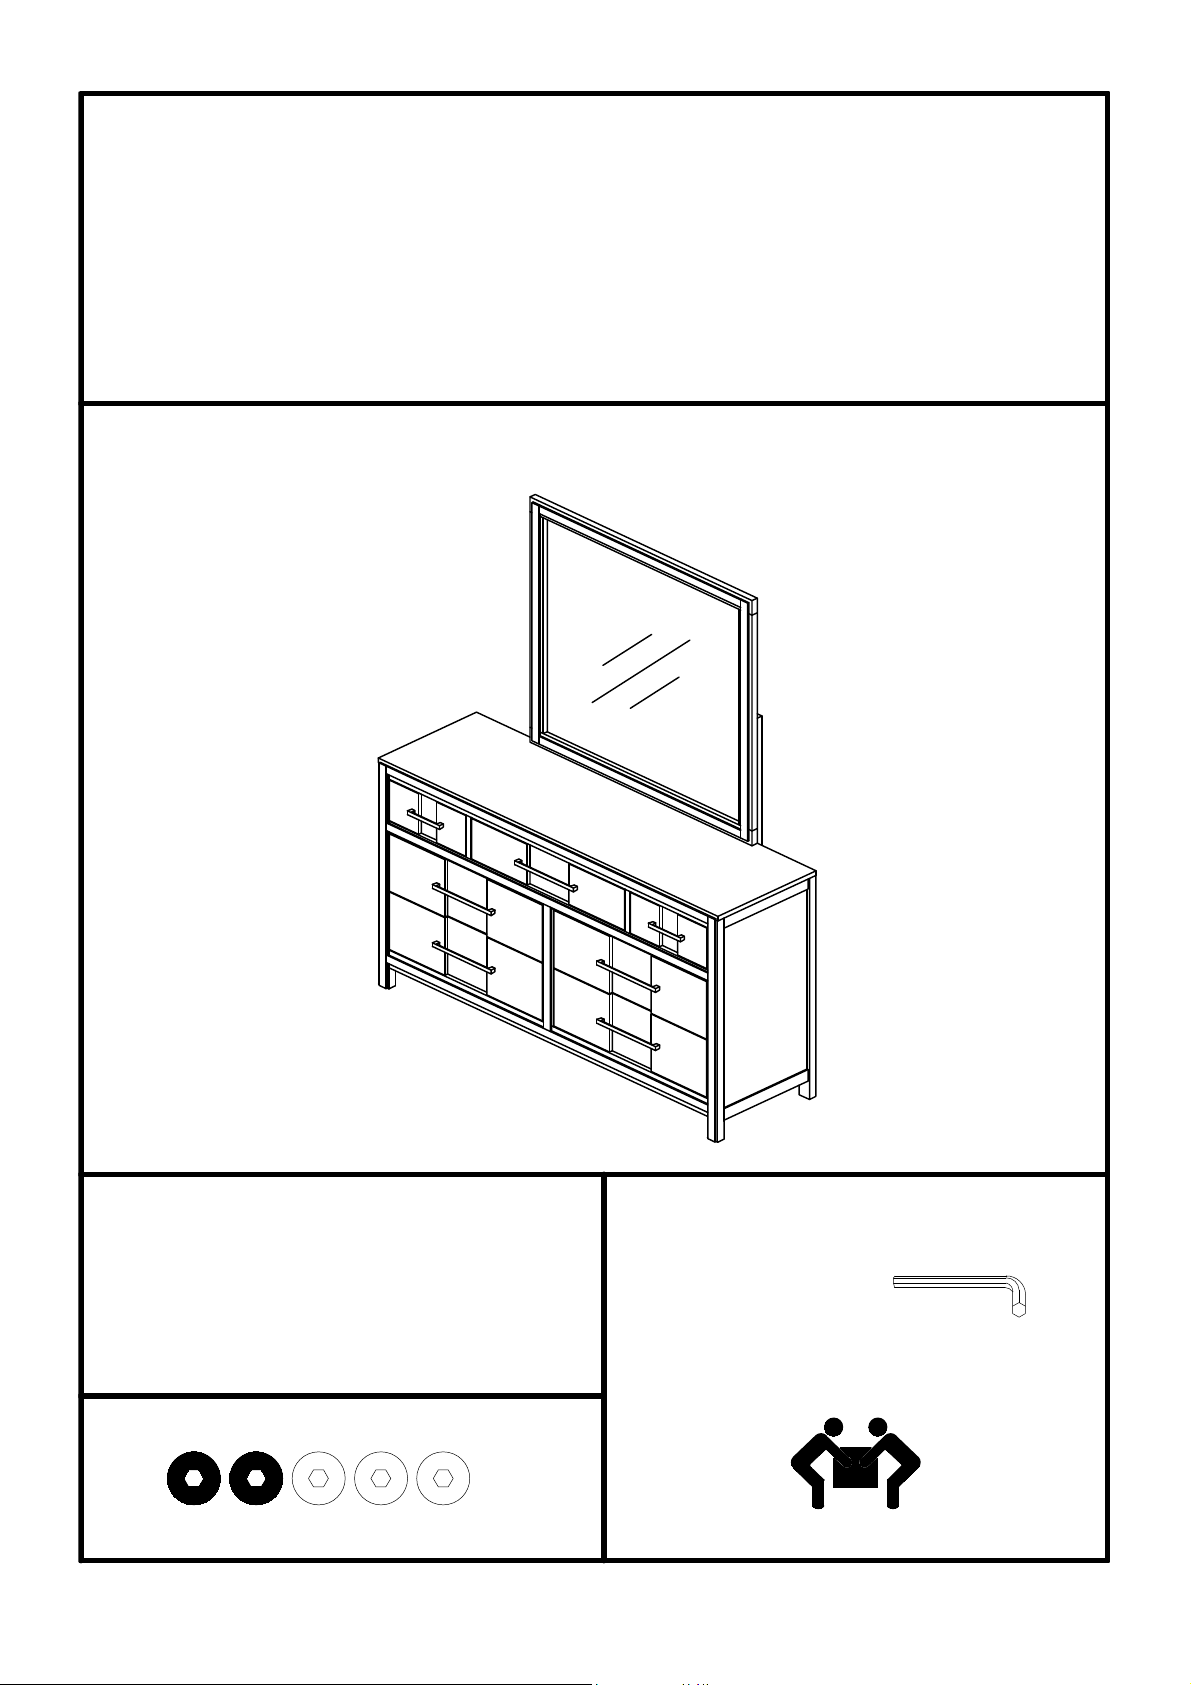
2 PERSONS RECOMMENDED
Tools Required For Assembly:
Allen Wrench
(Included)
The Assembly Rating is a 5-point system that
shows the degree of effort needed in
assembling a specific product (with 1 being
easy and 5 being difficult). For some
products, two persons are recommended.
Assembly Instructions
For more information please contact our team
Page 2
Page 2 of 4
BASIC ASSEMBLY TECHNIQUES
FOR YOUR FURNITURE TO LAST,CORRECT ASSEMBLY AND PROPER MAINTENANCE ARE NECESSARY.
PLEASE FOLLOW THE INFORMATION PROVIDED BELOW TO FULLY ENJOY YOUR FURNITURE.
FAILURE TO FOLLOW THE GUIDELINES ABOVE MAY
RESULT IN INJURY AND/OR PROPERTY DAMAGE.
IT IS THE USER'S RESPONSIBILITY TO MAINTAIN THE FURNITURE.THE HARDWARE MAY
LOOSEN OVER TIME AND MAY CAUSE THE FURNITURE TO BE WOBBLY AND UNABLE TO
SUPPORT ITS INTENDED WEIGHT CAPACITY. THIS MAY LEAD TO COLLAPSE AND MAY CAUSE
SERIOUS INJURY.
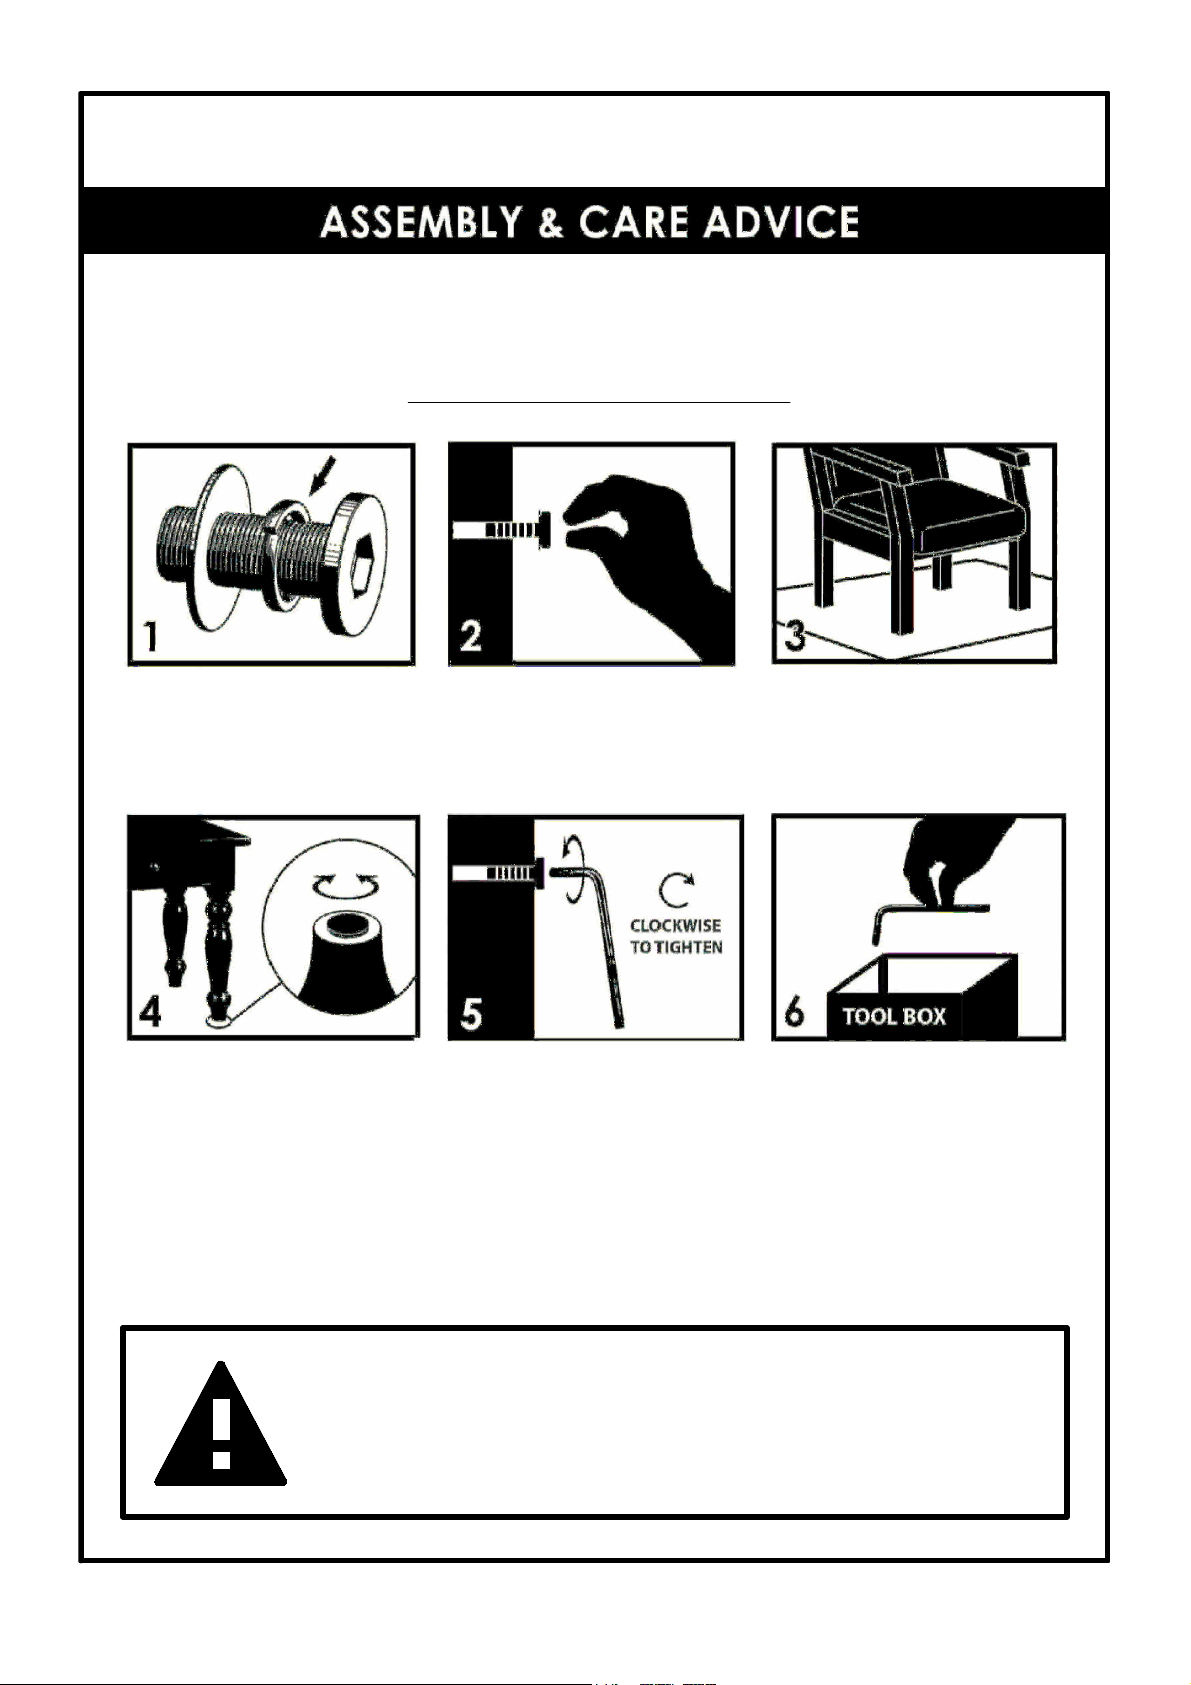
When lock or spring washer is used in
an assembly, please make sure the
lock or spring washer is placed
between the larger flat washer and the
head of the screw or bolt.
Some furniture comes with height
adjusetment knobs underneath each
leg. To lower or to raise each leg, you
need to turn clockwise or
counterclockwise, respectively.
Make sure all parts are properly
aligned, then use the appropriate
hand tool to completely tighten the
bolts or screws. Do not use power
tools and do not overtighten.
Position each part correctly and insert
screws or bolts into their respective
holes by hand tighten or using the
proper hand tool. Only tighten when
step is completed or when instructed
to do so.
Save the instructions and store the Allen
wrench or any supplied tool for later
maintenance. After two weeks, check and
tighten any loose hardware and repeat
again every six months thereafter.
Use cardboard or carpet area when
assembling furniture to prevent
scratches .Make sure the furniture
rests on a flat and level surface with
each leg evenly touching the floor.
No dragging of products/parts.
Page 3
Before you begin, please read Page 2
of "Assembly and Care Advice".
And remember, do not tighten until
each step is completed or instructed.
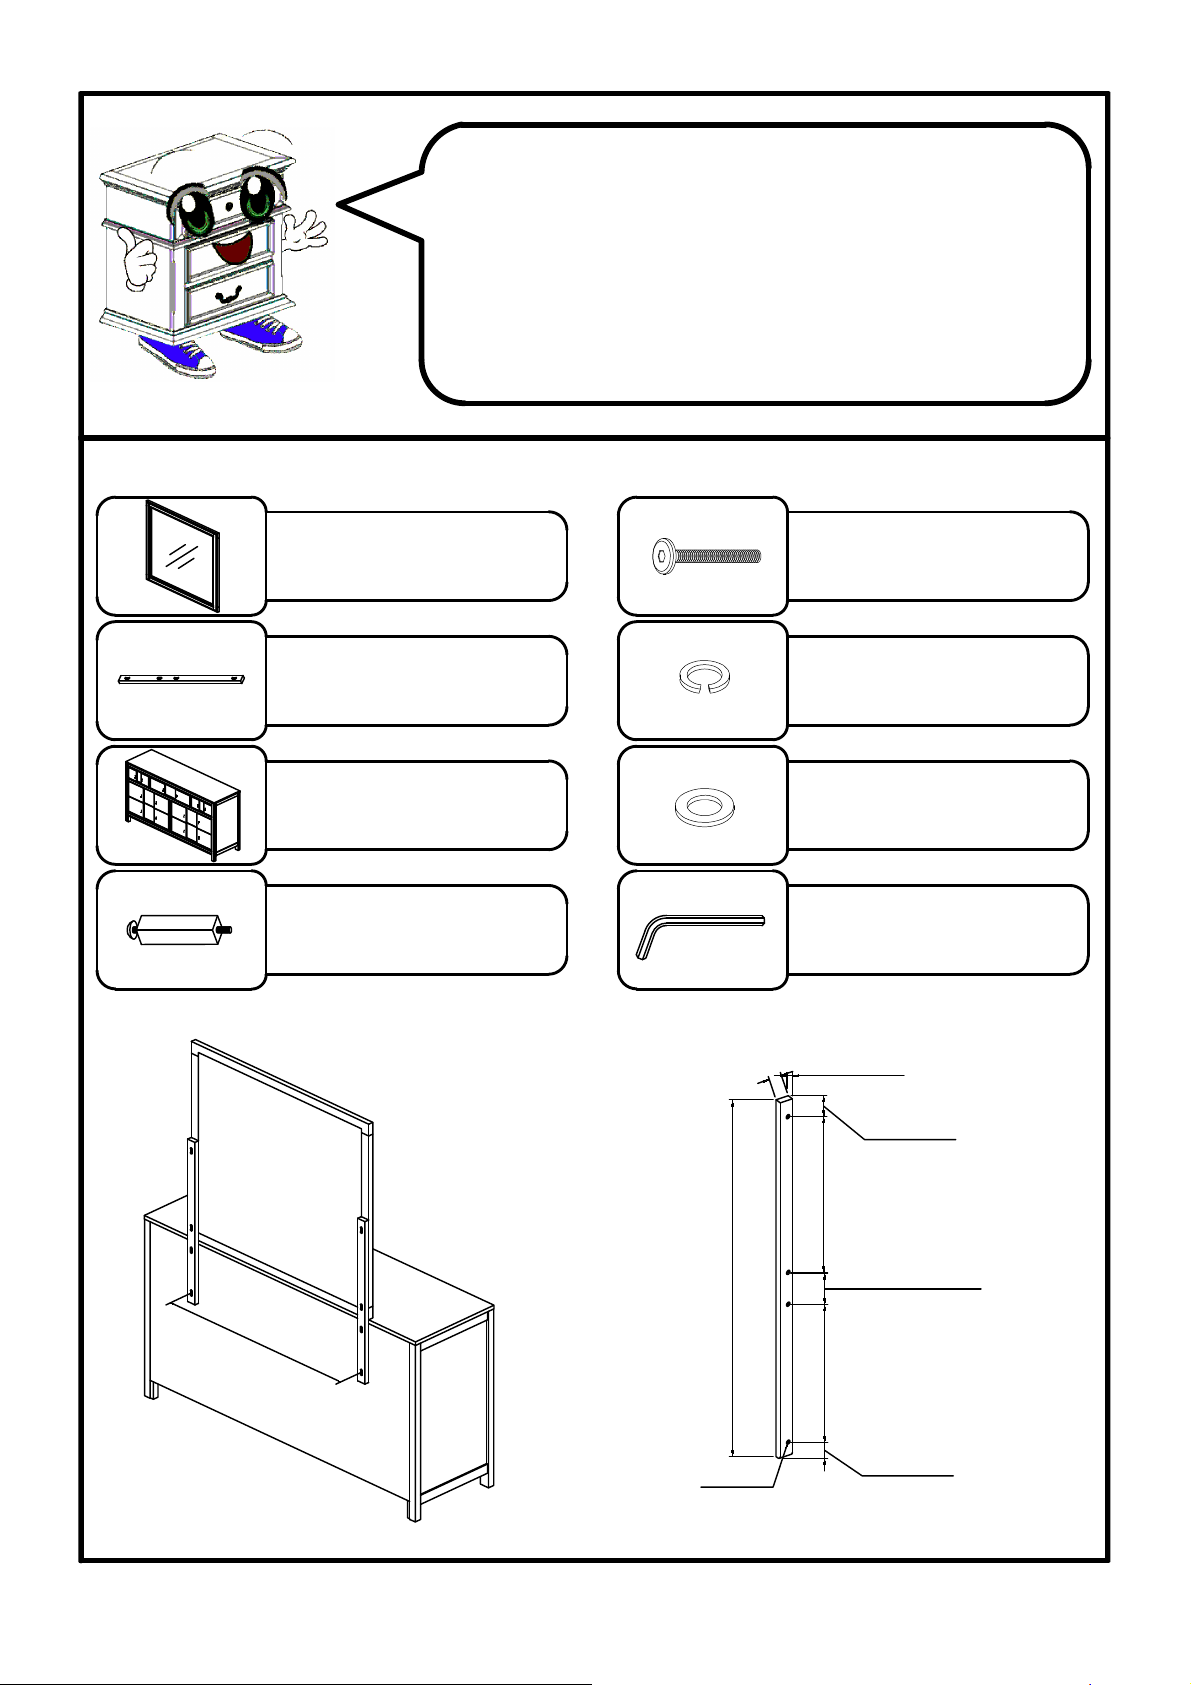
#1 x 1 pc
Mirror
Parts List Hardware List
#2 x 2 pcs
Mirror Support
#3 x 1 pc
Dresser
#4 x 1 pc (Ø5/16")
Support Leg 30x30x115mm
#A x 6 pcs
Bolt Ø1/4" x 1-3/8''
#B x 6 pcs
Lock Washer
Ø1/4"
#C x 6 pcs
Flat Washer Ø1/4"
#D x 1 pc
Allen Wrench M4
Page 3 of 4
924mm
800mm
40mm
50mm
379mm
110mm
211mm
50mm
20mm
10x30mm
Page 4
#A x 6 pcs
#B x 6 pcs
#C x 6 pcs
Page 4 of 4
ASSEMBLY IS COMPLETED
#4
#1
#2
#3
#2
#A
#B
#C
#D
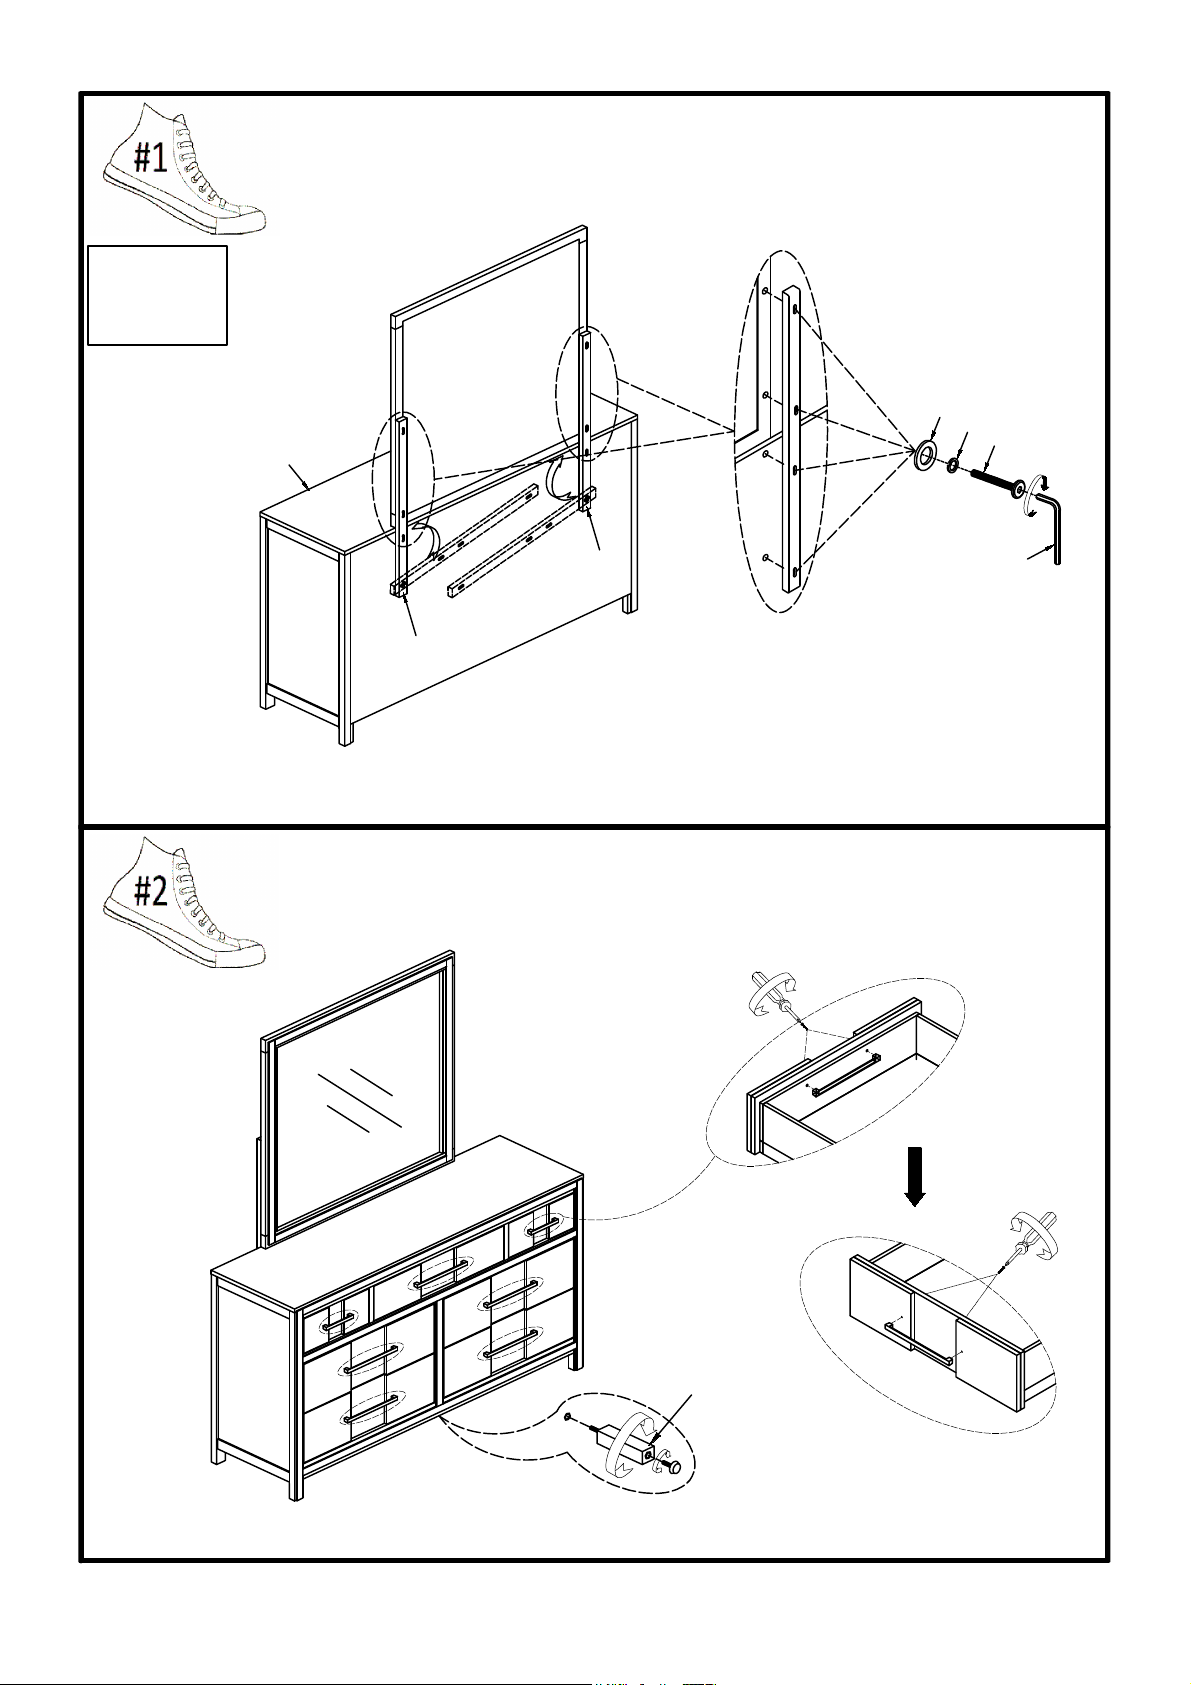
Prepare 6 bolts assembly by inserting lock washer (#B), then flat washer (#C) onto bolts (#A). Align
the mirror support (#2) to the holes of the mirror (#1) and dresser (#2). Secure with bolts (#A).
Attach the support leg (#4) to the bottom
center of the dresser. Adjust the
adjustable foot according to the ground
level.
 Loading...