

Page 1
INSTALLATION INSTRUCTION
LED Step and Wall Lights
WL-LED200
WARNING
IMPORTANT: NEVER attempt any work without shutting o the electricity.
- Read all instructions before installing.
- System is intended for installation by a qualied electrician in accordance with the National Electric Code,
and local regulations. Consult with local inspector to ensure compliance.
- To reduce the risk of re, electrical shock and injuries to persons, turn o power at main switch before installing
or modifying the system.
- Retain instructions for future maintenance reference.
- Not complying with instructions could result in failure of the xtures, and void the warranty.
INSTALLATION:
JUNCTION BOX: 2” x 4” boxes to have minimum inside dimensions of 3”H x 2”W x 2”D in order to accommodate
Note: Actual depth of box to be determined in accordance with the NEC and local ordinances. Indoor or outdoor frame mounted
junction box: Raco 2” x4” (16.5 cu. In) or equivalent recommended Outdoor surface mounted junction box: Red Dot deep
weatherproof box Model S103E or equiv. recommendedMortar or poured concrete installation: Use appropriate junction box
suitable for that particular application
1. Install 2”x4” junction box, and ensure it is water-tight for outdoor use.
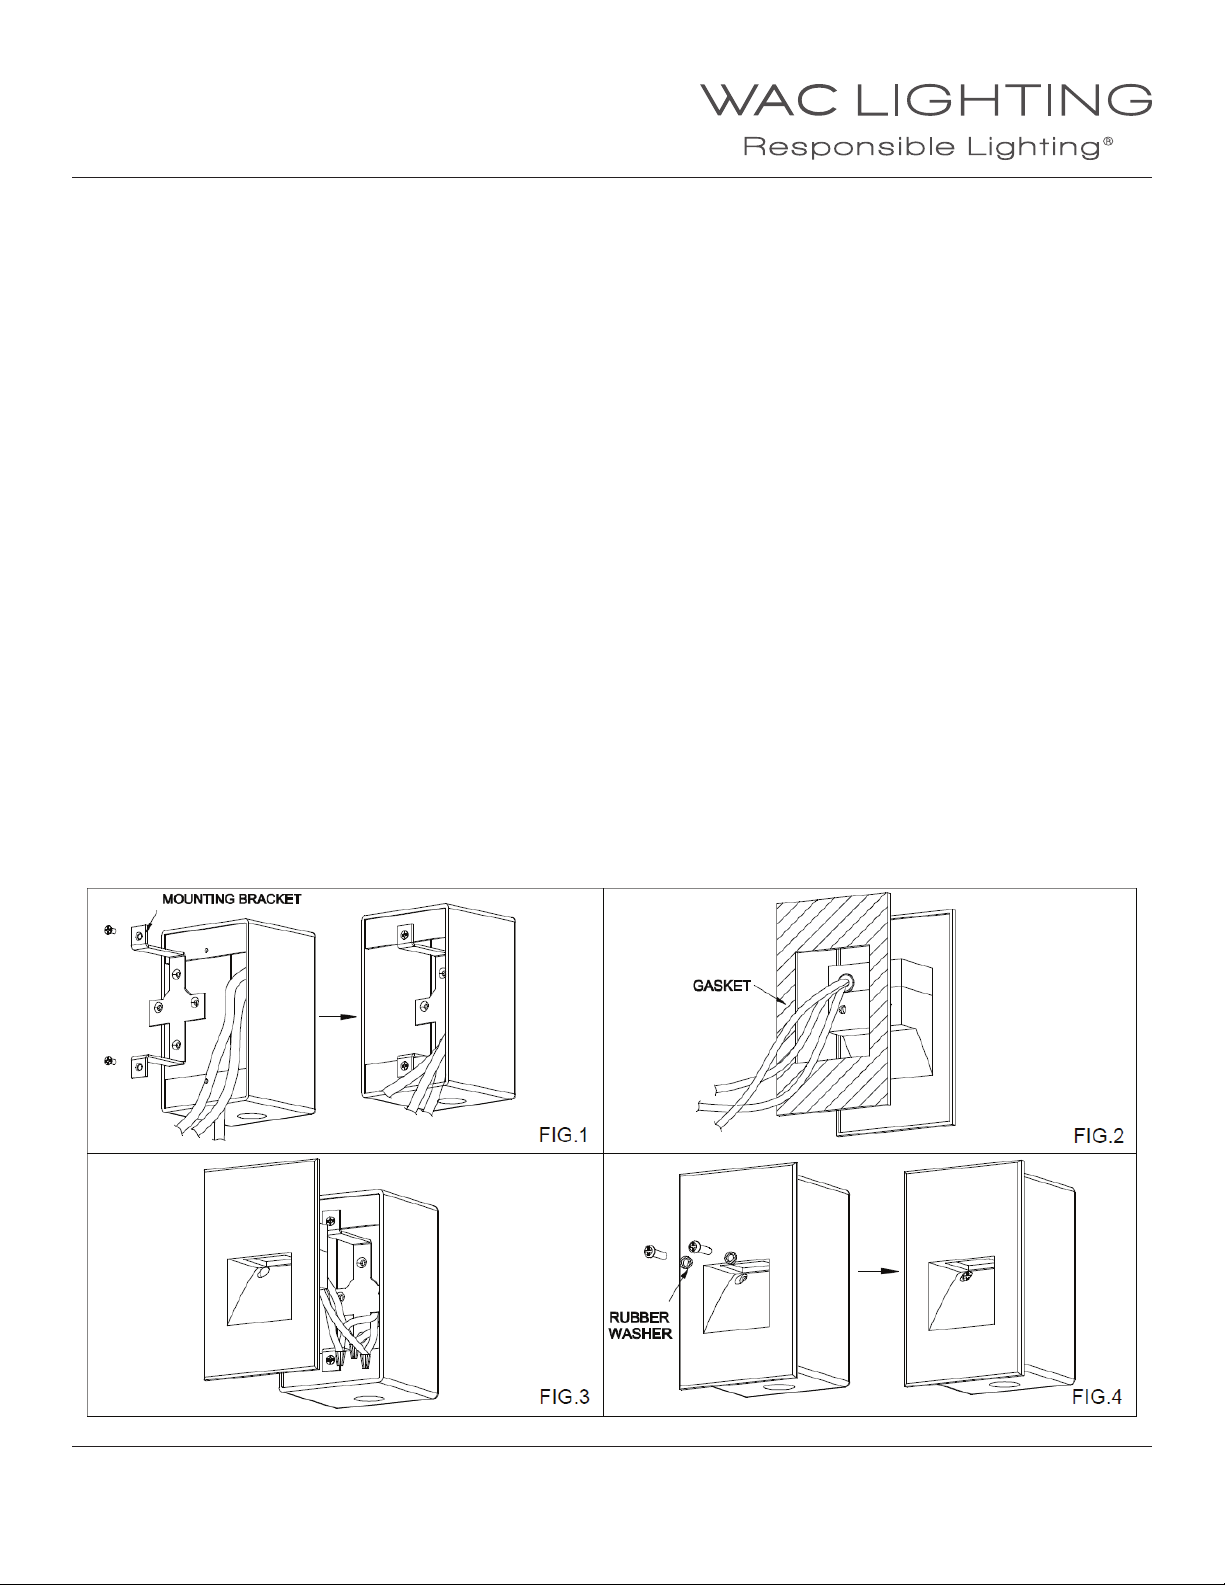
2. Secure mounting bracket to J-box using (2) 8-32 J-Box screws (J-box and screws by others) as shown in Fig.1.
3. Insert gasket onto the back of the xture (Fig.2).
Note: For indoor installation, gasket is not required, and can be discarded.
4. Connect the xture wires to the junction box wires as follows: Black xture wire to black (Hot) J-BOX wire, white xture wire to
white (Neutral) J-box wire, and green xture wire to Ground. (See Fig.3)
Note: Multiple xtures (up to 200) can be wired together in parallel: Hot to hot, and neutral to neutral.
5. Place all wiring and connectors back in junction box and install the xture.
Note: For outdoor installation, it is recommended that the installer run a bead of clear, outdoor-rated silicone
(GE RTV-162 or equivalent, provided by others) caulk between gasket or back of xture and mounting surface to
prevent seepage of water into xture.
6. Secure the xture to the surface using two mounting screws and two rubber washers provided. (See Fig.4)
(Note: Fixture, mounting bracket, gasket, mounting screws, and rubber washers provided by WAC.)
WAC Lighting
www.waclighting.com
Phone (800) 526.2588 • Fax (800) 526.2585
WAC Lighting retains the right to modify the design of our products at any time as part of the company's continuous improvement program. JUNE, 2014
Headquarters/Eastern Distribution Center
44 Harbor Park Drive • Port Washington, NY 11050
Phone (516) 515.5000 • Fax (516) 515.5050
Western Distribution Center
1750 Archibald Ave • Ontario, CA 91761
Phone (800) 526.2588 • Fax (800) 526.2585
 Loading...