

Page 1
INSTRUCTIONS: Model: QP-501 Pendant Socket Set
INSTRUCTIONS PERTAINING TO A RISK OF FIRE,
OR INJURY
Lighted lamp is HOT!
WARNING- To reduce the risk of FIRE OR INJURY:
Turn off all power and allow to cool before replacing
lamp.
Lamp gets HOT quickly! Contact only switch/plug
when turning on.
Do not touch lens, guard, or enclosure.
Keep away from materials that may burn.
Do not touch the lamp at any time. Use a soft cloth.
Oil from skin may damage lamp.
Do not operate the luminaire with a missing lens or
damaged shield.
Save these instructions.
Overview: Pendant sockets sets are designed for
use with all WAC quick connect adapters. They may
also be used on other manufacturers brand of quick
connect (consult factory for compatibility). Pendants
may be mounted to mono rail, monopoints, or line
volt track, by coupling to a low voltage quick connect
adapter. Sockets are supplied with a 6′cable and may
be field cut to desired length.
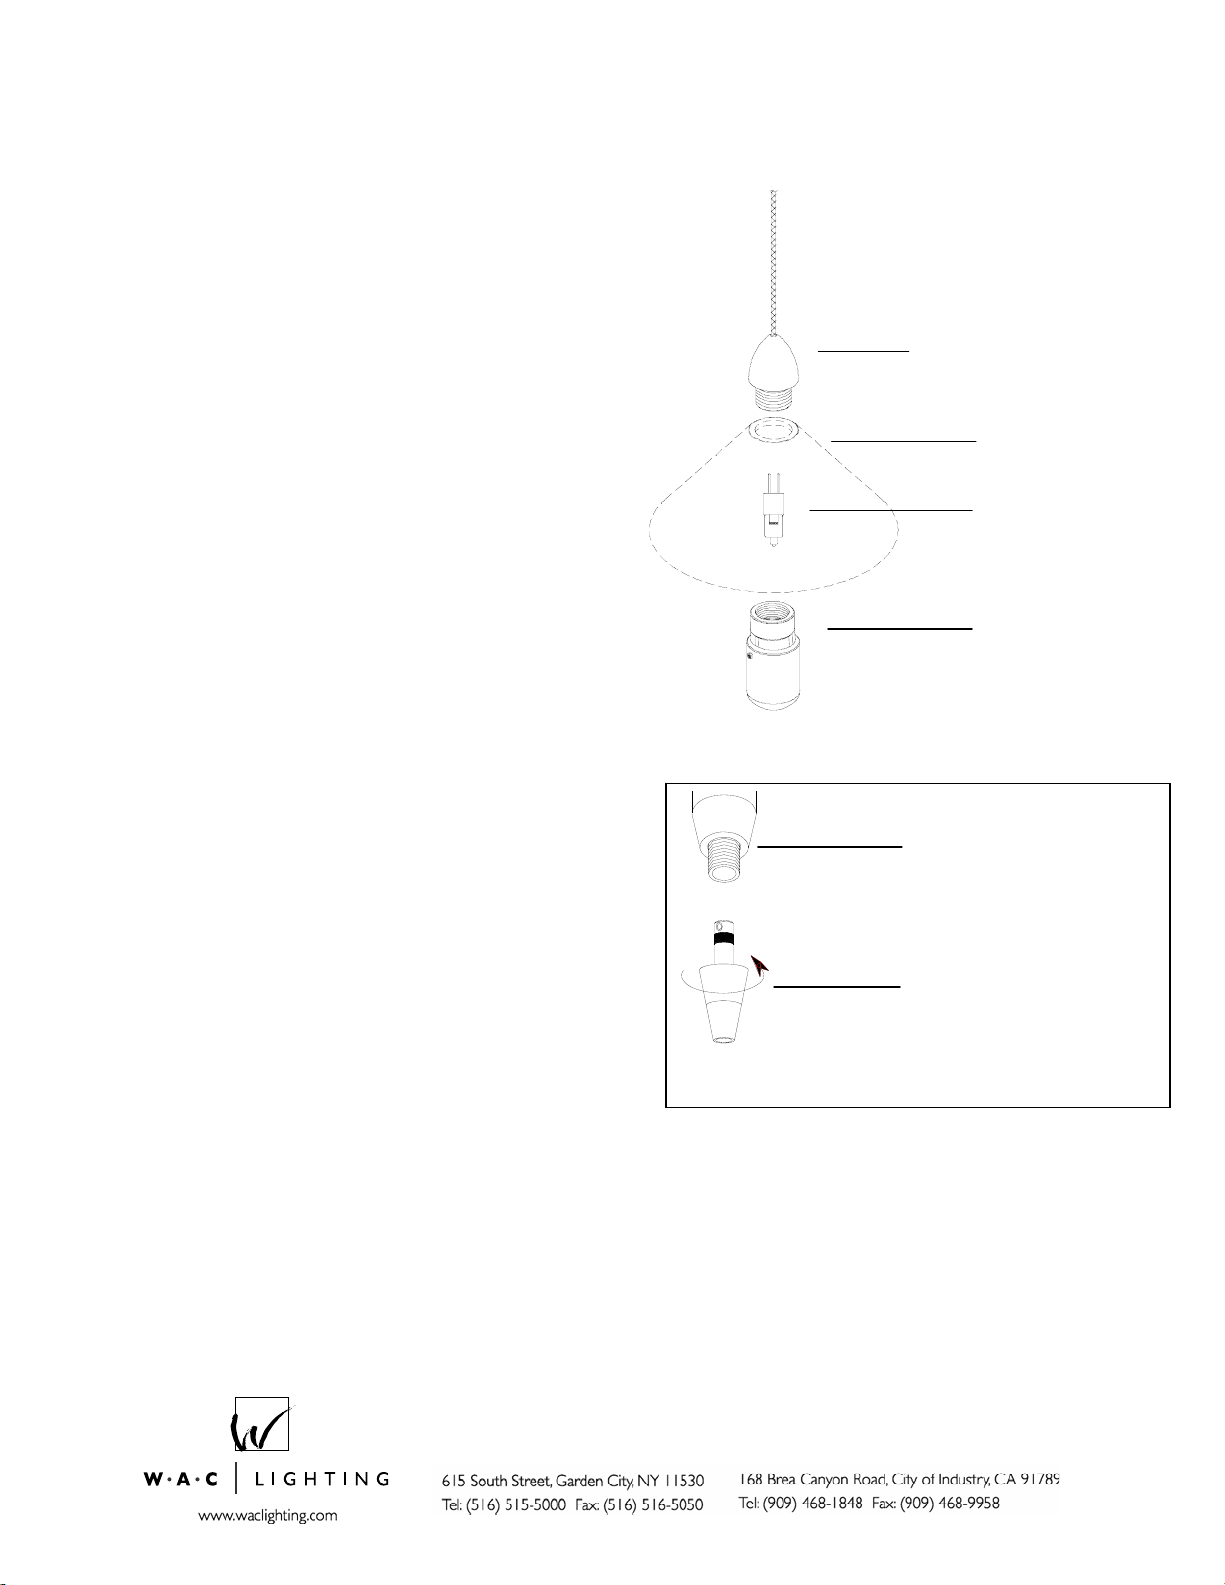
Installing Lamp & Shade:
1. Insert the lamp into the fixture by aligning the
(See diagram).
Installing Pendant to Quick Connect:
Accessories: series G500 glass shades.
See reverse for field shortening pendants.
pins with the socket holes, and gently
pushing until lamp seats.
2. Use 12V 50W bi-pin Halogen lamp with
G6.35 base (supplied) with 12V 50-watt
Halogen (24V lamp may be used depending
on power supply ).
3. Position shade so that threads go through
the hole in the shade and screw on Bulb
Shield from below.
1. Insert the post of the quick connect into the
quick connect adapter.
2. Thread the top half of the conical section until
it seats with the adapter.
3. Adjust fixture position, use caution not to
loosen the conical section.
Installing Lamp & Shade
QP-501 Socket
Shade
Lamp
Bulb Shield
Installing to Quick Connect
Quick connect adapter
Top Conical section
09/12/06 Rev 1
Page 2
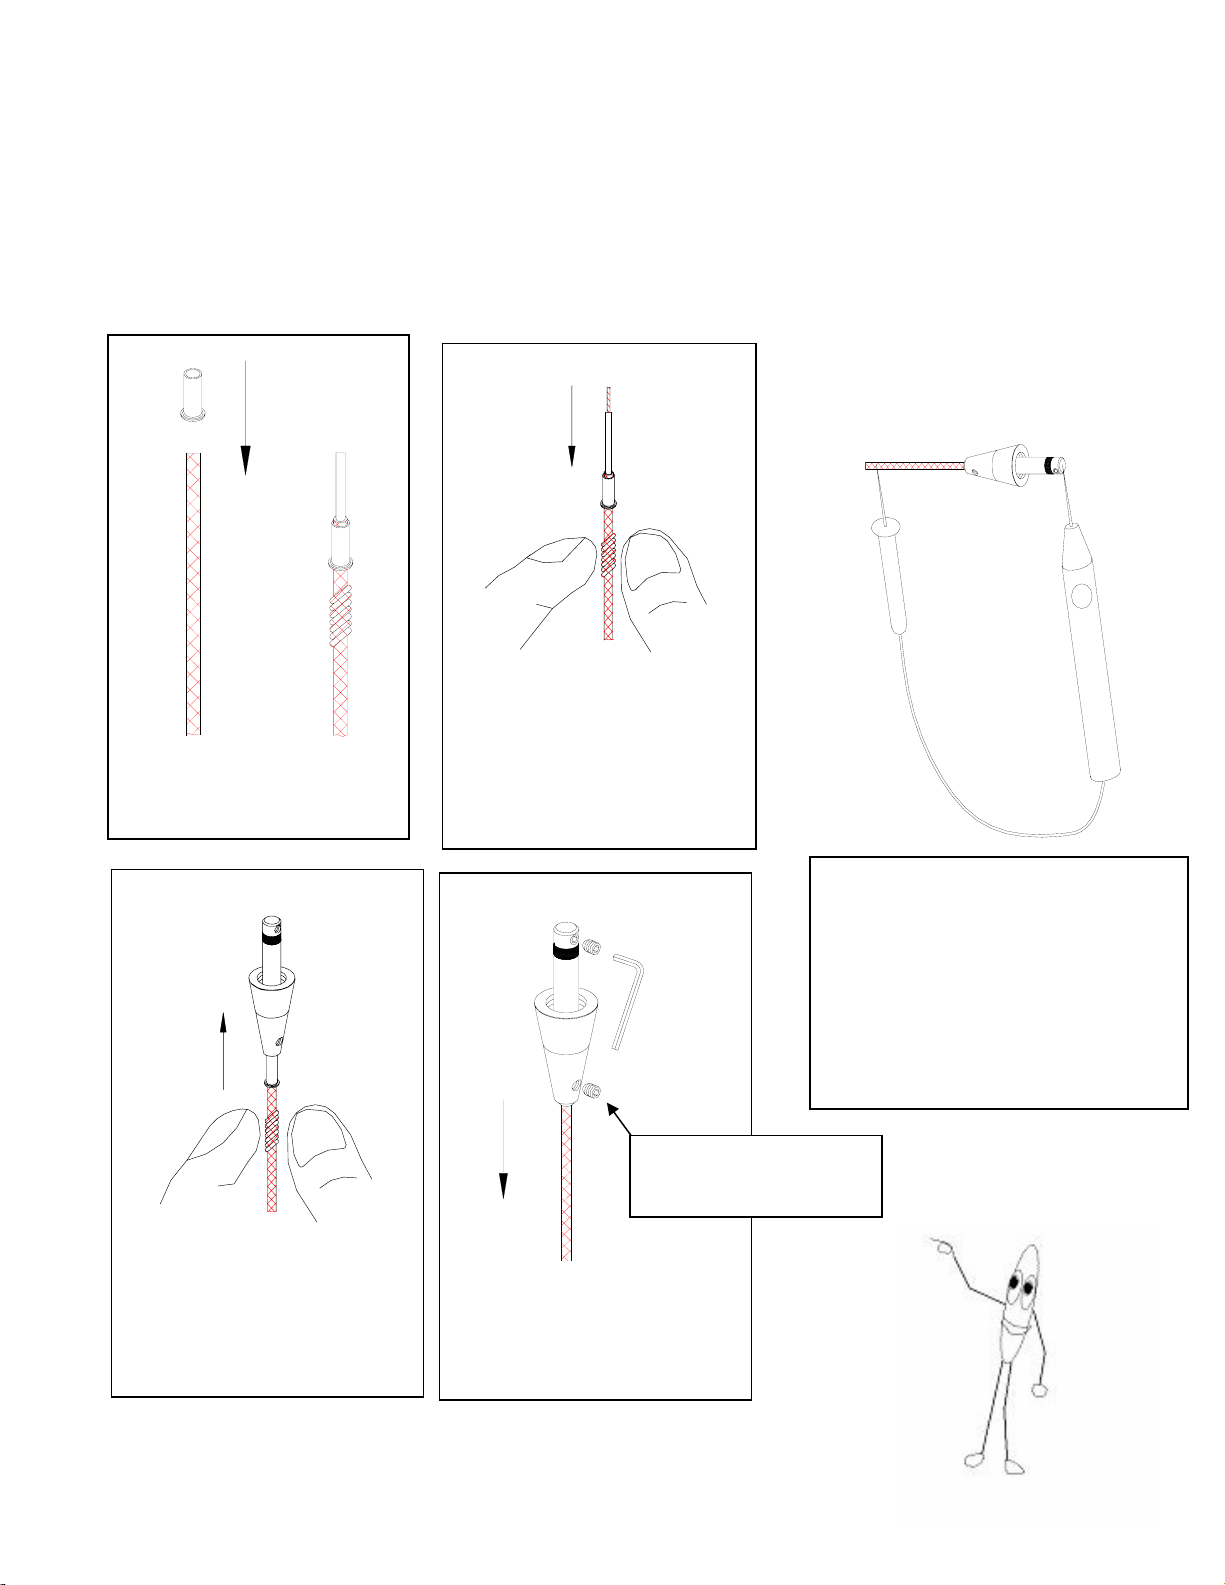
To Install/ Shorten Pendant:
All Pendant shades use the quick connect adapter to attach to the rail. On the QP-601 the mating piece (top conical
section) for quick connect adapter comes uninstalled. Feed the cable end through the glass shade and the metal
finial. If cable needs to be shortened, make the cut now. To install the top conical section, follow the step-by-step
instructions bellow. NOTE: Pendant cables are co-axial, if the lower screw in step 4 is made too tight, the
inner an outer wire will short. A short circuit will render the entire system in-operative and possibly damage
the transformer. Check all pendant splices for continuity before installing.
1
2
Make a clean cut. Slide brass
collar over wire.
Trim 1/8” of insulation from the
inner wire. Position the collar so
that a small section (1/16”) of
braided wire protrudes from the top
of the collar.
Continuity tester
3
4
Check Splice:
Before mounting, with lamp removed
from the socket, check for continuity.
There should be none.
Insert lamp in socket and re-check.
There should now be continuity,
indicating a completed circuit.
Install with power off.
CAUTION:
Snug but not tight
Feed inner wire until it reaches the
top set screw position. Feed
braided outer wire and collar into
bottom portion.
Tighten top setscrew first then
lower. Smooth out any bulges in
braided wire. Perform continuity
check before mounting.
08/04/03 Rev1
 Loading...