

Page 1
INSTALLATION INSTRUCTION
H Track Systems Monopoint
HMP
CAUTION:
Always turn o power at main switch prior to installation to
prevent electrical shock.
• Do not install in damp or wet locations.
• Do not attempt to energize anything other than a track
lighting xture.
OVERVIEW:
The HMP Monopoint attaches to a junction box and accepts
any “H” series line volt and low voltage track head.
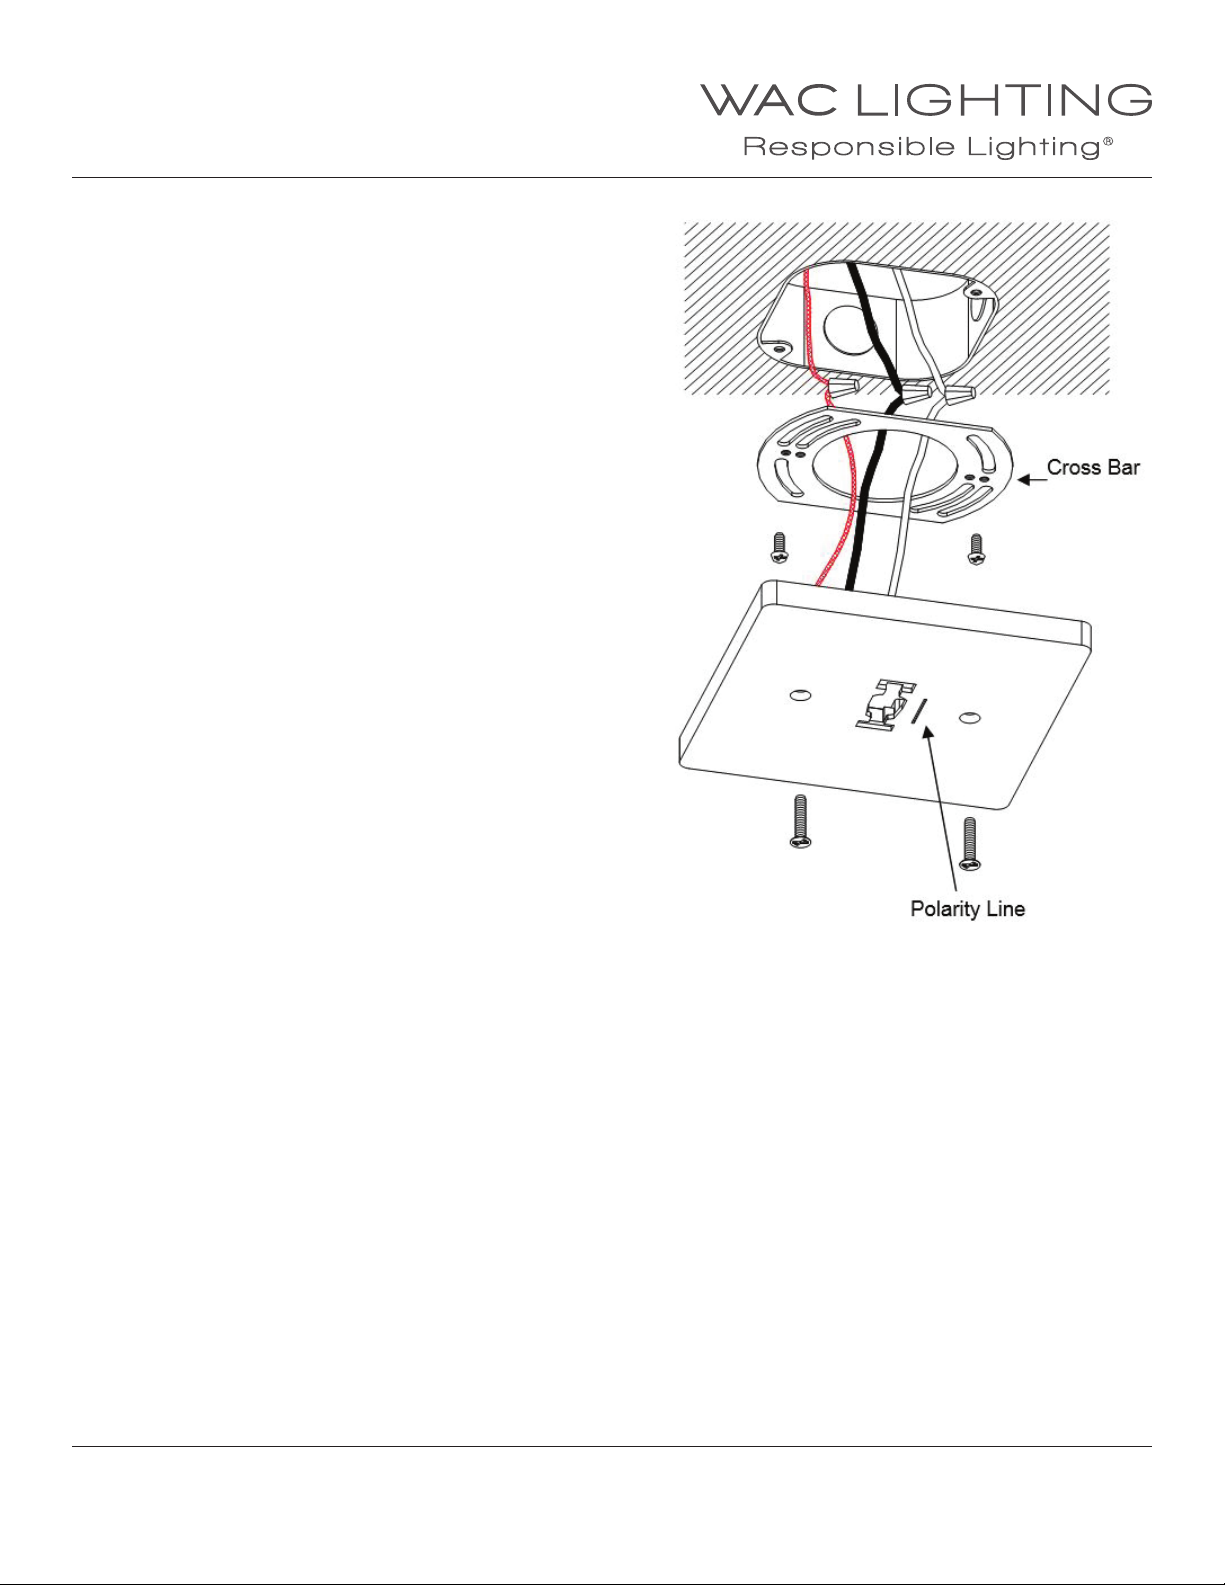
1. Attach the cross bar to a junction box using the screws
supplied with the J-box. The screws go through the slotted
holes to allow for adjustment.
2. Connect wires from the monopoint to the ceiling wires
using wire nuts ( not supplied ). White wire joins to white,
black to black. The bare copper ground wire joins to either
a bare or green wire from the ceiling, or may be attached
to a metal
junction box.
3. Secure the monopoint cover to the cross bar using the
colored screws (supplied).
INSTALLING TRACK FIXTURE:
NOTE: on one side of the monopoint the opening is
identied with a line, this indicates the side with two
contacts, to correspond to the contacts on the track head.
On the track xture, pull down on the adapter case while
pushing the contacts into the opening and turning 90 degrees.
WAC Lighting
www.waclighting.com
Phone (800) 526.2588 • Fax (800) 526.2585
WAC Lighting retains the right to modify the design of our products at any time as part of the company's continuous improvement program. JULY, 2014
Headquarters/Eastern Distribution Center
44 Harbor Park Drive • Port Washington, NY 11050
Phone (516) 515.5000 • Fax (516) 515.5050
Western Distribution Center
1750 Archibald Ave • Ontario, CA 91761
Phone (800) 526.2588 • Fax (800) 526.2585
Page 2
INSTALLATION INSTRUCTION
L / J Track Systems Monopoint
LMP, JMP
CAUTION:
Always turn o power at main switch prior to installation to
prevent electrical shock.
• Do not install in damp or wet locations.
• Do not attempt to energize anything other than
a track lighting xture.
OVERVIEW:
1. The LMP Monopoint attaches to a junction box and
UL listed accepts “L” series line volt and low voltage track
xtures, except heavy xture.
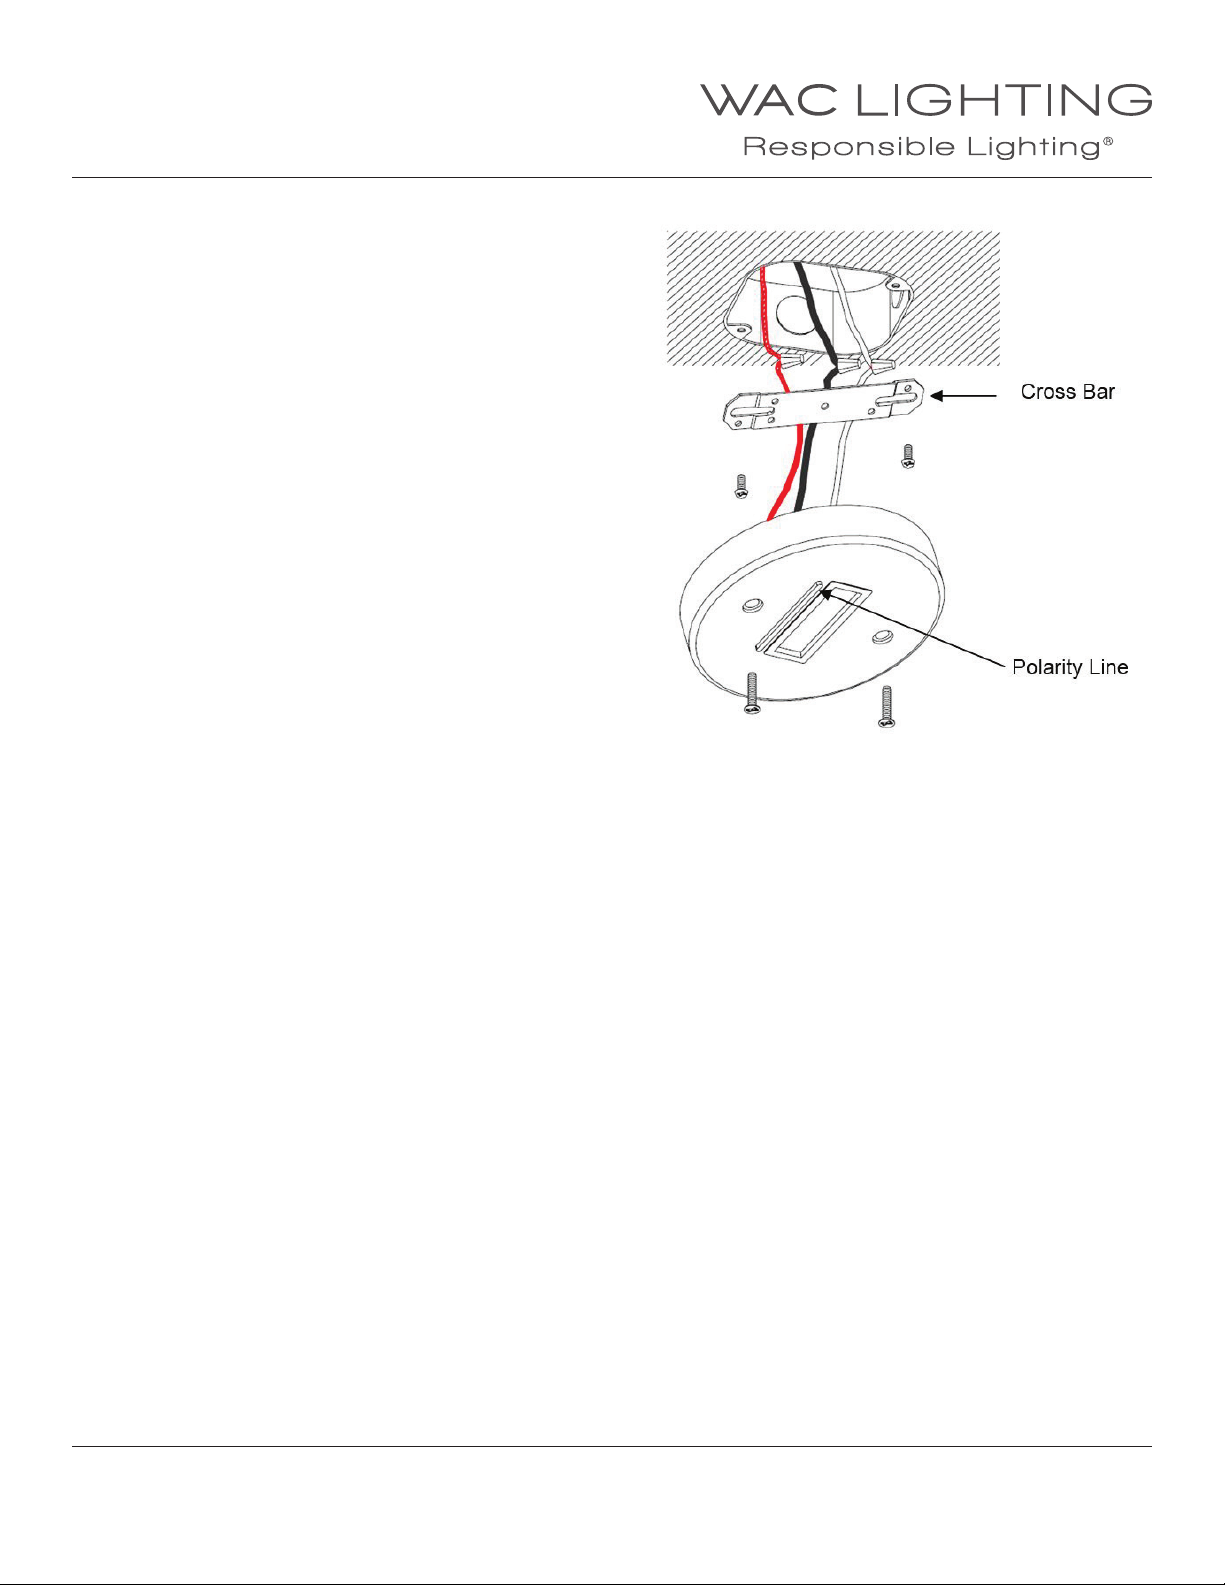
2. Attach the cross bar to a junction box using the screws
supplied with the J-box. The screws go through the slotted
holes to allow for adjustment.
3. Connect wires from the monopoint to the ceiling wires
using wire nuts ( not supplied ). White wire joins to white,
black to black. The bare copper ground wire joins to either
a bare or green wire from the ceiling, or may be attached to
a metal junction box.
4. Secure the monopoint cover to the cross bar using the
colored screws (supplied).
INSTALLING TRACK HEADS:
Note: on one side of the monopoint the opening is identied
with a line, this indicates the side with two contacts,
to correspond to the contacts on the track head.
Mount track head as you would to a track head. Pull down on
the adapter case while pushing the contacts into the opening
and turning 90 degrees.
*Approved for use with both line and low
voltage track heads however the look of line
voltage track heads are preferred.
For other low voltage models, see section on
“Surface Mount” track heads.
WAC Lighting
www.waclighting.com
Phone (800) 526.2588 • Fax (800) 526.2585
WAC Lighting retains the right to modify the design of our products at any time as part of the company's continuous improvement program. JULY, 2014
Headquarters/Eastern Distribution Center
44 Harbor Park Drive • Port Washington, NY 11050
Phone (516) 515.5000 • Fax (516) 515.5050
Western Distribution Center
1750 Archibald Ave • Ontario, CA 91761
Phone (800) 526.2588 • Fax (800) 526.2585
 Loading...