

V-ZUG Ltd
Washing machine
Adora SLQ WP
Operating instructions

Thank you for choosing to buy one of our products. Your appliance is made to
high standards and is easy to use. Nevertheless, please take the time to read
these operating instructions in order to familiarize yourself with the appliance
and get the best use out of it.
Please follow the safety precautions.
Modifications
Text, diagrams and data correspond to the technical standard of the appliance
at the time these operating instructions went to press. The right to make technical modifications for the purpose of the further development of the appliance
is reserved.
Validity
The product family (model number) corresponds to the first alphanumerics on
the identification plate. These operating instructions apply to:
Model Type Product family
Adora SLQ WA-SLQ WP 11004
Variations depending on the model are noted in the text.
Colour operating instructions can be downloaded from the internet from
www.vzug.com
© V-ZUG Ltd, CH-6301 Zug, 2013
2

Contents
1 Safety precautions 6
1.1 Symbols used ......................................................................................... 6
1.2 General safety precautions .................................................................. 7
1.3 Appliance-specific safety precautions ................................................ 9
1.4 Instructions for use ................................................................................ 10
2 Disposal 13
3 Using for the first time 14
3.1 Where is the identification plate? ........................................................ 14
4 Appliance description 15
4.1 Appliance overview ................................................................................ 15
4.2 Appliance construction.......................................................................... 16
4.3 Operating and display elements ......................................................... 17
5 Programme overview 19
5.1 Main wash programmes ....................................................................... 19
5.2 2 programmes for normally soiled cotton load ................................ 21
5.3 Extra programmes ................................................................................. 21
5.4 Further fabric types ................................................................................ 22
5.5 Additional programmes ......................................................................... 25
5.6 Bio and soap wash ................................................................................ 28
5.7 Separate rinsing / Separate spinning ................................................ 29
5.8 Additional functions ............................................................................... 30
5.9 Favourites ............................................................................................... 31
6 User settings 33
6.1 Adjusting user settings .......................................................................... 33
6.2 Language ................................................................................................. 34
6.3 Time .......................................................................................................... 34
6.4 Hybrid Eco ............................................................................................... 34
6.5 Spin speed .............................................................................................. 34
6.6 AquaPlus .................................................................................................. 35
6.7 Degree of soiling .................................................................................... 35
6.8 Automatic door opener ......................................................................... 36
6.9 Childproof lock ....................................................................................... 36
6.10 Hygiene recommendation .................................................................... 36
6.11 Soft water ................................................................................................. 37
6.12 Multi-component detergent ................................................................... 37
3

6.13 Loosening up the washing ................................................................... 37
6.14 Brightness ................................................................................................ 37
6.15 Button tone .............................................................................................. 38
6.16 Background image ................................................................................ 38
6.17 Silent ......................................................................................................... 38
6.18 Restoring factory settings ..................................................................... 38
7 Washing 39
7.1 Preparing the appliance ........................................................................ 39
7.2 Loading the appliance ........................................................................... 40
7.3 Adding washing detergent ................................................................... 41
7.4 Selecting a programme ........................................................................ 44
7.5 Selecting whites and coloureds programmes .................................. 45
7.6 Selecting another main programme ................................................... 46
7.7 Selecting programmes for normally soiled cotton load .................. 47
7.8 Selecting additional programmes ....................................................... 48
7.9 Opening the appliance door during operation ................................. 51
7.10 Changing selection ................................................................................ 52
7.11 Programme selection with childproof lock activated ...................... 53
7.12 End of programme ................................................................................. 54
7.13 At the end of the wash day .................................................................. 55
8 Care and maintenance 56
8.1 Cleaning the detergent dispenser drawer ......................................... 56
8.2 Cleaning the water inlet filter ................................................................ 57
8.3 Emergency draining ............................................................................... 58
8.4 Cleaning the foreign body trap ............................................................ 59
9 Trouble-shooting 60
9.1 What to do if … ....................................................................................... 60
9.2 Opening the appliance door in the event of a power failure ......... 69
10 Washing tips 70
10.1 Fabric care symbols .............................................................................. 70
10.2 Washing detergent ................................................................................. 70
10.3 General tips ............................................................................................. 70
10.4 Net curtains ............................................................................................. 71
10.5 Saving energy and water ..................................................................... 72
10.6 Unsatisfactory wash results .................................................................. 73
4

11 Spare parts 77
12 Technical data 78
12.1 Dimensions .............................................................................................. 78
12.2 Plumbing in .............................................................................................. 78
12.3 Electrical connection ............................................................................. 78
12.4 Spin speed .............................................................................................. 78
12.5 Consumption data .................................................................................. 79
12.6 Note for testing institutes ...................................................................... 81
12.7 VAS Vibration Absorbing System ........................................................ 81
12.8 Water and energy economy ................................................................. 82
12.9 Automatic energy-saving stand-by ...................................................... 82
13 Notes 83
14 Index 86
15 Repair service 91
5

1 Safety precautions
1.1 Symbols used
Denotes important safety precautions.
Failure to observe said precautions can result in injury or in
damage to the appliance or fittings!
Information and precautions that should be observed.
Information on disposal
Information about the operating instructions
Indicates step-by-step instructions.
– Describes how the appliance reacts to the steps taken.
• Indicates a list.
6

1 Safety precautions
1.2 General safety precautions
• Read the operating instructions before using
the appliance for the first time!
• This appliance can be used by children aged
8 and above and by persons with reduced
physical, sensory or mental capabilities, or
lack of experience and/or knowledge,
provided they are supervised or have been
instructed on the safe use of the appliance
and have understood the hazards involved.
Children shall not play with the appliance.
Cleaning and user maintenance shall not be
undertaken by children without supervision.
7

1 Safety precautions
• If an appliance is not equipped with a mains
cable and a plug or other means for disconnecting from the mains with a contact opening
on each pole complying with the conditions of
overvoltage category III for full isolation, an
isolating device must be incorporated into the
permanently installed electrical installation in
accordance with the installation regulations.
• If the mains cable of this appliance is
damaged, it must be replaced by the manufacturer or its Customer Services or a similarly
qualified person in order to avoid hazard.
8

1 Safety precautions
1.3 Appliance-specific safety precautions
• Children under 3 years of age must be kept
away unless constantly supervised.
• The appliance is only to be used with the
recommended vaporizing medium. The use of
other substances may give rise to a toxic or
fire risk.
• The appliance has a maximum dry load
capacity of 8 kg.
CAUTION
• If this appliance is supplied from a cord extension set or electrical portable outlet device,
the cord extension set or electrical portable
outlet device must be positioned so that it is
not subject to splashing or ingress of moisture.
9

1 Safety precautions
1.4 Instructions for use
Before using for the first time
• The appliance must be installed and connected to the electricity supply in
accordance with the separate installation instructions. Have a qualified fitter/
electrician carry out the necessary work.
• Ensure access to the place of disconnection (e.g. socket outlet, wall switch,
fuse) and the water tap.
• The transportation lock must be removed. Failure to remove the transportation locks can result in damage to the appliance or apartment or laundry
room fittings.
Correct use
• The appliance is suitable for washing home textiles with water and regular
washing machine detergent. It is designed for use in the home and for the
above-mentioned purpose only. No liability is assumed for any damage
caused by improper or incorrect use.
• Any repairs, modifications or manipulations to the appliance, especially any
electrically live parts, may only be carried out by the manufacturer, its
Customer Services or a similarly qualified person. Repairs if carried out
incorrectly could cause serious injury or damage to the appliance and
fittings as well as affect the functioning of the appliance. If the appliance is
not working properly or in case of a repair order, follow the instructions
given in the 'Repair service' section. If necessary, please contact our
Customer Services.
• Use original spare parts only.
Note on use
• If the appliance is not operating properly, disconnect it from the power
supply immediately.
• To protect your washing, follow the fabric care symbols and the hints and
advice in the 'Washing tips' section.
10

1 Safety precautions
Caution: Burns hazard!
• Textiles that have been cleaned, treated or soaked with flammable chemicals, detergents or solvents such as benzene, alcohol, stain remover, oil,
paint, wax, etc. are not to be washed in the appliance. Fire or explosion
hazard! Wash materials containing such substances first by hand with water
or allow the solvent to evaporate completely.
Caution: Risk of injury!
• Ensure the washing drum has stopped moving before reaching inside. Do
not touch the washing drum while it is still in motion – risk of serious injury!
• Disconnect the appliance from the mains before carrying out maintenance
work.
Caution: Risk to life!
• Packaging material, e.g. plastic film and polystyrene, can be dangerous for
children. Danger of suffocation! Keep packaging material away from children.
11

1 Safety precautions
How to avoid damaging the appliance
• Close the appliance door carefully.
• Before closing the appliance door and starting a programme, ensure that
there are no foreign objects or pets in the washing drum, detergent
dispenser drawer or around the foreign body trap. Foreign objects such as
coins, nails, paper clips, etc. can damage parts of the appliance, as well as
the washing.
• During longer periods of absence, turn off the water tap before switching off
the power by pulling out the mains plug. Never pull the mains plug out by
the cable. Please note: the built-in overflow protection is rendered inactive
when the power is switched off.
• When cleaning the appliance make sure no water gets inside it. Use a
moderately damp cloth. Do not spray the outside or the inside of the appliance with water. If water gets inside the appliance, it will cause damage.
• Textiles with metal reinforcements are not to be washed in the appliance
(risk of damage).
• Trainers, diving suits, rucksacks, carpets, etc. are not to be washed in the
appliance.
12

2 Disposal
Packaging
• All packaging materials (cardboard, plastic film (PE) and polystyrene (EPS))
are marked and should, if possible, be collected for recycling and disposed
of in an environmentally friendly way.
Disconnection
• Disconnect the appliance from the mains. With a fixed appliance, this is to
be carried out by a qualified electrician!
Safety
• Disable the appliance to prevent accidents caused by improper use, especially through children playing.
• Pull the plug out of the mains socket or have the appliance disconnected
from the mains by an electrician. Then cut the mains cable off flush with the
appliance.
• Remove or disable the lock on the appliance door.
Disposal
• The old appliance should not be discarded as worthless rubbish. If
disposed of correctly, the raw materials can be recovered for recycling.
• The symbol on the identification plate warns that the appliance may not
be disposed of in normal household waste.
• The appliance must be disposed of in accordance with local regulations on
waste disposal. For more information on the handling, disposal and recycling of the product, please contact the local authorities, the local recycling
facilities for household waste or the retailer from whom you purchased the
appliance.
Note on heat pump
This appliance is CFC-free (the cold circuit contains R134a).
13
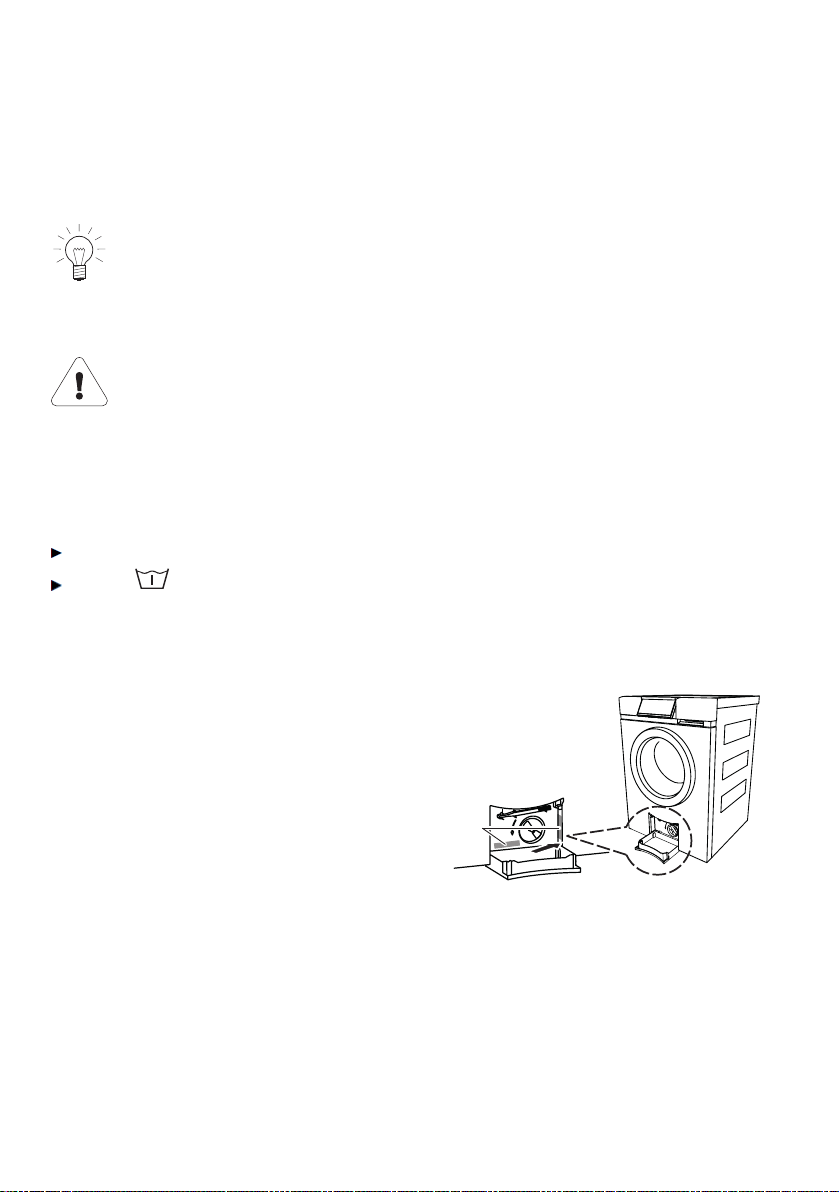
3 Using for the first time
1*
The appliance must be installed and connected to the electricity supply in
accordance with the separate installation instructions. Have a qualified fitter/
electrician carry out the necessary work.
The appliance was tested with water before being shipped. There may
therefore still be traces of water left in the appliance.
Transport lock
Before using the appliance for the first time, the transportation lock
must be removed (3 screws with washers at the back of the appliance), in order to avoid damage to the appliance.
Running the first wash cycle without any washing
Run an empty wash cycle to remove any residues from the manufacturing
process.
Add a little washing detergent to compartment II.
Select coloureds 60 °C with pre-wash.
3.1 Where is the identification plate?
1
Identification plate with serial number
(FN)
* Depending on the serial number (FN)
Note down the serial number (FN) of your appliance on the back page of
these operating instructions.
14

4 Appliance description
4.1 Appliance overview
• Load capacity: 8 kg dry washing
• Programmes for 14 different types of textiles
• 2 programmes for normally soiled cotton load
• 4 extra programmes
• 6 favourite programmes
• Additional programmes
– Hybrid Eco – Anti-mite
– Sprint – AquaPlus including skin protection
– Easy care – Delayed start
– Pre-wash – Soaking
– Steam anti-crease – Soap wash
– Spin-speed setting including
stop after rinsing
– Programmes for lightly to
heavily soiled washing
• Additional functions
• Sensors for optimizing the wash cycle
• Automatic energy-saving stand-by
• TouchDisplay
• Automatic door opener
• Language selection
• Childproof lock
• Aquastop with anti-leak protection
• Heat pump heater
Being equipped with a heat pump, the appliance is exceptionally energy efficient. It sounds different to traditional washing machines and this is solely due
to innovative technology.
– Bio wash
15
1
2
3
4
5
6
7
8*
10
9
13
12
11
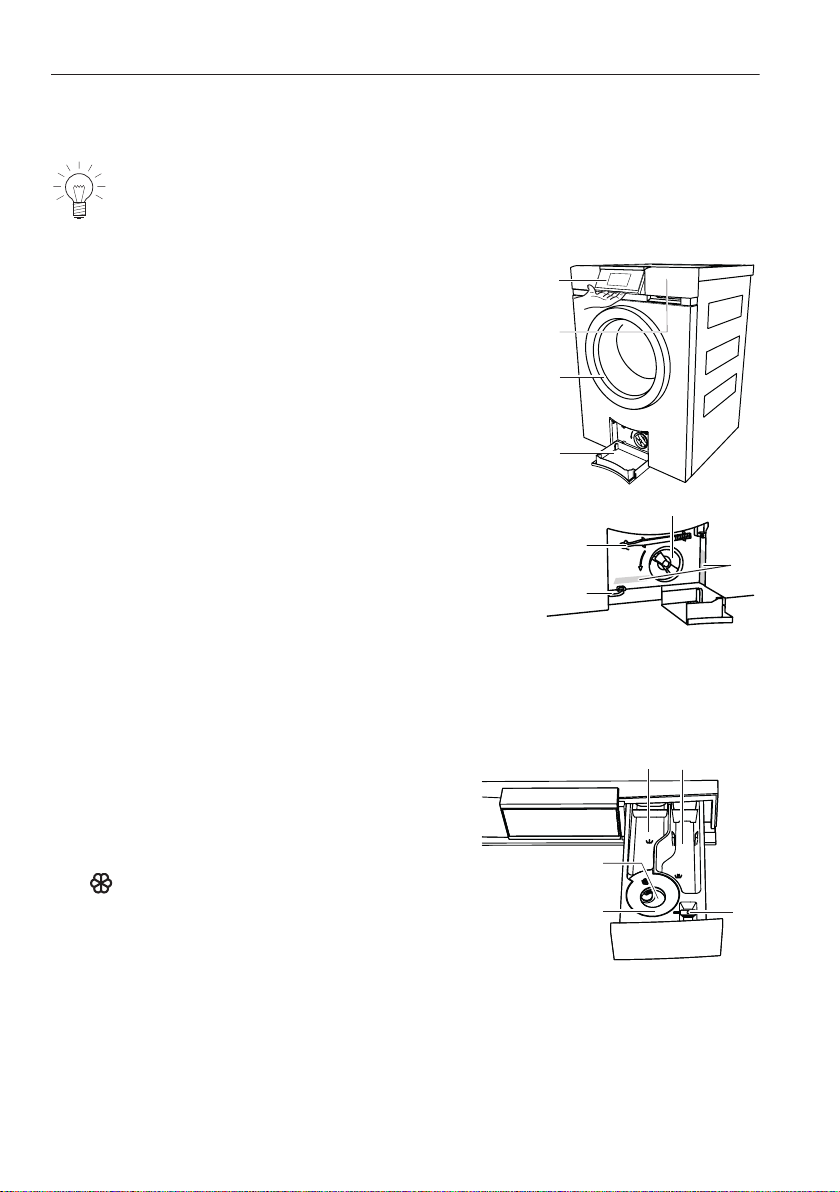
4 Appliance description
4.2 Appliance construction
The appliance door can be set to open to the left or to the right. Our
Customer Services can make the necessary adjustments to the appliance.
1
Operating and display elements
(pivoting operating panel)
2
Detergent dispenser drawer
3
Appliance door
4
Drain tray
5
Foreign body trap
6
Emergency door release tool
7
Emergency door release
8
Identification plate / Serial number (FN)
* Depending on the serial number (FN)
Detergent dispenser drawer
9
Pre-wash detergent, compartment I
10
Main wash detergent, compartment II
11
Liquid detergent flap
12
Siphon for fabric conditioner (softener)
13
Fabric conditioner (softener), compartment
16
*
4 Appliance description
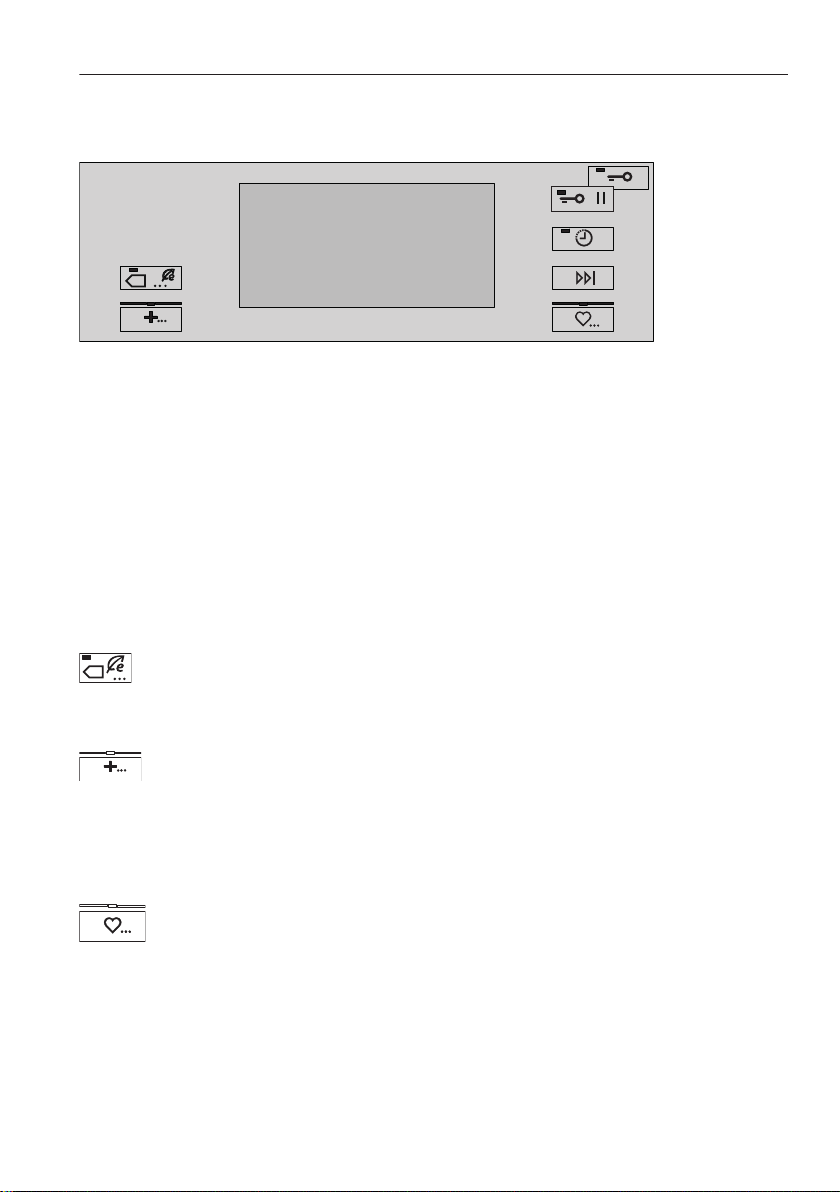
4.3 Operating and display elements
TouchDisplay
All available functions are displayed on the TouchDisplay and can be selected
directly by pressing the corresponding symbol or text
• Programme name with duration • Delayed start
• Programme end time • User settings
• Programme progress with time
remaining
• Additional functions • Further information
• Hints and trouble-shooting
Programmes for normally soiled cotton load
• 40 °C Coloureds normal
• 10 °C Coloureds normal
Extra programmes
• Steam anti-crease
• Proofing
• Appliance hygiene
• Spinning
Favourites
17
4 Appliance description
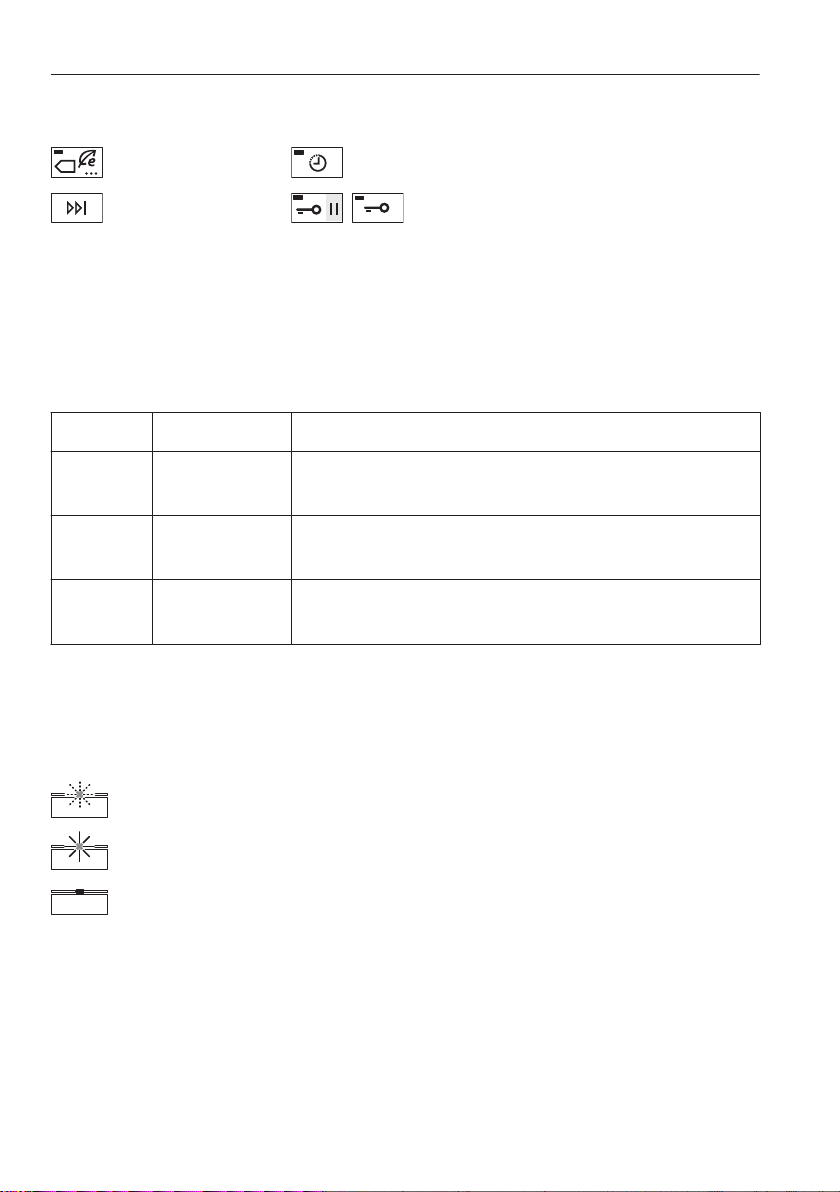
Additional function/Additional programmes
Hybrid Eco Delayed start
Fast forward /
End of programme
/
* Pause / Door opener or Door opener
* Depending on the serial number (FN)
Button state
The buttons arranged on the TouchDisplay have three different operating
states.
Symbol Background
Bright Dark
Selectable function
Programme or function can be selected.
Bright Blue
Function selected/changed
Programme or function is active.
Dark Dark
Non-selectable function
Programme or function is switched off.
Indicator lights
Certain of the buttons to the left and right of the TouchDisplay are equipped
with an indicator light.
18
Indicator light flashes
Programme or function can be selected.
Indicator light is illuminated
Programme or function is active.
Indicator light is dark
Programme or function is switched off.

5 Programme overview
95
70
60
40
5.1 Main wash programmes
To select the right programme, follow the fabric care symbols on the
labels of the wash items, e.g. 40.
Whites 95 °C
1–8 kg
White cottons, linens with the 95 fabric care symbol e.g. bed and
table linen, towels, white or colour-fast underwear.
Coloureds 70 °C
1–8 kg
Energy-saving programme for coloured cottons with the 95 fabric
care label.
Coloureds 60 °C
1–8 kg
Coloured cottons with the 60 fabric care symbol e.g. bright blouses,
overalls, shirts, bed linen.
Coloureds 40 °C
1–8 kg
Coloured cottons and mixed washing with the 40 fabric care symbol
e.g. coloured sweatshirts, t-shirts.
19
30
20
cold
1– 6
5 Programme overview
Coloureds 30 °C
1–8 kg
Coloured cottons and mixed fabrics with the 30 fabric care symbol
e.g. t-shirts.
Coloureds 20 °C
1–8 kg
Energy-saving programme for lightly soiled textiles with fabric care
symbols 30, 40, 60 or 95.
Coloureds cold
1–8 kg
Refresh programme without heat. Suitable for washing new textiles
with the 30, 40, 60 or 95 fabric care label for the first time.
Favourites
20
Six programmes that can be freely put together and saved
.
40
cold
5 Programme overview
5.2 2 programmes for normally soiled cotton load
40 °C Coloureds normal
+
The recommended programme for washing normally soiled cottons
at rated load capacity.
10 °C Coloureds normal
+
The programme with the lowest possible temperature setting for
washing cottons. It corresponds to the 40 °C Coloureds normal
programme without the water being heated. This programme has
the same water level as the 40 °C Coloureds normal programme.
5.3 Extra programmes
Steam anti-crease
Dry, creased washing that can be washed at min. 40°C is partially
uncreased and made damp, ready to iron.
1–1.5 kg
Proofing
For starching or proofing fabrics. The starching or proofing agent can
be added to the fabric conditioner compartment .
Appliance hygiene
Without any washing. A small amount of water is heated up to
around 80 °C and the steam produced sharply reduces the germ
count.
Spinning
1–8 kg
1–3 kg
0 kg
21

5 Programme overview
5.4 Further fabric types
Shirts
Maximum 7 shirts/blouses
Programme is optimized for minimizing creasing. Programme contains steam
anti-crease. Select temperature according to fabric care symbol.
Woollens
1–2.5 kg
Gentle wash for woollens and other delicates. Only for woollens with a felt-free
finish and labelled as «machine washable».
Hand wash
1–2 kg
Very gentle wash for items labelled with the fabric care symbol.
Down
1 item of washing, max. 1 kg
Programme is optimized for the particular wetting characteristics of down
fabrics.
Short spin at the beginning of the programme to get rid of any air in down
textiles.
Intermediate spinning for optimal removal of water. Select temperature
according to fabric care symbol.
Add the detergent to the detergent dispenser drawer. Do not use a
dosing ball.
Outdoor garments
1–3 kg
Programme for waterproof and breathable clothing. Higher water level during
washing and spinning. Intermediate spinning for optimal removal of water.
Select temperature according to fabric care symbol.
22

95
5 Programme overview
Silks
1–1.5 kg
Programme is optimized for delicate silk articles. Spin speed is reduced to
minimize creasing. Select temperature according to fabric care symbol.
Underwear
1–3 kg
Very gentle programme for washing delicates, such as underwear, with the
fabric care label. The intermediate spin is significantly reduced and the
final spin has a lower spin speed. Select temperature according to fabric care
symbol.
Baby garments
1–5 kg
Very thorough rinsing for the protection of sensitive baby skin. If a
temperature is selected, the programme contains a pre-wash. Select temperature according to fabric care symbol.
Denim
1–4 kg
Optimized for colour run from denim. Select temperature according to fabric
care symbol.
WetClean
1–1.5 kg
For all fabrics labelled as washable. Most gentle treatment possible through
applying a gentle rocking motion and a fine spray of water.
23
5 Programme overview
Net curtains
1–2 kg
Reduced washing action for very gentle treatment. Higher water level during
washing and spinning. The washing remains lying in the water after the final
rinse (stop after rinsing).
Press the button 1×.
– Start draining with spinning at 400 rpm.
Press the button 2×.
– Start draining without spinning.
Select temperature according to fabric care symbol.
Black garments
1–4 kg
Rinsing is optimized through a higher water level and extended rinsing. Select
temperature according to fabric care symbol.
Black hand wash garments
1–2 kg
Very gentle wash for items labelled with the fabric care symbol. Rinsing is
optimized through a higher water level and extended rinsing time. Select
temperature according to fabric care symbol.
24

5 Programme overview
5.5 Additional programmes
Hybrid Eco
The appliance is equipped with two heating systems:
• Heat pump heater (approximately 1 kW heat output) with very low
energy consumption. Suitable for heating up to 50 °C.
• Conventional auxiliary heater (approximately 2.8 kW heat output)
with normal energy consumption.
Energy efficiency can be set to one of three levels:
Optimal energy efficiency
Up to a wash temperature of around 45–50 °C only the heat pump is used for
heating; the set temperature is also reduced. The extended washing time,
however, ensures the washing performance is maintained. This means that the
main wash takes significantly longer than with the «Good energy efficiency» or
«Very good energy efficiency» variants. The energy consumed to heat the
water is also significantly lower and means a saving of around 50–70 %
compared to a conventional washing machine without a heat pump.
Very good energy efficiency
Up to a higher wash temperature only the heat pump is used for heating. Only
from around 40–50 °C (depending on the programme) does the conventional
heater come on. This means that it takes longer to reach the desired wash
temperature. The energy consumed to heat the water is significantly lower
(40–50 %) than with conventional washing machines without a heat pump.
Good energy efficiency
At the start of a programme only the heat pump is used briefly for heating.
From a wash temperature of around 20 °C (depending on the programme)
both heating systems, and thus a higher heat output, are used to heat the
water. This means that the desired wash temperature is reached quickly. The
energy consumed to heat the water is around 10–20 % lower than with
conventional washing machines without a heat pump.
25

5 Programme overview
Sprint
Short programme for lightly soiled washing
• Programme duration for 2.5 kg wash load with Hybrid Eco «good»
+ : 26 minutes
+ : 28 minutes
+ : 29 minutes
+ : 39 minutes
• 2 instead of 3 rinsing cycles
Add a small quantity of washing detergent.
A large washing load or too much washing detergent can significantly
lengthen the programme duration.
Easy care
For washing requiring very gentle treatment
• Reduced washing action
• Higher water level during washing and rinsing
• Reduced spin speed: 800 rpm
• Optimum wash load: max. 3.5 kg
Pre-wash
Suitable for heavily soiled washing
• Programme duration extended: about 15 minutes
26

Steam anti-crease
The steam finish at the end of the programme significantly reduces
creasing in the washing. Recommended for items that crease easily,
e.g. shirts and blouses.
• The washing is warm and should be hung up immediately to dry –
for easy ironing – or tumble dried.
• To avoid renewed creasing at the end of the programme, the
washing is loosened up for an extended period (min. 60 minutes).
The washing can be unloaded at any time.
5 Programme overview
– Press the
• Programme duration extended: about 20 minutes
• Limited spin speed: max. 1000 rpm
• Optimum wash load: max. 2 kg
Degree of soiling
Adjustment to the degree of soiling of the washing
«Soiling light»
• Suitable for lightly soiled washing
«Soiling medium»
• Wash time extended: 25–80 minutes
«Soiling heavy»
• Extended wash time
• Higher water level during washing
• Additional rinsing cycle
«Soaking»
Press the corresponding button in the TouchDisplay to set the
soaking time (0.5–6 hours)
Anti-mite
or button and unload the washing.
Can be selected with 60, 70 and 95 only.
• Suitable for individuals with an allergy to mites
– The main wash is extended and intensified at the temperature
set. The mites are killed and the allergens are rinsed out thoroughly.
27

5 Programme overview
AquaPlus
There are 5 different settings for rinsing intensity.
«Standard»
• Normal water level
«More water»
• The water level is increased by around 1–3 cm during the main wash
and each rinse cycle.
«+1 rinse»
• An extra rinse cycle is added to each programme.
«More water +1 rinse»
• An extra rinse cycle is added to each programme and the water level
is also increased by around 1–3 cm during the main wash and each
rinse cycle.
«Skin protection»
• Two extra rinse cycles are added to each programme and the water
level is also increased by about 5 cm during each rinse cycle. This
function is particularly suitable for people with sensitive skin or with a
suspected allergy to washing detergent.
5.6 Bio and soap wash
Bio wash (alkaline detergent + bleach)
The programme sequence is adapted for the use of multi-component detergents (alkaline detergent + bleach). First the alkaline detergent with softener
(compartment II) is added to the wash and the suds are heated up to 40 °C.
Then after around 6 minutes the bleach (compartment I) is added.
Soap wash (softener + soap detergent)
The programme sequence is adapted for the use of multi-component detergents (softener + soap detergent). The softener (compartment I) and the soap
detergent (compartment II) are added to the wash one after the other.
28

Selecting bio or soap detergent
Multi-c omponent
detergent
Multi-c omponent
detergent
Multi-component detergent
Status: Off
Multi-c omponent
detergent
Multi-c omponent
detergent
Multi-component detergent
Status: Off
Select wash detergent
Stan dard With pre -wash
Soap wash Bio wash
In user settings, set the «multicomponent detergent» setting to
status ON and confirm with .
5 Programme overview
Select main programme.
Press the button.
– The display shown adjacent
appears.
Press the desired detergent type.
5.7 Separate rinsing / Separate spinning
It is possible to skip parts of the programme selected.
Select main programme according to fabric care labels.
Press the button 1×.
– Rinsing and final spin are selected.
Press the button 2×.
– Final rinse / Conditioning and final spin are selected.
Press the button 3×.
– Separate final spin is selected.
29

5 Programme overview
5.8 Additional functions
Function/Symbol Uses
Spin speed
Delayed start Take advantage of cheap-rate electricity (setting
Fast forward /
End of programme
The spin speed can be changed in steps of 200 rpm
(1200, 1000, 800, 600, 400 rpm, stop after rinsing,
1600, 1400 rpm). Delicates can thus be spun at a
lower spin speed. However, this increases the drying
time (greater energy consumption for tumble drying).
range of up to 24 hours). When the time set is
reached, the programme starts automatically.
Press the button to skip individual parts of a
programme at any time during the programme
sequence.
Pause / Door opener*
Pressing the button 1× when a programme is
running will cause the programme to pause. Pressing
the button again will cause the appliance door to
open provided the appliance is in a state (depending
on the water level, temperature, speed) that allows
this.
Press the «Continue programme» button in the
TouchDisplay to end the pause and resume the
programme.
* Depending on the serial number (FN)
30

5.9 Favourites
Define favourites
empty
empty
empty
Coloureds
Sele ct temperature
cold
Simplifies selecting frequently used programmes. You can compile
your own favourites. Favourites are easy to start.
A maximum of six favourites can be saved.
The appliance door has to be open to define, change or delete a
favourite.
Defining favourites
Open the appliance door.
Press the button.
– The adjacent screen appears in
the TouchDisplay:
Press one of the 6 favourite
buttons.
– The TouchDisplay switches to
the adjacent view.
5 Programme overview
Select the desired main programme, additional programmes and additional
functions.
Then press the button again.
Press the Yes button.
– The defined favourite is saved.
Press the No button.
– The favourites programme remains empty.
31

5 Programme overview
Starting your favourite
Close the appliance door.
Press the button.
Press the desired favourites programme.
– The programme starts automatically after about 20 seconds.
Changing your favourite
Open the appliance door.
Press the button.
Press the desired favourites programme.
Press the Change button.
Make the desired changes.
Press the button.
Press the Yes button.
– The changes are saved.
Press the No button.
– The changes are discarded.
Deleting a favourite
Open the appliance door.
Press the button.
Press the desired favourites programme.
Press the Clear button.
– The favourites programme is deleted.
32

6 User settings
Extra
SpinningAppl ianc e hygiene
ProofingSteam anti-crease
Extra
SpinningAppl ianc e hygiene
ProofingSteam anti-crease
Settings
Language
English
800
3
Hybrid Eco
Settings
Language
English
800
Time
10:3 4
6.1 Adjusting user settings
Providing no programme is running and no error message is displayed, the
user settings can be changed. The procedure is generally the same for all
settings.
Changing user settings
Press the button.
– A selection of extra
programmes appears in the
TouchDisplay.
Press the button.
The first of several pages with user
settings appears.
Press the desired setting to change it.
– A selection of possible levels appears.
Press the desired level and save with .
To go to the other user setting pages:
Press the button.
– The screen changes to the next page.
33

6 User settings
Exiting user settings
To exit user settings:
Press the button
6.2 Language
The language in the TouchDisplay can be changed.
6.3 Time
The time must be reset if the appliance has been disconnected from
the mains for a longer period of time (about 5 weeks).
To ensure the time is stored, the appliance should not be disconnected from the mains supply for at least 30 minutes after making the
settings.
6.4 Hybrid Eco
Energy efficiency can be pre-set to one of three levels.
Optimal energy efficiency
Very good energy efficiency
Good energy efficiency
6.5 Spin speed
Each programme and combination of programmes is
assigned an optimum spin speed at the factory. This
can be adjusted to suit individual needs.
Increasing the spin
speed:
Reducing the spin
speed:
34
To protect delicates, can only be used with suitable
programmes (e.g. whites).
Can be used with all programmes.

6 User settings
6.6 AquaPlus
There are 5 different settings for rinsing intensity.
«Standard»
• Normal water level
«More water»
• The water level is increased by around 1–3 cm during the main wash
and each rinse cycle.
«+1 rinse»
• An extra rinse cycle is added to each programme.
«More water +1 rinse»
• An extra rinse cycle is added to each programme and the water level
is also increased by around 1–3 cm during the main wash and each
rinse cycle.
«Skin protection»
• Two extra rinse cycles are added to each programme and the water
level is also increased by about 5 cm during each rinse cycle. This
function is particularly suitable for people with sensitive skin or with a
suspected allergy to washing detergent.
6.7 Degree of soiling
There are three different pre-settings for degree of soiling.
«Soiling light»
• Suitable for lightly soiled washing
«Soiling medium»
• Wash time extended: 25–80 minutes
«Soiling heavy»
• Extended wash time
• Higher water level during washing
• Additional rinsing cycle
35

6 User settings
6.8 Automatic door opener
If the automatic door opener is switched on, the appliance door opens automatically at the end of the programme. Otherwise it remains closed and can
be opened by pressing the or button.
6.9 Childproof lock
The childproof lock is to prevent children accidentally starting or stopping a programme. When the childproof lock is activated, the appliance can only be operated after first entering a code.
6.10 Hygiene recommendation
It is common nowadays to select programmes with temperatures below 60° C
in order to save energy. These achieve perfectly good results with lightly
soiled everyday washing. Washing almost exclusively with low temperatures
will result in the formation of foul smelling coatings in the appliance. To
prevent this, «hygiene info» indicates when it is recommendable to wash with a
temperature of at least 60° C or to use the hygiene programme.
36

6 User settings
6.11 Soft water
The programmes can be adjusted for use with very soft water.
The slightly reduced wash action prevents excessive foaming. Since the detergent does not rinse out as well with soft water, the amount of water used for
rinsing is increased slightly and an extra rinse cycle is added.
6.12 Multi-component detergent
If this setting is switched on, after programme selection when the button is
pressed a detergent selection display appears. Depending on the desired
detergent, select soap wash (softener and soap detergent), bio wash (alkaline
detergent and bleach) or with pre-wash.
6.13 Loosening up the washing
The loosening-up period at the end of the programme can be set to 4 levels:
• 30 seconds*
• 10 minutes
• 30 minutes
• 6 hours
*Factory setting
The washing can be unloaded at any time during the loosening-up
phase by pressing the or button.
6.14 Brightness
With this function, the readability of the display can be adjusted to the
lighting conditions.
1. Dark
2. Medium
3. Bright
4. Very bright
37

6 User settings
6.15 Button tone
The button tone can be switched on/off.
The button tone for the button cannot be switched off.
6.16 Background image
The background image of the TouchDisplay can be switched off. In this case,
the background is black.
6.17 Silent
The function can also be assigned to the additional
programme. This lengthens the duration of the programmes slightly,
but also makes them quieter because the washing is spun at a lower
spin speed.
6.18 Restoring factory settings
The factory settings can be restored.
Any favourites that have been saved will be deleted.
38

7 Washing
1
1
0
1
0
7.1 Preparing the appliance
Ensure that the foreign body trap 1 is sitting properly.
Plug the appliance in at the mains or turn the wall
switch on.
– The appliance switches on.
Turn on the water tap.
Press the or button to open the appliance
door.
39

Coloureds
Sele ct te mper ature
cold
7 Washing
7.2 Loading the appliance
Load dry washing (max. 8 kg).
• If washing normally soiled whites and
coloureds, fill the washing drum.
• If washing heavily soiled whites and coloureds,
fill the washing drum max. ¾ full.
• If washing easy care cotton fabrics, white and
coloured synthetic fabrics as well as mixed
fabrics, fill the washing drum max. ½ full.
• If washing delicates, woollens, silks, polyacrylics or net curtains, fill the washing drum
max. ¼ full.
For wet loads, halve these load capacities.
To prevent unbalanced spinning, vibration noise and interrupted spinning action, avoid loading the washing drum with any one single,
heavy item.
Close the appliance door (pushing
firmly to)
– The start screen appears
If no programme selection is made within about 20 seconds, all the displays
go out. Touch anywhere on the TouchDisplay at any time to display the start
screen again.
40

7.3 Adding washing detergent
2
3
II
1
3
1
II
2
Pull the detergent dispenser drawer out as
far as it will go.
Powder detergent
If using powder detergent, flap 1 in compartment II must be removed.
Pull flap 1 upwards and out of position 3
and insert in position 2.
Liquid detergent
If using liquid detergent, flap 1 in compartment II must be inserted in position 3.
Pull flap 1 upwards and out of position 2
and insert in position 3.
7 Washing
Do not fill with liquid detergent past the upper mark. Liquid detergent can only
be used for the main wash with programmes without a pre-wash. They are
only suitable for temperatures of up to 60 °C. With 95 °C programmes, liquid
detergents are not as effective as they do not contain bleach.
Liquid detergents are best used with very gentle programmes (e.g.
«Woollens» and «Hand wash»), low-temperature programmes and
programmes with .
41

7 Washing
Liquid detergent and a delayed start
If a delayed start has been selected, after loading the washing the liquid detergent should be added to a dosing aid (e.g. ball). It is important that the liquid
detergent does not spill onto the washing during the delayed start period,
otherwise the washing could be damaged through a possible chemical reaction.
Detergent dosage
Adding too much washing detergent can cause excess foaming,
giving a poor wash result and, in the worst case, causing damage
to the appliance.
The amount of detergent required depends on the degree of soiling as well as
the wash load, the hardness of the water and the product being used. Follow
the detergent manufacturer’s dosing instructions.
The hardness of the water is measured using the French degree of water hardness (° fH) and is subdivided into three categories:
• Soft
• Medium
• Hard
0 °fH to 15 °fH
15 °fH to 25 °fH
over 25 °fH
(NB Use water softener to reduce amount of washing detergent required.)
The local water authorities can provide information on the level of water hardness in your area.
42

Compartment
I
II
Pre-wash detergent Add to compartment I
Main detergent Add to compartment II
Fabric conditioner (soft-
ener)
Bio wash
Alkaline detergent Add to compartment II
Bleach Add to compartment I
Fabric conditioner (softener)
Soap wash
Water softener Add to compartment I
Soap detergent Add to compartment II
Fabric conditioner (softener)
Add to compartment
Add to compartment
Add to compartment
7 Washing
Fabric conditioner
Do not fill with fabric conditioner past the «MAX» mark.
Do not use fabric conditioner if drying the washing in a tumble dryer. Tumble
drying automatically leaves fabrics soft and fluffy.
Soap detergent (softener + soap detergent)
Select the additional «Soap wash» programme to wash with soap detergent.
Since soap binds with lime, soap detergent should only be used when the
water is soft or moderately hard (up to 25 °fH) and limescale protection is
added. Soap scum can otherwise form and build up in the laundry and the
appliance. Further, limescale build-up on the tub heating element can result in
damage to the appliance.
43

Coloureds
Sele ct te mperatur e
cold
7 Washing
Dyeing textiles
Textiles can be dyed in the appliance using suitable dyeing agents. Please
follow the manufacturer’s safety instructions and warnings carefully.
Each wash programme starts with brief draining and for this reason
liquid dye components should be added after this.
After adding the wash detergent
Push the detergent dispenser drawer back in.
Select main programme.
7.4 Selecting a programme
«Press and go»
• After being switched on, the appliance is ready for the user to select a
coloureds programme.
• Press one of the temperature buttons
displayed to select the coloureds
programme with the corresponding
temperature.
• All the necessary settings for the programme are assigned automatically.
• The TouchDisplay changes to another view where additional functions can
be selected or deselected by pressing the corresponding button.
• If no other button is pressed within the next 20 seconds, the coloureds
programme selected starts automatically.
Use the programme overview to determine which programme is the
most suitable for your washing.
44

Coloureds
Sele ct te mperatur e
cold
1 h 0 0
16 : 13
60°C Coloureds
800
1 h 0 0
end 16 : 13
60°C
800
7 Washing
7.5 Selecting whites and coloureds programmes
Close the appliance door.
– The following screen appears in
the TouchDisplay.
Press the desired temperature
button, e.g. 60 °C.
– The TouchDisplay changes to a
view where all possible additional
functions can be selected or
deselected by pressing the corresponding button.
– The programme selected, the likely duration (hours/minutes) and the
end time are displayed.
– The indicator lights for the selectable and buttons flash.
– If no other button is pressed within the next 20 seconds, the coloureds
programme selected starts automatically.
Press the button at the top left of the TouchDisplay or press the or
button at any time to cancel the programme selected.
45

Coloureds
Sele ct te mperatur e
cold
Fabric sel ection
Colo ured s
Hand washWolle ns
Shir ts
Fabric sel ection
Colo ured s
Hand washWolle ns
Shir ts
7 Washing
7.6 Selecting another main programme
Close the appliance door.
– The following screen appears in
the TouchDisplay.
Press the button at the top right
of the TouchDisplay.
– The first of several pages with
fabric selection appears.
Press the required type of fabric.
– The TouchDisplay switches back again to the temperature selection
page.
– The selected fabric type is displayed.
– Only temperatures suitable for the fabric type selected are available for
selection.
or:
Press the button.
– The screen changes to the next page of fabric selection.
or:
Press the button.
– The TouchDisplay switches back again to the temperature selection
page. The whites/coloureds programme remains selected.
46

cold
Coloureds nor mal
Select temper ature
cold
7 Washing
7.7 Selecting programmes for normally soiled cotton load
Close the appliance door.
Press the flashing button.
– The adjacent screen appears in
the TouchDisplay:
Press the 40 button to select the
programme 40 °C Coloureds
normal.
or:
Press the
button to select the
standard 10 °C Coloureds normal.
With these programmes, it is not possible to change the additional
functions. Only delayed start is selectable.
Data of programme 40 °C Coloureds normal
Load capacity 8 kg
Programme duration 3h04
Energy star rating 5.0
Energy consumption 0.51 kWh/cycle
Water star rating 4.5
Water consumtion 65 l/cycle
Residual moisture 52 %
47

1 h 00
16 : 13
60°C Coloureds
800
1 h 00
end 16 : 13
60°C
800
AquaPlus
+ 1 rinse+ WaterStandard
Skin protection + Water + 1 rinse
7 Washing
7.8 Selecting additional programmes
After selecting fabric type, e.g.
coloureds, and wash temperature, e.g. 60 °C, the display
adjacent appears:
Sprint Pre-wash
Easy care Steam anti-crease
Anti-mite
Press the desired button in the TouchDisplay.
– The button changes its colour from dark «selectable» to blue «selected».
– The new programme duration and programme end time are displayed.
AquaPlus
Spin speed
Degree of soiling
Press the desired button, e.g.
AquaPlus, in the TouchDisplay.
– The TouchDisplay switches
to the adjacent screen:
– Alternatives to the corresponding additional function are displayed. The
pre-selected state is marked blue.
Press the desired setting.
– The setting is immediately accepted.
– The TouchDisplay switches back again.
48

Hybrid Eco
Energy efficiency
very good
Energy efficiency
good
Energy efficiency
optimal
1h 30
1h 30
1h 30
7 Washing
– The additional function that has been changed is shown as «selected»
blue and the corresponding setting is displayed.
– The new programme duration and programme end time are displayed.
Selecting level of Hybrid Eco
Press the Hybrid Eco button
while the indicator light is flashing.
– The TouchDisplay switches to
another view: The pre-selected
state is marked blue.
Press the desired setting.
– The setting is immediately accepted.
– The TouchDisplay switches back again.
– The changed setting , or is displayed green in the status line.
– The new programme duration and the programme end time appear in
the TouchDisplay.
Depending on the main programme selected, not all of the levels
above will be available for selection.
49

21 0 3
End of programme
7 Washing
Selecting a delayed start
Delayed start
Press the button while the
indicator light is flashing.
– The TouchDisplay switches to
the adjacent screen:
– The digit which can be changed is displayed in orange.
– After a digit has been entered, the orange marking switches automati-
cally to the next digit.
Enter the desired programme end time.
Confirm with (or with back to additional function selection without
delayed start).
– The TouchDisplay switches back again to additional function selection
and goes dark.
– The programmed end time and the calculated start time of the
programme is displayed.
– The programme starts automatically when the start time set is reached.
Washing can be added at any time. The desired end time can be
changed at any time by pressing the button and entering another
programme end time.
50

7 Washing
Selecting separate rinsing / separate spinning
Select programme.
Press the button 1×.
– The programme starts from rinse.
Press the button 2×.
– The programme starts from last rinse.
Press the button 3×.
– The programme starts from final spin.
7.9 Opening the appliance door during operation
The appliance door can only be opened if the water level and temperature are
still low and there is no spinning in progress. As long as the indicator light for
the or button is illuminated, the appliance door can be opened.
For appliances with the button
Press the button 1×.
– The appliance changes over to the «Pause» mode.
Press the button again.
– The appliance door opens.
Add or unload wash items.
Close the appliance door.
– The programme is resumed.
For appliances with the button
Press the button.
– The appliance door opens.
Add or unload wash items.
Close the appliance door.
– The programme is resumed.
In the event of a power failure, the appliance door can only be opened
using the emergency door release.
The programme memory ensures that the programme sequence is
resumed after a power failure.
51

7 Washing
7.10 Changing selection
During programme selection
Press the or button.
– All settings are cleared.
Press the button.
– The changes at the active level are not accepted.
– The TouchDisplay switches back to the previous screen.
After a programme has started
The spin speed and temperature can still be changed. To change any other
settings, the programme must be aborted.
Aborting a programme
Press the button repeatedly until the «Draining» part of the programme
appears in the TouchDisplay.
– This part of the programme cannot be skipped and will be carried out in
full.
52

0 0 0
Childproof lock
Code
731
Childproof lock
Code
731
7 Washing
7.11 Programme selection with childproof lock activated
How to switch the childproof lock on/off is described in 'User settings'.
Close the appliance door
– The following display appears:
One after the other, press the digits 7, 3, 1. Confirm with .
– A programme can now be selected.
– If no programme selection is made within 30 seconds, the childproof
lock is activated again.
Aborting a programme
Press the button
– The above display appears again.
– Enter the code to override the childproof lock.
Press the button again until the «Draining» part of the programme
appears in the TouchDisplay.
53

7 Washing
7.12 End of programme
Loosening up the washing
Shortly before the end of the programme, the washing is loosened up. If steam
anti-crease has been selected, the loosening-up period is extended to about
60 minutes to prevent further creasing.
Press the or button to unload the washing at any time during
the loosening-up phase.
With «Automatic door opener OFF»
When the programme has finished, the following
appears in the TouchDisplay for about 20 minutes: End
of programme
Press the or button.
– The appliance door opens and the washing can be unloaded.
In the event of a power failure, the appliance door can only be
opened using the emergency door release.
With «Automatic door opener ON»
• The appliance door opens automatically at the end of the programme.
The washing can be unloaded.
54

Hygiene
recommendation
- At least 60°C programme
or select appliance hygiene
Hygiene
recommendation
- At least 60°C programme
or select appliance hygiene
7 Washing
With «Stop after rinsing»
The washing remains lying in the water after the final rinse. The water must be
drained off before the washing can be unloaded.
Press the button 1×.
– The washing is spun at the spin speed set for the programme selected.
Press the button 2×.
– Draining without spinning.
With the hygiene recommendation display
One of the next times you wash, run
a minimum 60 °C wash programme
or the appliance hygiene
programme.
7.13 At the end of the wash day
Clean the detergent dispenser drawer if necessary.
After finishing washing for the day, remove any
deposits or foreign bodies from out of the door seal
Push the appliance door to, but do not close.
– This allows the washing drum and the door seal
to dry.
55

8 Care and maintenance
2
1
4
l
3
2
Using the correct dosage of detergent will automatically clean the inside of the
appliance. Immediately wipe away all traces of detergent with a soft cloth to
avoid staining.
8.1 Cleaning the detergent dispenser drawer
If the correct dosage of detergent is used, the compartments in the detergent
dispenser drawer are cleaned by the water flowing in. Wash out the detergent
compartments if particularly soiled.
Cleaning the detergent compartments
Pull the detergent dispenser drawer 1 out
as far as it will go, push the release lever
4 to the left and then remove the drawer
completely.
Wash out the detergent compartments.
Clean the duct under the pre-wash detergent compartment l.
Cleaning the siphon and suction tube
Pull the siphon 2 in the fabric conditioner
compartment up in the direction of the
arrow.
Clean the siphon 2 and suction tube 3.
Replace the siphon correctly.
56

8.2 Cleaning the water inlet filter
1
To avoid blockages, the filter 1 in the water inlet must
be periodically checked and, if necessary, cleaned.
The water inlet should be tested for leaks following maintenance work.
8 Care and maintenance
57

1
1
1
2
1
8 Care and maintenance
8.3 Emergency draining
The water in the appliance may be hot. Scalding hazard! Allow to
cool before emergency draining.
In the event of a blocked water outlet or drain pump, a malfunction
or a power failure, if there is water still in the appliance it must be
drained off as follows:
Open the drain tray 1 by pressing it at
the bottom.
or:
Open the drain tray 1 with the liquid
detergent flap.
Fold the drain tray 1 right down.
– The drain tray also functions as a
receptacle for collecting the water
being drained off.
Release the foreign body trap 2
slightly by slowly turning it anti-clockwise. Steadily drain off the water.
From time to time the drain tray
may have to be emptied.
Close the foreign body trap by turning
it clockwise and remove the drain tray
1 from the front.
Empty the drain tray and then put it
back in position (push it straight in
until it clicks into position).
58
When draining off the water, the drain tray can be removed and a
larger receptacle used in its place. The appliance can hold up to 30
litres of water.

1
23
4
1
8 Care and maintenance
8.4 Cleaning the foreign body trap
The foreign body trap 1 must be periodically cleaned of any deposits.
The foreign body trap should also be cleaned after washing e.g. pet
blankets or other wash items that cause a thick build-up of fluff.
Drain off any residual water, see section on «Emergency draining».
Then turn the foreign body trap 1 anti-clockwise and
remove. Clean thoroughly.
Remove any foreign objects (buttons, coins, etc.).
Check that the drain pump impeller 2 can turn. Use
the emergency door release tool 3 for this.
If the impeller 2 does not turn, please contact
Customer Services.
The impeller 2 may turn stiffly. This is construction related and does
not indicate the presence of any foreign object or defect.
Insert the foreign body trap 1 – with
the arrow-Shaped positioning lug 4
facing upwards – as far as it will go.
Then turn the whole thing clockwise
as far as it will go.
Replace the drain tray and close it
to.
59

9 Trouble-shooting
9.1 What to do if …
This section lists faults that can be solved simply by following the instructions
given. If another fault is displayed or the fault cannot be remedied, please call
Customer Services.
Before calling Customer Services, please note down the error
message in full.
FXX/EXXX FNXXXXX XXXXXX see instructions
... in the display appears
A2 Check water outlet
Possible cause Solution
• The foreign body trap or drain
pump is blocked.
• The drain hose is bent or
kinked.
• The outlet or drain trap is
clogged.
Resolve the cause of the problem.
Cancel the error message by pressing
the button.
Restart the programme.
... in the display appears
A3 Clean foreign body trap
Possible cause Solution
• The foreign body trap is
clogged.
• The circulation nozzle is
clogged.
60
Remove the cause of the problem.
Cancel the error message by pressing
the button.
Restart the programme.

... in the display appears
A5 Spin stop: Unbalanced load
Possible cause Solution
• Large items are unevenly
distributed in the washing
drum.
• Pillows or similar items in the
wash.
• Wash items are tangled.
Wash large and small items together to
reduce the possibility of unbalanced
loads forming.
Remove the pillows.
Spin the washing again.
Spin the pillows separately.
Separate the wash items.
Fasten duvet covers and pillow cases.
Spin the washing again.
... in the display appears
A6 Check foreign body trap
Possible cause Solution
• The foreign body trap is
missing or is not sitting
correctly.
Ensure the foreign body trap is sitting
correctly.
Cancel the error message by pressing
the button.
Restart the programme.
9 Trouble-shooting
... in the display appears
A9 Check water inlet
Possible cause Solution
• The water tap is turned off.
• The mesh filter in the water
connection is clogged.
• Interruption in water supply.
• The water pressure is too low.
Remove the cause of the problem or
wait until the water supply is restored.
Cancel the error message by pressing
the button.
Restart the programme.
61

9 Trouble-shooting
... in the display appears
F6/E77 FNXXXXX XXXXXX see instructions
Possible cause Solution
• Related to anti-leak protection.
Turn off the water tap.
Note down the error message in full
(message, F and E number).
Cancel the error message by pressing
the button.
Call Customer Services.
... in the display appears
Possible cause Solution
• Various situations can lead to
an «F» message.
Cancel the error message by pressing
the button.
Switch off the power supply for about
1 minute.
Switch the power supply back on
again and select a new programme.
If the error appears again, note down
the error message in full (message, F
and E number)
Turn off the water supply and switch
off the power supply.
Call Customer Services.
62
If there is still some washing in the appliance:
Carry out emergency draining.
Use emergency door release.
Unload the washing.
Call Customer Services.

... in the display appears
U1/E27 FNXXXXX XXXXXX see instructions
Possible cause Solution
9 Trouble-shooting
• Faulty electrical connection.
• Overvoltage
If the error appears again:
If the error appears again:
... in the display appears
Foam in main wash, rinsing extended
Cancel the error message by pressing
the button.
Switch off the power supply for about
1 minute.
Switch the power supply back on
again and select a new programme.
Switch the power supply off.
Have an electrician check the house
installation.
note down the error message in full
and the serial number (FN) and then
disconnect the power supply.
Call Customer Services.
Possible cause Solution
• If there is very heavy foaming
during the wash cycle, the
programme is automatically
extended by an additional
Reduce the amount of washing detergent used next time.
Adjust the amount of washing deter-
gent used to the water hardness.
rinsing cycle. This improves
the wash results, but also
increases the duration of the
programme.
63

9 Trouble-shooting
... in the display appears
Defective heat pump. Washing at reduced energy efficiency. Still possible.
Possible cause Solution
• Defective heat pump
circuit.
Call Customer Services and have heat pump
checked.
Washing with conventional heater is possible.
... in the display appears
Hygiene recommendation: Select at least a 60 °C programme or appliance
hygiene
Possible cause Solution
• No wash cycle has been
carried out at a tempera-
With one of the next wash cycles carry out
a wash with at least 60° C.
ture of at least 60 °C for
a longer period of time.
or:
Run the «Appliance hygiene» programme
without any washing.
... the programme takes significantly longer than indicated
Possible cause Solution
• Using too much washing
detergent. Lengthening
Reduce the amount of washing detergent
used next time.
the rinsing time.
• Large unbalanced load in
the washing drum.
Wash large and small items together to
reduce the possibility of unbalanced loads
forming.
• Inlet water very cold.
Heating is extended.
64

... in the display appears
Inlet water very cold, heating extended
Possible cause Solution
• Inlet water very cold.
Heating is extended.
... in the display appears
Too many articles, heating extended
Possible cause Solution
9 Trouble-shooting
• Selected programme is
intended for a reduced
washing load. If there are
With the next wash cycle adjust the amount of
articles to the max. washing load (see
'Programme overview').
too many articles, heating
and possibly also the
rinsing will be extended.
… the washing is not spinning or is not being spun properly
Possible cause Solution
• The spin speed set is too
low.
• Too unbalanced a load in
the washing drum. The
wash items cannot be
Increase the spin speed for the next wash
cycle.
Wash large and small items together to
reduce the possibility of unbalanced loads
forming.
more evenly distributed.
• Steam anti-crease was
selected and the appli-
Optimize the appliance set-up according to
the installation instructions.
ance was not standing
level.
65

9 Trouble-shooting
... in the display appears
Large unbalanced load, spin extended
Possible cause Solution
• Large unbalance in the
washing drum. The appliance tries to improve the
distribution of the wash
load. The final spin is
extended.
Wash large and small items together to
reduce the possibility of unbalanced loads
forming.
… vibrating heavily when spinning
Possible cause Solution
• The transportation lock
has not been removed.
• The feet of the appliance
are not properly adjusted.
• The load could not be
optimally balanced in the
washing drum. This is not
a malfunction.
Remove transportation lock.
Optimize the appliance set-up according to
the installation instructions.
Wash large and small items together to
reduce the possibility of unbalanced loads
forming.
… at the end of the programme, the appliance door cannot be opened by pressing the door opener button
Possible cause Solution
• The appliance door is
stuck.
• An interruption in the
power supply.
66
Press hard against the lock side of the
appliance door (i.e. front edge of appliance
door).
Some text appears in the plain text display.
Press the or button.
Use emergency door release.

9 Trouble-shooting
… at the end of the programme water sounds can be heard when the washing drum is turned by hand
Possible cause Solution
• The water that the vanes
were filled with to
compensate the unbalanced load could not be
completely drained before
the end of the
programme.
No action is necessary. The expelled water is
automatically pumped off and there are no
negative consequences.
... traces of washing detergent left behind in the washing detergent compartment
Possible cause Solution
• Damp or lumpy washing
detergent.
• The washing detergent
compartment was damp
and a delayed start was
selected.
• The water flow pressure is
too low.
• The water inlet is scaled
up.
• The liquid detergent flap
was inserted.
Store washing detergent in a dry place.
Wipe the washing detergent compartment
dry before adding the detergent.
Open water tap fully.
Check the water supply and, if necessary,
clean the filter.
Clean nozzles above detergent dispenser
drawer.
Remove the flap and stow away.
67

9 Trouble-shooting
... traces of fabric conditioner or water left behind in the fabric conditioner compartment
Possible cause Solution
• The siphon in the fabric
Ensure the siphon is in place correctly.
conditioner compartment
is missing or is not in
place correctly.
• The siphon or suction
Clean the siphon and suction tube.
tube is clogged.
… the washing load is still dry at the end of the programme and no error message is displayed
Possible cause Solution
• «Demo mode» is
switched on.
Open the appliance door.
Hold the and / buttons
depressed.
Simultaneously press the button.
68
In the TouchDisplay appears:
Status of
demo mode: ON
Turn the demo mode off by pressing the relevant button in the TouchDisplay and save with
.

1
3
2
1
1
9 Trouble-shooting
9.2 Opening the appliance door in the event of a power
failure
Ensure that the washing drum is stationary. Do not touch the drum
while it is still in motion – risk of serious injury.
If the emergency door release tool 2 is missing, a screw driver can be
used instead.
Turn off the water tap.
Disconnect the appliance from the electricity supply.
Open the drain tray 1 by pressing it at
the bottom.
or:
Open the drain tray 1 with the liquid
detergent flap.
Fold the drain tray right down.
If necessary, carry out emergency
draining.
Remove the drain tray 1.
Remove the emergency door release
tool 2 from its fastening.
Insert the emergency door release tool
into the blue opening cap 3 and turn in
the direction of the arrow.
- The appliance door springs open.
Door hinged left Door hinged right
69

10 Washing tips
10.1 Fabric care symbols
To wash items correctly, please follow the fabric care symbols on the labels of
the wash items.
10.2 Washing detergent
The wash temperature selected should agree with the recommended temperature range of the washing detergent to ensure the washing detergent is at its
most effective.
10.3 General tips
• Wash white and coloured textiles separately.
• Empty pockets and turn inside out. Remove any foreign objects (coins,
nails, paper clips, etc.).
• Empty and brush out pockets of work overalls worn in the metal industry
(metal shavings can damage the washing and cause rust stains).
• Fasten duvet covers and pillow cases; close zips and hook and eye
fasteners; fasten cloth belts and apron ties.
• Wash smaller items (e.g. nylon tights, belts) and items with zips and hooks
in a washing net or cushion cover.
• Remove stains before washing using a suitable stain remover.
• Pre-treat heavily soiled areas (collars, cuffs, etc.) with soap, special deter-
gent or paste.
• For medium or heavily soiled washing, select the additional pre-wash
programme or select a heavier degree of soiling.
• Wash woollens and other textiles with the fabric care label using the
main hand wash programme only. Use detergent suitable for woollens
and delicates.
• Textiles, such as dog or horse blankets, that are covered in animal hair
should be brushed out before washing
70

10 Washing tips
10.4 Net curtains
If washing curtains made from mixed or man-made fibres:
• Ask the retailer whether the curtains are machine washable and, if so, at
what water temperature.
• Fill the washing drum only a quarter full.
• Tie up metal rollers and plastic sliders using an open weave fabric.
• Use a mild detergent (use sparingly due to foaming).
• With older, faded curtains, the material is weaker and may be easily
damaged if machine washed.
71

10 Washing tips
10.5 Saving energy and water
• Use the maximum wash load capacity of the particular programme.
• Select «Pre-wash» or «Soaking» only for washing that is heavily soiled or
stained.
• For lightly soiled washing without staining select the main 20 programme
or the additional «Sprint» function.
• Select the «optimal» level of Hybrid Eco if programme duration plays
no role.
Spin speed
How much energy is consumed by subsequent tumble drying depends on the
spin speed set. The higher the spin speed set, the lower the level of residual
moisture in the washing at the end of the programme.
rpm Residual moisture in cotton fabrics in %
1600 ~44
1400 ~47
1200 ~52
1000 ~60
800 ~70
600 ~90
400 ~110
Automatic door opener
Use the appliance with the automatic door opener turned on. In this way, when
the appliance door opens the appliance immediately enters the lowest
possible stand-by power consumption state.
72

10.6 Unsatisfactory wash results
White residue on washing
Possible cause Solution
10 Washing tips
• Despite thorough rinsing,
badly soluble compounds
(zeolites) in the detergent
can be left on the
washing.
Shake out or brush the wash items.
Wash the items again with just a little
washing detergent.
Use a liquid detergent that does not
contain zeolites.
Select the additional «Black garments»
programme.
Grey residue on washing
Possible cause Solution
• Grease and dirt particles
have not been removed
from fabric effectively.
• Residue from detergent,
limescale and dirt.
• Overloaded washing
drum.
Use more detergent next time.
Use heavy-duty washing detergent.
Adjust amount of detergent to water hardness and degree of soiling of washing.
Put less laundry into the washing drum.
Washing feels hard to the touch
Possible cause Solution
• Poor rinse effect from
«very soft» water (below
15 °fH).
Select the «Soft water» user setting.
73

10 Washing tips
Unsatisfactory wash result using detergent for coloureds
Possible cause Solution
• Exceptionally heavily
soiled washing.
• Washing detergent used
does not contain bleach.
Fruit, coffee and tea
stains cannot be
removed.
Select stronger wash programme, e.g.
degree of soiling «heavy».
Use washing detergent containing bleach.
Unsatisfactory wash result using liquid detergent
Possible cause Solution
• Liquid detergent used
does not contain bleach.
Fruit, coffee and tea
stains cannot be
removed.
Use washing detergent containing bleach.
Soap deposits on washing
Possible cause Solution
• Water too hard.
Only use soap detergent if the water hardness does not exceed 25 °fH.
Colour run
Possible cause Solution
• Non-fast colours in the
wash.
• Objects in the wash
whose colour has run.
74
Wash white and coloured textiles separately.
Follow the fabric care instructions on the
items of washing.
Empty garment pockets.

Unsatisfactory rinsing performance
Possible cause Solution
10 Washing tips
• Too much washing detergent.
• Very «soft» water (below
15 °fH).
Adjust washing detergent dosage to water
hardness and degree of soiling.
Set to the soft water setting (see 'User
settings').
Fabric stains
Possible cause Solution
• Rust stains.
• Chemical effect.
Brush out work overall pockets.
Residues from hair care products,
cosmetics and plants can react with the
suds to cause a chemical reaction that can
result in staining.
Wash items with metal parts separately.
Holes, rips or tears
Possible cause Solution
• Washing items with zips
or hooks (e.g. bras)
open.
Fasten zip fasteners and hooks before
washing.
Wash delicates in a laundry bag or pillow
case.
Turn garment pockets inside out.
• Chemical effect of
washing detergent.
• Fabric quality, wear and
tear, weathering of fibres.
• Washing drum damaged
by foreign objects (e.g.
nails, paper clips, bra
hooks).
Do not put washing detergent directly on to
fabrics.
Inspect the washing drum for foreign
objects and for damage.
Remove foreign objects.
Call Customer Services if the washing
drum is damaged.
75

10 Washing tips
Fabric wear
Possible cause Solution
• Washing drum overloaded.
• Friction between fabrics
during washing.
• Pilling.
Put less laundry into the washing drum.
Select the additional «Easy care»
programme.
Turn items inside out before washing.
76

11 Spare parts
Please give product family and exact designation when ordering parts.
Drain hose 1.5 m / 4.0 m
Emergency door release tool
Foreign body trap
Drain tray
Siphon
Detergent dispenser drawer
Liquid detergent flap
77

12 Technical data
1*
12.1 Dimensions
Height: 85 cm
Width: 59.5 cm
Depth: 60 cm
Empty weight: 84 kg
Dry load capacity: 8 kg
12.2 Plumbing in
Connection to water supply: Cold water G¾"
Permitted pressure of water supply: 0.1–0.6 MPa (1–6 bar)
Max. pumping height of drain pump: 1.2 m
12.3 Electrical connection
See identification plate 1
* Depending on the serial number (FN)
12.4 Spin speed
400, 600, 800, 1000, 1200, 1400, 1600 rpm
78

12 Technical data
12.5 Consumption data
The consumption data and programme durations given serve only as a guide.
They refer to the maximum load capacity and can vary with, for instance,
towelling material, a very cold water feed, the degree of soiling selected or a
smaller wash load. The time remaining and the programme end time shown
are adjusted during the programme sequence accordingly.
Whites and coloureds programmes, soiling light
Programme Load
kg
Spin
speed
1
Duration
hrs./mins.
2
Water
Litre
Energy
kWh
rpm
Whites
1–8 1200 2h25 3h02 75 1.6
95 °C
Coloureds
1–8 1200 2h10 2h40 65 1.2
70 °C
Coloureds
1–8 1200 2h00 2h18 65 1.0
60 °C
Coloureds
1–8 1200 1h40 1h50 70 0.5
40 °C
Coloureds
1–8 1200 1h30 1h35 70 0.3
30 °C
Coloureds
1–8 1200 1h20 1h25 70 0.2
20 °C
Coloureds cold 1–8 1200 0h59 1h00 70 0.2
The programme duration refers to the «very good» level of Hybrid Eco .
1
Factory setting
2
The longer programme duration is valid for 230 V~ 50 Hz, 10 A mains
connection.
79

12 Technical data
Fabric types
Programme Load
kg
Shirts
40 °C
Woollens
Max. 7 shirts/
blouses
1–2.5 kg 800 0h58 52 0.2
30 °C
Hand wash
1–2 kg 600 0h50 58 0.1
20 °C
Down
40 °C
Outdoor
1 item,
max. 2 kg
max. 3 kg 1000 1h32 40 0.3
garments
40 °C
Silks
max. 1.5 kg 400 0h58 52 0.2
30 °C
Underwear
max. 3 kg 800 1h25 40 0.2
30 °C
Baby garments
max. 5 kg 1200 2h25 120 1.1
60 °C
Denim
max. 4 kg 1200 1h47 55 0.3
40 °C
WetClean
max. 1.5 kg 400 1h00 60 0.2
20 °C
Net curtains
max. 2 kg Stop after
30 °C
Black garments
max. 4 kg 1200 1h50 85 0.4
40 °C
Black hand
max. 1.5 kg 600 1h05 68 0.1
wash carments
20 °C
Spin
speed
1
Duration
hrs./mins.
Water
Litre
Energy
kWh
rpm
1000 1h57 33 0.3
800 1h44 40 0.3
1h15 45 0.3
rinsing
80

Extra programmes
cold
12 Technical data
Programme Load
kg
Steam
1–1.5
Spin speed
rpm
None
1
Duration
hrs./mins.
Water
litres
0h23 1 0.1
Energy
kWh
anti-crease
Proofing 20 °C 1–3 800 0h28 12 0.1
Appliance
0
None
0h30 9 0.7
hygiene
12.6 Note for testing institutes
Set to the test according to AS/NZS 2040.2:2005
Programme 40 °C Coloureds normal
Press the button.
Press the 40 button in the TouchDisplay.
– The programme 40 °C Coloureds normal is selected.
Programme 10 °C Coloureds normal
Press the button.
Press the
button in the TouchDisplay.
– The programme 10 °C Coloureds normal is selected.
12.7 VAS Vibration Absorbing System
As the washing drum starts to spin, if the control unit detects that the load is
out of balance it will interrupt the spinning action once or more. In this case,
the appliance tries to improve the distribution of the wash load in the washing
drum.
When spinning, at all spin speeds the load is, where necessary, actively
balanced in the washing drum, whereby the hollow vanes are filled with the
necessary quantity of water. This ensures optimal care and draining of the
washing.
81

12 Technical data
12.8 Water and energy economy
During the first few minutes of a programme running, sensors automatically
determine the type and the size of the load being washed.
Water levels are then optimally adjusted to the wash load so that only the strict
amount of water needed is used.
12.9 Automatic energy-saving stand-by
The appliance is equipped with automatic energy-saving stand-by to avoid
consuming energy unnecessarily.
All displays go out within minutes of a programme finishing. Energy consumption is reduced to an absolute minimum. The safety functions, however, remain
activated.
Power consumption in accordance with AS/NZS 2040.2:2005
• In «OFF mode»:
• In «Left-on mode»:
0 watts
0 watts
82

13 Notes
83

13 Notes
84

13 Notes
85

14 Index
A
Aborting a programme
Aborting ...................................... 52
After a programme has started
................................................ 52
During programme selection.. 52
Additional functions ................18, 30
Delayed start ............................. 18
Door opener ..............................18
Economy programme .............. 18
End of programme ...................18
Fast forward ...............................18
Pause .......................................... 18
Additional programmes
Selecting ..................................... 48
Allergies ....................................28, 35
Anti-mite ....................................27, 48
Appliance
Construction ..............................16
Description .................................15
Preparing .................................... 39
Appliance door ............................... 16
Checking the door seal ........... 55
Door does not open ................. 66
Opening during operation ....... 51
Opening in the event of a power
failure ..................................... 69
Appliance hygiene.......................... 21
AquaPlus ............................28, 35, 48
Automatic door opener ...36, 54, 72
Automatic water and energy
economy ..................................... 82
B
Background image ........................38
Before using for the first time ......10
Bio wash ..........................................28
Brightness ........................................37
Button state .....................................18
C
Care ..................................................56
Caution: Burns hazard! .................. 11
Caution: Risk of injury! ..................11
Changing user settings .................33
Childproof lock ...............................36
Cleaning
Detergent dispenser drawer ...56
Foreign body trap ..................... 59
Siphon ......................................... 56
Water inlet filter .........................57
Colour run ........................................74
Coloureds programme
Selecting ..................................... 45
Correct use ......................................10
86

14 Index
D
Damage to fabrics .........................75
Degree of soiling .....................27, 35
Delayed start ............................30, 42
Selecting ..................................... 50
Deposits on washing .....................74
Detergent dispenser drawer .. 16, 77
Cleaning .....................................56
Traces .........................................67
Detergent dosage ..........................42
Dimensions ......................................78
Disconnection .................................13
Display .............................................. 17
A messages ........................ 60, 61
F messages ...............................62
Display elements ............................17
Disposal ...........................................13
Door opener
Automatic ................................... 54
Door seal
Checking ....................................55
Drain hose .......................................77
Drain tray ..................................16, 77
Dyeing .............................................. 44
E
Easy care ..................................26, 48
Electrical connection ..................... 78
Faulty ........................................... 63
Emergency door release .............. 16
Emergency door release tool ... 16,
69, 77
Emergency draining ....................... 58
End of the wash day ...................... 55
Extra programmes ..................17, 81
Appliance hygiene .................... 17
Proofing ......................................17
Spinning .....................................17
Steam anti-crease .....................17
F
Fabric care symbols ......................70
Fabric conditioner ...................16, 43
Conditioning ..............................29
Traces .........................................68
Fabric stains ....................................75
Fabric wear ...................................... 76
Factory settings ..............................38
Fast forward ....................................30
Favourites .................................17, 31
Foam in main wash........................ 63
Foreign body trap .............16, 59, 77
Checking ....................................61
Cleaning ..............................59, 60
G
General note .................................... 72
Grey residue on washing ..............73
H
How to avoid damaging the appli-
ance ............................................12
Hybrid Eco ....................................... 25
Selecting ..................................... 49
Hygiene recommendation .....36, 64
I
Identification plate ..........................16
Inlet water very cold ....................... 65
L
Language ......................................... 34
Large unbalanced load .................66
Liquid detergent .............................. 41
Liquid detergent flap ............... 16, 77
Load capacity .................................. 15
Loosening up the washing ....37, 54
87

14 Index
M
Main programme
Selecting another ...................... 46
Main wash detergent ..................... 16
Main wash programmes ............... 19
Maintenance ....................................56
Model no. ............................................2
Multi-component detergent ........... 37
N
Net curtains ..................................... 71
Note on heat pump ........................ 13
Note on use ..................................... 10
Notes ................................................83
O
Opening the appliance door during
operation
Opening ......................................51
Pause .......................................... 51
Operating elements ....................... 17
Overvoltage ..................................... 63
P
Packaging ........................................13
Pause
Continuing the programme ..... 30
Door opener ..............................30
Programme pause .................... 30
Plumbing .......................................... 78
Powder detergent ...........................41
Power failure ...................................69
Pre-wash ...................................26, 48
Pre-wash detergent ........................ 16
Product family ....................................2
Programme
10°C Coloureds normal .......... 81
40°C Coloureds normal .......... 81
End .......................................30, 54
Taking too long .........................64
Proofing ............................................21
Q
Quick instructions ........................... 92
R
Repair service ................................. 91
Rinsing performance
Unsatisfactory ............................75
88

14 Index
S
Safety ................................................13
Safety precautions
Before using for first time........ 10
General ..........................................7
Saving
Energy ......................................... 72
Water ........................................... 72
Selecting programmes for normally
soiled cotton load .....................47
Separate rinsing/spinning .....29, 51
Serial number (FN) .................14, 16
Silent .................................................38
Siphon ..............................................77
Siphon for fabric conditioner ........ 16
Cleaning .....................................56
Skin protection .........................28, 35
Soap detergent ...............................43
Soap wash .......................................28
Soft water .........................................37
Softener .....................................16, 43
Spare parts ......................................77
Spin speed .................30, 34, 72, 78
Spin stop ..........................................61
Sprint .........................................26, 48
Standard programmes ..................17
Stand-by
Energy-saving ............................ 82
Steam anti-crease ...................27, 48
Stop after rinsing ............................ 55
Symbols ..............................................6
T
Tears in washing ............................75
Technical data ................................. 78
Technical questions ....................... 91
Time ..................................................34
Too many articles ...........................65
TouchDisplay ................................... 17
Traces of washing detergent in the
detergent dispenser drawer ...67
Type .....................................................2
U
Unsatisfactory wash result using
detergent for coloureds ...........74
Unsatisfactory wash result using
liquid detergent .........................74
User settings ...................................33
Exiting .........................................34
Using for the first time ................... 10
V
Validity .................................................2
VAS Vibration Absorbing System 81
Vibrating ........................................... 66
89

14 Index
W
Warranty extensions ...................... 91
Wash results
Unsatisfactory ............................73
Washing
Adding washing detergent ...... 41
Changing selection ..................52
Drying .......................................... 68
End of programme ...................54
Loading ....................................... 40
Preparing appliance .................39
Spinning unsatisfactory ...........65
Washing detergent .........................70
Adding ........................................41
Washing feels hard to the touch .73
Washing tips .................................... 70
Water hardness ..............................42
Water inlet
Checking ....................................61
Water inlet filter
Cleaning .....................................57
Water outlet
Checking ....................................60
Water sounds ..................................67
White residue on washing ............73
Whites ...............................................19
Whites programme
Selecting ..................................... 45
90

15 Repair service
The «Trouble-shooting» section gives you valuable tips on how to
correct minor functions yourself, saving you the time and trouble of
calling out a service technician and the cost that goes along with it.
Register your V-ZUG appliance today online via our website at vzug.com or
using the card supplied and benefit from the best possible support in the
event of a malfunction – including during the manufacturer's warranty period.
You need the serial number (FN) and designation of the appliance to register.
You can also note them down here or on the service sticker which comes with
the appliance:
FN _______________________ Appliance _______________________
Please have these details to hand when contacting V-ZUG in connection with a
malfunction. You will find them on the identification plate of your appliance.
Open up drain tray.
– The identification plate* is located next to the foreign body trap.
* Depending on the serial number (FN)
Your repair order
You will find contact information for your nearest V-ZUG Service Centre at
vzug.com. In most countries you will also be able to contact V-ZUG Service &
Support using the toll-free service number 00800 850 850 00 (or
+800 850 850 00).
Technical questions, accessories, warranty extensions
Your V-ZUG Service Centre will be happy to help you with any technical questions, to accept your orders for accessories and spare parts and to inform you
about the progressive warranty extensions.
91

Quick instructions
Please first read the safety precautions in the operating instructions!
Switch on the appliance and turn on the water tap
Open the appliance door by pressing the or button
Load the washing and then close the appliance door
Pull the detergent dispenser drawer out and add the washing detergent
Push the detergent dispenser drawer back in
Select programme
If required, select any additional programme/functions
The appliance starts automatically after about 20 seconds
When the programme has finished:
Press the or button and unload the washing
At the end of the wash day:
If necessary, clean the detergent dispenser drawer
Push the appliance door to, but do not close
V-ZUG Ltd
Industriestrasse 66, CH-6301 Zug
info@vzug.ch, www.vzug.com
J11004.360-3
 Loading...