

Page 1
Operating instructions
WS60144 | WS60162 | WS60220 |
WS60283 | WS60312
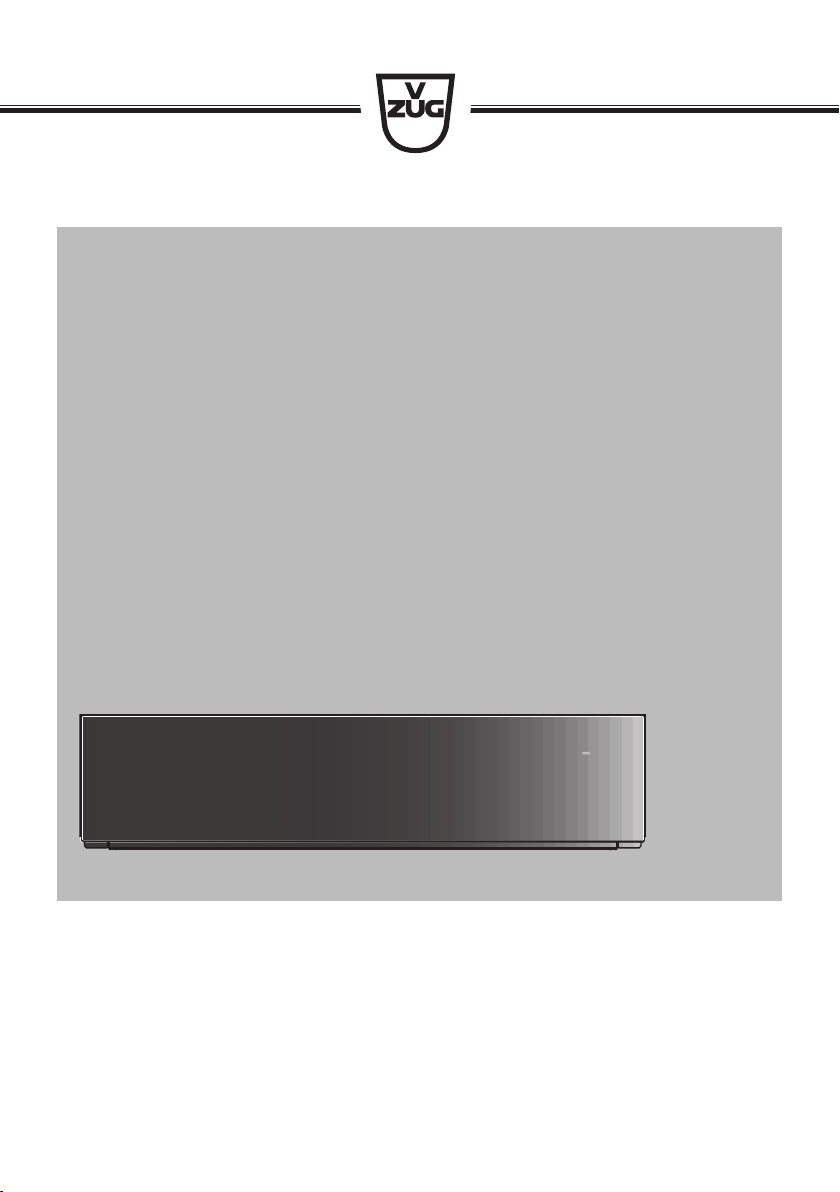
Warming drawer
Page 2

Thank you for choosing to buy one of our products. Your appliance is made to high
standards and is easy to use. Nevertheless, please take the time to read these operating
instructions in order to familiarize yourself with the appliance and get the best use out of
it.
Please follow the safety precautions.
Modifications
Text, diagrams and data correspond to the technical standard of the appliance at the
time these operating instructions went to press. The right to make technical modifications
for the purpose of the further development of the appliances is reserved.
Validity
The model number corresponds to the first alphanumerics on the identification plate.
These operating instructions apply to:
Model designation Model number Type Size system
Warming drawer 60 144 34017 WS60144g, WS60144c 60-144
Warming drawer 60 162 34018 WS60162g, WS60162c 60-162
Warming drawer 60 220 34019 WS60220g, WS60220c 60-220
Warming drawer 60 283 34020 WS60283g, WS60283c 60-283
Warming drawer 60 312 34021 WS60312g, WS60312c 60-312
Warming drawer 60 144 Vi 34022 WS60144Vi 60-144
Variations depending on the model are noted in the text.
© V-ZUG Ltd, CH-6302 Zug, 2019
2
Page 3

Contents
1 Safety precautions 4
1.1 Symbols used......................................................... 4
1.2 General safety precautions.................................. 4
1.3 Appliance-specific safety precautions ............... 4
1.4 Instructions for use................................................ 5
2 General appliance description 8
2.1 Structure ..................................................................8
2.2 Operating and display elements......................... 8
2.3 Opening and closing the drawer ........................ 9
2.4 Standby mode......................................................10
2.5 Operating the appliance..................................... 10
2.6 Delayed start ........................................................11
2.7 Sabbath mode......................................................11
2.8 Loading examples ............................................... 12
2.9 Wire shelf ..............................................................13
3 Operating modes 13
3.1 Heating serving and tableware ......................... 13
3.2 Heating cups ........................................................14
3.3 Keeping food warm............................................. 14
3.4 Making yoghurt ....................................................15
3.5 Favourite................................................................ 15
4 Uses 16
4.1 Possible uses ....................................................... 16
4.2 Low temperature cooking .................................. 18
5 Care and maintenance 19
5.1 Procedure..............................................................19
5.2 Cleaning the exterior........................................... 19
5.3 Cleaning the interior............................................ 20
6 Trouble-shooting 20
6.1 What to do if …..................................................... 20
7 Accessories and spare parts 21
8 Technical data 21
8.1 External dimensions............................................21
8.2 Electrical connection........................................... 21
9 Disposal 21
10 Index 22
11 Service & Support 23
3
Page 4

1 Safety precautions
1.1 Symbols used
Denotes important safety precautions.
Failure to observe said precautions
can result in injury or in damage to
the appliance or fittings!
Information and precautions that
should be observed.
Information on disposal
Information about the Operating Instructions
▸ Indicates step-by-step instructions.
– Describes how the appliance reacts
to the steps taken.
▪ Indicates a list.
1.2 General safety precautions
▪ Read the operating instruc-
tions before using the appliance for the first time!
Cleaning and user maintenance shall not be undertaken
by children without supervision.
▪ If an appliance is not
equipped with a mains cable
and a plug or other means for
disconnecting from the mains
with a contact opening on
each pole complying with the
conditions of overvoltage category III for full isolation, an
isolating device must be incorporated into the permanently installed electrical installation in accordance with the
installation regulations.
▪ If the mains cable of this ap-
pliance is damaged, it must
be replaced by the manufacturer or its Customer Services
or a similarly qualified person
in order to avoid hazard.
▪ This appliance can be used
by children aged 8 and above
and by persons with reduced
physical, sensory or mental
capabilities, or lack of experience and/or knowledge,
provided they are supervised
or have been instructed on
the safe use of the appliance
and have understood the hazards involved. Children shall
not play with the appliance.
4
1.3 Appliance-specific safety precautions
▪ WARNING: The appliance
and its accessible parts get
hot during use. Be careful not
to touch the heating elements.
Page 5

▪ Children under 8 years of age
must be kept away from the
appliance unless they are
constantly supervised.
▪ This appliance can be used
by children aged 8 and above
and by persons with reduced
physical, sensory or mental
capabilities, or lack of experience and/or knowledge,
provided they are supervised
or have been instructed on
the safe use of the appliance
and have understood the hazards involved. Children shall
not play with the appliance.
Cleaning and user maintenance shall not be undertaken
by children without supervision.
▪ WARNING: Accessible parts
can get hot during use. Keep
small children away.
▪ The warming drawer and its
contents get hot.
▪ Under no circumstances use
a steam cleaner to clean the
appliance.
▪ WARNING: If the surface is
cracked, switch the appliance
off and disconnect it from the
mains to avoid possible electric shock.
1 Safety precautions
1.4 Instructions for use
Appliance installation
▪ The appliance must be installed by
qualified personnel only.
▪ Each step must be carried out and
checked in full in the order specified.
Before using fully integrated appliances
for the first time, the cabinet front must
be mounted correctly as the metal parts
behind the cabinet front get hot during
operation.
▪ Electrical connections must be carried
out by qualified personnel in accordance with the guidelines and standards
for low-voltage installations and the specifications of the local electricity supply
companies.
▪ A plug-in appliance may only be con-
nected to a socket outlet with earthing
contact, installed according to specifications. An all-pole mains isolating device
with 3mm contact opening should be
provided in the house wiring system.
Switches, plug and socket devices, circuit breakers and fusible cut-outs which
are accessible after installation and
which have all-poles switching are permissible as isolating devices. Effective
earthing and separately installed neutral
and earth conductors ensure safe and
fault-free operation. After installation,
live parts and cables with basic insulation must not be accessible. Check old
installations.
▪ Refer to the identification plate for in-
formation on the required mains
voltage, current type and fuse protection.
▪ Efficient repairs can only be guaranteed
if it is possible to de-install the complete
appliance at any time without causing
any damage.
5
Page 6

1 Safety precautions
Before using for the first time
▪ The appliance must be installed and
connected to the electricity supply in
accordance with the separate installation instructions. Before using fully integrated appliances for the first time,
the cabinet front must be mounted correctly as the metal parts behind the
cabinet front get hot during operation.
Have a qualified fitter/electrician carry
out the necessary work.
Correct use
▪ The appliance can be used in the home
for preparing food. Under no circumstances flambé or cook food using a lot
of fat in the warming drawer! No liability
is assumed for any damage caused by
improper use or incorrect handling.
▪ Never use the appliance to dry animals,
textiles or paper!
▪ Do not use the appliance as a room
heater.
▪ Any repairs, modifications or manipula-
tions to the appliance, especially any
electrically live parts, may only be carried out by the manufacturer, its Customer Services or a similarly qualified
person. Repairs if carried out incorrectly
may cause serious injury, damage to
the appliance and fittings, as well as affect the functioning of the appliance. If
the appliance is not working properly or
in case a repair is needed, follow the instructions given in the «Service & Support» section. Contact our Customer
Services if necessary.
▪ Use original spare parts only.
▪ Retain these operating instructions for
future reference.
▪ The appliance corresponds to recog-
nized technology standards and the relevant safety regulations. Proper use of
the appliance is essential to avoid damage and accidents. Please therefore follow the precautions given in these operating instructions.
Note on use
▪ If the appliance is visibly damaged, do
not use it. Contact our Customer Services.
▪ If the appliance is not functioning prop-
erly, disconnect it from the power supply immediately.
▪ Ensure there are no foreign bodies or
pets in the warming drawer before closing it.
▪ Do not store objects in the warming
drawer that could pose a danger if it
were accidentally switched on. Do not
store food or any temperature-sensitive
or inflammable materials, e.g. cleaning
agents, oven sprays, etc., in the warming drawer.
Caution: Risk of burns!
▪ The appliance gets hot when in use.
▪ The appliance is not be placed in oper-
ation without the cabinet front properly
mounted.
▪ The appliance will remain hot for some
time after being switched off and will
slowly cool down to room temperature.
Allow sufficient time for the appliance to
cool down before, for instance, cleaning
it.
▪ Overheated fat and oil can easily catch
fire. Heating oil in the warming drawer
to sear meat is dangerous and should
not be done. Never attempt to extinguish burning oil or fat with water.
Danger of explosion! Smother the
flames with a fire blanket. Keep doors
and windows closed.
▪ Do not pour spirits (brandy, whisky,
schnapps, etc.) over hot food. Danger
of explosion!
▪ Do not leave the appliance unattended
when drying or desiccating herbs,
bread, mushrooms, etc. If the foodstuff
dries out too much, it can pose a fire
hazard.
6
Page 7

▪ If you notice smoke possibly coming
from the appliance itself or from inside
the warming drawer, keep the drawer
closed and disconnect it from the
power supply.
▪ Accessories get hot in the warming
drawer. Use protective gloves or oven
cloths.
Caution: Risk of injury!
▪ Be careful not to put fingers in the
drawer, there is otherwise a risk of injury if the drawer is moved. Particular
care should be taken when children are
around.
▪ When open, the drawer poses a danger
of tripping or injury! Do not sit or rest on
the drawer or use it as a storage surface.
Caution: Risk to life!
▪ Packaging materials, e.g. plastic film
and polystyrene, can be dangerous for
children. Danger of suffocation! Keep
packaging material away from children.
1 Safety precautions
How to avoid damaging the appliance
▪ Do not use objects that can rust in the
warming drawer.
▪ Using knives or cutting wheels in the
drawer will visibly damage the surface.
▪ To prevent corrosion, leave the drawer
open until the cooking space has
cooled down.
▪ When cleaning the appliance make
sure no water gets inside it. Use a
damp cloth. Do not spray the outside or
the inside of the appliance with water. If
water gets inside the appliance, it will
cause damage.
▪ Never force the drawer open.
7
Page 8
2 General appliance description
30'
45'
2h
3h
6h
1h
1
2
4
5
3
6
7
3.1
1
9 10
2
3
11
12
4
5
6
7
8
2
3
2.1 Structure
The warming drawer can be used for warming dishes and keeping food warm.
Operating panel
1
Drawer front ▸ Gently push the drawer front to both open and close the
2
Pilot lamp ▸ Illuminates when in operation and the drawer is closed.
3
Pilot lamp (fully
3.1
integrated only)
Warming plate ▸ Gets hot when in operation.
4
Fan plate ▸ Outlet openings for heated air
5
Interior illumination ▸ Illuminates when the drawer is open.
6
Identification plate ▸ Technical data
7
2.2 Operating and display elements
▸ Touch to switch the warming drawer on.
drawer (push/pull system).
▸ Flashes regularly when in operation and the drawer is
open, and when a delayed start has been set and the
drawer is closed.
▸ Is switched off when in standby mode.
8
Page 9

2 General appliance description
Operation Display
On/Off
1
Decrease temperature or duration
2
Increase temperature or duration
3
Operating mode for heating serving
4
and tableware
Operating mode for heating cups and
5
glasses
Operating mode for keeping food
6
warm
Operating mode for making yoghurt
7
Favourite operating mode
8
The temperatures refer to the surface of the warming plate when the appliance is
empty. Own measurements can be imprecise and are not suitable for checking the
accuracy of the temperature.
The appliance will start heating only if the warming drawer is closed properly.
Temperature
9
Temperature – the current setting is
10
displayed
Duration
11
Duration – the current setting is
12
displayed
2.3 Opening and closing the drawer
Opening Closing
▸ Push in the middle of the drawer front.
– The drawer opens.
Never force the drawer open
as this could damage the closing mechanism (push/pull system).
▸ Close in the middle of the drawer front.
– The drawer engages and closes.
9
Page 10

2 General appliance description
2.4 Standby mode
The standby mode refers to the state of the drawer when the function is temporarily deactivated, but can be reactivated at any time and without any preparation or lengthy wait-
ing times. Open the drawer and it is ready for operation. The button illuminates dimly
to indicate the appliance is ready for operation. Pressing the button switches the appli-
ance on and the desired operating mode required can be selected.
Operation
Your warming drawer is equipped with a safety shut-off that switches the drawer to the
standby mode after a maximum of 12 hours of continuous operation.
Switching the «standby mode» off
The button is dimmed.
▸ Touch .
– The button illuminates.
– The recommended value illuminates.
The desired operating mode required
can be selected.
2.5 Operating the appliance
The operating panel must be kept clean and dry. Wash and dry your hands. The
buttons will otherwise not react or can come on accidentally.
▸ Touch the button to switch the drawer on.
▸ Touch or repeatedly to set the required temperature and duration or one of the
four preset operating modes (see page 13) with adjustable temperature and duration
settings.
▸ Close the drawer.
– Operation starts; the pilot lamp illuminates if the drawer is closed.
▸ Opening the drawer interrupts operation.
– The pilot lamp flashes if the drawer is open.
– Close the drawer to continue the programme.
▸ When the set duration is up, an acoustic signal is emitted.
– The button is dimmed in the standby mode.
After the operation ends or the button is touched, the interior illumination of the
warming drawer goes out automatically after 5minutes. The interior illumination is
activated again by touching the button or by closing and opening the warming
drawer.
▸ If necessary, switch the appliance off before time: hold the button depressed for 1
second.
– After the button is released, the button is dimmed in the standby mode.
10
Page 11

2 General appliance description
Do not leave the warming drawer unattended for longer periods of time when using continuous operation. Keeping food warm overly long can dry it out and even
cause it to catch fire.
Your warming drawer is equipped with a safety shut-off that switches the drawer to
the standby mode after a maximum of 12 hours of continuous operation.
2.6 Delayed start
The delayed start is activated when both an operating time and a delayed start duration
have been set for the operating mode selected.
The appliance switches on when the delayed start is up and switches off again when the
operating time finishes.
Before setting the delayed start
▸ Place the dishes or food in the warming drawer.
▸ Select the desired operating mode.
▸ Set the temperature and duration.
Setting a delayed start
▸ For the duration, touch the but-
ton for 5 seconds.
–
flashes.
▸ Using the or button, set the
desired delayed start.
– The delayed start selected
flashes in the display.
▸ Close the drawer.
– If a delayed start has been set,
the pilot lamp flashes until operation starts. The pilot lamp illuminates after an automatic start.
2.7 Sabbath mode
The Sabbath mode enables an operating duration of up to 72 hours to be set. When the
Sabbath mode is activated, the safety shut-off and illumination are deactivated except in
the case of a malfunction. The food is heated up and kept warm in the warming drawer
without having to operate the appliance.
Switching the Sabbath mode on
▸ Touch the button for 10 seconds.
– The duration and temperature displays illuminate briefly 3×.
– The Sabbath mode is activated.
11
Page 12

2 General appliance description
AAA
B
C
A
B
C
D
E
F
25kg
Switching the Sabbath mode off
▸ Touch the button for 10 seconds.
– The duration and temperature displays illuminate briefly 3×.
– The Sabbath mode is deactivated.
2.8 Loading examples
The maximum load depends on the dimensions and weight of your dishes.
Appliance
height
Plates Basic place settings Full place settings and
serving dishes
A
40items
A, B, C
20of each
item
A, B, C
D, E
12of each item
1of each item
F
283/312 mm
220mm
162mm
144mm
plate 27cm
A
soup plate 23cm
B
cup 9cm
C
A
A
A
30items
20items
14items
A, B, C
A, B, C
A, B, C
D
E
F
15of each
item
10of each
item
6of each
item
dish 17cm
dish 19cm
platter 34cm
A, B, C
D, E
F
A, B, C
D, E
F
A, B, C
D, E, F
10of each item
1of each item
8of each item
1of each item
4of each item
1of each item
Maximum load
The maximum load of the warming drawer is 25kg. Damage to the appliance can
occur if this load weight is exceeded.
2items
2items
1item
12
Page 13

3 Operating modes
3
1
2
2.9 Wire shelf
For models 283 and 312, the loading
surface can be increased by using the
wire shelf supplied. It can also be useful
for keeping food warm in different items
of tableware. The wire shelf can be inserted on the left- or right-hand side of the
warming drawer.
Additional wire shelves can be obtained from our Customer services or from
www.vzug.com.
3 Operating modes
3.1 Heating serving and tableware
Spread dishes across entire warming plate. The heating duration depends on the material and thickness of the dishes as well as their quantity, height and arrangement. Stacked
plates take longer to heat up than individual items.
Do not place any large platters on their end in front of the ventilation slits. They block the
outlet openings for the heated air and as a result the dishes are not heated evenly.
▸ Put the dishes in the drawer.
▸ Touch the button.
– The recommended values illuminate.
▸ Close the drawer.
– The pilot lamp illuminates.
– The appliance heats up.
13
Page 14

3 Operating modes
It takes approximately 45 minutes to heat place settings for 6 persons.
Unloading dishes
As heated dishes cools down quickly, take them out of the warming drawer just before
you need them.
▸ Open the drawer when the operating mode finishes.
▸ Touch to switch the appliance off.
▸ Use protective gloves or oven cloths to remove the dishes.
Risk of burns! The surface of the warming plate is hot. Items around the outside of
the drawer get hotter than those in the middle. Always use protective gloves or
oven cloths to remove the dishes.
3.2 Heating cups
The heating duration depends on the material and thickness of the dishes as well as
their quantity, height and arrangement. Tall stacks of cups and glasses take longer to
heat up than individual cups and glasses.
Do not place any dishes in front of the ventilation slits. They block the outlet openings for
the heated air and as a result the dishes are not heated evenly.
Risk of burns! To prevent burns, only use the operating mode for heating cups
and glasses.
▸ Place the cups and/or glasses in the warming drawer.
▸ Touch the button.
– The recommended values illuminate.
▸ Close the drawer.
– The pilot lamp illuminates.
– The appliance heats up.
It takes approximately 30 minutes to heat cups for 6 persons.
▸ Open the drawer when the operating mode finishes.
▸ Touch to switch the appliance off.
▸ Use protective gloves or oven cloths to remove the dishes.
Risk of burns! The surface of the warming plate is hot. Items around the outside of
the drawer get hotter than those in the middle. Always use protective gloves or
oven cloths to remove the dishes.
3.3 Keeping food warm
This operating mode is for keeping food warm straight after being cooked and not
for reheating refrigerated food. Never place hot saucepans or frying pans straight
from the hob on to the warming plate. This can damage the warming plate. Only
use the operating mode for keeping food warm.
▸ Put the dishes in the drawer.
14
Page 15

3 Operating modes
▸ Touch and preheat the appliance for 15 minutes.
▸ Place the food in the preheated dishes.
To avoid spillage, do not overfill plates, dishes, cups, etc.
Cover food with a heat-resistant lid or aluminium foil. The surface of food that is
not covered will dry out.
We recommend that food is not kept warm for longer than one hour.
▸ Close the drawer.
– The pilot lamp illuminates.
– The appliance heats up.
▸ Open the drawer when the operating mode finishes.
▸ Touch to switch the appliance off.
▸ Use protective gloves or oven cloths to remove the dishes.
Risk of burns! The surface of the warming plate is hot. Items around the outside of
the drawer get hotter than those in the middle. Always use protective gloves or
oven cloths to remove the dishes.
Suitable foods
Accompaniments, poultry, vegetables, fish, meat, sauces and soups
3.4 Making yoghurt
▸ Put the prepared milk with the yoghurt in jars or dishes in the warming drawer.
▸ Touch the button.
– The recommended values illuminate.
▸ Close the drawer.
– The pilot lamp illuminates.
– The appliance heats up.
– Open the drawer when the operating mode finishes.
– Touch to switch the appliance off.
– Leave the yoghurt to cool down in the drawer for several hours, then store in a refri-
gerator.
3.5 Favourite
If you use a particular temperature and duration frequently, these settings can be saved
as a favourite.
Creating favourites
▸ Touch .
– The recommended values illuminate.
▸ Touch or to select the required temperature and duration.
▸ Touch the button for 5 seconds
– The settings are saved.
15
Page 16

4 Uses
Starting favourites
▸ Touch .
– The set values illuminate.
▸ Close the warming drawer.
– The pilot lamp illuminates.
– The appliance heats up.
– Open the drawer when the operating mode finishes.
– Touch to switch the appliance off.
Risk of burns! The surface of the warming plate is hot. Items around the outside of
the drawer get hotter than those in the middle. Always use protective gloves or
oven cloths to remove the dishes.
4 Uses
4.1 Possible uses
The table lists various uses for the warming drawer.
▸ Set the required level.
▸ Preheat the dishes according to the table below.
Setting level Approximate
duration
–
max.
Food/dishes Note
Proofing yeast
dough
Put in suitable cookware,
cover with damp cloth
16
–
Extend as re-
quired to max.
–
Defrosting delicate
deep-frozen food
e.g. cream cakes,
butter, sausages,
cheese
Making yoghurt In several small or one large
Keeping eggs warm,
e.g. hard-boiled
eggs, scrambled
eggs
Defrosting frozen
food,
e.g. meat, cake
Leave in the packaging
receptacle, leave uncovered
Preheat tableware, cover
food
Leave in the packaging
Page 17

Setting level Approximate
duration
–
– max.
– max.
– max.
Food/dishes Note
Preheating drinking
vessels,
e.g. espresso cups
Melting chocolate Use suitable cookware,
Dissolving gelatine Use suitable cookware,
Keeping delicate
foods warm,
e.g. meat cooked at
a low temperature
Heating up food or
keeping it warm,
e.g. omelettes,
crêpes, pancakes,
tacos, tortillas, fajitas
Keeping food warm,
e.g. roasts, sauces
Only use suitable tableware
leave uncovered
leave uncovered
Preheat tableware, cover
food
Preheat tableware, cover
food
Preheat tableware, cover
food
4 Uses
– max.
Keeping beverages
warm
Keeping bread
warm,
e.g. toast, bread
rolls
Warming sponge
cake,
e.g. crumble cake,
muffins
Preheat tableware as required
Place food directly on warming plate, leave uncovered
Preheat tableware as required
17
Page 18

4 Uses
Setting level Approximate
duration
– max.
– max.
Extend as re-
quired to max.
Food/dishes Note
Preheating serving
dishes
e.g. soup plates,
plates, bowls, platters, sauce boats
Keeping beverages
hot
Drying, desiccating Prepare and chop up the
Spread tableware out flat for
shorter heating times
Preheat tableware, cover
beverages as required
fruit, place on the wire shelf
and turn as needed
– max.
– – max.
Low temperature cooking
Warm, moist cloths
for wellness applications
Preheat tableware.
Moisten cloths/towels, fold
or roll and then place directly on the warming plate.
Only use cloths/towels
made from natural fibres –
no synthetic fibres!
4.2 Low temperature cooking
The setting is suitable for low temperature cooking and cooking to
completion of seared, small to medium-sized, high-quality cuts of meat (beef, lamb, pork,
veal) no thicker than 6cm. We recommend cooking larger pieces of meat in an oven or
combi-steam cooker.
Cooking meat at a low temperature for longer makes it tender and succulent.
Preparations
Sear meat before low temperature cooking.
▸ Use suitable glass, porcelain or ceramic cookware.
▸ Preheat the drawer containing the cookware at setting level .
▸ Rapidly heat a little fat in a pan.
▸ Sear the meat.
The searing times below refer to the sealing of meat in hot fat.
Dish Searing on
the hob
Small pieces of meat
Small escalopes 2–3 mins. on all sides for
Completion
in the appliance
18
–
Page 19

5 Care and maintenance
Dish Searing on
the hob
Small pieces of meat
Steak medallions 1–2 mins. per side for
Medium-sized pieces of meat
Loin of lamb (ca. 150–
300g)
Fillet of pork (400–600g) 4–6 mins. on all sides for
2–3 mins. per side for
Completion
in the appliance
–
–
Fillet of beef/veal, loin of
pork, (up to 900 g)
▸ Place the meat in the preheated cookware in the drawer to cook to completion.
▸ Cover the cookware with a lid.
Meat that has been low temperature cooked is not as hot as conventionally
cooked meat. Sauces should be served very hot. Put the plates in the warming
drawer during the last 45–60 minutes of cooking.
To keep meat that has been cooked at a low temperature warm, switch back to
level after low temperature cooking. Small pieces of meat can
be kept warm for up to 45minutes, large pieces for up to 2hours.
12–15 mins. on all sides for
–
5 Care and maintenance
5.1 Procedure
Only clean the drawer in the standby state in left-on mode.
Do not use high pressure or steam cleaners.
Do not use abrasive, caustic cleaning agents or stainless steel cleaner. Do not use
scouring pads, steel wool, etc. as such products can damage the surface.
5.2 Cleaning the exterior
▸ Remove any soiling or excess cleaning solution immediately.
▸ Clean the surfaces with a soft cloth dampened with water and a little washing-up liquid
– for metallic surfaces rub in the direction of the original polish lines. Dry with a soft
cloth.
19
Page 20

6 Trouble-shooting
5.3 Cleaning the interior
▸ Remove any soiling from the warming drawer while still hand warm.
▸ Clean the warming plate, ventilation grille and operating panel with a soft cloth
dampened with water and a little washing-up liquid and dry with a soft cloth.
6 Trouble-shooting
This section lists faults that can be solved simply by following the instructions given. If
another fault is displayed or the fault cannot be remedied, please call Customer Services.
6.1 What to do if …
Problem Possible cause Solution
Dishes and/or food remain
cold.
Dishes and/or food are
not warm enough.
The pilot lamp flashes regularly and the drawer is
closed.
The pilot lamp flashes rapidly and the drawer is
open.
The pilot lamp does not illuminate when the drawer
is in operation.
The pilot lamp flashes rapidly and the drawer is
open/closed.
The drawer cannot be
opened/closed.
▪ The appliance is not
switched on.
▪ An interruption in the
power supply.
▪ The drawer is not closed
properly.
▪ Warming duration too
short.
▪ The drawer is not closed
properly.
▪ Temperature is not set
high enough.
▪ A flashing pilot lamp sig-
nals that the drawer is
closed properly and a
delayed start has been
set.
▪ The delayed start is activ-
ated.
▪ Pilot lamp is defective. ▸ Call Customer Services.
▪ Drawer is still in opera-
tion.
▪ Push-pull mechanism is
defective.
▸ Switch the appliance on.
▸ Check the power supply.
▸ Close the drawer.
▸ Lengthen the warming dur-
ation.
▸ Close the drawer.
▸ Select a higher temperat-
ure setting.
▸ Close the drawer. End the
delayed start as required.
▸ Close the drawer and then
select operation with a
delayed start. Touch the
button to end the delayed
start.
▸ Touch .
▸ Call Customer Services.
20
Page 21

7 Accessories and spare parts
7 Accessories and spare parts
Please give product family of the appliance and exact designation of the accessory or
spare part when ordering parts.
Wire shelf for models 283 / 312 mm
8 Technical data
8.1 External dimensions
▸ See installation instructions
8.2 Electrical connection
▸ See identification plate (see page 23)
9 Disposal
9.1 Packaging
Never allow children to play with packaging material due to the danger of injury or
suffocation. Store the packaging material in a safe location or dispose of it in an
environmentally-friendly way.
9.2 Safety
Render the appliance unusable to prevent accidents caused by improper use (e.g.
through children playing):
▸ Disconnect the appliance from the mains. With a fixed appliance, this is to be carried
out by a qualified electrician. Then cut the mains cable off flush with the appliance.
9.3 Disposal
▪ The «crossed‐out wheeled bin» symbol requires the separate collection of waste
electrical and electronic equipment (WEEE). Such equipment can contain hazardous,
environmentally harmful materials.
▪ These appliances are to be handed over to a designated collection point for the recyc-
ling of electrical and electronic equipment and must not be disposed of with unsorted
household waste. And in this way, you will be helping to protect resources and the environment.
▪ For more information, please contact the local authorities.
21
Page 22

10 Index
A
Accessories and spare parts ........................ 21
Appliance description ........................................ 8
Appliance disposal .......................................... 21
Appliance installation ......................................... 5
C
Care.................................................................... 19
Cleaning............................................................. 19
Cleaning the exterior ....................................... 19
Construction......................................................... 8
D
Damage from overloading ............................. 12
Delayed start..................................................... 11
Dishes
Loading.......................................................... 14
Preheating..................................................... 13
Display elements................................................. 8
Disposal............................................................. 21
Drawer
Cleaning ........................................................ 20
E
Electrical connection ....................................... 21
External dimensions ........................................ 21
F
Favourite
Saving ............................................................ 15
Setting............................................................ 15
Starting........................................................... 16
Food
Keep warm.................................................... 14
H
Heating cups..................................................... 14
Heating serving and tableware ..................... 13
I
Identification plate............................................ 21
Initial set-up .......................................................... 6
Instructions for use ............................................. 5
Interior
Cleaning ........................................................ 20
L
Loading examples ........................................... 12
Low temperature cooking .............................. 18
Cooking to completion ............................... 18
Searing times................................................ 18
M
Maintenance ..................................................... 19
Making yoghurt................................................. 15
Model designation .............................................. 2
Model number ..................................................... 2
O
Operating elements ............................................ 8
Operating modes............................................. 13
P
Possible uses ................................................... 16
S
Sabbath mode.................................................. 11
Safety precautions
Appliance-specific .......................................... 4
General ............................................................. 4
Safety shut-off ................................................... 10
Safety warnings
Appliance installation.....................................5
Before using for the first time....................... 6
Correct use ...................................................... 6
Service & Support............................................ 23
Standby mode .................................................. 10
Symbols ................................................................ 4
T
Technical data .................................................. 21
Technical questions......................................... 23
Trouble-shooting .............................................. 20
Type....................................................................... 2
Types of use ..................................................... 16
V
Validity................................................................... 2
W
Warranty extensions ........................................ 23
Wire shelf........................................................... 21
22
Page 23

11 Service & Support
11 Service & Support
The «Trouble-shooting» section gives you valuable tips on how to deal with minor
malfunctions yourself, saving you the time and trouble of calling out a service technician and any cost that goes along with it.
Information on the V-ZUG warranty can be found at www.vzug.com →Service
→Warranty information. Please read this information carefully.
Please register your appliance straightaway online at www.vzug.com →Service
→Warranty registration. This will allow you to take advantage of the best possible support
in the event of a fault in the appliance during the guarantee period. You will require the
serial number (SN) and appliance designation to register your appliance. You will find
them on the identification plate of your appliance.
My appliance information:
SN: __________________________ Appliance: _______________________________
Please have this appliance information to hand when contacting V-ZUG. Thank you.
▸ Open the warming drawer.
– The identification plate is located on the in-
side right of the warming drawer.
Your repair order
At www.vzug.com →Service→Service number you will find the telephone number of your
nearest V‑ZUG service centre.
Technical questions, accessories, warranty extensions
V-ZUG is happy to help you with any general administrative or technical queries, to take
your orders for accessories and spare parts and to inform you about our progressive
service agreements.
23
Page 24

Quick instructions
1044764-R04
Open appliance Switch appliance on
Set temperature Set duration
Switch appliance off Close appliance
V-ZUG Ltd, Industriestrasse 66, CH-6302 Zug
info@vzug.com, www.vzug.com
 Loading...