

Vytran PTR-200 Series, PTR-200-ARL Quick Reference Manual

Artisan Technology Group is your source for quality
new and certied-used/pre-owned equipment
• FAST SHIPPING AND
DELIVERY
• TENS OF THOUSANDS OF
IN-STOCK ITEMS
• EQUIPMENT DEMOS
• HUNDREDS OF
MANUFACTURERS
SUPPORTED
• LEASING/MONTHLY
RENTALS
• ITAR CERTIFIED
SECURE ASSET SOLUTIONS
SERVICE CENTER REPAIRS
Experienced engineers and technicians on staff
at our full-service, in-house repair center
Instra
Remotely inspect equipment before purchasing with
our interactive website at www.instraview.com
Contact us: (888) 88-SOURCE | sales@artisantg.com | www.artisantg.com
SM
REMOTE INSPECTION
View
WE BUY USED EQUIPMENT
Sell your excess, underutilized, and idle used equipment
We also offer credit for buy-backs and trade-ins
www.artisantg.com/WeBuyEquipment
LOOKING FOR MORE INFORMATION?
Visit us on the web at www.artisantg.com for more
information on price quotations, drivers, technical
specications, manuals, and documentation

RREEFFEERREENNCCEE GGUUIIDDEE
PTR-200-ARL
Artisan Technology Group - Quality Instrumentation ... Guaranteed | (888) 88-SOURCE | www.artisantg.com

PTR-200 Series Quick Reference Guide Version 1.2. Printed in the United States.
The contents of this manual and the associated software are the property of Vytran Corporation and are
copyrighted. Under the copyright laws, neither the documentation nor the software may be copied,
photocopied, reproduced, translated or reduced to any electronic medium or machine readable form, in
whole or part, without prior written consent of Vytran Corporation.
Copyright 1999 Vytran Corporation
1400 Campus Drive West
Morganville, NJ 07751 USA
Phone: 732-972-2880
800-421-8874
Fax: 732-972-6229
PTR-200-ARL Quick Reference Guide Version 1.2
Artisan Technology Group - Quality Instrumentation ... Guaranteed | (888) 88-SOURCE | www.artisantg.com
Setting Up The PTR-200 And Getting Started
Quick Reference Guide For The ARL Module
This quick reference guide will show you how to set up your PTR-200 and how to recoat and proof test an optical fiber.
The illustrations and descriptions refer to an ARL Module configured with the optional Integrated Module Controller
(Touch Screen Controller) and external vacuum pump. Please refer to the serial command list if operating directly from a
PC.
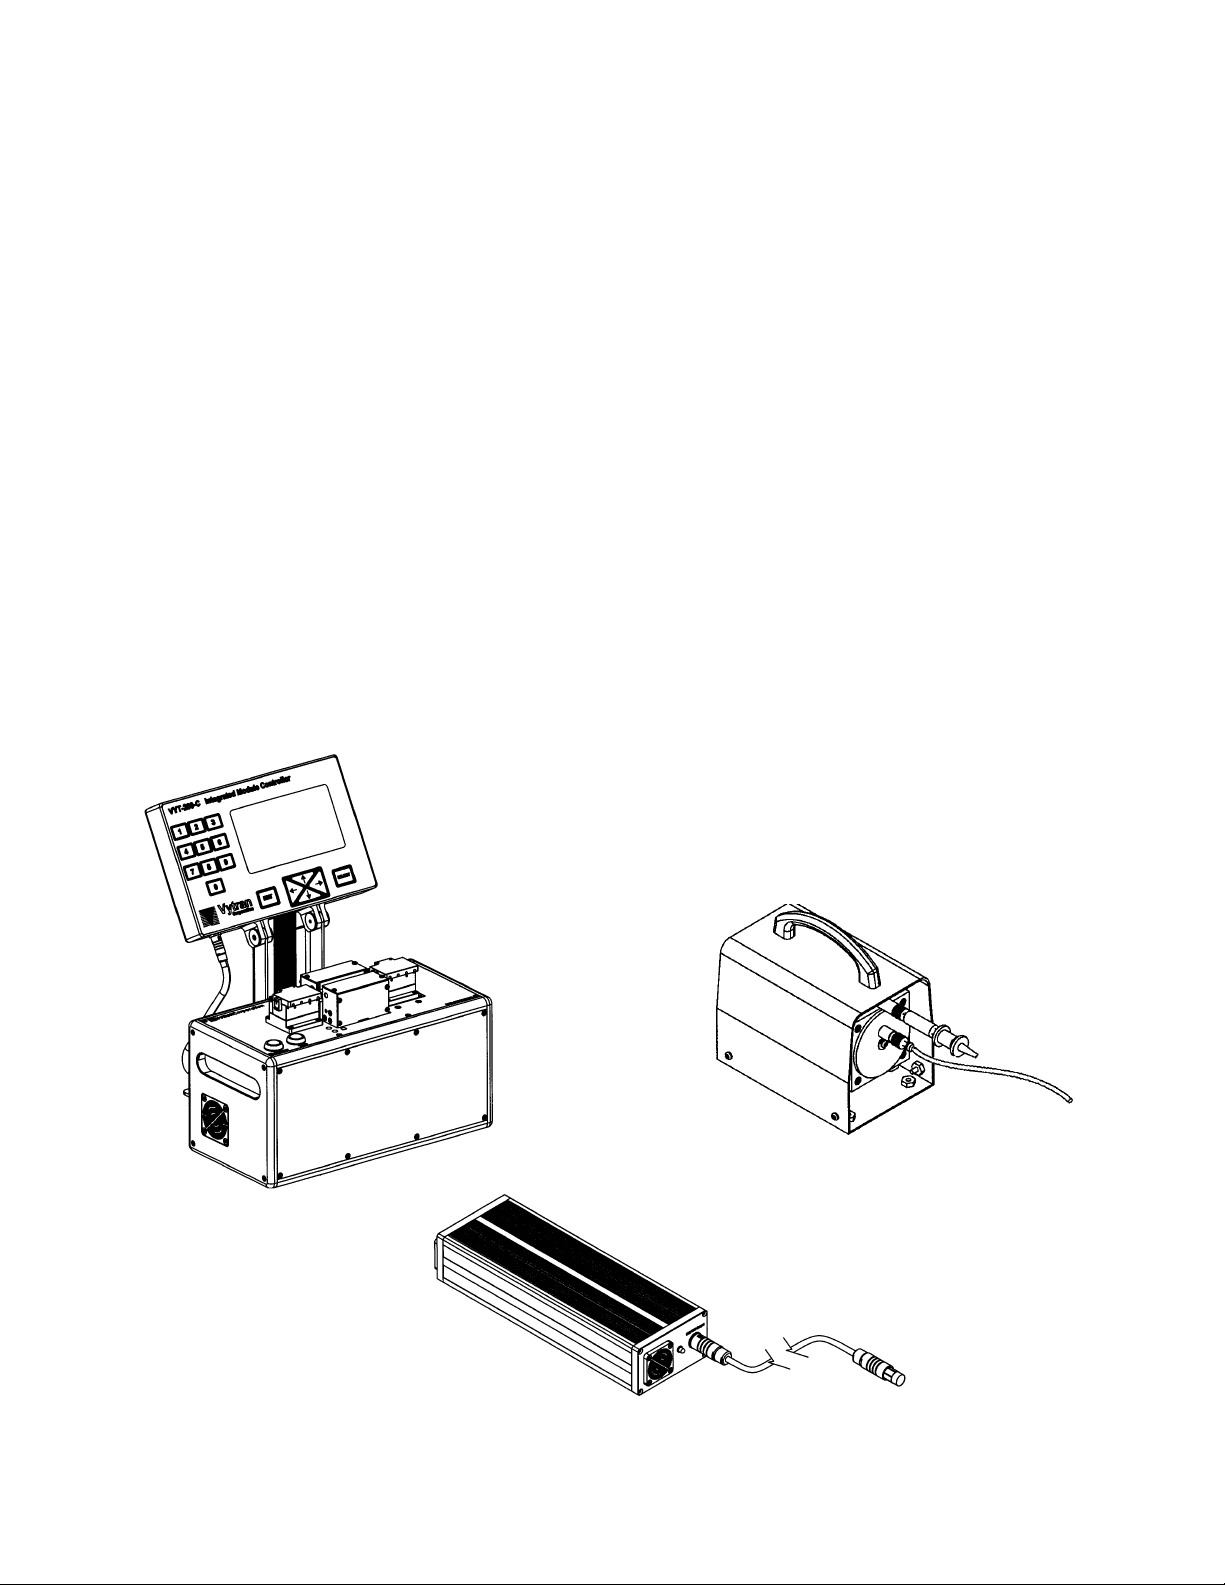
Accessory Parts Checklist
When unpacking the PTR-200 for the first time, check to make sure that you have the following accessories:
12.5V Power supply box with AC power cord
DC power cable to connect the external power supply to the unit
1/8" O.D. pressure supply tubing and fittings kit for compressed air hook-up
VYT-200-C Integrated Module Controller with interface cable (optional)
External vacuum pump with vacuum line (optional)
Tool kit containing: Recoat material, DSM Desotech 950-200
Cotton swabs
Lens tissue
5/64" Allen wrench
3/32" Allen wrench
.035" Allen wrench
External Power Supply and Cable
ARL Module with Integrated
Module Controller Attached
External Vacuum Pump
PTR-200-ARL Quick Reference Guide Version 1.2 Page 1
Artisan Technology Group - Quality Instrumentation ... Guaranteed | (888) 88-SOURCE | www.artisantg.com
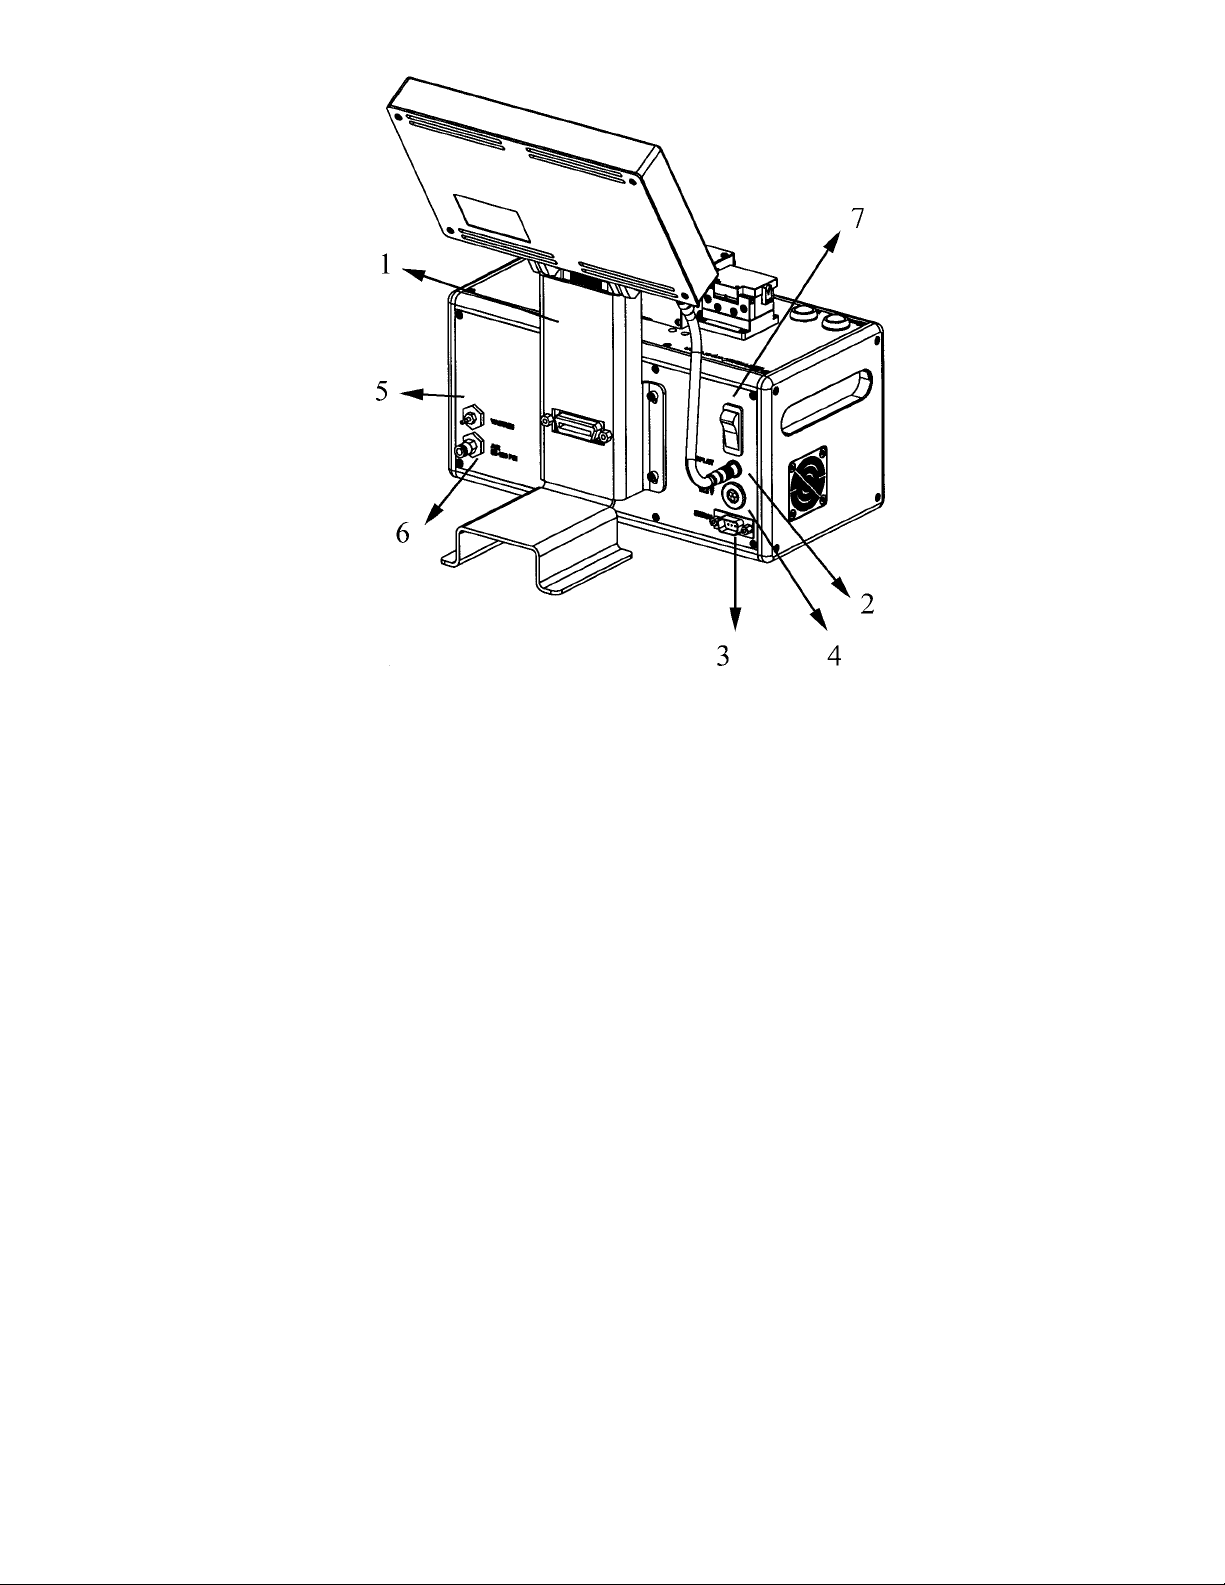
Figure 1 - Back View of ARL Module
I. SETTING UP the PTR-200
A. The following steps will show you how to set up your PTR-200. (Refer to Fig.1)
1. Attach the Integrated Module Controller (VYT-200-C), by removing the four mounting screws and washers from the
back of the PTR-200. Place the PTR-200 and Controller on a flat work surface and secure the controller bracket to
the back of the PTR-200. Make sure the feet on the bottom of the bracket sit flush on the work surface. NOTE:
You can set the tension of the tilt display by adjusting the left- hand pivot screw. A5/64" allen wrench is provided
in the tool kit.
2. Connect the interface cable from the bottom of the Controller to the back of the PTR-200.
3. An RS-232 serial input is provided for direct PC control. Note: The Integrated Module Controller and the PC
serial interface should not be connected simultaneously - possible damage to the controller could occur.
4. Connect the DC power cable from the external power supply to the back of the PTR-200. Plug in the power supply
(100-120 / 200-240 VAC).
5. Plug in the external vacuum pump. To connect the vacuum line, insert the silver quick connect fitting into the
lower fitting on the pump. Connect the other end of the tubing to the brass barbed fitting on the back of the
PTR-200. Connect the small "muffler" to the upper fitting of the vacuum pump.
6. The pneumatic gripper of the automated recoater requires a clean compressed air (or gas) supply of 80 to 120 psi.
Use the fittings kit provided to connect the 1/8" OD quick connect fitting into the supply source. Connect the 1/8"
OD pressure supply line between the source and the unit by pushing the tubing fully into the fittings.
PTR-200-ARL Quick Reference Guide Version 1.2 Page 2
Artisan Technology Group - Quality Instrumentation ... Guaranteed | (888) 88-SOURCE | www.artisantg.com
 Loading...