

Page 1
MOR600 Mobile Router Quick Installation Guide
Package Contents
1.
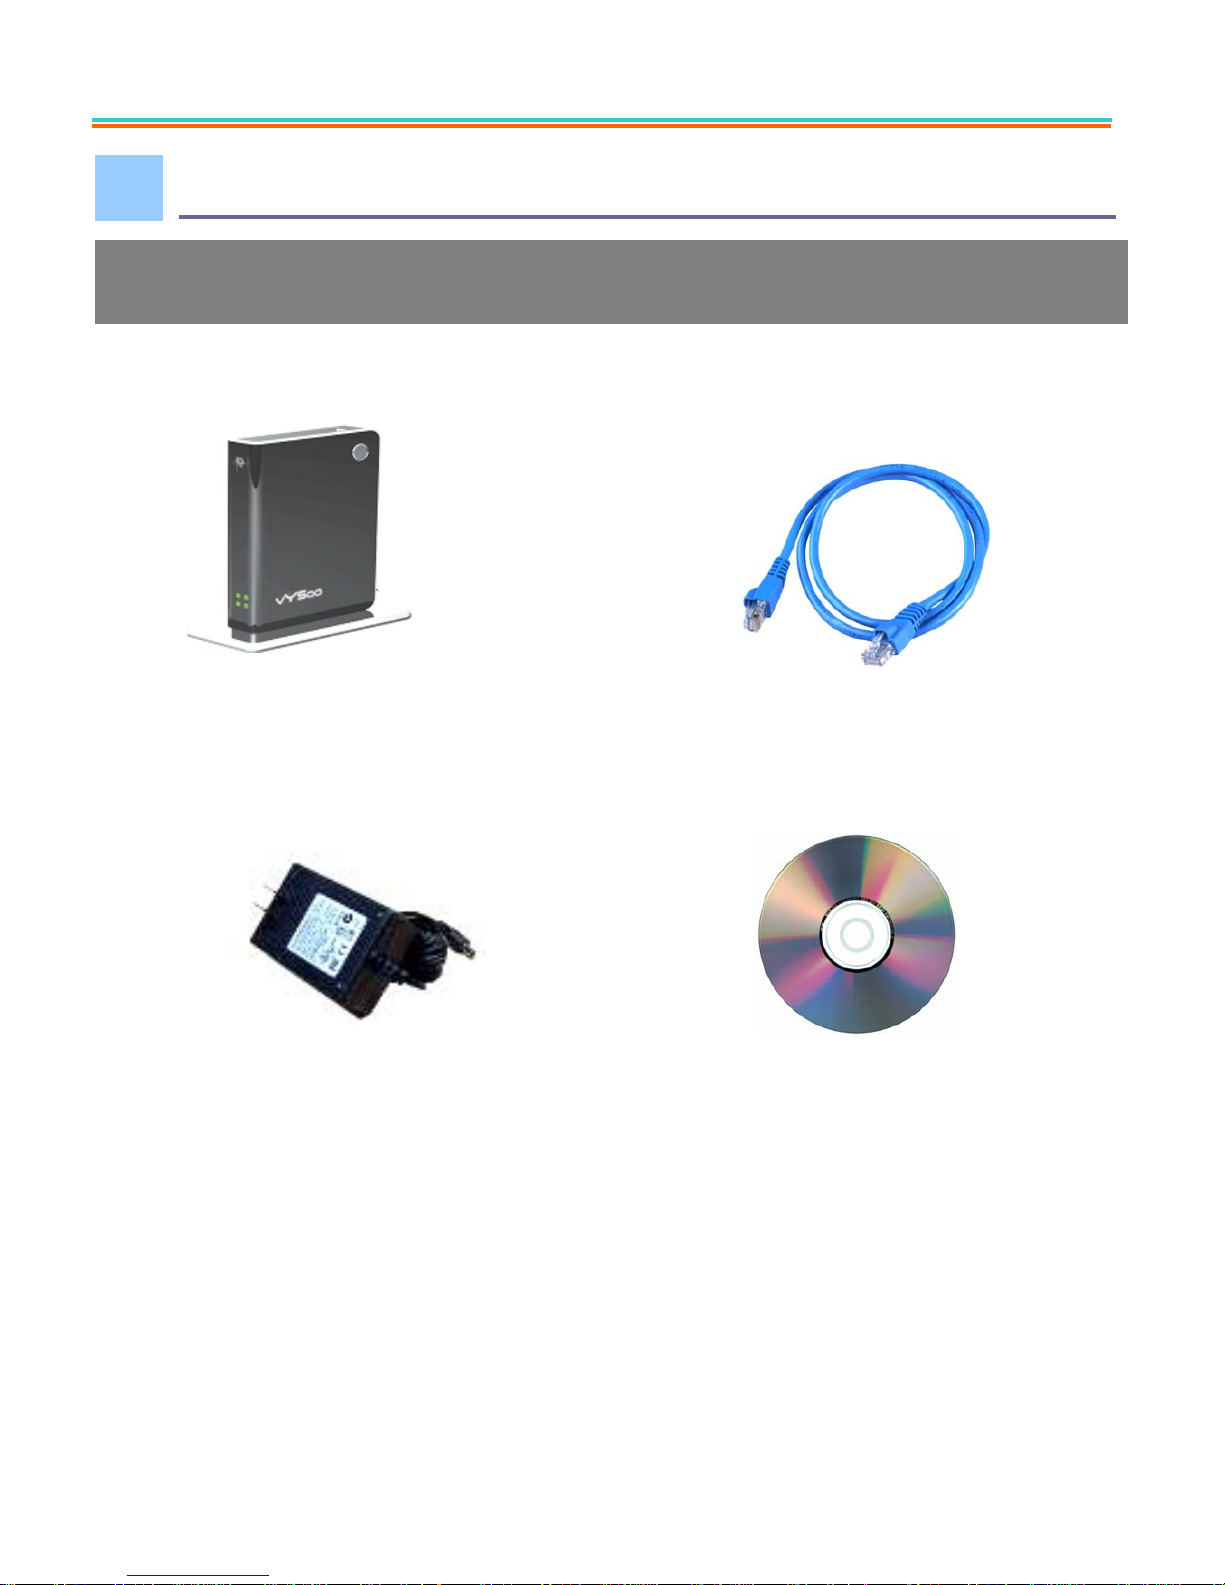
MOR600 Mobile Router package should contain items Listed as below. If
anything is missing, please contact your Reseller immediately.
• MOR600 Router • Ethernet Cable
• DC 5V/2A Power Adapter • User Guide on CD-ROM (optional)
1 V 0.7
Page 2
Connections and LEDS
2.
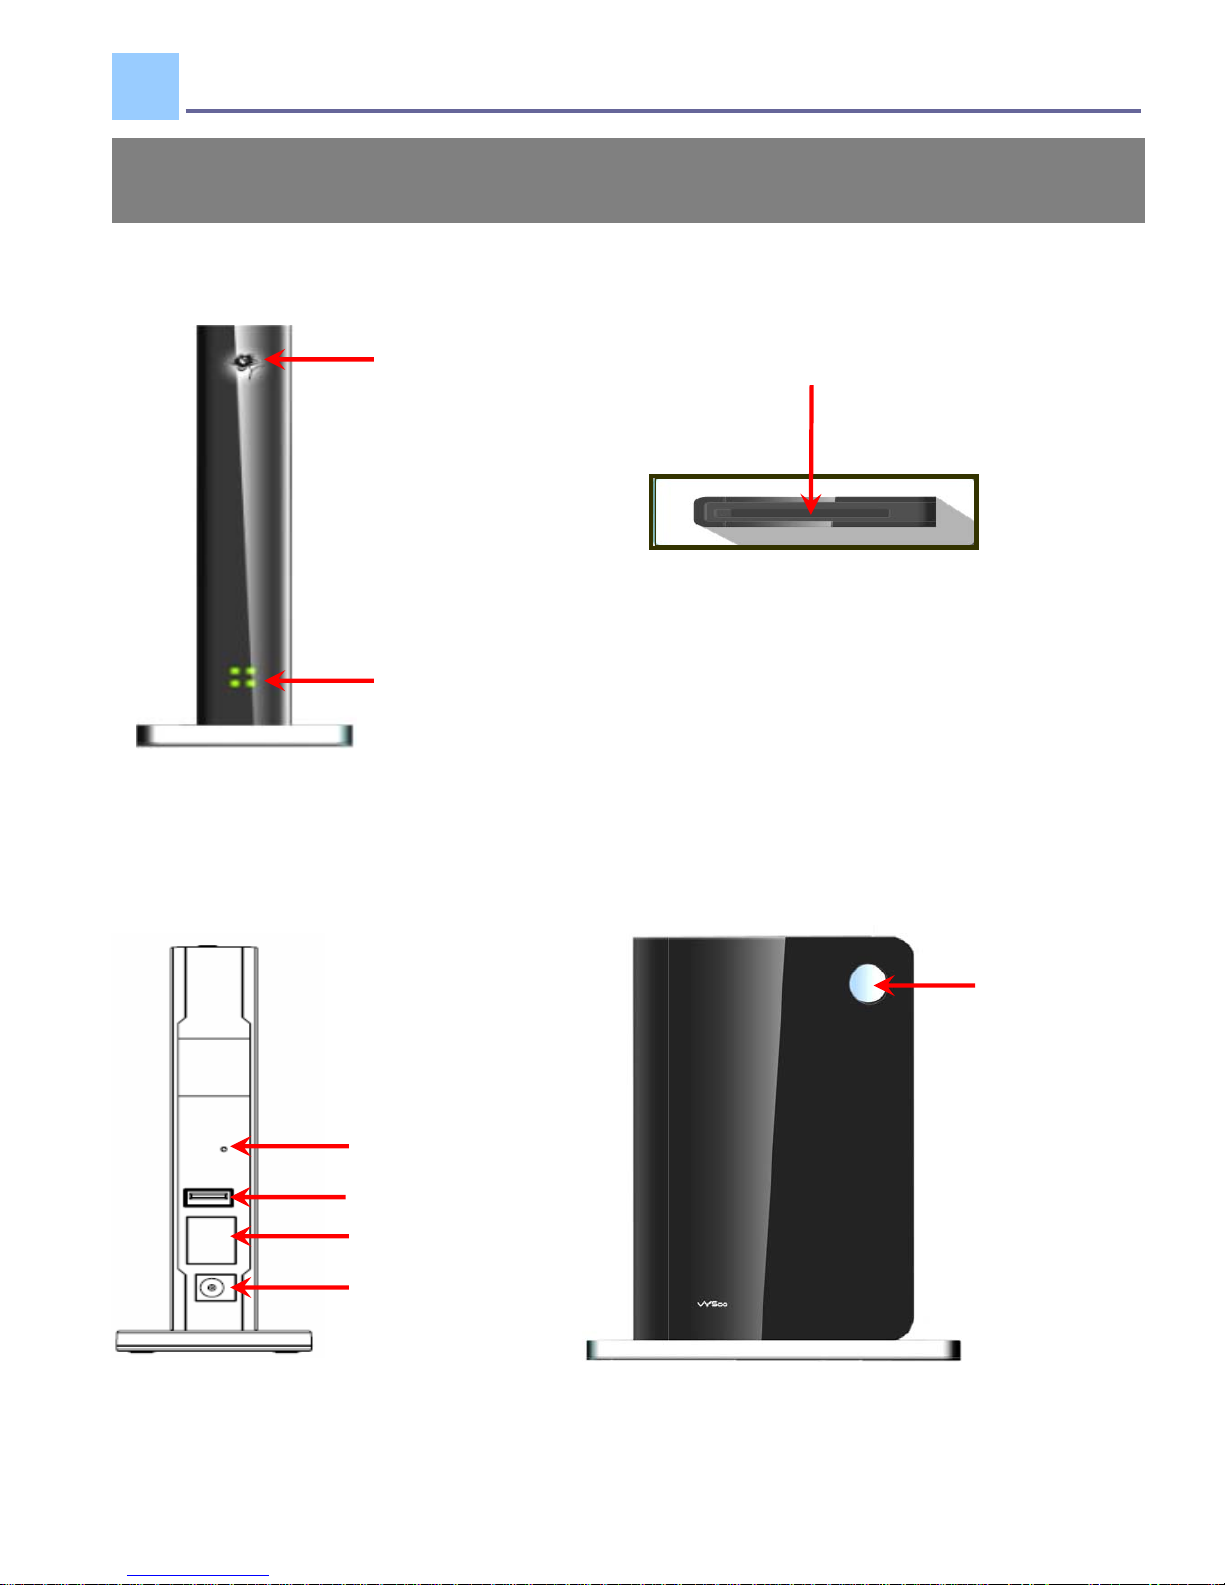
The following pictures show you various connectors and status LED indicators
on the MOR600 Mobile Router.
Power
LED
Status
LED
PC Card Slot
USB Port (Optional)
Power Jack
Ethernet LAN Port
Default Button
WiFi Secure
Set Button
2 V 0.7
Page 3
Getting Start
3.
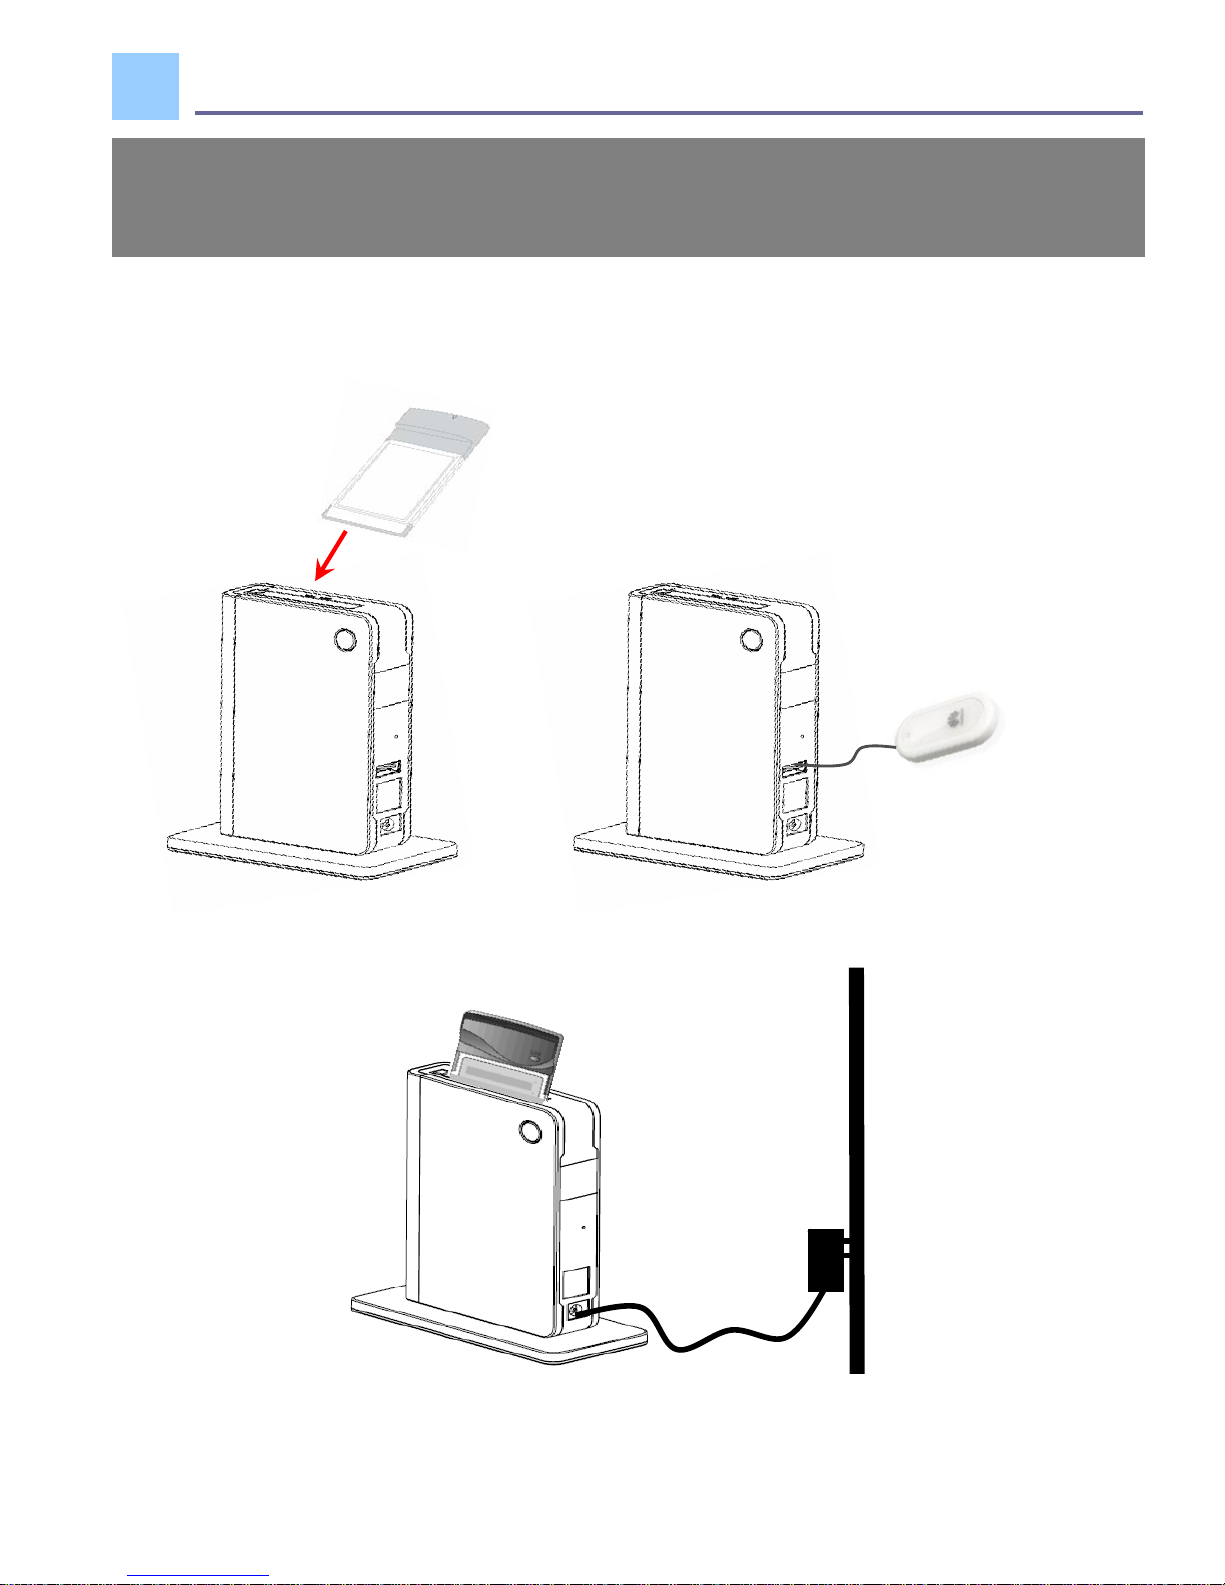
Before getting started, make sure your 32-bit PC Card or USB Data Card supports
and compatible with broadband service. (Subject to services and Service terms
available from your carriers).
STEP 1:Insert Data card to PC card slot or USB Port
or
Cable
USB
STEP 2 : Plug in power adapter
3 V 0.7
Page 4
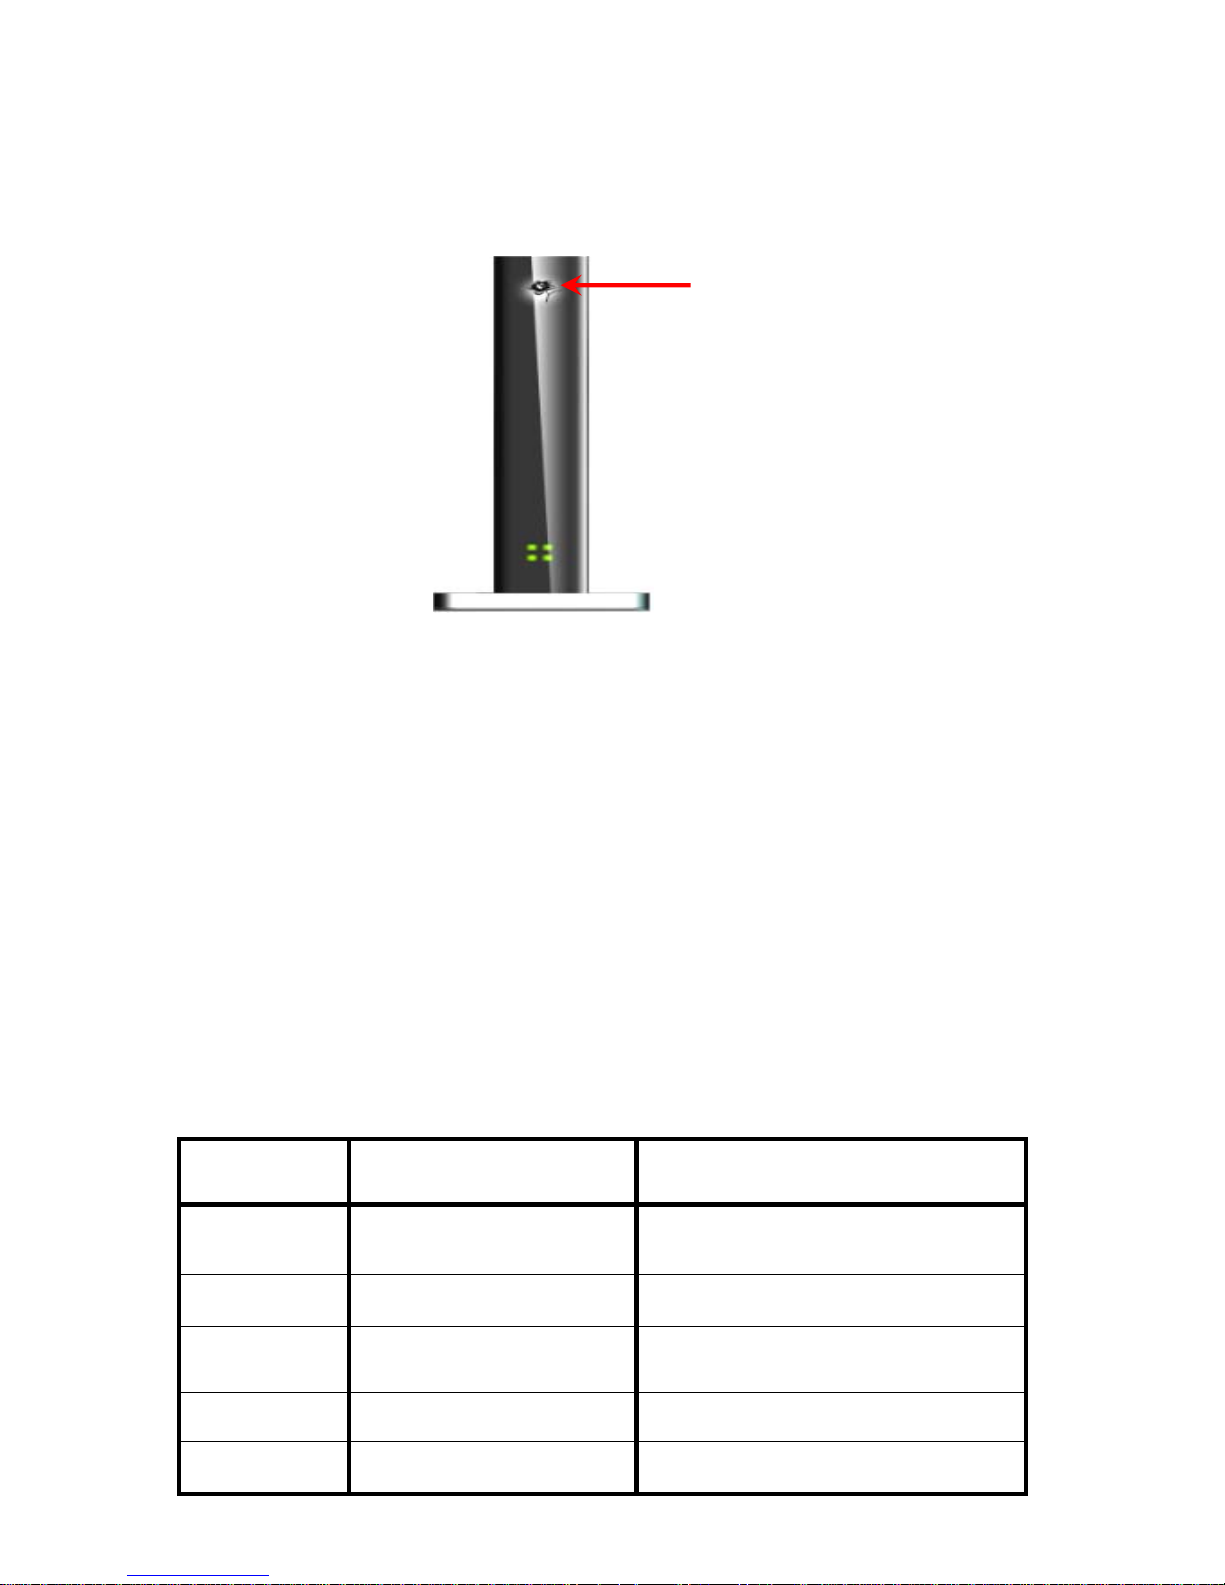
When connect the power adapter to back panel power Jack, the power LED turns ON
to indicate power has been applied.
Power
LED
STEP 3:Check Status LED
When power on MOR600, it will auto-detect and initial your date card。Status LED Will Flash
ON and OFF One by one when MOR600 performs initialization and Internet connection
process。MOR600 will be auto-configured properly for your Internet Service Account。This
process takes a few minutes。
When complete, the status LED illuminates in Green。Please refer the below Status
LED Activity table for each State。
LED Color Activity State
None None
No Date Card Inserted or No
Internet Connection
Green Flash One by one System initialization State
Red Always ON Card Error
Green Always ON High Speed Internet Connection
Green Flash at Same time Low Speed Internet Connection
4 V 0.7
Page 5

Congratulation! You have Connected With Wireless Internet
4.
MOR600 is PnP for your Data card. It configures and enables wireless LAN
automatically. If you have any problem or need more advanced feature setting,
please refer to chapter 5 for more details.
5 V 0.7
Page 6
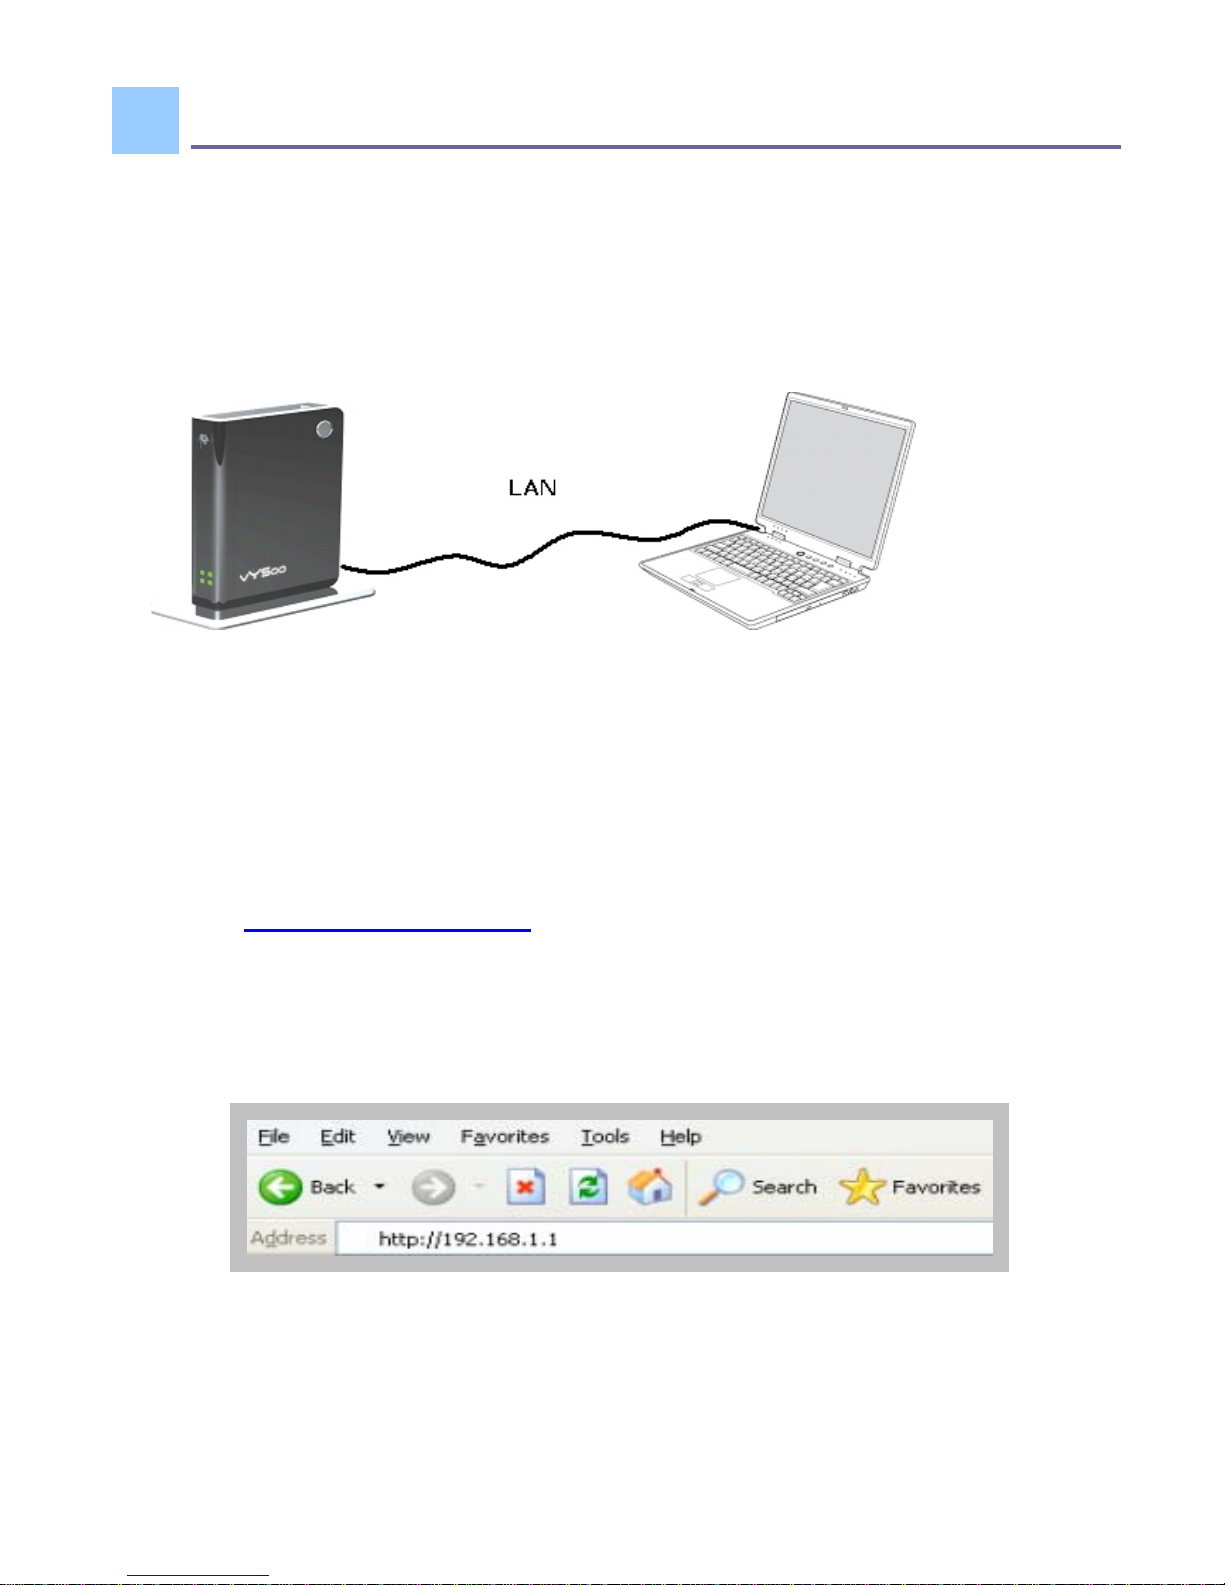
Advance Setting through Web page
5.
STEP 1:Connect your PC/Notebook to MOR600
STEP 2:Open your web browser such as IE or Netscape and type Press
Enter
http://192.168.1.1 in address bar.
6 V 0.7
Page 7
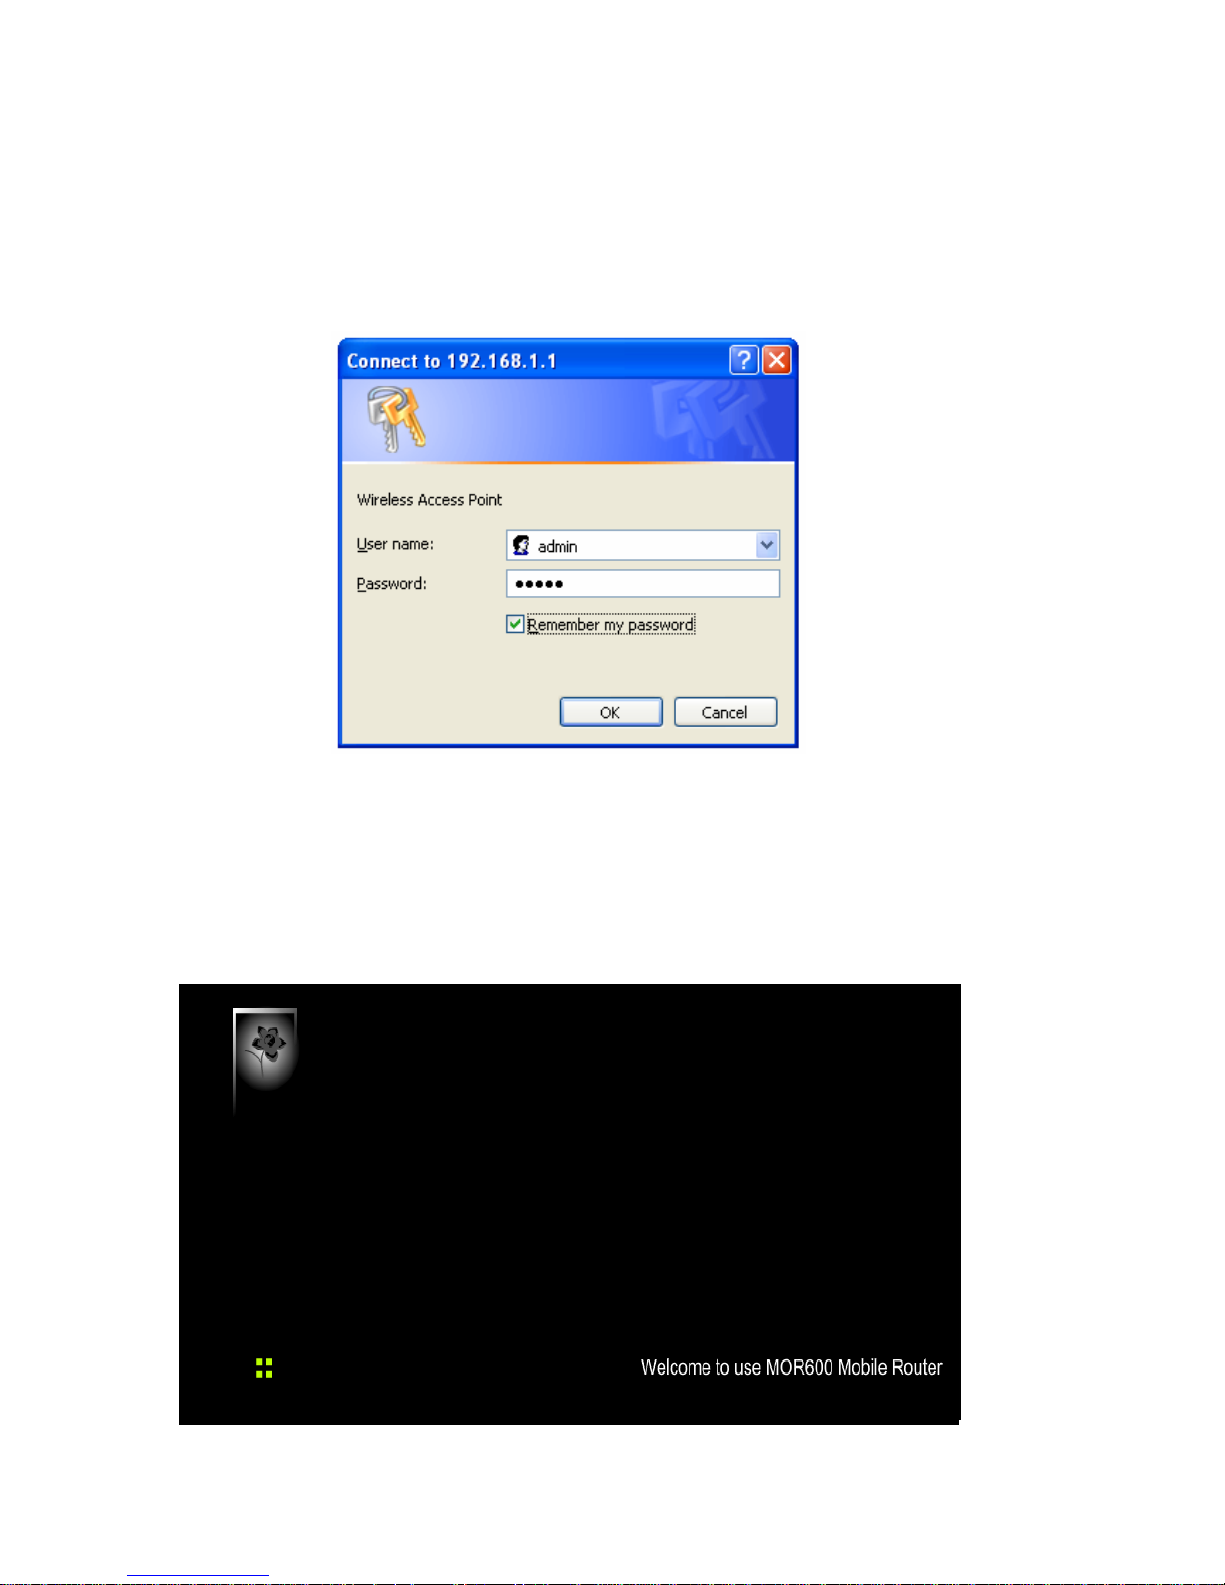
STEP 3:Login Mobile Router
• Enter your user name in
the User
name box. The
default user name is admin
.
•
Enter your passwor
d in
the Password
box. The
default passwor
d is
admin
.
•
Click OK.
STEP 4:Once logged in the following screen is displayed
7 V 0.7
Page 8
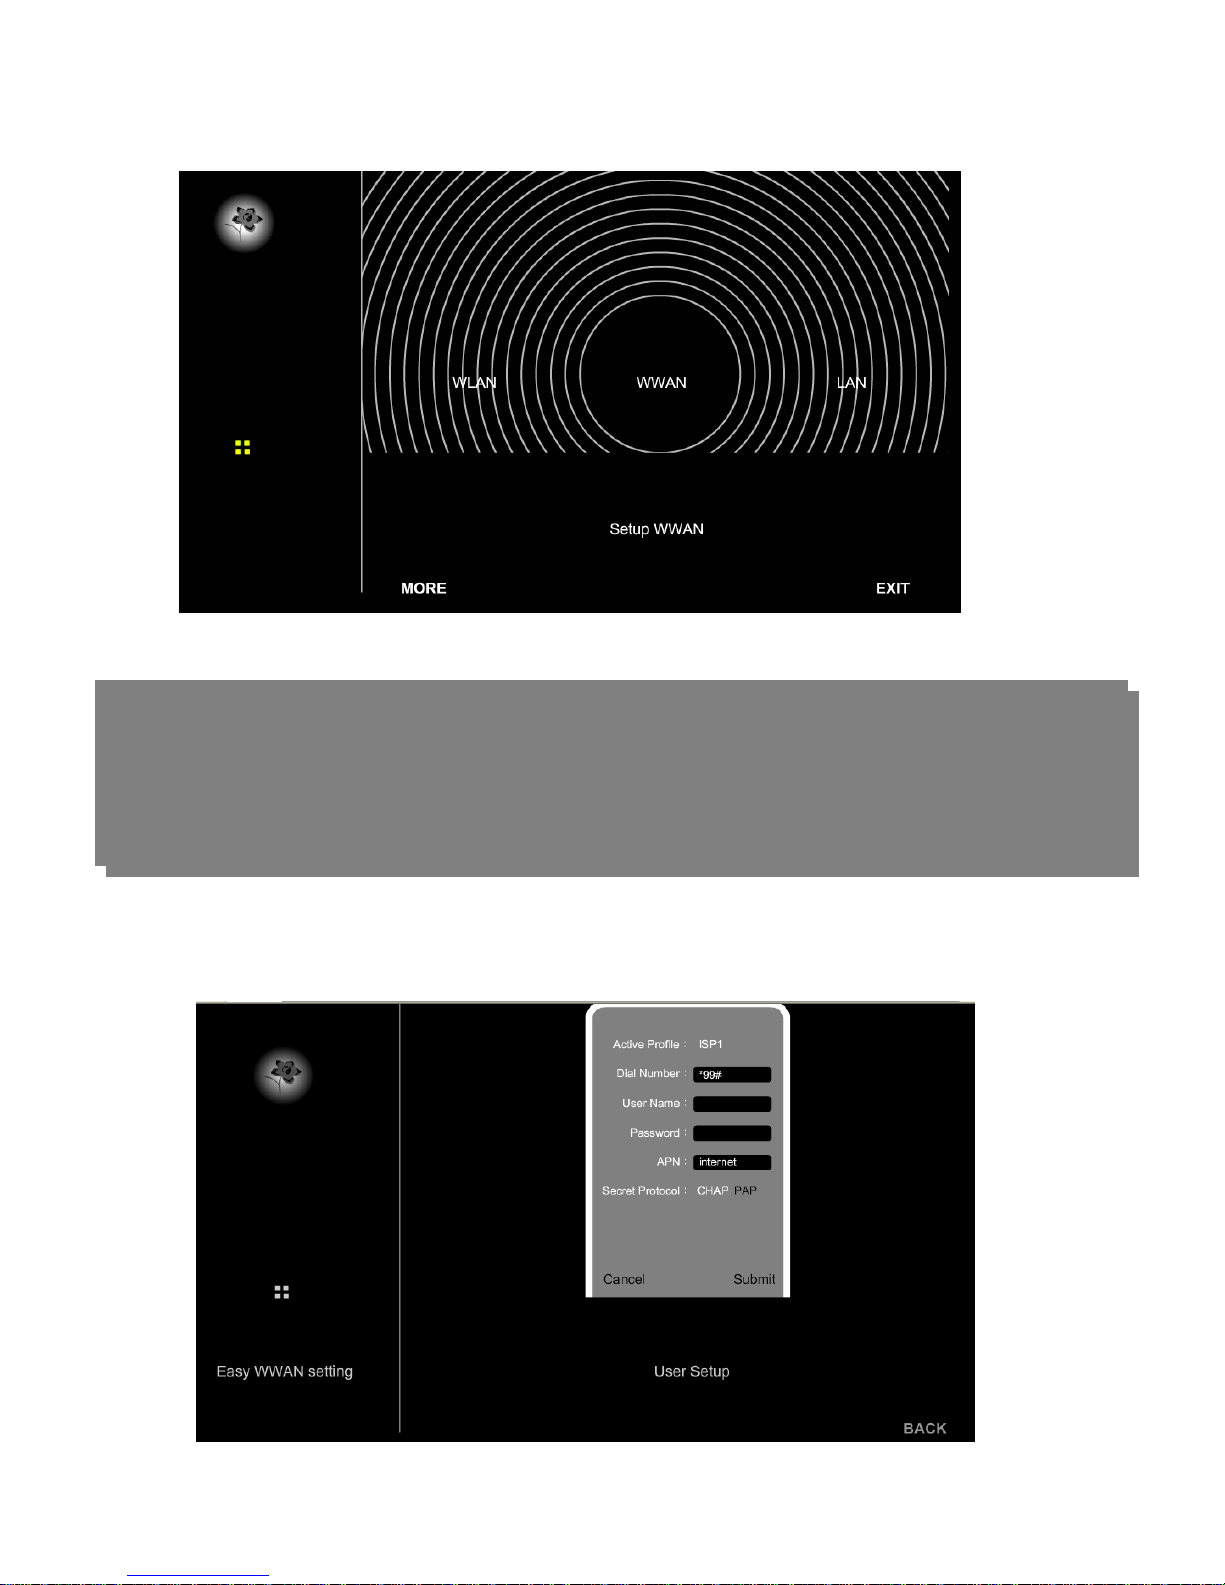
STEP 5:Click WWAN for WAN Networking Setting
Note:The WAN fields may not be necessary for your connection.
Information on this page will only be used when your service provider requires
you to enter User Name and Password to connect to the broadband Network.
Please refer to your Data Card documentation or service provider for addition
8 V 0.7
Page 9
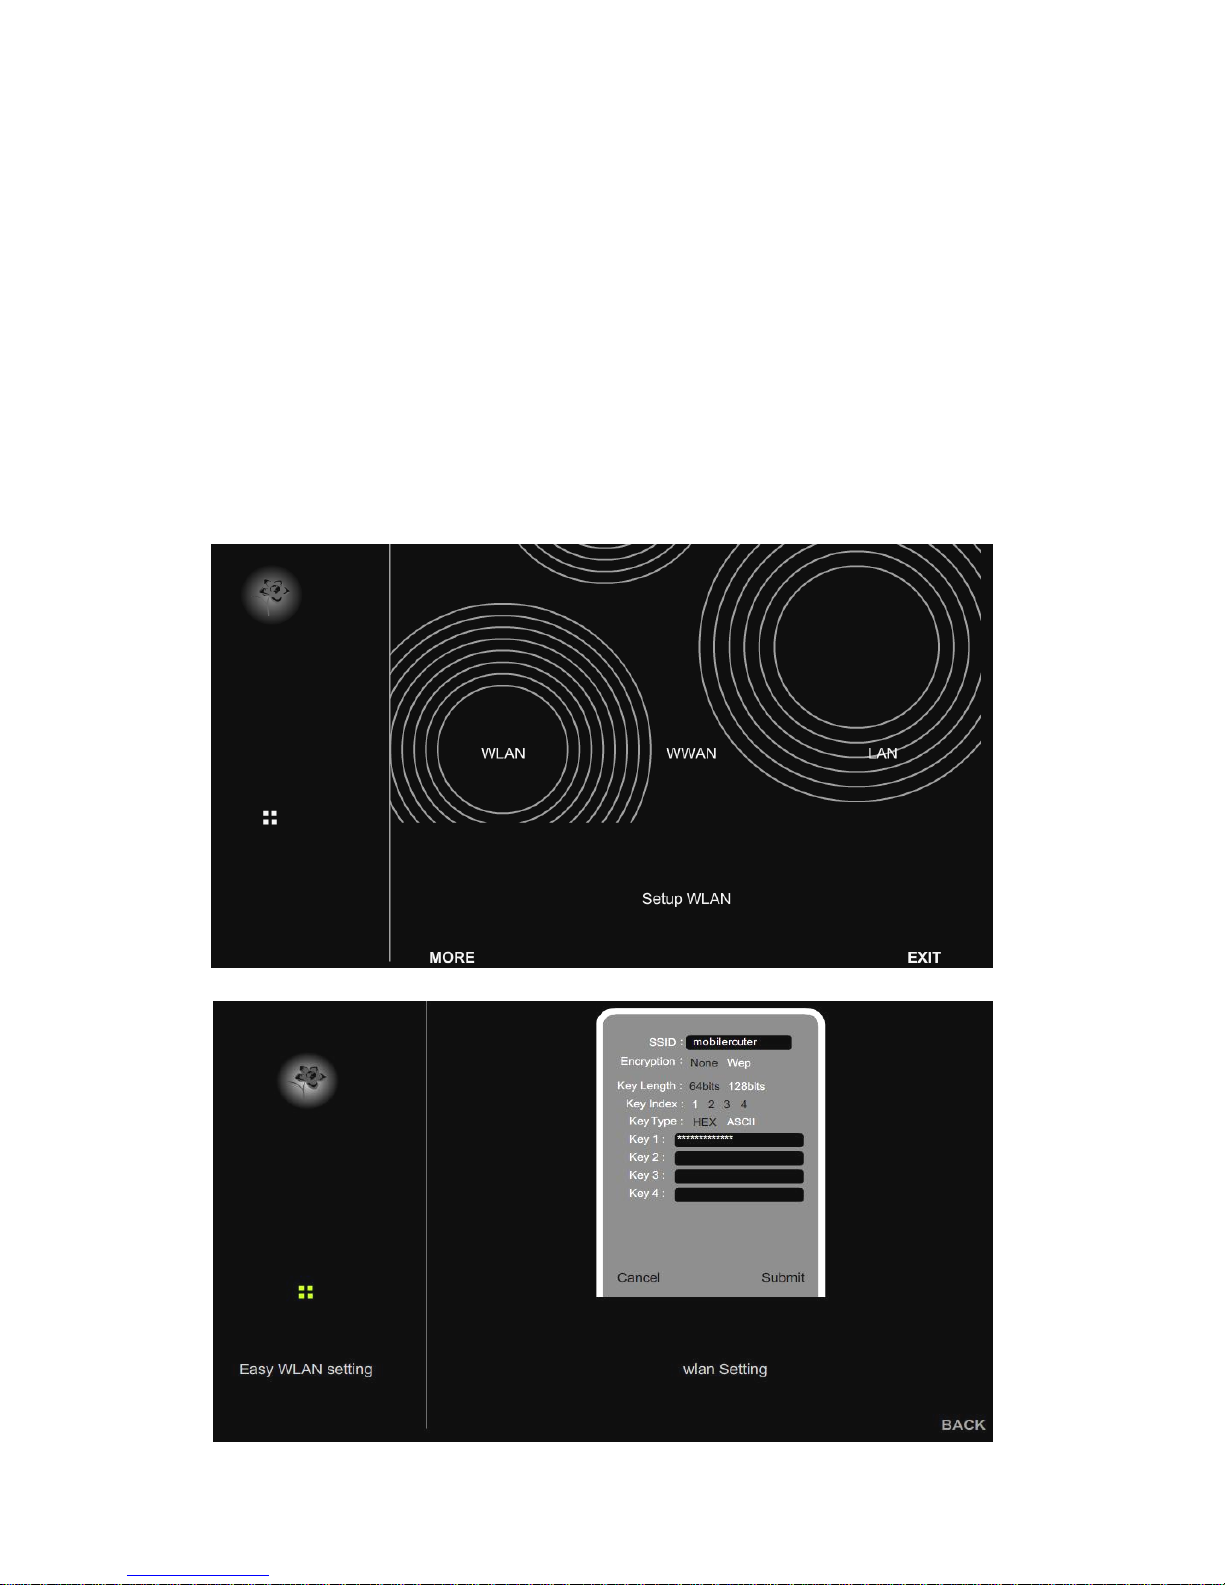
Dial Number : The default is *99#. This field should not be altered unless required
by your service provider.
User Name :
Enter the new User Name for your Data card connection.
Password :
Enter the new Password for your Data card connection.
APN :
Enter the name of your service Provider Network.
STEP 6:Click WLAN for wireless network setting
9 V 0.7
Page 10
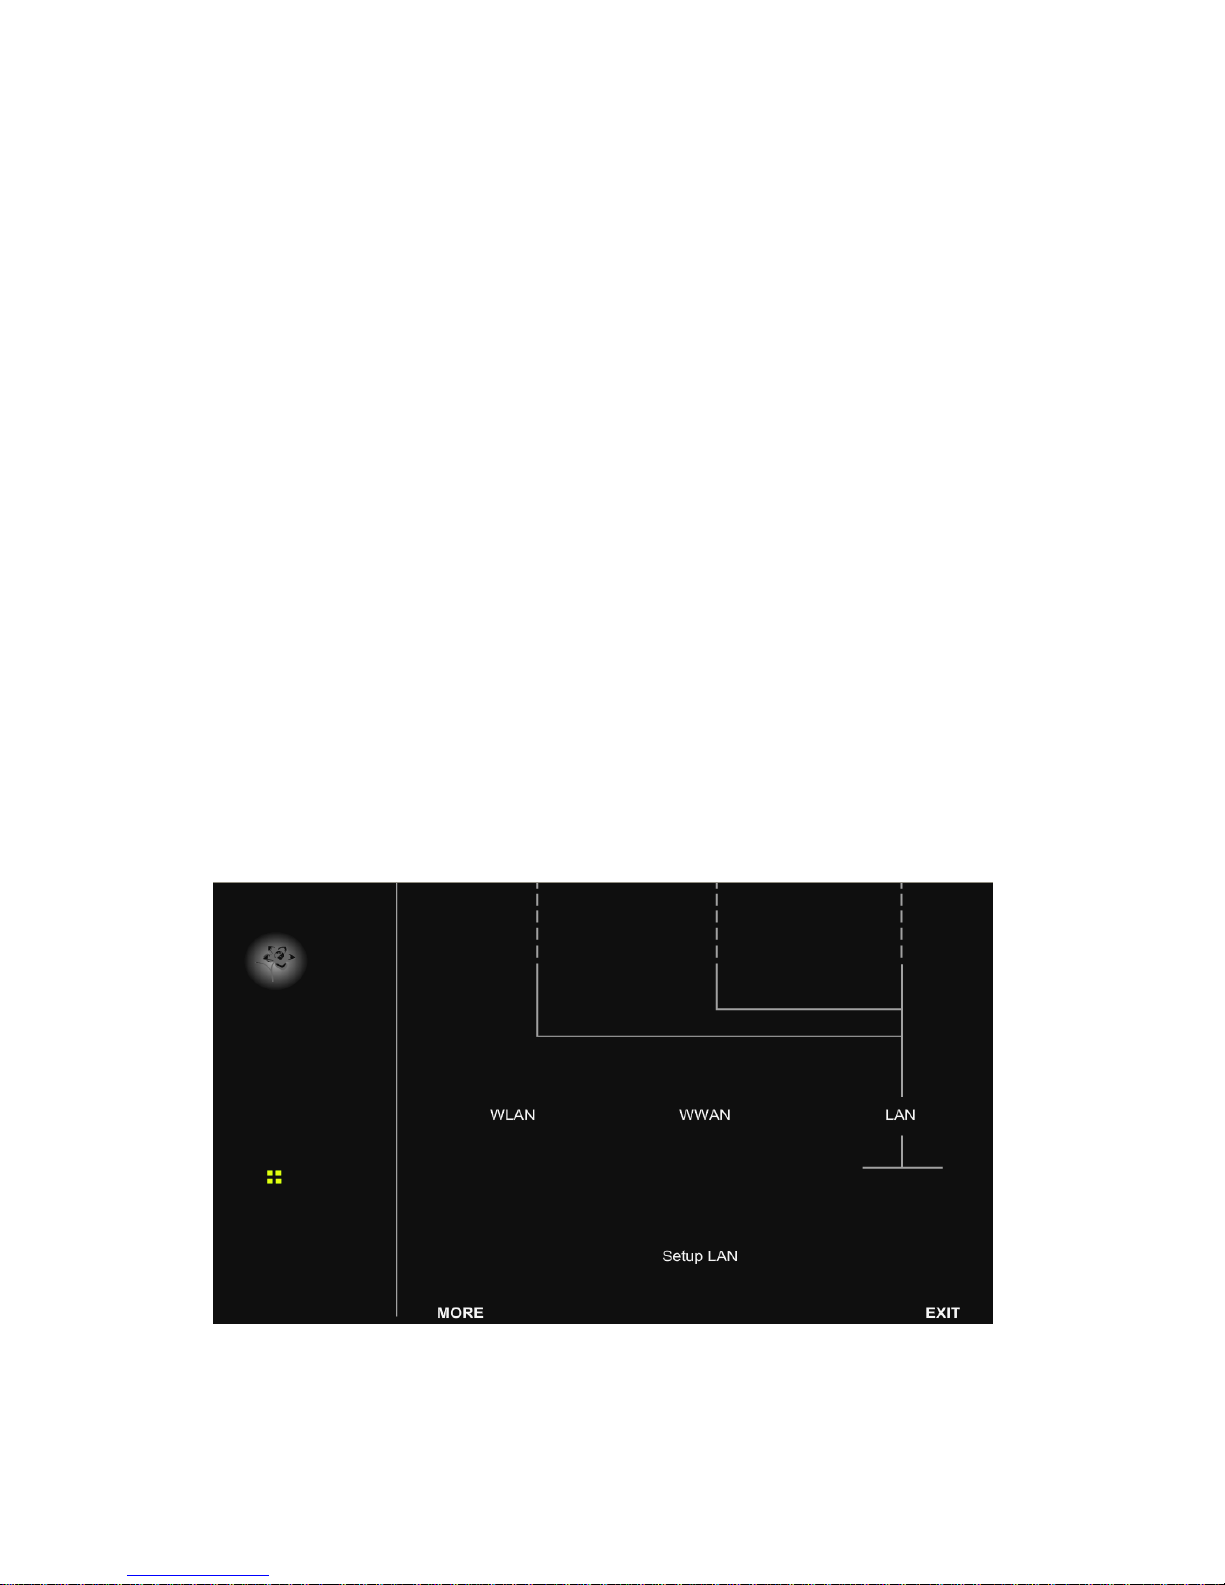
Enter your SSID name in the field provided. SSID names can contain
SSID :
up to 32 ASCLL characters.
Encryption :
You may select from two levels of encryption to secure your wireless
network:None or WEP.
Key Length : Two levels of wireless encryption are available:64 bits and 128 bits.
Key Type : Two type of WEP Key:Hex or ASCII. choose the proper one for key
Setting.
Key1~Key4 :
You can enter the WEP key by manually and choose Key1~Key4 for
enable.
STEP 7:Click LAN for Local Network setting
10 V 0.7
Page 11
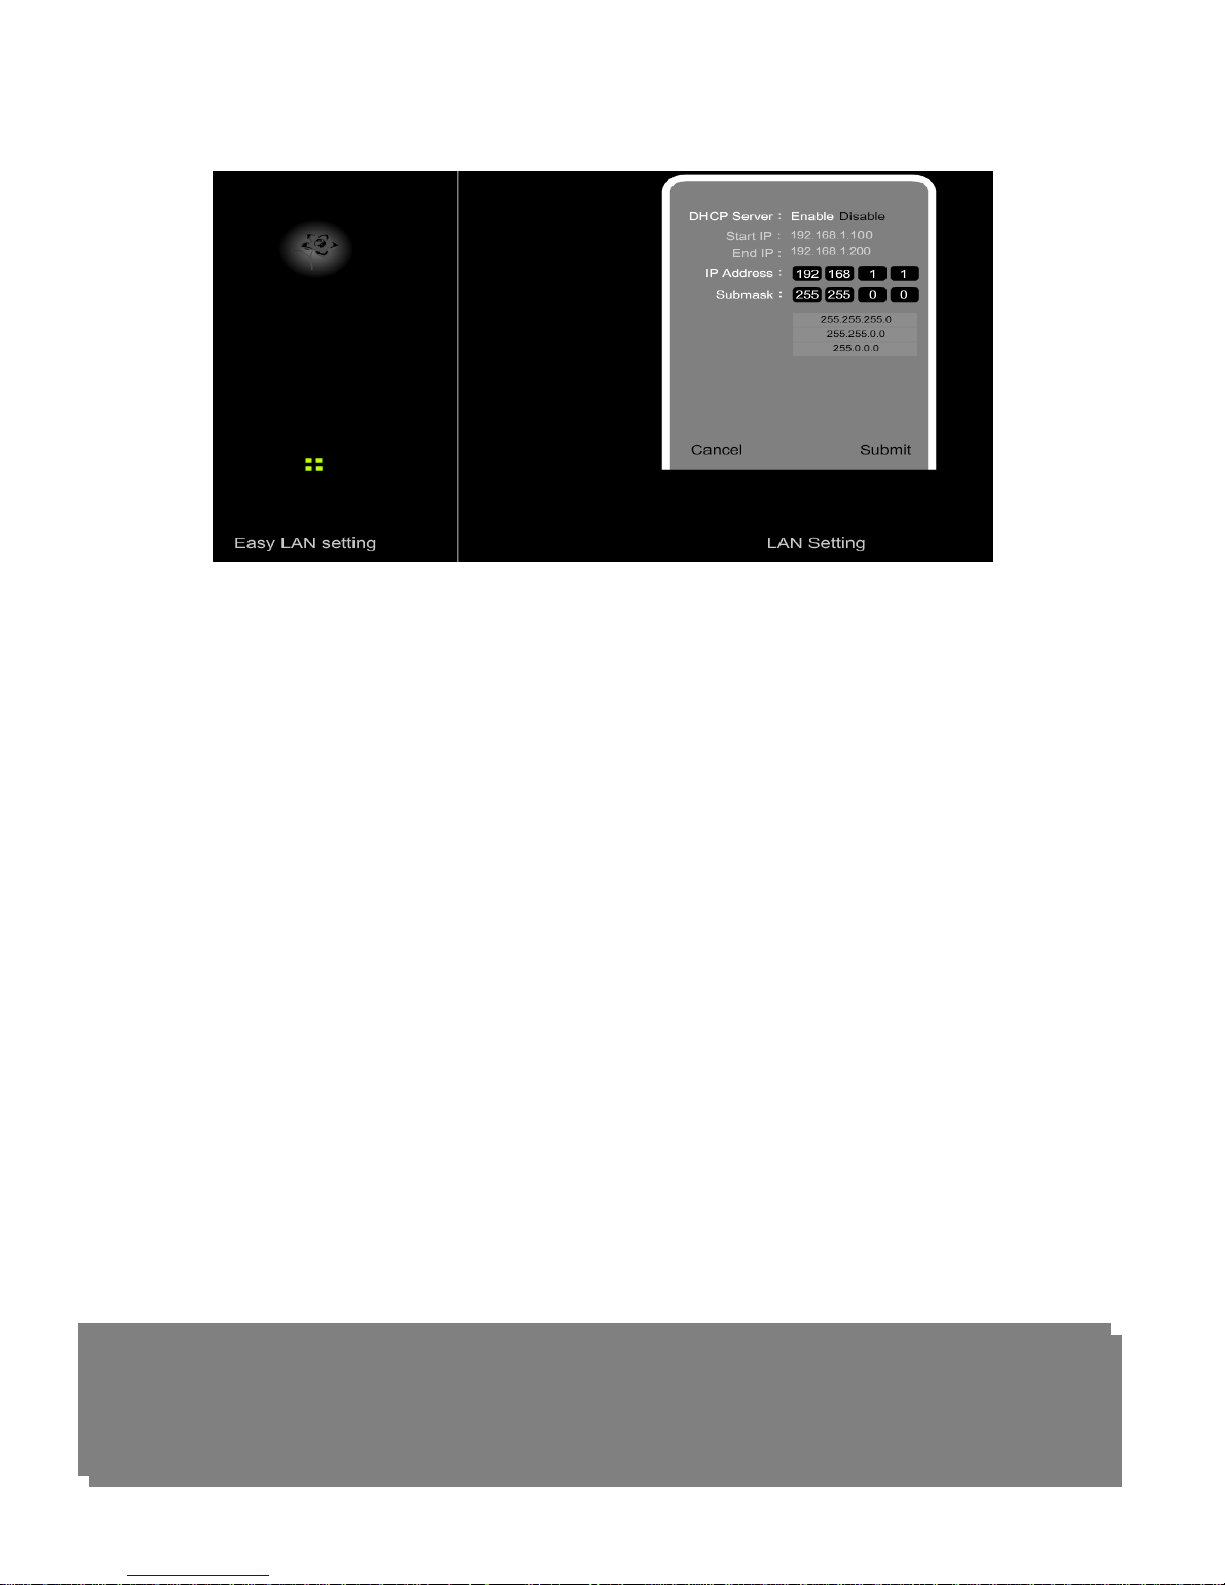
DHCP Server :
This setting is used to configure MOR600’s Dynamic Host Configuration
Protocol (DHCP) server function. MOR600 can be used as a DHCP
server for the internal LAN network. The DHCP server automatically
assigns an IP address to each computer in the LAN network. If you
choose to enable MOR600 s DHCP server option, you must configure all
of PCs in the LAN network to connect to this DHCP server (MOR600),
and make sure there is no other DHCP server on your network.
Start IP Address:
Enter the values for start IP address. The default start IP address is
192.168.1.100.
End IP address :
Enter the values for end IP address. The default end IP address is
192.168.1.200.
IP Address :
The IP Address of the LAN. The default IP address is 192.168.1.1
Net mask :
The subnet mask of the LAN
Note: When DHCP server IP address range is set , it must be assured that
there is no other device in the network to use the IP address located in this
address range , such as printer server , file server , etc . Otherwise there is
11 V 0.7
Page 12

http://www.vysoo.com
 Loading...