

Vyrsa Skydrop Installation And Quick Start Manual

Installation and Quick Start Guide
Connected to Wi-Fi
Next Watering
Smart watering enabled
Tomorrow 12:00 AM
May 26, 2016
8:00 AM
Burgos, Spain
Partly sunny
10%
20º
Wi-Fi

Welcome to Skydrop
This guide will help you set up your Skydrop Controller. For more information,
check out our step-by-step installation video or visit our website.
Installation Video:
www.vyrsa.com/skydrop

Before You Begin
Wireless Access
The Skydrop Controller uses
Wi-Fi, and the controller must be
installed close to a strong signal
source for optimal performance.
If the Wi-Fi signal strength is low,
you may need to relocate your
wireless router or install a Wi-Fi
range extender.
The Skydrop Controller is designed
to be installed indoors.
If you need to place your controller
outside, ensure that is in encased
in a weather-resistance enclosure.
Outdoor Installation
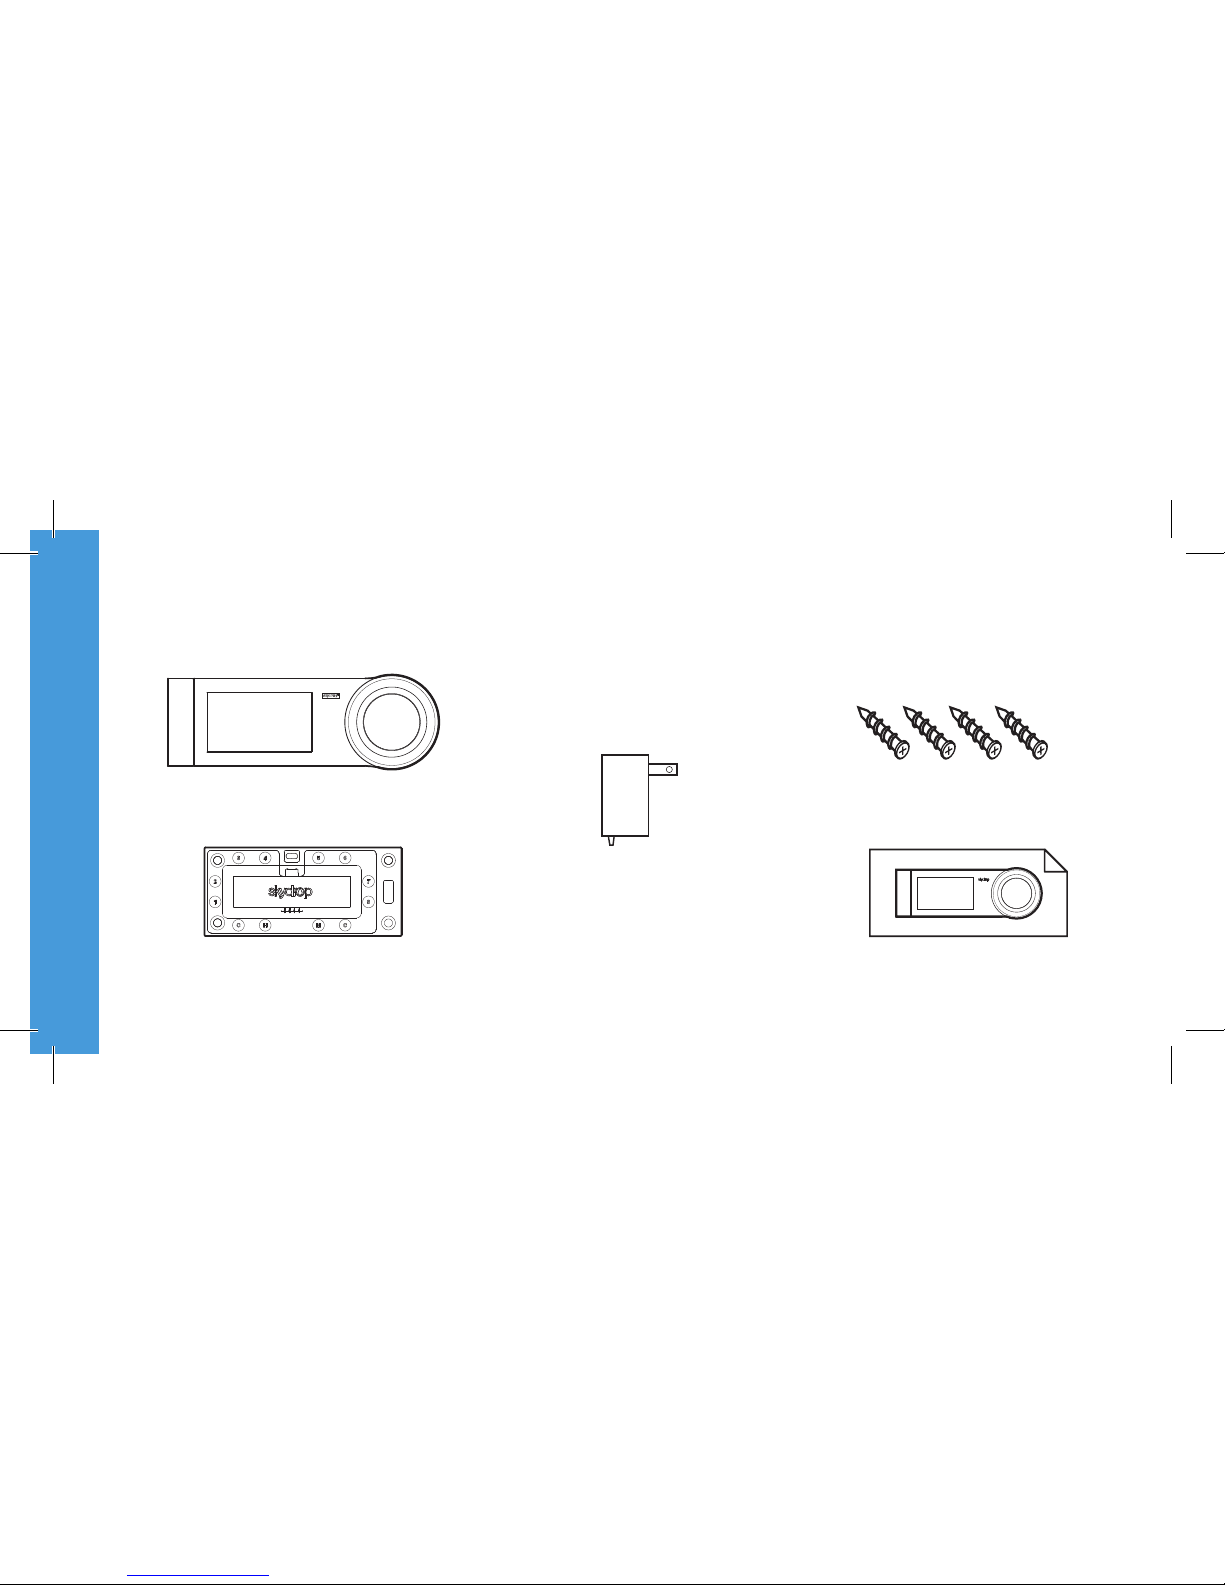
Contents
Controller
Wall Plate
Wall Screws
Installation Guide
Power Supply
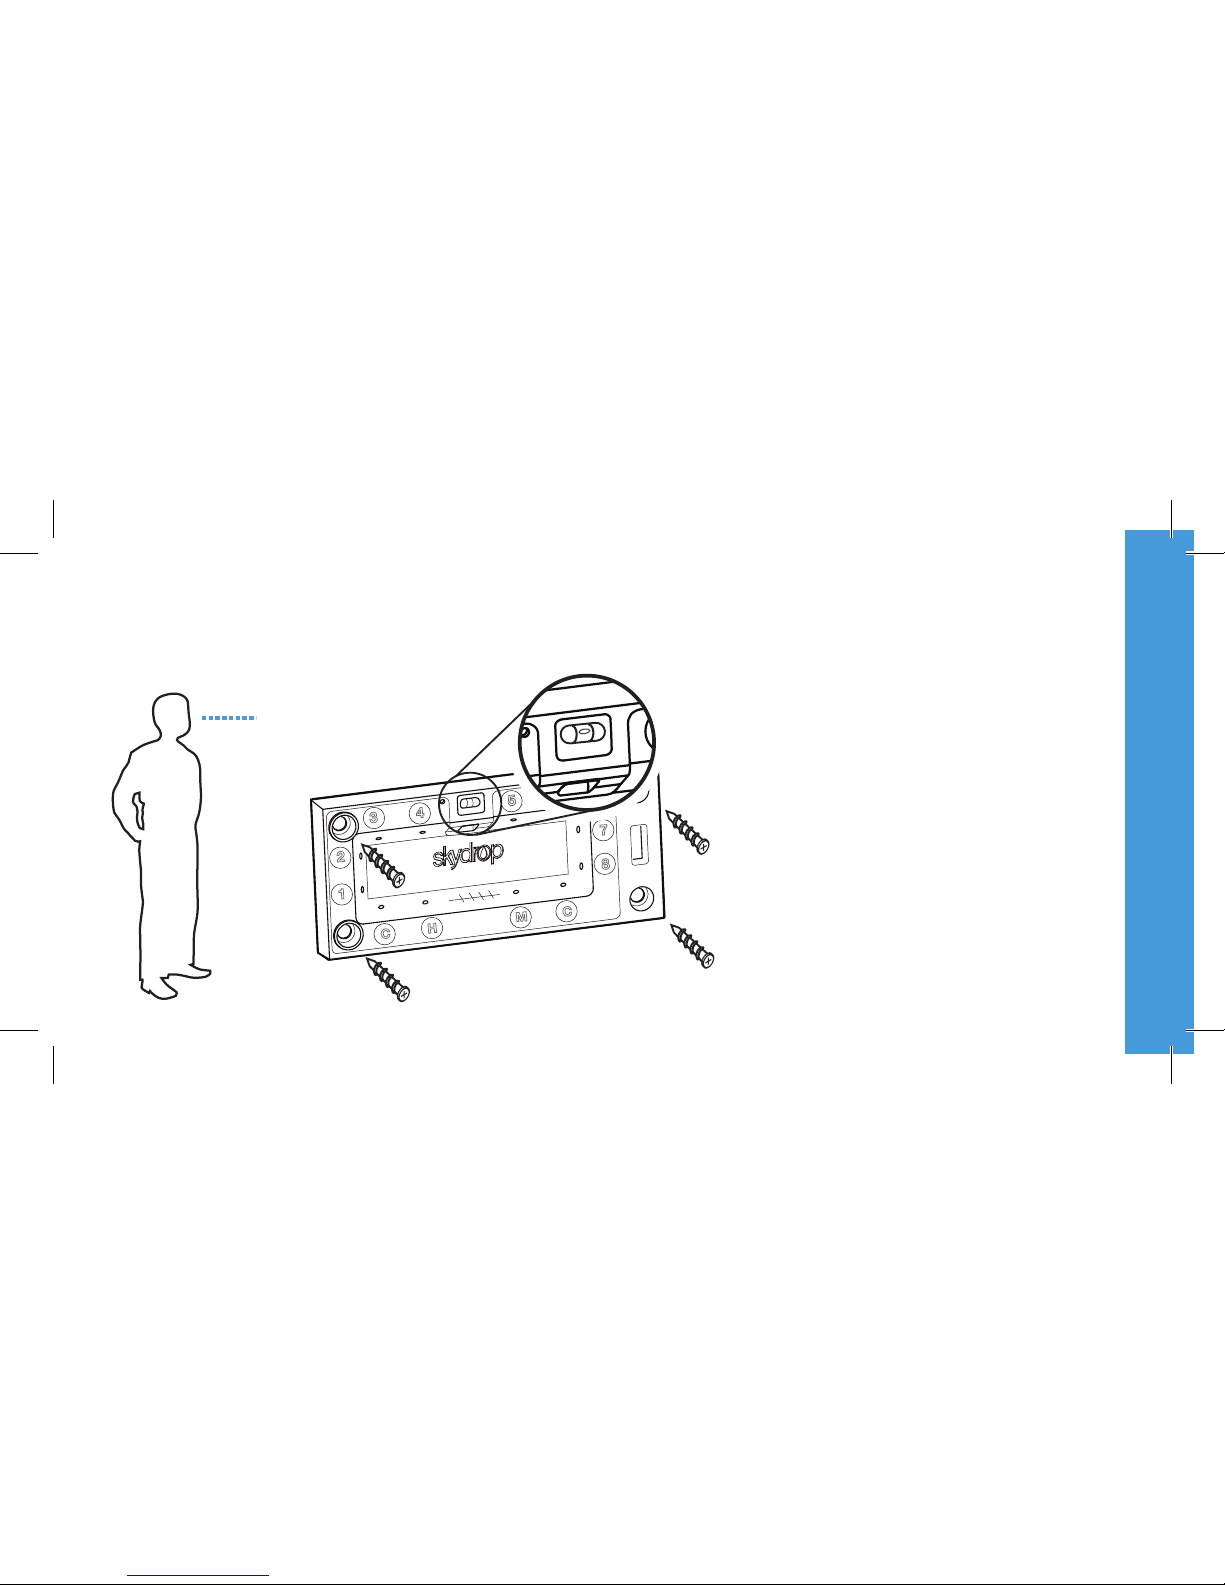
Step 1: Mount the Skydrop Wall Plate
Position your Skydrop Wall
Plate using the integrated
level, and secure using
anchor screws (included)
NOTE: Wall anchors are not necessary when
mounting your Skydrop Controller to drywall.
Pre-drilling with a 3mm bit is recommended
when mounting to wood studs.
Do not over-tighten screws.
Hand tightening is recommended.
Mount your Skydrop
Controller at eye level for
optimal screen viewing.
TIP:
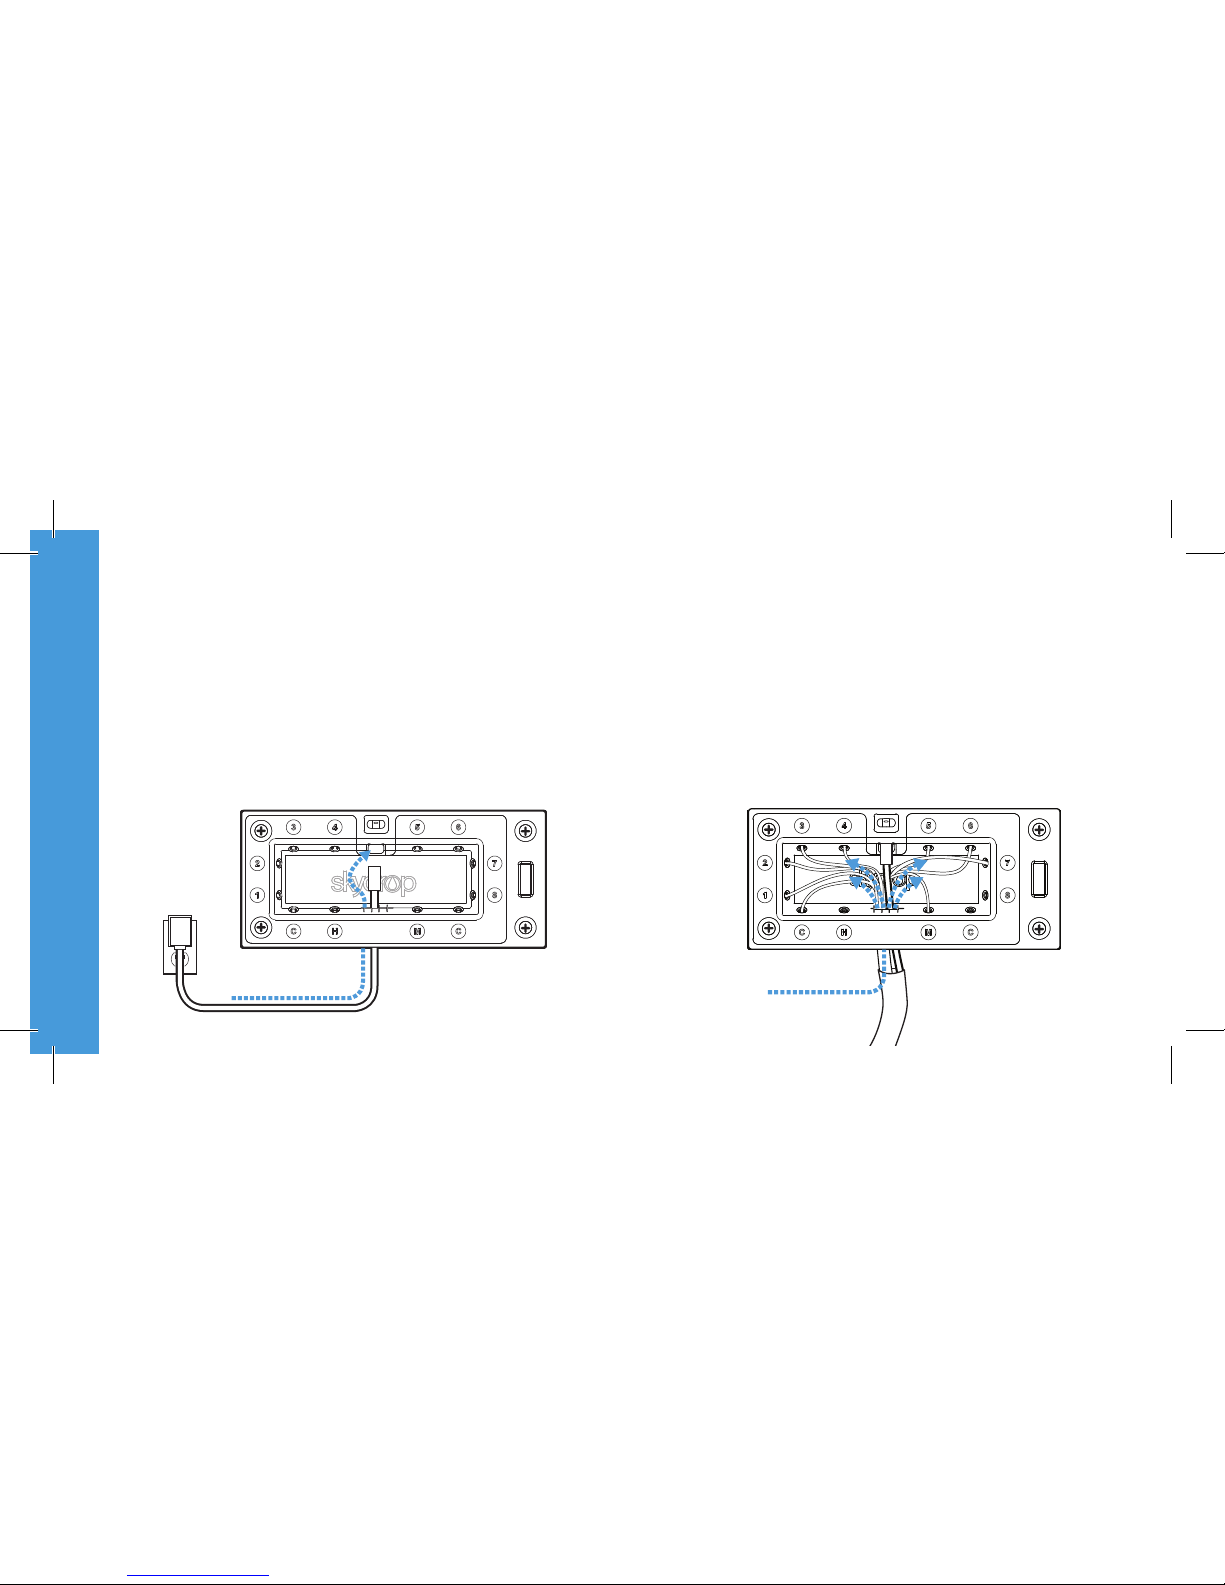
Step 2: Power and Wiring
Insert the power supply cable through the
wiring slot found on the bottom of the
mounted Wall Plate (or through the breakaway
tab on the rear of the Wall Plate). Secure the
power cable into the top, center plug.
Push each valve wire firmly into a designated
zone position (1-8) and pull back gently to verify
that each wire is secure. The “C” positions are for
common wire(s). To remove a valve wire, depress
its corresponding button and pull the wire out.
 Loading...