

Vu Ryte VUR 59GR Installation Instructions Manual
INSTALLATION INSTRUCTIONS FOR
VUR 59GR AND VUR 79GR
Congratulations:
Your VUR 59GR or VUR 79GR have
been engineered to meet the
ergonomic support needs of your
monitor arm and/or your sit-stand
workstation. Both are designed to
attach to any existing monitor arm
with a VESA plate for a world-class
“in-line” computing experience.
Vu Ryte 59GR Vu Ryte 79GR
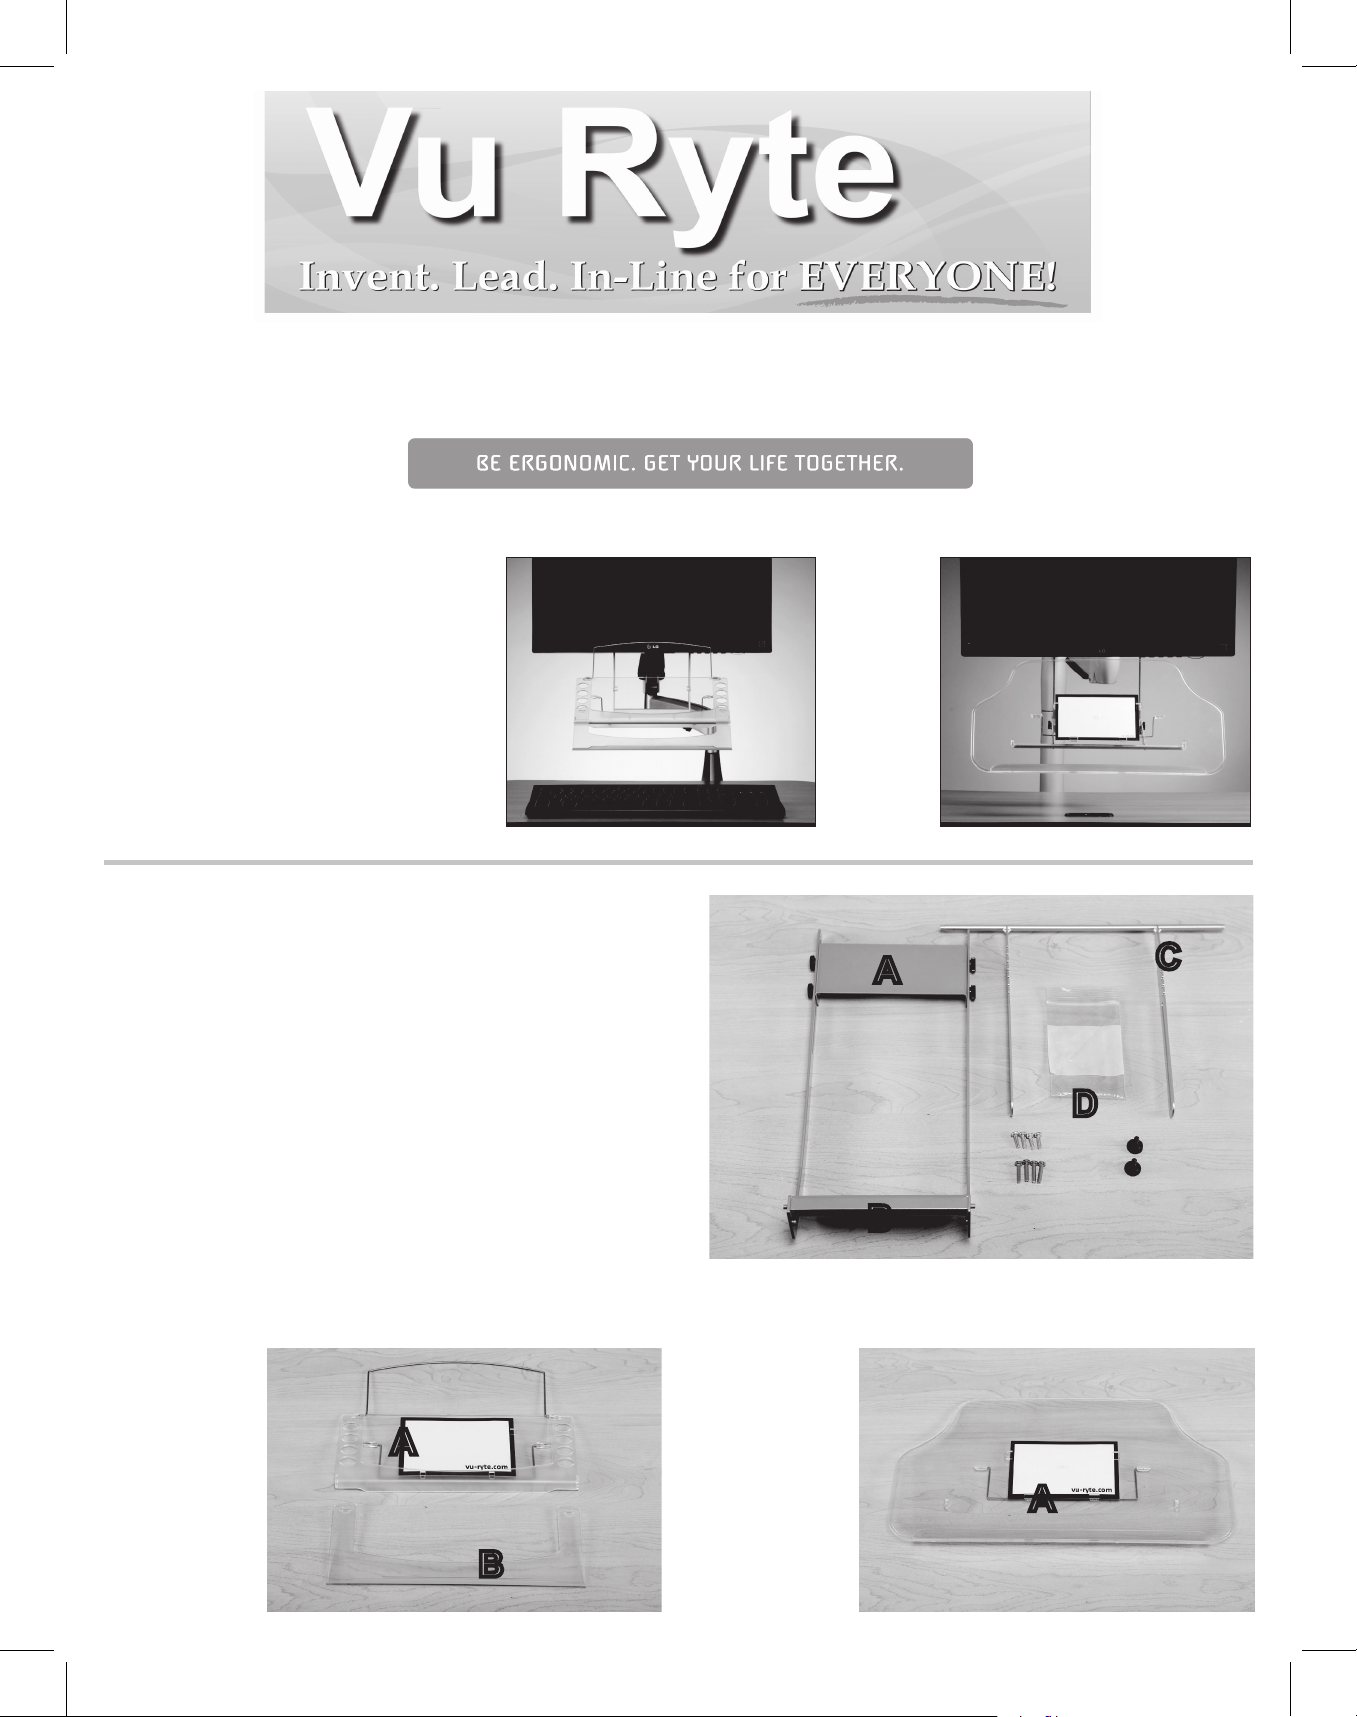
Let’s begin by describing the components
to either your VUR 59GR or VUR 79GR:
Common Components of BOTH (See Image I)
• Back Plate (A)
• Vertical Support Arm (B)
• Horizontal Support Arm (C)
• Hardware Bag: 2 thumb screws, 8 machine screws (D)
I.
A
C
D
B
Your monitor arm has standard screws for attachment to your monitor. We have included TWO additional sets of screws in the rare case that
your existing screws are not long enough. One set of four each are 14mm long and the other set of four are 20mm long.
VUR 59GR
(See Image II)
• Easel (A)
• Easel Lip (B)
II. III.
A
VUR 79GR
(See Image III)
• Easel (A)
A
B
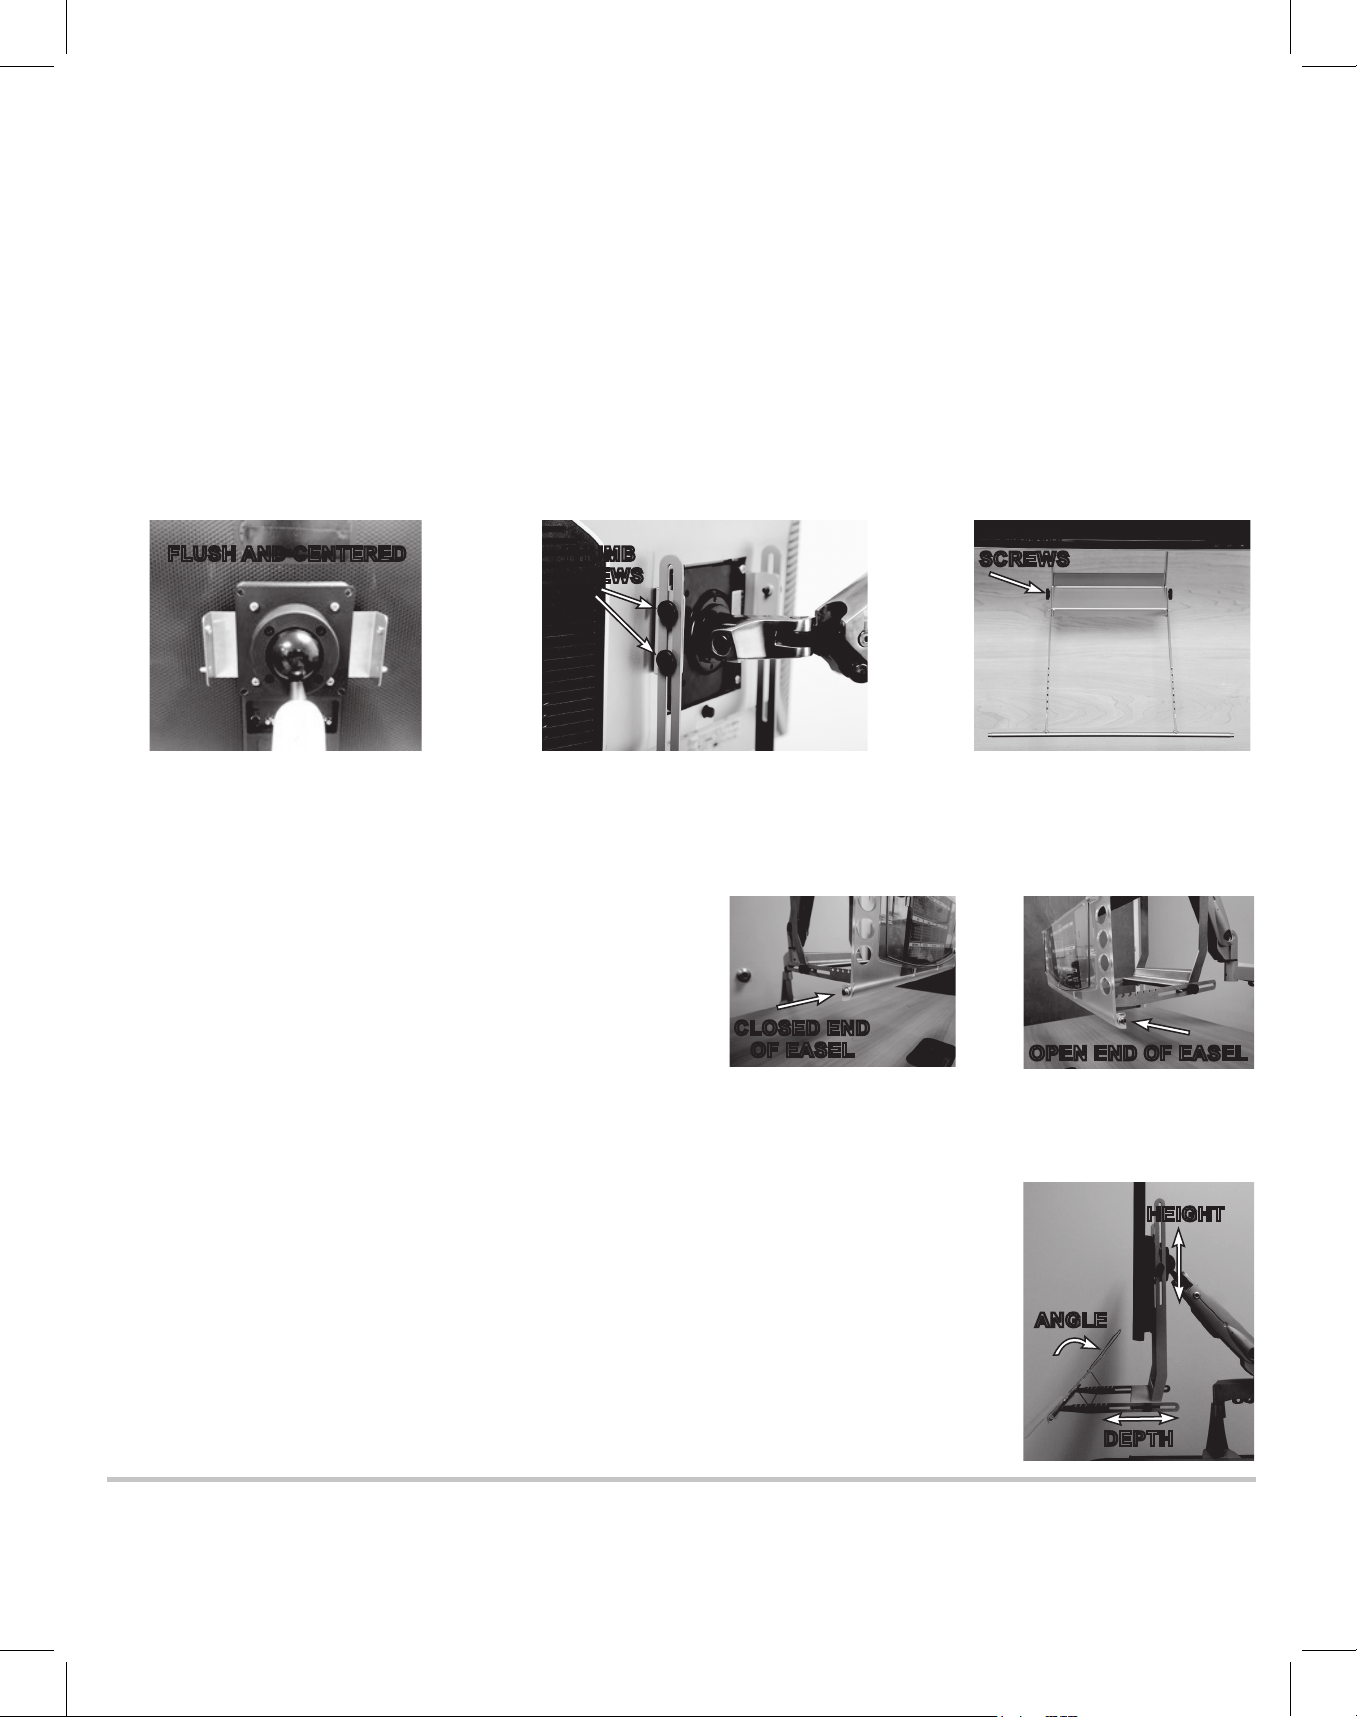
INSTALLATION STEPS:
1. Remove the four screws from the Back Plate. If your monitor is already attached to an arm, remove the top two screws from the VESA
attachment and loosen the bottom two screws.
2. Slide the Back Plate between the VESA attachment and the monitor as shown in Image IV. Position the Back Plate flush and center
against the back of your monitor.
3. Replace the top two screws and tighten all 4 screws. If the original screws are not long enough, we have included 2 additional sets of
screws. One set of four screws is 14mm long and the other set of four screws is 20mm long. If needed, try the 14mm screws first. It is
IMPORTANT that this connection be “snug.”
4. Position the Vertical Support Arm on the Back Plate. Thread and tighten the four thumb screws through the slots of the Vertical Support
Arm and into the Back Plate. (See Image V.)
5. Attach the Horizontal Support Arm to the Vertical Support Arm by placing the guideposts in the Vertical Support Arm through the slots
in the Horizontal Support Arm. Tighten by threading each of the two thumb screws through the Horizontal Support Arm and into the
Vertical Support Arm. Make sure the slots in the Horizontal Support Arm face upward. (See Image VI.)
IV. V. VI.
FLUSH AND CENTERED
If Monitor Arm is NOT Attached to the Monitor:
THUMB
SCREWS
Insert all four screws through VESA plate and into the monitor. Repeat steps 1-5.
THUMB
SCREWS
Attaching the VUR 59GR Easel:
1. Slide the closed circular end of the Easel over the left side of
the Easel Arm, and gently snap the open end of the Easel into
place. (See Images VII and VIII.)
2. The Easel Lip attaches to any of the four holes on either side of
the Easel. Slide the Easel Lip into the desired holes and GENTLY
PUSH DOWNWARD until it engages. The bottom two holes are
recommended for full size documents.
3. To adjust the size of your Easel, gently slide the Easel Lip upward until it disengages. Position as desired.
VII.
CLOSED END
OF EASEL
VIII.
OPEN END OF EASEL
Attaching the VUR 79GR Easel, see number 1 above.
Angle Adjustment
1. To adjust the angle of the document, swing out the angle adjustment wire and
place into the desired slot.
Height and Depth Adjustment
1. To adjust the unit up or down, loosen the thumb screws on the Back Plate and slide into the desired
position. Retighten the screws. (See Image IX.)
2. To adjust horizontally for depth, loosen the thumb screws on the Horizontal Support Arm and slide into
the desired position. Retighten the screws.
HELP is just a call or click away! 1(800)-678-2629 or help@vu-ryte.com
www.vu-ryte.com Vu Ryte, Inc. Tyler, Texas USA 75701 - Patented
Vu Ryte, Inc. expressly disclaims the warranty of merchantability, as described in Business and Commerce Code 2.314, and the warranty of fitness for a particular purpose,
as described in Business and Commerce Code 2.315, and the buyer/user of the product expressly disclaims that it has contracted for of received any warranty of fitness for
a particular purpose with respect to the product. THE PRODUCT SOLD UNDER THIS AGREEMENT IS SOLD ON AN “AS IS” AND “WITH ALL FAULTS” BASIS.
IX.
ANGLE
HEIGHT
DEPTH
 Loading...