

Page 1
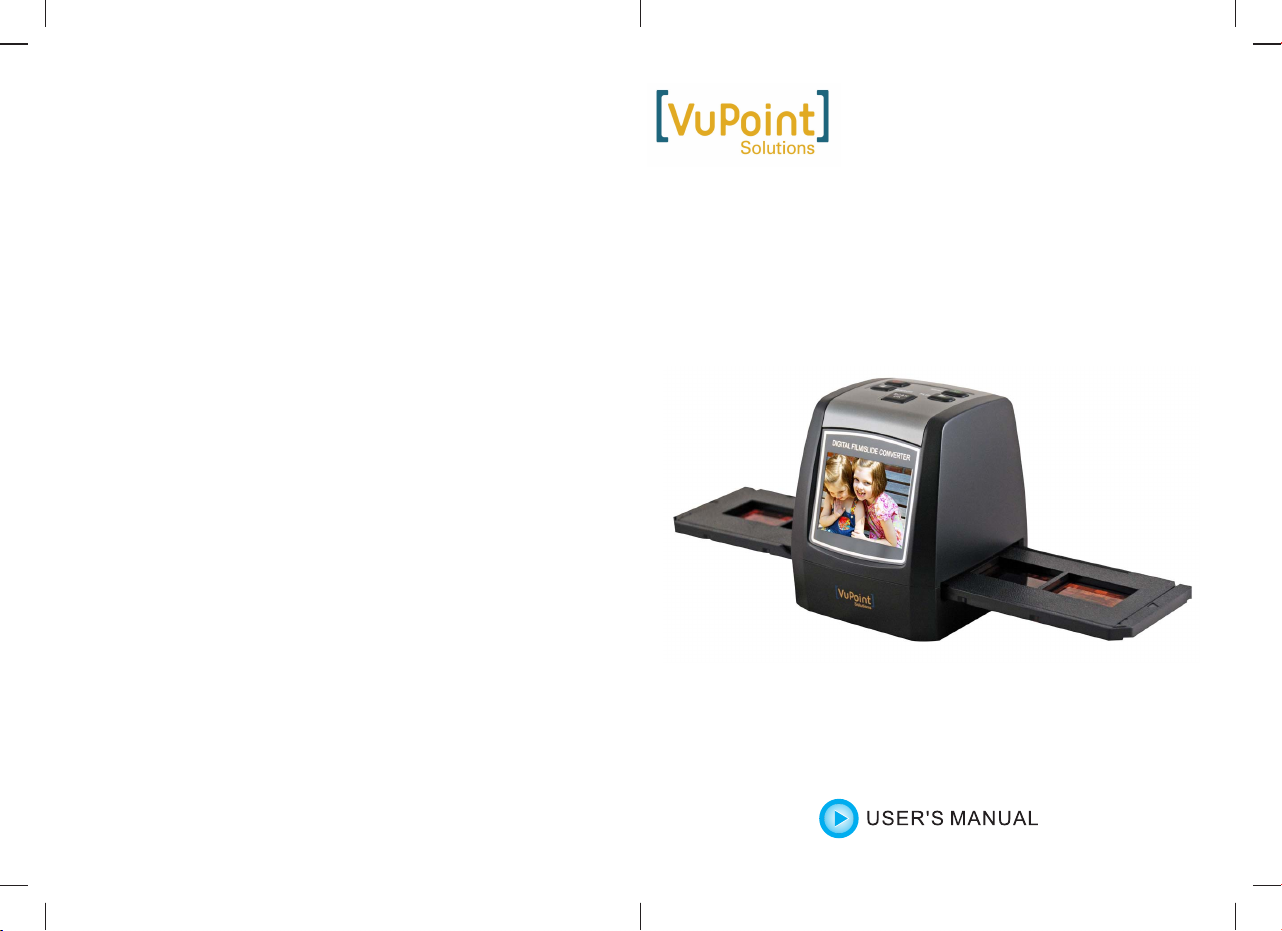
Digital Film & Slide
Converter
FC-C520-VPD
Page 2

CONTENTS
Safety Precautions…………………………………… 1
Package Contents…………………………………… 2
Descriptions of Parts………………………………… 3
Inserting SD Memory………………………………… 3
Installing Slides……………………………………..... 4
Installing Negatives………………………………….. 5
Quick Start Guide…………………………………..... 6
Menu Icon Key……………………………………….. 6
Display Screen……………………………………….. 7
Mirror Image/Flip…………………………………...... 7
Main Menu………………………………………........ 8
Capture Mode Setting………………………….... 8
Film Type…………………………………….... 8
Exposure Compensation…………………….. 9
Playback Mode………………………………….... 9
Subordinate Menu from Playback………...... 9
Rotate and Save…………………………….... 10
Delete and Return to Capture Mode……….. 10
Language Setting……………………………….... 11
Formatting……………………………………….... 11
Resolution……………………………………….... 12
USB MSD: Viewing images from a Computer.... 12
Product Specification………………………………… 13
Federal Communications Commission (FCC)……. 14
Page 3
Important:
Do not expose this product to rain or moisture to preserve
the life of this product
Ventilation:
The device should be situated so that its location or position
does not interfere with its proper ventilation. For example,
the unit should not be situated on a bed, sofa, rug or similar
surface that may block the ventilation openings.
Heat:
The device should be situated away from sources of high
heat such as radiators or stoves.
Cleaning:
We recommend using a clean, dry non-alcoholic cotton swab
to clean the glass surface periodically to produce a clear image
Non-use period:
When the product is not in use for long period of time, remove
the USB cable form your computer.
Federal Communications Commission
(FCC)
Scanning medium
Use compliant standard negative film and slide size.
This device complies with Part 15 of the FCC Rules.
Operation is subject to the following two conditions:
(1) This device may not cause harmful interference, and
(2) this device must accept any interference received, including
interference that may cause undesired operation.
Windows® XP, Windows® Vista™, Windows® 7 are registered trademarks of Microsoft Corporation,
Mac OS® 10.4 and above is a registered trademark of Apple Inc. SD/SDHC logo is a trademark of SD-3C, LLC.
Product names logos, brands, and other trademarks referred to herein are the properly of their respective
trademark holders.
FC-C520-VPD_Manual_12-0814
Page 4
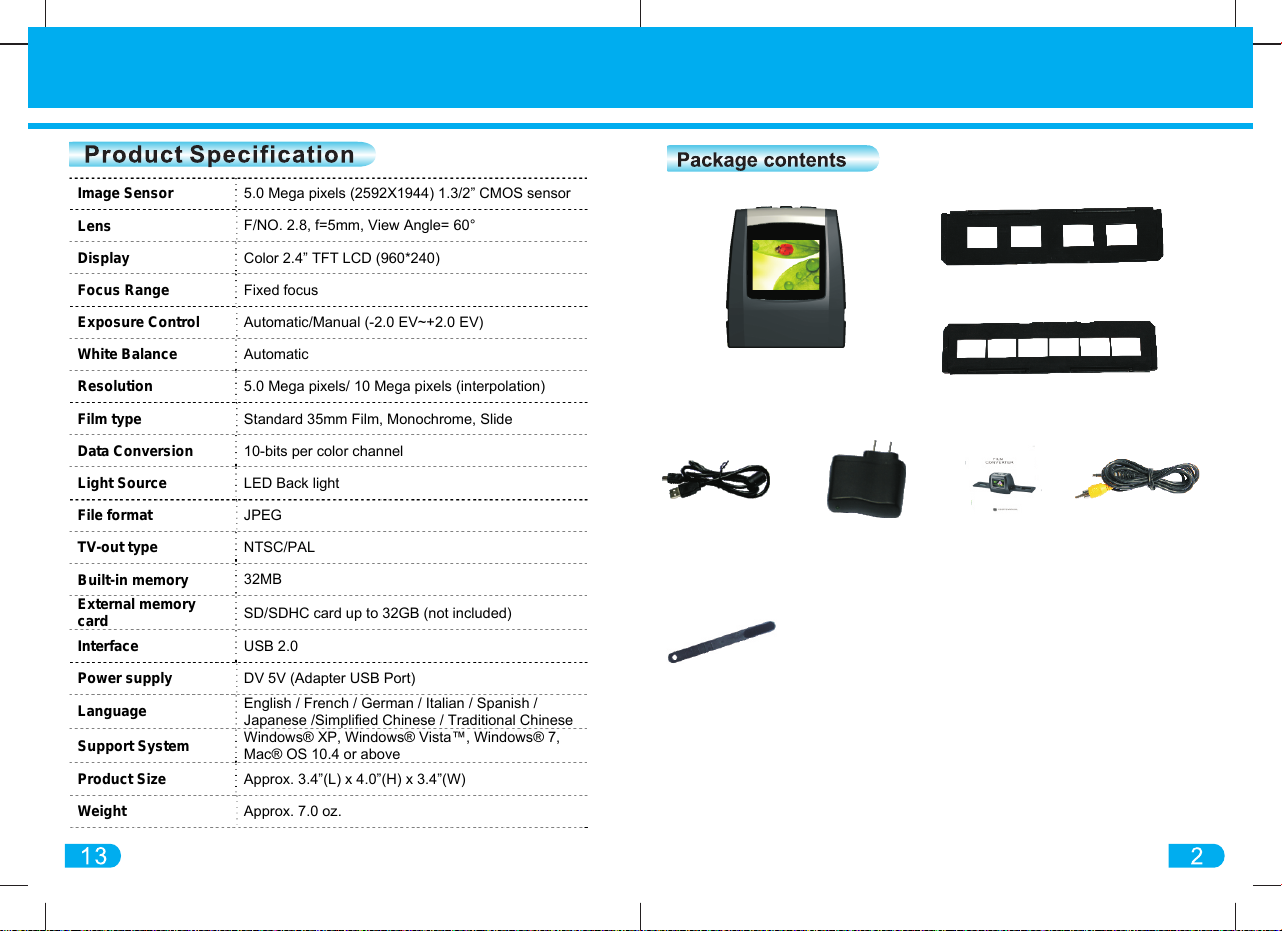
Image Sensor
Negative Film Holder
Film/Slide Converter
Positive Slide Holder
USB cable Power adapter User's Manual TV cable
NOTE:
You can use the Cleaning Brush to clean
the glass screen. Insert the Cleaning Brush
with the padding facing downward and
through the slot of the right side of the
converter. Sweep any dust away to ensure
better quality scans.
Cleaning brush
Lens
Display
Focus Range
Exposure Control
White Balance
Resolution
Film type
Data Conversion
Light Source
File format
TV-out type
Built-in memory
External memory
card
Interface
Power supply
Language
Support System
Product Size
Weight
5.0 Mega pixels (2592X1944) 1.3/2” CMOS sensor
F/NO. 2.8, f=5mm, View Angle= 60°
Color 2.4” TFT LCD (960*240)
Fixed focus
Automatic/Manual (-2.0 EV~+2.0 EV)
Automatic
5.0 Mega pixels/ 10 Mega pixels (interpolation)
Standard 35mm Film, Monochrome, Slide
10-bits per color channel
LED Back light
JPEG
NTSC/PAL
32MB
SD/SDHC card up to 32GB (not included)
USB 2.0
DV 5V (Adapter USB Port)
English / French / German / Italian / Spanish /
Japanese /Simplified Chinese / Traditional Chinese
Windows® XP, Windows® Vista™, Windows® 7,
Mac® OS 10.4 or above
Approx. 3.4”(L) x 4.0”(H) x 3.4”(W)
Approx. 7.0 oz.
FILM SCANNER
Page 5
FILM SCANNER
321
548910
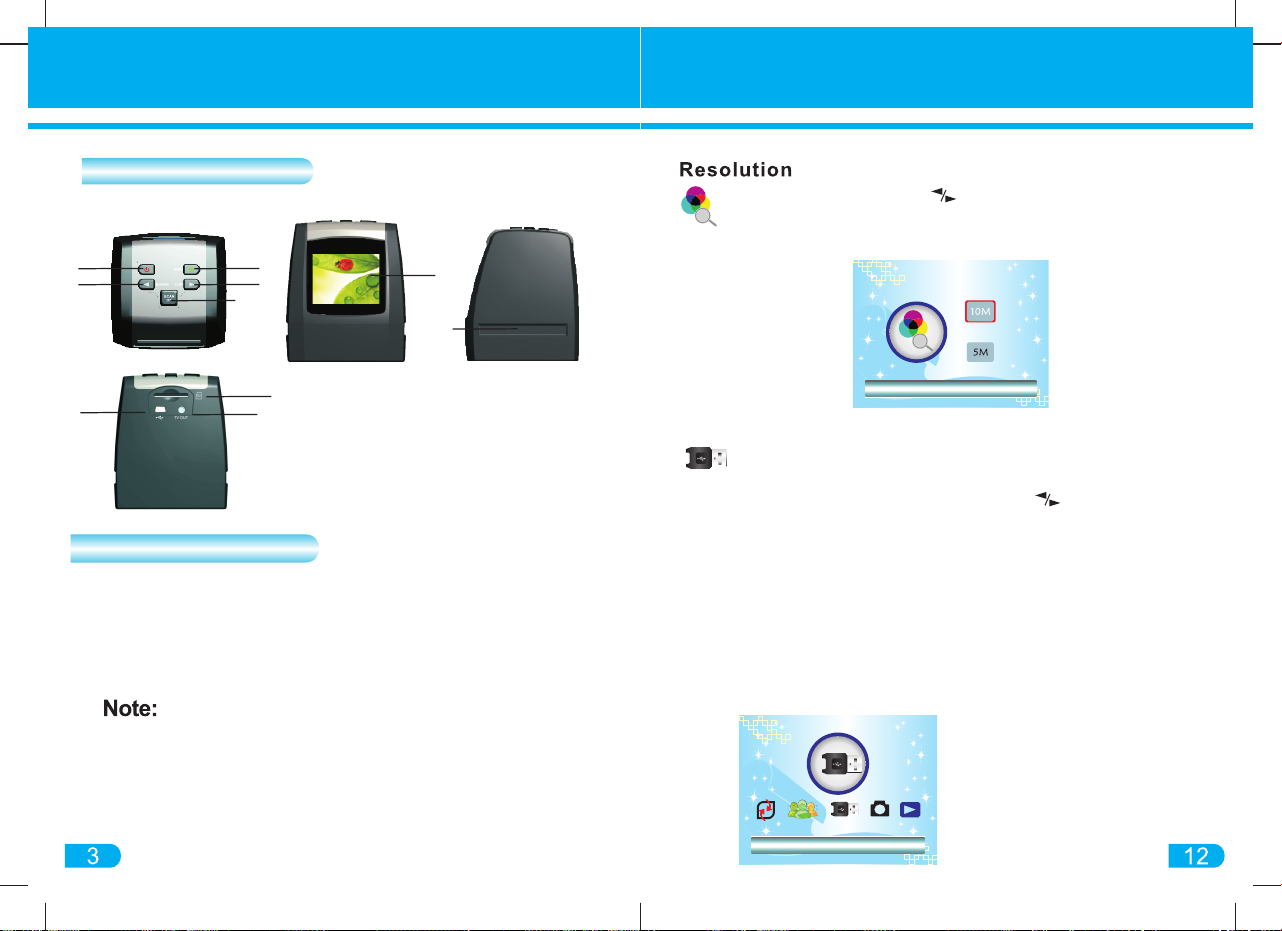
(1) Power ON/OFF (6) Display Screen
(2) Left/Mirror (7) Slide/Negative slot
(3) Menu (8) USB Connection
(4) Right/Flip (9) SD/SDHC slot
(5) Scan/OK (10) TV Output
6
7
1) In the main MENU, press button to navigate to RESOLUTION
2) Press SCAN/OK to enter into RESOLUTION setting
3) Choose resolution 5MP/10MP, then Press SCAN/OK to confirm
Resolution
To view images on the computer:
1) Plug the converter to a USB port on the computer
2) Press the MENU button then press the button to navigate
to USB MSDC mode.
3) Press SCAN/OK button to enter (Display Screen will turn off).
4) On your computer, it should recognize the converter as a
"Removable Disk" Click "Open folder to view files" to view, or
download images to your computer
USB MSDC: Viewing images from a Computer
NOTE: If the Auto Play window for Removable Device did not launch
automatically, go to your "My Computer" (PC) to find the device under
Removable Storage
To exit USB mode and return to
CAPTURE mode on the converter,
press the MENU button on the
converter
Inserting SD Memory
OPTIONAL: SD/SDHC (not included)
To save images on an SD/SDHC memory card, insert a
memory card into the SD/SDHC slot. Once external memory
card is inserted, images will not be saved in the converter's
internal memory.
Description of Parts
If message "Please insert memory card" appears
on the Display Screen, scanning amount available
is zero. Free up the internal memory by deleting
scanned images from the converter or insert a
SD/SDHC memory card into the converter.
SD/MMC
USB
TV-out
USB MSDC
Page 6
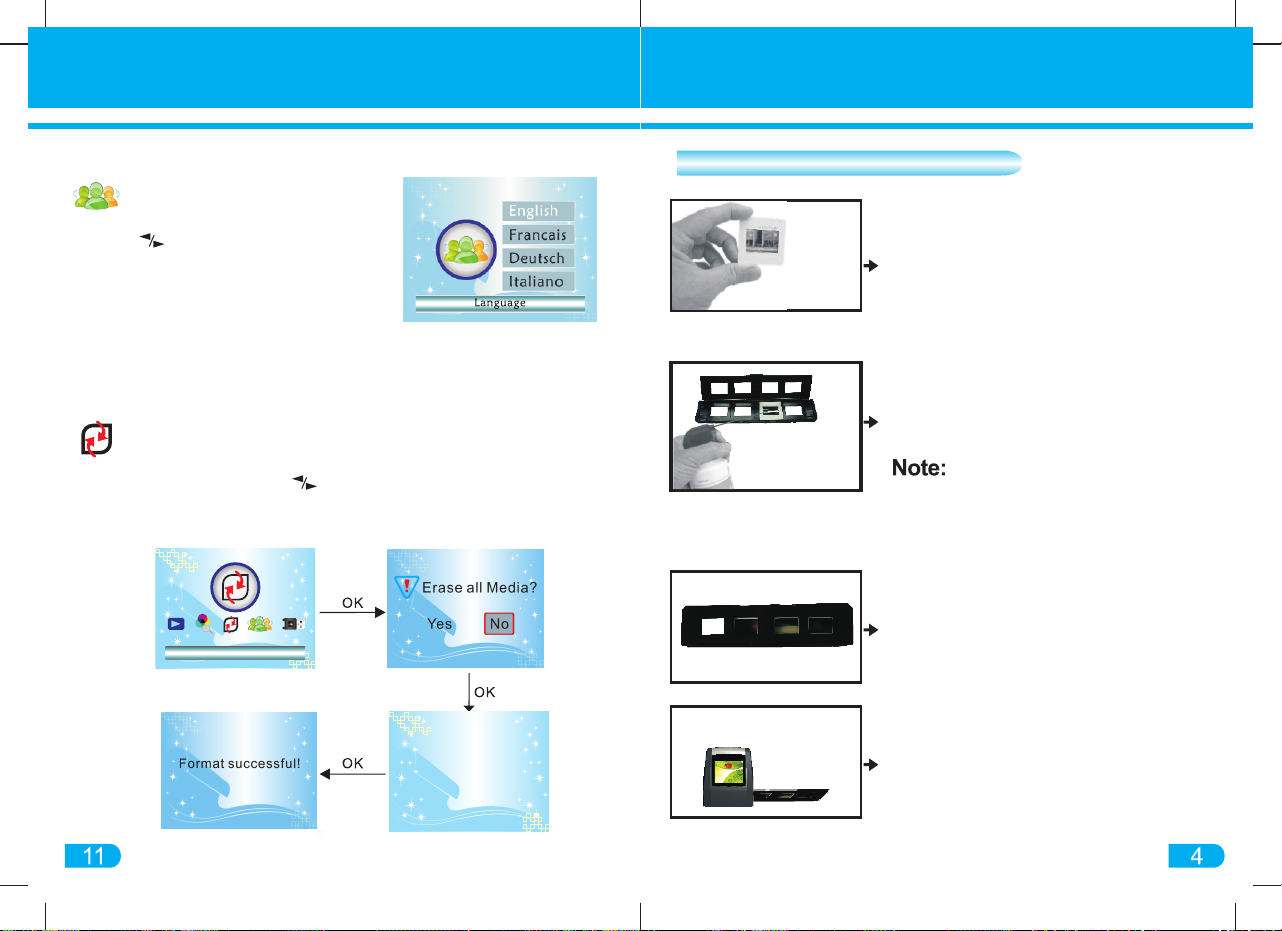
Format
Installing Slides
In CAPTURE mode, press
MENU button, and then press the
navigation button to the
LANGUAGE setting. Press the
SCAN/OK button to confirm
Select Language: English, French, German, Italian, Spanish, Japanese
Traditional Chinese, Simplified Chinese
Formatting
Language Setting
NOTE: Formatting will erase all media stored in the internal memory
of the converter and in the SD/SDHC memory card (if inserted)
1) In the main MENU, press button to navigate to FORMAT mode
2) Press the SCAN/OK button to enter FORMAT mode. Select NO to exit.
Select YES to format and erase all media.
Hold the slide toward the light.
Images on the slide should be
seen upright
Open the Slide Holder with "Open"
indicator marked on the latch of the
slide holder. Place each slide into
recessed area. The slide should fit
perfectly.
Handle slides with care. Any
dust, scratches or fingerprints will
display on the saved images
Close the Slide Holder and press the
edges shut so that it locks in place
Insert the Slide Holder into the slot on
the right of the converter. Image will
appear on the Display Screen
Form ati ng. .....
FILM SCANNER
Page 7
FILM SCANNER
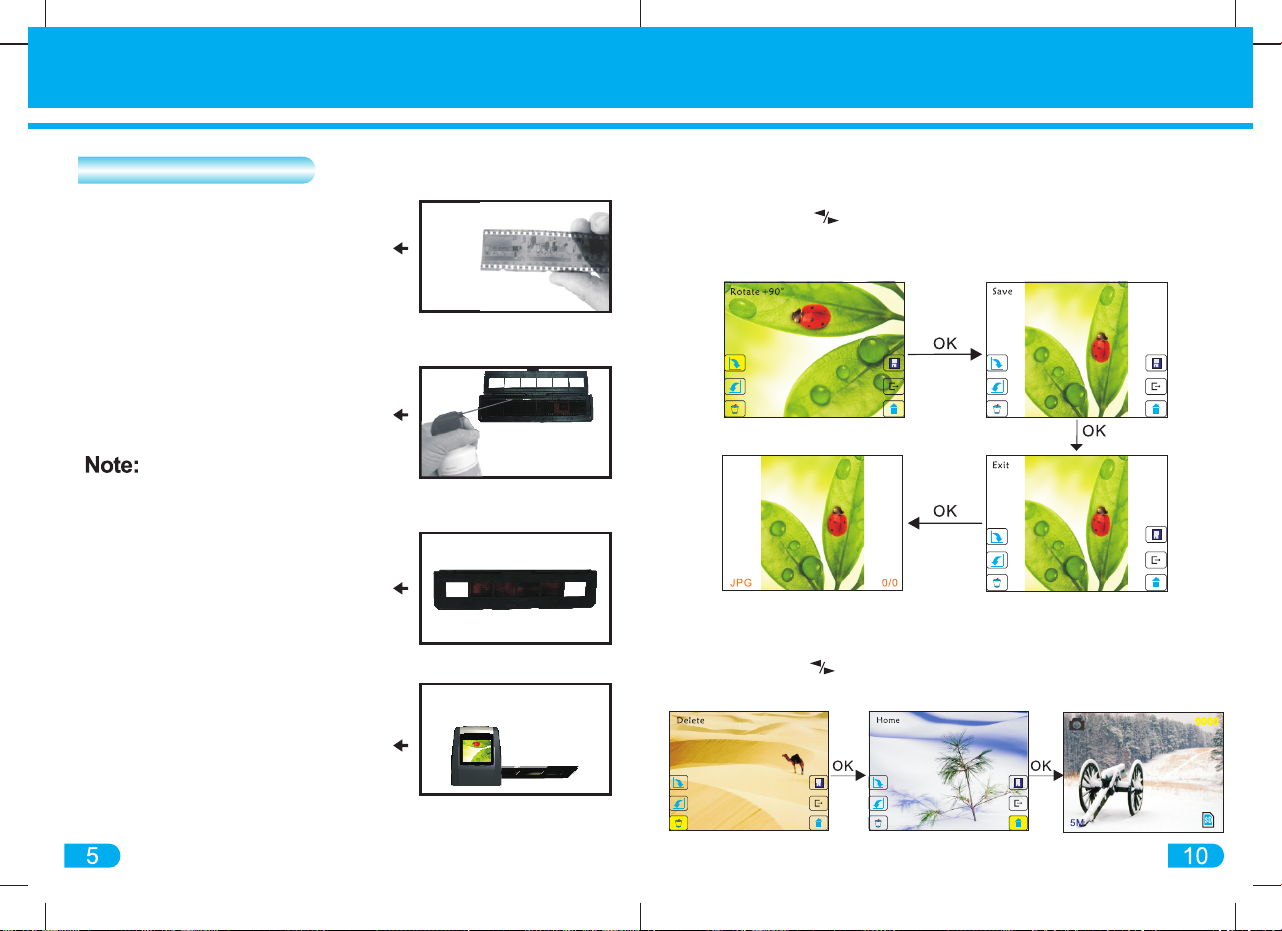
Rotate and Save
1) In PLAYBACK mode press the MENU button for the Subordinate Menu
2) Navigate with the buttons to ROTATE feature.
3) Press SCAN/OK button to rotate image
4) To save image after rotation, navigate to SAVE. Press SCAN/OK to confirm
Delete and Return to Capture mode
1) To delete image in the PLAYBACK screen enter into the Subordinate Menu
2) Navigate with the buttons to DELETE
3) Press SCAN/OK to confirm. Navigate to HOME to return to CAPTURE mode
Hold the negative film strip toward
the light. Images on the negative
should be upright.
Open the Negative Holder with
"Open"indicator marked on the latch
of the holder. Place the negative
in the holder aligning with the
notches in the holder
Handle slides with care. Any
dust, scratches or fingerprints will
display on the saved images
Close the Negative Holder and
press the edges shut so that it
locks in place
Insert the Negative Holder into the
slot on the right of the converter.
Image will appear on the Display
Screen
Installing Negatives
Page 8
EVEV
Quick Start Guide
Menu Icons Key
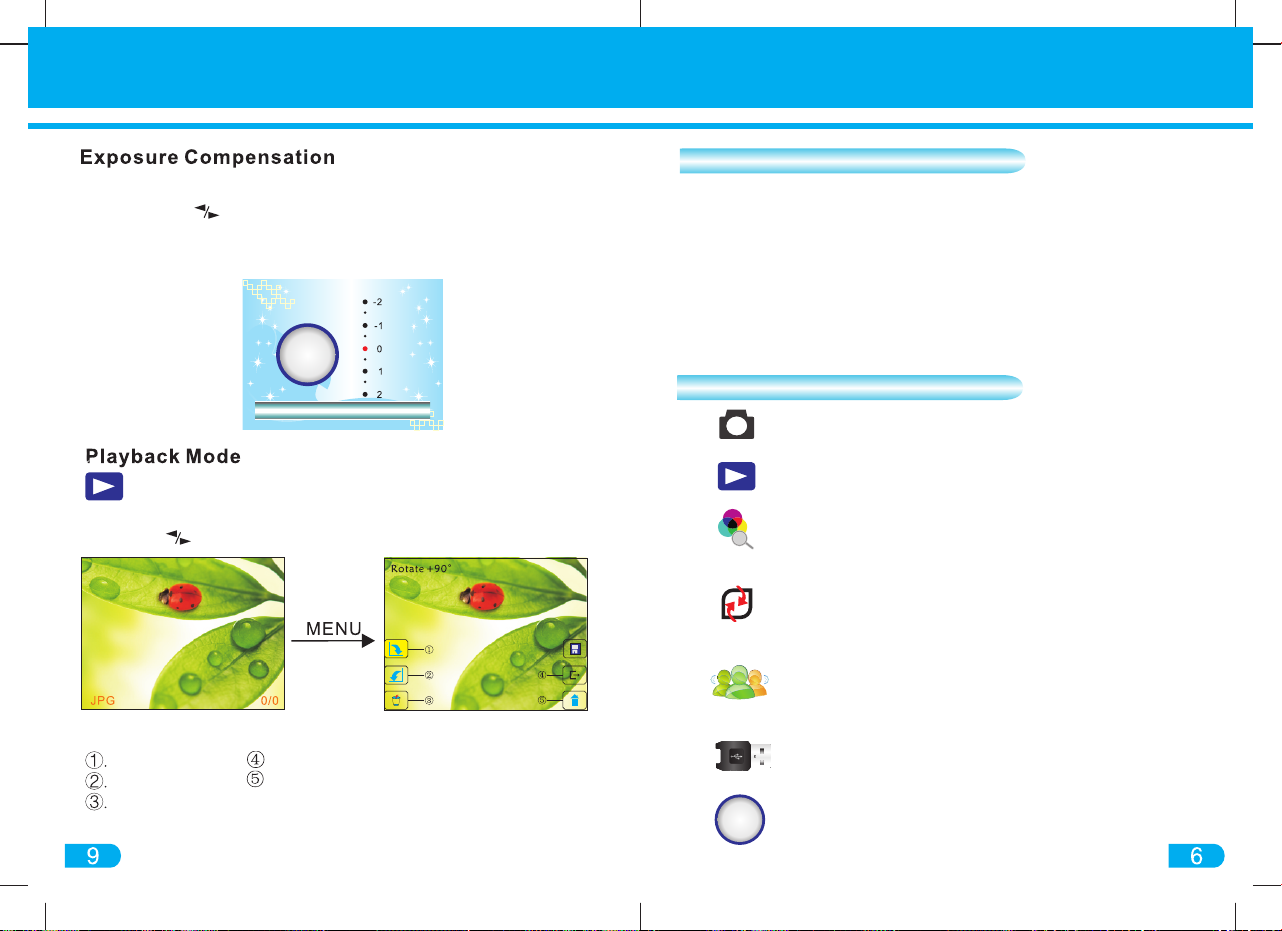
Playback: Preview your saved scans
Language Setting: English, French, German, Italian,
Spanish,Traditional Chinese, Simplified Chinese,
Japanese
Format: By formatting the converter's internal memory
and external SD/SDHC memory card, all contents will
be erase and deleted.
Resolution: Select resolution of 5MP or 10MP
USB MDSC: Mass storage. Connect to the
computer and switch to this mode to view
images on PC
Exposure Control: Select exposure -2, -1, 0, 1, 2
Capture: Select Film types and Exposure
1) Press the MENU button to enter into main menu
2) Use the navigation button to CAPTURE mode
3) Click SCAN/OK button, and then select Exposure (EV)
4) Click SCAN/OK to confirm selection. Click MENU to exit screen
To preview captured images, enter into MENU screen and
select PLAYBACK. To view next or previous image, press
the navigation buttons.
Subordinate Menu from Playback
Rotate +90°
Rotate -90°
Exit: Return to Playback mode
Delete image
Home: Return to Capture mode
Powering ON/OFF the converter:
A) Connect converter to the Power Adapter and then the USB
Cable. Plug the adapter to a power source. Press the POWER
button to turn ON the converter. Press the POWER button again
to turn OFF.
B) Connect the converter to the USB Cable then to the computer
USB port. Press the POWER button to turn ON the converter.
Press the POWER button again to turn OFF.
Exposure
EVEV
Page 9
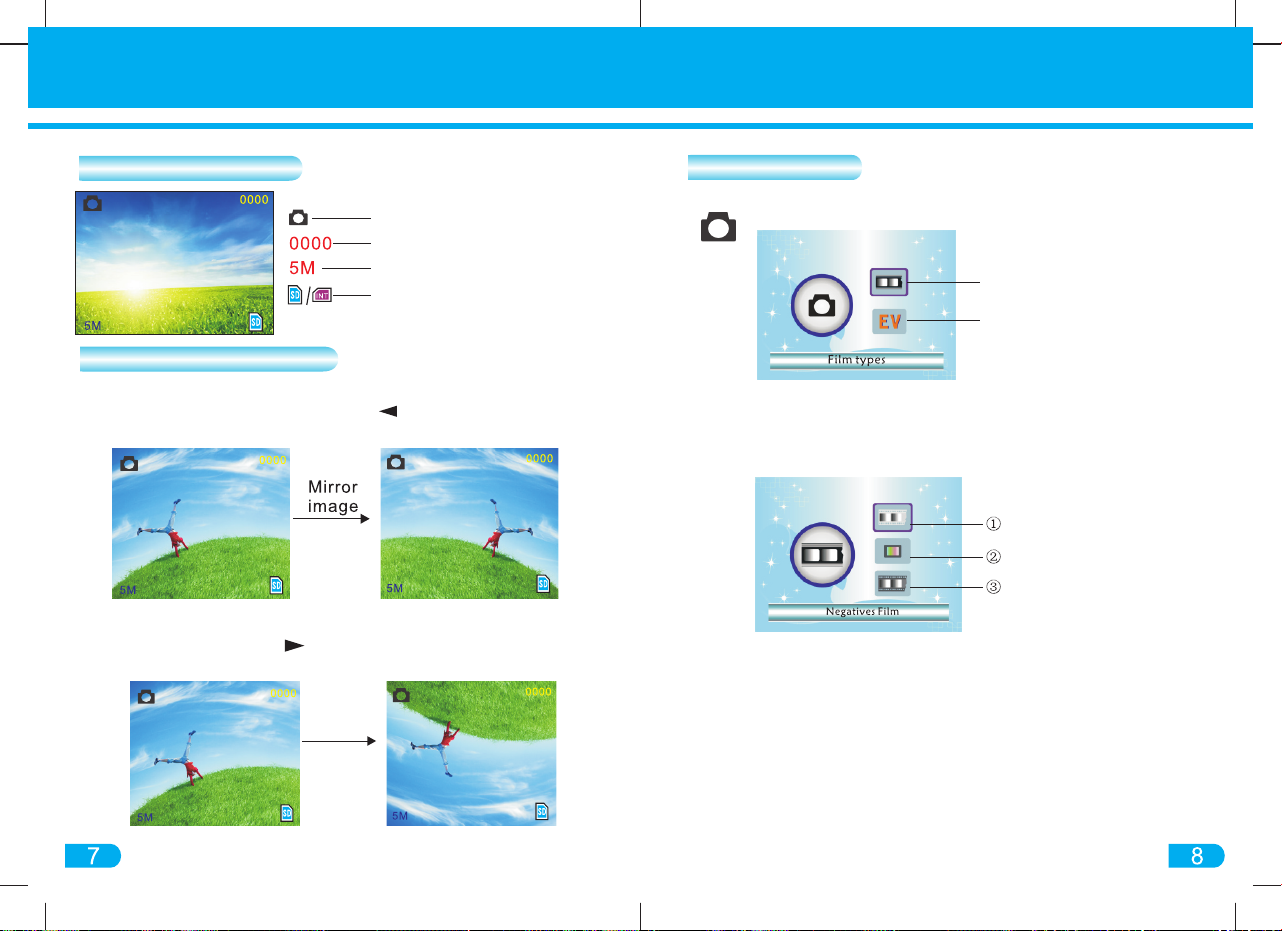
Capture Mode
Scanning amount available
Resolution
Storage mode
Mirror image: In CAPTURE mode, to view a mirror image of the
Negative/Slide on screen, press the MIRROR button before
capturing the image
Flipping image: In CAPTURE mode, to FLIP an image from
top to bottom, press the FLIP button before capturing the
image
Capture Mode Setting
Film Types
Exposure
Film Types
Select the correct Film Type before capturing image.
Choose B&W, Slides, or Negatives.
B&W
Slides
Negatives
FLIP
Main Menu
Mirror Image/Flip
Display Screen
 Loading...