

Page 1
Mantis Z Arm
Assembly
Guide
Vulcan MutliFrame
Mantis
Z Arm Assembly Guide
www.VulcanUAV.com.
Page 2

Mantis Z Arm
Assembly
Guide
Thank you for purchasing the Vulcan Multiframe
Mantis
The MultiFrame is a very strong, light, durable airframe, and is very
straightforward to assemble.
Please follow these build instructions carefully, and we wish you
many hours of safe and enjoyable ying!
SAFETY NOTICE
Multicopters can be dangerous and pose a signicant risk of injury and
damage to property. Always take all necessary safety precautions to avoid
damage or injury to yourself and those around you!
Never y near or over buildings, roads or people.
Always ensure you have plenty of space to y with an uninterrupted view of
your machine at all times.
Always stay well clear of moving propellers.
Before ying, always check your machine carefully.
Ensure all nuts, bolts and linkages are tight and cannot come undone.
Check your propellers are securely tightened, have no chips, cracks or dents
and if they do, replace them as necessary.
Ensure all electrical connections are secure with good contacts, well insu-
lated and cannot come apart.
Make sure all onboard equipment such as batteries, cameras or any other
payload is properly and securely attached and cannot come loose, shake,
vibrate or move around during ight.
www.VulcanUAV.com.
Page 3
Mantis Z Arm
Assembly
Guide
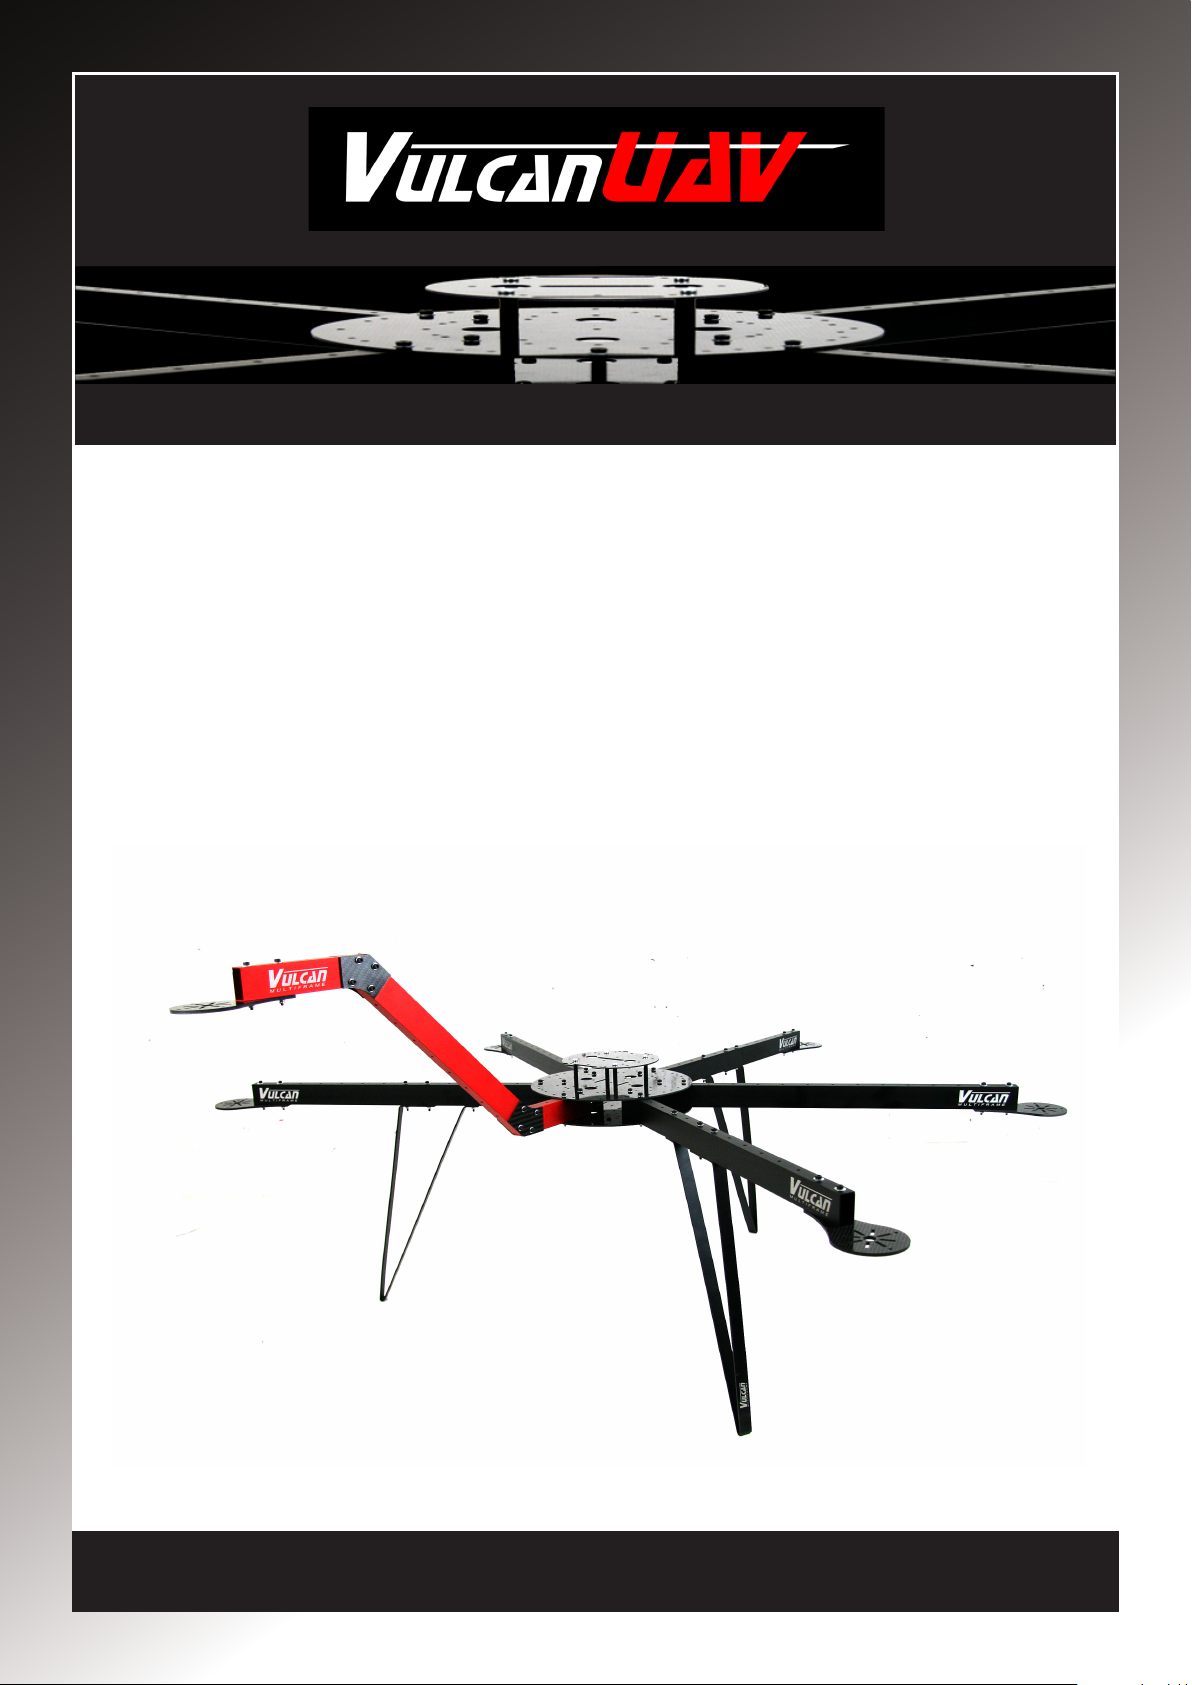
Vulcan Mantis Z Arm Assembly Guide
The Mantis airframe is assembled exactly the same as a standard frame, the only difference
between a standard frame and the Mantis, is the use of the Z arm.
This type of arm raises the motor and gives an uninterrrupted clear forward view for the
camera without props appearing in the shot, even during fast forward ight. It also is a great
pilot aid, helping with machine orienataion in the air, a notoriously difcult issue for multiro-
tors.
No special ight controller setup is required when using Z arms, and they are a ‘straight
swap’ upgrade for existing Multiframes.
Arms are available in black or red anodized nish, and come in 350mm or 440mm lengths.
The 350mm Z arm is identical in length to the standard arm in a 900mm frame. A standard
1200mm frame uses 500mm arms, but the 440mm Z arm can be tted to a 1200mm frame
without detriment to ight characteristics, there is no need to chnage your existing 500mm
arms. 440mm standard arms are also available giving a frame diameter of 1080mm and
perfect symmetry of the frame.
www.VulcanUAV.com.
Page 4

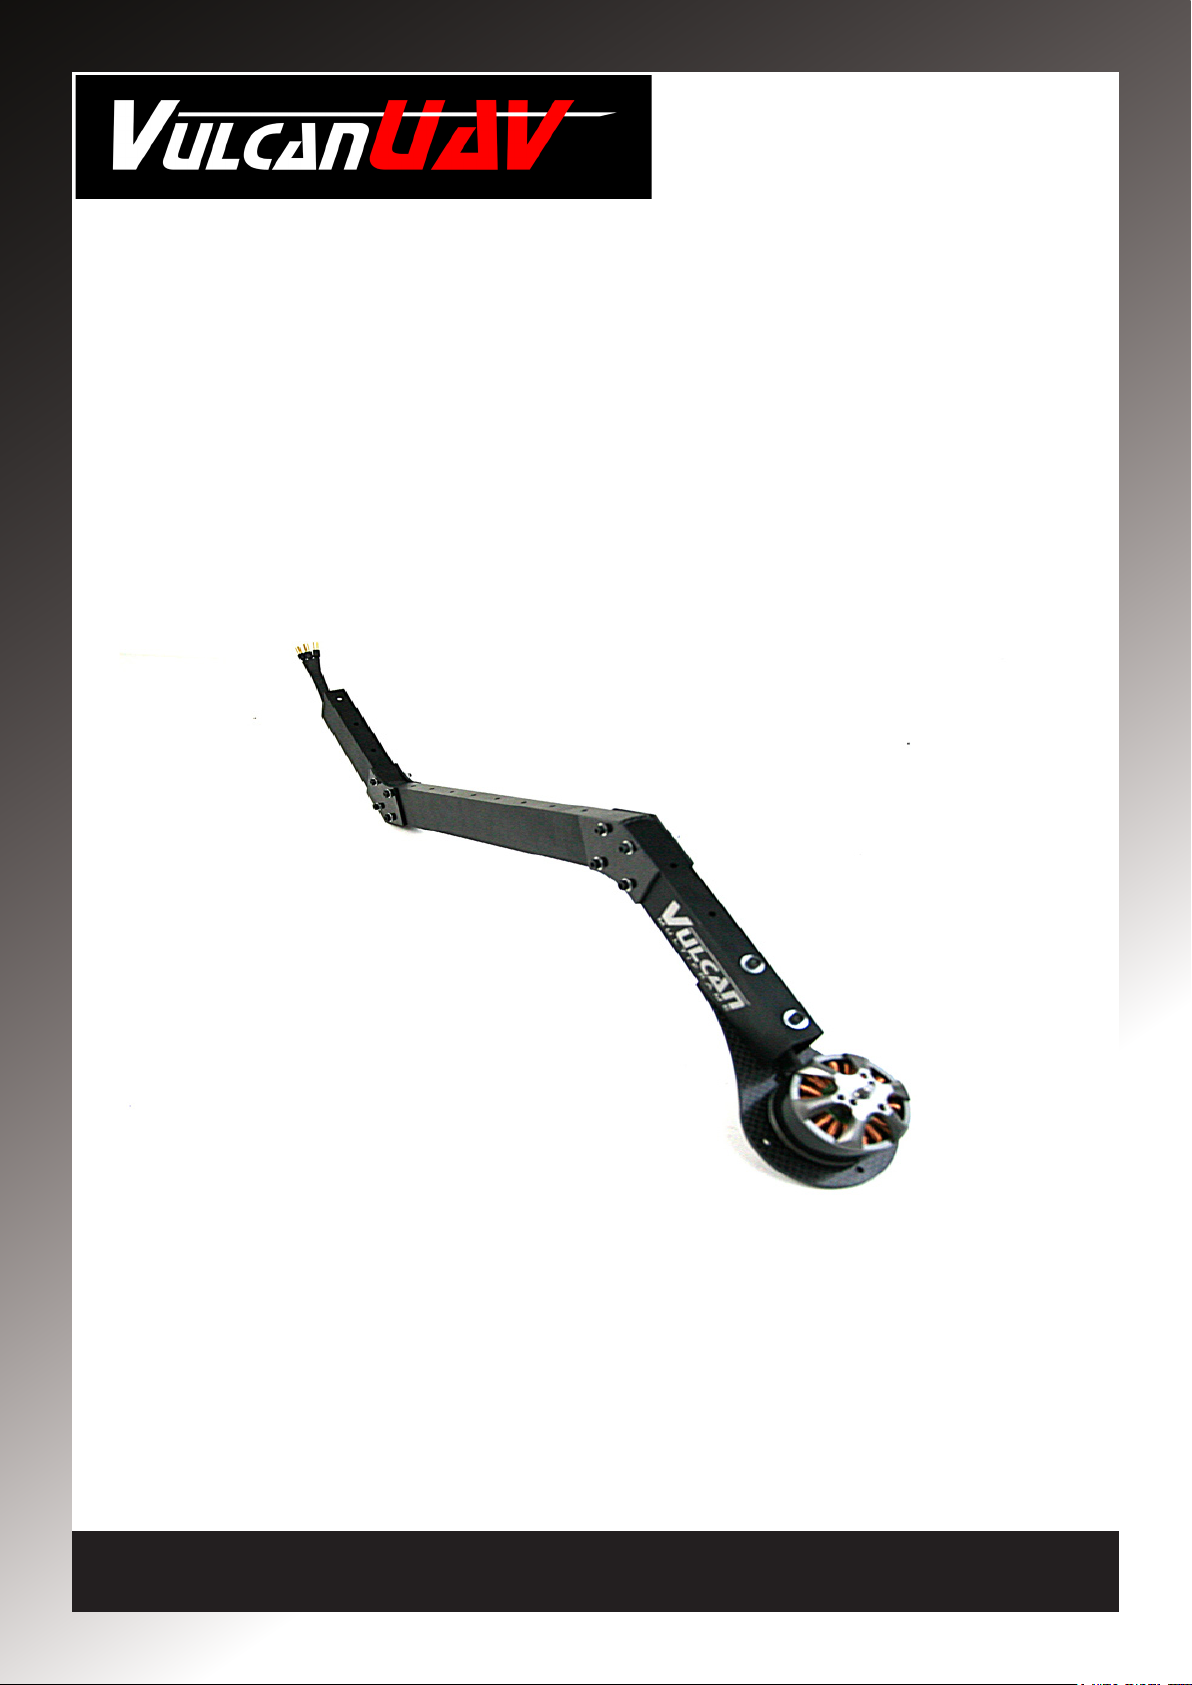
Mantis Z Arm
Once your motor wires are properly protected, t the motor to the motor mount. Do not use
motor mounting bolts longer than 8mm and use a washer.
Next you need to thread the motor wires through the arm itself. This is not easy with the
bends in the arm, so we recommend using something exible like string with a small weight
on one end, and the other end tied to the end on the motor wires. See below.
Parts
Included with the arm itself are four brace plates, one for each side of the welded joints, and
eight 25mm bolts with Nylock nuts and washers to secure them.
IMPORTANT!
Never use the Z arm without the brace plates properly tted. They not only provide ex-
tra strength and security for the welds, but also add aditional stiffness to the arm and help
minimise vibration and sideways ex.
Always protect your motor wires at the points where they go over the bends in the
arm. We also recommend protecting wires where they pass any bolts and enter or exit the
arm itself. This is very important, as if the wires move around (which they can), it is possible
that over time the soft silicone covering on your motor wires could wear through and cause
a short with potentially catasrophic results! Safety rst always!
Assembly
Guide
www.VulcanUAV.com.
www.VulcanUAV.com.
Page 5

Mantis Z Arm
Drop the weighted end of the string through the arm and tie the other end to your motor
wires. Carefully help the motor wires through the arm by pulling on the string and moving the
wires themselves at the top of the arm. DO NOT pull hard on the string! You may damage
the connectors on your motor wires.
Assembly
Guide
www.VulcanUAV.com.
Page 6

Mantis Z Arm
Once the wires are through the arm, remove the string and attach the motor mount and motor to the arm. DO NOT overtighten motor mount bolts!
Next you must t the brace plates over the welds, one either side. These holes can be tight
and bolts hard to align, but by turning the bolt you can use it to cut a tight t in the carbon of
the plate and aluminium of the arm.
IMPORTANT!
Ensure the two bolts on the inside of the bend in the arm go under the motor wires. By doing
so you will help protect the wires from rubbing on the sharp edge of the inside of the bend,
as they will rest on the bolts themselves.
Once all four bolts are in place, t washers and nylock nuts to the other end and tighten.
DO NOT overtighten or you risk damaging the arm!
Repeat the process for both bends in the Z arm.
Assembly
Guide
www.VulcanUAV.com.
Page 7

Mantis Z Arm
Assembly
Guide
That’s it, you’re done!
You can now t the arm to your machine, please see frame assembly guide.
www.VulcanUAV.com.
Disclaimer: As the assembly, care and circumstances of use of our products are completely beyond our control, VulcanUAV Ltd and it’s associates, partners, ofcers, employees and assignees, remain completely harmless and free of liability
or responsibility for any damage, harm, or claim arising from the purchase, assembly, use or misuse of any product(s) purchased from, or supplied by us. VulcanUAV Ltd makes no claim of guarantee, warranty or any other claim, expressed
or implied, that any item supplied is suitable for any purpose, including the intended purpose. Furthermore, nothing said, written or implied by any person connected with VulcanUAV Ltd shall invalidate any of the preceding disclaimer. The
user assumes all liability for all potential damages or claims that might arise from the use, purchase or handling of any items supplied by or purchased from VulcanUAV Ltd.
 Loading...