

Page 1
X13-PLUS Slicer Series – Cleaning and Sanitizing Instructions
This machine must be cleaned, rinsed and sanitized at intervals to comply with national, state and/or local health codes.
The slicer knife is sharp. Exercise extreme caution when
working near the knife.
Note: Sanitizer concentration shall comply with Section 4-501.114, Manual and Mechanical
Warewashing Equipment, Chemical Sanitization – Temperature, pH, Concentration, and
Hardness of the FDA Food Code. If a chemical sanitizer other than chlorine, iodine, or
quaternary ammonium is used, it shall be applied in accordance with the EPA-registered
label use instructions.
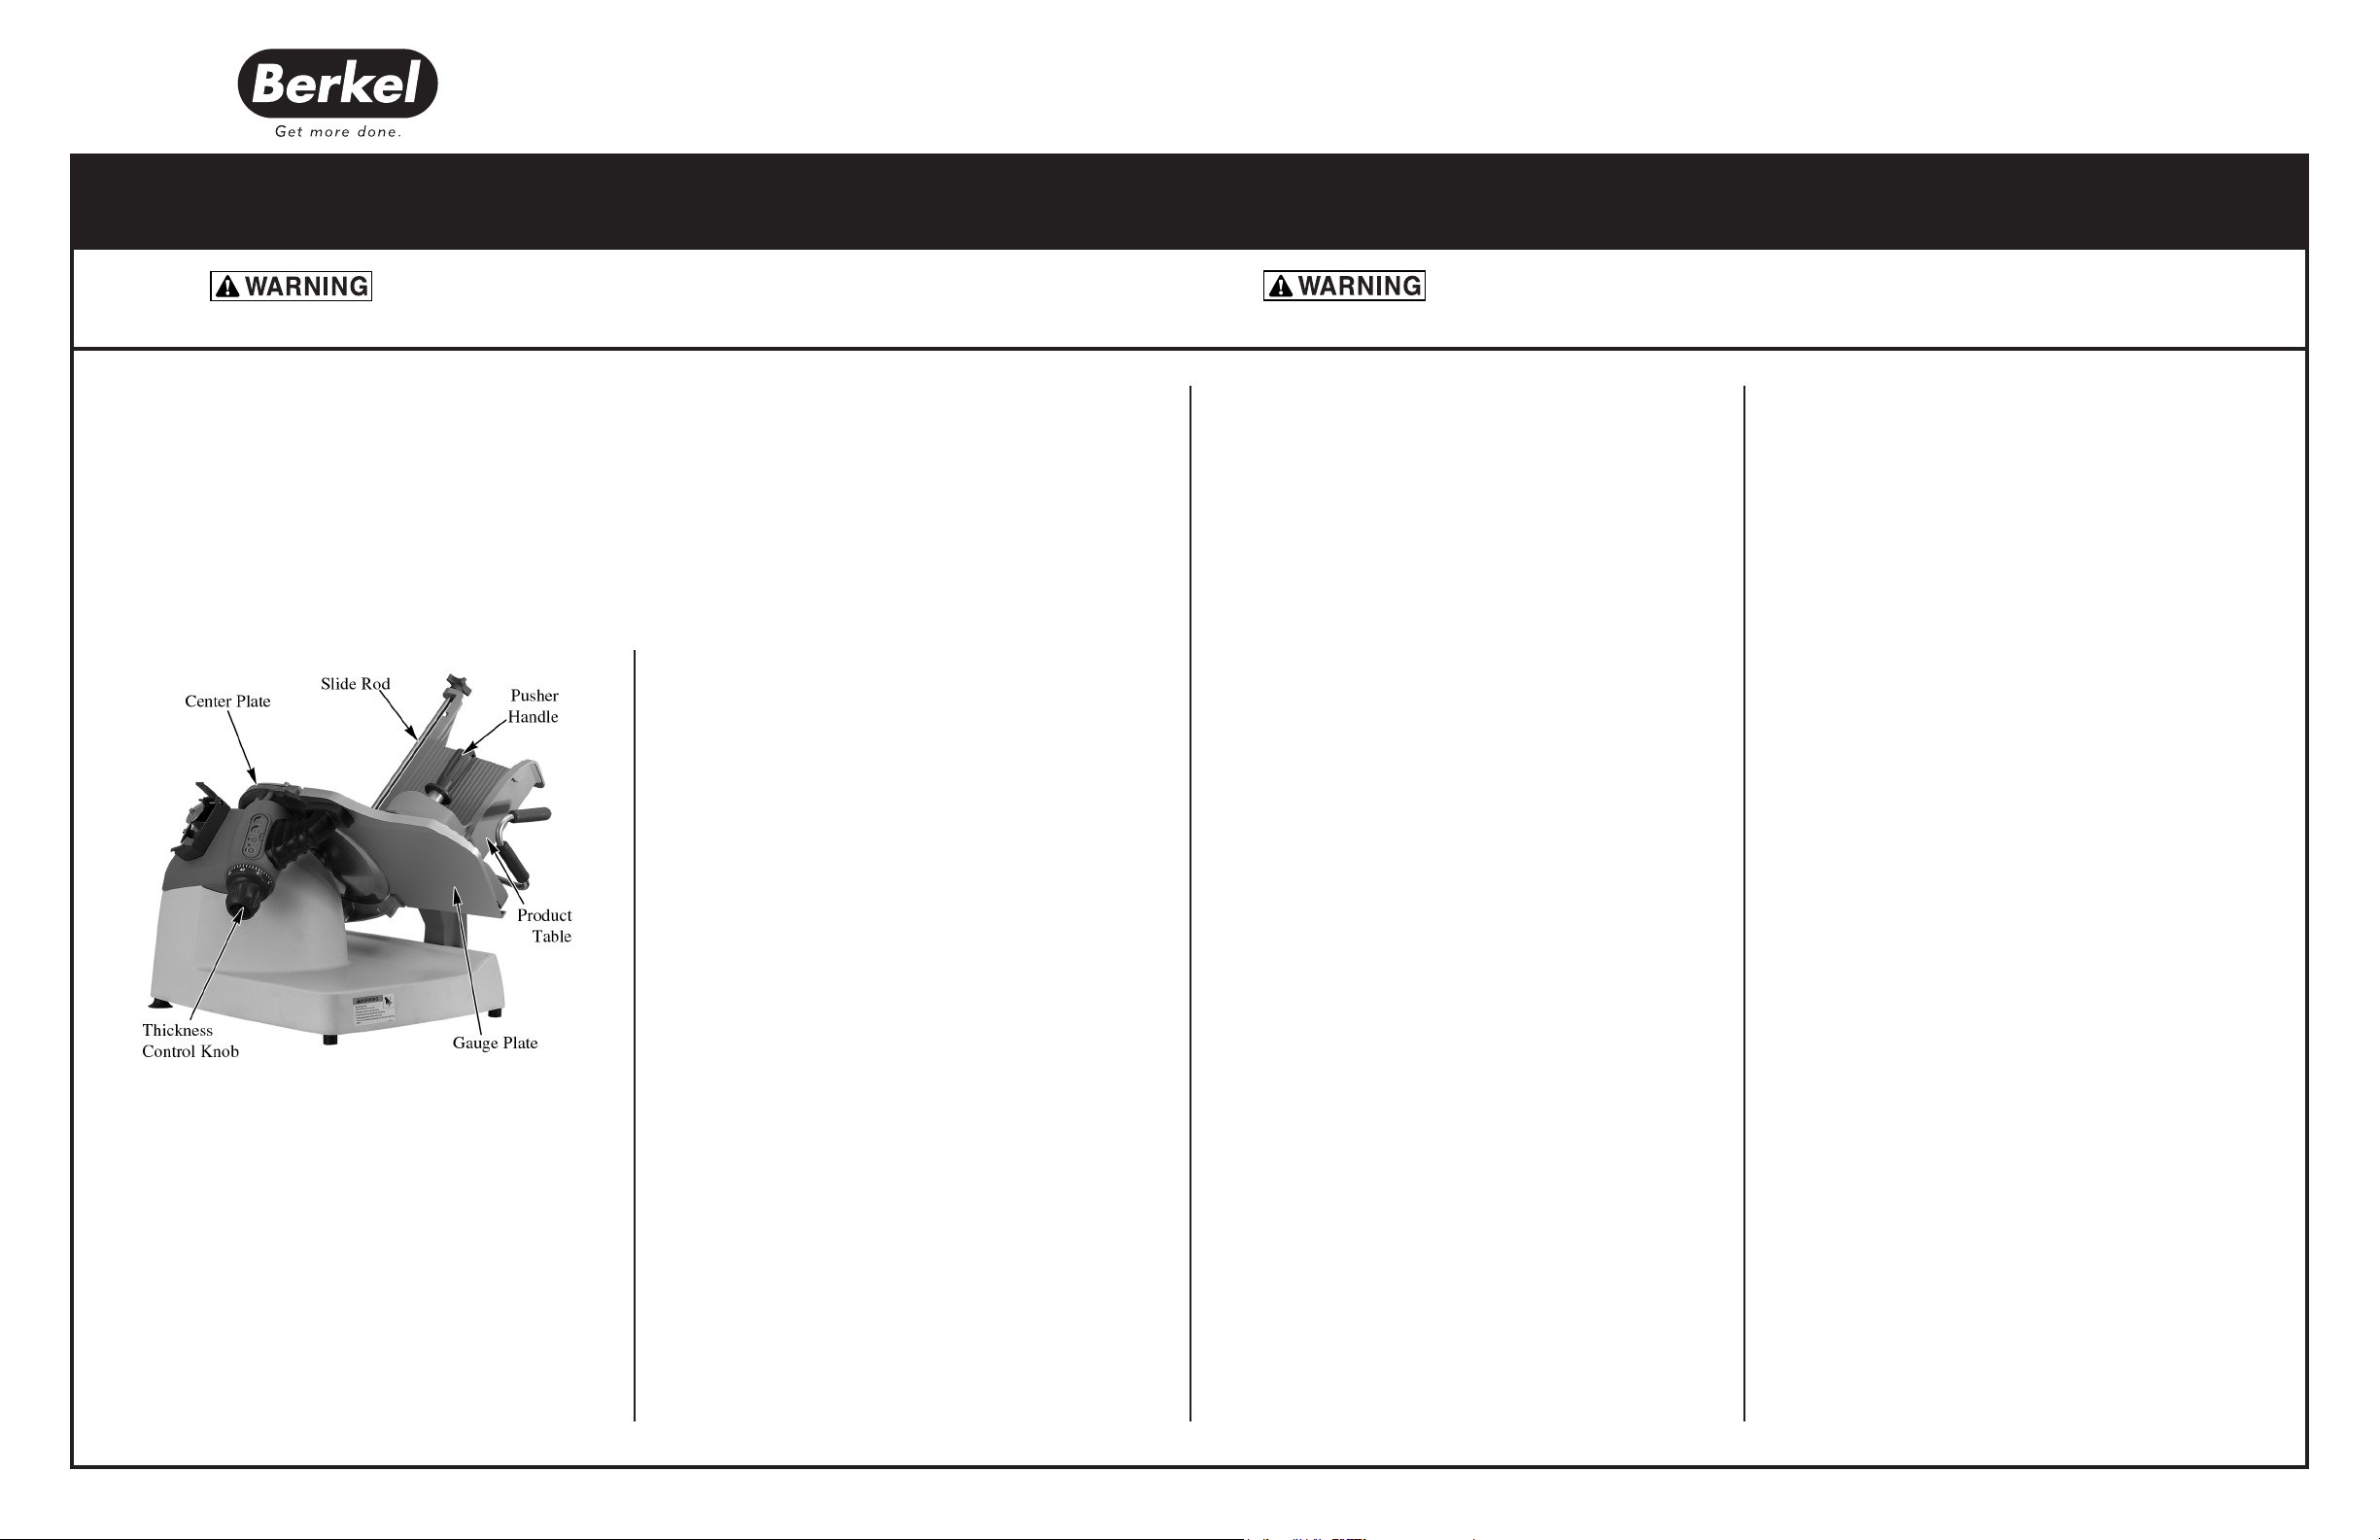
• Unscrew the red handle from the pusher
and remove the pusher from the pusher
arm. Unscrew and remove the pusher
arm slide rod from the product table.
Loosen the product table locking knob
and remove the table. The product table
• Close the slicer thickness control knob.
• Turn the slicer off and unplug power cord
from the wall outlet.
• Pull the product table to the front of the
slicer. If it is an automatic slicer, make
sure the engagement knob is in the
manual position before pulling the product
table to the front of the slicer.
cannot be removed unless it is fully for
ward and the thickness control knob is
completely closed.
• Remove the center plate by lifting the
center plate locking knob at the top of the
center plate and lift from the slicer.
• Pre-scrape food from removable product
table and center plate.
• Wash center plate, product table, red han
dle, pusher, pusher arm, and slide rod in
hot detergent solution. The sharpener can
be submerged in the hot detergent solution for cleaning.
• Rinse the center plate, product table, red
handle, pusher, pusher arm, slide rod, and
sharpener in fresh, hot, potable water.
-
-
Unplug the machine power cord and turn thickness control
knob fully clockwise to close the gauge plate before cleaning the slicer.
• Submerge the center plate, product table,
red handle, pusher, pusher arm, slide rod,
and sharpener in sanitizer solution. Set
parts to the side on a sanitized surface
and allow to air dry.
• Put on cut resistant gloves. Pre-scrape
food from slicer.
• Using fresh detergent solution, clean the
front side of the knife with a non- abrasive
pad, nylon brush, and/or cloth wipes.
Always wipe from the center of the knife
to the outer edge.
• Clean the backside of the knife with the
fresh detergent solution, non-abrasive
pad, nylon brush, and/or cloth wipes.
• Fold a cloth wipe that has been sub
merged in fresh detergent solution and
work it between the ring guard and knife,
starting at the base of the ring guard.
Carefully work the cloth around the knife,
cleaning the edge of the knife, edge of the
ring guard and edge of the gauge plate.
Use extreme caution.
• Clean the rest of the slicer base and other
components with the fresh detergent solu
tion and a non-abrasive pad.
• Lift up the front of the slicer about 6 inch
es. A spring loaded kick stand will drop
down to the table surface and hold the
-
-
-
front of the slicer up. This will allow you to
pre-scrape food and clean the table sur
face under the slicer with fresh detergent
solution.
• Using a fresh cloth wipe, rinse slicer and
area under slicer with fresh hot potable
water.
• Spray slicer and area under slicer with
fresh sanitizer solution from a sanitizer
spray bottle and allow to air dry. Remove
cut-resistant gloves.
• Once the table surface under the slicer
has been washed, rinsed and sanitized,
lift the front edge of the slicer and push
the kick stand back under the slicer. Slow
ly lower the slicer back to the table.
• Slide the pusher arm onto the slide rod
and reassemble the pusher to the pusher
arm using the red handle. Reassemble
the slide rod to the product table. Reinstall
the center plate and the product table to
the slicer. After assembly, spray with sani
tizer solution and allow to air dry.
• Plug in slicer. Place sharpener in proper
storage location.
-
-
-
F35287 (November 2012)
 Loading...