

Page 1
INSTALLATION &
OPERATION MANUAL
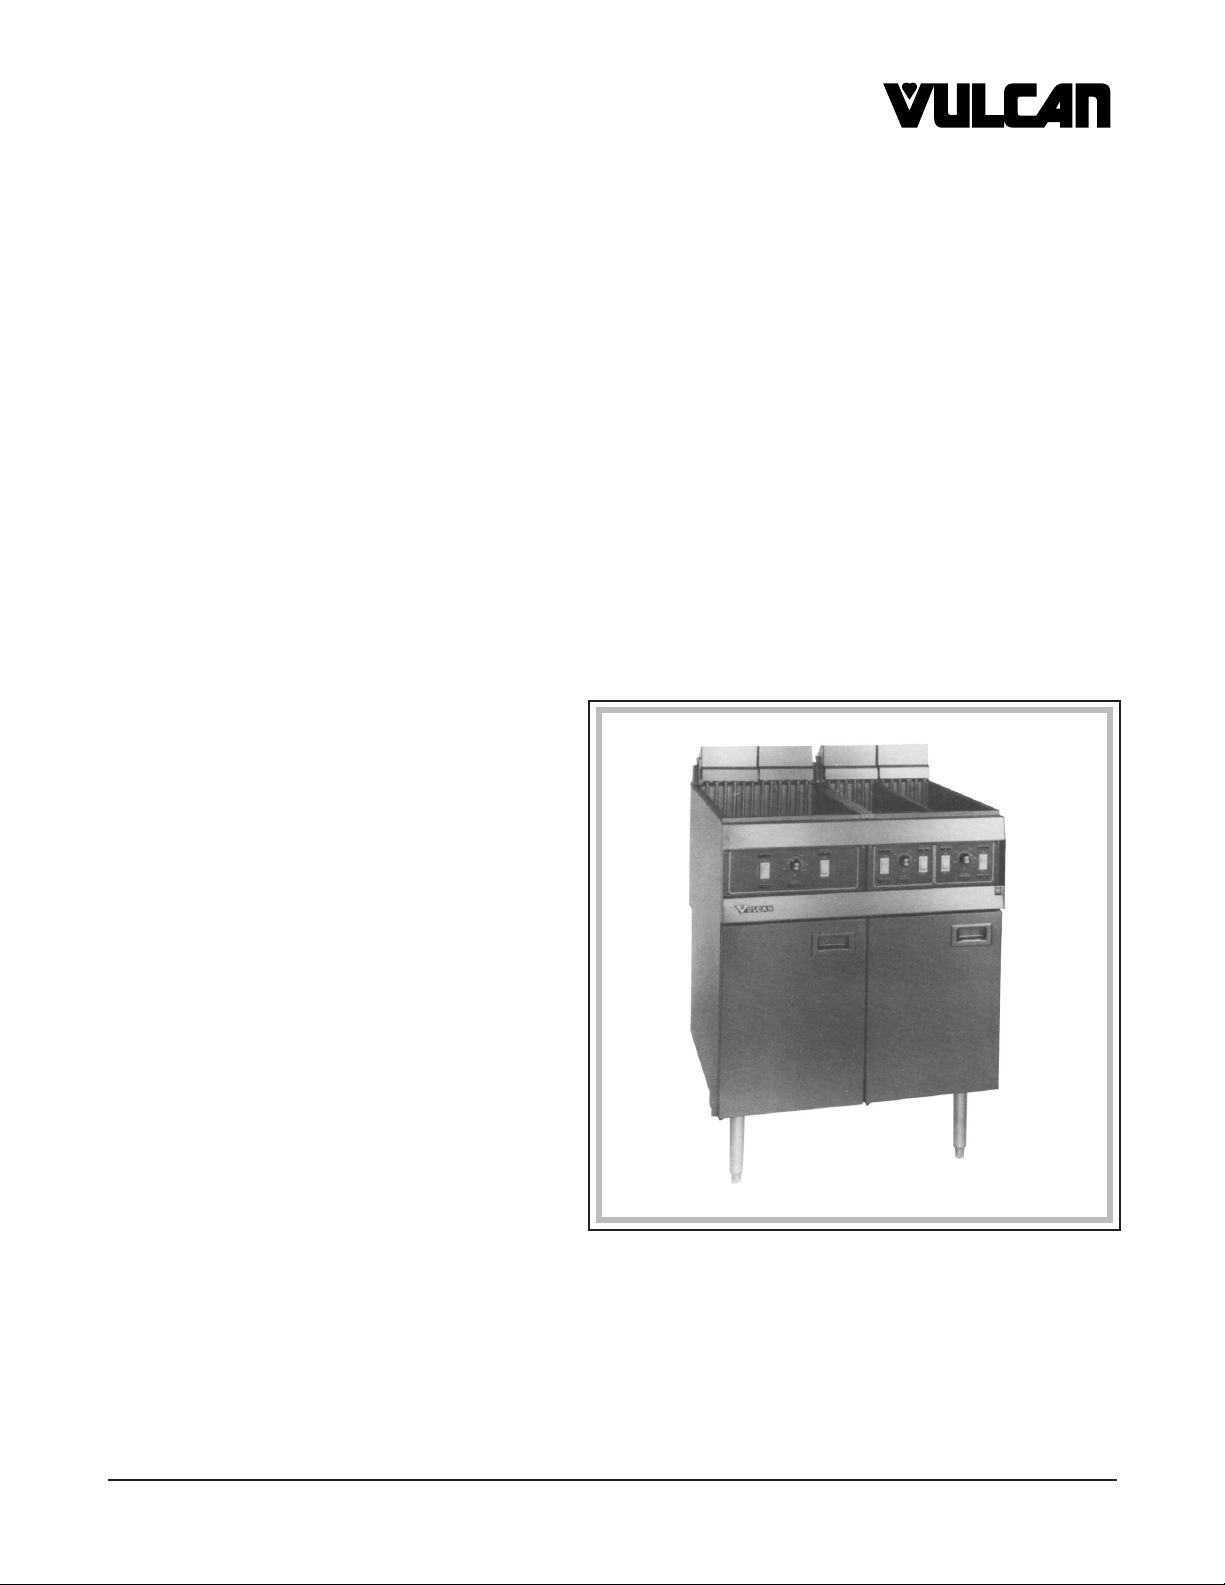
SPER1 & SPER2 ELECTRIC FRYERS
MODEL
SPER1 ML-52918
SPER2 ML-52919
SPER0 Frymate ML-52920
SPER1 & 2
VULCAN-HART COMPANY, P.O. BOX 696, LOUISVILLE, KY 40201-0696, TEL. (502) 778-2791
FORM 30729 Rev. A (1-95)
Page 2

Installation, Operation and Care of
MODEL SPER1 & SPER2 ELECTRIC FRYERS
PLEASE KEEP THIS MANUAL FOR FUTURE REFERENCE
GENERAL
Your Vulcan fryer is produced with quality workmanship and material. Proper installation, usage and
maintenance of your fryer will result in many years of satisfactory performance.
Vulcan-Hart Company suggests that you thoroughly read this entire manual and carefully follow all of
the instructions provided.
INSTALLATION
Before installing, verify that the electrical service agrees with the specifications on the rating plate
located on the inside of the fryer door panel. If the supply and equipment requirements do not agree,
do not proceed with the installation. Contact your dealer or Vulcan-Hart Company immediately.
UNPACKING
This fryer was inspected before leaving the factory. The transportation company assumes full
responsibility for safe delivery upon acceptance of the shipment. Immediately after unpacking, check
for possible shipping damage. If the fryer is found to be damaged, save the packaging material and
contact the carrier within 15 days of delivery.
Open the cardboard box containing component parts and check quantities. For both Models SPER1
and SPER2 there should be (2) baskets, (1) clean-out rod, and (2) basket hangers.
LOCATION
The fryer may be installed at 0" clearance from the back or side walls. Position the fryer for easy
accessibility for service.
— 2 —
Page 3

INSTALLATION CODES AND STANDARDS
Your Vulcan fryer must be installed in accordance with:
1. State and local codes.
2. The National Electrical Code, ANSI/NFPA No. 70 (latest edition). Copies may be obtained from The
National Fire Protection Association, Batterymarch Park, Quincy, MA 02269.
3. NFPA Standard #96.
LEVELING
Place a carpenter's level on top of the fryer and level the fryer front-to-back and side-to-side by turning
the adjustable legs. If your fryer is equipped with the optional non-adjustable casters, the fryer must
be placed on a level surface.
ELECTRICAL CONNECTIONS
WARNING: ELECTRICAL AND GROUNDING CONNECTIONS MUST COMPLY WITH THE
APPLICABLE PORTIONS OF THE NATIONAL ELECTRICAL CODE AND/OR OTHER LOCAL
ELECTRICAL CODES.
WARNING: DISCONNECT ELECTRICAL POWER SUPPLY AND PLACE A TAG AT THE
DISCONNECT SWITCH TO INDICATE THAT YOU ARE WORKING ON THE CIRCUIT.
Place fryer as near to its final position as possible. Connect 3-phase line to X, Y and Z of terminal block.
To reach terminal block, remove electric cover plate.
1
For each 15
/2" section, a 3-phase supply line capable of handling 16 KW at the fryer's rated voltage
(208, 240, 480) is required. A hood ventilator interlock should be connected to 1 and 2 on the 4-pole
3
barrier strip. 1 and 2 go to a set of dry contacts on the power switch. (
/4 HP fan maximum, if needed.)
A wiring diagram is located inside the front door panel.
— 3 —
Page 4
OPERATION
WARNING: HOT OIL AND PARTS CAN CAUSE BURNS. USE CARE WHEN OPERATING,
CLEANING AND SERVICING THE FRYER.
BEFORE FIRST USE
Cleaning
Clean the fryer thoroughly, following the procedures described in this manual under CLEANING —
WEEKLY OR AS REQUIRED.
Clean all fryer accessories. Rinse all parts thoroughly after cleaning and wipe dry.
Seasoning
Light seasoning of the backsplash area is required to avoid possible surface corrosion. With a soft,
lint-free cloth, apply a thin layer of cooking oil over entire backsplash area. This should also be done
after every cleaning.
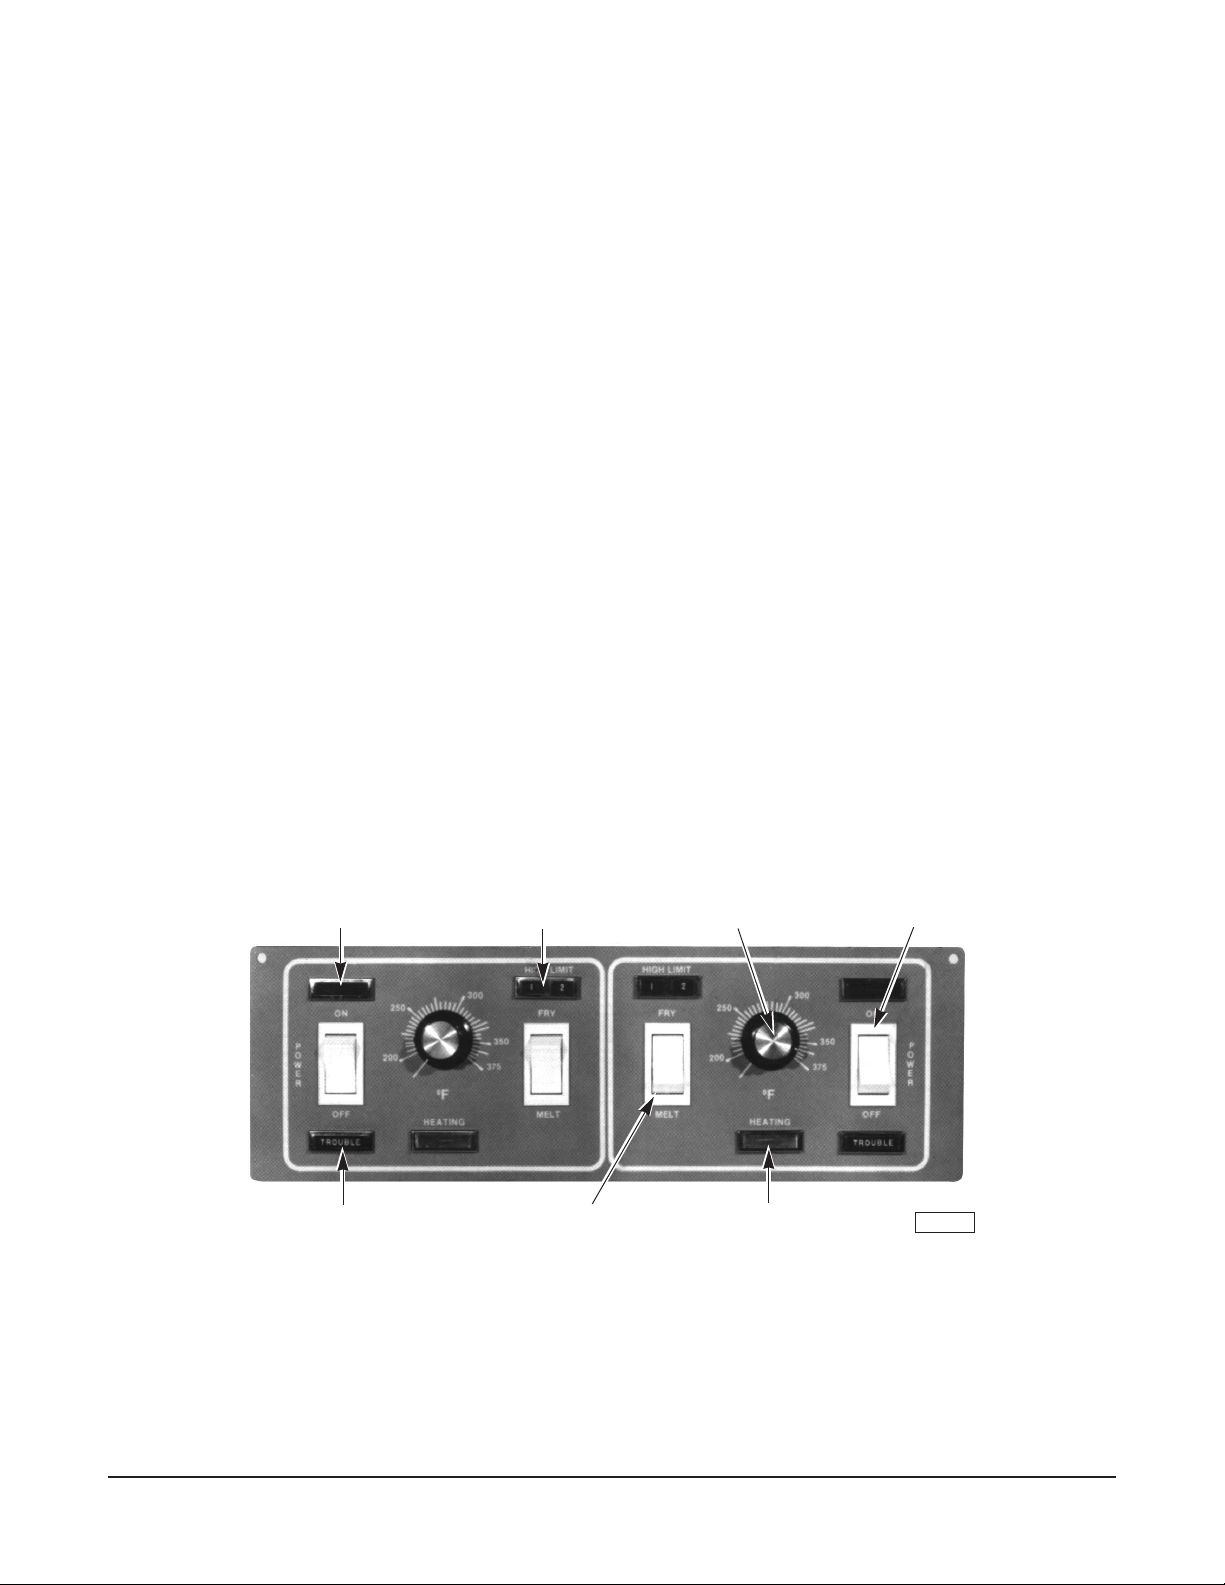
CONTROLS (Fig. 1)
Power On Light
Trouble Light Fry / Melt Switch
High Limit Lights
Temperature Controller Power Switch
Heating Light
PL-40545-1
MODEL SPER2
Fig. 1
— 4 —
Page 5

POWER SWITCH — Controls electric supply to fryer (Optional - hood ventilator to
interlock.)
POWER ON LIGHT — Indicates when electric supply is on.
TEMPERATURE CONTROLLER — Maintains frying temperature by controlling power supply.
HEATING LIGHT — When on, indicates temperature control is calling for power to
the elements.
FRY/MELT SWITCH — Controls melting or frying cycle. Use MELT cycle position to melt
solid shortening. When melted, turn switch to FRY position, with
thermostat set at desired frying temperature. MELT cycle not
needed with liquid shortening.
Option: Leave Fry/Melt Switch in MELT mode. When shortening
temperature reaches 135°F, temperature control automatically
overrides MELT mode and normal FRY mode begins.
FIRST HIGH LIMIT LIGHT — When on, indicates first high limit thermostat has shut fryer
down. (Reset not required.)
SECOND HIGH LIMIT LIGHT — When on, indicates second high limit thermostat has shut fryer
down. (Reset required.)
To reset, push reset button on back of the element head (see
Fig. 3 on page 9).
TROUBLE LIGHT — Indicates fryer has been shut down by second high limit
thermostat.
ADDING SHORTENING
If replacing shortening, place the block of shortening in the room with the fryer for 1 to 2 hours before
using. This will soften the shortening and make it easier to divide.
CAUTION: Failure to remove crumb screens prior to addition of fresh shortening may cause
fryer side walls to overheat, allowing shortening to reach flashpoint.
After draining shortening, allow the tank to cool down before adding all new shortening to avoid
scorching new shortening.
Shortening Capacity
Full Vat 50 lb.
Split Vat 25 lb. each vat
— 5 —
Page 6

Split Vat
1. Remove crumb screens.
2. Divide a 50-pound block of shortening into two equal halves (approximately 25 pounds each).
3. Place each half of the shortening directly on the heating elements in each well of the fry tank and
slide back.
4. Place crumb screens on top of shortening in tank.
Single Vat
1. Remove crumb screen.
2. Place 50-pound block of shortening directly on the heating elements in the tank and slide back.
3. Place crumb screen on top of shortening.
Melt Cycle
1. Set temperature control knob to desired cooking temperature and turn on power switch. Place Fry/
Melt switch in the MELT position. It will take approximately 45 minutes to completely melt the cold
shortening. Energy savings may be obtained by covering the vat(s) during the melt cycle.
2. Elements will cycle on and off until the shortening melts and a temperature of 135°F is obtained.
Then the temperature controller will bring the fryer to set temperature.
HIGH LIMIT CONTROL
The function of the high limit control is to shut the fryer down in the event of a thermostat failure which
would allow the shortening to be overheated. The operating temperature of the high limit control is
435°F, or 60°F higher than the highest temperature allowed by the thermostat when the thermostat
is functioning properly.
In the event of a High Limit "Shutdown," the entire control system will be put out of operation.
DO NOT attempt to restart the fryer until the temperature of the shortening has lowered to
approximately 350°F.
If this situation persists, do not attempt to bypass the High Limit; shut fryer down and contact a Vulcanauthorized service agency.
DRAINING AND FILTERING SHORTENING
Turn power switch OFF when draining or filling.
— 6 —
Page 7

1. Allow shortening to cool before draining or filling.
2. Consult the operating instructions supplied by the manufacturer of your filtering system before
filtering the shortening.
3. Firmly screw the fryer drain nipple (supplied) into the fryer drain valve (Fig. 2). Position your filtering
container under the drain nipple mouth before opening the drain valve.
4. Completely open the drain valve. Let the shortening drain into the filter container. If the drain valve
becomes clogged with food particles, use the cleaning rod supplied with your fryer to unclog the
valve.
Use the cleaning rod with care from inside the fryer vat. Do not hammer on the drain valve with the
cleaning rod from inside or outside the fry vat. This type of abuse will damage the drain valve.
5. If it is necessary to clean the fry tank more thoroughly, follow the procedure shown in CLEANING
— WEEKLY OR AS REQUIRED.
6. Close drain valve and pour filtered shortening back into fry tank to continue frying.
Drain Valves
Model SPER2 Drain Valves Shown
Fig. 2
Drain Nipple
PL-40547-1
— 7 —
Page 8

SHORTENING MAINTENANCE
Shortening life may be extended by following these important procedures.
Do not salt foods over the fryer.
Use good quality shortening.
Filter shortening daily at a minimum.
Keep equipment and surroundings clean.
Set thermostats correctly. Do not use excessively high temperatures.
Remove excess moisture and particles from food products before placing in fryer.
Dip out several cups of shortening from fry tank every day and add fresh shortening to replace it.
CLEANING
DAILY
Clean your fryer regularly. If regular cleaning is neglected, grease will be burned on and discolorations
may form. These may be removed by washing with any detergent or soap and water. Particularly
stubborn discolorations may be removed with a self-soaping scouring pad or a paste made of water
and a mild scouring powder applied with a plastic open pad or sponge. Do not use standard steel wool
on stainless steel finishes. Pieces of the steel wool will adhere to the stainless steel and cause rusting.
Always rub in the direction of the polish lines on the steel front to preserve the original finish.
Keeping the fryer exterior clean and free of accumulated grease will prevent stubborn stains from
forming. Wash all exterior surfaces at least once daily. Use a cloth with warm water and a mild soap
or detergent. Follow with a clear rinse, then dry.
WEEKLY OR AS REQUIRED
Heating Elements and Thermostat Bulb
1. The fry tank must be at operating temperature.
2. Turn power switch OFF.
3.Wear protective gloves, and using the lift rod, raise elements out of hot shortening. Allow
shortening to drip off for five minutes.
4. Place cover(s) (optional extra) over fry tank(s) to preserve clean shortening.
5. Turn operating thermostat to 300°F.
6. Turn power switch ON. DO NOT leave fryer unattended. The second high limit will trip out,
terminating the burn-off cycle.
— 8 —
Page 9

7. Turn power switch OFF at termination of burn-off cycle.
8. Heating elements will heat up in excess of 600°F glowing red. If any do not glow, call a Vulcanauthorized service agency. Some smoking, crackling sound and puffs of flame will occur. This is
normal. If excessive flaming occurs, turn power switch OFF and extinguish immediately to prevent
damage to elements and thermostat bulbs.
9. Allow elements to cool and press reset button on rear of element head (Fig. 3).
10. Brush residue from elements and thermostat bulbs with a nylon brush. Take care not to bend or
displace temperature controller bulbs.
11. Remove cover(s) (optional extra) from fry tank(s) and lower elements into shortening.
12. Proceed with filtering procedures.
Reset Button
PL-40546-1
Model SPER2 Element Heads Shown
Fig. 3
Fry Tank
1. Drain and strain shortening into a clean container and refrigerate if necessary.
2. Close drain valve (see Fig. 2) and fill tank to the full line with hot water and all purpose cleaning
concentrate.
3. Set temperature control knob to 212°F and turn power switch ON. DO NOT leave fryer unattended.
4. Boil the cleaning solution for 30 minutes. Readjust temperature control to maintain a soft boil.
5. Turn power switch OFF. Add two gallons of cold water (for single vat) or one gallon (for each split
vat) to cool the solution.
— 9 —
Page 10

6. Drain solution and discard. Close drain valve and fill tank half full with water.
7. Scrub entire inside of tank with a stiff bristle nylon brush.
8. Drain solution and rinse tank thoroughly with clean water.
9. Close drain valve and refill tank with clean hot (minimum 140°F) water. Add 1 cup of vinegar to
neutralize alkaline left by the cleaner. Turn power switch ON and boil again for 15 minutes.
10. Turn power switch OFF, allow solution to cool, drain, then rinse thoroughly with clear, hot water until
clean. Wipe dry with a clean cloth.
11. Close the drain valve. Add shortening.
STAINLESS STEEL
Stainless steel may be cleaned with ordinary soap or detergent and water. To prevent water spots and
streaks, rinse equipment thoroughly with warm water and wipe dry with a soft clean cloth. The addition
of a rinsing agent will also help prevent spotting.
Fingerprints
Fingerprints are sometimes a problem on highly polished surfaces of stainless steel. They can be
minimized by applying a cleaner that will leave a thin, oily or waxy film. Wipe cleaner on and remove
excess with a soft dry cloth. After using, subsequent fingerprints will usually disappear when wiped
lightly with a soft dry cloth, or with a cloth containing a little of the cleaner. If the surface is especially
soiled to start with, wash first with soap or detergent and water.
Burned On Foods and Grease
Soaking with hot soapy water will help greatly to remove burned on foods and grease. Stubborn
deposits can be removed with scouring powder mixed into a paste and applied with stainless steel wool
or sponges. Always rub with the "grain" in a horizontal direction.
Heat Tint
Straw-colored or slightly darkened areas may appear on stainless steel equipment where temperatures
reach 500°F or more. This "Heat Tint" is caused by a slight oxidation of the stainless steel and is not
harmful. To control this condition, never use more heat than is absolutely necessary.
Precautions
When scraping off heavy deposits of grease or oil from stainless steel equipment, never use ordinary
steel scrapers or knives. Particles of ordinary steel may become embedded in, or lodge on, the surface
of the stainless steel. These will rust, causing unsightly stains. Where it is necessary to scrape, use
stainless steel, wood, plastic or rubber tools, or stainless steel wool.
— 10 —
Page 11

MAINTENANCE
WARNING: HOT OIL AND PARTS CAN CAUSE BURNS. USE CARE WHEN OPERATING,
CLEANING AND SERVICING THE FRYER.
WARNING: DISCONNECT ELECTRICAL POWER SUPPLY BEFORE PERFORMING ANY
MAINTENANCE.
CALIBRATION PROCEDURES
1. Monitor shortening temperature 1" below the surface with an accurate temperature measuring
device.
2. Turn power switch ON, and when coming up from lower temperature, set temperature control knob
to frying temperature.
3. Allow fryer to reach temperature (when heating light goes out) and maintain it (by cycling) for 15
minutes.
4. Check temperature when the heating light first comes on. If the reading is not within five degrees
of the temperature control setting, take the following steps.
A. Loosen the set screw in the temperature control knob.
B. Rotate the knob and set the knob to read the same as the shortening temperature readings.
C. Tighten the set screw.
D. Allow the fryer to cycle and check the readings.
E. If for any reason calibration is not obtained in this manner, call a Vulcan-authorized service
agency.
LUBRICATION
The motors in all SPER1 and SPER2 fryers are permanently lubricated and no lubrication is required.
SERVICE AND PARTS INFORMATION
To obtain service and parts information concerning the fryers covered in this manual, contact the
Vulcan-Hart Service Depot in your area (refer to listing supplied with the fryer), or Vulcan-Hart
Company Service Department at the address or phone number shown on the front cover of this manual.
— 11 —
Page 12

FORM 30729 Rev. A (1-95) PRINTED IN US.A.
— 12 —
 Loading...