

Vuescape 11011225-A Installation & User Manual
7” Portable DVD Player
Item Number: 11011225-A
Installation & User’s Guide
All brand names and trademarks are the property of their respective owners

Contents
Precautions...................................................................................................................................... 3
Overview .......................................................................................................................................... 4
Attaching the Frame Stand to the DVD Player .............................................................................. 5
Package Contents ........................................................................................................................... 6
7” Portable DVD Player Diagram................................................................................................. 6-7
Installation Setup............................................................................................................................. 8
Menu Control Buttons..................................................................................................................... 9
Remote Control Buttons ............................................................................................................... 10
Using the Remote Control ............................................................................................................ 11
Playing a Disc ................................................................................................................................ 12
Viewing a DVD or Video CD Disc ............................................................................................13-16
Playing a MP3 and Audio CD........................................................................................................ 17
Viewing a Picture CD................................................................................................................ 17-18
Using the Built-in Card Reader .................................................................................................... 19
Using the Power Adaptor.............................................................................................................. 19
Using the Battery........................................................................................................................... 20
Setup Menu Instructions.......................................................................................................... 21-22
Connecting the DVD Player to a TV ............................................................................................. 23
Connecting Earphones ................................................................................................................. 23
Installing the Carrying case in the car......................................................................................... 24
Specifications ................................................................................................................................ 25
Troubleshooting ............................................................................................................................ 26
Maintenance................................................................................................................................... 27
FCC Norm....................................................................................................................................... 28
Service Procedure......................................................................................................................... 29
Warranty......................................................................................................................................... 30
2
Precautions
1. Read all of these instructions and save this manual for later use.
2. Follow all warnings and instructions on the product.
3. Do not insert sharp objects or spill liquid into the Portable DVD player through the cabinet slots;
this may cause accidental fire, electric shock or failure.
4. Unplug the unit when not in use for an extended period of time.
5. Unplug the unit from power outlet before cleaning.
6. Do not attempt to service this product yourself, as opening or removing the cover may expose
you to potential electric shock. Only a qualified technician should service this product.
7. Do not apply pressure to the screen, the LCD screen is very delicate.
8. Keep the portable DVD player away from extreme heat, excessive moisture, rain, sand, cold
or humid places.
9. Do not place directly under sunlight, dusty surroundings or near equipment which may
generate strong magnetic fields.
10. Do not place any object on the power cord.
11. Place the DVD player on a firm, flat surface.
12. When placing the DVD player in a cabinet, allow about one inch of space all around the DVD
player for ventilation.
13. The DVD player should be connected to a power supply only of the type described in the
operating instructions or as marked on the DVD player.
3

Overview
• The 7” Portable DVD Player enables you to view your DVD movies, digital photos and play
music files from DVDs / CDs and different types of memory cards simply and quickly. You can
enjoy your favorite DVDs anytime and anywhere.
• The Portable DVD Player does not require a direct connection to a computer. The built-in
memory card reader can read a wide assortment of the most popular memory cards.
• The unit supports DVD, DVD-R, DVD+R, DVD-RW, DVD+RW, VCD, CD, HDCD, Picture CD,
CD-R, CD-RW, MPEG4, MP3, and WMA.
• The Portable DVD Player supports SD, MS and MMC memory cards via the built-in card
reader.
• You can play a picture SLIDESHOW with background music, provided you have the MP3 or
WMA files saved on the media card, along with your picture files.
• Built-in rechargeable battery can power the unit up to 2 hours.
• The Portable DVD Player can be operated from a distance with the remote control.
• Carry case to transport the unit or use to mount on back of a car seat.
• Built-in Stereo speakers and earphone jack recreate quality sound from your video and music
files.
4
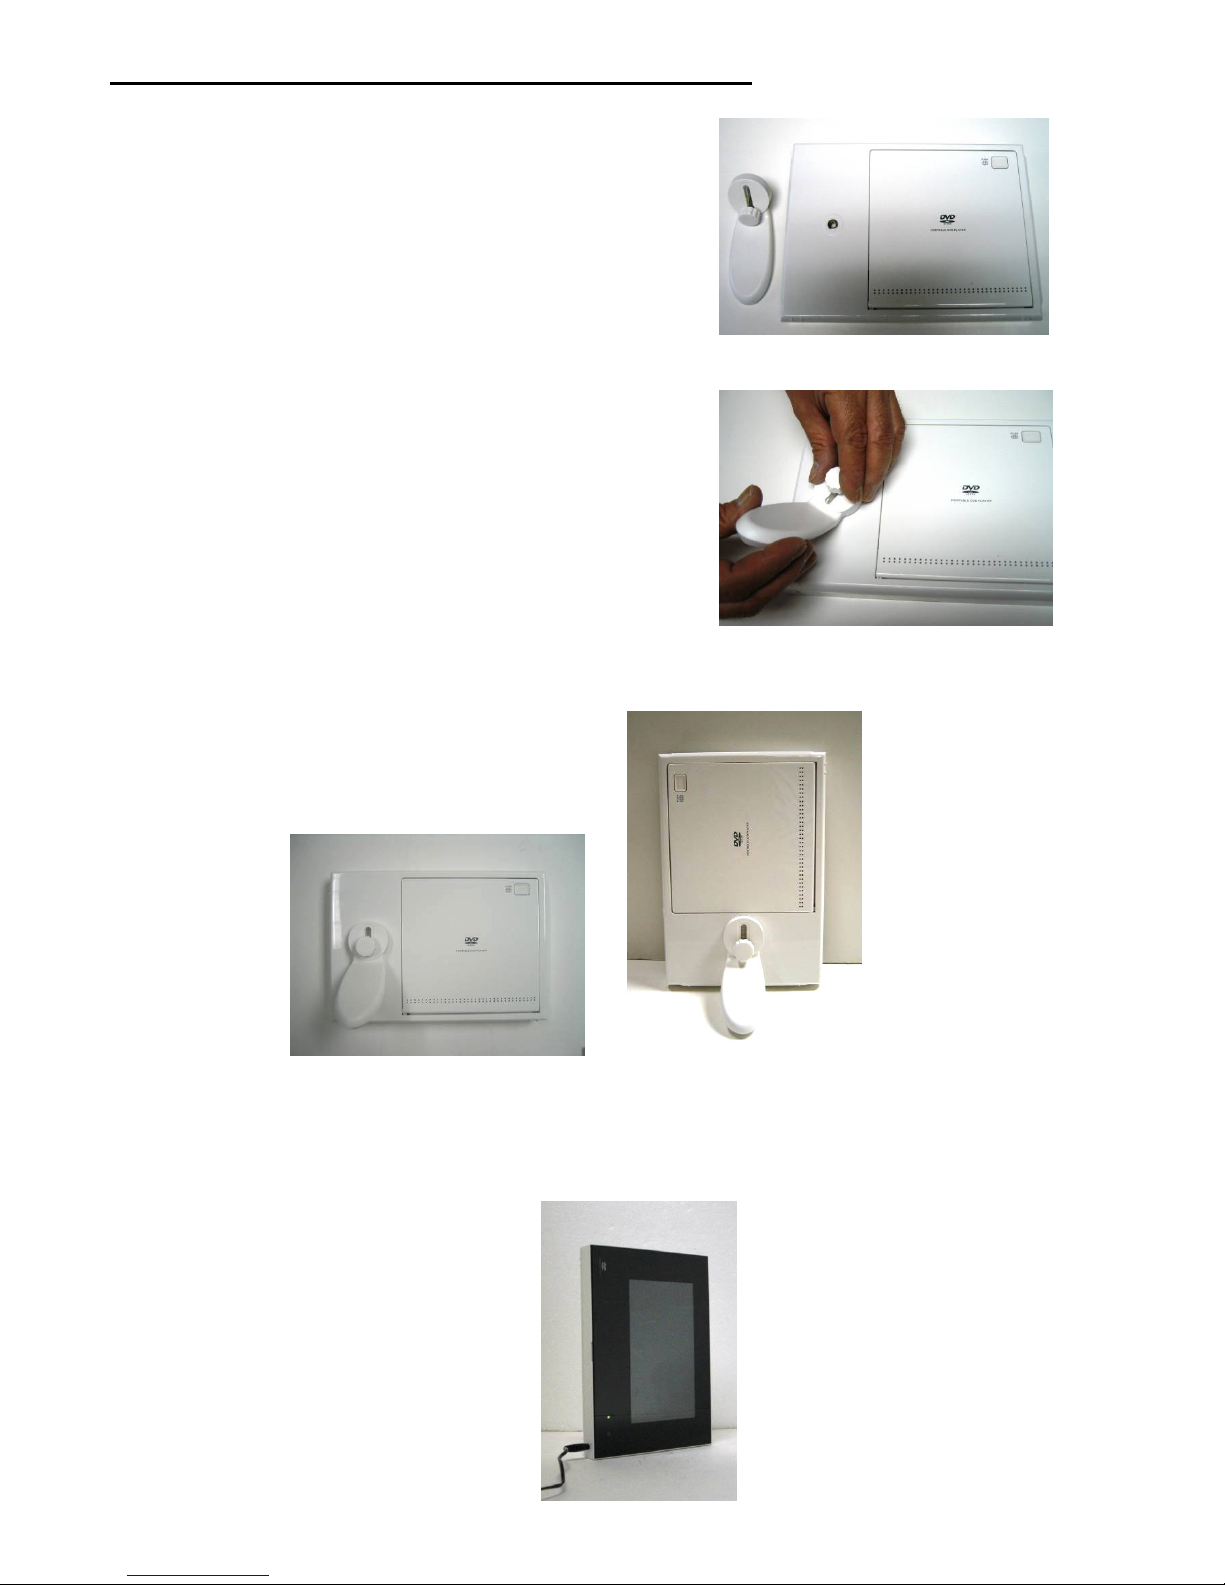
Attaching the Frame Stand to the DVD Player
1. Clear a flat clean area to set your portable DVD player
down upon in order to attach the easel stand to the
back of the portable DVD. Make sure there are no
sharp objects in the area that can make contact with
the LCD screen of the portable DVD that may cause
damage to the screen.
2. Align the frame stand to the back of the portable DVD
so that the mounting hole lines up correctly. Locate the
securing screw packed with the unit and insert it
through the stand and tighten the knob to securely hold
the frame stand to the portable DVD player.
3. You may set the Portable DVD Player in a horizontal or vertical position as shown below.
Horizontal Position Vertical Position
Note: When setting the Portable DVD in the vertical position, connect the DC power adapter to the
“DC IN” input on the side as illustrated below.
5

Package Contents
7” Portable DVD
Remote Control
Power Adapter
User’s Manual
Frame Stand
DC Car Adapter
Carry Case
7” Portable DVD Player – Front View
6
LCD Screen
Power LED Indicator
Remote Control Sensor
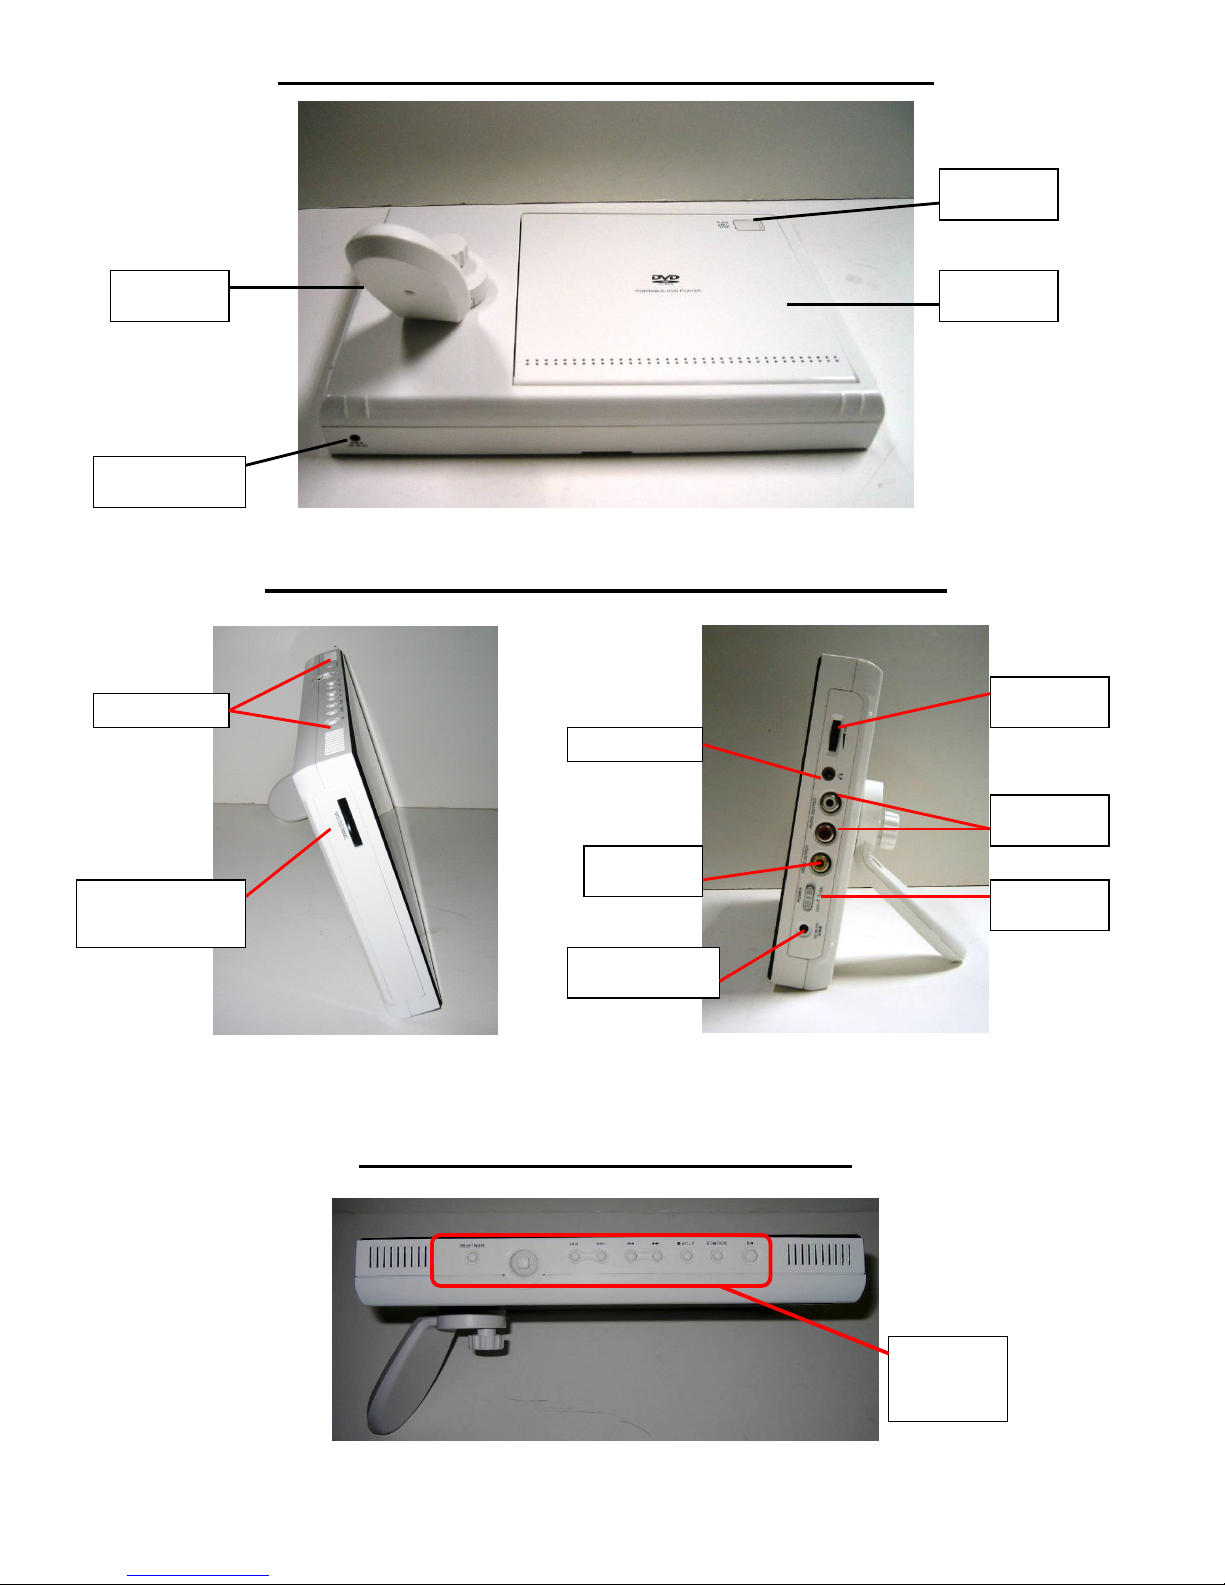
Power Adapter
Input
Disc Tray
Cover
Easel
Stand
Volume
Control
3 in 1
SD/MMC/MS
Headphones
Audio
Output
Video
Output
On/Off
Switch
Open
Button
Power Adapter
Input
Speakers
Menu
7” Portable DVD Player – Back & Bottom View
7” Portable DVD Player – Left & Right Side View
Left Side View Right Side View
7” Portable DVD Player – Top View
7
Control
Buttons
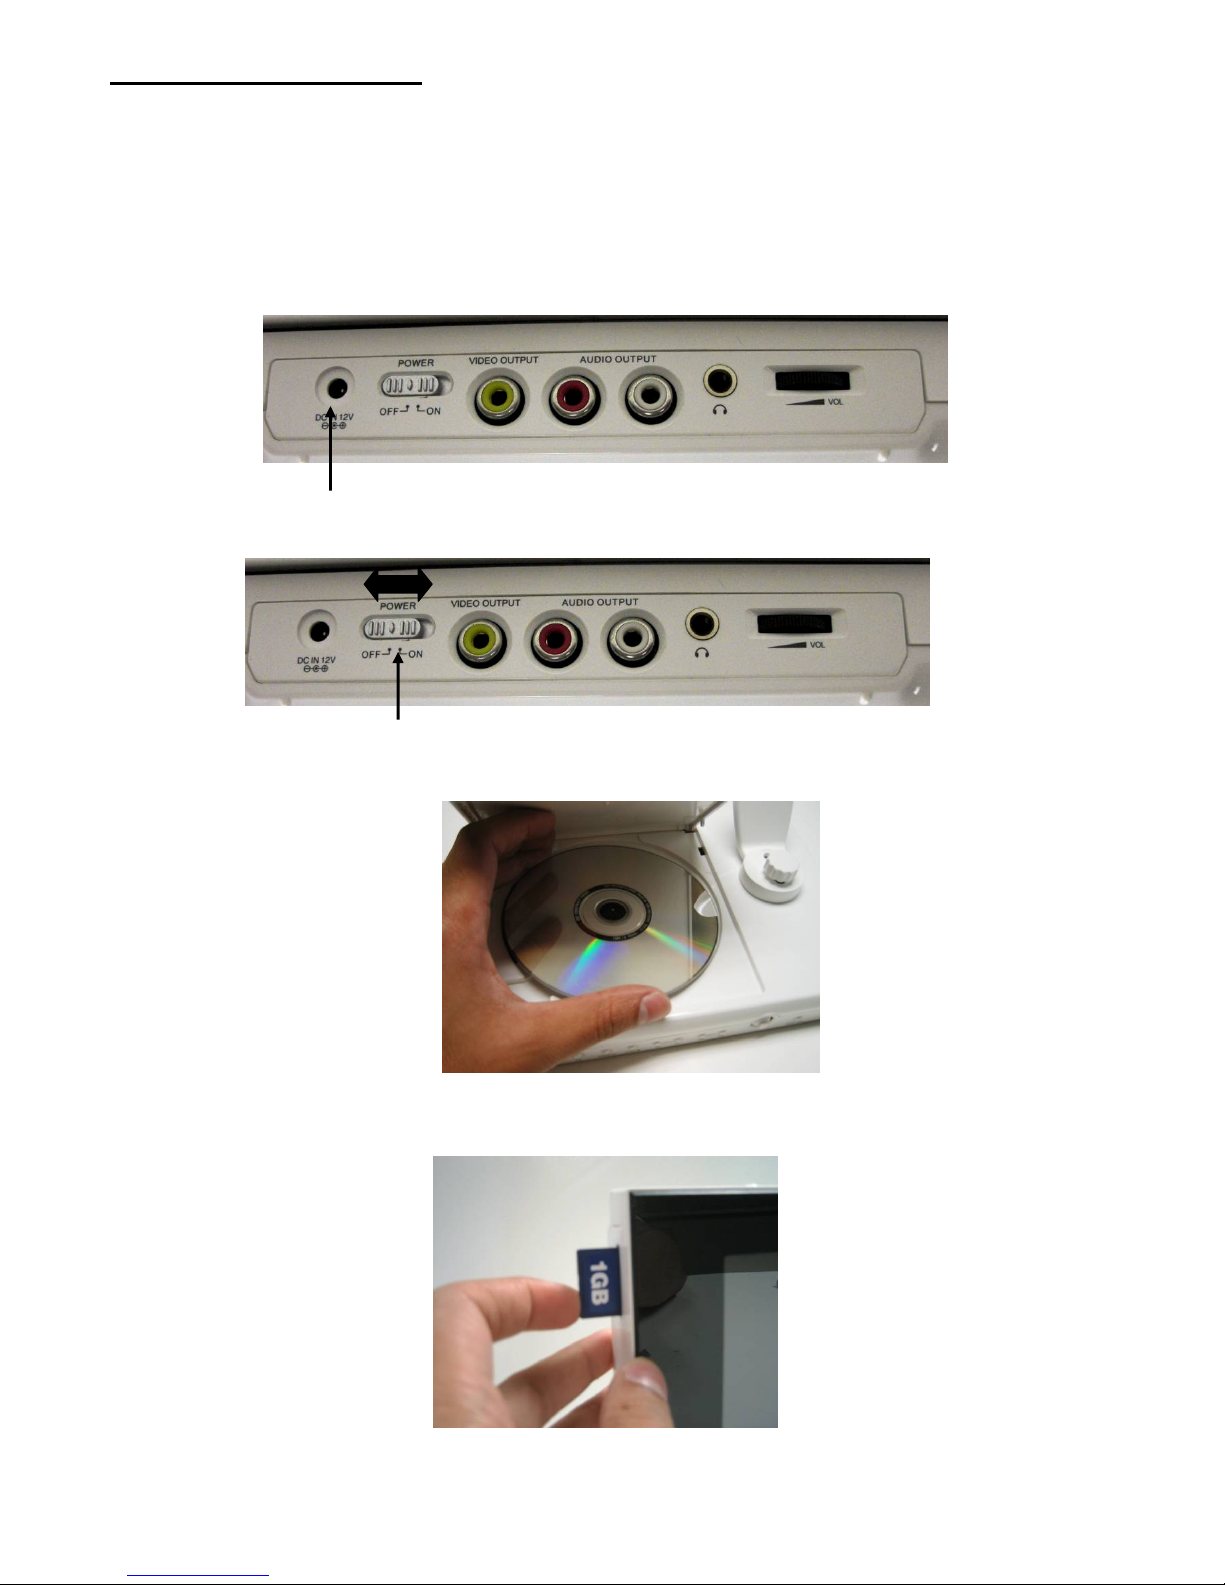
Installation and Setup
1. Carefully position your Portable DVD Player so that you can see all of the connection ports
on the side of the frame.
2. Plug the Power Adapter or DC Car Adapter cable into the “DC IN” port on the side of the
unit and plug the AC end of the adapter into a normal AC outlet or cigarette adapter in your
car.
3. Slide the power On/Off switch to the ON position.
4. Insert a disc into the disc tray on the back of the Portable DVD Player.
5. Insert your MS, SD or MMC memory cards into the built-in card reader on the left side panel
of the DVD player.
8
Moves the cursor Up / Down / Left / Right when
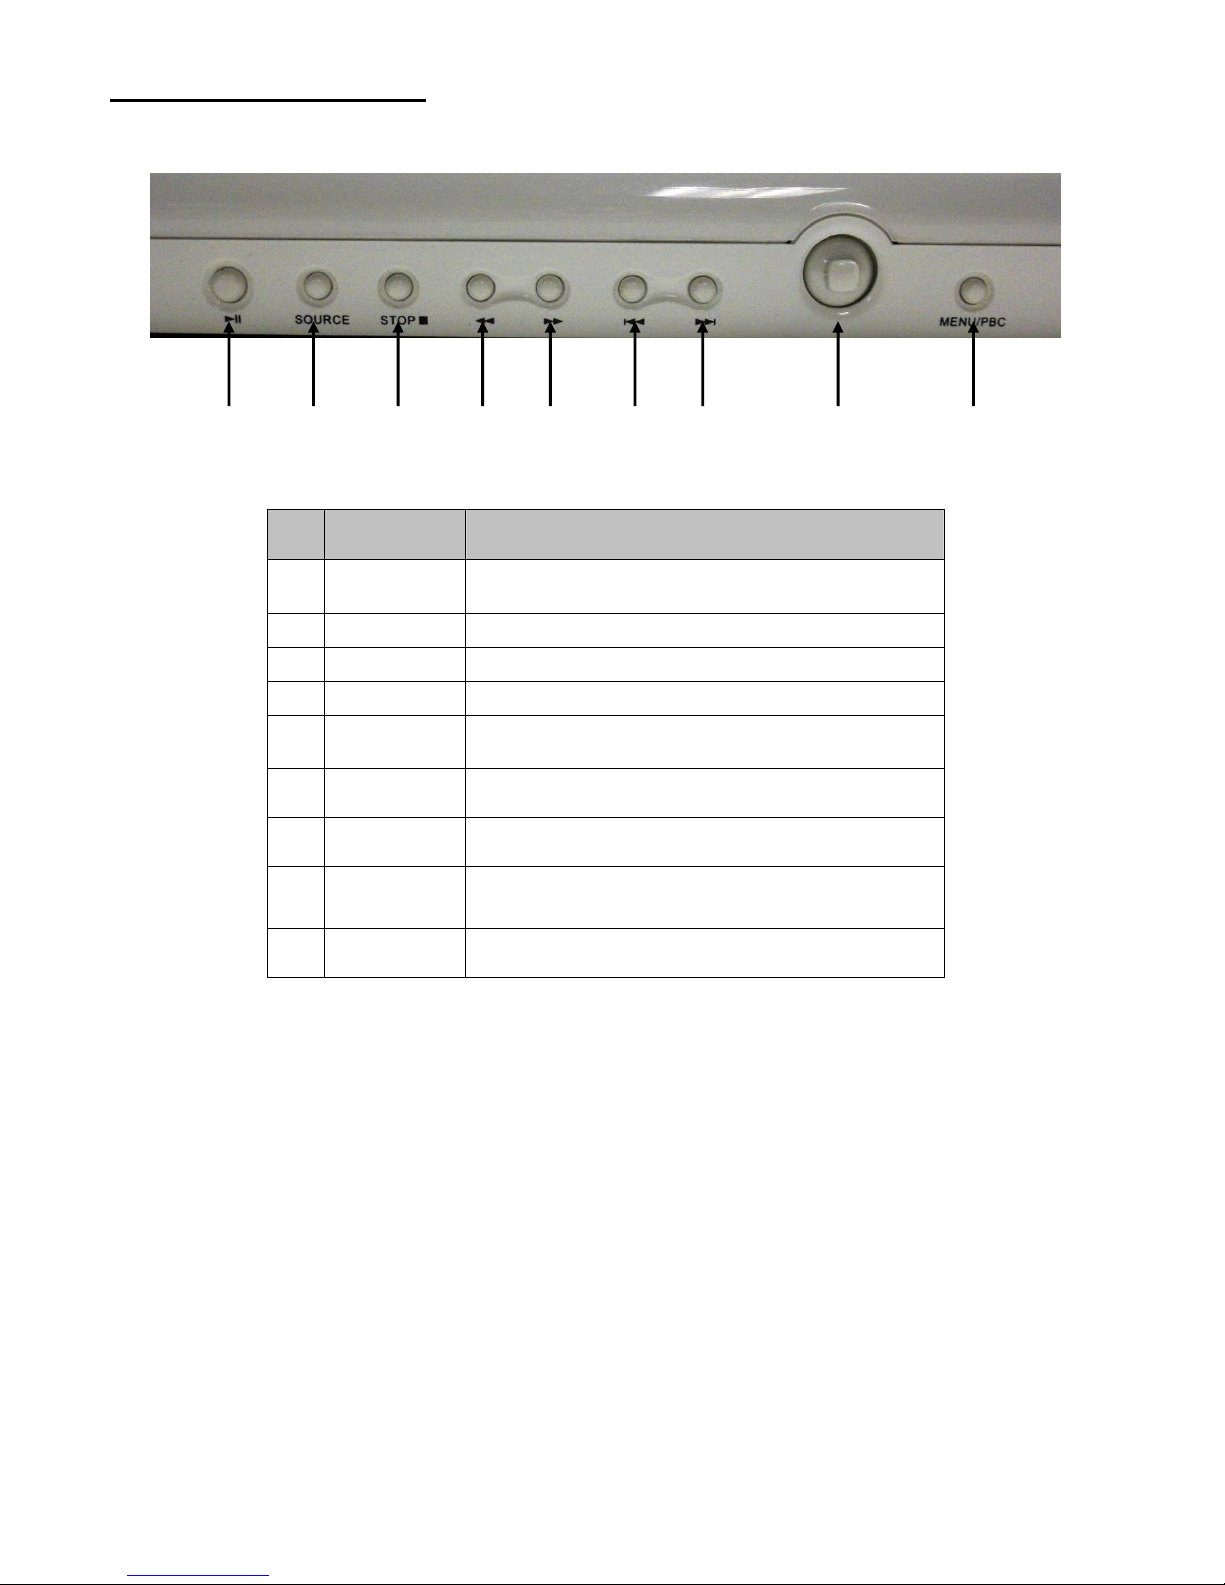
Menu Control Buttons
No. Button Function
PLAY /
PAUSE
SOURCE Switches between DVD and Card Mode.
STOP Stops the video, music or slideshow.
REWIND
FAST
FORWARD
PREVIOUS
NEXT
JOYSTICK
Play or Pauses the video, music or slideshow
on the disc or memory card.
Rewinds the video or music file.
Fast forwards the video or music file
Skips to the previous chapter or track.
Skips to the next chapter or track.
making a selection.
MENU/PBC
Displays the DVD Menu.
9
 Loading...