

Vuescape 11010945 Installation & User Manual
8.5" Digital Photo Frame 8.5" Digital Photo Frame
8.5" Digital Photo Frame 8.5" Digital Photo Frame
Item Number: 11010945
Installation & User's Guide
All brand names and trademarks are the property of their respective owners

2
FCC Norm
FCC
This equipment has been tested and complies with limits for Class B
digital devices pursuant to Part 15 of Federal Communications
Commission (FCC) rules.
FCC Compliance Statement
CAUTION!
The Federal Communications Commission warns the user that changes
or modifications to the unit not expressly approved by the party
responsible for compliance could void the user's authority to operate
the equipment
Reorient or relocate the receiving antenna
Increase the separation between the equipment and the receiver
Plug the equipment into an outlet on a circuit different from that
to which the receiver is connected.
These limits are designed to provide reasonable protection against
frequency interference in residential installations. This equipment
generates, and radiates radio frequency energy, and if not installed
properly or used in accordance with the instructions, may cause
harmful interference to radio communication. However, there is no
guarantee that interference will not occur in television reception, which
can be determined by turning the equipment on and off. Interference
may be corrected by one or more of the following measures:

Contents
Precautions..............................................................................4
Overview..................................................................................5
Quick Start Guide......................................................................5
Attaching the Easel Stand to the Digital Photo Frame....……….....6
Package Contents....................................................................7
Using the Key Pad....................................................................7
8.5” Digital Photo Frame Diagram..............................................8
Installation and Setup of Accessories.........................................9
Key Pad Control Buttons..........................................................10
Main Menu..............................................................................11
Setup Menu Instructions..........................................................12
Frequently Asked Questions................................................13-14
Specifications.........................................................................15
Maintenance...........................................................................16
Service Procedure...................................................................17
Warranty................................................................................18
3

Precautions
1. Read all of these instructions and save this manual for later use.
2. Follow all warnings and instructions on the product.
3. Do not insert sharp objects or spill liquid into the digital photo frame
through the cabinet slots; this may cause accidental fire, electric
shock or failure.
4. Unplug the unit when not in use for an extended period of time.
5. Unplug the unit from power outlet before cleaning.
6. Do not attempt to service this product yourself, as opening or
removing the cover may expose you to potential electric shock.
Only a qualified technician should service this product.
7. Do not apply pressure to the screen, the LCD screen is very delicate.
8. Keep the digital photo frame away from extreme heat, cold or humid
places.
9. Do not place directly under sunlight, dusty surroundings or near
equipment which may generate strong magnetic fields.
10. Do not place any object on the power cord.
4

Overview
Quick Start Guide
The 8.5” Digital Photo Frame enables you to view digital photos from
different types of memory cards simply and quickly. There's no need
to use a computer. You can enjoy your photos anytime and anywhere.
It's very convenient and quick.
The Digital Photo Frame does not require a direct connection to a
computer. The built-in card reader can read a wide assortment of
the most popular memory cards.
The Digital Photo frame supports CF, SD, MMC and MS memory
cards via the built-in card reader, and USB Flash Drive via the USB
port.
The unit supports JPEG, MP3, MPEG-1, MPEG-2 and MPEG-4 file
formats.
Automatic slideshow with multiple transition effects and adjustable
display time.
You can play a picture SLIDESHOW with MP3 background music,
provided you have MP3 files saved on the media card, along with
your picture files.
1. Plug the DC power adapter cable into the DC + 12V input and plug
the AC end of the adapter into a normal AC outlet. Turn power on.
2. Insert your CF, SD, MMC and MS memory card found in your digital
camera into the card slot on the top side of the Digital Photo Frame.
The Digital Photo Frame will initialize and display an icon in the main
menu.
5
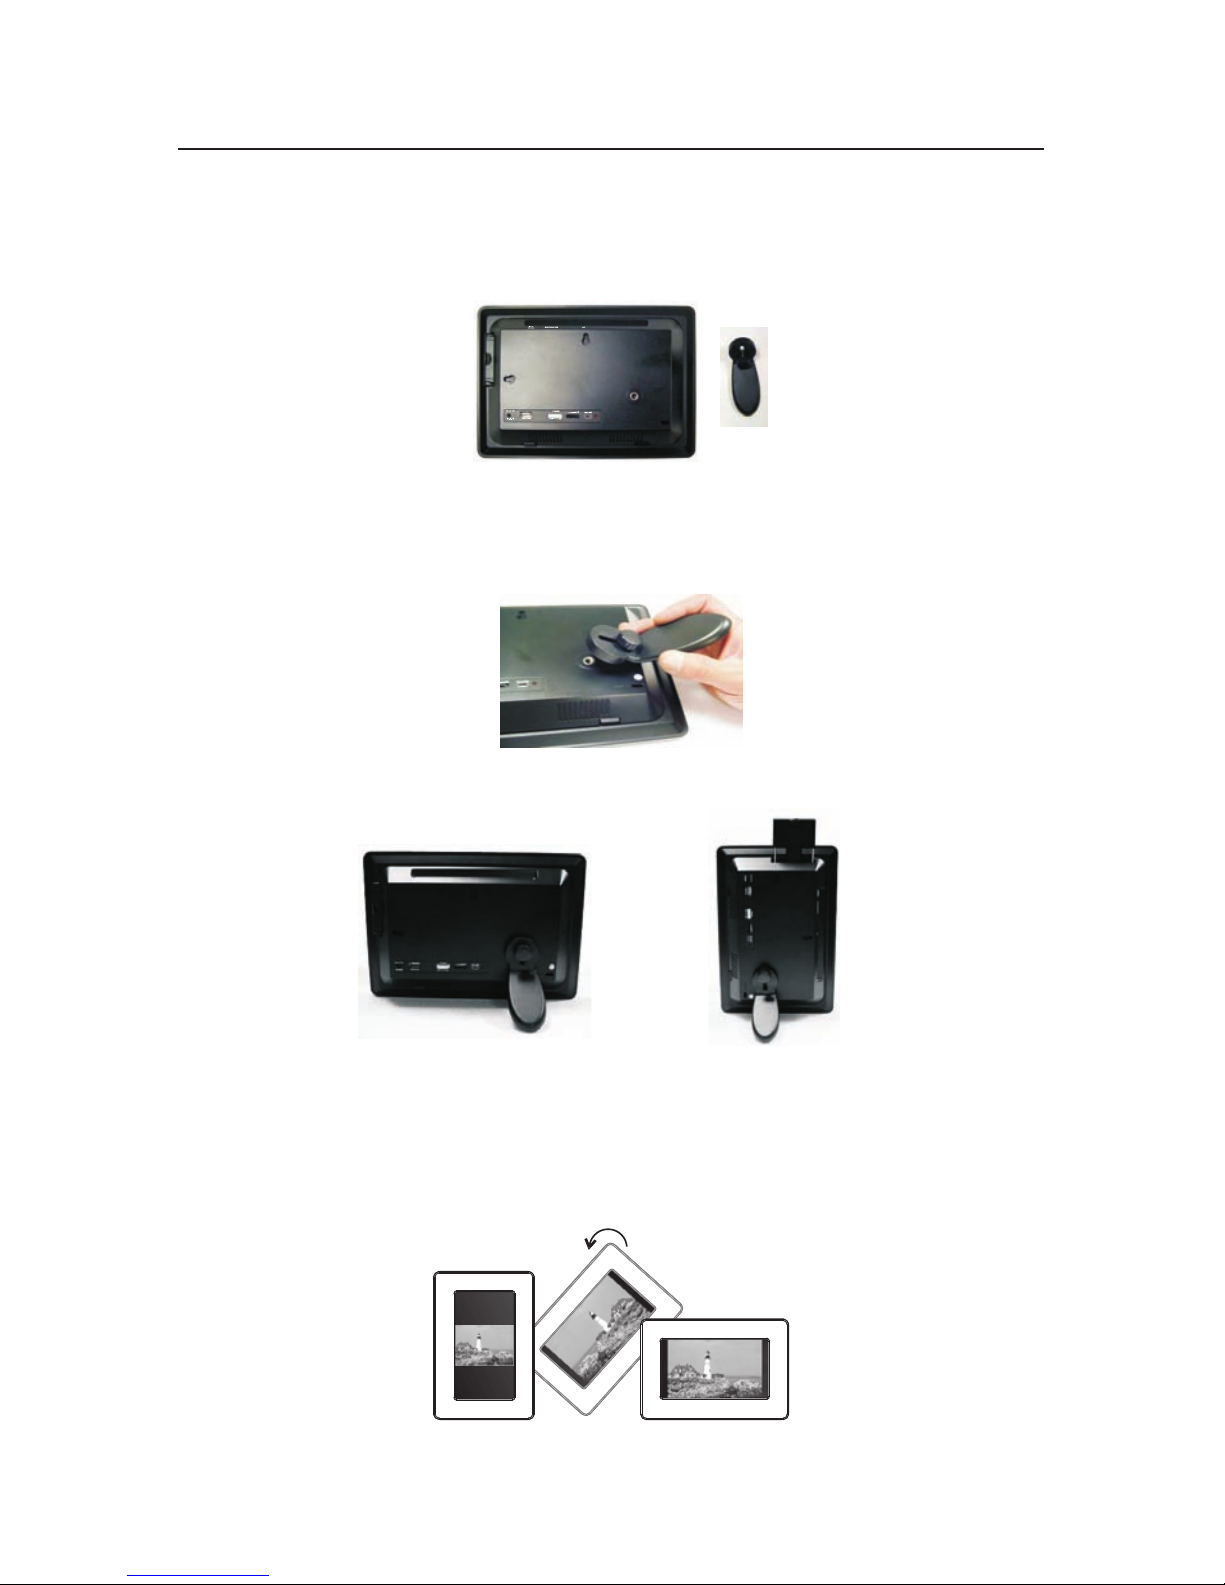
Attaching the Easel Stand to the Digital Photo Frame
1. Clear a flat clean area to set your photo frame down upon in order
to attach the easel stand to the back of the frame. Make sure there
are no sharp objects in the area that can make contact with the LCD
screen of the photo frame that may cause damage to the screen.
2. Align the easel stand to the back of the photo frame so that the
mounting hole lines up correctly. Locate the securing screw packed
with the photo frame unit and insert it through the easel and tighten
the knob to securely hold the easel stand to the photo frame.
3. You may set the Digital Photo Frame in a vertical or horizontal
position as shown below.
Vertical Position
4. You may rotate the Digital Photo Frame 90 degrees counter clockwise
to the vertical position from the horizontal position, or 90 degrees
clockwise to the horizontal position from the vertical position, the
photo will automatically turn 90 degrees. This feature will only
work with photos.
(Note: You must have the keypad on the top side of the frame when is
set vertical or on the right side of the frame when is set horizontal).
6
Horizontal Position
 Loading...