

VTech Telecommunications 80-8040-00, 80 8041 00 User Manual
Online user’s manual
Models:
CS6419/CS6419-2
w w w.v t e c h p h o n e s . c o m

Congratulations
T
Compatible with
Hearing Aid T-Coil
TIA-1083
on purchasing your new VTech product. Before using this telephone, please read
Important safety instructions on pages 47-48 of this manual.
This manual has all the feature operations and troubleshooting necessary to install
and operate your new VTech telephone. Please review this manual thoroughly to
ensure proper installation and operation of this innovative and feature rich VTech
product. For support, shopping, and everything new at VTech, visit our website at
www.vtechphones.com.
Telephones identied with this logo have reduced noise and interference when
used with most T-coil equipped hearing aids and cochlear implants.
The TIA-1083 Compliant Logo is a trademark of the Telecommunications
Industry Association. Used under license.
In Canada, please visit www.vtechcanada.com.
The ENERGY STAR® program (www.energystar.gov) recognizes and
encourages the use of products that save energy and help protect our
environment. We are proud to mark this product with the ENERGY STAR
label indicating it meets the latest energy efciency guidelines.
®

Table of contents
Getting started ................................1
Parts checklist ..................................1
Telephone base and
charger installation ........................2
Battery installation ............................3
Battery charging ...............................4
Installation options ............................5
Telephone base layout ....................7
Handset layout .................................8
Telephone settings .......................10
Using the menu ..............................10
Ringer volume ................................10
Ringer tone .....................................11
LCD language.................................11
Clear voicemail indicators...............12
Key tone .........................................13
Set date and time ...........................13
Home area code .............................14
Dial mode .......................................14
Telephone operation ....................15
Make a call .....................................15
Predial a call ...................................15
Answer a call ..................................15
End a call ........................................15
Speakerphone ................................15
Volume ...........................................15
Mute................................................16
Call waiting .....................................16
Temporary ringer silencing .............16
Temporary tone dialing ...................16
Chain dialing ...................................17
Join a call in progress .....................18
Find handset ...................................18
Redial list ........................................19
Review and dial a redial entry ........19
Store a number from the redial list
to the directory ............................19
Delete a redial entry .......................19
Intercom..........................................20
Answer an incoming call during an
intercom call ................................21
Call transfer using intercom ............21
Directory ........................................23
About directory ...............................23
Create a new directory entry ..........24
Review the directory .......................26
Alphabetical search ........................26
Dial a directory entry.......................26
Edit a directory entry.......................26
Delete a directory entry ..................27
Speed dial.......................................27
Store a speed dial entry..................27
Dial a speed dial number ................28
Delete a speed dial entry ................28
Caller ID .........................................29
About caller ID ................................29
Information about caller ID with
call waiting...................................29
Call log............................................30
Missed call indicator .......................31
Memory match ................................31
Review and dial from the call log ....31
i

Table of contents
View dialing options ........................32
Save a call Iog entry to
the directory ................................32
Delete from the call log ...................33
Call log display screen messages ..33
Appendix .......................................34
Handset display
screen messages ........................34
Handset and telephone
base indicators ............................36
Battery ............................................37
Expand your telephone system ......38
Add and register
a handset (optional) ....................38
Replace a handset..........................39
Troubleshooting ..............................40
Important safety instructions...........47
Precautions for users of implanted
cardiac pacemakers ....................48
Operating range..............................48
Maintenance ...................................49
About cordless telephones .............50
The RBRC® seal .............................50
Limited warranty .............................51
FCC, ACTA and IC regulations ......53
Technical specications..................55
Index ..............................................56
ii
Getting started
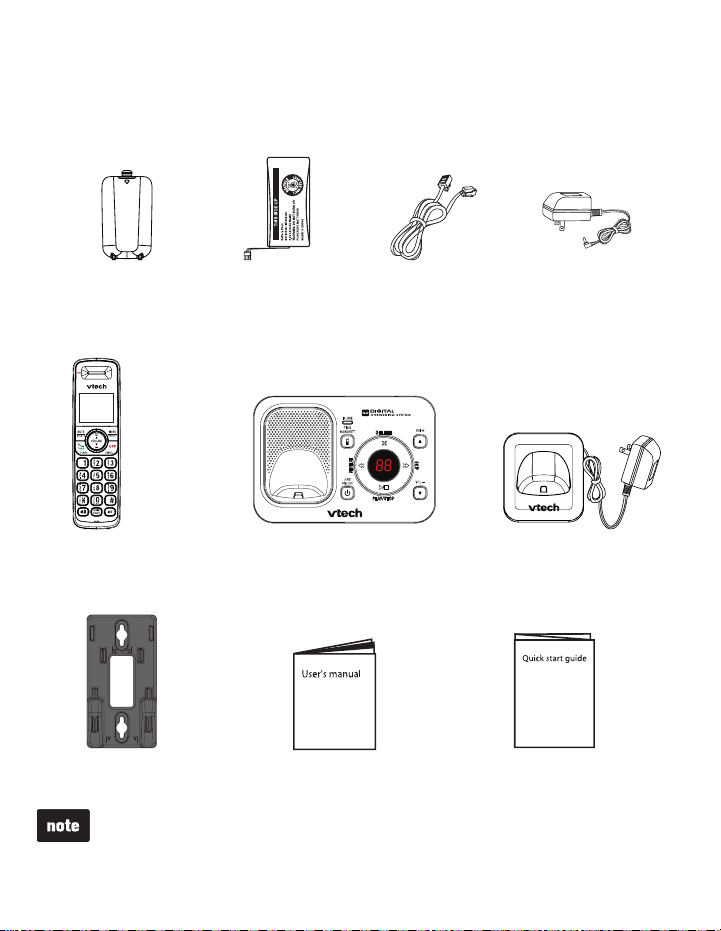
Parts checklist
Your telephone package contains the following items. Save your sales receipt and
original packaging in case it is necessary to ship your telephone for warranty service.
Battery compartment
cover
(1 for CS6419 and
2 for CS6419-2)
(1 for CS6419 and
2 for CS6419-2)
To purchase replacement batteries or power adapters, visit our website at
www.vtechphones.com or call 1 (800) 595-9511. In Canada, go to
www.vtechcanada.com or call 1 (800) 267-7377.
Battery
(1 for CS6419 and
2 for CS6419-2)
Telephone baseHandset
User’s manualWall mount bracket
Telephone line cord
1
Telephone base
power adapter
Charger and charger adapter
(1 for CS6419-2)
Quick start guide
Getting started
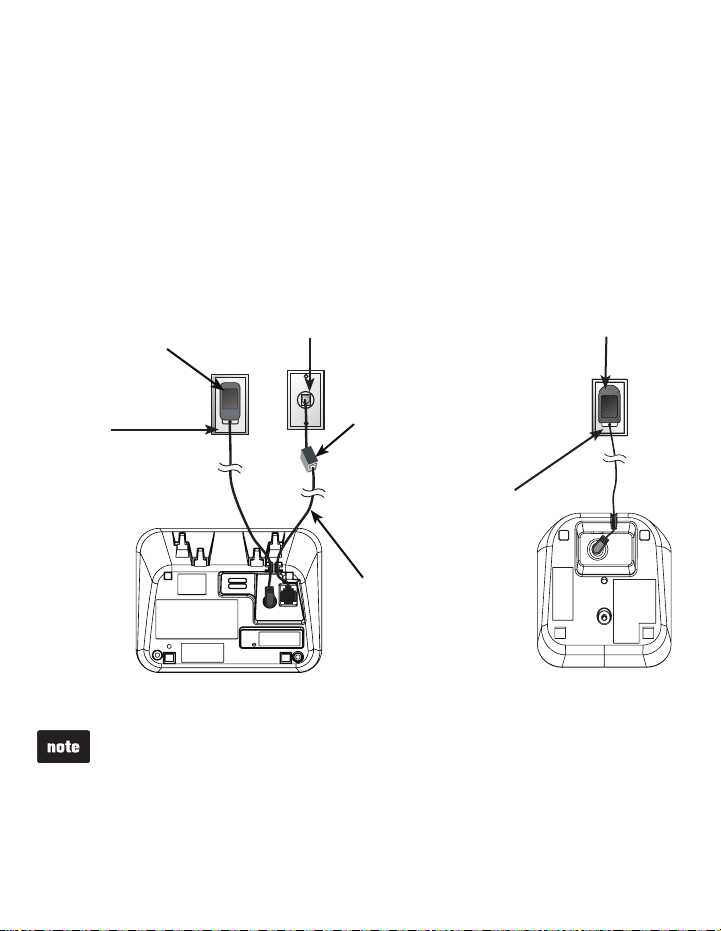
Telephone base and charger installation
Install the telephone base and charger(s) as shown below.
If you subscribe to digital subscriber line (DSL) high-speed Internet service
through your telephone line, you must install a DSL filter between the telephone
line cord and the telephone wall jack. Contact your DSL service provider for more
information about DSL filters.
The telephone base comes ready for tabletop use. If you want to mount your
telephone on a wall, refer to Tabletop to wall mount installation on page 5
for details.
Telephone base
power adapter
Electrical
outlet not
controlled
by a wall
switch
Telephone
wall jack
If you have DSL
high speed
Internet service,
a DSL filter (not
included) is
required.
Electrical
outlet not
controlled by
a wall switch
Telephone line
cord
Use only the power adapters supplied with this product. To order a
•
replacement, visit our website at www.vtechphones.com or call
1 (800) 595-9511. In Canada, go to www.vtechcanada.com or dial
1 (800) 267-7377.
The power adapters are intended to be correctly oriented in a vertical or floor
•
mount position. The prongs are not designed to hold the plug in place if it is
plugged into a ceiling, under-the-table or cabinet outlet.
Charger adapter
ChargerTelephone base
2
 Loading...