

VTech Telecommunications 80-6101-00 Part C
Getting started
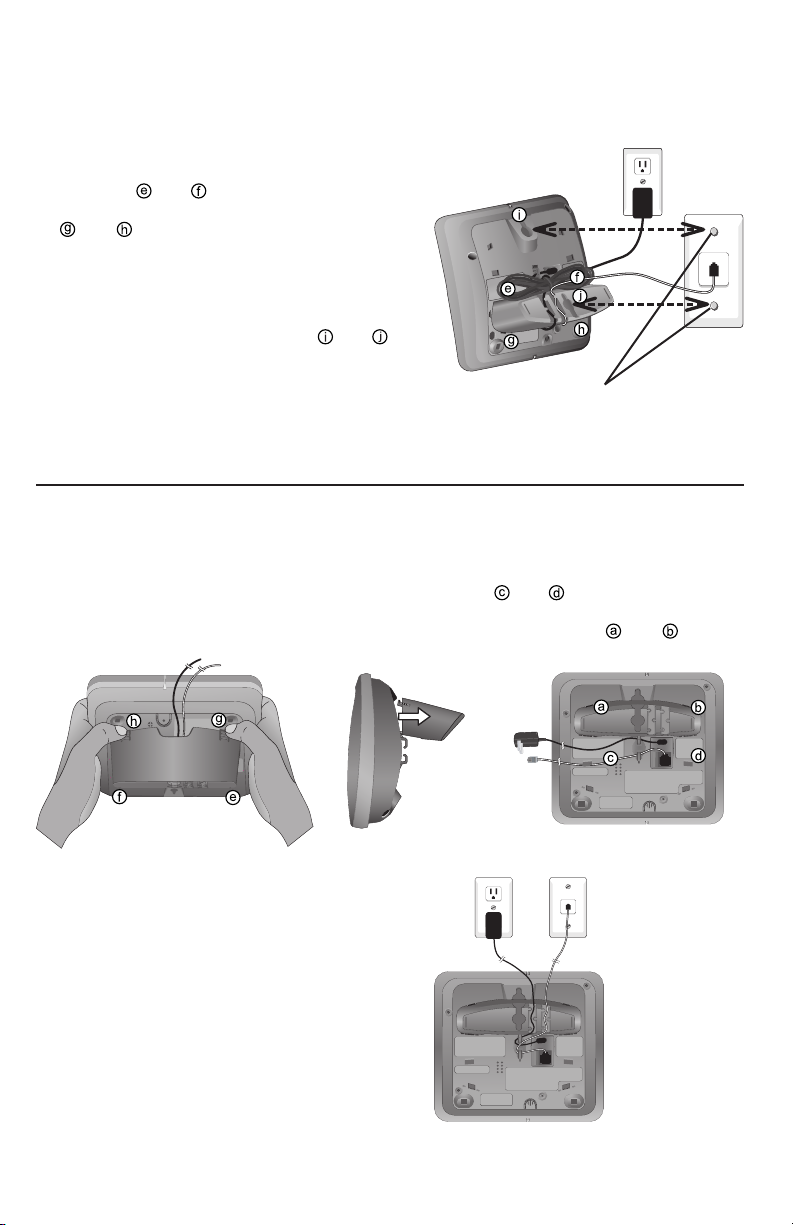
Installation options
3. To attach the mounting bracket for wall
mounting, insert the tabs of the bracket
into slots and on the telephone base,
then press the other bracket tabs into slots
and as shown on the right.
4. Plug the power ad ap te r into an electrical
outlet not controlled by a wall switch. Plug
the telephone line cord into a telephone
wall jack. To mount the telephone on the
wall, position the mounting holes and
over the telephone outlet mounting studs.
Press and slide th e bracket down firmly
so the telephone is held securely on the
telephone outlet mounting studs.
Tabletop mounting
To change back from the wall mounting to tabletop mounting position,
follow the directions below.
Telephone outlet mounting studs
1. Remove the telephone base from the wall.
Unplug the cords from the wall jacks. Remove
th e mou nti ng brac ket from the teleph one
base.
3. Route cords through slots. Plug the other
end of the telephone line cord into a
telephone wall jack. Plug the large end
of the power adapter into an electrical
outlet not controlled by a wall switch.
2. Insert the bracket tabs into slots
and on the telephone base,
then press the other bracket tabs
into the slots and .
10
Getting started
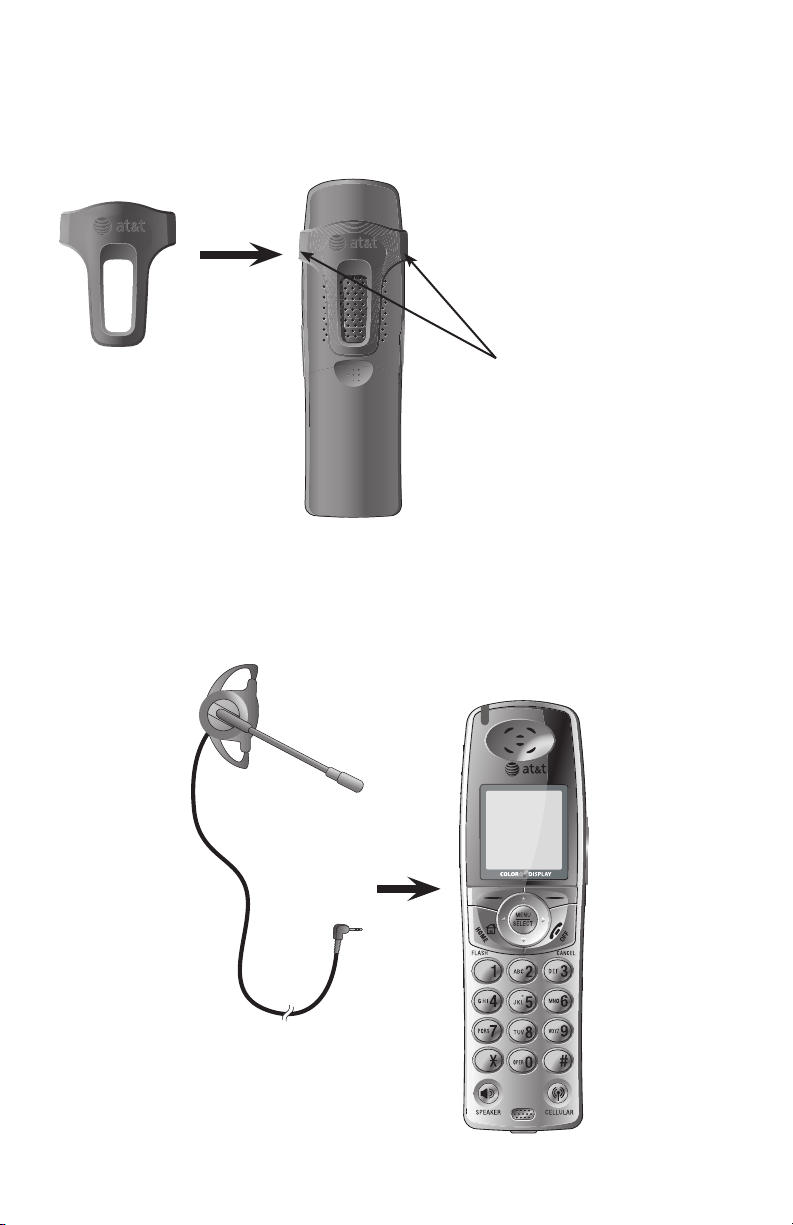
Belt clip & optional headset
Install belt clip as shown below if desired.
Snap belt clip
in to notches
on both sides
of handset.
For handsfree telephone conversations, use any industry standard 2.5 mm
headset (purchased separately). For best results, use an AT&T 2.5 mm headset.
To purchase a headset, visit our website at www.telephones.att.com or contact our customer service representatives at 1 (800) 222-3111. In Canada,
dial 1 (866) 288-4268.
To release belt clip from handset,
press on both flaps of the clip
(as shown). Pull a nd unlock one
flap from th e notch first before
detaching the whole belt clip from
handset.
Pl ug 2.5 mm hea dset
into the jack on the side
of the handset (beneath
small rubber flap).
11

Telephone setup
12:00AM
HAN DSE T 1
RED IAL
Animations
Anim ations
SET
CAL LER ID
x 1 x 2or
Browse through
listings.
Pict ures
SET
Pictu res
Pictu res
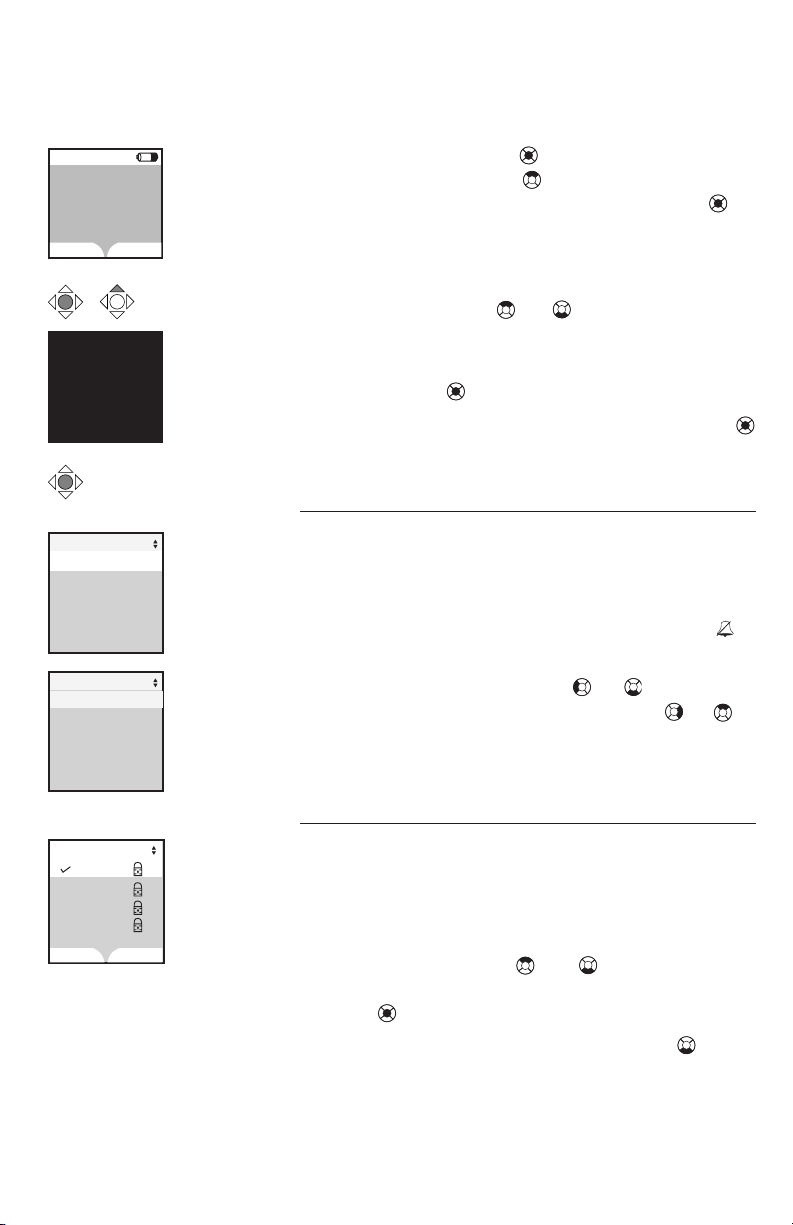
Handset screen images
The Pictures and Animations settings allow you
to select an image or design as wallpaper for
the background of the handset screen.
These images can also be programmed for individual callers in the directory so that different
images will show when there are incoming calls
from different callers (see page 31).
Press the center NavKey to display the menu.
Use the up or down NavKey or to highlight
Animations or Pictures, then press the center
NavKey again to select this option.
Browse through the options using the up or
down NavKey or , then press the softkey
set or center NavKey to select an image.
To change the wallpaper display, repeat the
above steps.
Press the SET softkey or
the center NavKey to
select the desired image.
12
Telephone setup
Handset ringers
12:00AM
HAN DSE T 1
RED IAL
CAL LER ID
x 3
Ringers
Ringers
Ringer for HOME
Ringer for CELL 1
Ringer for CELL 2
Record New Ringer
Ringer for HOME
Ringer Volume
Ringer Melody
Press the center NavKey to enter the main menu,
and press the up NavKey three times to enter the
Ringers menu, then press the center NavKey to
activate the menu.
Select the desired originating telephone line
(HOM E , CELL 1 , CELL 2 ) by pressing the
up or down NavKey or to highlight it.
When the desired originating telephone line (HOME,
CELL 1, CEL L 2) is highlighted, press the
center NavKey to confirm selection.
After selecting any option, press the center NavKey
or the softkey SET to confirm.
Ringer volume
At this menu, the ringer volume can be set between
levels 1 and 6, or set the ringer off by pressing
the OFF softkey so the telephone does not ring
at all with incoming calls. When the ringer on
the handset is turned off, the flashing icon is
shown on the screen of the handset.
Press the left or down NavKey or to lower the
ringer volume. Press the right or up NavKey or to
increase the ringer volume. Press the SET softkey
or the center NavKey to confirm your choice.
Ringer Melody
Melody 1
Melody 2
Melody 3
Melody 4
SET
DEL ETE
Ringer melody
This feature allows you to customize the ringers. The menu inc ludes options for 8 ringer
styles and 13 preloaded musical melodies. A
sample of each ringer melody will be played
when scrolling through the choices. Press the
up or down N avKey or to change the
ringer melody. Press the SET softkey or the center
NavKey to confirm.
• From the S e tt ings menu, Press three
times to enter the Ringer Melody menu.
Press the SELECT softkey to confirm.
• The system will start by showing the name and
a sample of the current ringer melody.
13
 Loading...