

Page 1
Telephone operation
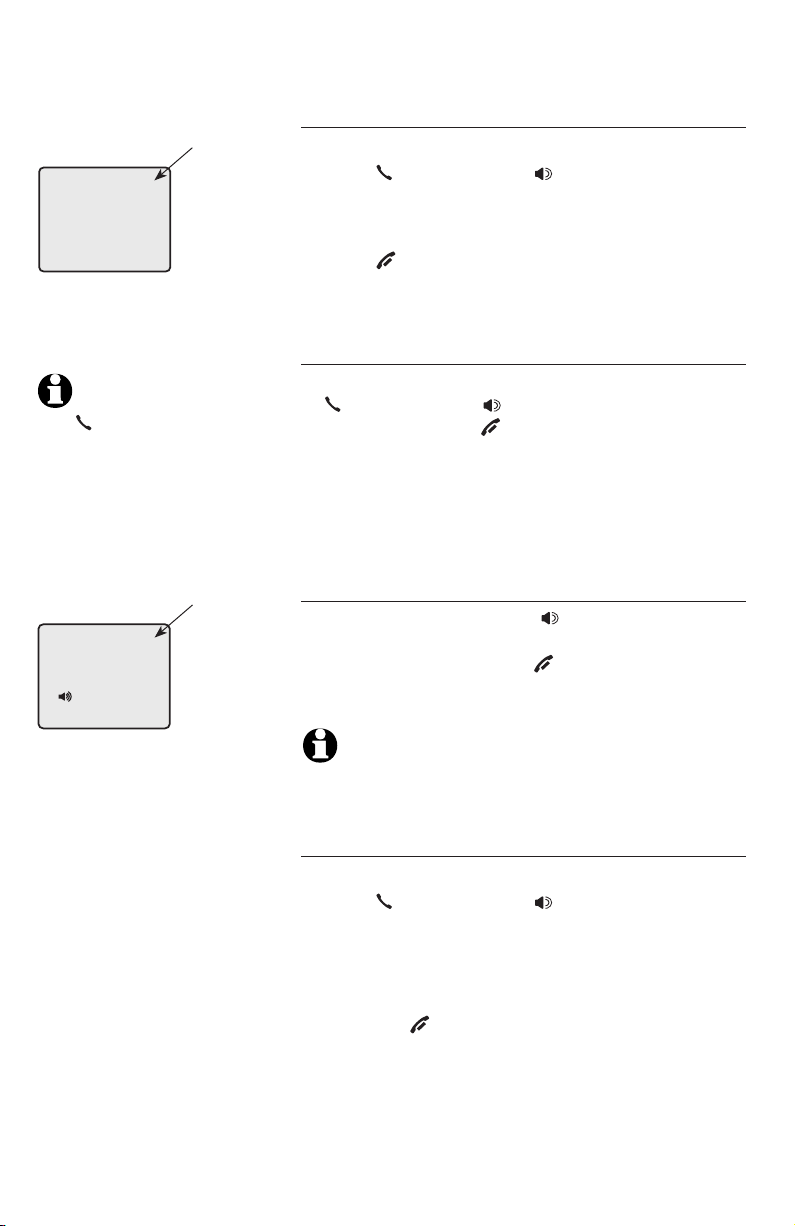
PHONE 0:00:30
NOTE:
Pressing
PHONE/FLASH to
access services from
your local telephone
service provider will
not affect the
elapsed time.
Elapsed
time
Handset operation
Making a call
To make a call:
• Press PHONE/FLASH or SPEAKER, then enter
the telephone number.
To end a call:
• Press OFF/CLEAR or return the handset in the
telephone base or charger.
On-hook dialing
• Enter the telephone number, then press
PHONE/FLASH or SPEAKER. Press
MUTE/REMOVE or OFF/CLEAR at any time to
make corrections as you are entering numbers.
The screen displays the elapsed time as you talk
(in hours, minutes and seconds).
Elapsed
time
SPEAKER 0:00:30
Handset speakerphone
During a call you can press SPEAKER to
alternate between hands-free speakerphone and
normal handset use. Press OFF/CLEAR to hang
up.
NOTE: If a headset is plugged into the handset, you will
not be able to use the handset speakerphone.
Answering a call
To answer a call:
• Press PHONE/FLASH or SPEAKER.
–OR–
• Press any dial pad key (0-9, * or #).
To end a call:
• Press the OFF/CLEAR or return the handset in
the telephone base or charger.
10
Page 2

Telephone operation
REDIAL
555-1234
Handset operation
Auto off
A call will be terminated automatically by placing
the handset in the telephone base or charger.
Last number redial
To view the dialed numbers:
• Press REDIAL/PAUSE to display the most
recently called number (up to 32 digits).
• Press , or REDIAL/PAUSE repeatedly to
view up to five recently called numbers.
The handset will beep twice at the beginning
and end of the list. Press OFF/CLEAR to exit.
To redial a number:
• Press PHONE/FLASH or SPEAKER to redial
the displayed number.
–OR–
• Press PHONE/FLASH or SPEAKER then
REDIAL/PAUSE to call the most recently called
number (up to 32 digits).
Press MUTE/REMOVE to delete the displayed
number from the redial memory.
11
Page 3
Telephone operation
**PAGING**
Handset operation
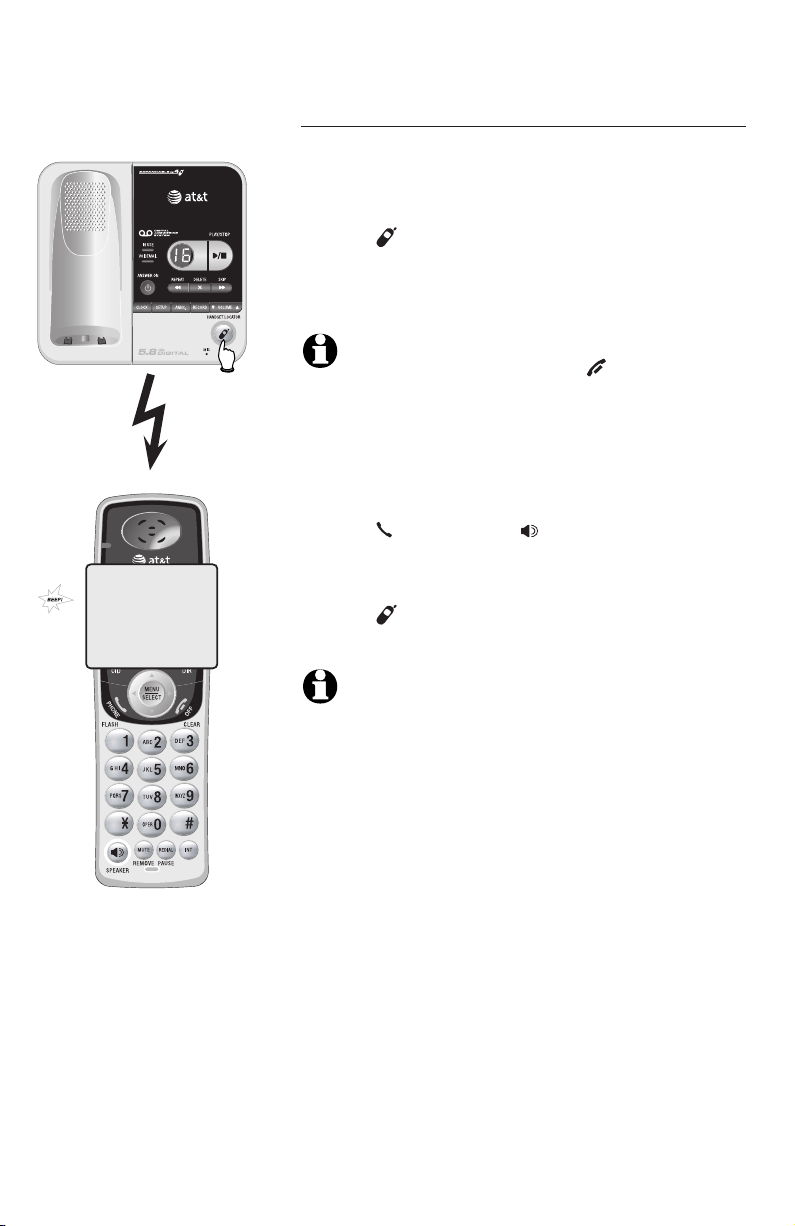
Handset locator
The handset locator feature is useful if you
misplace a handset(s).
To start the paging tone:
• Press HANDSET LOCATOR at the telephone
base. This starts the paging tone at the
handset(s) for 60 seconds to help you locate the
handset(s).
NOTE: When paging, if you press OFF/CLEAR or
MUTE/REMOVE on a handset, the ringer of the handset
will be silent but the handset locator feature will not
be cancelled.
To stop the paging tone:
• Press PHONE/FLASH, SPEAKER, or any dial
pad key (0-9, *, or #) on the handset(s),
–OR–
• Press HANDSET LOCATOR on the telephone
base.
NOTE: The handset ringer volume also determines the
level of the paging tone. If the handset ringer volume
level is set to off, that handset will be silent for all calls
and paging (page 19).
12
Page 4
Telephone operation
Options while on calls
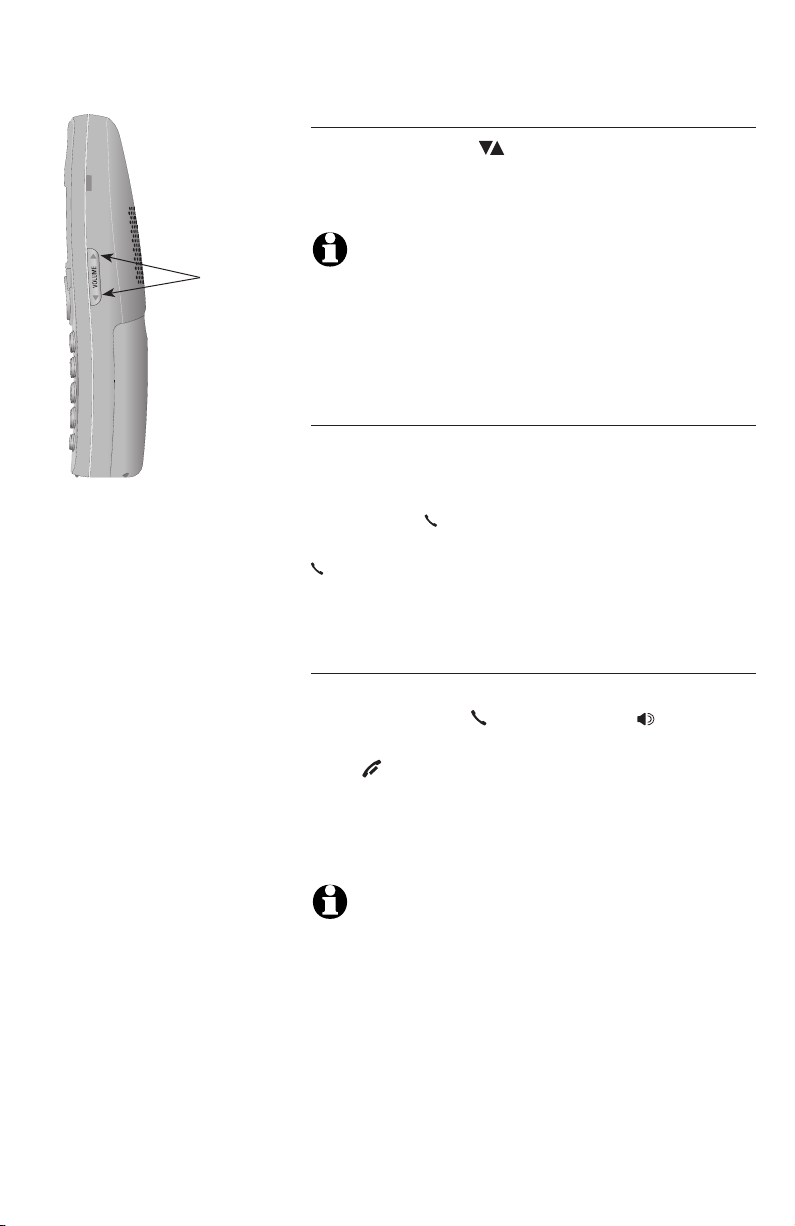
Volume control
Press the VOLUME keys on the side of the
handset to adjust listening volume. Each press of
the button increases or decreases the volume.
Volume
control
NOTES:
1. All volume settings, (normal handset, speakerphone, and
headset) are independent.
2. When the volume level has reached the minimum or
maximum setting, you will hear two beeps.
Call waiting
If you subscribe to call waiting service with your
local telephone service provider, you will hear a
beep if someone calls while you are already on
a call. Press PHONE/FLASH to put your current
call on hold and take the new call. You can press
PHONE/FLASH at any time to switch back and
forth between calls.
Multiple handset use (Not applicable to
TL72108)
If a handset is already in use and you would like to
join the call, press PHONE/FLASH or SPEAKER
on another system handset.
Press OFF/CLEAR or place the handset in the
telephone base or charger to exit the call. The
call will not be terminated until all handsets
hang up.
NOTE: A maximum of two handsets can be used at
once on an outside call.
13
Page 5
Telephone operation
Options while on calls
Last number redial
While on a call, you can press REDIAL/PAUSE to
review the most recently called number. To return
to your call, press REDIAL/PAUSE. If you do not
press REDIAL/PAUSE within two seconds, the most
recently called number displayed will be dialed
automatically.
NOTE: While on a call, only the most recently called
number can be reviewed, and erasing the entry is not
allowed. For more details about the redial memory, see
page 11.
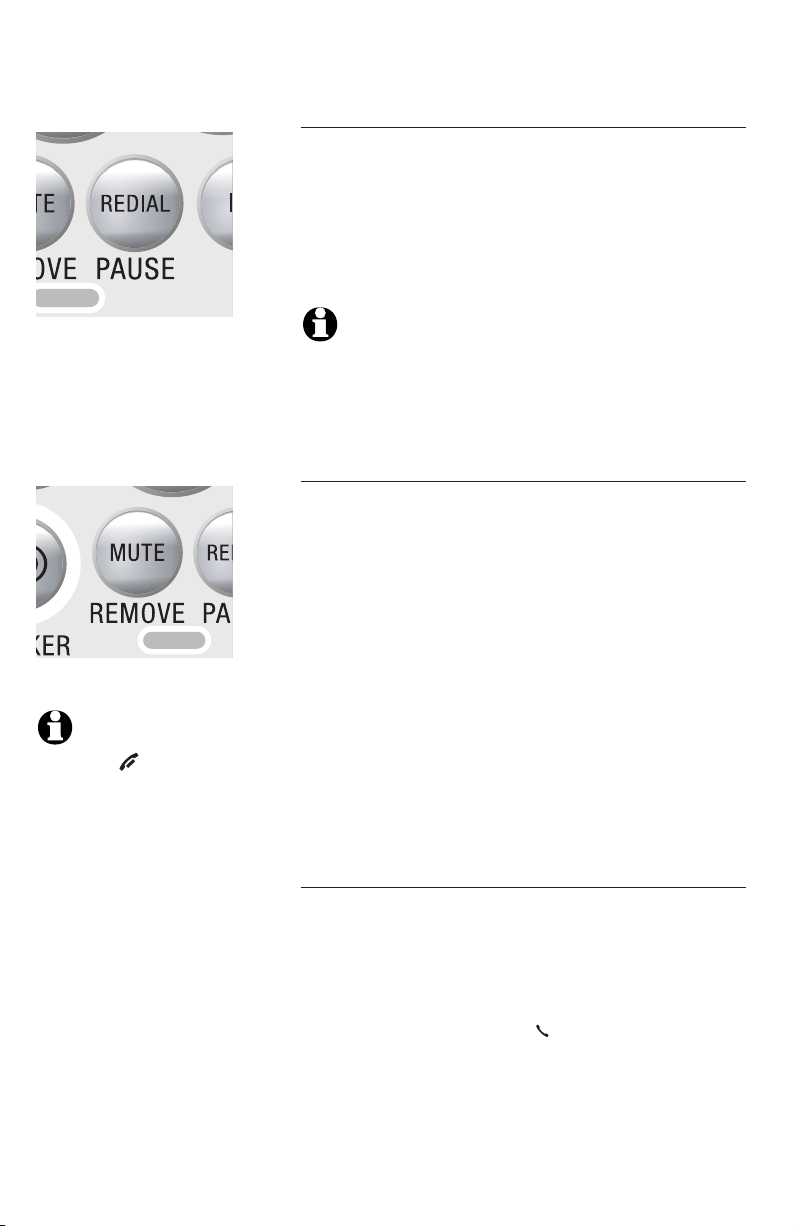
Mute
The mute function allows you to silence the
microphone. You can hear the caller, but the caller
will not be able to hear you.
To mute the call:
• Press MUTE/REMOVE to silence the microphone.
When mute is on, MUTED will display
temporarily on the handset screen and MUTE
will be shown until mute is turned off.
NOTE: You cannot
press OFF/CLEAR
to exit redial,
directory or caller
ID access without
ending the call.
To un-mute the call:
• Press MUTE/REMOVE again and resume speaking.
When mute is turned off, MICROPHONE ON will
display temporarily on the handset screen.
Temporary tone dialing
If you only have dial pulse (rotary service), you can
temporarily switch to touch tone dialing during a
call by pressing *. This can be useful if you need to
send tone signals for access to answering systems
or long-distance services.
After you hang up or press PHONE/FLASH (to
receive a call waiting call), the phone automatically
returns to dial pulse (rotary) service.
14
Page 6
Telephone operation
Options while on calls
Directory
Pat Williams
555-1234
CHRISTINE SMITH
908-555-0100
10:01
AM
NEW
11/23
While on a call, you can press DIR to review the
directory. To clear the entry from the display, press
and hold OFF/CLEAR. To dial the displayed number,
press MENU/SELECT.
NOTE: While reviewing the directory on a call, editing
an
entry is not allowed. For more details about the
directory, see page 24.
Caller ID log
While on a call, you can press CID to review the
caller ID log. To dial the displayed number, press
MENU/SELECT. To clear the entry from the display,
press and hold OFF/CLEAR.
NOTE: While reviewing the call log on a call, storing the
caller ID number in the directory is not allowed. For more
details about the call log, see page 30.
15
Page 7
Telephone operation
Intercom
Use the intercom feature for conversation
between handsets. This feature is not applicble
to TL72108.
Model TL72208
1. Press INT. The screen will show CALLING
OTHER HANDSET. The destination handset will
ring, and its screen will show OTHER HANDSET
IS CALLING.
2. On the ringing destination handset, press
PHONE/FLASH, INT, SPEAKER, or any dial
pad key (0-9, * or #) to answer the intercom call.
Models TL72308/TL72408
1. Press INT. The screen of the originating handset
will show INTERCOM TO:.
2. Enter the handset number of the destination
handset. The display will show CALLING
HANDSET X. The destination handset will
ring, and its screen will show HANDSET X IS
CALLING.
3. On the ringing destination handset, press
PHONE/FLASH, INT, SPEAKER, or any dial
pad key (0-9, * or #) to answer the intercom call.
NOTES:
1. Before the intercom call is answered, you can cancel the
intercom call by pressing OFF/CLEAR or INT on the
originating handset.
2. If the destination handset is not answered within 100
seconds or if it is in the directory or call log mode, or out
of range, the originating handset will show the message
UNABLE TO CALL TRY AGAIN.
3. Pressing OFF/CLEAR or MUTE/REMOVE will temporarily
silence the intercom ringer.
To end the intercom call:
• Press OFF/CLEAR or INT on either handset.
-OR-
• Place either handset in the charger or telephone
base.
16
Page 8
Telephone operation
Intercom call transfer
Use the intercom feature to transfer an external call
from one handset to another. This feature is not
applicble to TL72108.
Model TL72208
1. During a conversation with an external call, press
INT. The external call is automatically placed on
hold. The handset’s screen will show CALLING
OTHER HANDSET. The destination handset will
ring, and its screen will show OTHER HANDSET
IS CALLING.
2. On the ringing destination handset, press
PHONE/FLASH, INT, SPEAKER, or any dial
pad key (0-9, * or #) to answer the intercom
call. You can now talk without the external
caller hearing the conversation.
3. Press OFF/CLEAR on the originating handset
or place that handset in the telephone base or
handset charger to complete the transfer. The
originating handset’s screen will show CALL
TRANSFERRED and the other handset will
automatically be connected to the external call.
NOTES:
1. Before the intercom call is answered, you can cancel the
transfer and return to the external call by pressing
OFF/CLEAR, PHONE/FLASH, or INT on the originating
handset.
2. If the destination handset does not answer the intercom
call within 100 seconds, or if the other handset is in the
directory or call log mode, or out of range, the originating
handset will show UNABLE TO CALL TRY AGAIN on its
screen and will automatically return to the external call.
3. You can switch between the intercom call and the outside
call by pressing INT on the originating handset. The display
will change between INTERCOM and OUTSIDE CALL to
indicate which party is active.
4. You can end the intercom call and return to the external call
by pressing PHONE/FLASH on the originating handset.
17
Page 9

Telephone operation
Intercom call transfer
Models TL72308/TL72408
1. During a conversation with an external call, press
INT. The external call is automatically placed
on hold and TRANSFER TO: is displayed on the
screen.
2. Enter the destination handset number (1, 2,
3 or 4). The originating set’s screen will show
CALLING HANDSET X. The destination handset
will ring, and its screen will show HANDSET X IS
CALLING.
3. On the ringing destination handset, press
PHONE/FLASH, INT, SPEAKER, or any dial
pad key (0-9, * or #) to answer the intercom call.
You can now talk without the external caller
hearing the conversation.
4. Press OFF/CLEAR on the originating handset
or place that handset in the telephone base or
handset charger to complete the transfer. The
originating handset’s screen will show CALL
TRANSFERRED and the other handset will
automatically be connected to the external call.
NOTES:
1. Before the intercom call is answered, you can cancel the
transfer and return to the external call by pressing
OFF/CLEAR, PHONE/FLASH, or INT.
2. If the destination handset does not answer the intercom
call within 100 seconds, or if the other handset is in the
directory or call log mode, or out of range, the originating
handset will show UNABLE TO CALL TRY AGAIN on its
screen and will automatically return to the external call.
3. You can switch between the intercom call and the outside
call by pressing INT on the originating handset. The display
will change between INTERCOM and OUTSIDE CALL to
indicate which party is active.
4. You can end the intercom call and return to the external call
by pressing PHONE/FLASH on the originating handset.
18
Page 10

Telephone operation
>
DIRECTORY
CALL LOG
>
DIRECTORY
CALL LOG
Handset settings
Using the feature menu, you can change settings
to customize how the telephone works.
1. Press MENU/SELECT in idle mode to enter the
feature menu.
2. Use or to scroll to the feature to be
changed. When scrolling through the menu,
the top menu item is always highlighted with
a > symbol.
3. Press MENU/SELECT to select the highlighted
item.
NOTE:
To cancel an operation, back up to the previous
menu or exit the menu display, press OFF/CLEAR.
Press and hold OFF/CLEAR to return to idle mode.
Ringer volume
Using this menu, you can set a ring volume level
(1-6), or turn the ringer off. When the ringer is
turned off, the will appear on the handset
screen.
>
RINGER VOLUME
RINGER TONE
RINGER VOLUME
To adjust the RINGER VOLUME:
1. Press MENU/SELECT in idle mode to enter the
feature menu.
2.
Use
or
to scroll to the >RINGER
VOLUME menu, then press MENU/SELECT.
3. Press or to sample each volume level.
4. Press MENU/SELECT to save your preference
and return to the feature menu.
-OR-
When the handset is in idle mode, press the
VOLUME buttons on the right side of the
handset to change ringer volume.
NOTE: The ringer volume level also determines the
ringer levels of intercom calls (pages 16-18) and the
paging tone when initiating the handset locator feature
(page 12). If the handset ringer volume level is set to
off, that handset is silenced for all incoming calls and
paging.
19
Page 11

Telephone operation
>
DIRECTORY
CALL LOG
Handset settings
Ringer tone
This feature allows you to choose one of 10 ringer
tones.
To choose a ringer tone:
1. Press MENU/SELECT in idle mode to enter the
feature menu.
>
RINGER TONE
KEY TONE
RINGER TONE
1
>
DIRECTORY
CALL LOG
>
KEY TONE
LANGUAGE
KEY TONE
ON
2. Use
or
to scroll to the >RINGER
TONE
menu, then press MENU/SELECT.
3. Press or to sample each ringer tone.
4. Press MENU/SELECT to save your preference
and return to the feature menu.
Key tone
The handset is factory programmed to beep with
each key press. If you turn off the KEY TONE,
there will be no beeps when keys are pressed.
To turn the KEY TONE on or off:
1. Press MENU/SELECT in idle mode to enter the
feature menu.
2. Use or to scroll to the >KEY TONE
menu, then press MENU/SELECT.
3. Press or to select ON or OFF.
4. Press MENU/SELECT to save your preference
and return to the feature menu.
20
Page 12

Telephone operation
>
DIRECTORY
CALL LOG
Handset settings
Language
In this menu, you can select the language used for
all screen displays.
To select a language:
1. Press MENU/SELECT in idle mode to enter the
feature menu.
>
LANGUAGE
CLR VOICE MAIL
LANGUAGE
ENGLISH
2. Use or to scroll to the >LANGUAGE
menu, then press MENU/SELECT.
3. Press or to select ENGLISH, FRANCAIS
or ESPANOL.
4. Press MENU/SELECT to save your preference
and return to the feature menu.
21
Page 13

Telephone operation
>
DIRECTORY
CALL LOG
>
CLR VOICE MAIL
DIAL TYPE
TURN INDICATOR
OFF?
Handset settings
Visual message waiting (voicemail) indicator
If you subscribe to a voice mail service provided
by your local telephone company, the visual
message waiting indicator (VMWI) feature will
provide visual indication when you have new
voice mail messages - the VOICEMAIL light on
the telephone base will flash, and NEW VOICE
MAIL and the icon will appear on all handset
screen(s).
NOTE: This feature does not indicate new answering
system messages recorded on your phone.
Clear voice mail indication
Use this feature when the telephone indicates
that there is new voice mail but there is none
(for example, when you have accessed your voice
mail from a different telephone line while away
from home). If there actually are new voice mail
messages, your local telephone company will
continue to send the signal to activate the visual
message waiting indication.
To manually turn off the new voice mail
indication:
1. Press MENU/SELECT in idle mode to enter the
feature menu.
2. Use or to scroll to the >CLR VOICE
MAIL menu, then press MENU/SELECT.
3. Press MENU/SELECT again to turn the voice mail
indication off, or press OFF/CLEAR to exit.
NOTES:
1. Telephone company voice mail may alert you to new
messages with stutter (broken) dial tone. Contact your
telephone company for more details.
2. This only turns off the displayed NEW VOICE MAIL message,
icon and VOICEMAIL light; it does not delete your voice
mail message(s).
22
Page 14

Telephone operation
>
DIRECTORY
CALL LOG
>
DIAL TYPE
DIRECTORY
Handset settings
Dial type
Using this function, you can choose TONE or
PULSE (rotary) dialing. The factory default setting
is TONE. Change this to PULSE only if you do not
have touch-tone dialing service.
1. Press MENU/SELECT in idle mode to enter the
feature menu.
2. Use or to scroll to the >DIAL TYPE
menu, press MENU/SELECT.
DIAL TYPE
TONE
3. Press the or to select TONE or PULSE.
4. Press MENU/SELECT to save your preference.
NOTE: If you have more than one handset registered,
dial type change made on any one handset will apply
to all.
Temporary ring silencing
Press OFF/CLEAR or MUTE/REMOVE while the
telephone is ringing to silence the ringer
temporarily. This will silence the ringer without
disconnecting the call. The next incoming call
will ring normally at the preset volume.
NOTE: If there is more than one handset in use, all
handsets ring with an incoming call except those with
the volume turned off. Pressing OFF/CLEAR or
MUTE/REMOVE on one handset will only silence the
ringer of that particular handset but the other
handset(s) will continue to ring.
23
Page 15

Directory
Pat Williams
555-1234
Directory
Shared directory
The directory is stored in the telephone base,
and is shared by all handsets. Changes made to
the directory on any one handset will apply to
all.
NOTE: Only one handset can review the directory or
caller ID log at a time. If another handset attempts to
enter the directory, the screen will display NOT
AVAILABLE AT THIS TIME.
Memory capacity
The directory can store up to 50 entries, with a
maximum of 15 alphanumeric characters (including
spaces) and 30 digits. A convenient search feature
can help you find and dial numbers quickly (page
28).
If all memory locations are in use, the screen will
display LIST FULL. You will not be able to store a
new number until an existing one is deleted.
Exiting the directory
Press OFF/CLEAR to cancel an operation,
back up to the previous menu, or exit the menu
display. Press and hold OFF/CLEAR to return to
the idle mode.
If you pause for too long while creating or
reviewing an entry, the procedure will time out
and you will have to begin again.
24
Page 16

Directory
New directory entries
To create and store a new directory entry
1. Press MENU/SELECT in idle mode to enter the
feature menu.
>
DIRECTORY
CALL LOG
>
REVIEW
STORE
>
STORE
REVIEW
ENTER NUMBER
555-1234_
2. Press MENU/SELECT again to enter the
>DIRECTORY menu.
3. Press to highlight STORE.
4. Press MENU/SELECT
5. Enter the telephone number when prompted.
• Use the dial pad to enter up to 30 digits.
– Press or to move the
cursor to the left or right.
– Press MUTE/REMOVE to erase numbers.
– Press and hold REDIAL/PAUSE to enter a
three-second dialing pause.
-OR-
• Copy a number from redial by pressing
REDIAL/PAUSE then press or
to locate the number to copy. Press
MENU/SELECT to copy the number.
6. Press MENU/SELECT to save the number in
the display. The display will show ALREADY
SAVED if the number is already in the
directory.
25
Page 17

Directory
Dial
Key
Characters by number of key presses
1
2
3
4
5
6
7
8
9
0 0
#
# , .- &‘
? ! / ( )
@
1
1
A B C 2
a b c
3 d e f
4 g h i
5 j k l
6 m n o
S 7 p q
8
t u v
Z 9 w xrysz
D E F
G H
I
J K
L
M N O
P Q R
T U V
W
space
X Y
2
3 4 5 6 7 8 9
ENTER NAME
Pat Williams_
NOTE: The first word
of every word will be
capitalized. The
remaining letters in a
word begin with
lower case letters
shown in the chart to
the right.
New directory entries
7. Enter the name when prompted.
• Use the dial pad to enter a name (up to
15 characters). Each time a key is pressed,
the character on that key will be displayed.
Additional key presses will produce other
characters on that key. See the chart below.
– Press or to move the cursor to
the left or right.
– Press MUTE/REMOVE to erase letters.
Pat Williams
555-1234
8. Press MENU/SELECT to store your new
directory entry. The name and the telephone
number will then be shown on the screen. To
change it later, see page 29.
26
Page 18

Directory
5556789
Andrew
Directory review
To review directory entries
1. Press DIR in idle mode to display the first
listing in the directory. DIRECTORY EMPTY
will be displayed if there are no directory
entries.
-OR-
You can also display the first listing in the
directory by first pressing MENU/SELECT twice,
then press MENU/SELECT again to choose
>REVIEW.
Barbara
5559876
2. Press or to browse through the
directory. Entries will be displayed
alphabetically by the first letter in the name.
27
Page 19

Directory
Directory search
To search by name
1. Press DIR in idle mode to display the first
listing in the directory. DIRECTORY EMPTY
will be displayed if there are no directory
entries.
2. When a name entry is displayed, press the dial
pad keys (2-9) to start a quick name search.
The directory will display the first name
beginning with the first letter associated with
the dial pad key, if there is an entry in the
directory that begins with that letter.
3. To see other names that start with the letters
on the dial pad key, keep pressing the key. The
names will be shown in alphabetical order.
For example, if you have name entries Jennifer,
Jessie, Kevin and Linda in your directory:
• If you press 5 (JKL) once, you will see
Jennifer.
• If you press 5 (JKL) twice, you will see Jessie.
• If you press 5 (JKL) three times, you will see
Kevin.
• If you press 5 (JKL) four times, you will see
Linda.
• If you press 5 (JKL) five times, you will see
Jennifer again.
NOTES:
1. If there is no name entry matching the first letter of the
key you press, you will see a name entry that matches the
second letter of the key.
2. If you press a key (2-9) and there is no name entry to
match those letters, the directory will show the entry that
matches the next available letter in the directory.
28
Page 20

Directory
To dial, delete or edit entries
To dial, delete or edit a directory entry (name
and number), the entry must be displayed on the
handset. Use directory search (pages 27-28) to
display an entry.
Display dial
To dial a displayed number from the directory,
press PHONE/FLASH or SPEAKER.
To delete an entry
When a directory entry is displayed, press
MUTE/REMOVE to delete the displayed entry from
the directory. Once deleted, an entry cannot be
retrieved.
To edit an entry
When a directory entry is displayed:
1. Press MENU/SELECT to modify the entry. You will
be prompted to EDIT NUMBER.
Andrew
5556789
EDIT NUMBER
555-1234
EDIT NAME
Andy
Andy
5551234
• Press the dial pad keys to add digits.
• Press MUTE/REMOVE to erase digits.
• Press or to move the cursor.
• Press and hold REDIAL/PAUSE to add a
three-second pause if desired.
• Press REDIAL/PAUSE, then or to scroll
to a previously dialed number. Press MENU/
SELECT to add the redial number to the
entry.
2. Press MENU/SELECT. You will be prompted toYou will be prompted to
EDIT NAME.
• Press the dial pad keys to add characters
(page 26).
• Press MUTE/REMOVE to erase characters.
• Press or to move the cursor.
3. Press MENU/SELECT to confirm.
29
Page 21

Caller ID operation
CHRISTINE SMITH
908-555-0100
AM
10:01
NEW
11/23
Caller ID operation
Information about caller ID with call waiting
This product has a caller ID function with call
waiting feature which works with service from your
local telephone company.
Caller ID with call waiting lets you see the name
and telephone number of the caller before
answering the telephone, even while on another
call.
It may be necessary to change your telephone
service to use this feature. Contact your telephone
company if:
• You have both caller ID and call waiting, but
as separate services (you may need combined
service).
• You have only caller ID service, or only call
waiting service.
• You do not have any caller ID or call waiting
services.
This product can be used with regular caller ID
service, or this product’s other features can be
used without subscribing to either caller ID or
combined caller ID with call waiting service.
There are fees for caller ID services. In addition,
services may not be available in all areas.
Depending on your service, you may see the
caller’s number or the caller’s name and number.
This product can provide information only if both
you and the caller are in areas offering caller
ID service and if both telephone companies use
compatible equipment. The time and date are sent
by the telephone company along with the call
information.
NOTE: Caller ID features will work only if both you and
the caller are in areas offering caller ID service, and if
both telephone companies use compatible equipment.
30
Page 22

Caller ID operation
CHRISTINE SMITH
908-555-0100
AM
10:01
NEW
11/23
Caller ID operation
How the call log works
Information about the last 50 incoming calls is
stored in the call log. You can review the call log
to find out who has called, easily return the call,
or copy the caller’s name and number into your
directory.
When the call log is full, the oldest entry is deleted
to make room for new incoming call information.
If you answer a call before the information appears
on the screen, it will not be saved in the call log.
The call log is stored in the telephone base, and
is shared by all handsets. Changes made at any
one handset will be reflected in all.
NOTE: Only one handset can review the caller ID log
or directory at a time. If another handset attempts to
enter the directory or caller ID log, it will display NOT
AVAILABLE AT THIS TIME.
Caller’s name
CHRISTINE SMITH
908-555-0100
NEW
AM
10:01
Time of call
11/23
31
Caller’s number
Appears when the
call is missed and
un-reviewed
Date of call
Page 23

Caller ID operation
Chris
908-555-0100
AM
10:01
HANDSET 1
6 MISSED CALLS
Pat Williams
555-1234
NEW
AM
10:31
11/23
NEW
11/23
Caller ID operation
Memory match
If the incoming telephone number exactly
matches a telephone number in your directory,
the name that appears on the screen will match
the corresponding name in your directory.
For example, if Christine Smith calls, her name
will appear as Chris if this is how you entered it
into your directory.
NOTE: The number shown by your caller ID will be in
the format sent by the phone company. The phone
company usually delivers ten-digit phone numbers (area
code plus phone number). If the telephone number of
the person calling does not exactly match a number in
your directory, the name will appear as delivered by the
phone company. For example if the phone company
includes the area code and the directory number does
not, the name will appear as delivered by the phone
company.
Missed calls indicator
When a handset is in idle mode and has calls that
have not been reviewed, its screen will show XX
MISSED CALLS.
All entries which have not been reviewed will be
counted as missed calls when the phone is idle.
Each time a call log entry marked NEW is reviewed,
the number of missed calls decreases by one.
If you have too many missed calls and you do
not want to review them one by one, but you still
want to keep them in the call log, you can press
and hold OFF/CLEAR for four seconds when the
handset is idle. All the entries in the caller ID log
will be considered old (have been reviewed), and
the missed calls counter is reset to 0.
32
Page 24

Caller ID operation
HANDSET 1
6 MISSED CALLS
Pat Williams
555-1234
AM
10:31
Jeffrey Adams
555-9876
10:21AM11/23
Chris Thompson
908-555-0100
AM
10:11
The various dialing options
are:
555-555-5555
1-555-555-5555
1-555-5555
NOTE: If both the
name and number are
not provided, UNABLE
TO SAVE will be
displayed.
NEW
11/23
NEW
NEW
11/23
555-5555
To review the call log
To review the call log
1. Press CID to review the call log. The call
log displays the caller ID entries in reverse
chronological order starting with the most
recent call.
-OR-
You can also review the call log by pressing
MENU/SELECT, then use or to scroll to
the >CALL LOG, then press MENU/SELECT.
2. Press or to scroll through the list as
shown on the left.
To dial from the call log
While reviewing a call log entry:
• Press PHONE/FLASH or SPEAKER to call the
number as it is displayed in the call log.
-OR-
• Press # repeatedly to see the various dialing
options (you can choose to dial with or without
an area code, or with or without the 1), then
press PHONE/FLASH or SPEAKER to place
the call.
NOTE: You may need to change how a caller ID number
will be dialed if the entry is not displayed in the correct
format. Caller ID numbers may appear with an area
code which may not be required for local calls, or
without a 1 which may be needed for long distance
calls.
Other options
•
Press MUTE/REMOVE to delete the displayed
entry from the call log.
• Press and hold
entries from the call log. When asked to
confirm, press MENU/SELECT to clear the call
log of all entries, or press OFF/CLEAR to exit
and leave all call log entries intact.
• Press MENU/SELECT to copy this entry into your
directory. If the name or number is not provided,
you will be prompted to enter them (page 26).
• Press OFF/CLEAR to exit the call log.
33
MUTE/REMOVE
to delete all
Page 25

Answering system operation
Message counter
Number of messages stored
(or during playback, message
number currently playing)
Answering system operation
Message capacity
The answering system can record up to 99
messages, depending on the length of each
message. Individual messages can be up to four
minutes long, and the total maximum recording
time is 14 minutes. Messages will remain available
for replay until you delete them.
Voice prompts
Each time you press any answering system key, the
answering system uses voice prompts to guide you.
34
Page 26

Answering system operation
NOTES:
1. If the clock was not set
when the message was
recorded, the system will
announce "Time and day
not set."
2. Caller ID provides the time
and date. Set the year so
that the day of the week
can be calculated from
the caller ID information.
After you set the time
once, it will thereafter
be set automatically
with incoming caller ID
information. The time will
be set automatically only
if you subscribe to caller
ID service provided by your
local telephone company
(page 30).
Day & time announcement
To check day & time
You can press CLOCK when the system is idle to
hear the current day and time without changing
it.
To set day & time
Before playing each message, the answering system
announces the day and time the message was
received.
Follow the steps below to set the year, time and
day, so messages are dated correctly. Each time
you press SKIP or REPEAT , the year, hour,
minute or day increases or decreases by one.
Press and hold SKIP or REPEAT to increase or
decrease the minutes or year by increments of ten.
When you hear the correct setting, press CLOCK to
move to the next setting.
1. Press CLOCK, the system will announce the
current clock setting, then announces “To set
the clock, press CLOCK.”
2. Press CLOCK, The system will announce the
current year setting, then announces “To change
the year, press SKIP or REPEAT, to change the
hour, press CLOCK.”.
3. Press CLOCK, The system will announce the
current hour setting, then announces “To change
the hour, press SKIP or REPEAT, to change the
minute, press CLOCK.”.
4. Press CLOCK, The system will announce the
current minute setting, then announces “To
change the minute, press SKIP or REPEAT, to
change the day, press CLOCK.”.
5. Press CLOCK, The system will announce the
current day setting, then announces “To change
the day, press SKIP or REPEAT, press CLOCK
when you are done”.
6. Press CLOCK. The system announces the
current clock setting.
35
Page 27

Answering system operation
Outgoing announcements
Outgoing announcements are the messages callers
hear when calls are answered by the answering
system.
The telephone is pre-set with an outgoing
announcement. If the telephone is set up to record
messages, it answers calls with “Hello. Please
leave a message after the tone.” You can use this
announcement, or replace it with your own recording.
To play your outgoing announcement
Press ANNC. then you will hear "Announcement.
Press PLAY or press RECORD." Press PLAY/STOP
to hear the outgoing announcement. Press ANNC to
exit the announcement menu.
To record your outgoing announcement
Press ANNC. You will hear "Announcement. Press
PLAY or press RECORD." Then press RECORD and
begin speaking after you hear "Record after the tone.
Press STOP when you are done." Speak facing the
telephone base from about nine inches away. Press
PLAY/STOP when you are done. Your recorded
announcement will be played back. To listen to the
recorded announcement again, press PLAY/STOP.
To re-record a new announcement, press RECORD
then follow the above steps. Press ANNC to exit the
announcement menu.
Elapsed time (in seconds) will be shown in the
message window when recording. You can record an
announcement up to 90 seconds long. Announcement
shorter than two seconds long will not be recorded.
To delete your outgoing announcement
Press ANNC. You will hear “Announcement. Press
PLAY or press RECORD." Then press PLAY/STOP
to begin playback. Press DELETE during playback to
delete your announcement. Press ANNC to exit the
announcement menu.
When your announcement is deleted, calls will be
answered with the pre-set announcement described
above.
36
Page 28

Answering system operation
Changing feature options
You can change how the answering system operates.
Press SETUP repeatedly to hear each feature. When you
hear the feature you want to modify press SKIP or
REPEAT to change the setting. Press SETUP to
confirm your selection and move to the next menu
option or press PLAY/STOP to confirm your
selection and exit the menu.
1.
2.
3.
SETUP
Press until desired
feature is heard (see
list at right).
SKIP or
REPEAT
Press until desired
selection is heard.
SETUP
Press to set selection
and move to next
menu option.
-OR -
Press to set selection
and exit menu.
PLAY/STOP
Feature options (Default settings underlined).
System announces: Feature description:
"Number of rings," current
setting, then "To change
the setting press SKIP
or REPEAT; to continue
setup, press SETUP."
Options: 2/4/6/toll saver
“Base ringer,” current
setting, then “To change
the setting press SKIP
or REPEAT; to continue
setup, press SETUP.”
Options: high/low/off
"Remote access code,"
current setting, then
"To change the setting
press SKIP or REPEAT;
to continue setup, press
SETUP."
Options: (select two-digit
code) 19
"Message alert tone,"
current setting, then
"To change the setting
press SKIP or REPEAT;
to continue setup, press
SETUP."
Options: on/off
Choose number of rings before the
system answers a call. When toll saver
is active, the system answers after two
rings if you have new messages, and
after four rings if you have no new
messages. When retrieving messages
from a long-distance call, you may
disconnect your call after three rings
so that long distance charges will not
be charged.
Choose base ringer volume to high or
low level, or turn the base ringer off.
Select a two-digit number (10-99)
for remote access from another
telephone (page 42).
NOTE: Press and hold SKIP or
REPEAT to increase or decrease the
rem ote acces s code number by
increments of 10.
When on, the telephone beeps every
10 second s when there are new
messages.
NOTE:
The message alert tone will beep only if all the conditions below are met:
Answering system is on.
Message alert tone setting is on.
There are new messages. Pressing any telephone base key (except HANDSET LOCATOR) will
temporarily silence the message alert tone. If you press DELETE in idle mode, there will be a voice
prompt to direct you to press DELETE again to delete all old messages, the message alert tone will
be temporarily silenced. The message alert tone will be re-activated with the next incoming message.
37
 Loading...