

Page 1
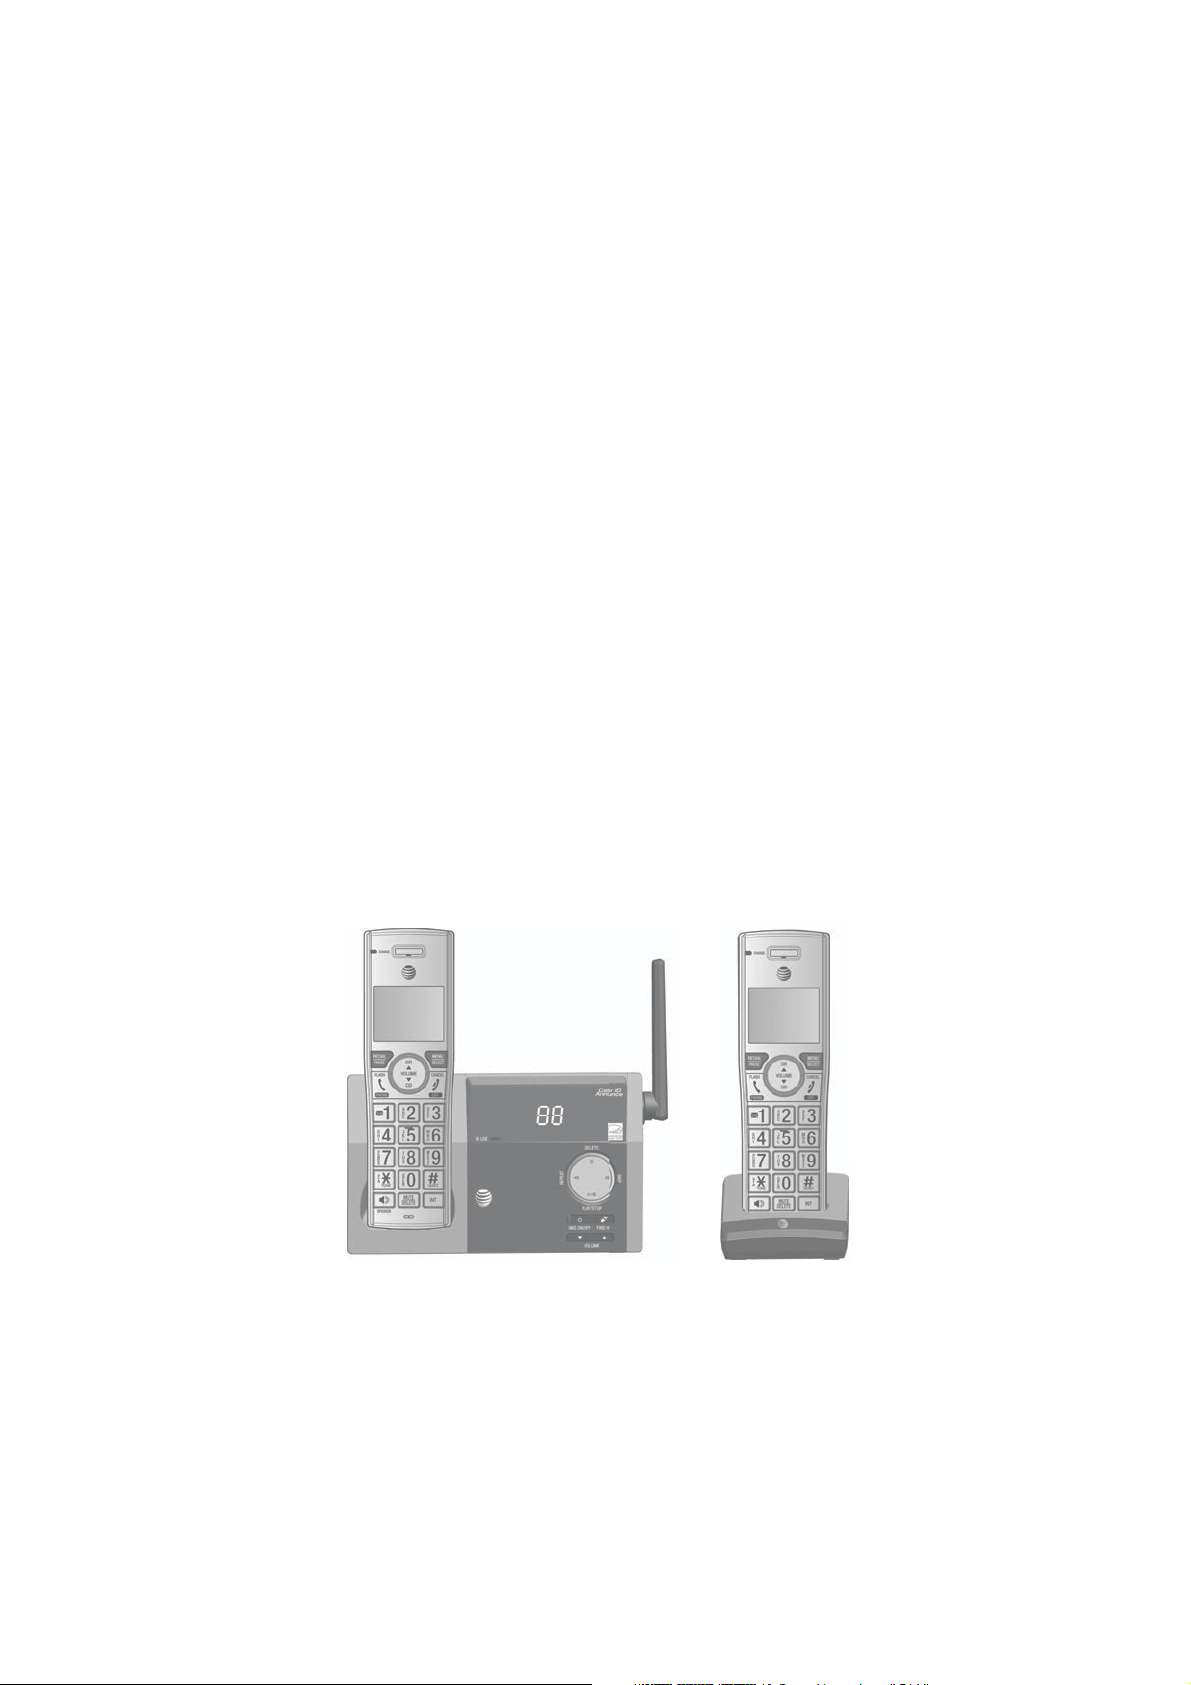
Complete user’s manual
CL82115/CL82215/CL82315/
CL82415/CL82465
DECT 6.0 cordless telephone/
answering system with
caller ID/call waiting
Page 2

Congratulations
on your purchase of this AT&T product. Before using this AT&T
product, please read the Important safety information section
on pages 115-117 of this manual. Please thoroughly read this
user’s manual for all the feature operations and troubleshooting
information necessary to install and operate your new AT&T
product. You can also visit our website at
www.telephones.att.com or call 1 (800) 222-3111.
In Canada, dial 1 (866) 288-4268.
This telephone meets the California Energy Commission regulations for
energy consumption. Your telephone is set up to comply with the energyconserving standards right out of the box. No further action is necessary.
This telephone system is compatible with certain AT&T DECT 6.0
cordless headsets. Visit
for a list of compatible cordless headsets.
Model number: CL82115 (one handset)
CL82215 (two handsets)
CL82315 (three handsets)
CL82415/CL82465 (four handsets)
Type: DECT 6.0 cordless telephone/answering system with
caller ID/call waiting
Serial number:
Purchase date:
Place of purchase:
Both the model and serial numbers of your AT&T product can be
found on the bottom of the telephone base.
Save your sales receipt and original packaging in case it is
necessary to return your telephone for warranty service.
Telephones identified with this logo have reduced noise and
interference when used with most T-coil equipped hearing aids and
cochlear implants. The TIA-1083 Compliant Logo is a trademark of the
Telecommunications Industry Association. Used under license.
The ENERGY STAR® program (www.energystar.gov) recognizes and
encourages the use of products that save energy and help protect our
environment. We are proud to mark this product with the ENERGY STAR®
label indicating it meets the latest energy efficiency guidelines.
© 2014 Advanced American Telephones. All Rights Reserved. AT&T and
the AT&T logo are trademarks of AT&T Intellectual Property licensed to
Advanced American Telephones, San Antonio, TX 78219. Printed in China.
www.telephones.att.com/accessories
Page 3
Parts checklist
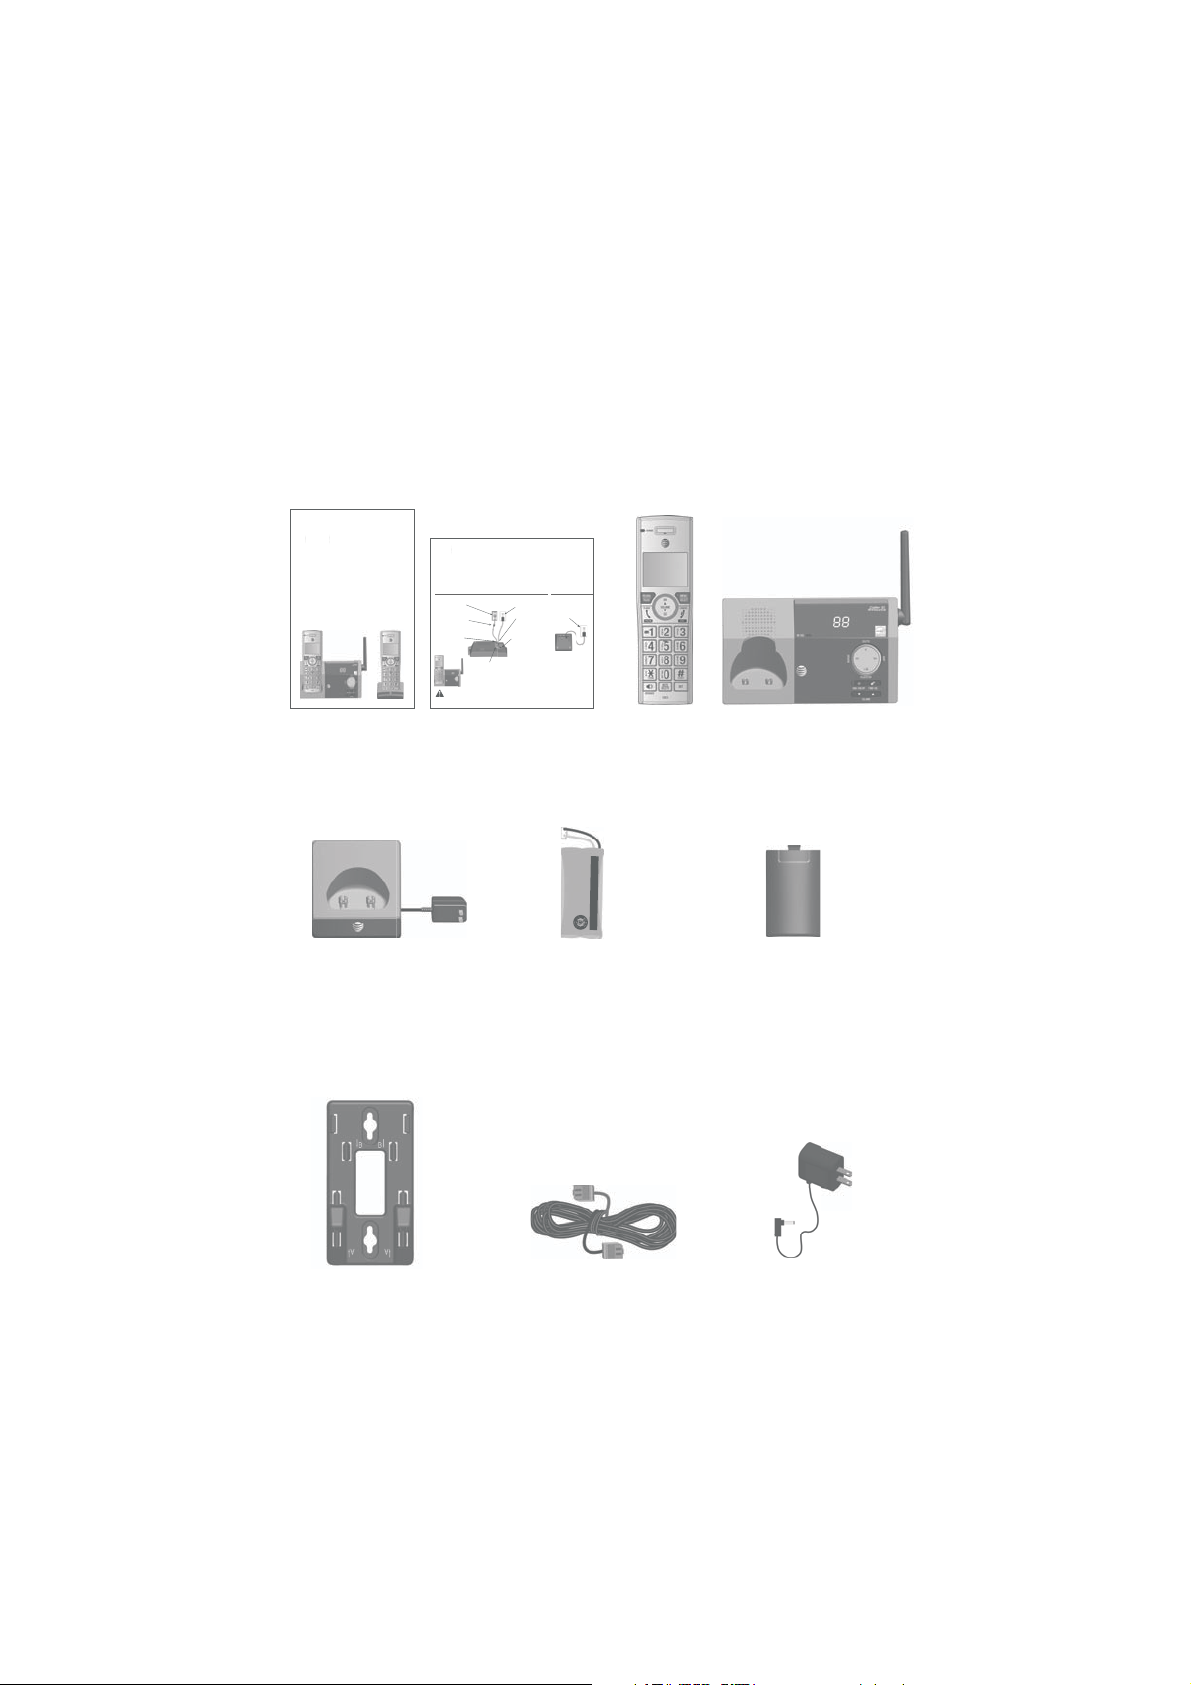
Your telephone package contains the following items. Save your
sales receipt and original packaging in the event warranty service is
necessary.
Quick start guide
CL82115/CL82215/CL82315/CL82415/CL82465
This quick start guide provides you with basic instructions only.
Abridged user’s manual
CL82115/CL82215/CL82315/
CL82415/CL82465
DECT 6.0 cordless telephone/
answering system with
caller ID/call waiting
Abridged
User’s manual
For more complete instructions, refer to your Abridged user’s
manual provided in the package, or see the online Complete
user’s manual at www.telephones.att.com/manuals.
Telephone base installation
Plug one end of the
telephone line cord
into a telephone
jack or a DSL filter.
If you have DSL
high-speed Internet
service, a DSL filter (not
included) is required.
Route the telephone
line cord through
this slot.
Raise the antenna.
Plug the other end
of the telephone line
cord into the telephone
jack on the back of the
telephone base.
Caution: Use only the power adapter provided with this product. To obtain a replacement,
visit our website at
www.telephones.att.com or call 1 (800) 222-3111. In
1 (866) 288-4268.
Canada, dial
Plug the large end of the power
adapter into a power outlet not
controlled by a wall switch.
Route the power
adapter cord
through this slot.
Plug the small end of
the telephone base
power adapter into
the power adapter
jack on the back of
the telephone base.
Charger installation
Plug the power
adapter into a
power outlet not
controlled by a wall
switch.
Quick start guide
Cordless handset
(1 for CL82115)
(2 for CL82215)
(3 for CL82315)
(4 for CL82415/CL82465)
Made in China / Fa
NE
DO NOT BURN OR PUNC
WARNING /
BT183342/BT283342 (2.4V 400mAh Ni-MH)
Battery Pack / Bloc-piles
PA
THIS SIDE UP
S INCINÉRER OU PERCER LES PILES.
AV
ERTISSEMENT
briqué en chine
/ CE CÔTÉ V
TURE BA
:
:
TTERIES.
ERS LE HAU
T
Telephone base
Charger for cordless
handset with power
adapter installed
(1 for CL82215)
(2 for CL82315)
(3 for CL82415/CL82465)
Wall mount bracket
Battery for cordless
handset
(1 for CL82115)
(2 for CL82215)
(3 for CL82315)
(4 for CL82415/CL82465)
Telephone line cord
Battery compartment
cover
(1 for CL82115)
(2 for CL82215)
(3 for CL82315)
(4 for CL82415/CL82465)
Power adapter for
telephone base
Page 4
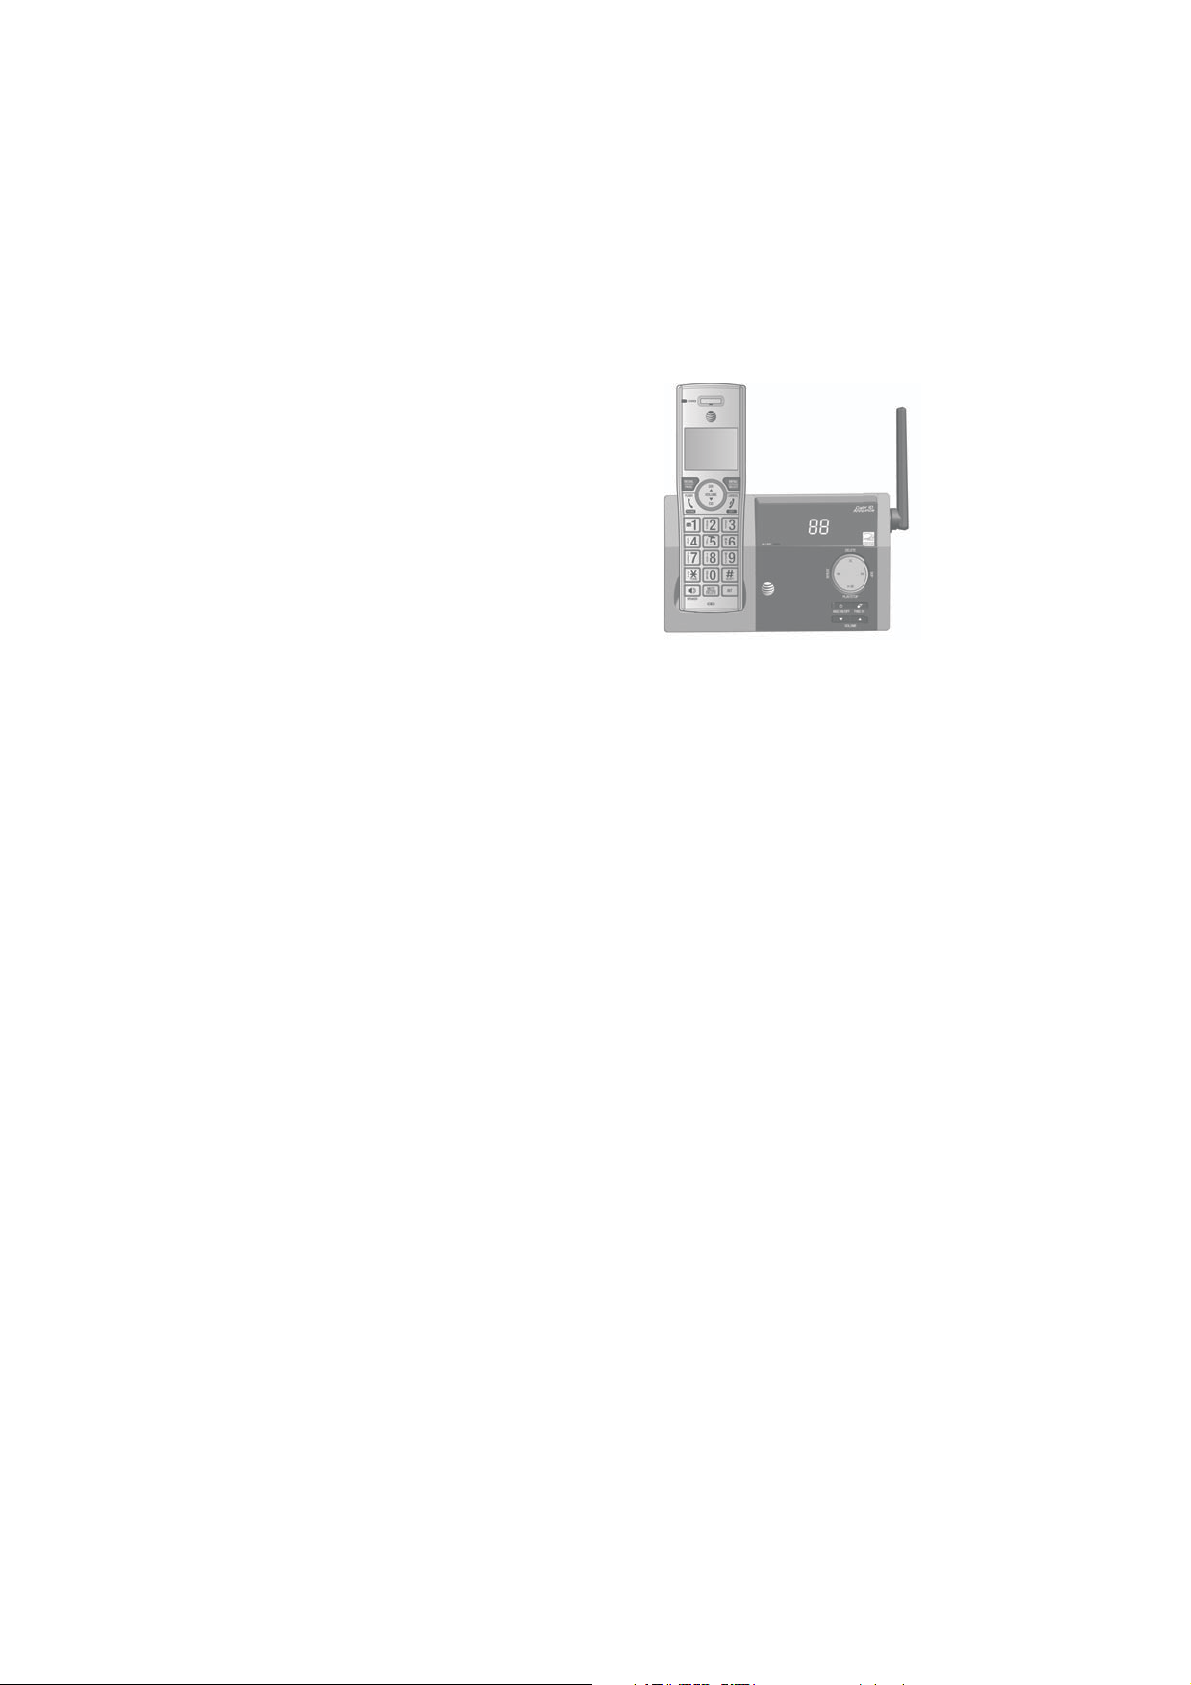
Complete user’s manual
CL82115/CL82215/CL82315/
CL82415/CL82465
DECT 6.0 cordless telephone/
answering system with
caller ID/call waiting
Table of contents
Getting started
Installation ...................................... 1
Quick reference guide -
handset .......................................2
Quick reference guide -
telephone base .......................5
Telephone base and charger
installation ................................6
Telephone base
installation..............................6
Charger installation ..............6
Battery installation and
charging .....................................7
Installation options .....................9
Tabletop to wall mount
installation..............................9
Wall mount to tabletop
installation........................... 10
Telephone settings
Handset settings ....................... 11
Ringer volume ...................... 12
Ringer tone ............................ 12
Set date/time ....................... 13
LCD language ....................... 14
Caller ID announce ............ 15
Set speed dial voicemail
number ..................................16
Voicemail (visual message
waiting) indicator ............. 16
Clear voicemail
indication ............................17
Rename handset .............. 18
Key tone .................................. 18
Use caller ID to
automatically
set date and time ............ 19
Home area code .................. 19
Dial mode ............................... 20
Web address ......................... 20
QUIET mode .......................... 21
Telephone operation
Telephone operation...............22
Making a call ......................... 22
On hook dialing
(predialing) .......................... 22
Answering a call ................. 22
Ending a call ......................... 22
Auto off ................................... 22
Page 5

Temporary ringer
silencing ............................... 22
Handset speakerphone .... 23
Last number redial ............. 23
Equalizer .................................. 24
Options while on calls ........... 25
Volume control .................... 25
Call waiting ............................ 25
Mute .......................................... 25
Chain dialing ......................... 26
Temporary tone dialing ... 27
Blind transfer ........................ 28
Multiple handset use
Multiple handset use .............. 29
Handset locator ................... 29
Join a call in progress ...... 29
Intercom ........................................ 30
Answer an incoming call
during an intercom
call........................................... 31
Call transfer using
intercom .................................. 32
Push-to-talk (PTT) .................... 33
Turn PTT on or off .............. 33
PTT call to a single
device .................................... 34
PTT call to multiple
devices .................................. 35
Answer a PTT call ............... 36
Change a one-to-one PTT
call to an intercom
call........................................... 36
Answer an incoming call
during a PTT call .............. 37
Make an outgoing call
during PTT call .................. 37
End or leave a PTT call .... 37
Directory
About the directory ................. 38
Shared directory .................. 38
Capacity ................................... 38
Create directory entries ........ 39
Create a new directory
entry .......................................... 39
Add a predialed telephone
number to the
directory .................................. 40
Review the directory ............... 41
Review directory
entries ...................................... 41
Search by name................... 42
Dial, delete or edit directory
entries ...................................... 43
Display dial ............................ 43
Delete a directory
entry .......................................... 43
Dial, delete or edit directory
entries ...................................... 44
Edit a directory entry ........ 44
Speed dial .................................... 45
Assign a speed dial
number..................................... 45
Assign your voicemail
speed dial number ............. 46
Reassign a speed dial
number..................................... 46
Delete a speed dial
number..................................... 47
Make a call using
speed dial ............................... 47
Check your voicemail using
speed dial ............................ 47
Caller ID
About caller ID .......................... 48
Page 6

Information about caller ID
with call waiting ............... 48
Caller ID history ........................ 49
How the caller ID history
(caller ID log) works ....... 49
Missed (new) call
indicator ............................... 49
Caller ID operation .................. 50
Memory match ..................... 50
Review the caller ID
log ........................................... 51
View dialing options .......... 52
Dial a caller ID log
entry ....................................... 52
Delete caller ID log
entries ................................... 52
Save a caller ID log entry
to the directory ................. 53
Reasons for missing caller ID
information ............................ 54
Call block
About call block ........................ 55
Add a call block entry ...... 56
Review call block list ........ 57
Save a caller ID log entry
to call block list ................ 58
Edit a call block entry ...... 59
Delete a call block
entry ....................................... 60
Block calls without
number .................................. 60
Answering system
Answering system
settings .................................... 61
Announcement .................... 61
Answer on/off ...................... 63
Voice guide ............................ 64
Call screening ....................... 65
Number of rings .................. 66
Remote access code ......... 67
Message alert tone ............ 68
Message recording time .. 69
About the answering
system ...................................... 70
Answering system and
voicemail indicators ........ 70
Using the answering
machine and voicemail
together ............................... 71
Message capacity ............... 71
Voice prompts ...................... 72
Call screening ....................... 72
Call intercept ........................ 73
Base ringer ............................ 73
Temporarily turning off the
message alert tone ......... 73
Message playback .................... 74
Options during
playback ............................... 75
Delete all old
messages ............................. 76
Recording and playing
memos ..................................... 77
Record a memo ................... 77
Play back a memo ............. 77
Base message counter
displays .................................... 78
Message counter
displays ................................. 78
Remote access ........................... 79
Appendix
Adding and registering
handsets/headsets ............ 81
Page 7

Register a handset to the
telephone base ................. 81
Deregistering handsets ......... 83
Deregister all handsets
from the telephone
base ........................................ 83
Alert tones and lights ............ 84
Handset screen icons ....... 84
Handset alert tones ........... 85
Telephone base alert
tones ...................................... 85
Lights ........................................ 86
Screen display messages ..... 87
Screen messages ................ 87
Troubleshooting ........................ 90
Maintenance................................ 99
Important safety
information ..........................100
Safety information ............100
Especially about cordless
telephones ........................101
Precautions for users of
implanted cardiac
pacemakers .......................102
Pacemaker patients .........102
ECO mode ............................102
Especially about telephone
answering systems ........102
FCC Part 68 and ACTA.........103
FCC Part 15 ...............................104
California Energy Commission
battery charging testing
instructions ..........................105
Limited warranty .....................106
Technical specifications ......108
DECT 6.0 digital
technology ........................108
Telephone operating
range ....................................108
Redefining long range
coverage and clarity.....108
HD audio ...............................108
Simulated full-duplex handset
speakerphone ................... 108
Index
Index .............................................109
Page 8

Getting started
Installation
You must install and
charge the battery
before using the
telephone.
Install the telephone base close to a telephone jack and a power
outlet not controlled by a wall switch. The telephone base can be
placed on a flat surface or vertically mounted on the wall (see page
11). For optimum range and better reception, place the telephone
base in a central and open location.
If you subscribe to high-speed Internet service (DSL - digital subscriber
line) through your telephone line, you must install a DSL filter between
the telephone line cord and the telephone wall jack (see page 6). The
filter prevents noise and caller ID problems caused by DSL interference.
Please contact your DSL service provider for more information about
DSL filters.
Your product may be shipped with protective stickers covering the
handset and telephone base displays - remove them before use.
For customer service or product information, visit our website at
STOP!
See pages
8-10 for easy
instructions.
www.telephones.att.com or call 1 (800) 222-3111. In
Canada, dial
Avoid placing the telephone base and charger too close to:
•
Communication devices such as television sets, VCRs, or other
cordless telephones.
•
Excessive heat sources.
Noise sources such as a window with traffic outside, motors,
•
microwave ovens, refrigerators, or fluorescent lighting.
Excessive dust sources such as a workshop or garage.
•
Excessive moisture.
•
Extremely low temperature.
•
Mechanical vibration or shock such as on top of a washing
•
machine or workbench.
1 (866) 288-4268.
Page 9
Getting started
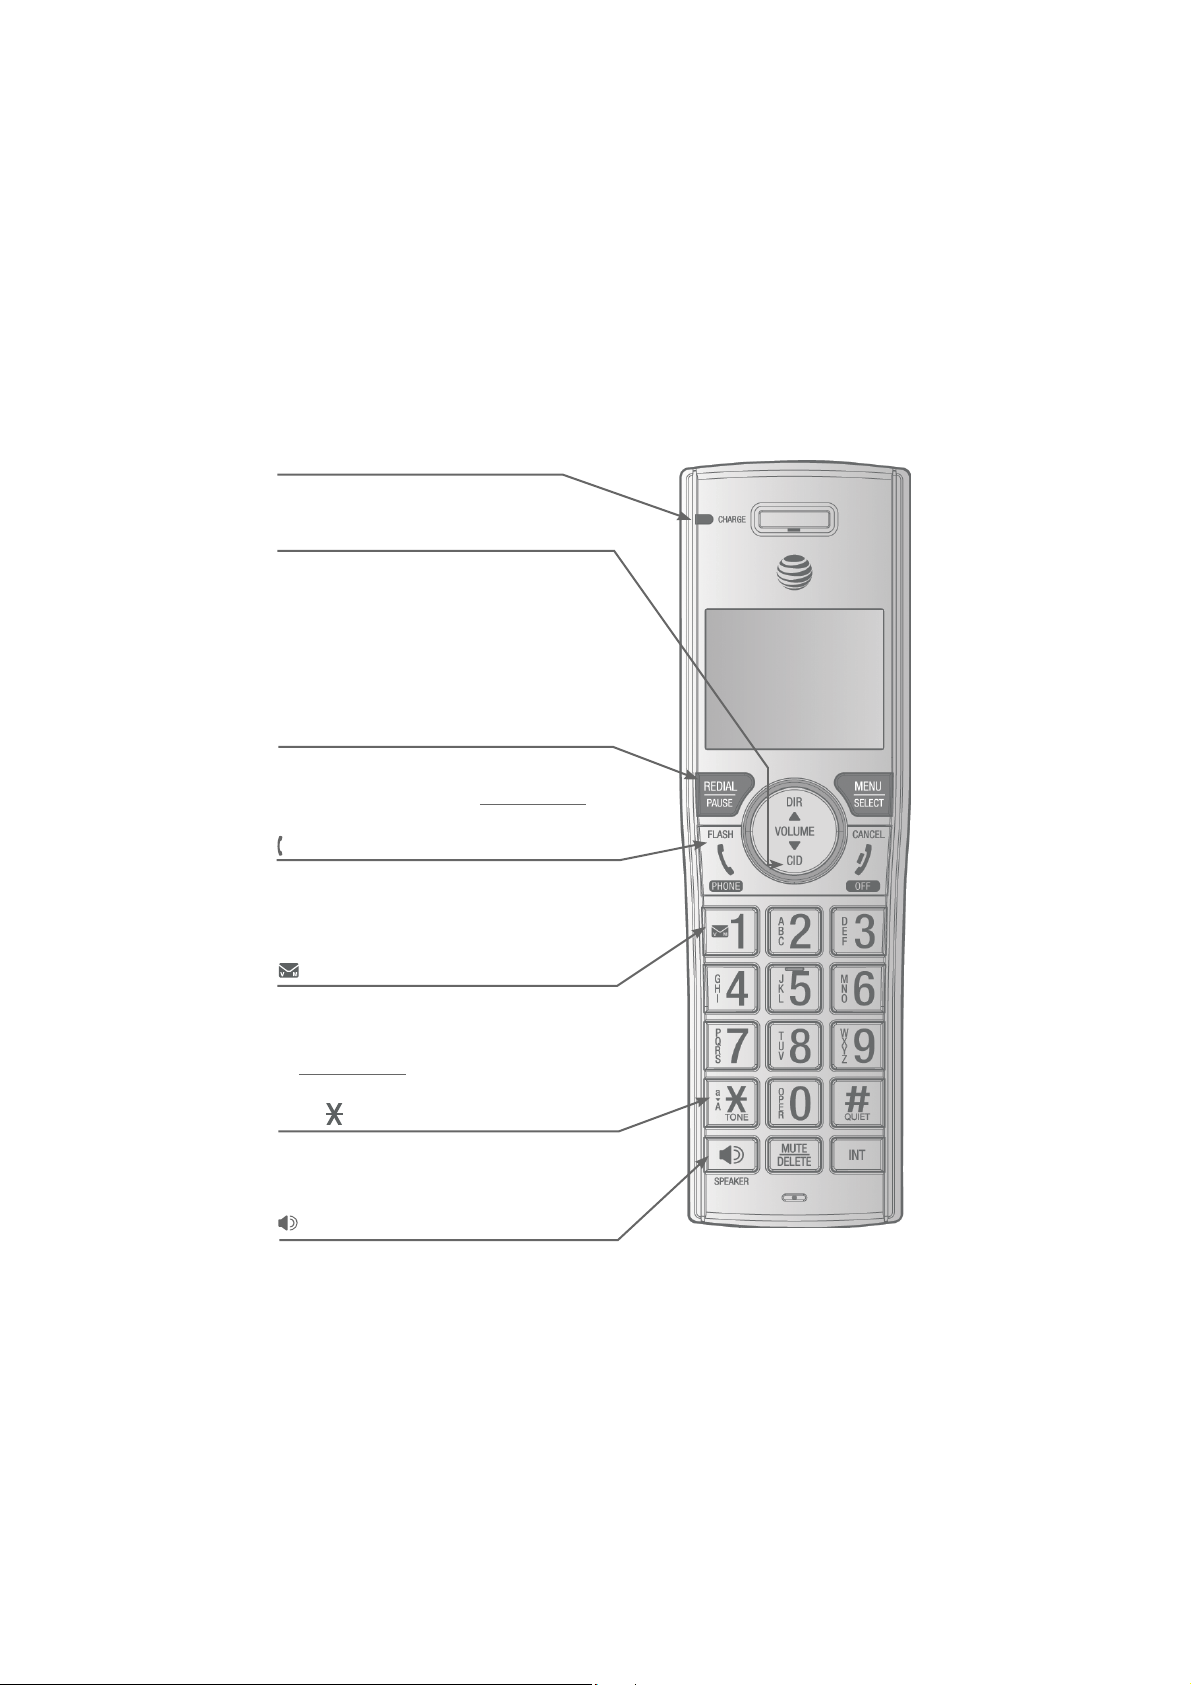
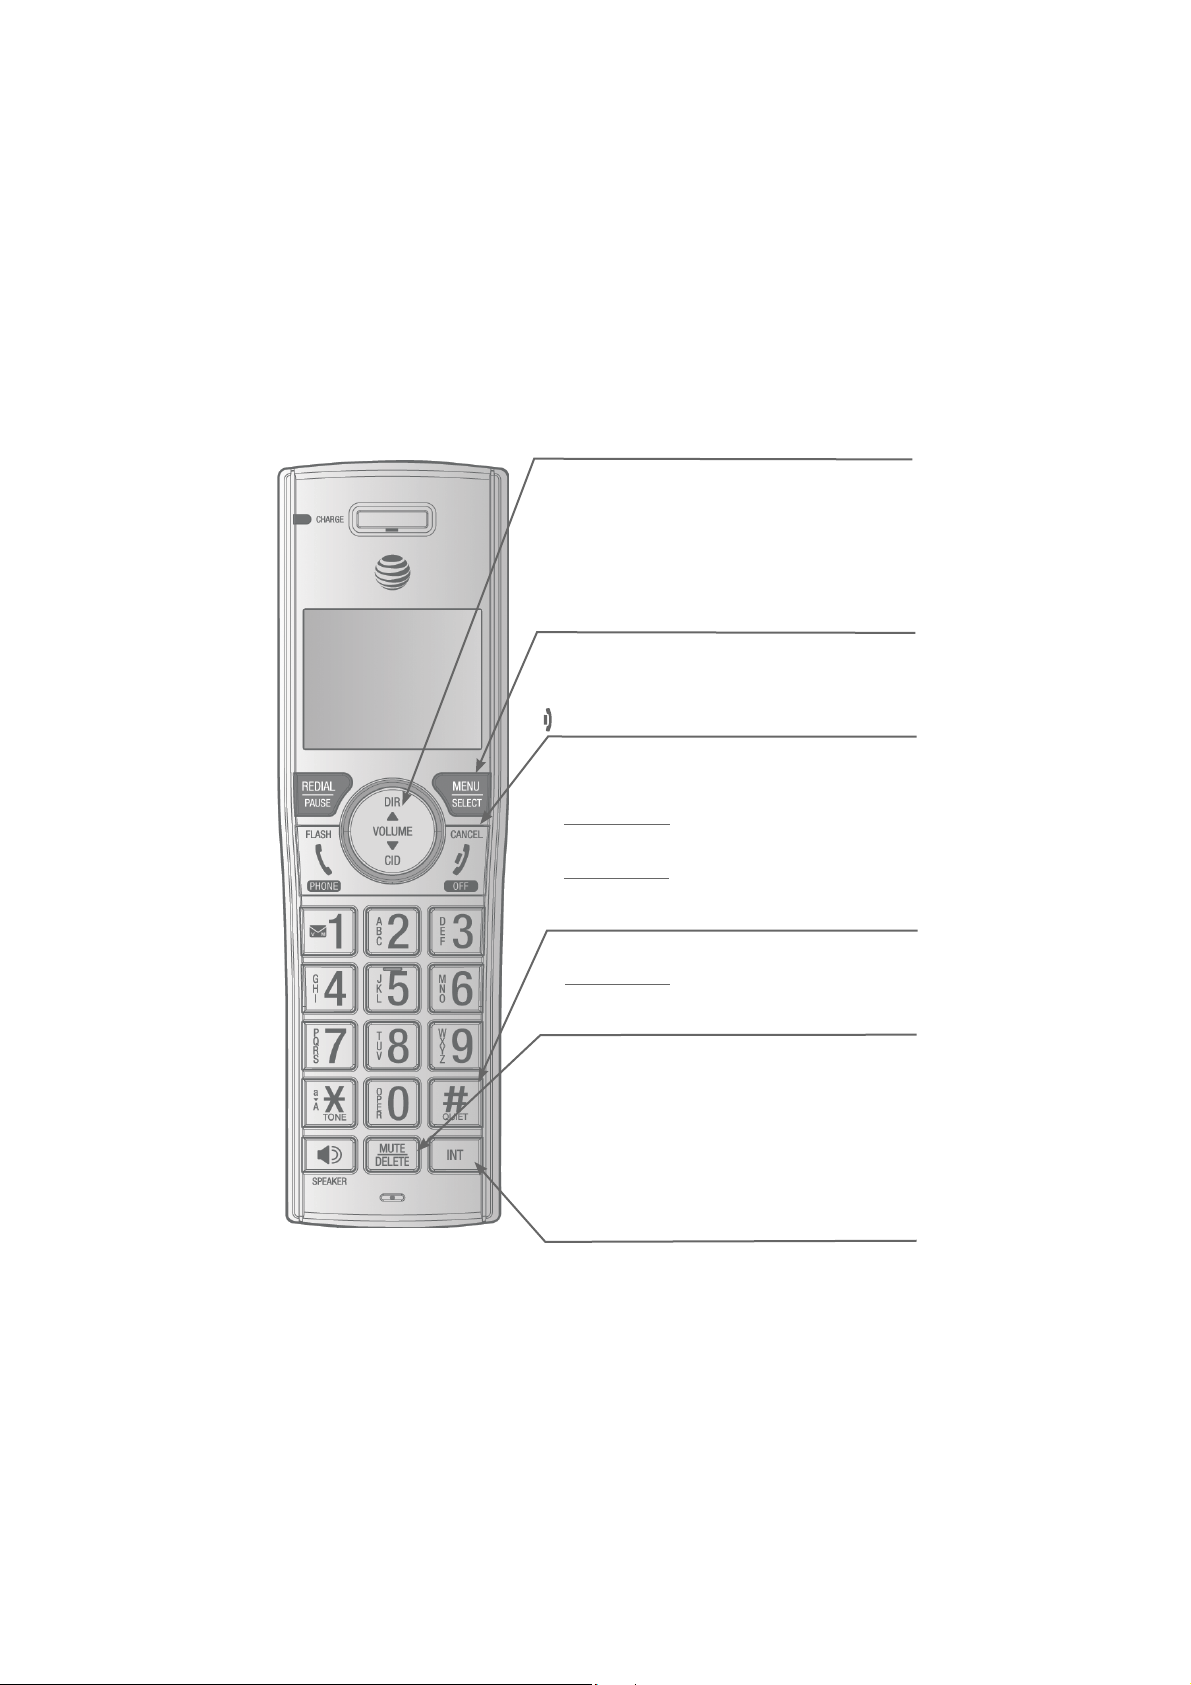
Quick reference guide - handset
CHARGE light
On when the handset is charging in the
telephone base or charger.
CID/VOLUME
Press CID to show caller ID log when the
•
handset is not in use (page 61).
Press to scroll down while in menus.
•
While entering names or numbers, press to
•
move the cursor to the left.
Press to decrease the listening volume when
•
on a call (page 32), or to decrease the message
playback volume (page 87).
REDIAL/PAUSE
Press repeatedly to view the last ten
•
numbers dialed (page 29).
While entering numbers, press and hold to
•
insert a dialing pause (page 48).
PHONE/FLASH
•
Press to make or answer a call (page 28).
•
During a call, press to answer an incoming call
when you receive a call waiting alert (page 32).
•
During message playback, press to call back the
caller if the caller’s number is available page 87).
1
While reviewing a caller ID log entry, press
•
repeatedly to add or remove 1 in front of the
telephone number before dialing or saving it in
the directory.
Press and hold to set (page 20) or to dial your
•
voicemail number (page 57).
TONE /a>A
Press to switch to tone dialing temporarily
•
during a call if you have pulse service (page 27).
While entering names, press to change the next
•
letter to upper or lower case.
/SPEAKERSPEAKER
Press to make or answer a call using the
•
speakerphone (page 28).
Press to switch between the speakerphone and
•
the handset (page 23).
2
Page 10
Getting started
Quick reference guide - handset
DIR/VOLUME
Press DIR to show directory entries when the
•
handset is not in use (page 50).
Press to scroll up while in menus.
•
While entering names or numbers, press to
•
move the cursor to the right.
Press to increase the listening volume when
•
on a call (page 32), or to increase the message
playback volume (page 87).
MENU/SELECT
•
When the handset is not in use, press to show
the menu.
•
While in the menu, press to select an item or
save an entry or setting.
OFF/CANCEL
•
During a call, press to hang up (page 28).
•
While in a menu, press to cancel an operation,
back up to the previous menu, or exit the menu
display; or
press and hold this button to exit to idle mode.
•
When the handset is ringing, press to mute the
ringer temporarily (page 28).
•
Press and hold while the telephone is not in use
to erase the missed call indicator.
QUIET# (pound key)
Press repeatedly to display other dialing options
•
when reviewing a caller ID log entry (page 62).
Press and hold to enter the QUIET mode setting
•
screen, or to deactivate QUIET mode (page 27).
MUTE/DELETE
During a call, press to mute the microphone
•
(page 32).
When the handset is ringing, press to mute the
•
ringer temporarily (page 28).
While reviewing the caller ID log, the directory or the
•
redial memory, press to delete an individual entry.
While predialing, press to delete digits.
•
During message or announcement playback,
•
press to delete the playing message or the
recorded announcement.
INT
Press to initiate an intercom conversation or
transfer a call.
3
Page 11
Getting started
Quick reference guide - handset
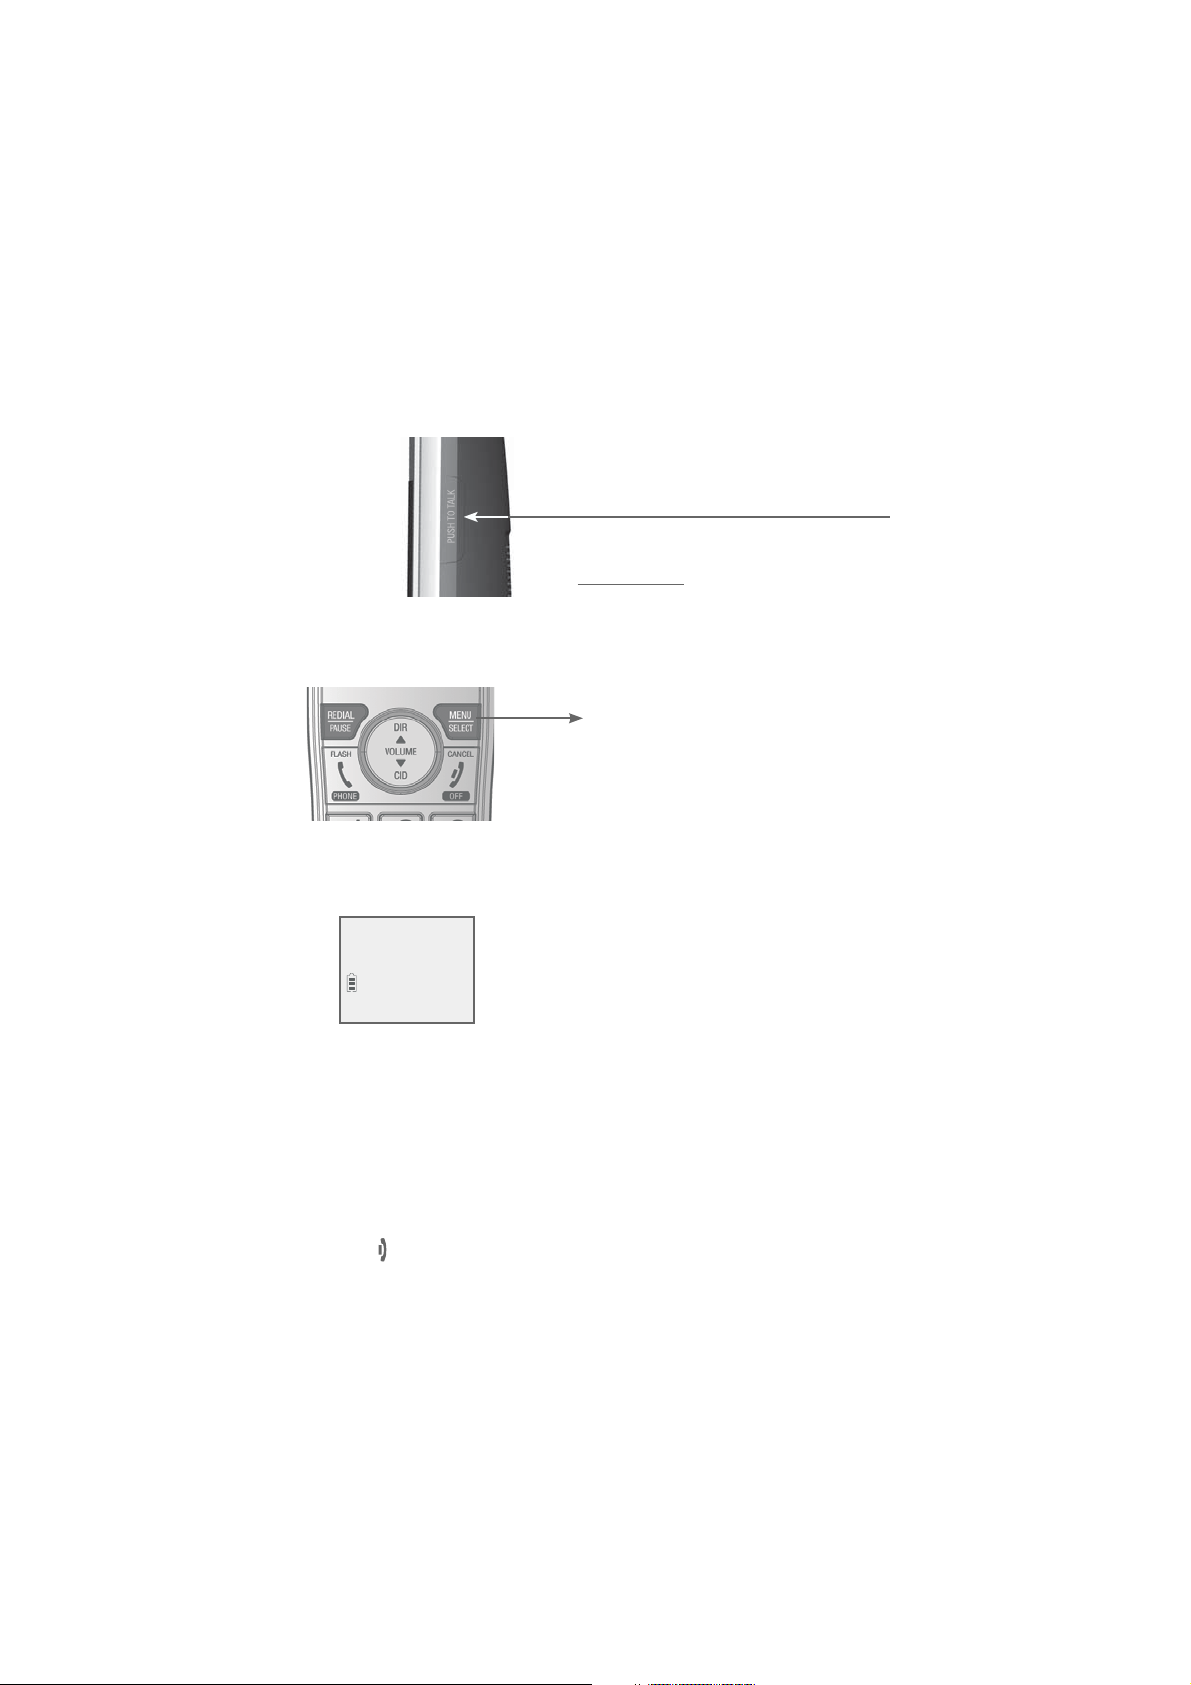
Handset
side view
PUSH TO TALK
Press to initiate a one-to-one (page 42) or
•
one-to-group broadcast (page 43).
Press and hold to broadcast to a group of
•
system devices (page 43).
Main menu
Main menu
Play messages (page 86)
•
Answering sys (page 72)
•
Directory (page 47)
•
Caller ID log (page 59)
•
The > symbol highlights
a menu item.
>Play messages
Answering sys
Call block (page 66)
•
Intercom (page 38)
•
Ringers (page 14)
•
Set date/time (page 16)
•
Settings (page 17)
•
Web address (page 26)
•
Using menus:
Press MENU/SELECT to show the menu.
•
Press CID or DIR to scroll through menu items.
•
•
Press
MENU/SELECT to confirm or save changes to a highlighted
menu item.
•
Press OFF/CANCEL to cancel an operation, back up to the
previous menu, or exit the menu display.
4
Page 12
Getting started
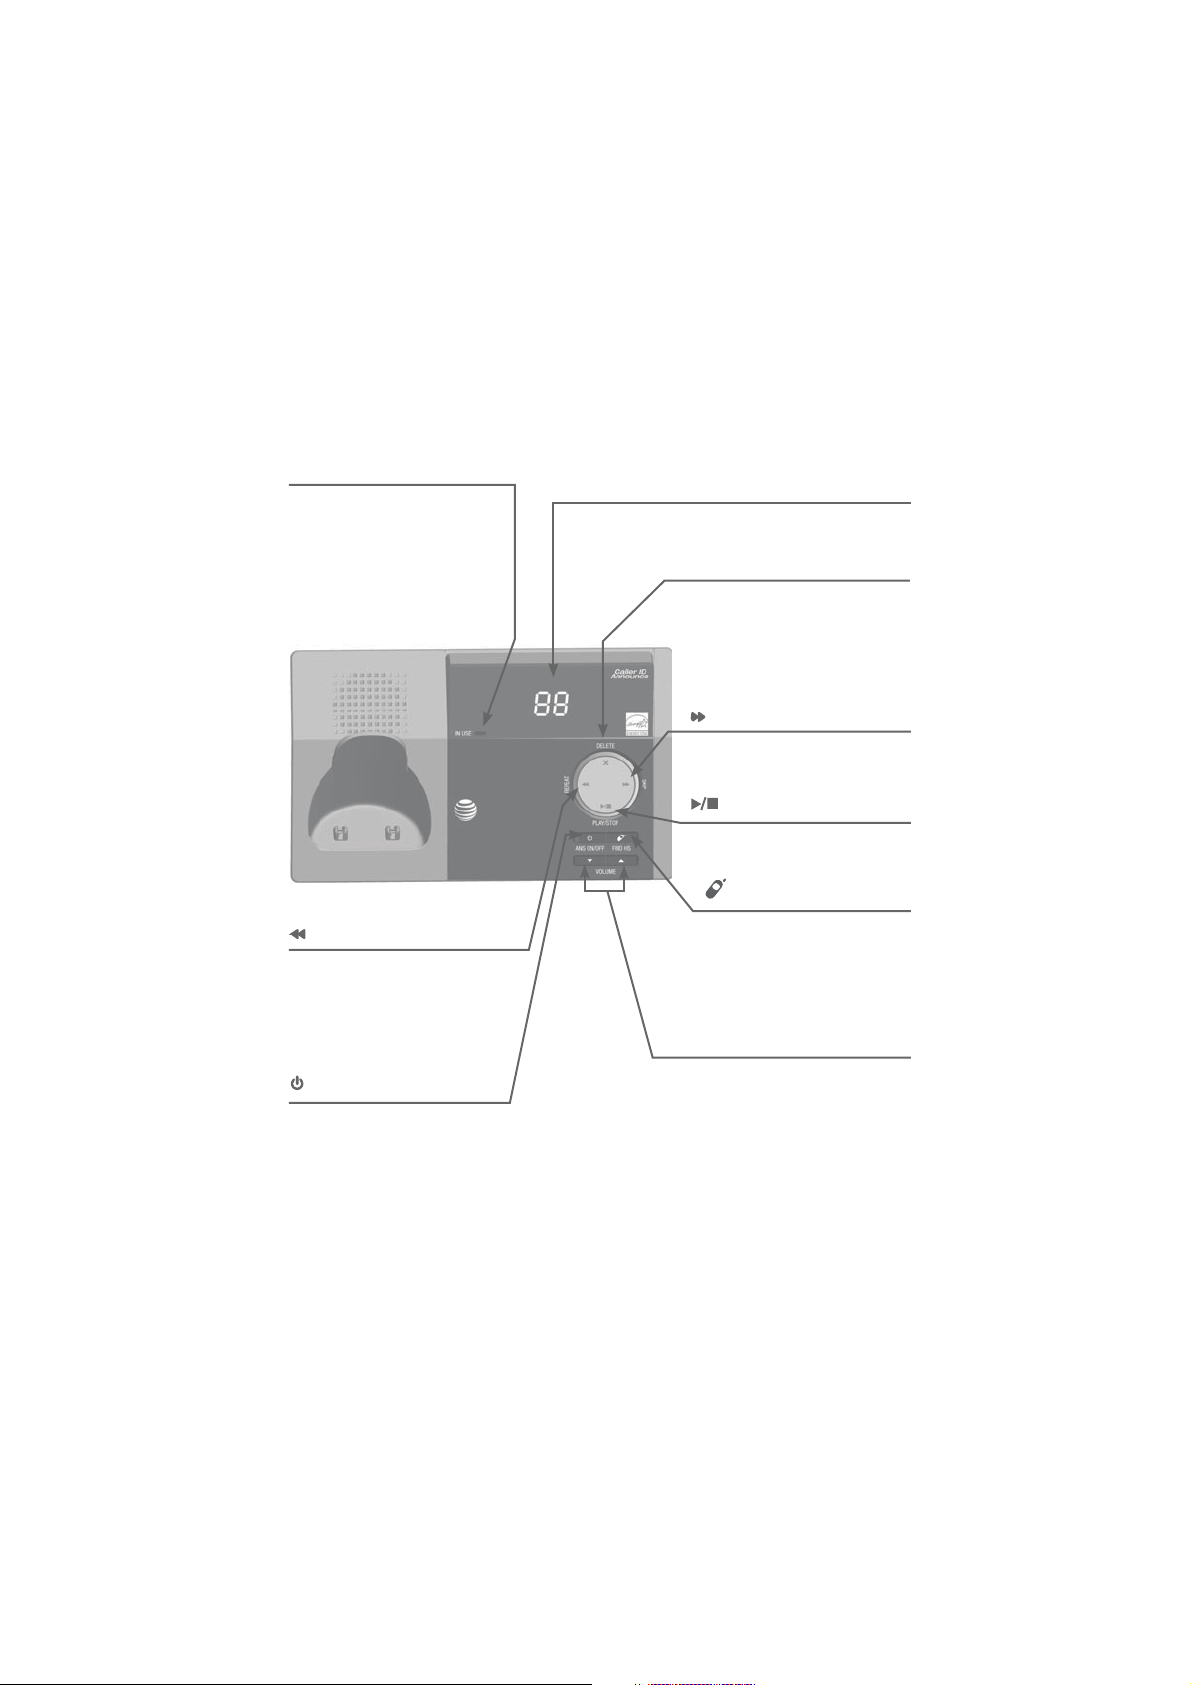
Quick reference guide - telephone base
IN USE indicator
•
On when the handset is in
use, or when the answering
system is answering an
incoming call.
Flashes when another
•
telephone is in use on the
same line.
/REPEAT
Press to repeat a message.
•
Press twice to play the
•
previous message (page 87).
/ANS ON/OFF
Press to turn the built-in
answering system on or off
(page 74).
Message counter
Shows the number of messages or other
answering system information.
X/DELETE
Press to delete the message
•
currently playing (page 87).
Press twice to delete all old
•
messages when the phone
is not in use (page 88).
/SKIP
Press to skip a message
(page 87).
/PLAY/STOP
Press to start or stop message
playback (page 86).
/HANDSET LOCATOR
While the phone is idle,
press to page all handsets
(page 37).
VOLUME and VOLUME
During message playback,
•
press to adjust the listening
volume (page 87).
While in idle mode, press to
•
adjust the base ringer volume.
5
Page 13
Getting started
Telephone base and charger installation
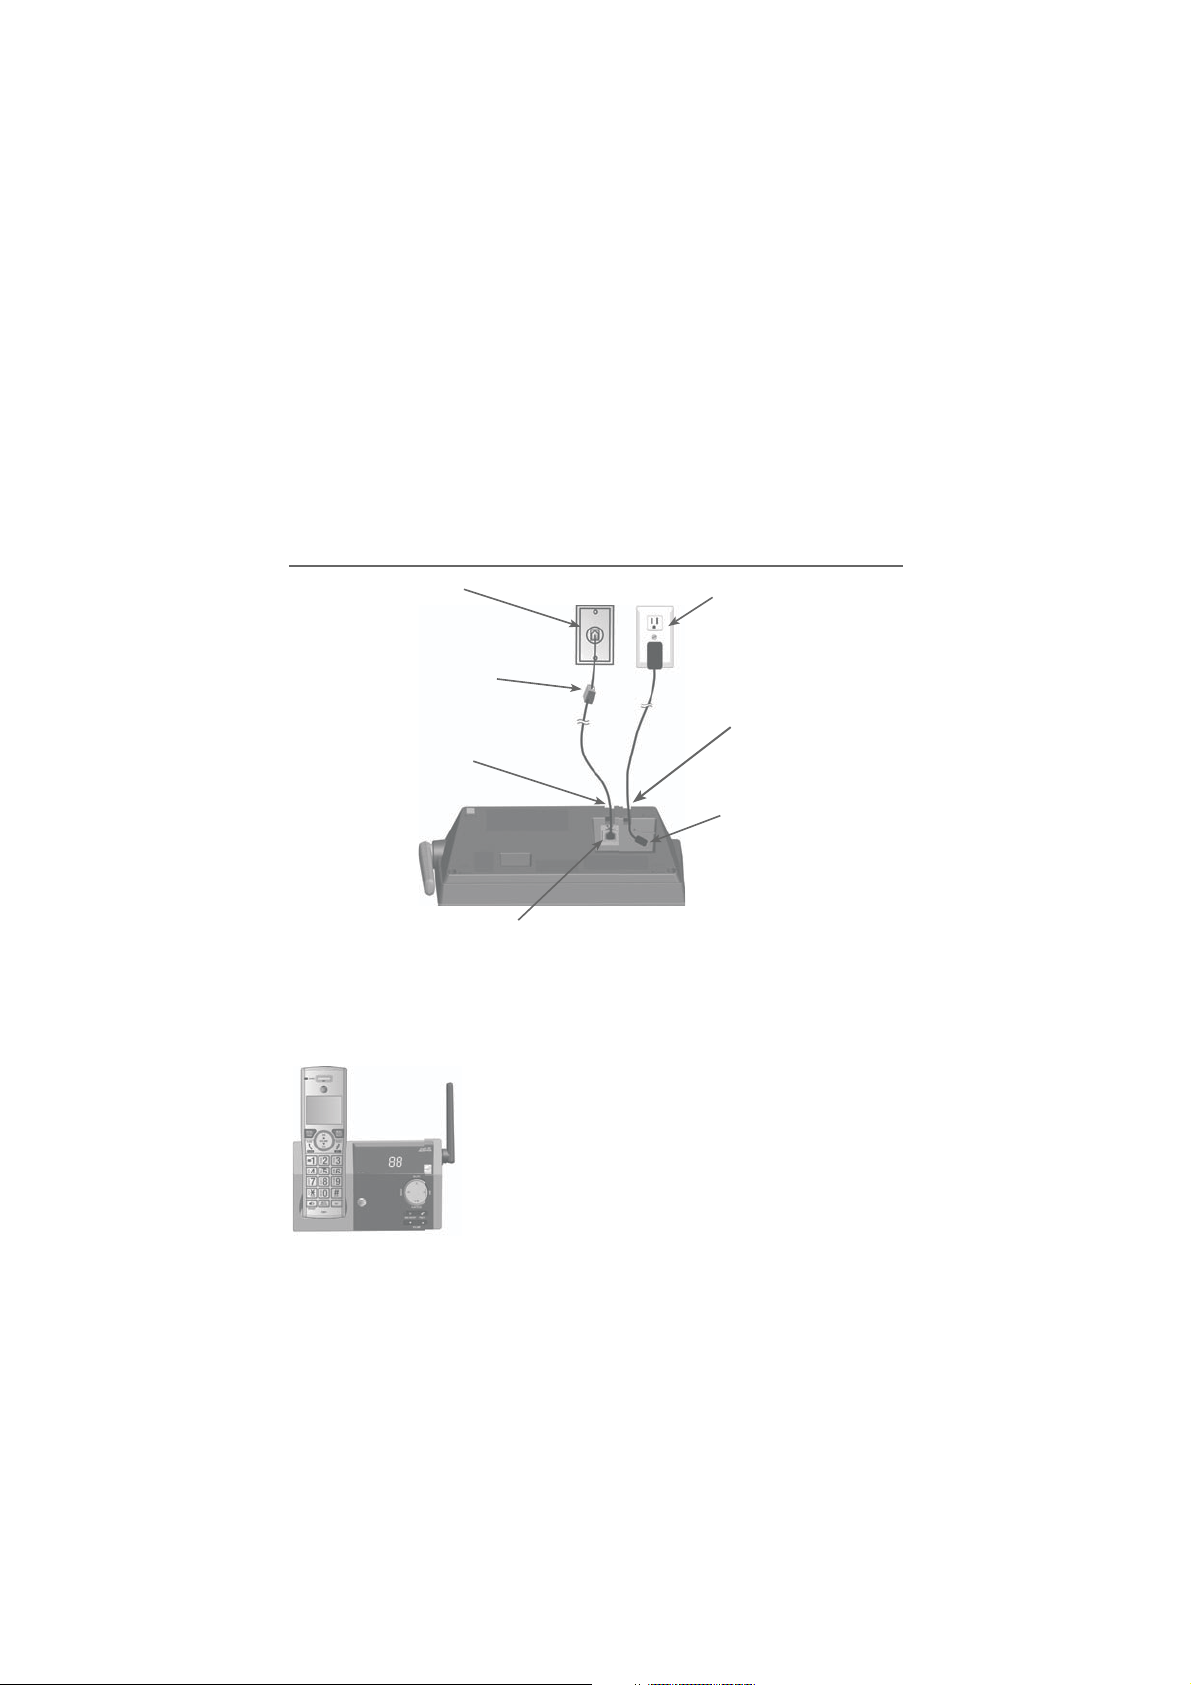
Install the telephone base and charger, as shown below.
The telephone base is ready for tabletop use. If you want to change
to wall mounting, see Installation options on page 11 for details.
Telephone base installation
Plug one end of the
telephone line cord into
a telephone jack or a DSL
filter.
If you have DSL high-speed
Internet service, a DSL filter
(not included) is required.
Route the telephone line
cord through this slot.
Plug the other end of the telephone
line cord into the telephone jack on
the back of the telephone base.
Plug the large end of the
telephone base power
adapter into a power
outlet not controlled by
a wall switch.
Route the power
adapter cord through
this slot.
Plug the small end of
the telephone base
power adapter into the
power adapter jack
on the back of the
telephone base.
Raise the antenna.
6
Page 14
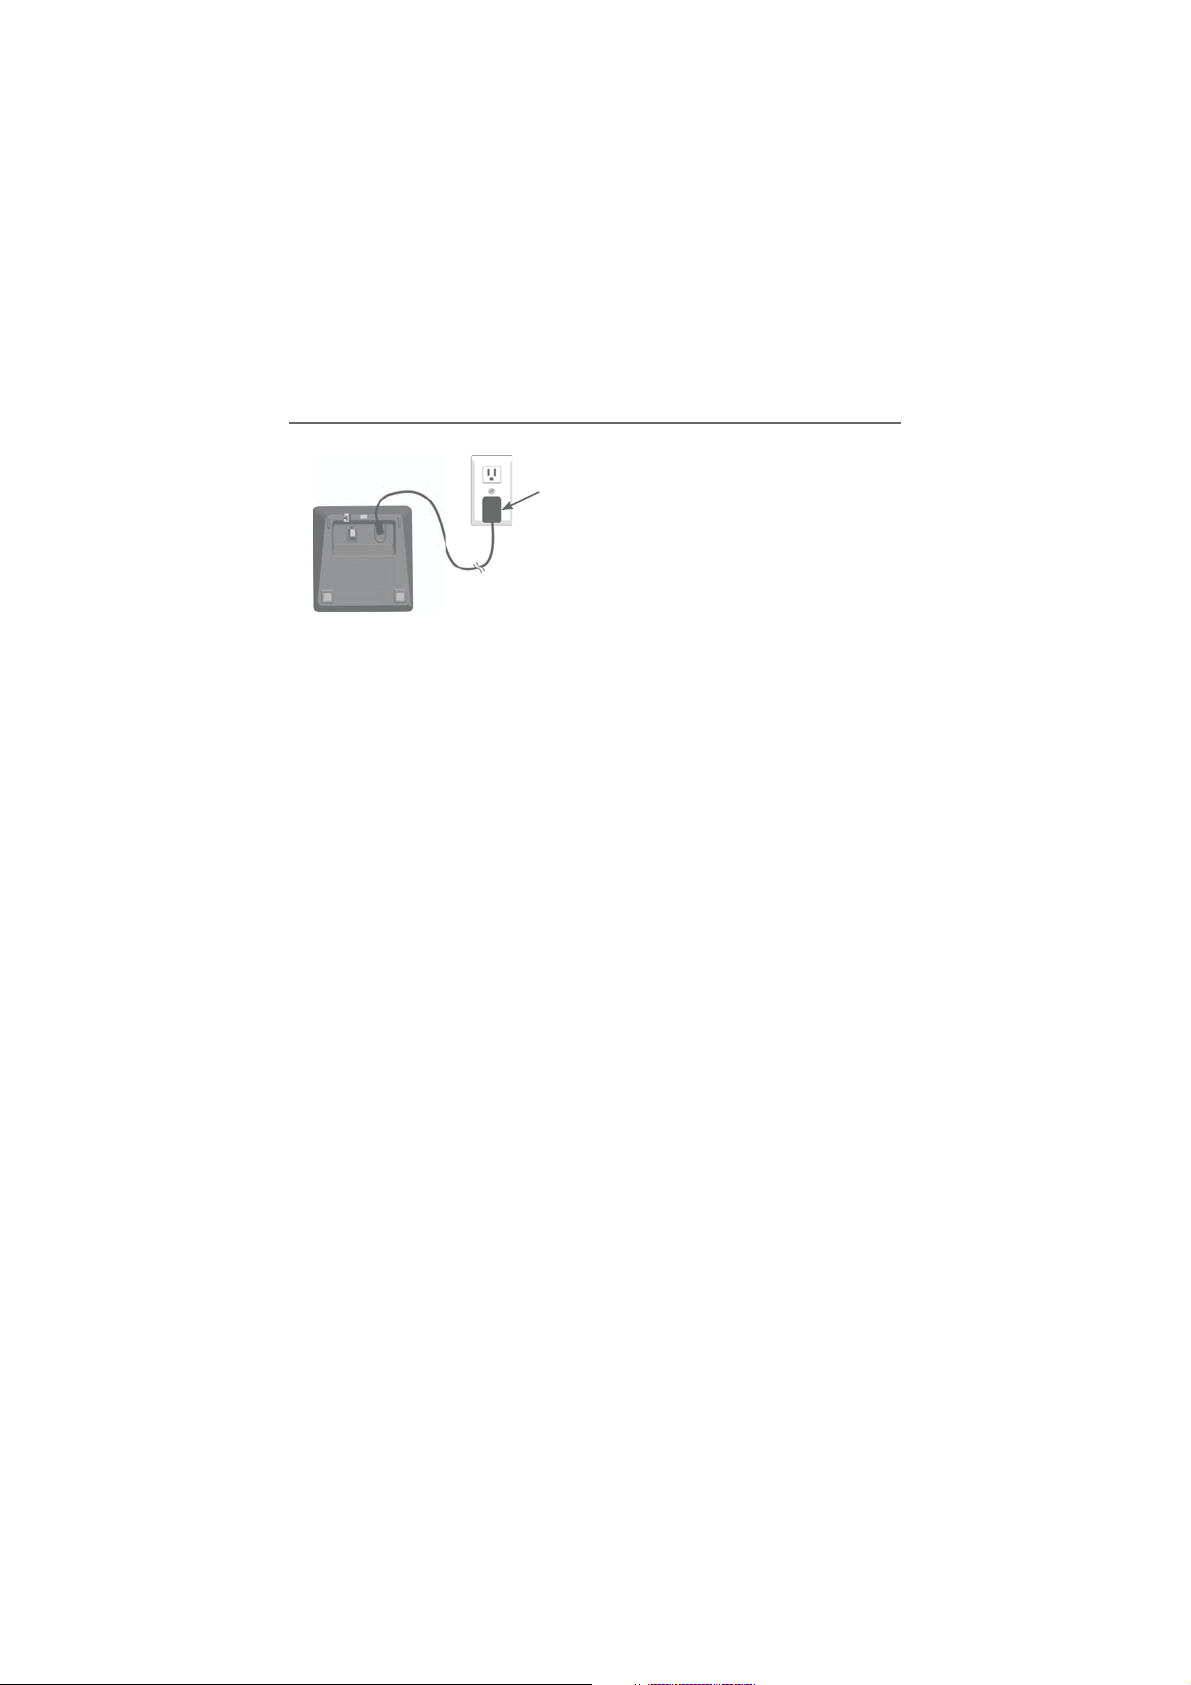
Getting started
Charger installation
Plug the power adapter into a power outlet not
controlled by a wall switch.
IMPORTANT INFORMATION
Use only the power adapter(s) supplied with this product. To order a
•
replacement
power adapter, visit our website at
www.telephones.
att.com or call
1 (800) 222-3111. In Canada, dial 1 (866) 288-4268.
The power adapters are intended to be correctly oriented in a vertical
•
or floor mount position. The prongs are not designed to hold the plug in
place if it is plugged into a ceiling, under-the-table or cabinet outlet.
7
Page 15
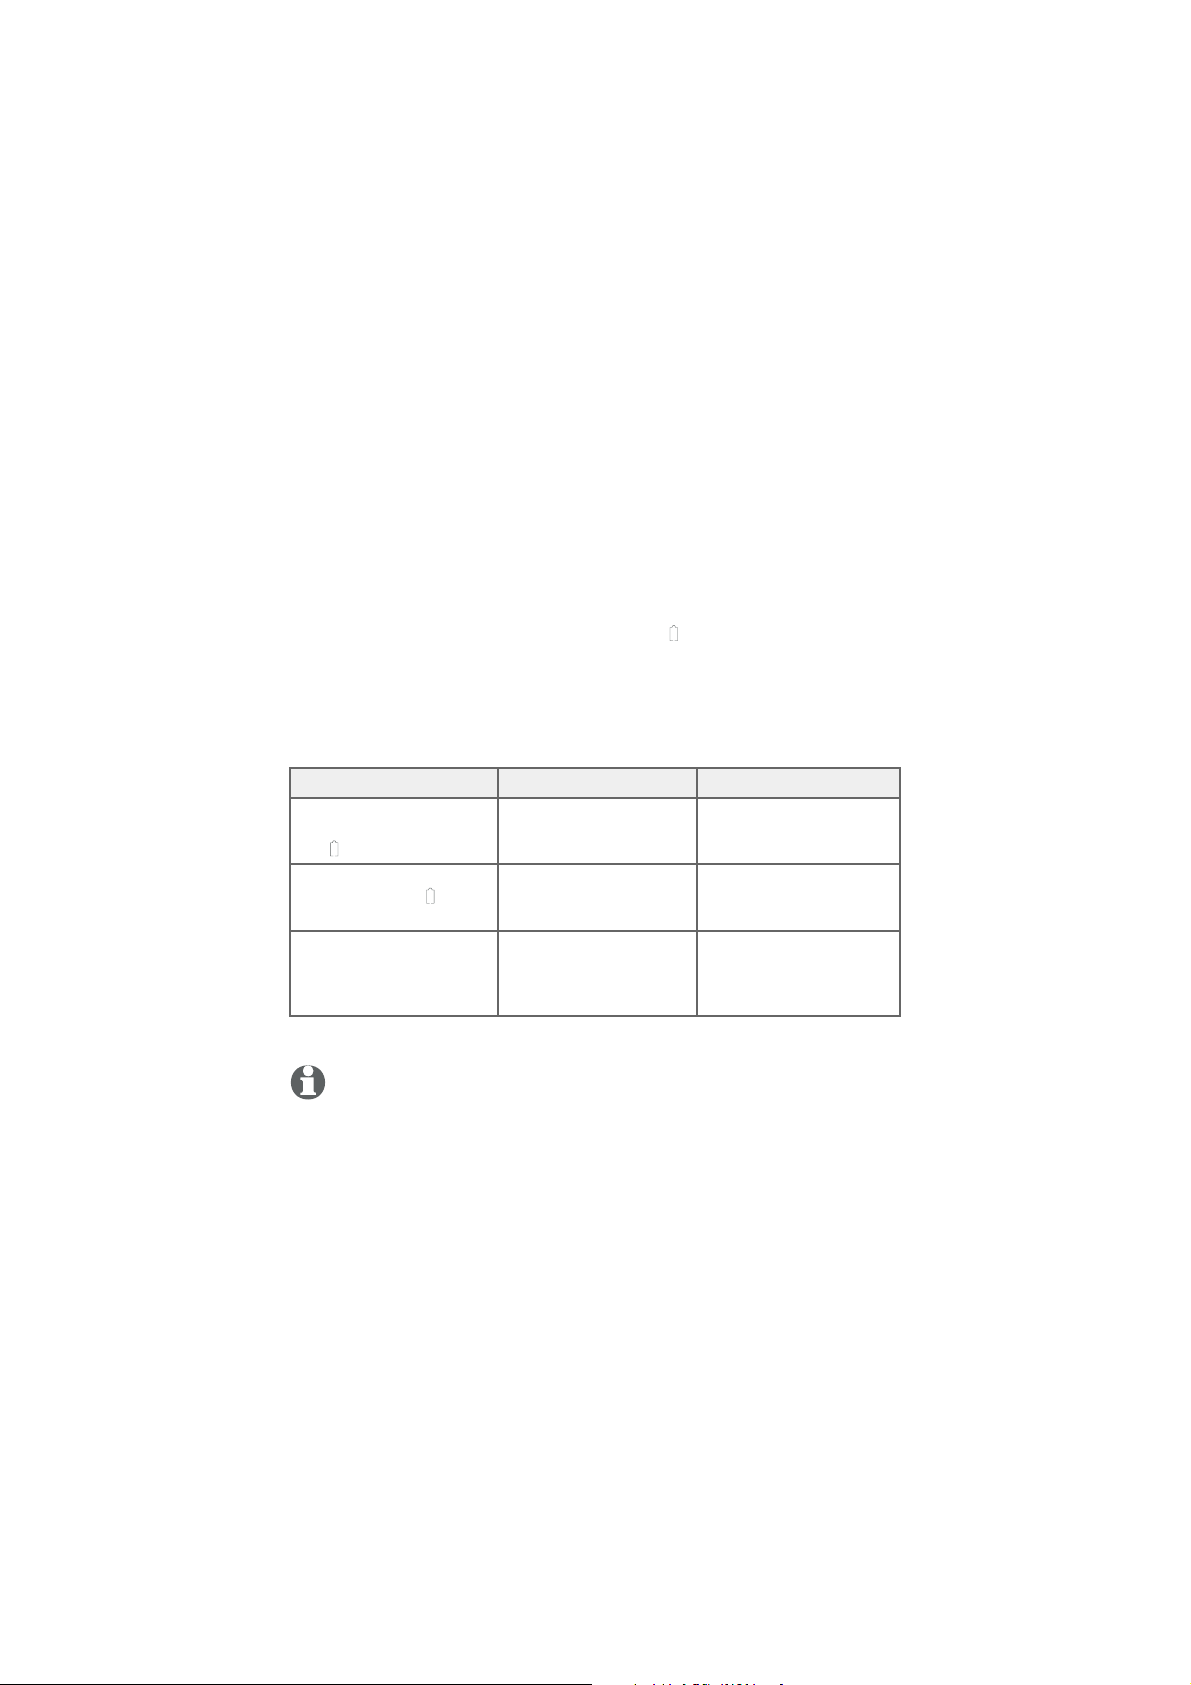
Getting started
Battery installation and charging
Install the battery, as shown below. Once you have installed the
battery, the screen indicates the battery status (see the following
table). If necessary, place the handset in the telephone base or
charger to charge the battery. For best performance, keep the
handset in the telephone base or charger when not in use. The
battery is fully charged after ten hours of continuous charging. See
the table on page 125 for battery operating times.
If the screen shows Place in charger and flashes, you need to
charge the handset without interruption for at least 30 minutes to
give the handset enough charge to use the telephone for a short
time. The following table summarizes the battery charge indicators
and actions to take.
Battery indicators Battery status Action
The screen is blank, or
shows Place in charger
and (flashing).
The screen shows
Low battery and
(flashing).
The screen shows
HANDSET X.
Battery has no or
very little charge. The
handset cannot be used.
Battery has enough
charge to be used for a
short time.
Battery is charged. To keep the battery
Charge without
interruption
(at least 30 minutes).
Charge without
interruption
(at least 30 minutes).
charged, place it in
the telephone base or
charger when not in use.
NOTE: If you are on a phone call in low battery mode, you hear four short
beeps every minute.
8
Page 16
Getting started
UP
/
C
E
C
Ô
T
É VE
R
S LE
HAUT
c-
p
i
l
es
:
(2.4
V
400mAh
Ni
-M
H)
SEMENT
:
NCTURE
BATTERIES.
PER
C
ER LES PILES.
en
ch
i
ne
THI
S
SID
E
B
a
t
tery P
ac
k
/
B
lo
B
T1
8334
2
/BT2
8334
WAR
NING /
A
VER
T
IS
D
O N
OT
BUR
N
OR
PU
N
E
PA
S
I
N
CI
N
É
R
ER
O
U
Ma
de
i
n C
h
in
a
/
F
abriq
ué
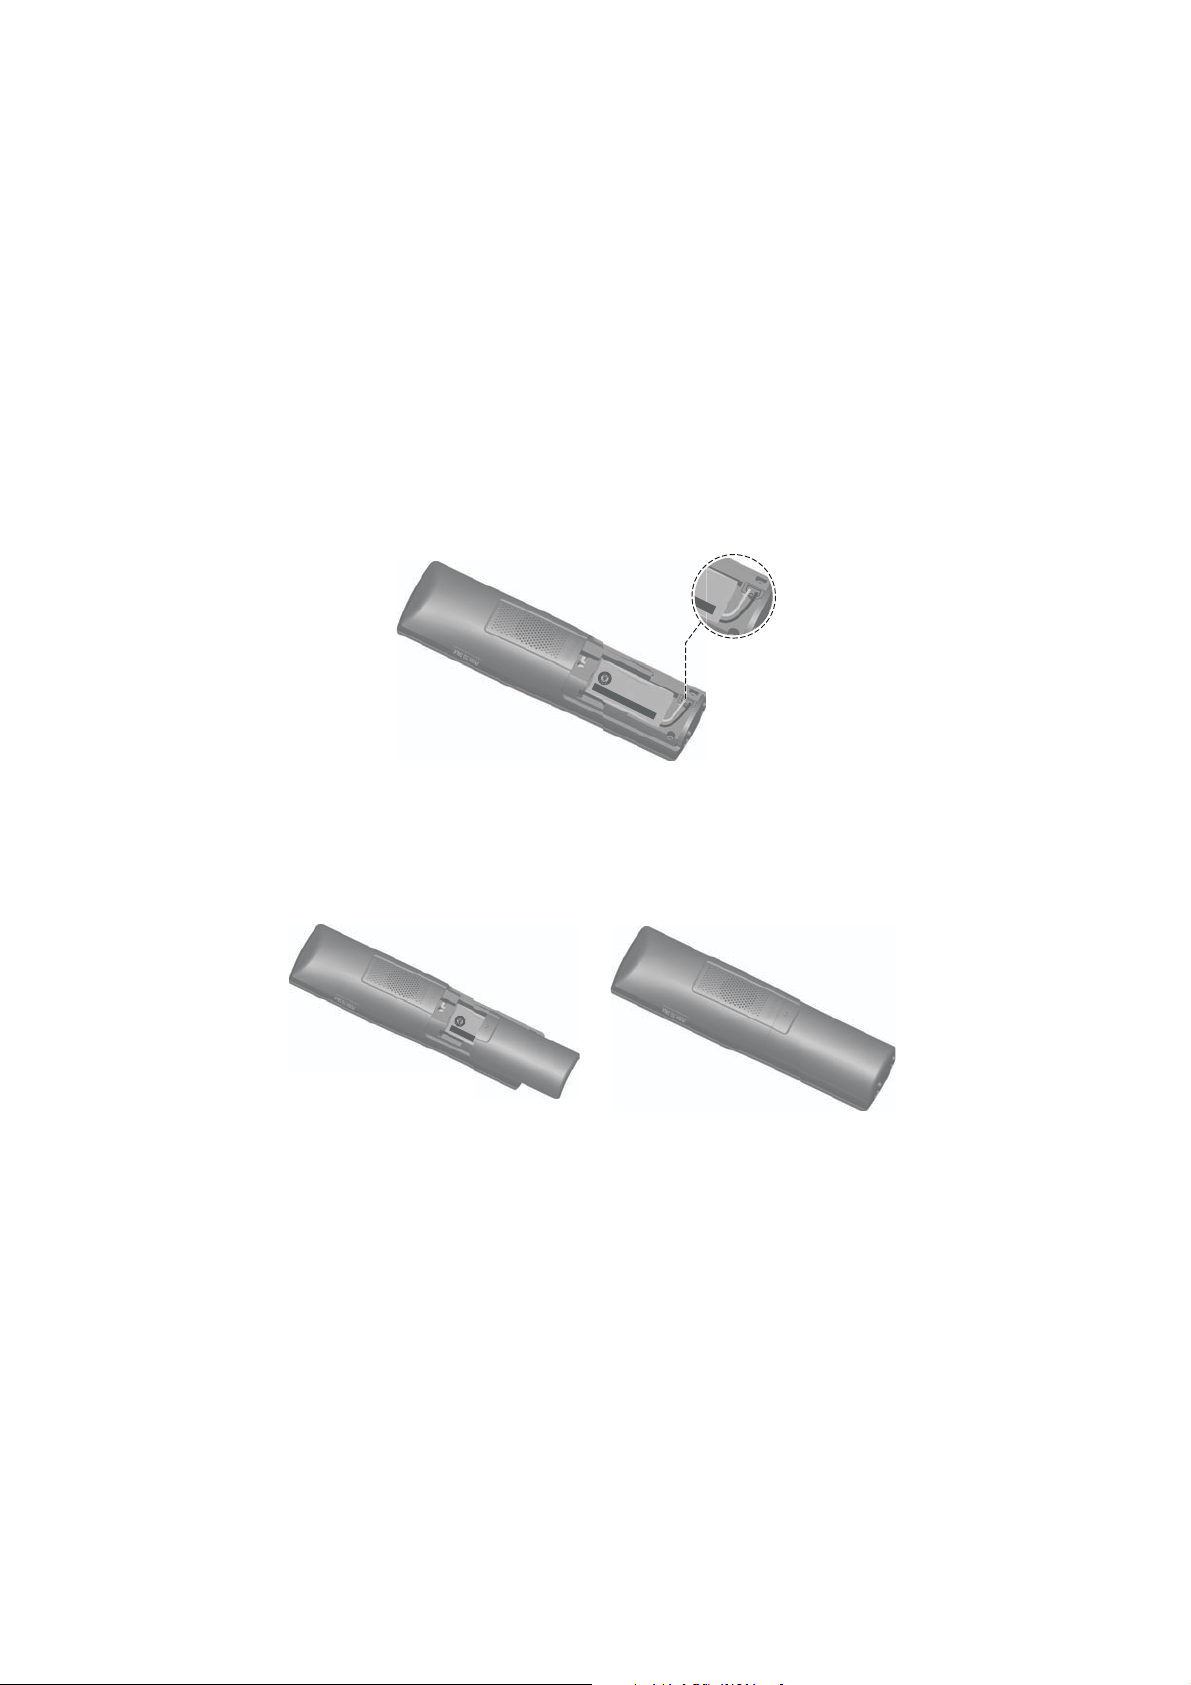
Battery installation and charging
Step 1
Plug the battery connector securely into the socket inside the
handset battery compartment. Insert the supplied battery with the
label THIS SIDE UP facing up, as indicated.
.
ne
i
ch
é en
TTERIES.
CER LES PILES
BA
/ Fabriqu
OU PER
a
:
Ni-MH)
UNCTURE
UT
n Chin
i
INCINÉRER
SSEMENT
LE HA
Made
S
URN OR P
ERTI
B
PAS
:
V
A
NE
/
es
il
É VER
p
ING
c-
DO NOT
ÔT
BT283342 (2.4V 400mAh
lo
B
2/
ARN
/
4
W
/ CE C
1833
y Pack
BT
UP
er
E
ID
Batt
S
IS
H
T
Step 2
Align the cover flat against the battery compartment, then slide it
upwards until it clicks into place.
9
Page 17
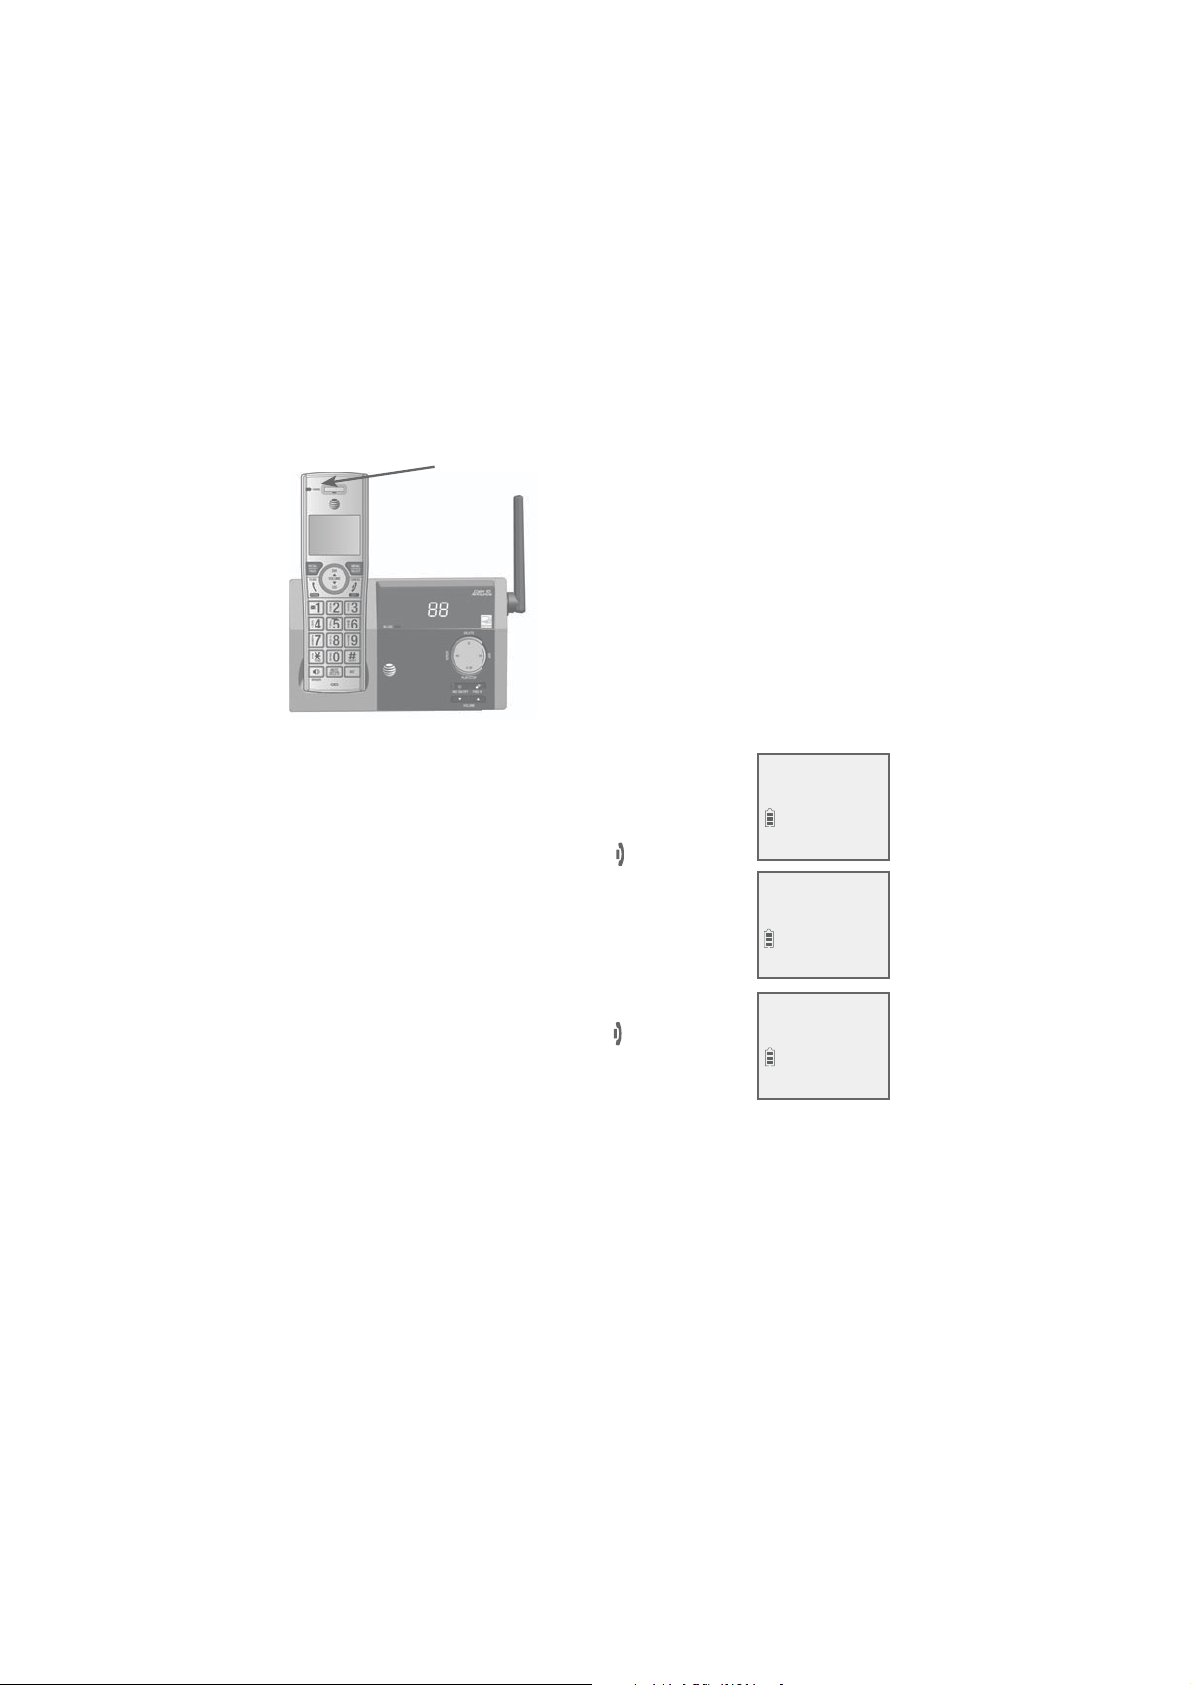
Getting started
Battery installation and charging
CHARGE light
Step 3
Charge the handset by placing it
face forward in the telephone base
or charger. The CHARGE light on
the handset is on during charging.
After you install your telephone or power
returns following a power outage, the handset
will prompt you to set the date and time. For
instructions, see Set date/time on page 16. To
skip setting the date and time, press
OFF/
CANCEL on the handset.
After the date and time setting is done or
skipped, the handset will prompt if you want
to set up the answering system. Press
MENU/
SELECT to start the answering system setup via
voice guide. For more details, see Voice guide
on page 75. To skip the setup, press
OFF/
CANCEL on the handset.
SET DATE
MM/DD/YY
SET TIME
HH:MM --
Setup Ans sys?
IMPORTANT INFORMATION
Use only the supplied rechargeable battery or replacement battery
•
(model BT183342/
BT283342). To order, visit our website at
telephones.att.com
or call
www.
1 (800) 222-3111. In Canada, dial 1 (866) 288-4268.
If you do not use the handset for a long time, disconnect and remove
•
the battery to prevent possible leakage.
10
Page 18
Getting started
Installation options
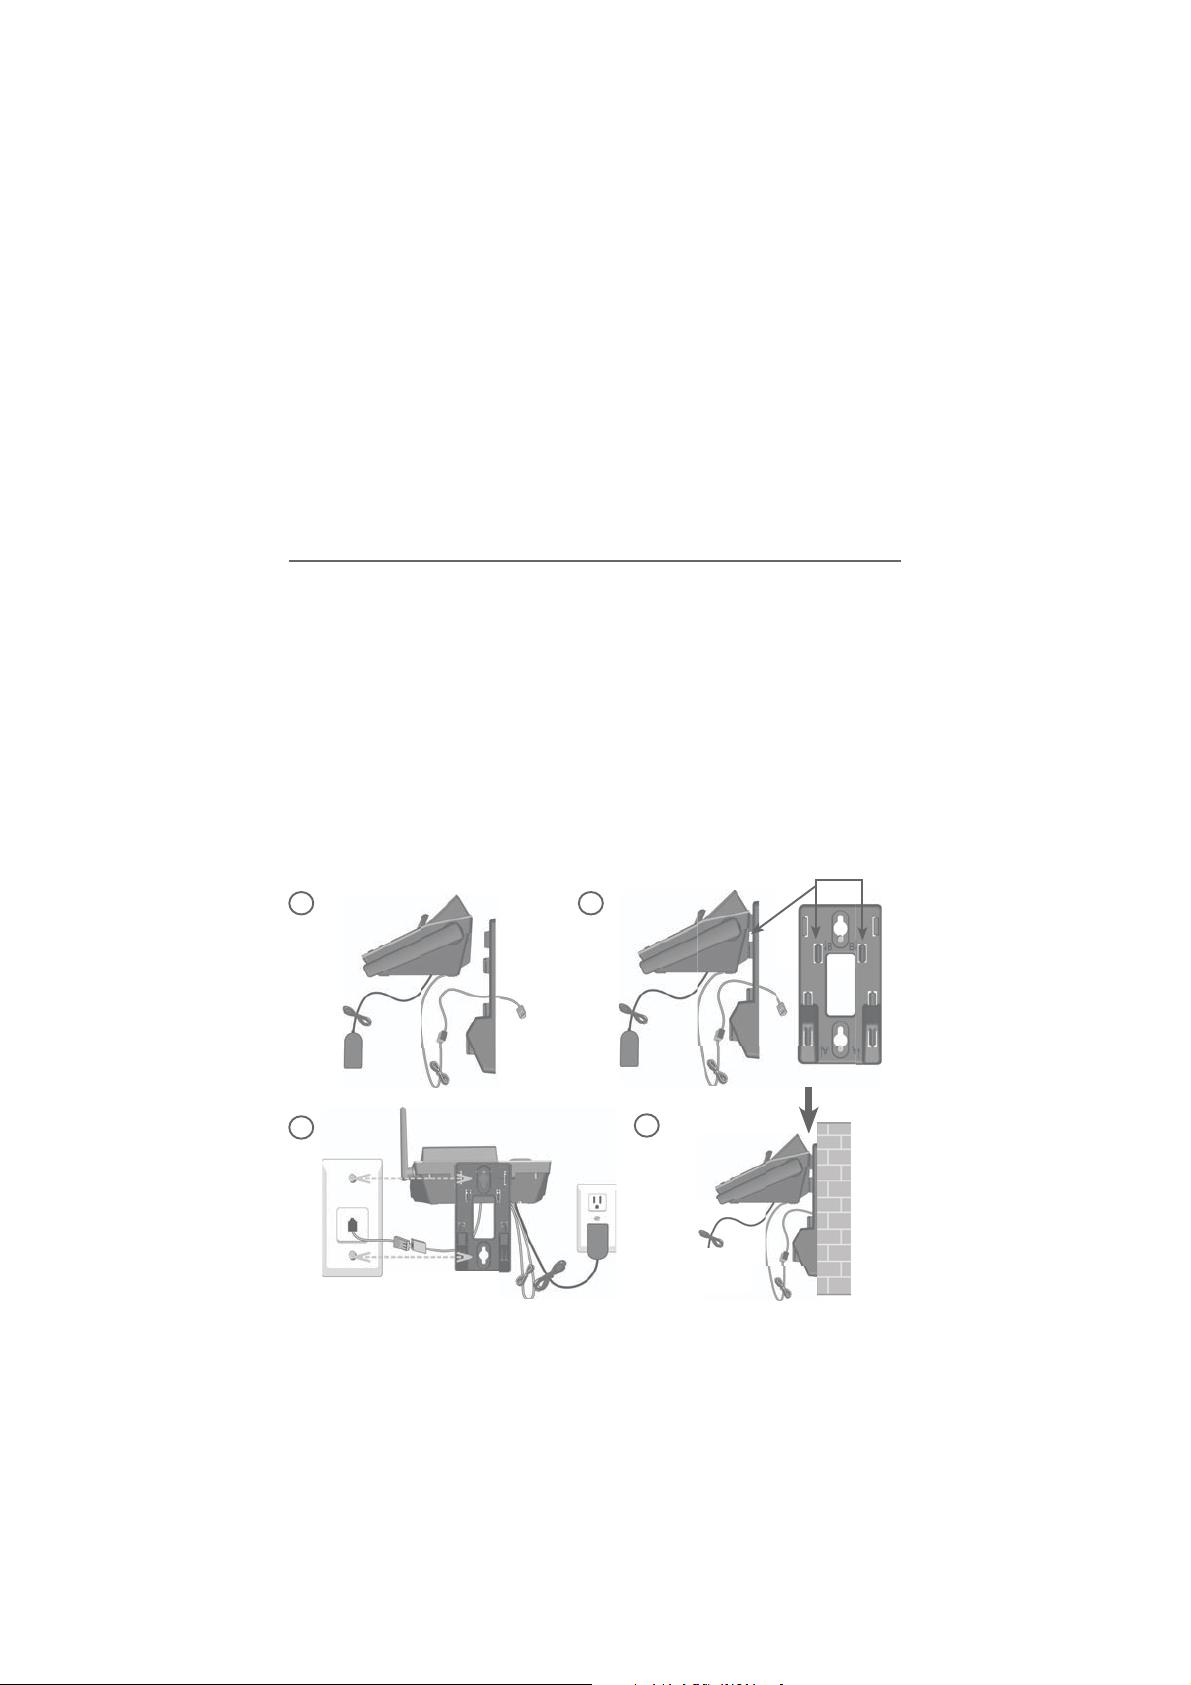
Your telephone base is ready for tabletop use. If you want to mount
your telephone on a wall, follow the steps to connect the telephone
base with a standard dual-stud telephone wall mounting plate. You
may need a professional to install the mounting plate.
Tabletop to wall mount installation
1. Plug the power cord and telephone line into the telephone
base. If you are using a DSL filter, plug the other end of the
telephone line into the filter. Route the telephone line cord (or
DSL filter) through the wall mount bracket hole.
2. Position the telephone base, as shown below. Insert the
extended tabs (marked B in the following illustration) of the wall
mount bracket into the slots on the back of the telephone base.
Push the telephone base down until it is securely in place.
3. Plug the telephone line cord (or DSL filter) into the wall jack.
Plug the power adapter into a power outlet not controlled by a
wall switch.
4. Align the holes on the wall mount bracket with the standard
wall plate and slide the wall mount bracket down until it locks
securely. Bundle the telephone line cord and power adapter cord
neatly with twist ties.
1
2
3
4
11
Page 19

Getting started
Installation options
Wall mount to tabletop installation
1. Unplug the large end of the power adapter from the electrical outlet.
2. If the telephone line cord and power adapter cord are bundled,
untie them first. Slide the wall mount bracket up and remove it
from the wall mounting plate.
3. Unplug the telephone line cord or the DSL filter from the
telephone wall jack. Push the telephone base up and away from
the wall mount bracket to detach it from the wall mount bracket.
4. See Telephone base and charger installation on page 6.
12
Page 20

Telephone settings
Handset settings
Use the menu to change the telephone settings.
1. Press MENU/
SELECT on the handset when it is not
in use to enter the main menu.
2. Press
CID or DIR to scroll to the feature to be
>Play messages
Answering sys
changed. When scrolling through the menu, the >
symbol indicates the selected menu item.
3. Press
MENU/SELECT to select the highlighted item.
NOTE: Press OFF/CANCEL to cancel an operation, back up to the previous
menu or exit the menu display. Press and hold
idle mode.
OFF/CANCEL to return to
13
Page 21
Telephone settings
Handset settings
Ringer volume
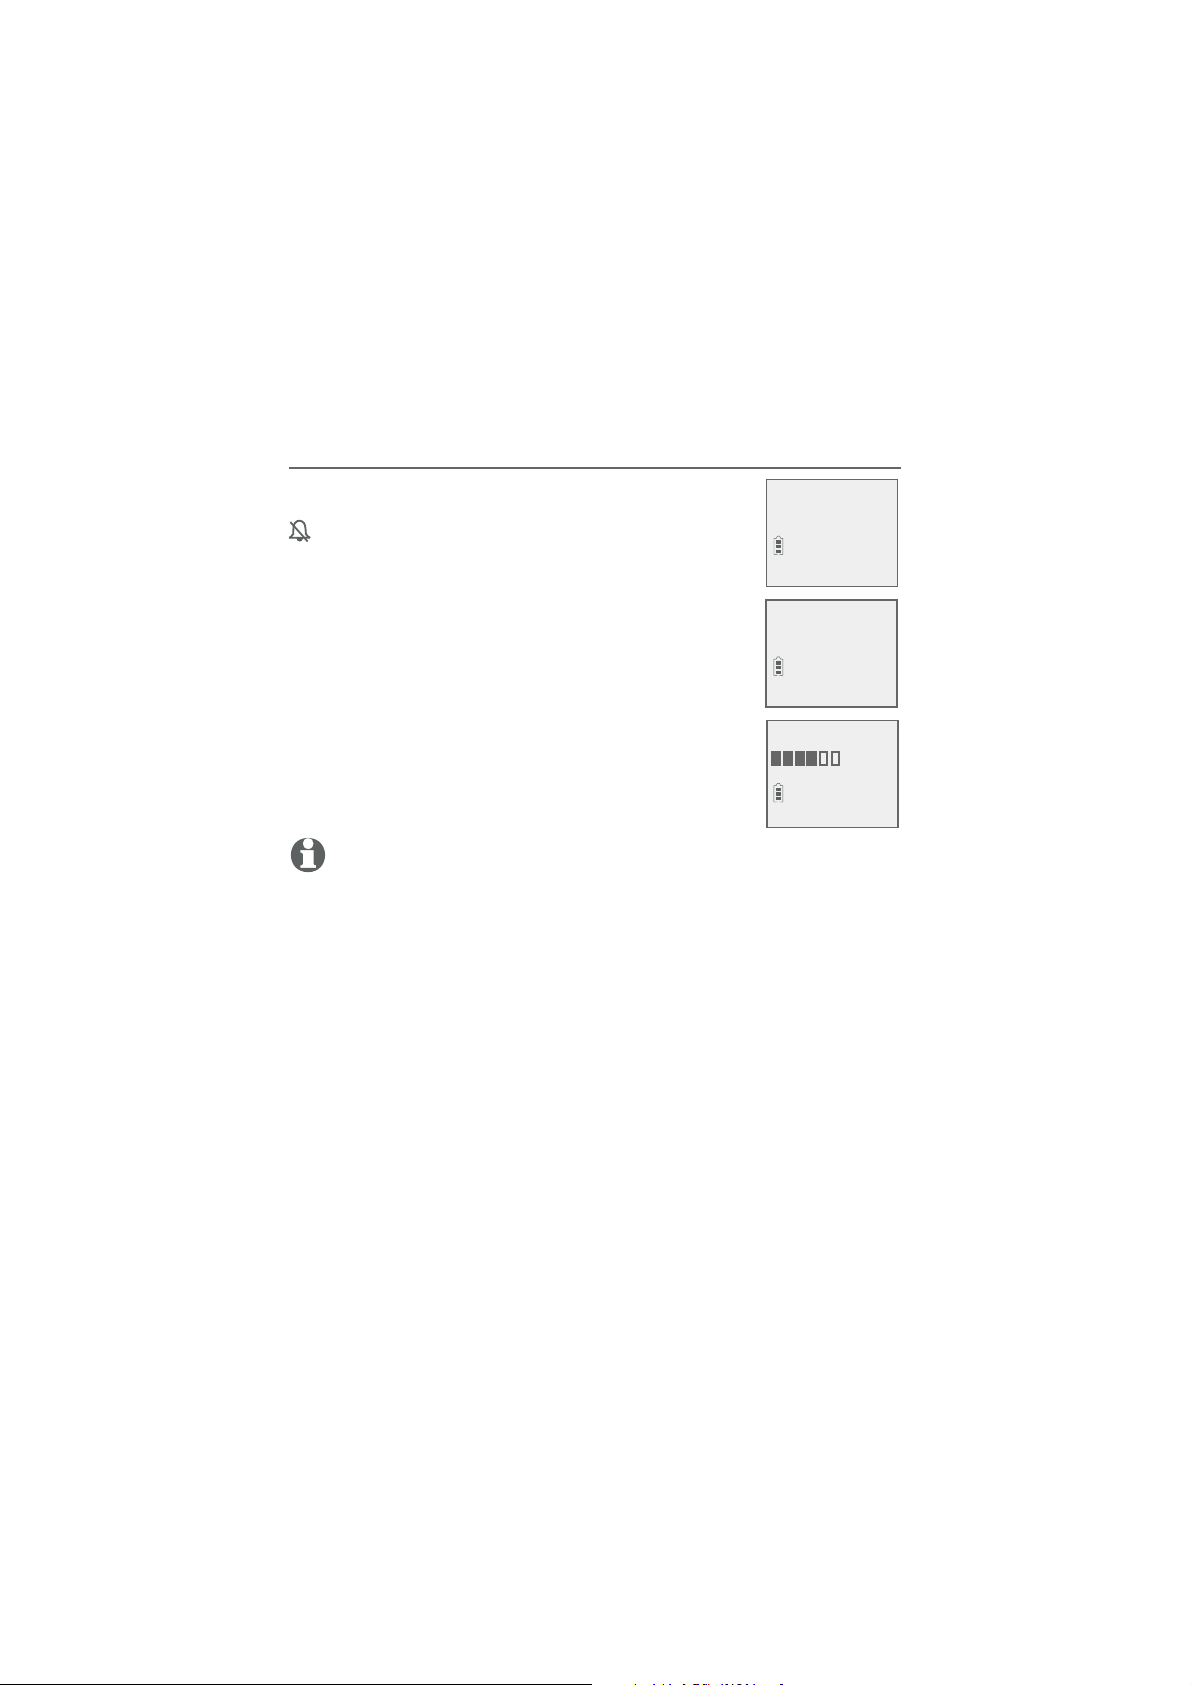
You can set the ringer volume level to one of six
levels or turn the ringer off. When the ringer is off,
appears on the screen.
1. Press MENU/SELECT in idle mode to enter the
main menu.
2. Use
CID or DIR to scroll to Ringers, then press
MENU/SELECT.
3. Press MENU/SELECT again to select Ringer
volume.
4. Press CID or DIR to sample each volume level.
5. Press MENU/SELECT to save your preference. There
is a confirmation tone and the screen returns to the
previous menu.
NOTES:
The handset ringer volume also determines the ringer volume for
•
intercom calls.
If the ringer volume is set to off, that handset is silenced for all incoming calls
•
except paging tone.
If the ringer volume is set to off, the caller ID will not be announced and the screen
•
will briefly display Caller ID won’t be announced.
Intercom
>Ringers
>
Ringer volume
Ringer tone
RINGER VOLUME
14
Page 22
Telephone settings
Handset settings
Ringer tone
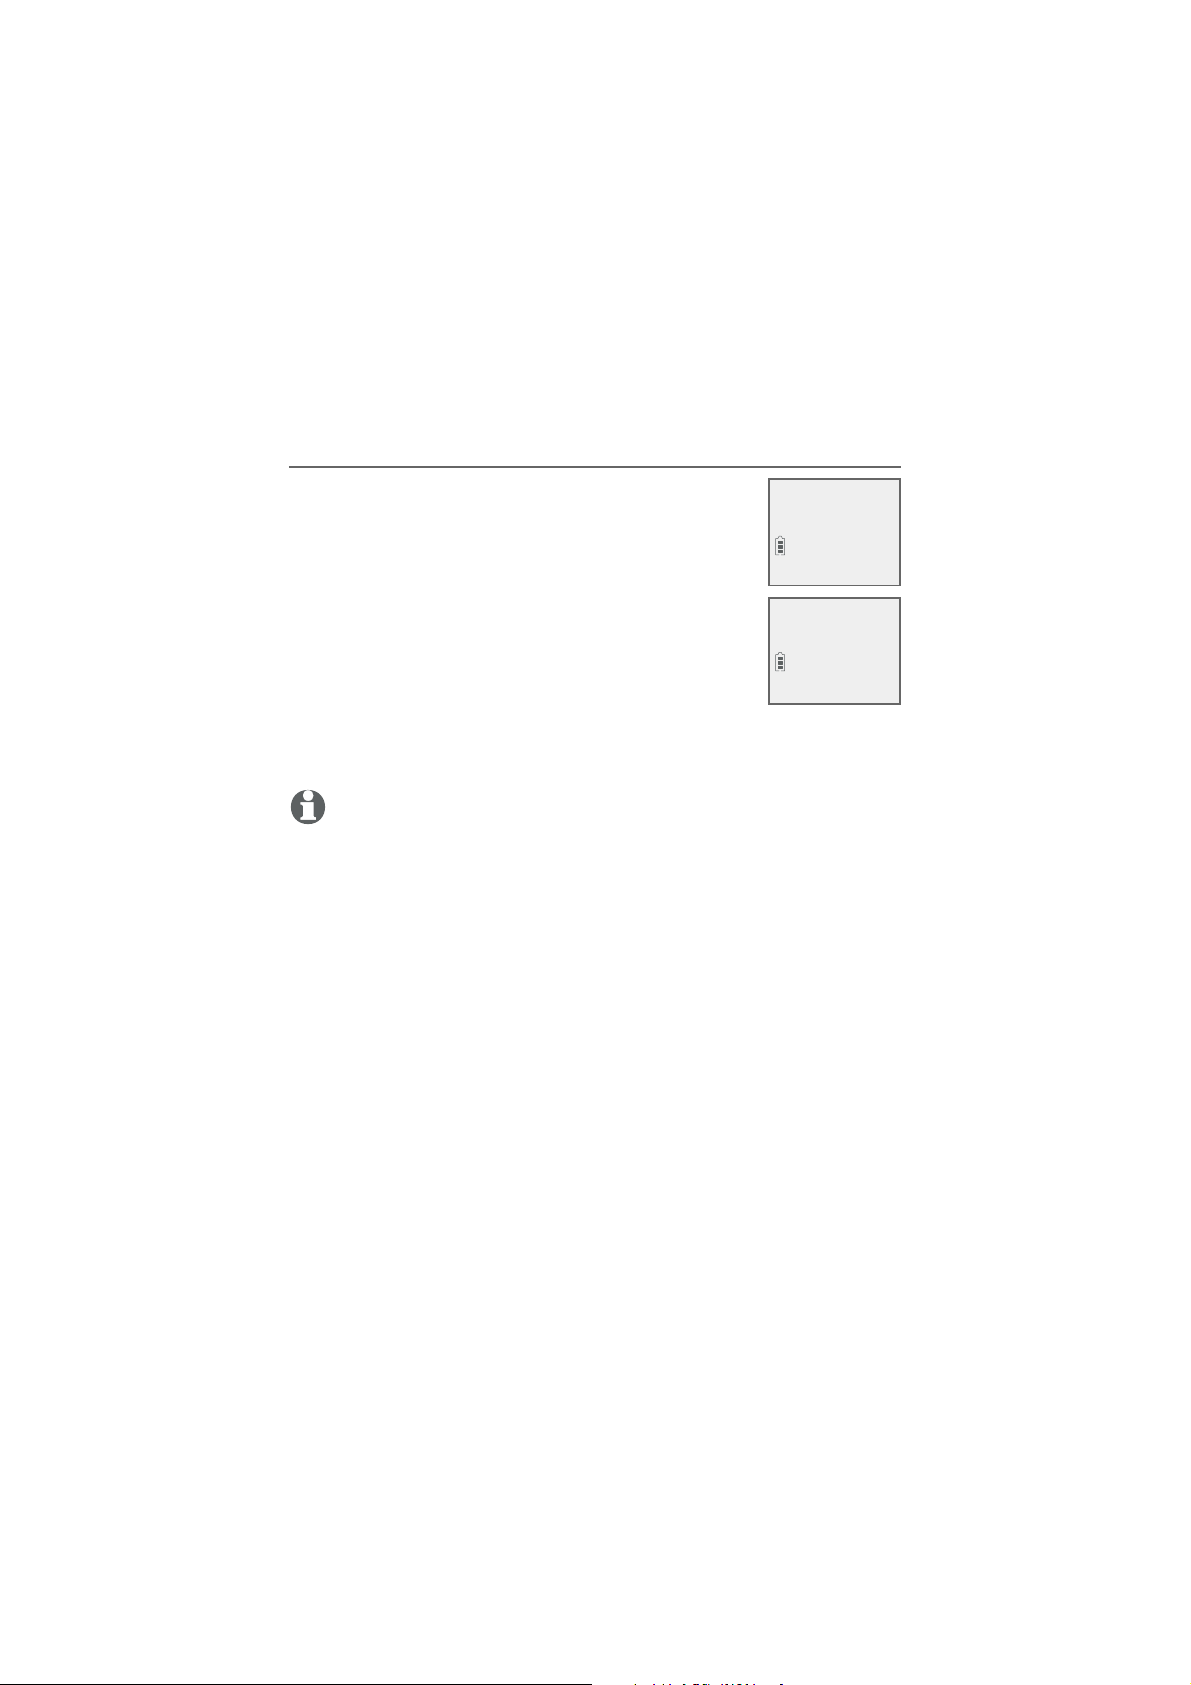
You can choose one of ten ringer tones.
1. Press MENU/SELECT in idle mode to enter the
main menu.
2. Use
CID or DIR to scroll to Ringers, then press
MENU/SELECT.
3. Press CID or DIR to scroll to Ringer tone, then
press MENU/SELECT.
4. Press CID or DIR to sample each ringer tone.
5. Press
MENU/SELECT to save your preference.
There is a confirmation tone and the screen returns to the
previous menu.
NOTE: If you turn off the ringer volume, you will not hear ringer tone samples.
Ringer volume
>
Ringer tone
RINGER TONE
>
Tone 1
15
Page 23

Telephone settings
Handset settings
Set date/time
The answering system announces the day and time of each
message prior to playing it. Before using the answering system,
set the date and time as follows. If you subscribe to caller ID
service, the day, month and time are set automatically with each
incoming call. The year must be set so that the day of the week
can be calculated from the caller ID information. You can turn
off the date and time settings of the caller ID service and set the
date and time manually (see Use caller ID to automatically set
date and time on page 24).
After a power failure or handset registration, the system prompts you
to set the date and time.
To set the date and time manually:
When the handset is in idle mode, press MENU/
1.
SELECT to enter the main menu.
Press CID or DIR to scroll to Set date/time
2.
and then press
3.
Press CID or DIR to select the month, then
MENU/SELECT.
press MENU/SELECT, or enter the number using
the dialing keys.
4.
Press CID or DIR to select the day, then press
MENU/SELECT, or enter the number using the
dialing keys.
Press
5.
CID or DIR to select the year, or enter
the number using the dialing keys, then press
MENU/SELECT to move on to set the time.
Press CID or DIR to select the hour, then press
6.
MENU/SELECT, or enter the number using the dialing keys.
Press CID or DIR to select the minute, then press
7.
MENU/SELECT, or enter the number using the dialing keys.
Ringers
>Set date/time
SET DATE
MM/DD/YY
SET TIME
HH:MM --
16
Page 24
Telephone settings
Handset settings
Press CID or DIR to highlight AM or PM, or press 2 for AM or
8.
7 for PM. Press MENU/SELECT to confirm. There is a confirmation
tone and the screen returns to the previous menu.
NOTE: If the clock is not set when a message is recorded, the system announces,
“Time and day not set,” before it plays the message.
LCD language
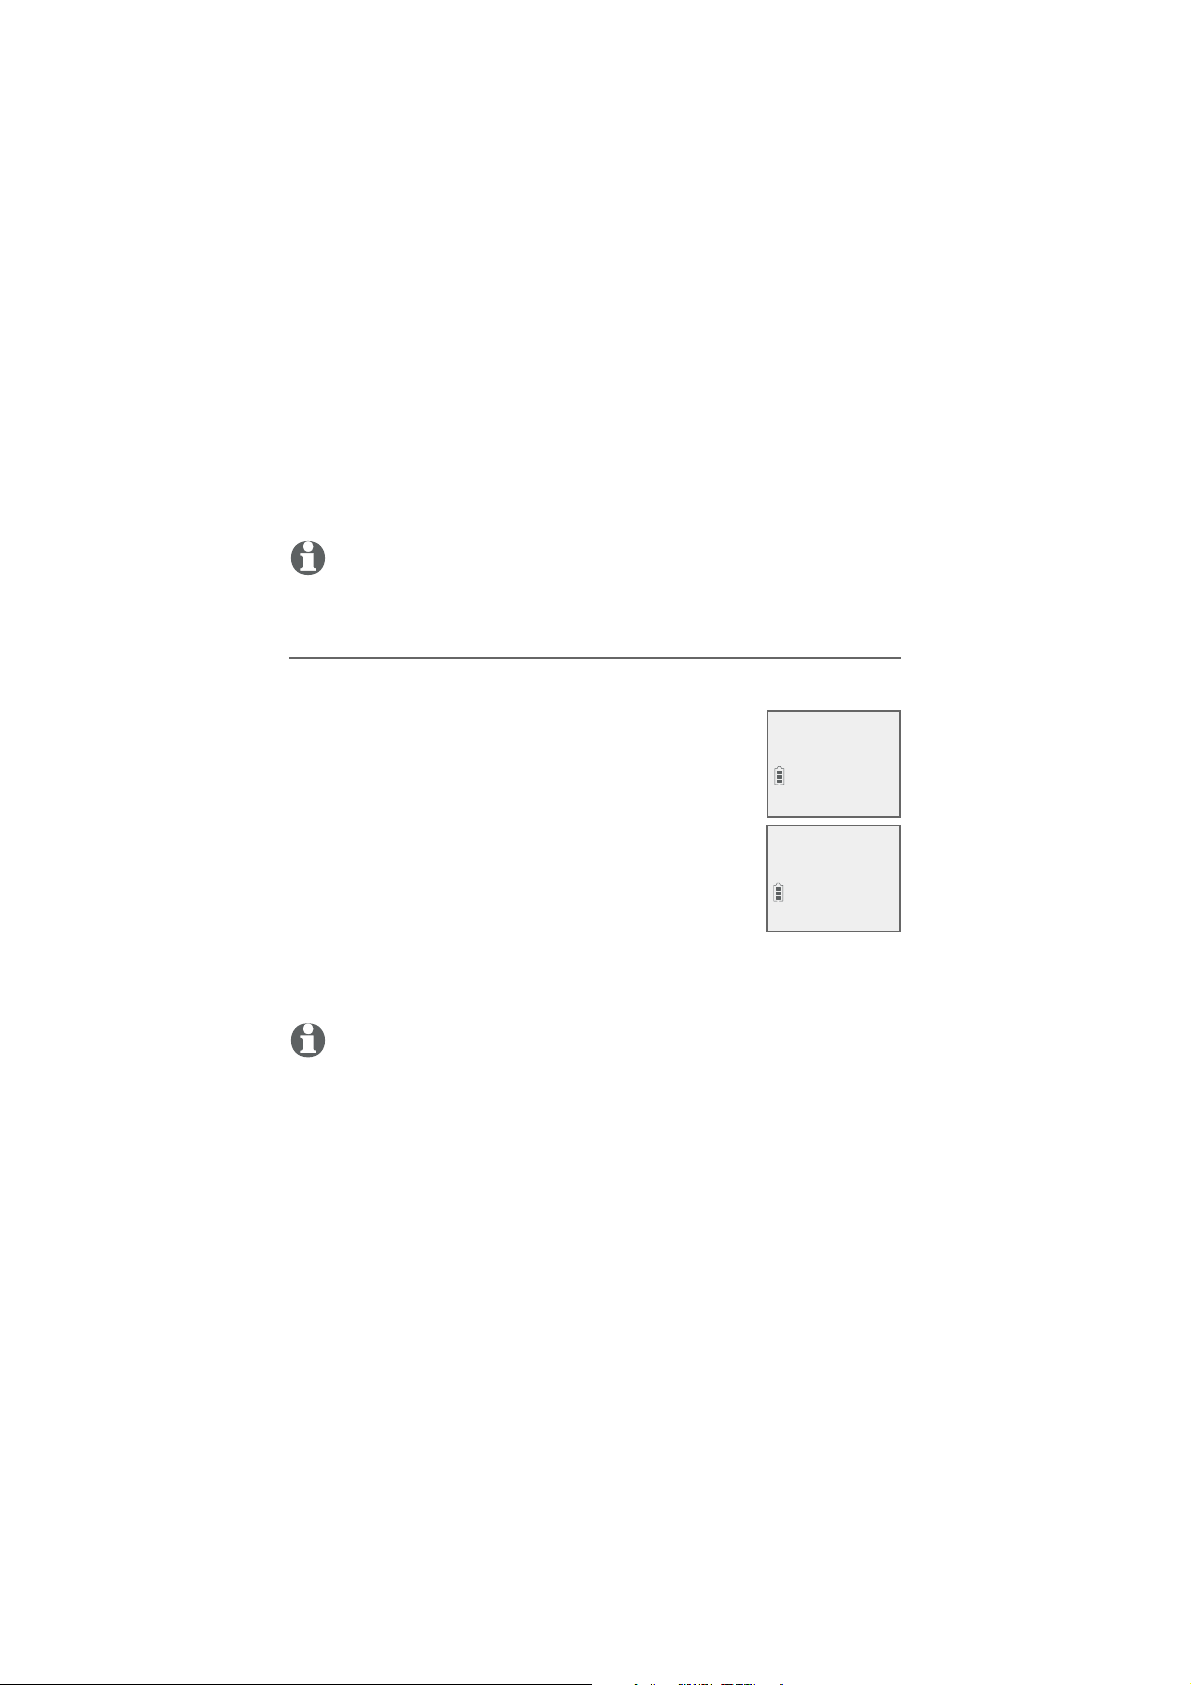
You can select the language used for all screen displays.
1. Press MENU/
main menu.
2. Use CID or DIR to scroll to Settings, then
SELECT in idle mode to enter the
LCD LANGUAGE
>
English
press MENU/SELECT.
3. Press
4. Press CID or DIR to highlight English, Français
MENU/SELECT to choose LCD language.
or Español, then press
MENU/SELECT. The screen
Set Francais as
LCD language?
prompts Set English/Français/Español as LCD
language?
5. Press MENU/SELECT to save your preference.
There is a confirmation tone and the screen returns to the
previous menu.
NOTE: If you accidentally change the LCD language to French or Spanish, you
can reset it back to English without going through the French or Spanish menus.
Press MENU/SELECT on the handset in idle mode, then enter 364#. There is a
confirmation tone.
17
Page 25
Telephone settings
Handset settings
Caller ID announce
The caller ID announce feature lets you know who’s calling without
having to look at the display. When you have an incoming call, the
handset and/or base speaks “Call from...” and the name of the caller
based on the directory or caller ID information. If the caller’s name is
private or unknown, the phone number up to the last 11 digits will be
announced. If the caller’s phone number is also private or unknown,
no information will be announced. The default setting is On.
To turn on or off the caller ID announce feature:
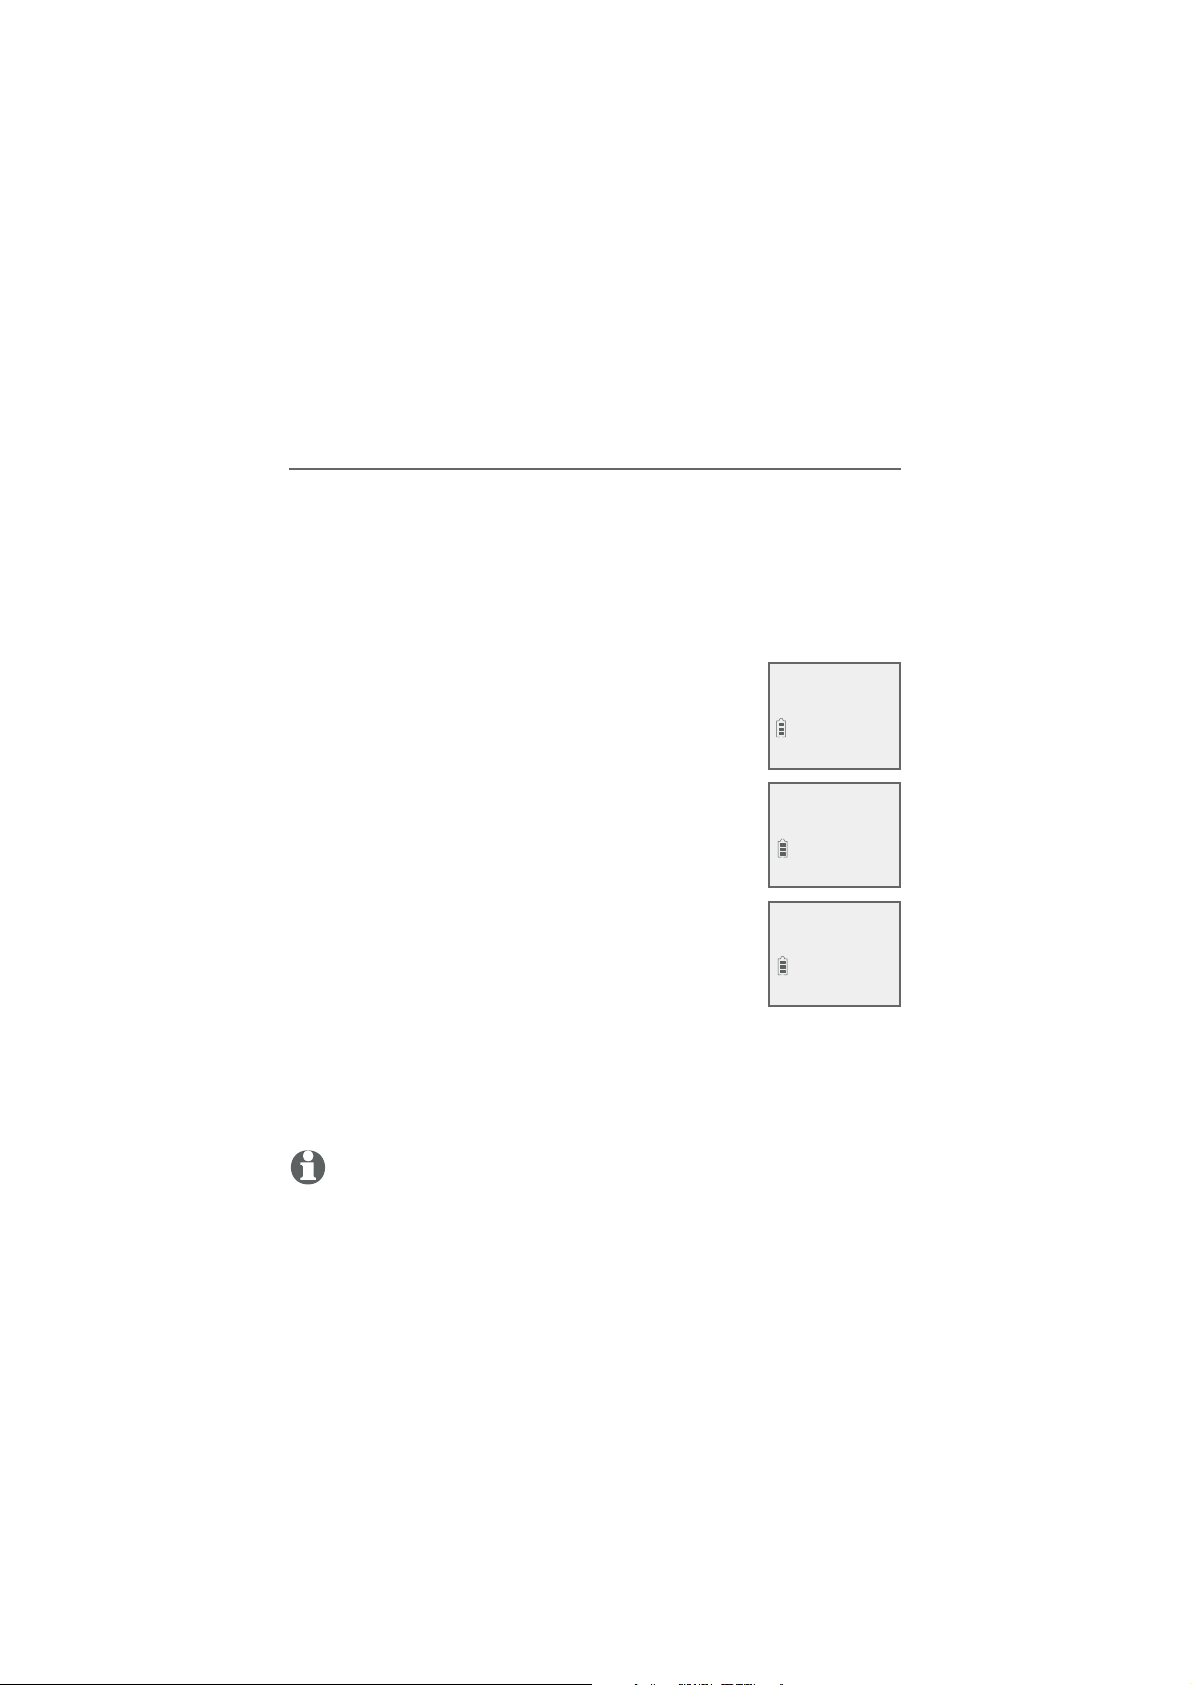
1. Press MENU/
SELECT in idle mode to enter the
main menu.
2. Use CID or DIR to scroll to Settings, then press
MENU/SELECT.
3. Use
CID or DIR to scroll to Caller ID annc,
then press MENU/SELECT.
4. Use CID or DIR to highlight the desired
option, then press MENU/SELECT.
Set all On/Off - Change the setting for the
•
base and all handsets.
•
Local handset - Change the setting for that
handset only.
Base - Change the setting for the telephone
•
base only.
5. Use
CID or DIR to highlight On or Off, then press
MENU/SELECT. There is a confirmation tone and the screen
returns to the previous menu. If you change the setting to Set all
On/Off, the screen shows CID Annc ON/OFF on all HS & BS.
LCD language
>Caller ID annc
CALLER ID ANNC
>Local handset
HS CID ANNOUNCE
>On
NOTES:
To use the caller ID announce feature, you must subscribe to caller ID service from
•
your telephone service provider.
When there are up to five handsets registered, the telephone system supports caller
•
ID announce for all handsets. If six or more handsets are registered, the system supports caller ID announce for the first four registered handsets only.
18
Page 26

Telephone settings
Handset settings
This feature does not announce information for call waiting calls.
•
It takes at least two rings for the phone to receive caller ID information and
•
announce it. If the phone is answered before the end of the second ring, the phone
won’t have time to announce the caller’s information.
Pronunciation of names may vary with this feature. Not all names may be
•
pronounced correctly.
Caller ID announce is available in English only.
•
19
Page 27
Telephone settings
Handset settings
Set speed dial voicemail number
This feature lets you save your voicemail number
for easy access when you press and hold the
key.
To save your voicemail number:
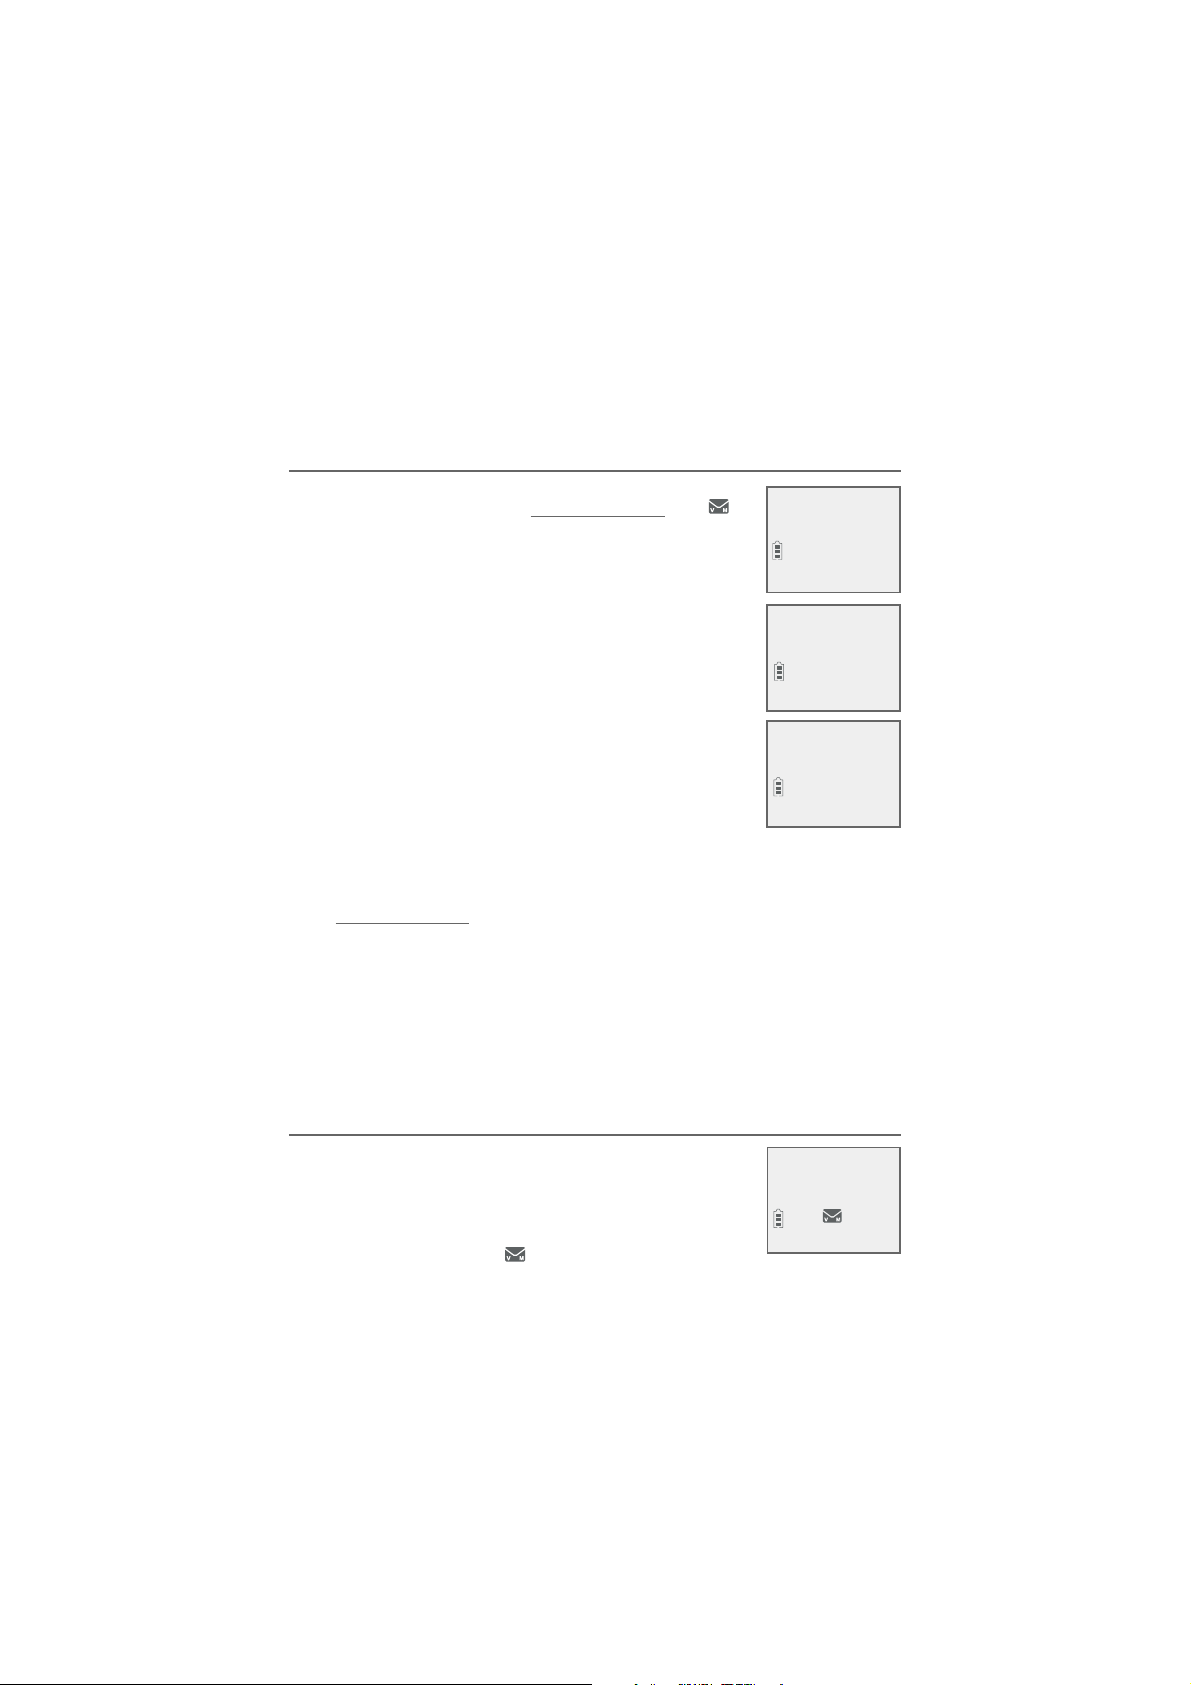
1. Press MENU/
SELECT in idle mode to enter the
main menu.
2. Use CID or DIR to scroll to Settings, then
press MENU/SELECT.
3. Use
CID or DIR to scroll to Voicemail #, then
press MENU/SELECT.
4. Use the dialing keys to enter the voicemail access
number provided by your telephone service
provider (up to 30 digits) when prompted.
Press
•
CID or DIR to move the cursor to the
left or right.
Press MUTE/DELETE on the handset to erase a digit.
•
Press and hold
•
MUTE/DELETE on the handset to erase
all digits.
Press REDIAL/PAUSE to enter a three-second dialing pause (a
•
p appears).
5. Press
MENU/SELECT to save. There is a confirmation tone and
the screen displays Voicemail # saved, then returns to the
previous menu.
1
Caller ID annc
>Voicemail #
VOICEMAIL #
800-222-3111_
Voicemail #
saved
Voicemail (visual message waiting) indicator
If you subscribe to a voicemail service offered
by your telephone service provider, this feature
provides a visual indication when you have new
voicemail messages.
New voicemail and the
icon appear on the
handset screen.
20
HANDSET 1
New voicemail
AM
10:21PM
2/11
Page 28

Telephone settings
Handset settings
NOTES:
This feature does not indicate new messages recorded on your phone’s built-in
•
answering system.
For more information about the difference between your answering system and
•
voicemail, see page81.
Clear voicemail indication
Use this feature when the telephone indicates that you have new
voicemail but there is none. For example, when you have accessed
your voicemail while away from home. This feature only turns off
the displayed New voicemail and the
your voicemail messages. As long as you have new voicemail
messages, your telephone service provider continues to send the
signal to turn on the indicators.
To manually turn off the new voicemail indicators:
1. Press MENU/
SELECT when in idle mode to enter
the main menu.
2. Use
CID or DIR to scroll to Settings, then
press MENU/SELECT.
3. Use CID or DIR to scroll to Clr voicemail,
then press MENU/SELECT. The screen shows
Reset Voicemail Indicator?
4. Press
MENU/SELECT again to turn the voicemail
indication off. There is a confirmation tone and
the screen returns to the previous menu.
icon; it does not delete
>
Clr voicemail
Rename handset
Reset Voicemail
Indicator?
NOTES:
Your telephone service provider voicemail may alert you to new messages with a
•
stutter (broken) dial tone. Contact your telephone service provider for more details.
For information about using your voicemail service, contact your telephone service
•
provider.
21
Page 29

Telephone settings
Handset settings
Rename handset
You can edit the handset name for each system
handset.
1. When the handset is idle, press MENU/SELECT.
2. Use CID or DIR to scroll to Settings, then press
MENU/SELECT.
3. Use CID or DIR to scroll to Rename handset,
then press MENU/SELECT.
4. Change the handset name when prompted.
Press
•
CID or DIR to move the cursor to the
left or right.
Use the dialing keys to enter a name (up to 11 characters).
•
Each time you press a key, a character on that key appears.
Additional key presses produce other characters on that key.
See the chart on page 49.
Press
•
•
MUTE/DELETE to backspace and delete a character.
Press and hold
MUTE/DELETE to delete all characters.
5. Press MENU/SELECT to save the setting and return to the
previous menu. There is a confirmation tone.
Clr voicemail
>
Rename handset
RENAME HANDSET
HANDSET____
22
Page 30

Telephone settings
Handset settings
Key tone
The handset is set to beep with each key press. You can adjust the
key tone volume or turn it off. If you turn off the key tone, there
are no beeps when you press keys.
1. Press MENU/
SELECT in idle mode to enter the
main menu.
2. Use
CID or DIR to scroll to Settings, then
press MENU/SELECT.
3. Use
CID or DIR to scroll to Key tone, then
press MENU/SELECT.
4. Use CID or DIR to select the desired volume
or Off.
5. Press
MENU/SELECT to save your preference.
There is a confirmation tone and the screen
returns to the previous menu.
Rename handset
>
Key tone
KEY TONE
23
Page 31

Telephone settings
Handset settings
Use caller ID to automatically set date and time
If you subscribe to caller ID service, the day,
month and time are set automatically with each
incoming call. Follow the steps to turn the CID
time sync feature on or off. The default setting is
On.
Key tone
>CID time sync
1. When the handset is in idle mode, press MENU/
SELECT to enter the main menu.
CID TIME SYNC
>On
2. Press CID or DIR to scroll to Settings, then
press
MENU/SELECT.
3. Press CID or DIR to scroll to CID time sync,
then press MENU/SELECT.
4. Press
CID or DIR to highlight On or Off, then press
MENU/SELECT to save. There is a confirmation tone and the
screen returns to the previous menu.
24
Page 32
Telephone settings
Handset settings
Home area code
If you dial seven digits to make a local call (no area code required),
enter your area code into the telephone as the home area code.
When you receive a call from within your home area code, the
caller ID log only displays the seven digits of the telephone
number.
This feature makes it easy for you to place a call from the caller
ID log. If you dial ten digits to make a local phone call, do not use
this home area code feature. If you do, you cannot place local calls
from your caller ID log, as they will have only seven digits.
To set the home area code:
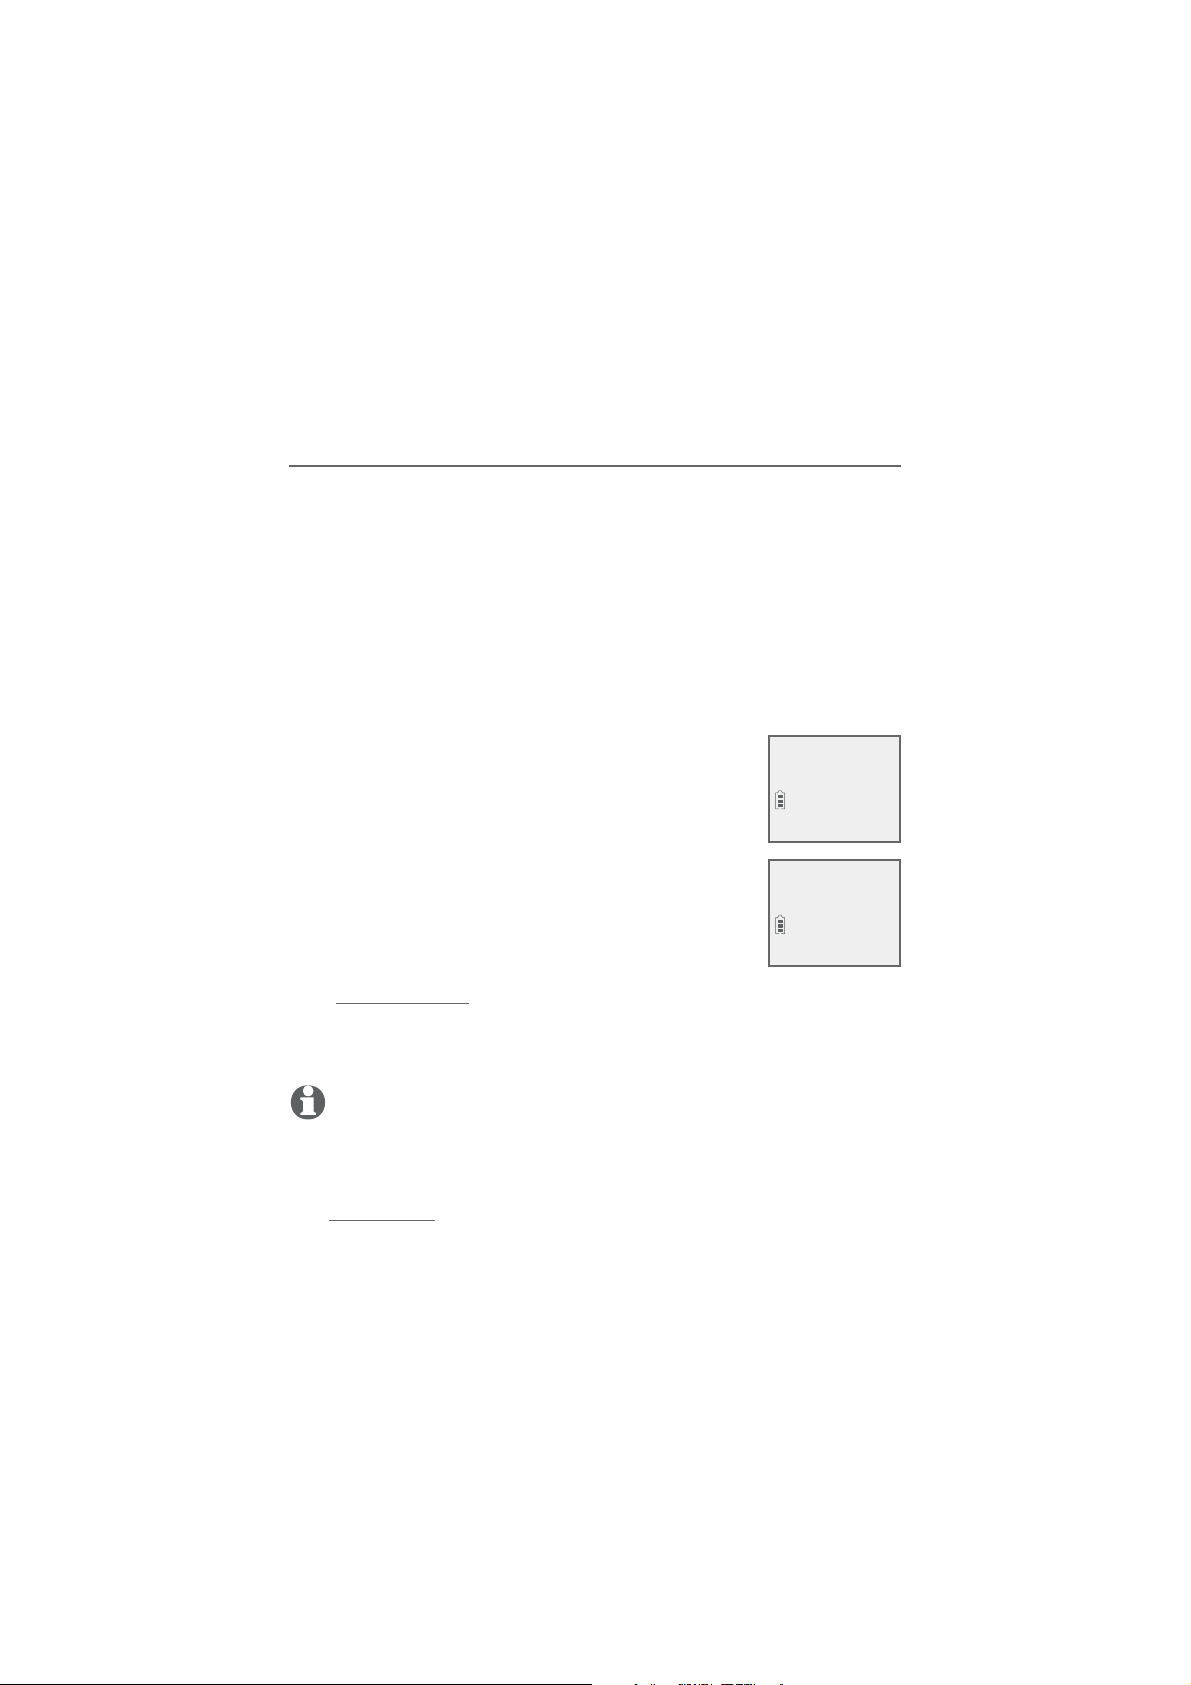
1. Press MENU/
main menu.
2. Use
CID or DIR to scroll to Settings, then
press MENU/SELECT.
3. Use CID or DIR to scroll to Home area code,
then press MENU/SELECT. The screen briefly
shows Only for 7digit dial from CID.
4. Use the dialing keys to enter a three-digit home
area code.
Press
•
Press and hold
•
5. Press MENU/SELECT to save. There is a confirmation tone and
the screen shows Area code will not show in CID briefly before
returning to the previous menu.
SELECT in idle mode to enter the
MUTE/DELETE to delete a digit.
MUTE/DELETE to delete all digits.
CID time sync
>Home area code
HOME AREA CODE
___
NOTE: If in the future, your telephone service provider requires you to dial ten
digits to make a local call (area code plus telephone number), you need to
delete your home
area code and dial out locally from the call ID log. With the home area code
displayed,
press and hold
SELECT.
The home area code is now restored to its default setting of _ _ _ (empty).
MUTE/DELETE until the digits are deleted, and then press MENU/
25
Page 33
Telephone settings
Handset settings
Dial mode
The dial mode is preset to tone dialing. If you have pulse (rotary)
service, you must change the dial mode to pulse dialing before
using the telephone.
To set the dial mode:
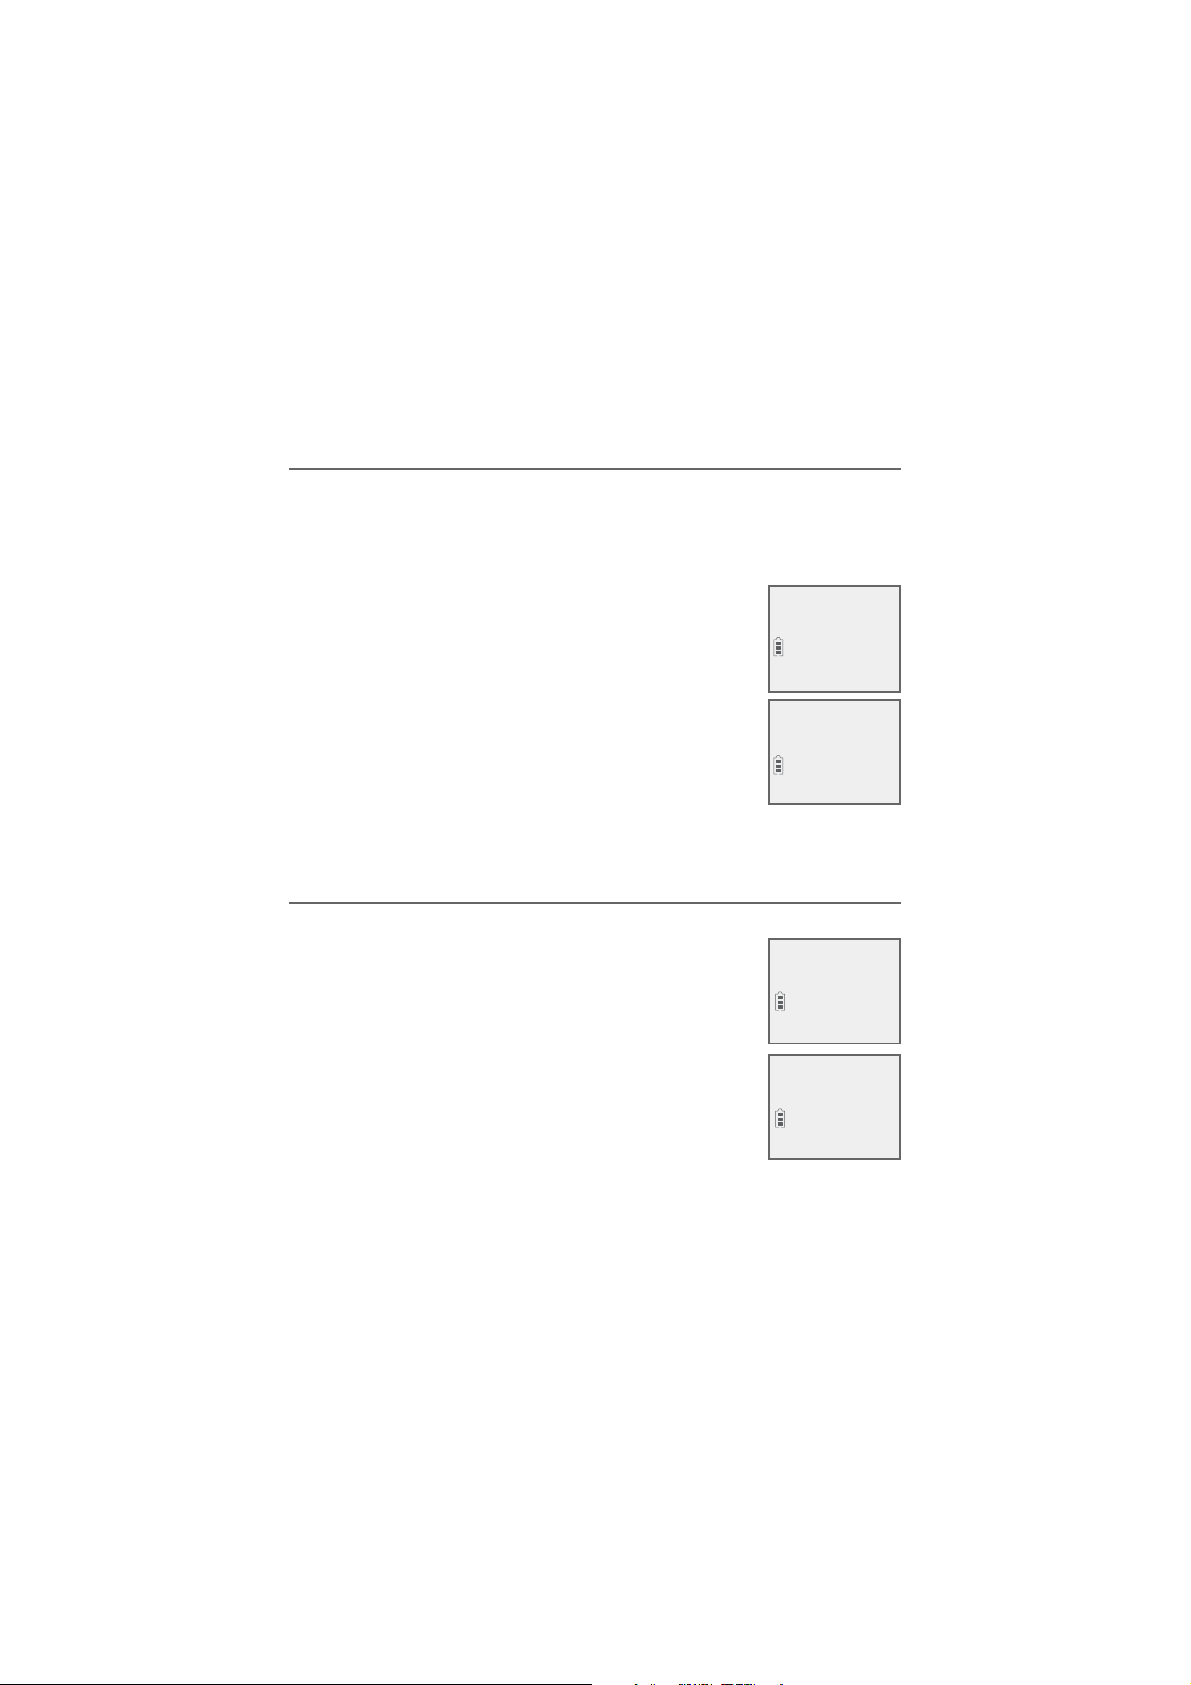
1. Press MENU/
main menu.
2. Use CID or DIR to scroll to Settings, then
press MENU/SELECT.
3. Use
CID or DIR to scroll to Dial mode, then
press MENU/SELECT.
4. Use CID or DIR to highlight Touch-tone or
Pulse, then press MENU/SELECT. There is a
confirmation tone and the screen returns to the
previous menu.
Web address
Use this feature to view the AT&T website address.
SELECT in idle mode to enter the
Home area code
>Dial mode
DIAL MODE
>Touch-tone
1. Press MENU/
SELECT in idle mode to enter the
main menu.
2. Use
CID or DIR to scroll to Web address,
then press MENU/SELECT.
26
Settings
>
Web address
www.telephones.
att.com
Page 34

Telephone settings
Handset settings
QUIET mode
When QUIET mode is turned on, the telephone silences all sounds
during the set period of time (1-12 hours). However, the handset
locator paging tone and any sound-generating operations initiated
by users, such as making calls using the speakerphone or setting
ringer volume, will sound as normal. After you turn on QUIET mode,
this feature activates immediately and the answering system turns
on automatically. When QUIET mode is on, the answering system
takes calls and records messages without broadcasting them.
To turn QUIET mode on:
1. Press and hold QUIET # in idle mode to enter the QUIET mode
setting screen. The screen shows Quiet: _ _ hours (1-12 hours).
2. Use the dialing keys to enter the desired number of hours (1-
12) you would like to turn on QUIET mode, then press
SELECT. Your screen briefly shows Answering sys is ON and
then Quiet mode on.
To turn QUIET mode off:
While QUIET mode is on, press and hold QUIET #. The screen
•
then shows Quiet mode is off and you hear a confirmation tone.
MENU/
NOTES:
•
If you change the base ringer, handset ringer, ringer volume, key tone, or caller ID
announce features when QUIET mode is on, the sample plays but the feature is still
muted after saving the setting.
After QUIET mode is turned off or the set period of time has expired, all muted fea-
•
tures will be activated again.
The PTT function is not available when QUIET mode is on.
•
Intercom is available during QUIET mode, but the handset will not ring.
•
27
Page 35
Telephone operation
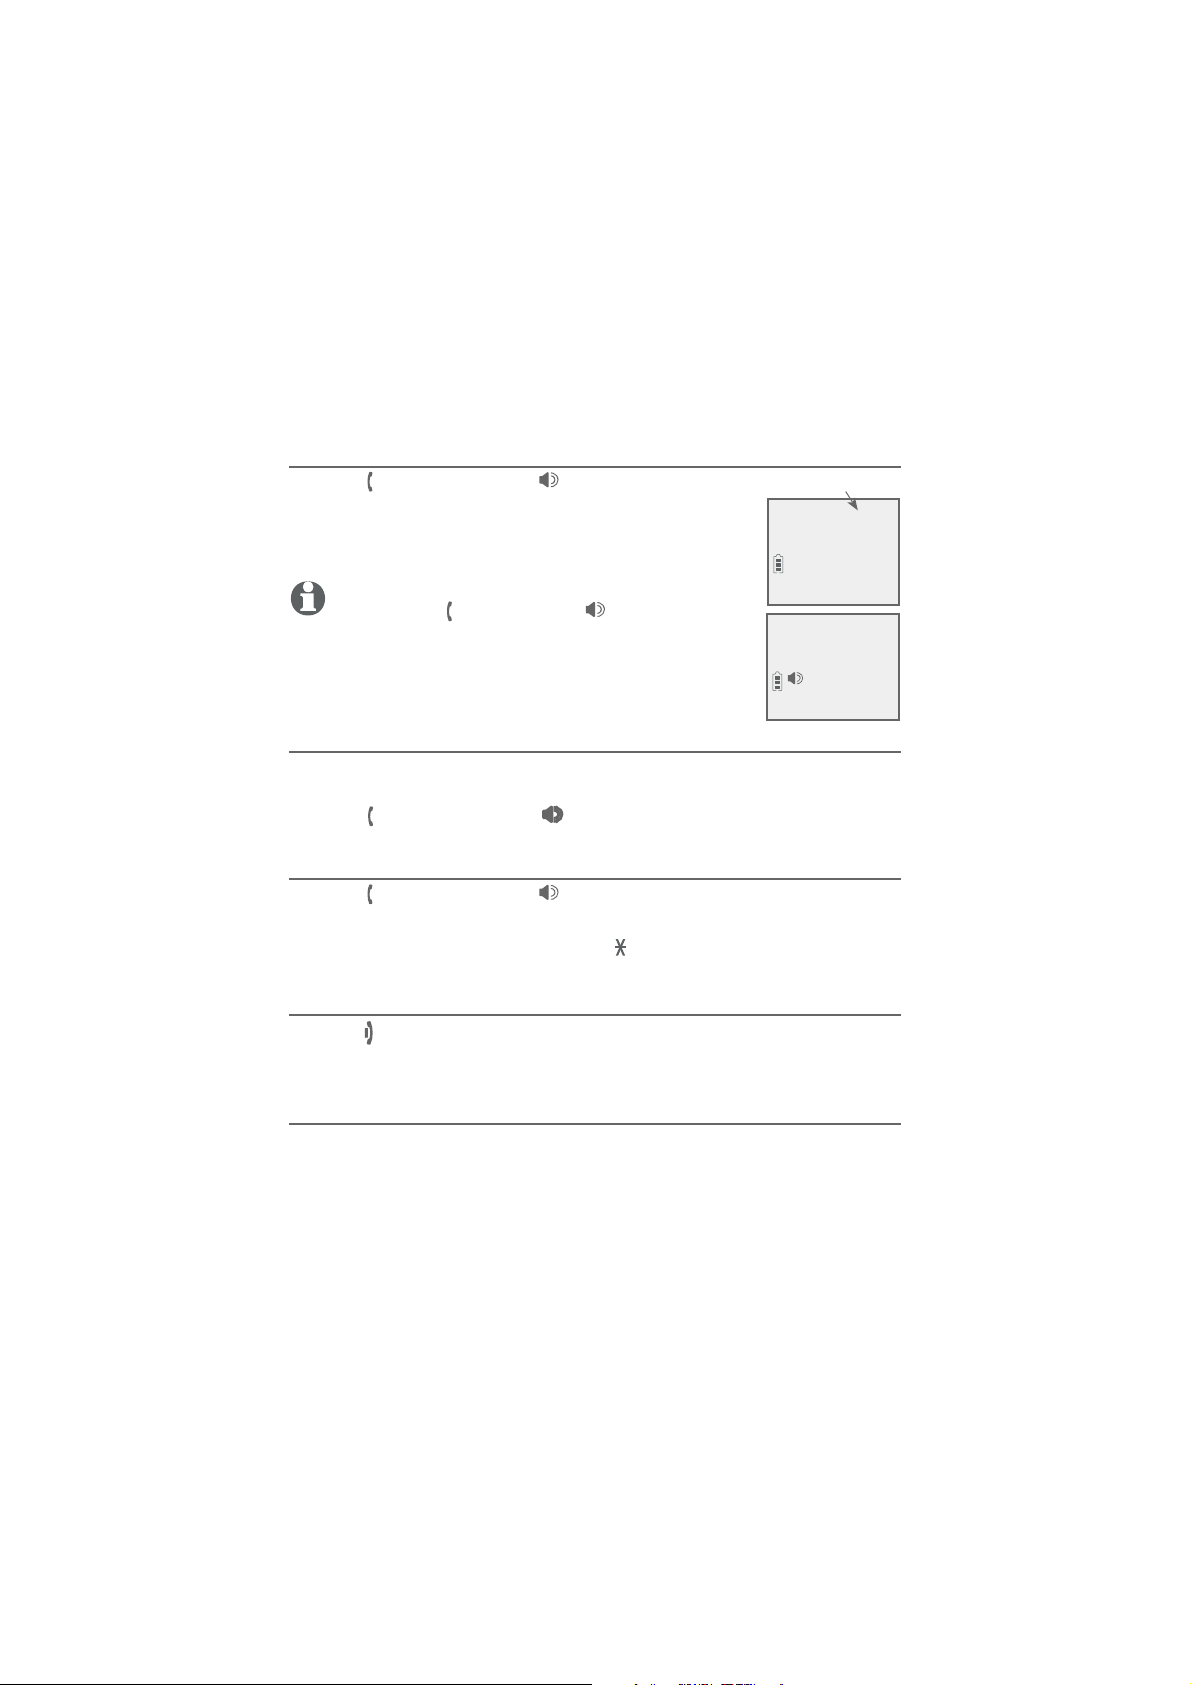
Telephone operation
Making a call
PHONE/FLASH or /SPEAKERSPEAKER, then
Press
•
enter the telephone number.
The screen displays the elapsed time as you talk
(in hours, minutes and seconds).
NOTE: Pressing PHONE/FLASH or /SPEAKERSPEAKER to
access services from your telephone service provider
does not affect the elapsed time.
On hook dialing (predialing)
1. Enter the telephone number. Press
corrections when entering the phone number.
2. Press PHONE/FLASH or /SPEAKERSPEAKER to dial.
Answering a call
Press
•
PHONE/FLASH or /SPEAKERSPEAKER.
-OR-
Press any dialing key (0-9, TONE or #).
•
MUTE/DELETE to make
Elapsed time
Phone 0:00:30
AM
6:30
Speaker 0:00:30
6:30
8/06
AM
8/06
Ending a call
Press
•
OFF/CANCEL or return the handset to the telephone base or
charger.
Auto off
A call ends automatically when you put the handset in the
telephone base or charger.
28
Page 36
Telephone operation
Telephone operation
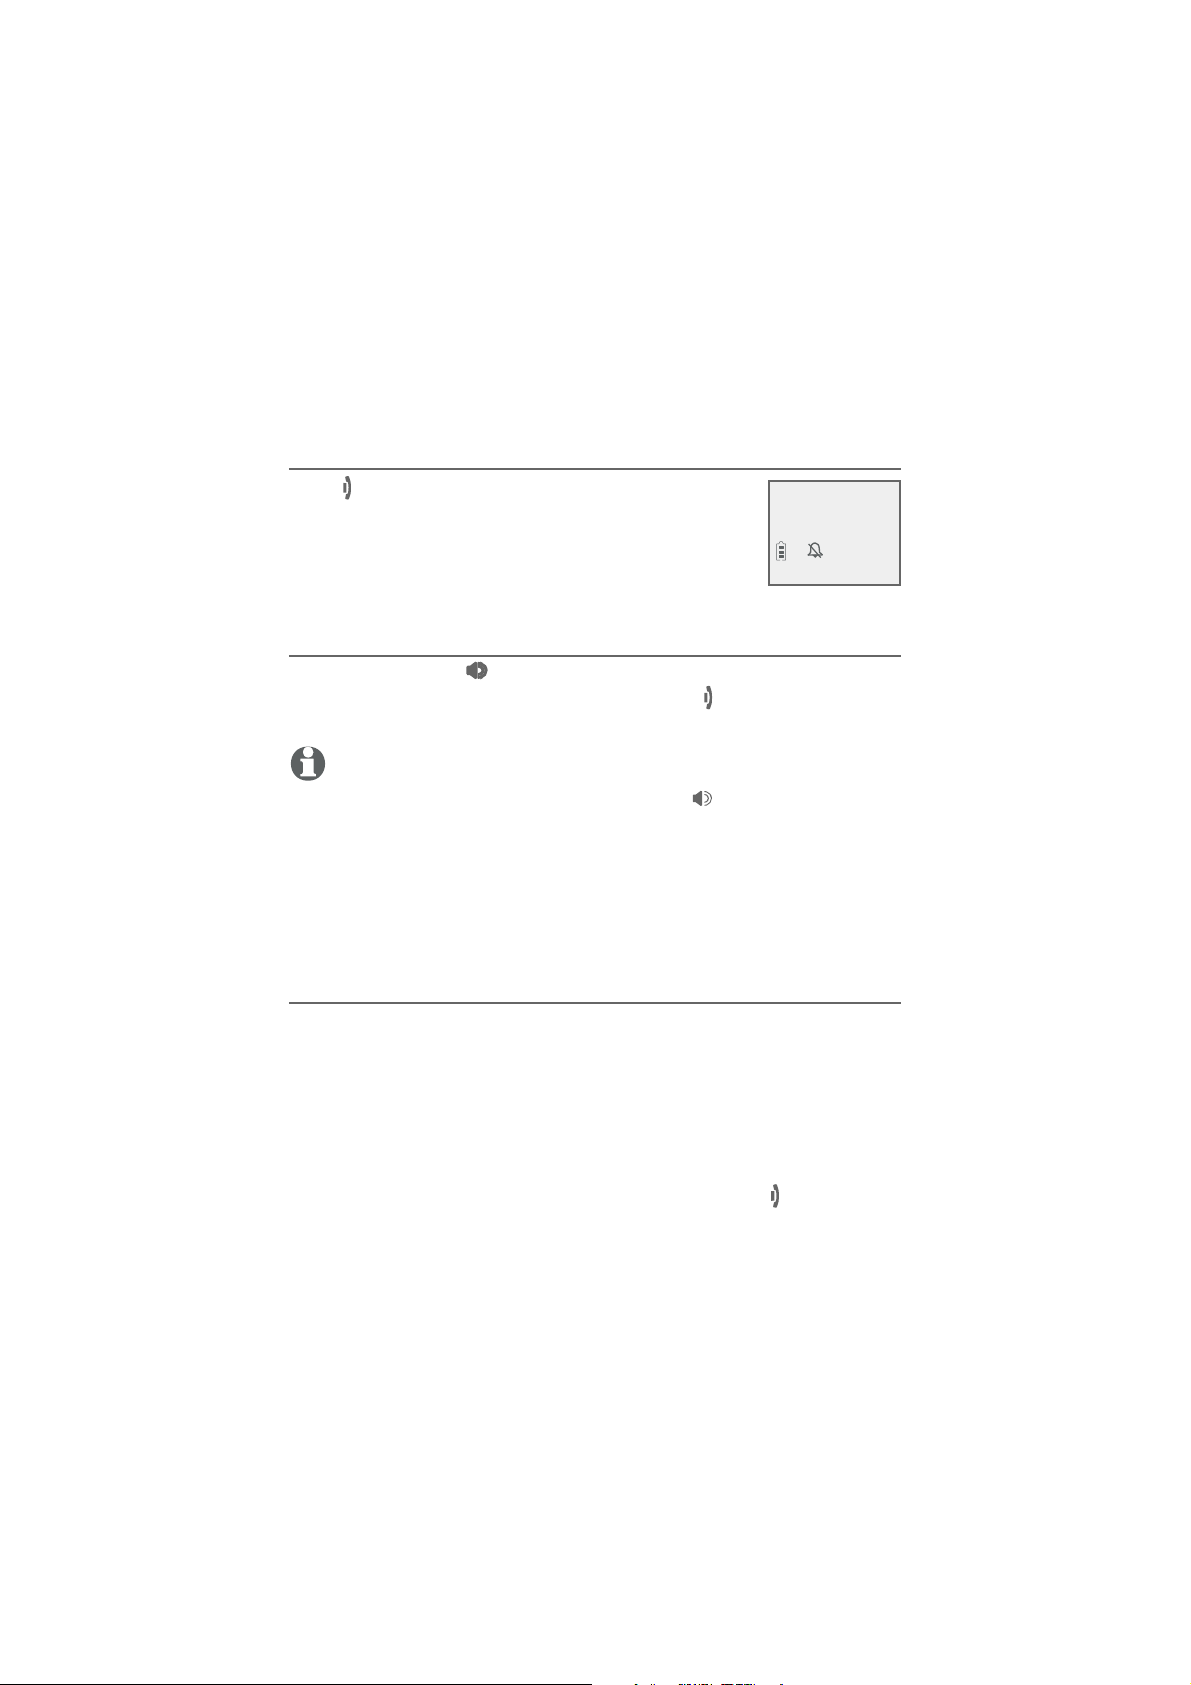
Temporary ringer silencing
Press
the telephone is ringing to silence the ringer
temporarily on that handset only. This turns off
the ringer without disconnecting the call. The next
incoming call rings normally at the preset volume.
Handset speakerphone
During a call, press
speakerphone and normal handset use. Press
return the handset to the telephone base or charger to hang up.
•
•
•
OFF/CANCEL or MUTE/DELETE while
Ringer muted
/SPEAKERSPEAKER to switch between handsfree
OFF/CANCEL or
NOTES:
When you use the speakerphone, the key pad and the
handset are lit.
The speakerphone uses more power than the normal handset. If the handset battery
becomes very low while you are using the speakerphone, the call remains in speakerphone mode until you hang up or the battery becomes depleted.
After installing a battery into the handset, the screen may show Low battery. If you
use the speakerphone at this time, the battery may become depleted. Follow the
instructions in the Battery installation and charging section on pages 8-10.
/SPEAKER button on the
Last number redial
Each handset stores the last ten telephone numbers dialed (up to
30 digits).
To view the ten most recently dialed numbers:
To display the most recently called number, press REDIAL/PAUSE.
•
To view up to ten recently called numbers, press REDIAL/
•
PAUSE, then
CID, DIR or REDIAL/PAUSE repeatedly.
The handset beeps twice at the end of the list. Press OFF/CANCEL
to exit.
29
Page 37

Telephone operation
Telephone operation
To redial a number:
•
To dial the displayed number, press
FLASH or /SPEAKERSPEAKER.
PHONE/
-OR-
•
PHONE/FLASH or /SPEAKERSPEAKER, then
Press
press REDIAL/PAUSE repeatedly to view the
redial memory. Press MENU/SELECT to dial the displayed number.
To delete a redial entry:
While the screen displays the desired number, press
•
DELETE to delete the number from the redial memory.
Redial #1/10
888-883-2445
MUTE/
30
Page 38

Telephone operation
Telephone operation
Equalizer
The handset equalizer enables you to change the quality of the
audio to best suit your hearing.
While on a call or intercom call, or listening to a message or
announcement, press EQ
Treble 2, Bass or Natural (the default setting). The current setting
is shown on the handset screen for two seconds.
NOTES:
•
If you switch the call between the handset and the
speakerphone by pressing
The current equalizer setting remains unchanged until a new setting is selected.
•
to select the equalizer setting Treble 1,
/SPEAKER, the audio setting remains unchanged.
31
Page 39

Telephone operation
Options while on calls
Volume control
You can set the listening volume to one of six
levels. While on a call, press
decrease or press
DIR/VOLUME to increase
the listening volume.
NOTES:
Handset and speakerphone volume settings are independ-
•
ent.
When the volume reaches the minimum or maximum setting, you hear two beeps.
•
Call waiting
If you subscribe to call waiting service from your telephone service
provider, and someone calls while you are already on a call, you
hear two beeps.
Press
•
PHONE/FLASH on the handset to put your current call on
hold and take the new call.
Press
•
PHONE/FLASH on your handset at any time to switch
back and forth between calls.
CID/VOLUME to
NOTE: Missed call waiting calls are not counted as missed calls.
32
Page 40
Telephone operation
Options while on calls
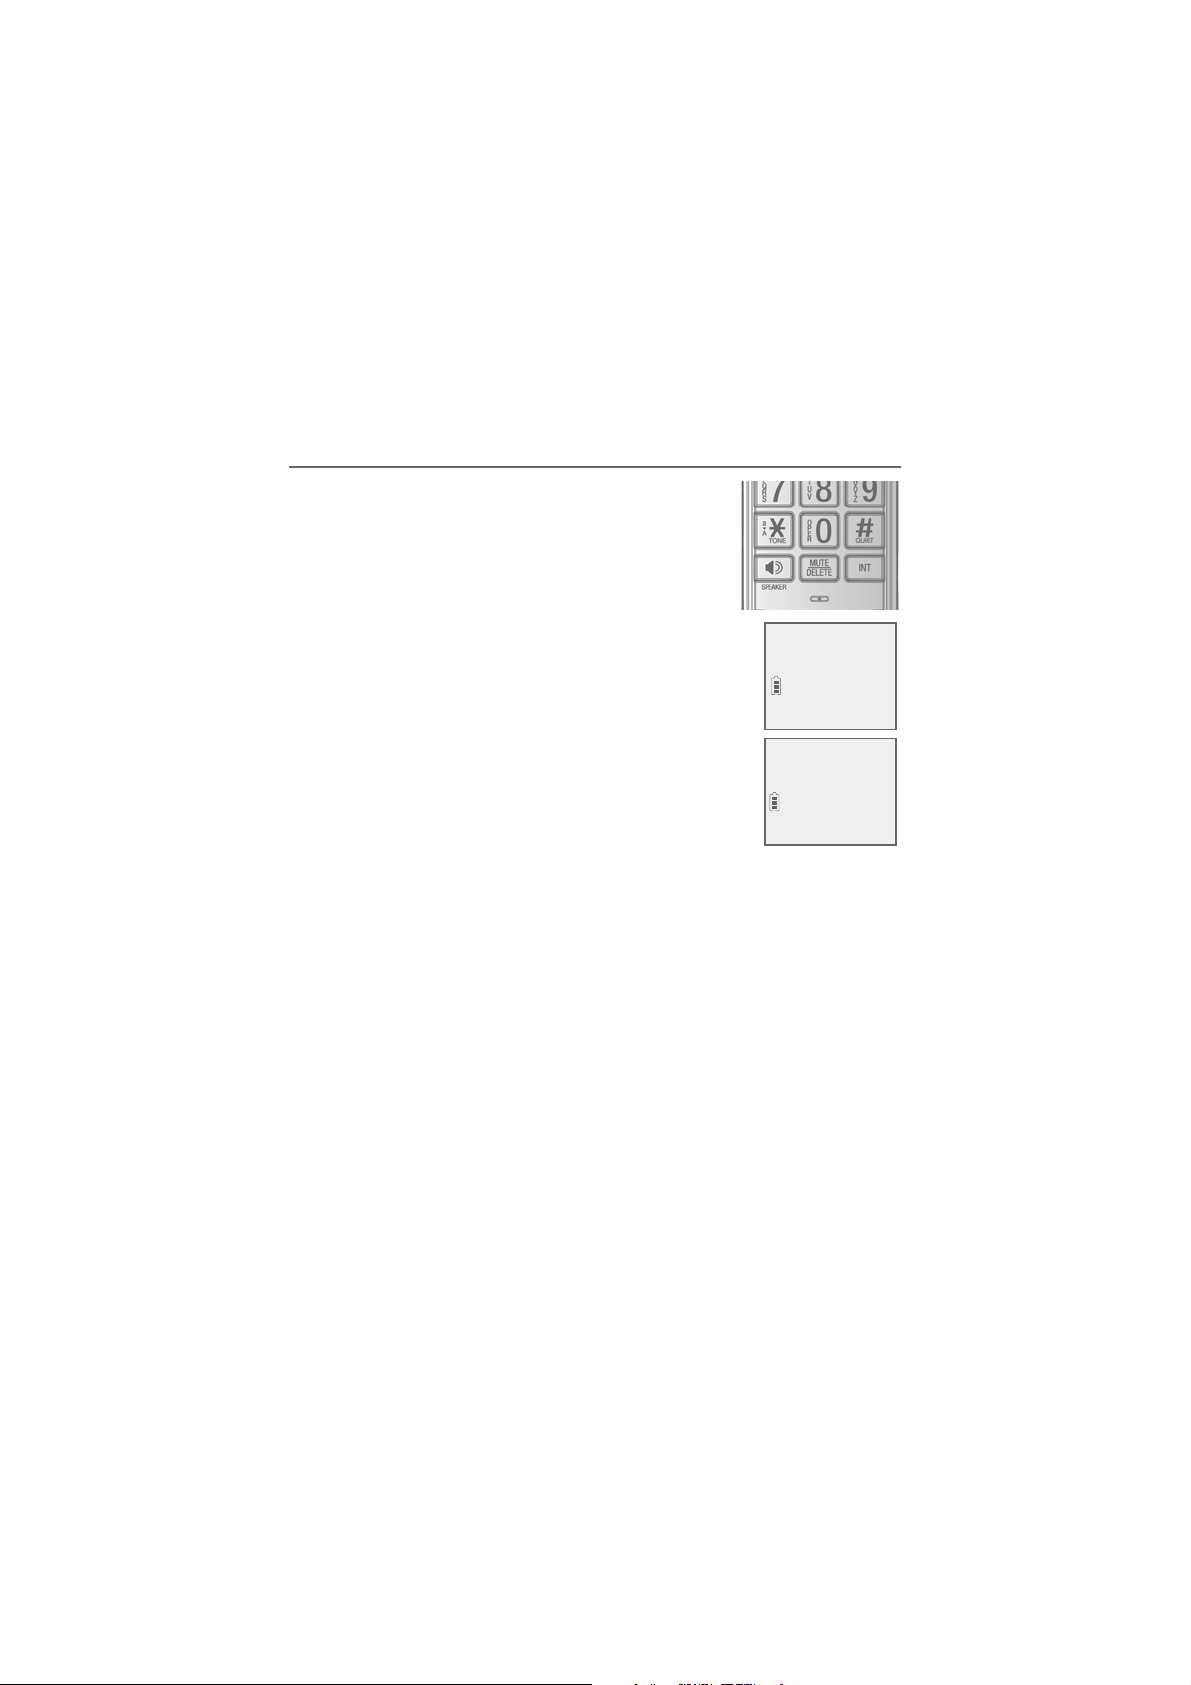
Mute
Use the mute function to turn off the
microphone. You can hear the caller, but the
caller cannot hear you.
To mute a call:
• While on a call, press MUTE/
mute is on, the handset shows Muted for a
few seconds and MUTE icon displays until you
turn off mute.
To end mute a call:
• Press MUTE/
DELETE again. When mute is off,
Microphone ON appears temporarily on the
handset.
DELETE. When
Muted
MUTE
AM
6:30
Microphone ON
6:30
8/06
AM
8/06
33
Page 41
Telephone operation
Options while on calls
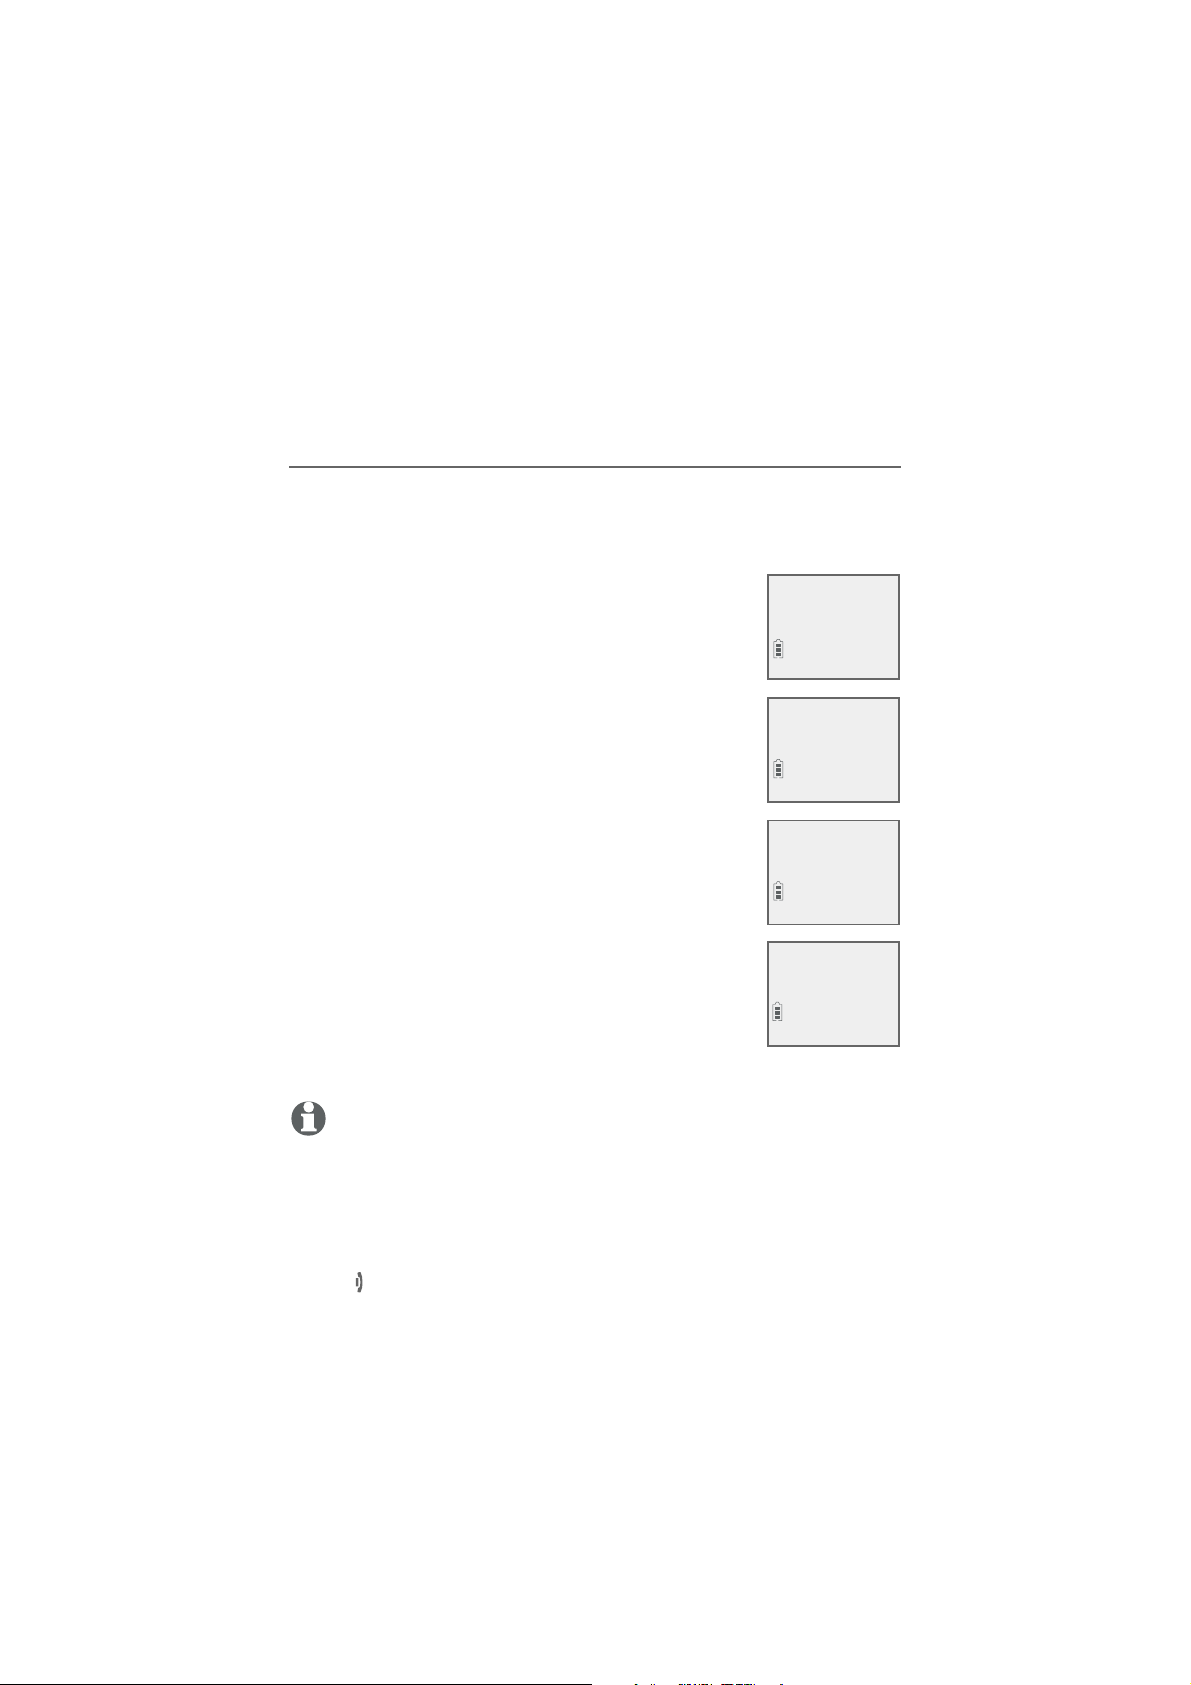
Chain dialing
Use this feature to initiate a dialing sequence from the numbers in
the directory, caller ID log or redial memory while you are on a call.
Chain dialing is useful when you wish to access other numbers
(such as bank account numbers or access codes) from the
directory, caller ID log or redial list.
To access the directory while on a call:
1. Press MENU/
SELECT.
Answering sys
>Directory
2. Press CID or DIR to scroll to Directory and
then press
3. Press CID or DIR to scroll to the desired number.
4. Press MENU/SELECT to dial the number shown.
MENU/SELECT.
Charlie Johnson
888-883-2445
To access the caller ID log while on a call:
1. Press MENU/
2. Press CID or DIR to scroll to Caller ID log,
then press MENU/SELECT.
3. Press CID or DIR to scroll to the desired number.
4. Press MENU/SELECT to dial the number shown.
SELECT.
Phone 0:01:20
Charlie Johnson
AM
6:30
To access the redial list while on a call:
1. Press REDIAL/
dialed number.
2. Press
CID or DIR to scroll to the desired
PAUSE to show the most recently
REDIAL #1/10
800-360-4121
number, or press REDIAL/PAUSE repeatedly to
find the desired number. Press. Press MENU/SELECT to dial the number
shown.
NOTES:
•
You cannot edit a directory entry while on a call. For more details about the directory, see pages 38-47.
•
You cannot copy a caller ID entry into the directory while on a call. For more details
about the caller ID log, see pages 48-54.
If you press REDIAL/
•
dialed numbers but you cannot erase the entries. For more details about the redial
memory, see page 23.
OFF/CANCEL on the handset to exit redial, directory or caller ID log when
Press
•
on a call.
PAUSE while on a call, you can only view the ten most recently
34
8/06
Page 42

Telephone operation
Options while on calls
Temporary tone dialing
If you have pulse (rotary) service only, you can switch from pulse to
touch-tone dialing temporarily during a call. This is useful if you need
to send touch-tone signals to access your telephone banking or long
distance services.
1. During a call, press TONE
2. Use the dialing keys to enter the desired number. The telephone
sends touch-tone signals.
3. The telephone automatically returns to pulse dialing after you
end the call.
.
35
Page 43
Telephone operation
Options while on calls
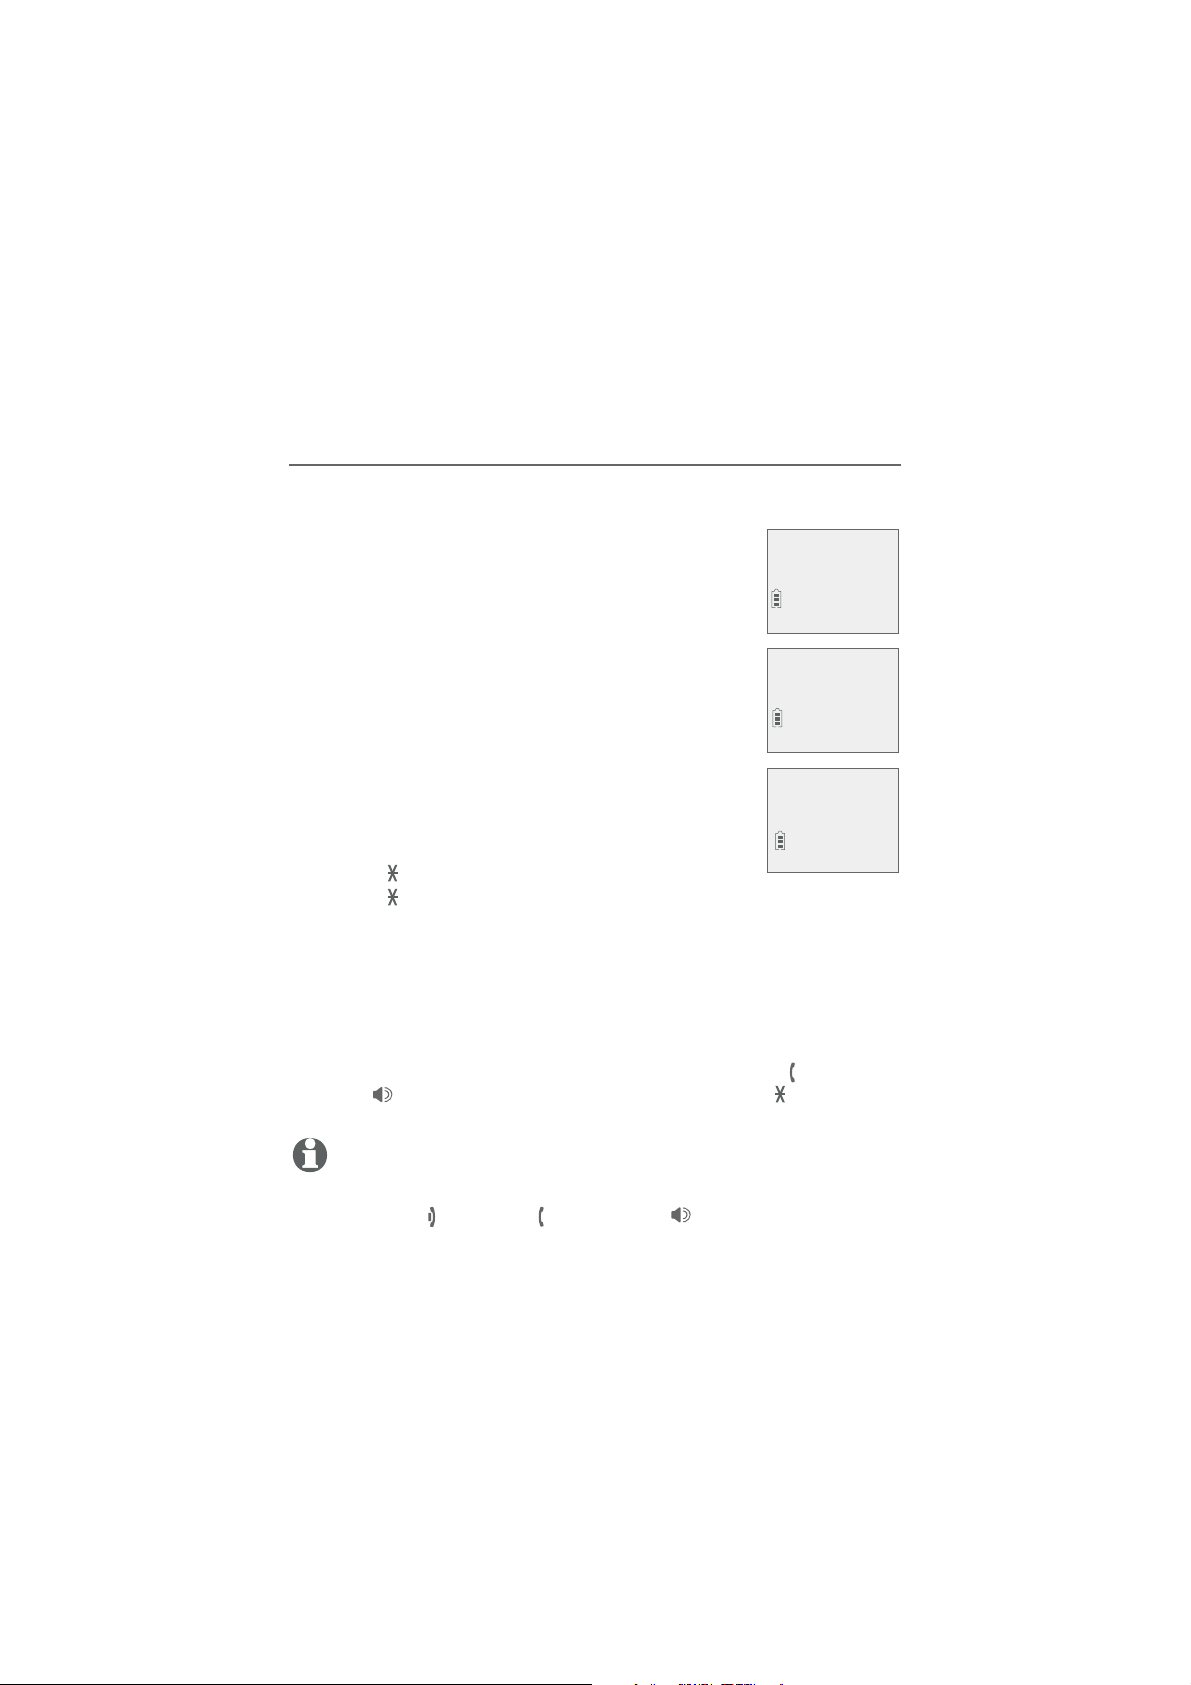
Blind transfer
While on an outside call, you can transfer the call to a specific
device or any device without notifying them.
To transfer an outside call directly without
notifying the desired device:
1. During the call, press MENU/
SELECT.
2. Press MENU/SELECT again to choose Transfer.
If you have a two-handset system and no other
•
registered devices, the outside call is put on
hold and your handset shows Transferring
Phone 0:00:12
AM
6:30
>Transfer
Intercom
call... The other handset rings and shows
Transfer from other handset.
If you have other registered device(s) or
•
more than two handsets, your screen shows
TRANSFER TO: Use the dialing keys to enter aenter a
TRANSFER TO:
>Handset 2
specific device number (1-9 for handsets 1-9,
TONE
followed by 0-2 for handsets 10-12, or
TONE followed by # for all devices), or presspress CID or DIR
to scroll to the desired device and press MENU/SELECT. The
outside call is put on hold and your handset screen shows
Transferring call... or Transferring call to all... The other
device rings and shows Transfer from HANDSET X (HANDSET
represents the handset name, X represents the handset
number).
3. To answer the call on the destination handset, press, press
FLASH, /SPEAKERSPEAKER, or any dialing key (or any dialing key (0-9, TONE or #). The The
PHONE/
initiating handset shows Call transferred and goes to idle mode.
8/06
NOTES:
To cancel the transfer and return to the external call before the blind transfer call is
•
answered, press
If the other device does not answer the transfer within 30 seconds, the transfer ends
•
and the initiating device rings while showing No response to transfer. If it does not
pick up within 30 seconds, the device returns to idle mode and the outside call ends.
OFF/CANCEL, PHONE/FLASH or /SPEAKERSPEAKER on your handset.
36
Page 44
Multiple handset use
Multiple handset use
Handset locator
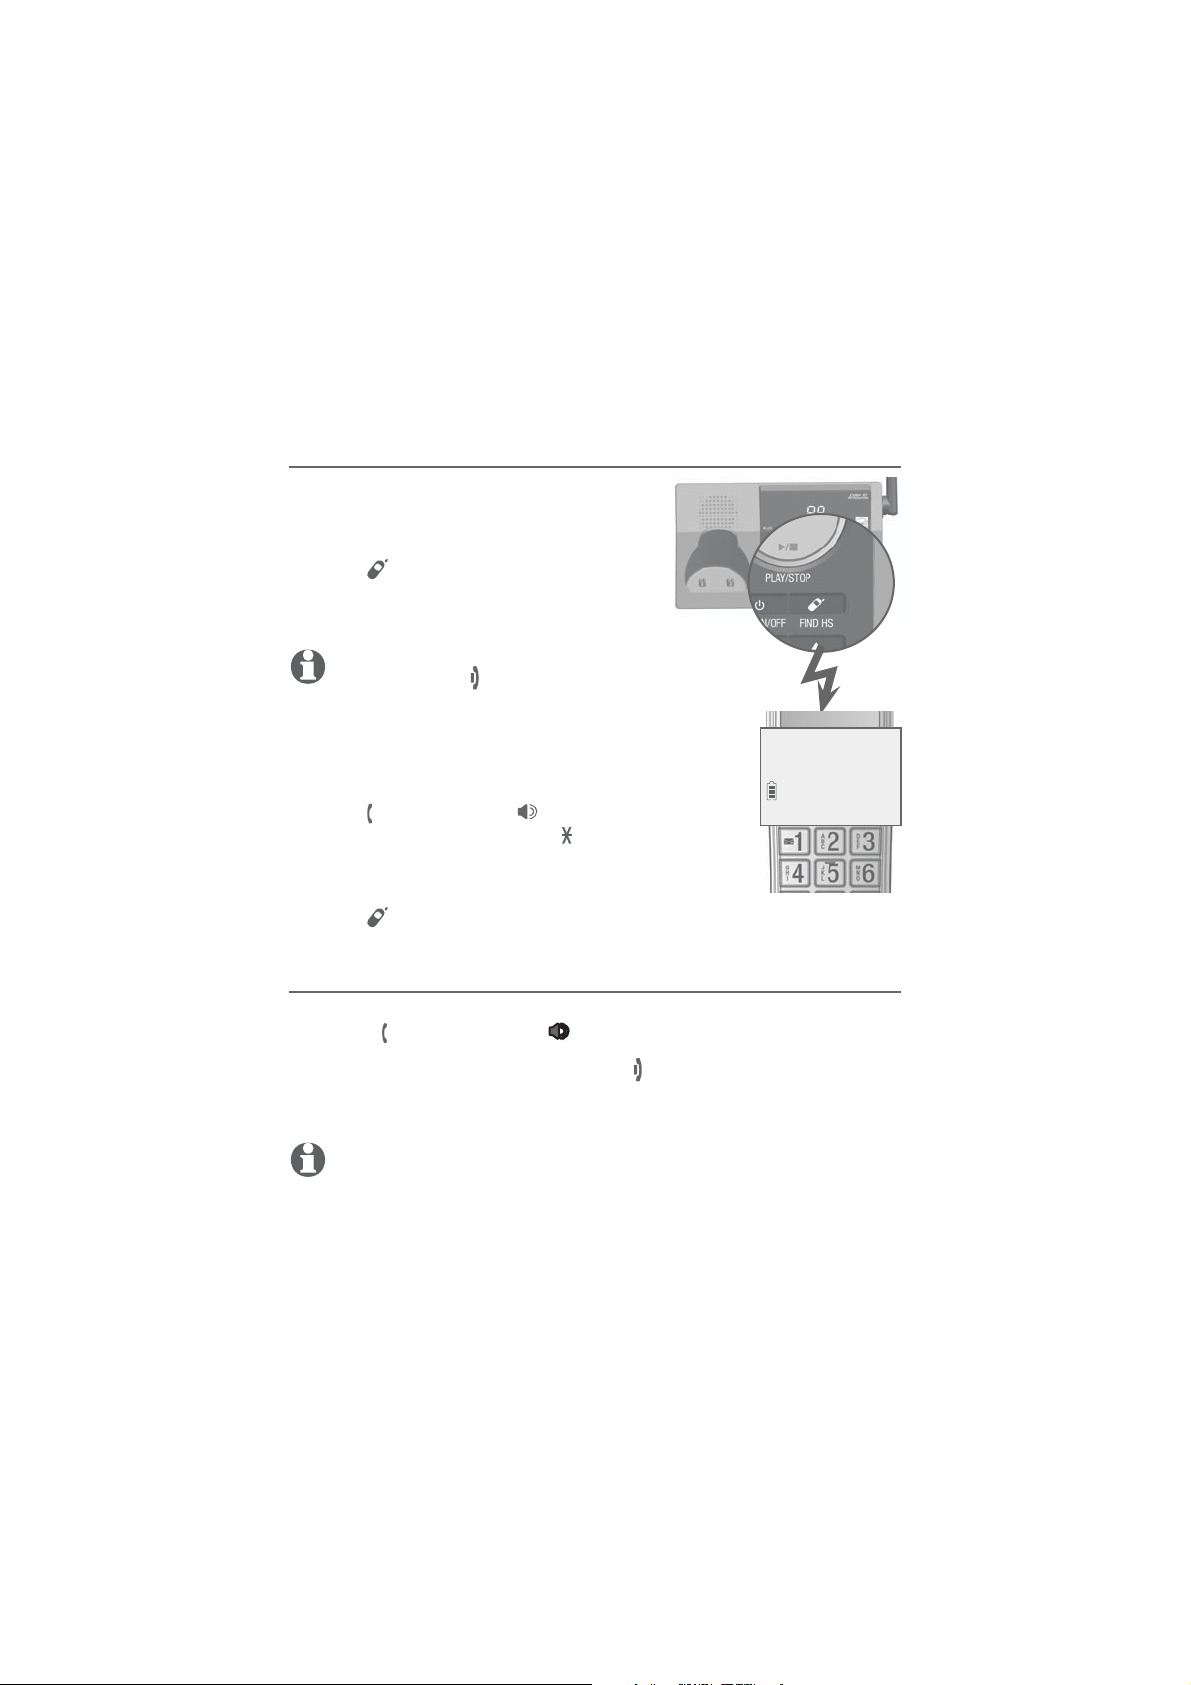
The handset locator feature is useful if
you misplace any handsets.
To start the paging tone:
Press /HANDSET LOCATOR on the
•
telephone base to start the paging
tone on all handsets for 60 seconds.
NOTE: If you press OFF/CANCEL or MUTE/
DELETE on a handset, the ringer of that handset
stops, but the paging to the rest of the
handsets continues.
To stop the paging tone:
•
Press
PHONE/FLASH, /SPEAKERSPEAKER, or
any dialing key (0-9, TONE or #) on
the handset(s).
-OR-
•
Press
/HANDSET LOCATOR on the telephone base.
**Paging**
Join a call in progress
When a handset is already on a call and you would like to join the
call, press
PHONE/FLASH or /SPEAKERSPEAKER on your handset.
To end the call using a handset, press OFF/CANCEL or place the
handset in the telephone base or charger. The call does not end
until all handsets hang up.
NOTE: You can use up to four system handsets at the same time on an
outside call.
37
Page 45
Multiple handset use
Intercom
Use the intercom feature for conversations between two handsets.
You can purchase expansion handsets (model AT&T CL80114) for this
telephone base to expand your telephone system (up to 12 handsets).
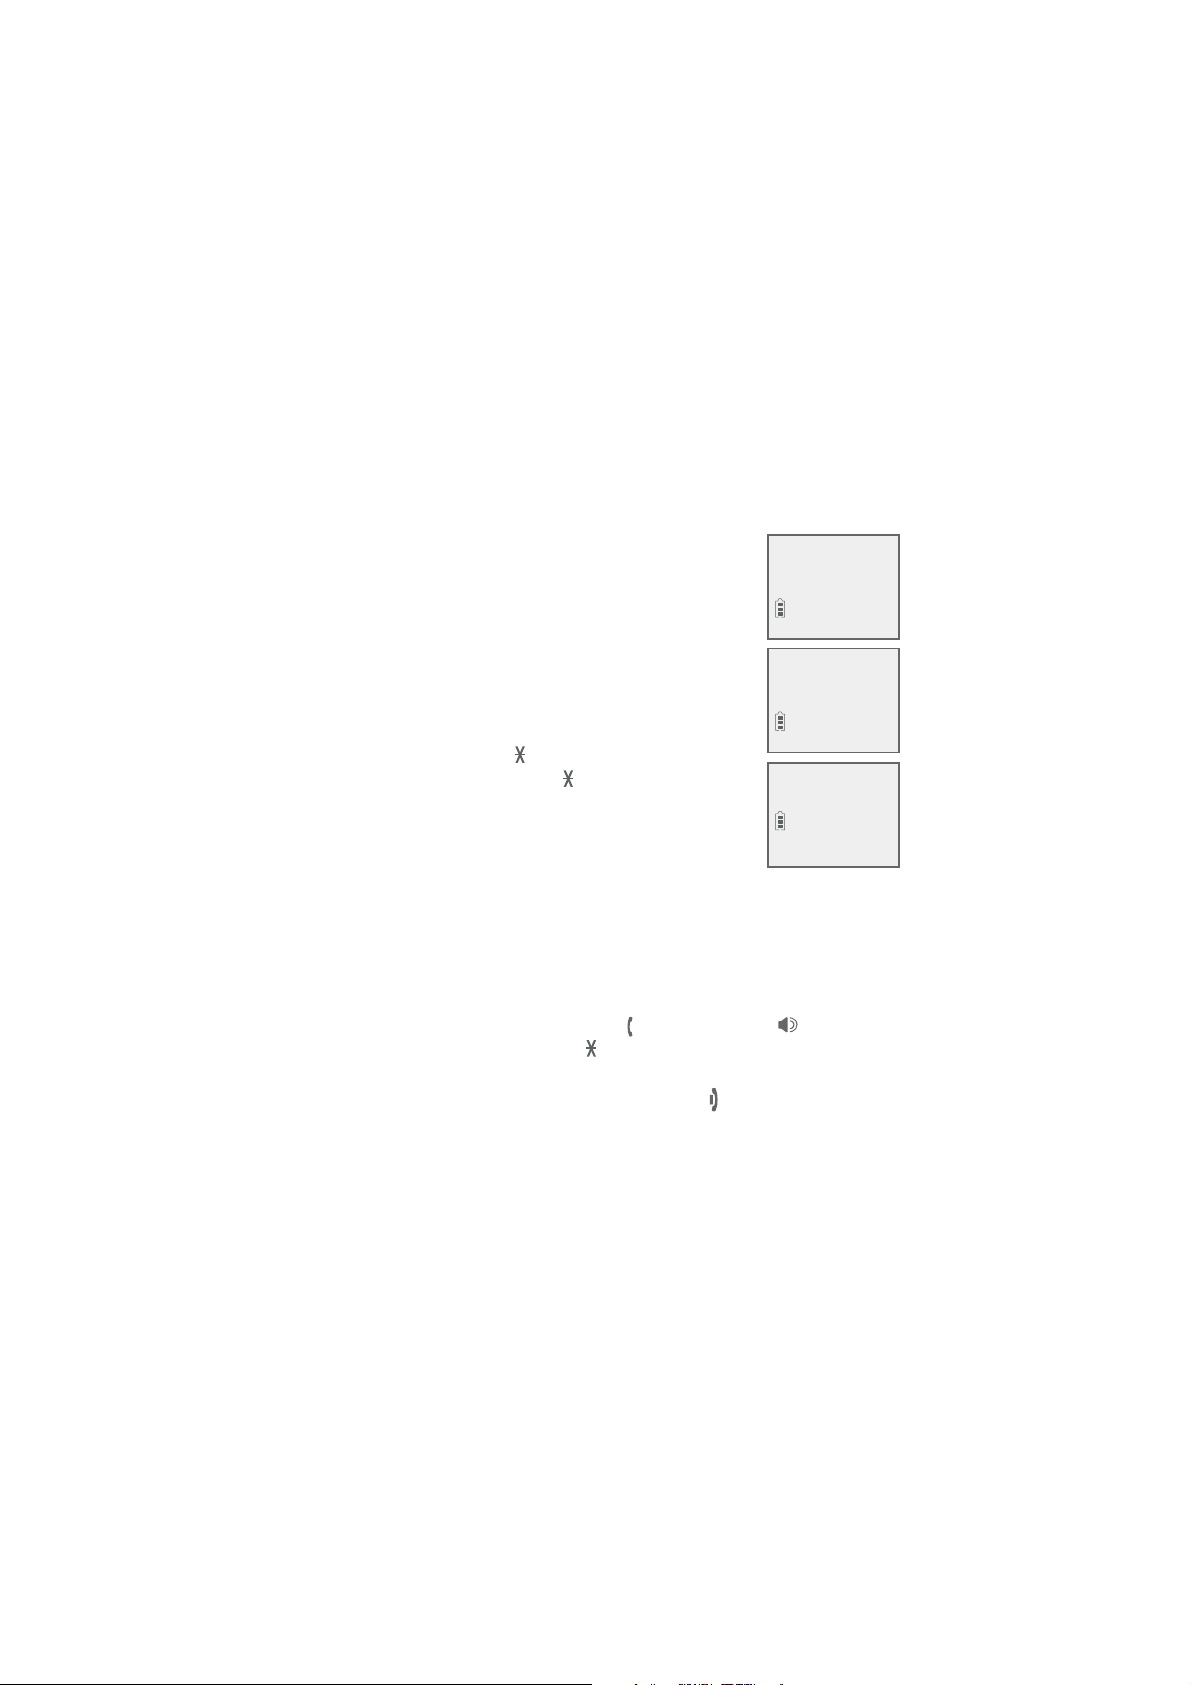
Using a handset to initiate intercom calls:
1. Press MENU/
SELECT in idle mode to enter the main
menu. Press CID or DIR to scroll to Intercom, then
press
MENU/SELECT.
If you have a two-handset system, the handset
•
shows Calling other handset.
If you have more than two handsets, the handset
•
shows INTERCOM TO: Use the dialing keys
to enter a specific device number (enter a specific device number (1-9 for
handsets 1-9, TONE
followed by 0-2 for
handsets 10-12, or TONE followed by # for
all devices), or presspress
CID or DIR to scroll to
the desired handset and press MENU/SELECT.
Your handset screen shows Calling HANDSET
X or
Calling all handsets.
The destination handset(s) rings and shows Other handset is
calling, HANDSET X is calling or HANDSET X is calling all
(HANDSET represents the handset name, X represents the handset
number).
2. To answer the intercom call, press PHONE/PHONE/FLASH, /SPEAKERSPEAKER
or any dialing key (0-9, TONE , or #) on the called device. Both
devices now show Intercom.
3. To end the intercom call, one party pressesTo end the intercom call, one party presses
OFF/OFF/CANCEL, or
place the handset back in the telephone base or charger. The. The The
other party hears four beeps. Both devices display Intercom
ended.
Calling
HANDSET X
HANDSET X
is calling
Intercom
AM
12/02
11:35
38
Page 46

Multiple handset use
Intercom
NOTES:
Before the intercom call is answered, you can cancel it by pressing
•
if the called party does not answer within 100 seconds or if the handset is in use, on
•
a call or out of range, the initiating device shows No answer. Try again.
To temporarily silence the intercom ringer, press
•
You can only use one pair of handsets at a time to make intercom calls.
•
OFF/CANCEL or MUTE/DELETE.
OFF/CANCELCANCEL.
Answer an incoming call during an intercom call
If you receive an outside call during an intercom call, there is a
two-beep call waiting tone.
To answer the call, press
•
PHONE/FLASH. The intercom call ends
automatically. The party on the intercom call hears four beeps.
Other system devices can also answer the incoming call by
pressing
PHONE/FLASH or /SPEAKERSPEAKER.
To end the intercom call without answering the incoming call,
•
press
OFF/CANCEL on the handset.
39
Page 47

Multiple handset use
Call transfer using intercom
Use the intercom feature to transfer an outside call to another
system device. You can also share an outside call with another
system device.
To transfer or share an outside call using intercom:
1. During the call, press MENU/
2. Press
CID or DIR to scroll to Intercom and press MENU/
SELECT.
3. If you have a two-handset system, your handset screen shows
Calling other handset.
-OR-
If you have more than two handsets, your screen shows
INTERCOM TO: Use the dialing keys to enter a specific deviceenter a specific device
number (1-9 for handsets 1-9, TONE
handsets 10-12, or TONE followed by # for all devices), or
press
CID or DIR to scroll to the desired handset and
press MENU/SELECT. Your handset screen shows Calling
HANDSET X, or Calling all handsets.
4. When the destination handset picks up, your handset shows
Intercom and the outside call is put on hold. You have the
following options:
SELECT.
followed by 0-2 for
You can transfer the call. Press MENU/SELECT
•
twice to
choose Transfer. The handset shows Call transferred. The
other handset automatically connects to the outside call.
You can let the other handset join you on the outside call in a
•
three-way conversation. Press MENU/SELECT. Press CID or
DIR to highlight Share call, then press MENU/SELECT.
You can end the intercom call and continue the outside call
•
with your handset. Press PHONE/FLASH on your handset (the
ended intercom call party hears four beeps).
40
Page 48
Multiple handset use
Push-to-talk (PTT)
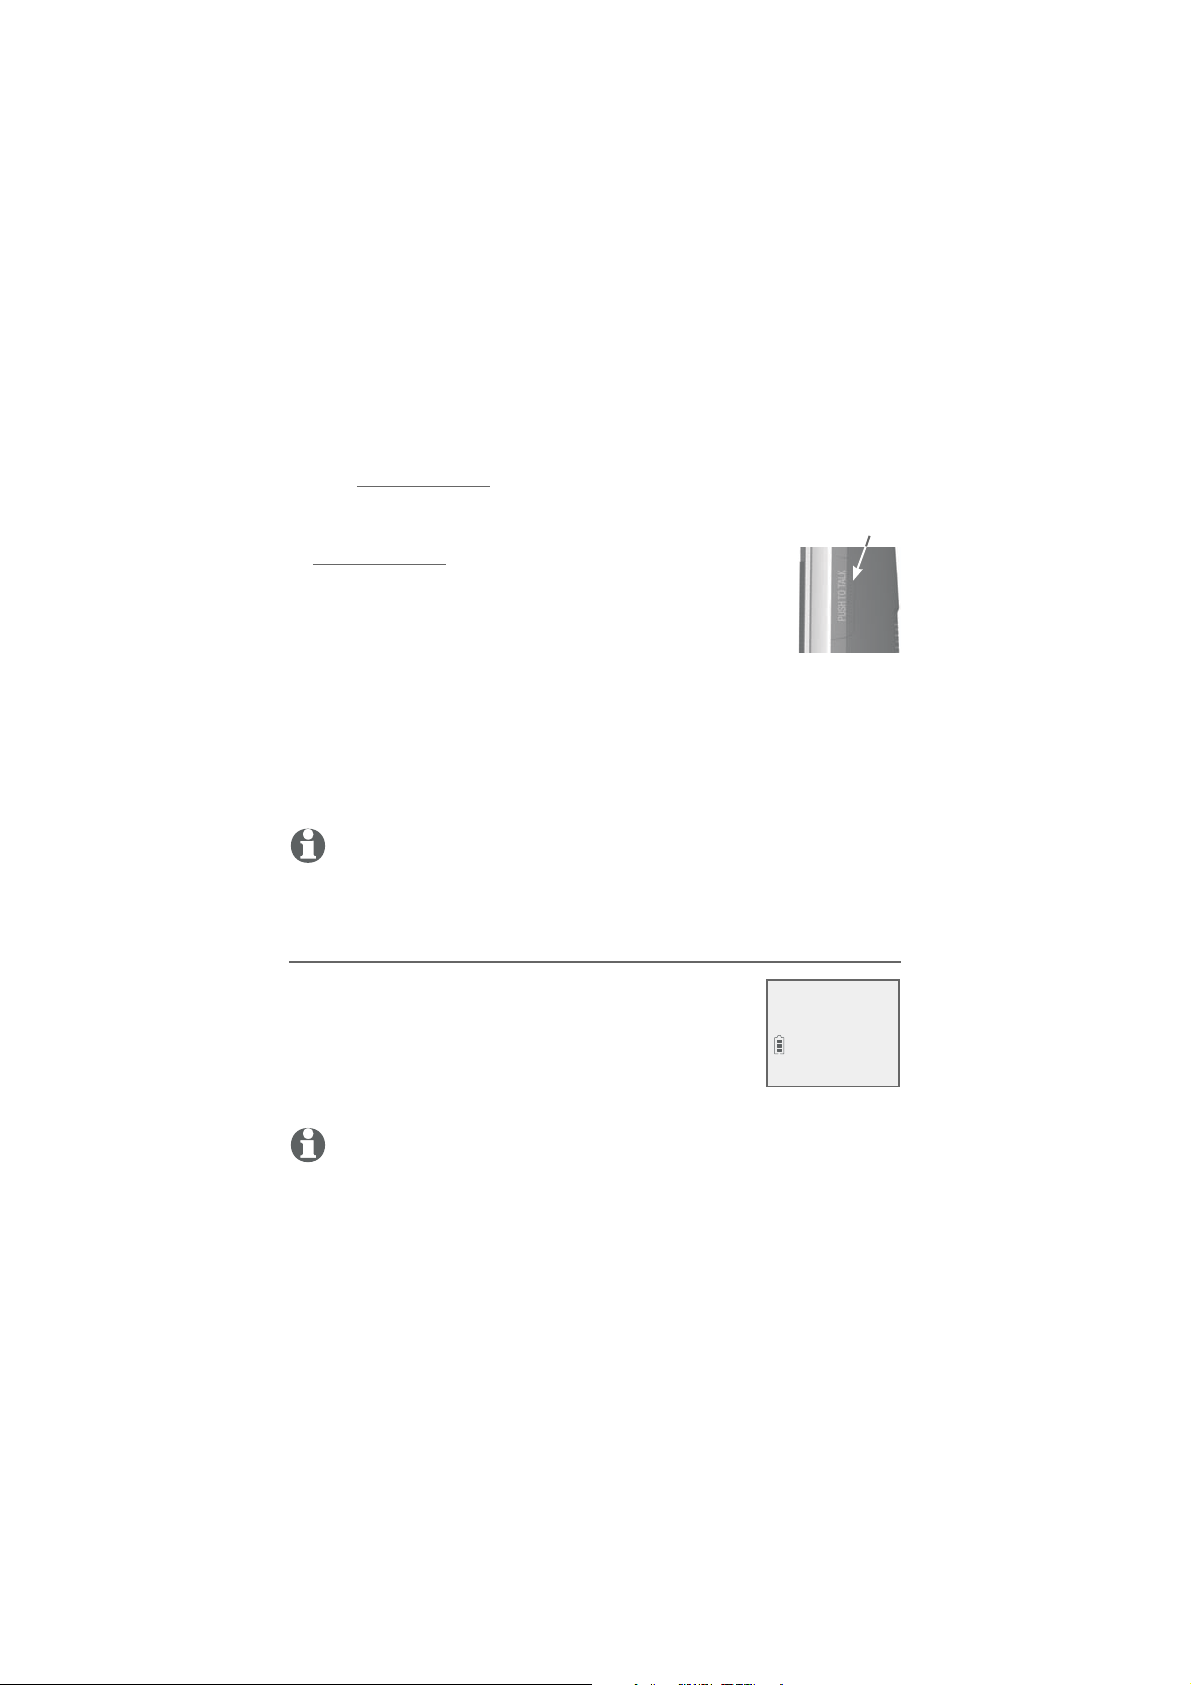
You can directly broadcast messages to the speakerphone of any
device. Press and hold PUSH TO TALK on a handset to begin two-
way communication.
Only one device can talk at a time. To do so,
•
press and hold PUSH TO TALK.
You must release PUSH TO TALK, so the other person
•
can respond.
•
Only one PTT session can be active at a time.
•
While PTT is in use between two devices, other
devices cannot use the intercom feature but can access the
answering system.
•
When you attempt to place a PTT call to another device which
is accessing the answering system or on an intercom call or
outside call, your device screen shows Not available at this
time.
NOTE: The PTT function is not available when QUIET mode is on or if you
have only
one handset.
Turn PTT on or off
1. Press PUSH TO TALK when the handset is not in
use. The PUSH TO TALK menu displays.
2. Press
CID or DIR to highlight PTT On/Off,
then press MENU/SELECT.
PUSH TO TALK
>PTT On/Off
3. Press CID or DIR to choose On or Off, then
press
MENU/SELECT.
PTT
NOTE: The handset screen displays No Incoming PTT when PTT is turned off.
41
Page 49
Multiple handset use
Push-to-talk (PTT)
PTT call to a single device
1. There are a few ways to begin a PTT call to a
single device. When the handset is not in use:
If you have a two-handset system, press and
•
hold PUSH TO TALK.
If you have more than two handsets:
•
Press PUSH TO TALK on the handset, then
use the dialing keys to enter the destination
device number.
-OR-
Press PUSH TO TALK on the handset. Press
CID or DIR to highlight the destination
device number, then press MENU/SELECT or
PUSH TO TALK.
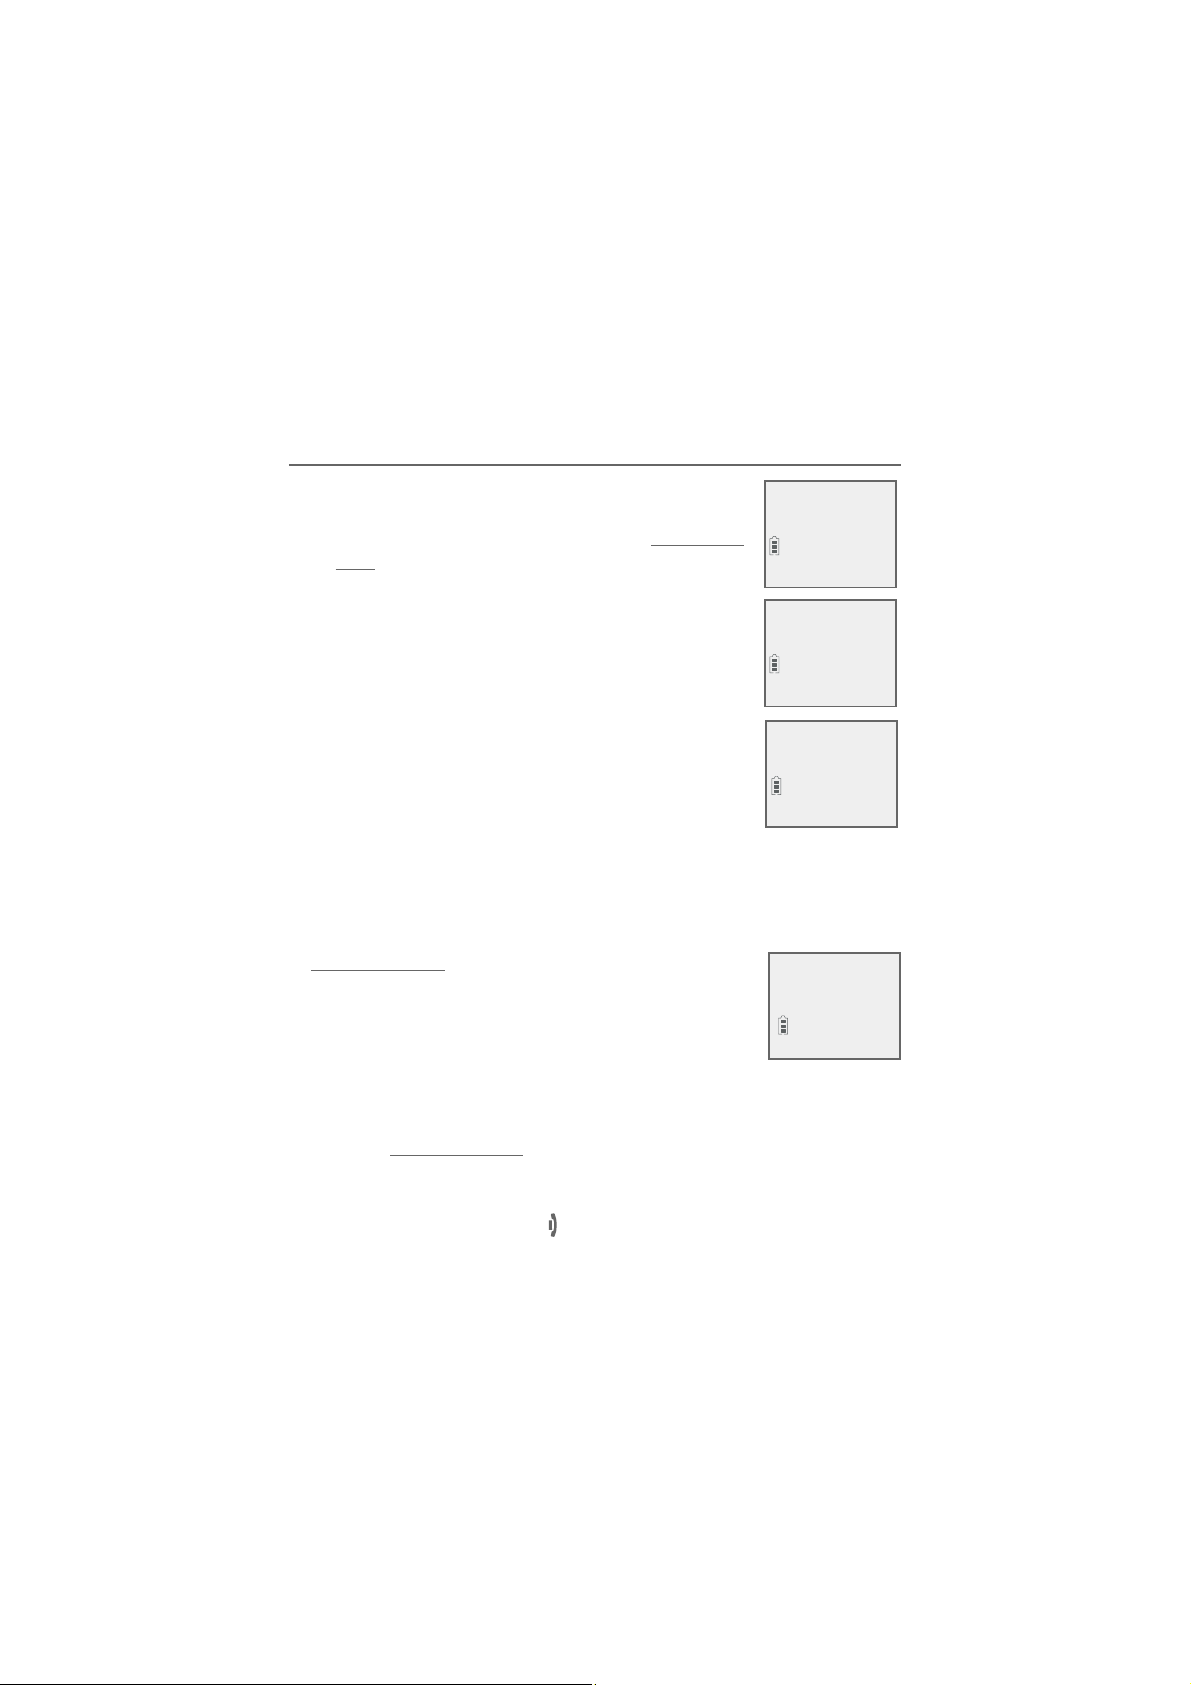
The handset shows Connecting to HANDSET
X...
(HANDSET represents the handset name, X represents the
destination handset number).
your and the destination device screens display
Press and hold [PTT] to talk.
When the connection is made, both
PUSH TO TALK
>HANDSET X
Connecting to
HANDSET X...
Press and hold
[PTT] to talk
2. Press and hold PUSH TO TALK. A chirp indicates
your microphone is on. Speak towards the device.
Your voice is broadcast to the destination device.
PTT To
handset: X
While you are speaking, your handset shows
PTT To handset: X.
3. Release PUSH TO TALK after speaking. Both devices beep once
again and the screens show Press and hold [PTT] to talk, then
you can press and hold PUSH TO TALK to continue speaking or
the destination device can respond (see Answer a PTT call on
page 44).
4. To end the PTT call, press
OFF/CANCEL or place the handset in
the telephone base or charger. The handset shows Push to talk
Ended.
42
Page 50

Multiple handset use
Push-to-talk (PTT)
PTT call to multiple devices
When there are multiple handsets registered to the phone system,
PTT supports one-to-group calls. PTT supports a maximum of
one-to-four calls when one to five handsets are registered, and
a maximum of one-to-three calls when six or more handsets are
registered. The first four registered handsets will be able to use this
feature. Other handsets can only use PTT for one-to-one calls.
To call multiple devices:
1. You have three ways to call multiple devices. When the handset is
not in use:
•
Press and hold PUSH TO TALK until the handset shows
Connecting to group...
•
Press PUSH TO TALK. Press
Press
MENU/SELECT or press PUSH TO TALK and your
handset shows Connecting to group...
•
Press PUSH TO TALK. Press TONE followed by # (pound key).
The handset shows Connecting to group...
When the connection is made, both the caller and the destination
parties hear a beep. The speakerphones on all other devices
automatically activate.
2. You need to press and hold PUSH TO TALK when you want to
speak. Speak towards the handset. Your voice is broadcast to all
devices.
3. Release PUSH TO TALK after speaking.
4. Any extension can reply (see Answer a PTT call on page 44).
CID or DIR to choose Group.
NOTE: After PUSH TO TALK on the handset is released, the PTT call remains open
for a short time. If no one presses PUSH TO TALK on the handset within ten
seconds, the PTT call ends automatically.
43
Page 51

Multiple handset use
Push-to-talk (PTT)
Answer a PTT call
You can respond to a PTT call, as described below.
When your device receives a PTT call, it beeps and shows Press
1.
and hold [PTT] to talk.
When the other party is speaking, your speakerphone light is
2.
on, and your device shows PTT From HS X To HS X (the first
X represents the initiating handset number, and the second X
represents your handset number; a maximum of four handset
numbers appear).
When your speakerphone light is off (the screen shows Press
3.
and hold [PTT] to talk), press and hold PUSH TO TALK on your
handset. You will hear a chirp. Speak towards the device.
While you are speaking, your device shows PTT To handset: X
•
(X represents the handset numbers of one or more destination
handsets; a maximum of four handset numbers appear).
Your voice is broadcast to all destination devices.
•
After speaking, release PUSH TO TALK. Your device will beep.
After the beep, if your speakerphone light is off, you can press
and hold PUSH TO TALK to continue speaking.
Change a one-to-one PTT call to an intercom call
You can convert a one-to-one PTT session to an intercom call.
When your device shows Press and hold [PTT] to talk, press
1.
MENU/SELECT. The screen shows Intercom.
Press MENU/SELECT. Your device displays Calling other
2.
handset or Calling HANDSET X. The destination device briefly
shows Push to talk Ended and then Other handset is calling
or HANDSET X is calling. The destination device rings.
Press
3.
PHONE/FLASH or any dialing keys (0-9,
the destination device to answer the intercom call. Both devices
now show Intercom.
To end the intercom call, press
4.
OFF/CANCEL on your handset
or place the handset in the telephone base or charger. Both
screens show Intercom ended.
or TONE ) on
#
44
Page 52

Multiple handset use
Push-to-talk (PTT)
Answer an incoming call during a PTT call
When you receive an outside call during PTT, there is an alert tone.
During a one-to-one PTT, press
•
PHONE/FLASH on the initiating
or destination handset. The PTT call ends automatically and the
outside call is answered.
During a one-to-group PTT call, press
•
PHONE/FLASH on the
initiating handset. The PTT call ends automatically and the
outside call is answered.
•
During a one-to-group PTT call, press
PHONE/FLASH on any
one of the destination handsets. That device answers the outside
call. The PTT call continues for the rest of the PTT participants.
•
To leave the PTT call without answering the incoming call, press
OFF/CANCEL. The telephone continues to ring.
Make an outgoing call during PTT call
•
During a one-to-one PTT call, press PHONE/FLASH to get a dial
tone. The PTT call ends automatically.
•
During a one-to-group PTT call, press
PHONE/FLASH on the
initiating handset. The PTT call ends automatically and you get a
dial tone.
•
During a one-to-group PTT call, press PHONE/FLASH on any
one of the destination handsets. That device gets a dial tone.
The PTT call continues for the rest of the PTT participants.
45
Page 53

Multiple handset use
Push-to-talk (PTT)
End or leave a PTT call
For one-to-one PTT calls, both initiating and destination devices
can end the PTT call. For PTT calls to multiple devices, the initiating
device can end the PTT call. If any one of the destination devices
leaves the PTT call, the call continues until all participants or the
initiator hangs up.
Press
OFF/CANCEL on the handset. The screen shows Push to
talk Ended.
-OR-
Place the handset in the telephone base or charger, then the
handset return to idle mode.
NOTE: After PUSH TO TALK is released, the PTT call remains open for a short
time. If no one presses PUSH TO TALK within ten seconds, the PTT call ends
automatically.
46
Page 54
Directory
About the directory
Shared directory
The directory is shared by all handsets. Changes
made to the directory from any device apply to all.
NOTE: Only one handset can review the directory at a
time. If another device tries to enter the directory, the
screen shows Not available at this time.
Capacity
The directory can store up to 50 entries, with a maximum of 15
alphanumeric characters (including spaces) for names and 30
digits for telephone numbers. A convenient search feature can
help you find and dial numbers quickly (pag 51).
If you try to save an entry when there are already 50 entries, the
screen shows Directory full. You cannot store a new number until
you delete one.
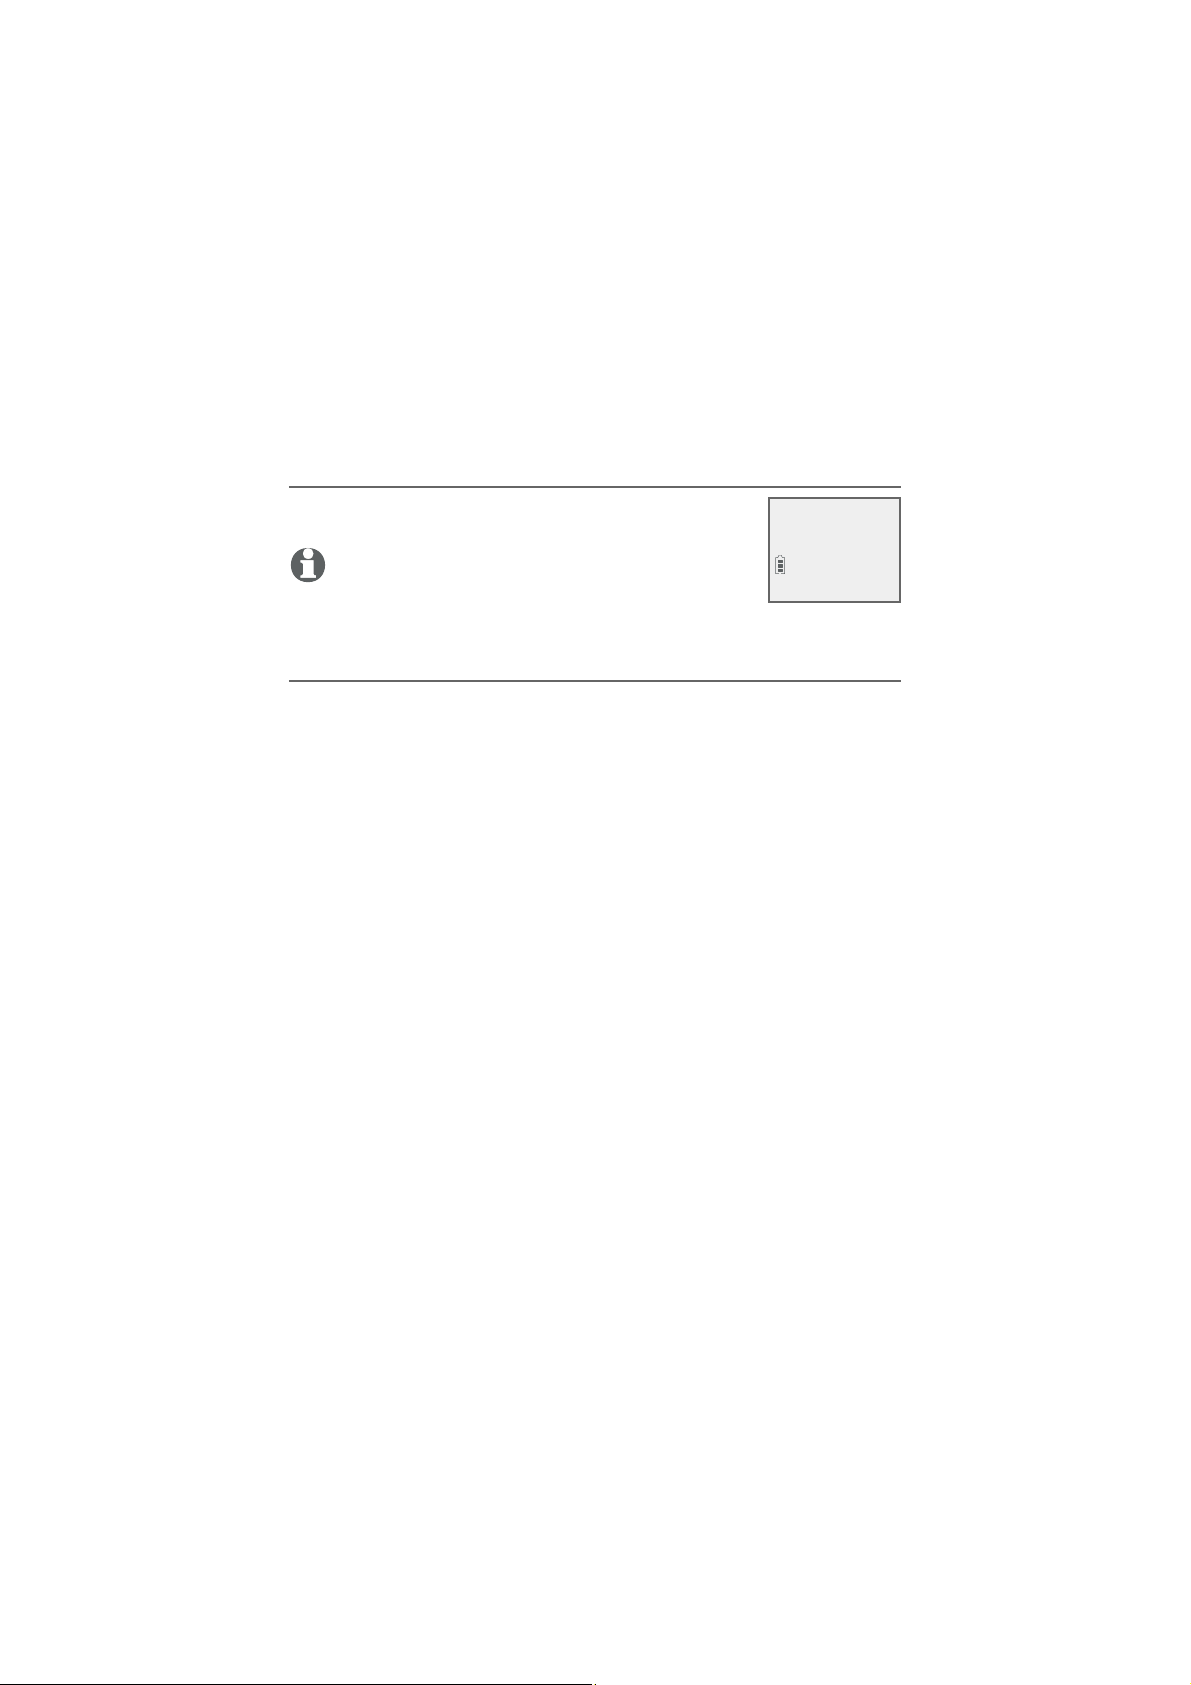
Charlie Johnson
888-883-2445
Page 55
Directory
Create directory entries
Create a new directory entry
1. Press MENU/
main menu.
2. Press
MENU/SELECT.
press
3. Press
4. Press MENU/SELECT.
5. Use the dialing keys to enter a telephone number
(up to 30 digits) when prompted.
Press
•
left or right.
Press MUTE/DELETE to erase a digit.
•
Press and hold MUTE/DELETE to erase all
•
digits.
Press and hold
•
second dialing pause (a p appears).
-OR-
Copy a number from the redial list by pressing
REDIAL/PAUSE, then CID, DIR, or pressing or pressing
REDIAL/
Press MENU/SELECT to copy the number.
6. Press MENU/SELECT to move on to the name.
The screen shows Number already saved if
•
the number is already in the directory. You
cannot save the same number twice.
7. Use the dialing keys to enter a name (up to
15 characters) when prompted. Each time you
press a key, the character on that key appears.
Additional key presses produce other characters on that key. See
the chart on next page.
Press
•
Press 0 to add a space.
•
Press
•
•
Press and hold MUTE/DELETE to erase all characters.
•
Press TONE to change the next letter to upper or lower case.
SELECT in idle mode to enter the
CID or DIR to scroll to Directory, then
CID or DIR to highlight Add contact.
CID or DIR to move the cursor to the
REDIAL/PAUSE to enter a three-
PAUSE repeatedly to locate the number.
CID or DIR to move the cursor to the left or right.
MUTE/DELETE to erase a character.
48
Answering sys
>Directory
Review
>Add contact
ENTER NUMBER
888-883-2445
ENTER NAME
Robert Brown_
Saved
_
Page 56

Directory
Create directory entries
NOTE: The first letter of every word is a capital letter. The remaining letters in
a word start as
lower case letters, as shown in the chart below.
Dial-
ing
keys
1
2 ABCabc2
3 DEFdef3
4 GHIghi4
5 JKLjkl5
6 MNOmno6
7 PQRSpqrs7
8 TUVtuv8
9 WXYZwxyz9
0 space 0
#
1234567891011
1.-‘()*#&/,
*
Characters by number of key presses
8. Press MENU/SELECT to store your new directory entry. There is
a confirmation tone and the screen shows Saved. To change the
entry later, see page 53.
Add a predialed telephone number to the directory
You can save a predialed telephone number to the directory.
1. Enter the telephone number when in idle mode.
2. Follow the steps in Edit a directory entry on page 53.
49
Page 57

Directory
Review the directory
Review directory entries
1. Press DIR when in idle mode. The summary screen shows
briefly and then the first entry in the directory shows.
-OR-
Press MENU/
DIR to scroll to Directory. Press MENU/SELECT twice.
2. Press CID or DIR to browse through the directory. Entries
appear alphabetically by the first letter in the name.
NOTES:
•
If the telephone number in the directory exceeds 15 digits, <
of the telephone number. Press TONE to move towards the end of the tel-
ephone number or press # (pound key) to move towards the beginning of the
telephone number.
•
If there are no directory entries when you press DIR in idle mode, Directory
empty appears briefly on the screen, followed by Add contact? If you would
like to add a new contact, press
tions on creating a new directory entry. Otherwise, press OFF/CANCEL to
cancel.
SELECT when in idle mode, then press CID or
appears in front
MENU/SELECT and refer to page 39 for instruc-
50
Page 58

Directory
Search the directory
Search by name
1. Press DIR in idle mode to show the first listing in the directory.
2. When an entry appears, press the dialing keys (0-9) to start a name
search. The directory shows the first name beginning with the first
letter associated with the dialing key, if there is an entry in the
directory beginning with that letter. Press
through the directory.
3. To see other names starting with the letters on the same dialing
key, keep pressing the key. The names appear in alphabetical
order.
For example, if you have the names Jennifer, Jessie, Kevin and
Linda in your directory:
CID or DIR to scroll
If you press 5 (JKL) once, you see Jennifer. Press
•
CID and
you see Jessie.
If you press 5 (JKL) twice, you see Kevin.
•
If you press 5 (JKL) three times, you see Linda.
•
If you press 5 (JKL) four times, you see 5 and then the
•
directory entry beginning with 5 or the next closest entry after
5.
If you press 5 (JKL) five times, you see Jennifer again.
•
NOTES:
•
If there is no name matching the first letter of the key you press, the directory
shows a name matching the following letters of the key.
•
If you press a key (0-9) and no name starts with any of the letters on that key, the
directory shows the entry matching the next letter in the directory.
51
Page 59
Directory
Dial, delete or edit directory entries
To dial, delete or edit a directory entry (name and number), the
entry must
be displayed on the screen. Use Review the directory (page 50) or
Search by name (page 51) to show an entry.
Display dial
To dial a displayed number from the directory, press
FLASH or /SPEAKERSPEAKER.
Delete a directory entry
To delete the displayed directory entry, press
MUTE/DELETE. Press MENU/SELECT to confirm.
There is a confirmation tone and the screen shows
Contact deleted. You cannot retrieve a deleted
entry.
PHONE/
Robert Brown
Delete contact?
52
Page 60
Directory
Dial, delete or edit directory entries
Edit a directory entry
1. When a directory entry displays, press
SELECT. The screen shows EDIT NUMBER along
with the phone number to be edited. If you only
want to edit the name, skip to Step 3.
2. To edit the number:
Press the dialing keys to add digits.
•
Press
•
CID or DIR to move the cursor to the
left or right.
Press
•
•
MUTE/DELETE to erase a digit.
Press and hold MUTE/DELETE to erase all
digits.
•
Press and hold
REDIAL/PAUSE to add a three-
second dialing pause (a p appears).
3. Press MENU/SELECT to move on to the name. The
screen shows EDIT NAME along with the name to
be edited.
4. To edit the name:
•
Press the dialing keys to add characters (page 40).
•
Press
CID or DIR to move the cursor to the left
or right.
•
Press 0 to add a space.
•
Press
MUTE/DELETE to erase a character.
•
Press and hold MUTE/DELETE to erase all characters.
•
Press TONE
to change the next letter to upper or lower
case.
5. Press MENU/SELECT to save the entry. There is a confirmation
tone and the screen shows Saved.
MENU/
Linda Miller
888-722-7702
EDIT NUMBER
888-883-2445_
EDIT NAME
Robert Brown_
Robert Brown
888-883-2445
NOTE: If the telephone number has more than 11 digits, EDIT NUMBER will
not be displayed on the screen.
53
Page 61
Directory
Speed dial
The telephone system has nine speed dial
locations (2-9, 0) and a voicemail access location
1 where you can store the telephone numbers
you wish to dial more quickly. You can store up to
Robert Brown
888-883-2445
2
30 digits in each location. Speed dial assignments
Speed dial location
can only be selected from the existing directory
entries. The voicemail access number must be
manually entered. In the directory, speed dial locations are
indicated by their number on the bottom of the screen.
Assign a speed dial number
1. When the telephone is idle, press MENU
2. Press CID or DIR to scroll to Directory. Press
MENU/SELECT.
/SELECT.
Answering sys
>Directory
3. Press CID or DIR to scroll to Speed dial. Press
MENU/SELECT.
4. Press CID or DIR to choose your desired
speed dial location (0 or 2-9), then press
MENU/
SELECT. The screen briefly shows Copy from
Add contact
>Speed dial
Directory... and then displays the directory list.
5. Press CID or DIR to scroll to the phone
number you wish to assign to the selected speed
dial location.
6. Press
MENU/SELECT to save the setting
>2:Robert Brown
3:<Unassigned>
and return to the previous menu. There is a
confirmation tone and the screen returns to the
speed dial list.
-OR-
1. When the telephone is idle, press and hold any dialing keys (0 or
2-9).
2. Press
CID or DIR to choose your desired speed dial location
(0 or 2-9), then press MENU/SELECT. The screen briefly shows
Copy from Directory... and then displays the directory list.
54
Page 62
Directory
Speed dial
3. Press CID or DIR to scroll to the phone number you wish to
assign to the selected speed dial location.
4. Press
Assign your voicemail speed dial number
To assign your voicemail speed dial number to location
page 20.
Reassign a speed dial number
1. When the telephone is idle, press MENU/
2. Press CID or DIR to scroll to Directory. Press
3. Press CID or DIR to scroll to Speed dial. Press
4. Press CID or DIR to choose the location you
5. Press MENU/SELECT again.
6. Scroll to Change SD and then press MENU/
7. Press CID or DIR to scroll to the phone
8. Press
MENU/SELECT to save the setting and return to the
previous menu. There is a confirmation tone and the screen
returns to the speed dial list.
1, see
MENU/SELECT.
MENU/SELECT.
wish to reassign, then press
SELECT.
MENU/SELECT to
Robert Brown
888-883-2445
2
Copy from
Directory...
show the directory entry.
SELECT. The screen briefly shows Copy from
Directory... and then displays the directory list.
number you wish to reassign to the selected
Linda Miller
888-722-7702
2
speed dial location.
MENU/SELECT to save the setting and return to the speed
dial list. There is a confirmation tone.
55
Page 63
Directory
Speed dial
Delete a speed dial number
1. When the telephone is idle, press MENU
2. Press
MENU/SELECT.
CID or DIR to scroll to Directory. Press
3. Press CID or DIR to scroll to Speed dial. Press
MENU/SELECT.
4. Press CID or DIR to scroll to the location you
wish
to delete the speed dial number from, then:
Press
•
MUTE/DELETE to delete the displayed
speed dial number. There is a confirmation
tone and the screen shows Speed dial empty
before returning to the speed dial list.
-OR-
i. Press
MENU/SELECT to show the directory
entry.
ii. Press MENU/SELECT again.
iii. Scroll to Clear SD and then press
displayed speed dial number. There is a confirmation tone
and the screen shows
Speed dial empty before returning to
the speed dial list.
/SELECT.
MENU/SELECT to delete the
Linda Miller
888-722-7702
2
Speed dial
empty
>2:<Unassigned>
3:<
Unassigned
>
56
Page 64

Directory
Speed dial
Make a call using speed dial
When in idle mode, press and hold the dialing key (0 or 2-9)
corresponding to the assigned location you wish to call.
-OR-
1. Press MENU
2. Press CID or DIR to scroll to Directory, then press MENU/
SELECT.
3. Press CID or DIR to scroll to Speed dial, then press MENU/
SELECT.
4. Press
and then press PHONE/FLASH or /SPEAKERSPEAKER.
Check your voicemail using speed dial
When in idle mode, press and hold 1 to dial the voicemail
number you have set. See page 20 to set your voicemail speed dial
number.
/SELECT when in idle mode.
CID or DIR to scroll to the desired location (0 or 2-9)
57
Page 65
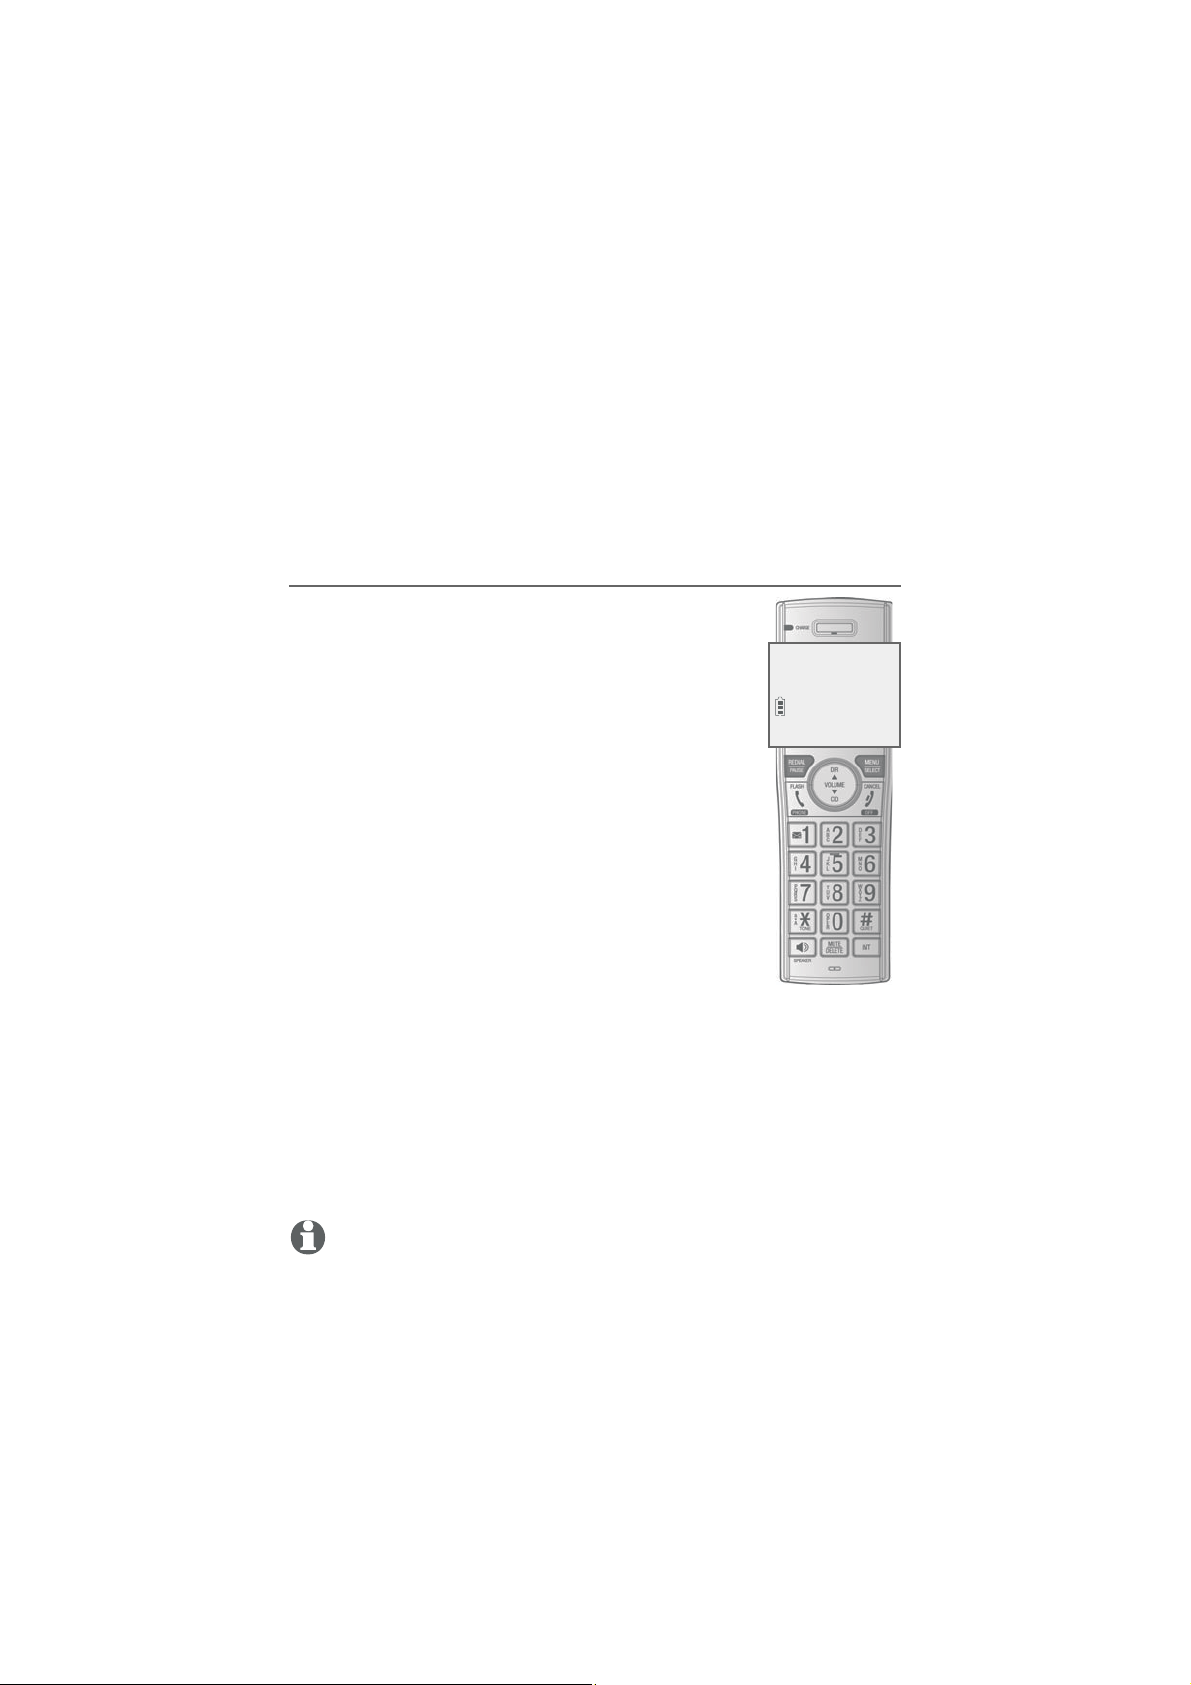
Caller ID
Caller ID
About caller ID
This product supports caller ID services offered by most telephone
service providers. Caller ID allows you to see the name, number, date
and time of calls. The available caller ID information will appear after
the first or second ring.
Information about caller ID with call waiting
Caller ID with call waiting lets you see the name
and telephone number of the caller before
answering the call, even while on another call.
It may be necessary to change your telephone
service to use this feature. Contact your telephone
service provider if:
You have both caller ID and call waiting, but as
•
separate services (you may need to combine
these services).
You have only caller ID service, or only call
•
waiting service.
You don’t subscribe to caller ID or call waiting
•
services.
There are fees for caller ID services. In addition,
services may not be available in all areas.
CHRISTINE SMITH
888-883-2445
NEW
AM
10:01
10/15
This product can provide information only if both
you and the caller are in areas offering caller ID service and if both
telephone service providers use compatible equipment. The time
and date, along with the call information, are from the telephone
service provider.
Caller ID information may not be available for every incoming
call. Callers may intentionally block their names and/or telephone
numbers. You can only view a maximum of 15 digits of every caller
ID log entry. To view caller ID log entries with numbers between 16
and 24 digits, you must save the entry to the directory (see page 63).
NOTE: You can use this product with regular caller ID service, or you can use
this product’s other features without subscribing to caller ID or combined
caller ID with call waiting service.
58
Page 66
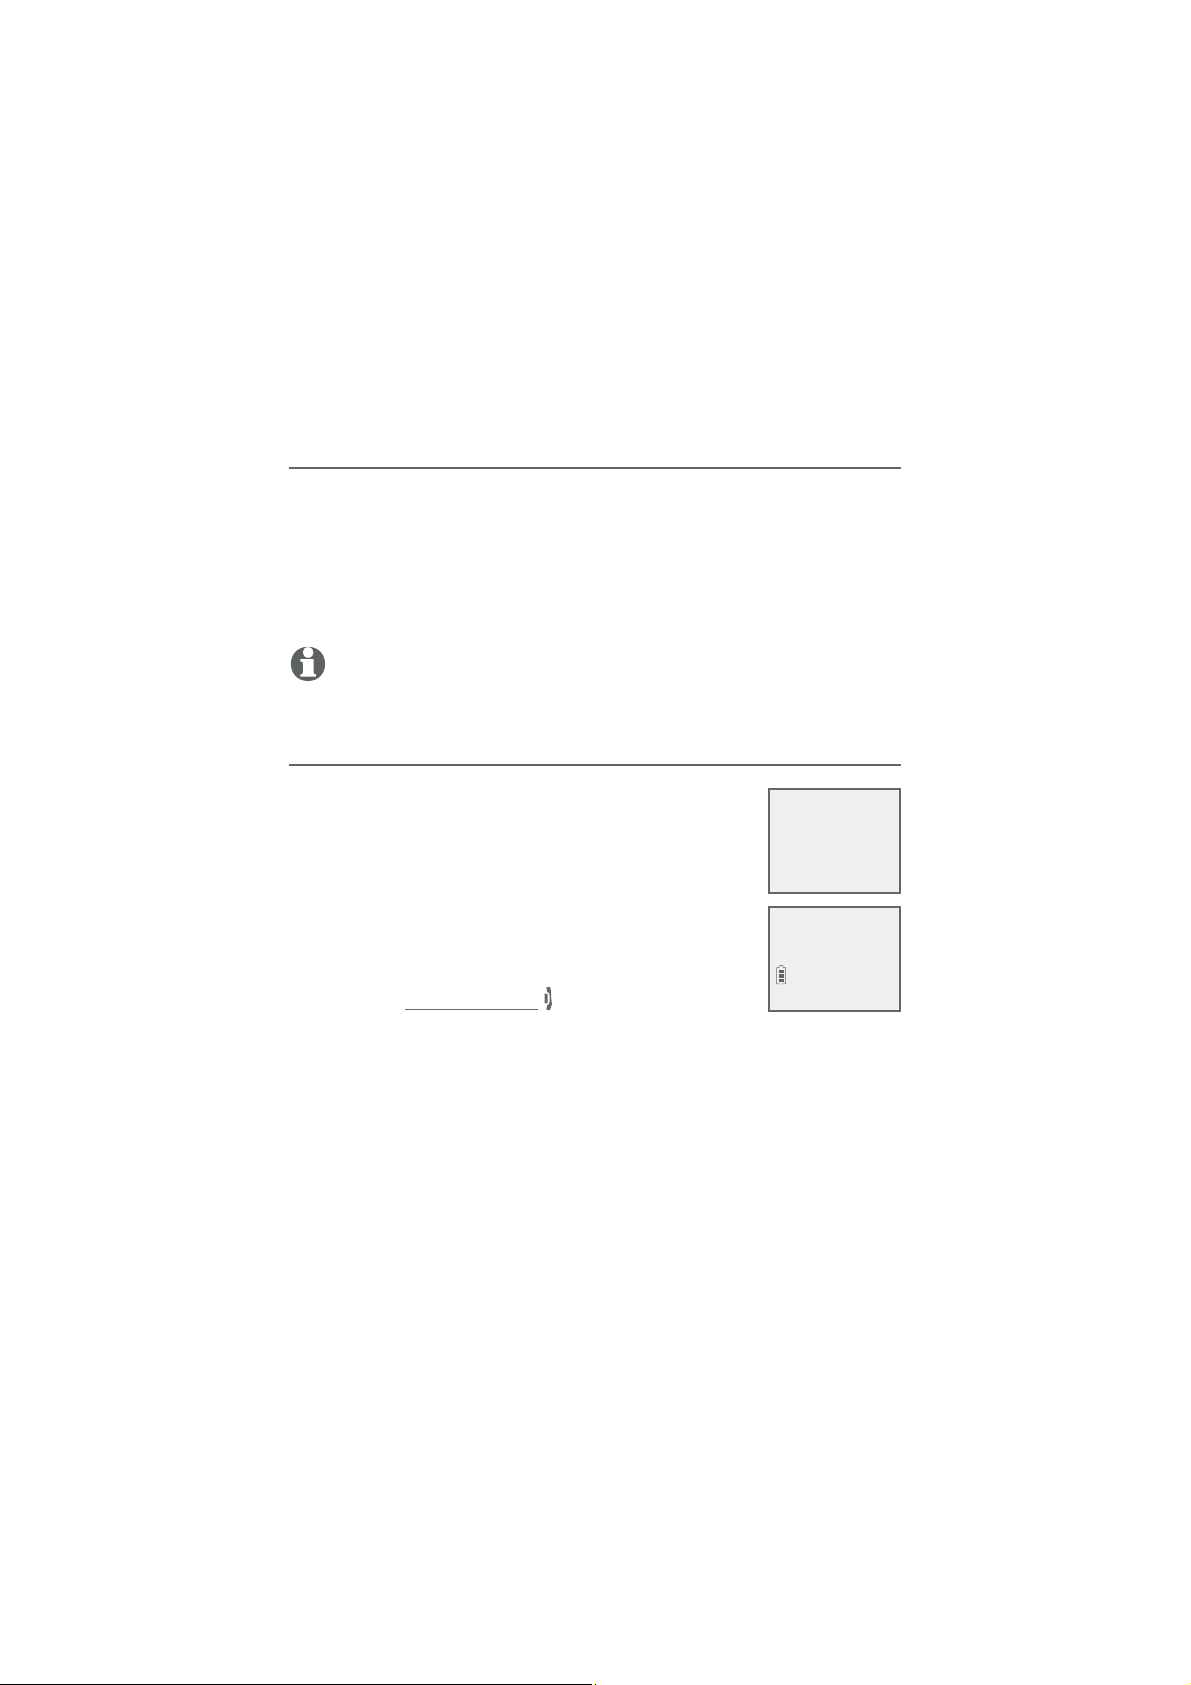
Caller ID
Caller ID history
How the caller ID history (caller ID log) works
The telephone stores caller ID information about the last 50
incoming calls. Entries are stored in reverse chronological order.
The phone deletes the oldest entry when the log is full to make
room for new calls. This information is common to all handsets,
so changes made using any handset are reflected in all other
devices. If you answer a call before the information appears on
the screen, it does not show in the caller ID log.
NOTE: Each entry may have up to 24 digits for the phone number and 15
characters for the name.
Missed (new) call indicator
When a handset is in idle mode and has new or
missed calls, its screen shows XX Missed calls.
All new and missed entries are counted as missed
calls. Each time you review a new caller ID log entry
(indicated by NEW on the screen), the number of
missed calls decreases by one.
If you do not want to review the missed calls one
by one, but still want to keep them in the caller ID
log, you can press and hold
OFF/CANCEL for four
seconds when the handset is idle. You will hear a
confirmation tone. All the entries in the caller ID log become old
(reviewed already), and the missed calls message goes away.
HANDSET 1
HANDSET 1
6 Missed calls
AM
10:01
Robert Brown
888-883-2445
09:30
10/15
10/15
NEW
AM
10/15
59
Page 67
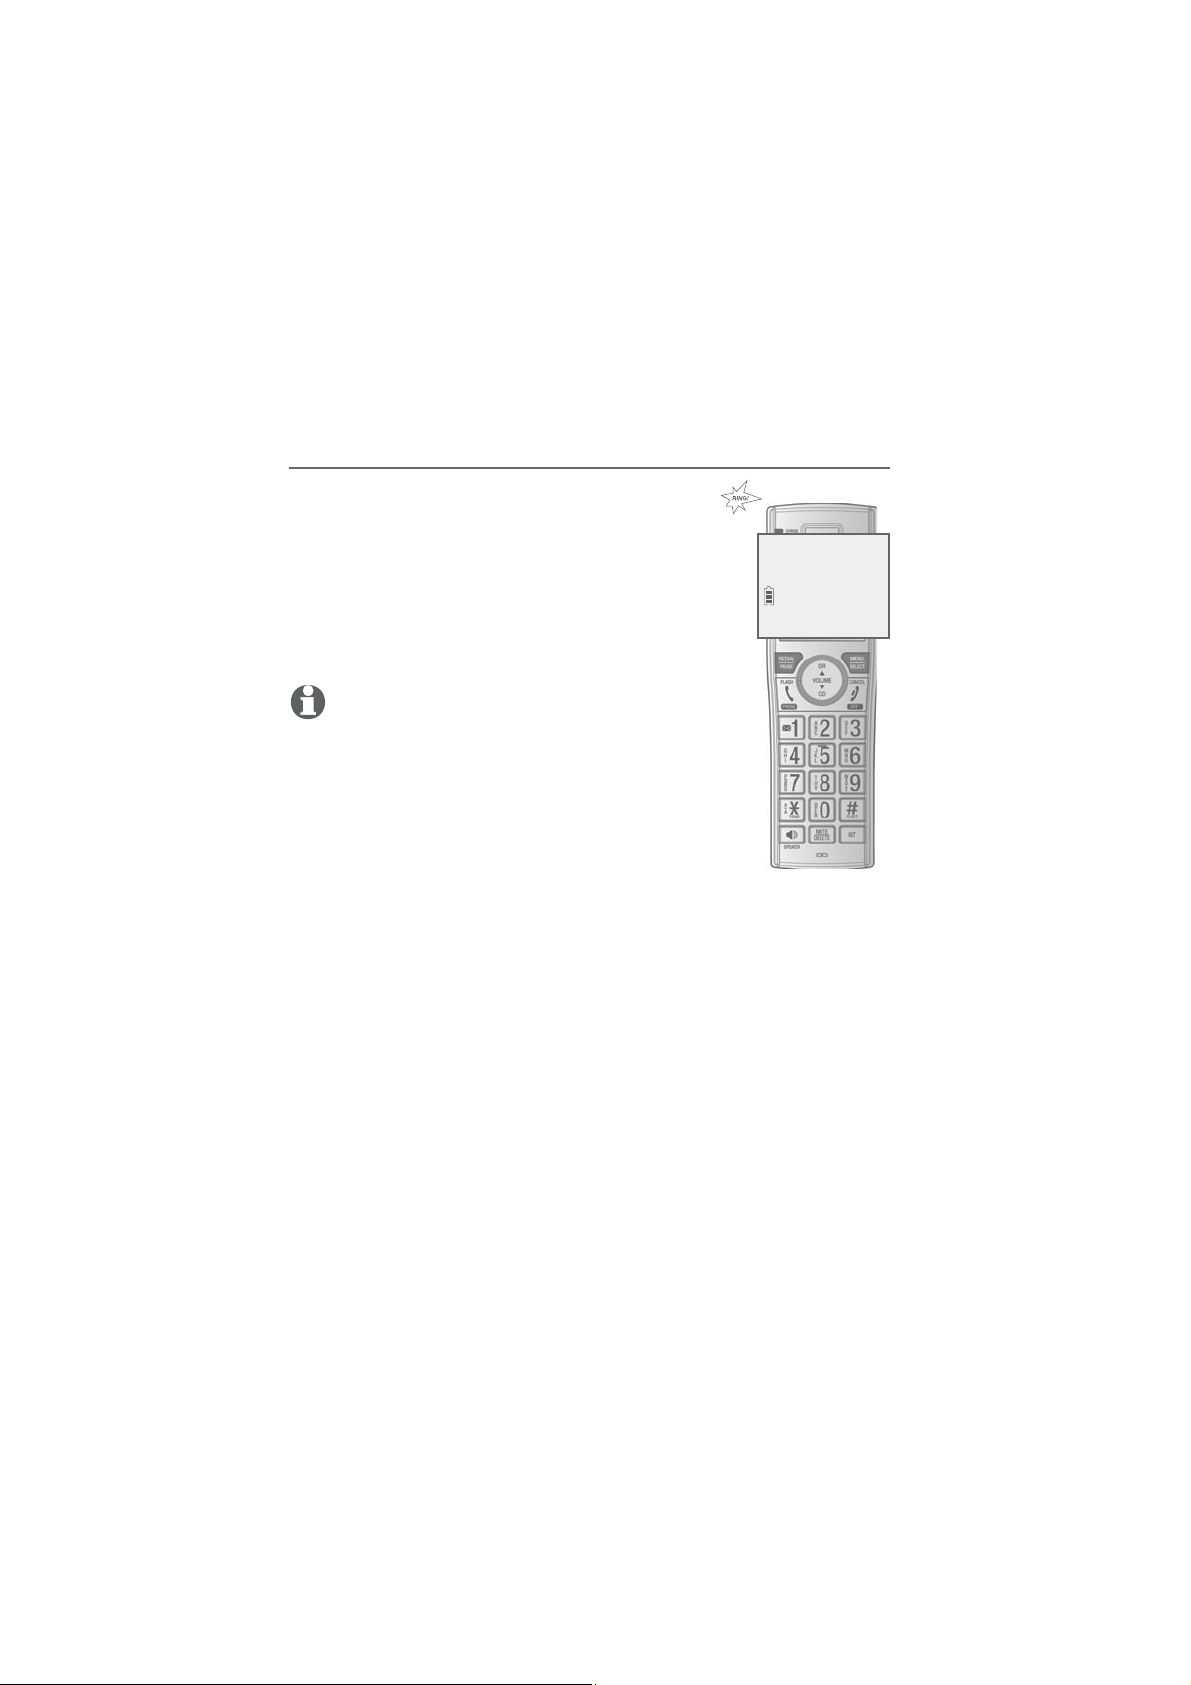
Caller ID
Caller ID operation
Memory match
If the incoming telephone number matches
the last 7 digits of a telephone number in your
directory, the name
that appears on the screen matches the
corresponding name in your directory.
For example, if Christine Smith calls, her name
appears as Chris if this is how you entered it
into your directory.
NOTE: The number shown in the caller ID log will be
in the format sent by the telephone service provider.
The telephone service provider usually delivers tendigit phone numbers (area code plus telephone
number). If the telephone number of the caller does
not match a number in your directory, the name will
appear as it is delivered by the telephone service
provider.
Chris
888-883-2445
NEW
AM
10:01
10/15
60
Page 68
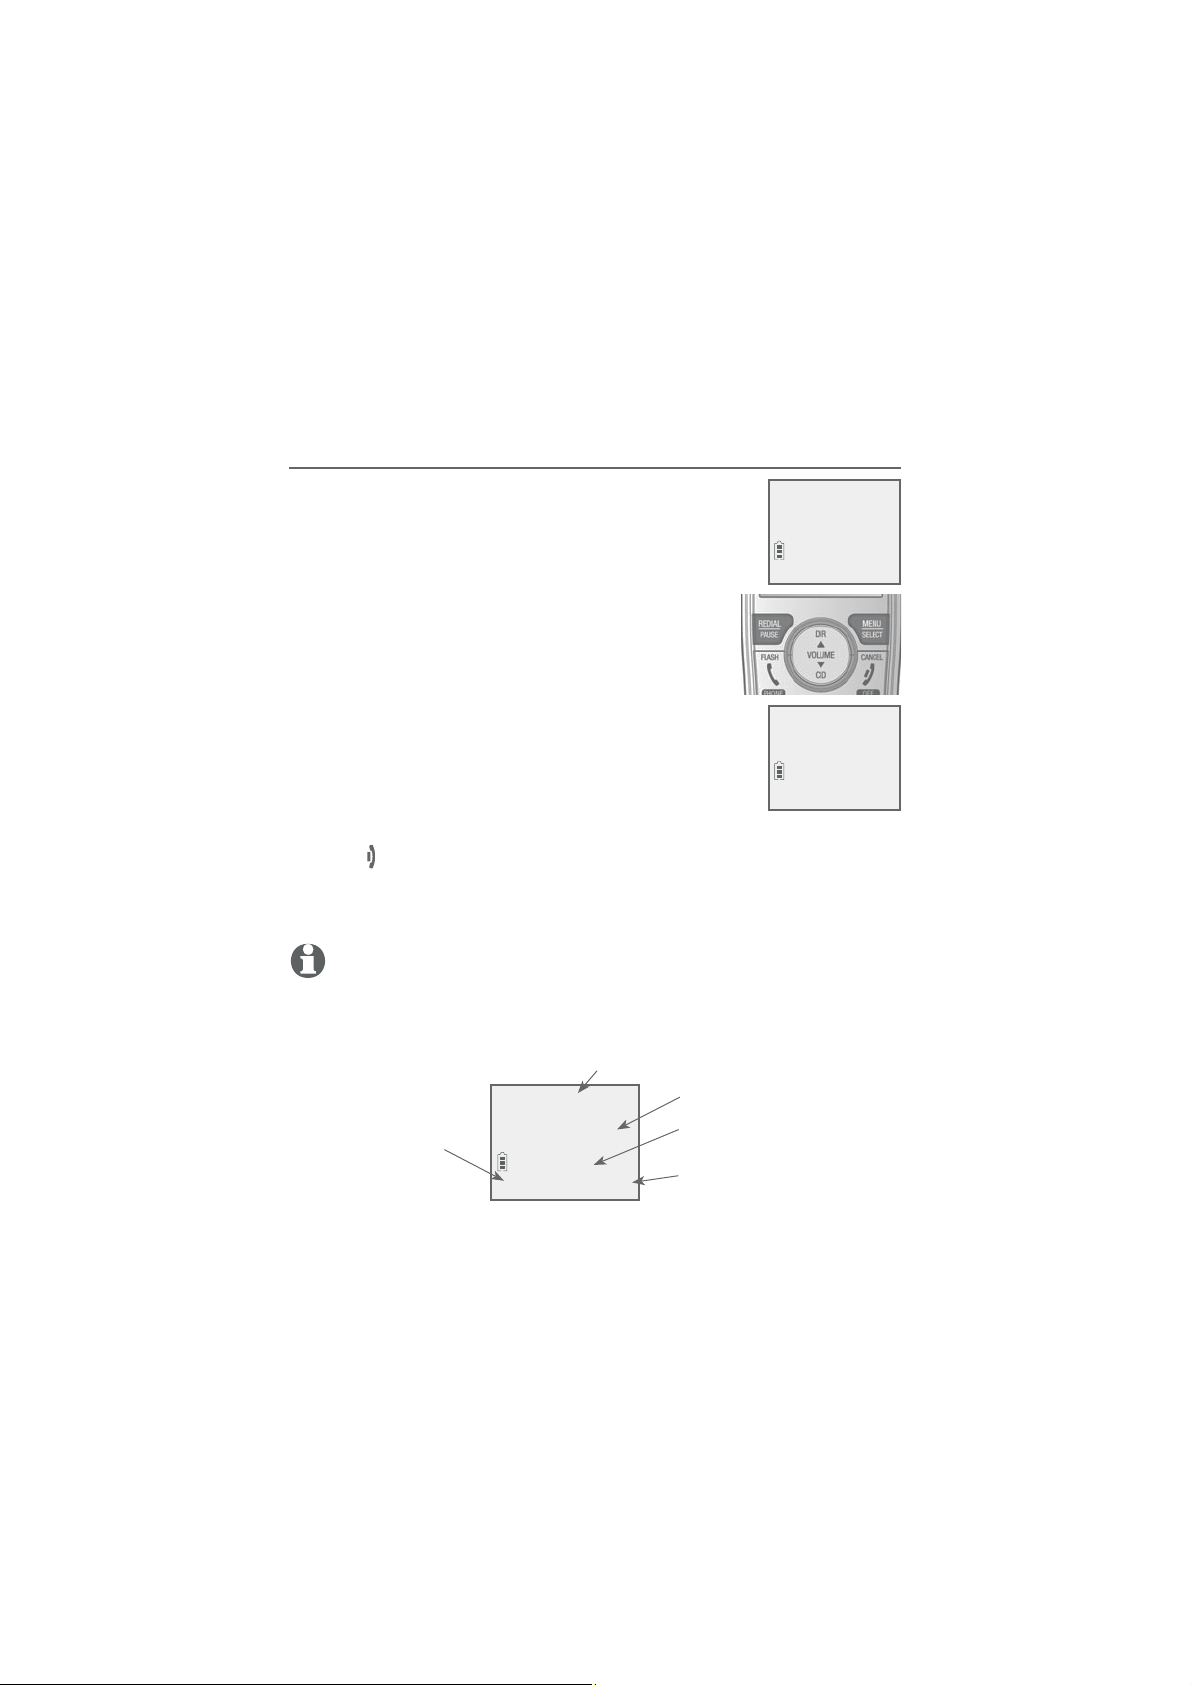
Caller ID
Caller ID operation
Review the caller ID log
Review the caller ID log to find out who called, to
return the call, or to copy the caller’s name and
number into your directory. Caller ID log empty
appears if there are no records in the caller ID log.
1. When the handset is in idle mode, press
CID to review the caller ID log in reverse
chronological order starting with the most
recent call.
-OR-
Review the caller ID log by pressing MENU/
SELECT. Press CID or DIR to scroll to Caller
ID log, then press MENU/SELECT twice to
select Review.
2. Press
CID or DIR to scroll through the list.
3. Press OFF/CANCEL to exit the caller ID log.
You hear a double beep when the list reaches the beginning or end
of the caller ID log.
HANDSET 1
6 Missed calls
AM
10:01
Directory
>Caller ID log
10/15
NOTE: Only one handset can review the caller ID log at a time. If another
device tries to enter the directory or caller ID log, it shows Not available at
this time.
Caller’s name
Caller’s number
Appears if it is a new or
missed call.
Date of call
Time of call
CHRISTINE SMITH SMITH
888-883-2445
NEW
AM
10:01
10/15
61
Page 69
Caller ID
Caller ID operation
View dialing options
Although the incoming caller ID log entries have ten digits (the area
code plus the seven-digit number), in some areas, you may need
to dial only the 7 digits, 1 plus the seven
digits, or 1 plus the area code plus the
seven digits. You can change and store the
number of digits that you dial in the caller
883-2445
1-883-2445
888-883-2445
1-888-883-2445
ID log.
While reviewing the caller ID log, press #
(pound key) repeatedly to show different
883-2445
1-883-2445
dialing options for local and long distance
numbers before dialing or saving the
telephone number in the directory.
888-883-2445
1-888-883-2445
Press 1 repeatedly if you need to add or remove 1 in front of the
telephone number before dialing or saving it in the directory.
When the number is in the correct format for dialing, press
PHONE/FLASH or /SPEAKERSPEAKER to call the number.
NOTE: This feature is only available to telephone numbers with 7 or 11 digits.
To save the number to the directory, see Save a caller ID log entry
to the directory on the next page.
Press #
Press 1
Dial a caller ID log entry
1. When in the caller ID log, press
CID or DIR to browse.
2. Press PHONE/FLASH or /SPEAKERSPEAKER to dial the displayed
entry.
62
Page 70

Caller ID
Caller ID operation
Delete caller ID log entries
To delete an entry:
•
To delete all entries:
1. Press MENU/
2. Press CID or DIR to scroll to Caller ID log, then press MENU/
3. Press CID or DIR to scroll to Del all calls, then press MENU/
4. When the screen shows Delete all calls?, press
Save a caller ID log entry to the directory
1. When in the caller ID log, press
2. When the desired entry displays, press MENU/SELECT.
3. Press MENU/SELECT to choose Directory.
4. When the screen displays EDIT NUMBER, use the dialing keys to
5. Press
MUTE/DELETE to delete the shown entry.
Press
SELECT when in idle mode.
SELECT.
SELECT.
MENU/SELECT to confirm. There is a confirmation
tone and the screen returns to the previous
>Del all calls
menu.
CID or DIR to browse.
edit
the number.
Press
•
Press MUTE/DELETE to backspace and erase a digit.
•
Press and hold MUTE/DELETE to erase the entire entry.
•
Press and hold
•
CID or DIR to move the cursor to the left or right.
REDIAL/PAUSE to insert a three-second dialing
pause
(a p appears).
MENU/SELECT to move to the name.
Review
63
Page 71

Caller ID
Caller ID operation
6. When the screen displays EDIT NAME, use the dialing keys (page
49) to edit the name.
•
Press
Press 0 to add a space.
•
Press
•
Press and hold
•
Press # (pound key) to move the last word to the front. For
•
example, Johnson Charlie becomes Charlie Johnson when
you press # (pound key).
7. Press
NOTES:
•
You may need to change how a caller ID number is dialed if the entry does not
appear in the correct format. Caller ID numbers may appear with an area code that
is not necessary for local calls, or without a 1 that is necessary for long distance
calls (see View dialing options on page62).
•
If the caller’s name you received from the telephone service provider is all in capital letters, the first letter of every word remains a capital letter, while other letters
become lowercase. However, the next letter after the prefix “Mac”, “Mc”, “D’”, “C’” or
“O’”, is kept as a capital letter. For example, the “D” in “MacDonald” is kept as a capital letter. Another exception is that “VAN DER” will be changed to “Van der”.
•
If the telephone number from the caller ID information has already been saved in
the directory under a different name, the new name will overwrite the old one.
CID or DIR to move the cursor to the left or right.
MUTE/DELETE to erase a character.
MUTE/DELETE to erase all characters.
MENU/SELECT when done. The screen shows Saved.
64
Page 72

Caller ID
Reasons for missing caller ID information
There are occasions when other information or no information
shows for various reasons:
On-screen message Reason
PRIVATE NUMBER
The caller prefers not to show the phone number.
PRIVATE NAME
PRIVATE CALLER
UNKNOWN NUMBER
UNKNOWN NAME
UNKNOWN CALLER
The caller prefers not to show the name.
The caller prefers not to show the phone number
and name.
Your telephone service provider cannot determine
the
caller’s number.
Your telephone service provider cannot determine
the
caller’s name.
Your telephone service provider cannot determine the
caller’s name and telephone number.
Calls from other countries may also generate this
message.
65
Page 73

Call block
About call block
If you have subcribed to caller ID service, you can use the call
block feature to reject certain calls automatically. The call block
list stores up to 20 entries. The telephone system can reject
calls automatically according to:
•
Numbers saved into the call block list
•
Incoming calls without numbers
This feature is only available on the cordless
handset.
When a call is blocked, the caller will hear a simulated busy tone
for one ring cycle. The call recipient may pick up the call during the
first ring when there is no caller ID information. Otherwise, the call
is disconnected.
NOTE: The blocked calls are displayed as Blocked call in the caller ID log.
Blocked call
888-772-7702
Page 74
Call block
Call block
Add a call block entry
Press MENU
1.
not in use.
Press
2.
press
Press
3.
Press CID or DIR to scroll to Add new entry,
4.
then press MENU/SELECT.
When the screen displays ENTER NUMBER, use
5.
the dialing keys to enter a number (up to 30
digits).
Press
•
left or right.
Press
•
Press and hold MUTE/DELETE to erase all
•
digits.
Press and hold REDIAL/PAUSE to enter a
•
three-second dialing pause (a p appears).
-OR-
Copy a number from the redial list by pressing
REDIAL/
repeatedly to find the desired number. Press MENU/SELECT to
copy the number.
6. Press MENU/SELECT to move on to the name.
The display shows Number already saved if the number
•
is already in the call block list. You cannot save the same
number twice.
/SELECT on the handset when it is
CID or DIR to scroll to Call block, then
MENU/SELECT.
MENU/SELECT to choose Block list.
CID or DIR to move the cursor to the
MUTE/DELETE to erase a digit.
PAUSE. Then, press CID, DIR or REDIAL/PAUSE
Caller ID log
>Call block
>Block list
Calls w/o num
Review
>Add new entry
ENTER NUMBER
888-883-2445_
67
Page 75
Call block
Call block
7. When the screen displays ENTER NAME, use
the dialing keys to enter a name (up to 15
characters). Press a key repeatedly until the
desired character appears. The first character of
every word is capitalized.
Press
•
Press 0 to add a space.
•
•
Press
•
Press and hold MUTE/DELETE to erase all characters.
•
Press TONE
CID or DIR to move the cursor to the left or right.
MUTE/DELETE to erase a character.
to change the next letter to upper or lower
case.
8. Press MENU/SELECT to store your call block entry.
Review call block list
1.
Press MENU
/SELECT on the handset when it is
not in use.
2.
Press CID or DIR to scroll to Call block, and
then press
3.
Press MENU/SELECT to choose Block list..
4.
Press MENU/SELECT to choose Review.
5.
Press
MENU/SELECT.
CID or DIR to browse through the call
block entries.
ENTER NAME
Salesman_
>Review
Add new entry
Salesman
888-883-2445
NOTE: Block list is empty appears if there are no call block entries.
68
Page 76

Call block
Call block
Save a caller ID log entry to call block list
Search for the desired caller ID log entry (see Review the caller
1.
ID log on page 61).
When the desired entry displays, press
2.
Press CID or DIR to scroll to Call block, then press MENU/
3.
SELECT.
The handset displays EDIT NUMBER. Use the dialing keys to edit
4.
the number, when necessary.
Press
•
Press
•
CID or DIR to move the cursor to the left or right.
MUTE/DELETE on the handset to backspace and erase a
digit.
Press and hold MUTE/DELETE to erase the entire entry.
•
Press and hold REDIAL/PAUSE to insert a three-second dialing
•
pause (a p appears).
5. Press
MENU/SELECT to move to the name. The screen displays
EDIT NAME.
6. Use the dialing keys to add or edit the name.
Press
•
Press 0 to add a space.
•
Press
•
Press and hold MUTE/DELETE to erase all characters.
•
Press # (pound key) to move the last word to the front. For
•
CID or DIR to move the cursor to the left or right.
MUTE/DELETE to erase a character.
example, Johnson Charlie becomes Charlie Johnson when
you press # (pound key).
7. Press
MENU/SELECT when done and the screen shows Saved.
MENU/SELECT.
69
Page 77
Call block
Call block
Edit a call block entry
Search for the desired entry in the call block list
1.
(see Review call block list on page 68)
When the desired entry displays, press
2.
MENU/
SELECT. The screen displays EDIT NUMBER
along with the phone number to be edited. If
you only want to edit the name, skip to Step 4.
To edit the number:
3.
Use the dialing keys to enter digits.
•
Press
•
CID or DIR to move the cursor to the
left or right.
Press MUTE/DELETE on the handset to erase
•
a digit.
Press and hold
•
MUTE/DELETE to erase all
digits.
Press and hold REDIAL/PAUSE to enter a three-second dialing
•
pause (a p appears).
4. Press
MENU/SELECT to move on to the name. The screen
displays EDIT NAME along with the name to be edited.
5. To edit the name:
Use the dialing keys to enter characters.
•
Press
•
Press 0 to add a space.
•
Press
•
Press and hold MUTE/DELETE to erase all characters.
•
CID or DIR to move the cursor to the left or right.
MUTE/DELETE to erase a character.
6. Press MENU/SELECT to save the entry. The screen displays
Saved.
Salesman
888-883-2445
ENTER NUMBER
888-883-2445_
ENTER NAME
TV Salesman_
70
Page 78
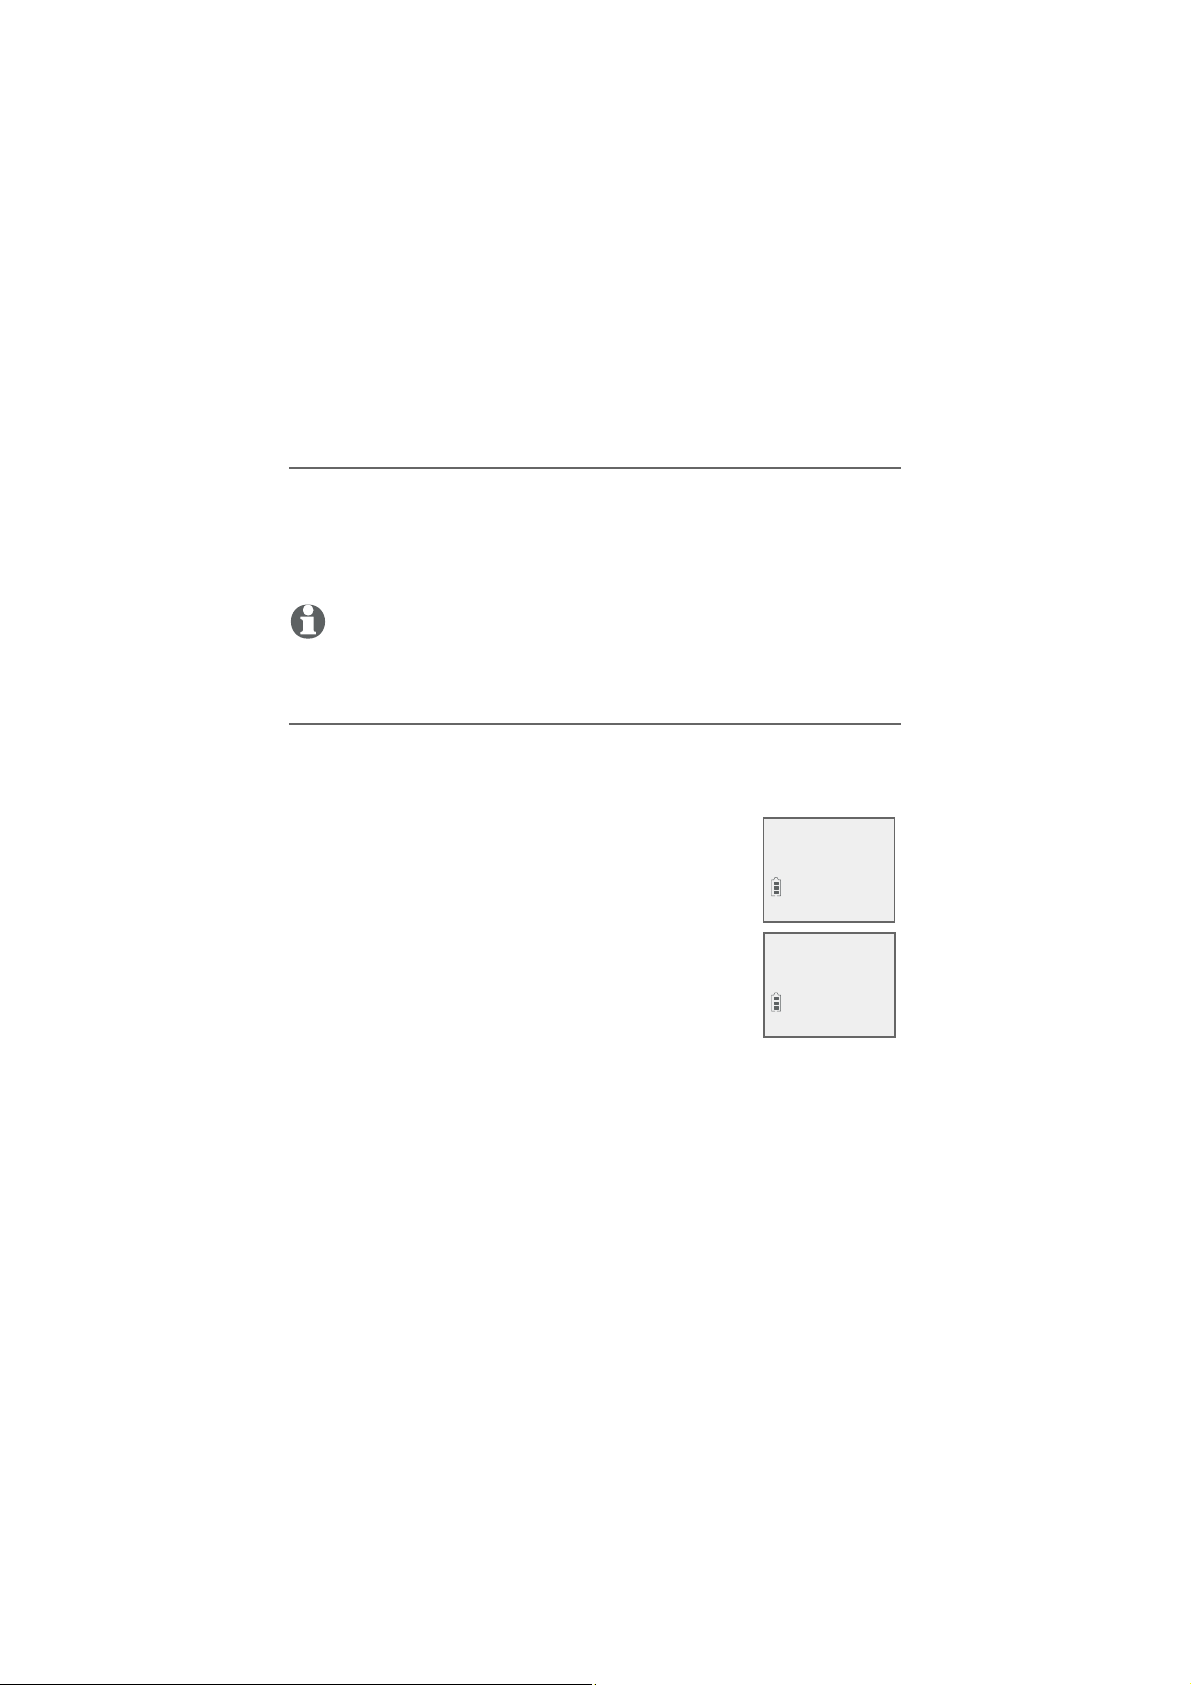
Call block
Call block
Delete a call block entry
Search for the desired entry in the call block list (see Review
1.
call block list on page 68).
When the desired entry displays, press
2.
handset. The screen shows Deleted and the next entry displays.
You cannot retrieve a deleted entry.
NOTE: If the call block list is empty after an entry is deleted, the screen
displays Block list is empty.
Block calls without number
You can use this feature to reject all incoming calls which are “out
of area“ or with numbers set to “Private“.
Press MENU
1.
Press CID or DIR to scroll to Call block, then
2.
/SELECT on the handset when it is not in use.
press MENU/SELECT.
Press
3.
CID or DIR to scroll to Calls w/o num,
then press MENU/SELECT.
Press CID or DIR to choose Not block or
4.
Block, then press MENU/SELECT.
MUTE/DELETE on the
Block list
>Calls w/o num
>Not block
Block
71
Page 79
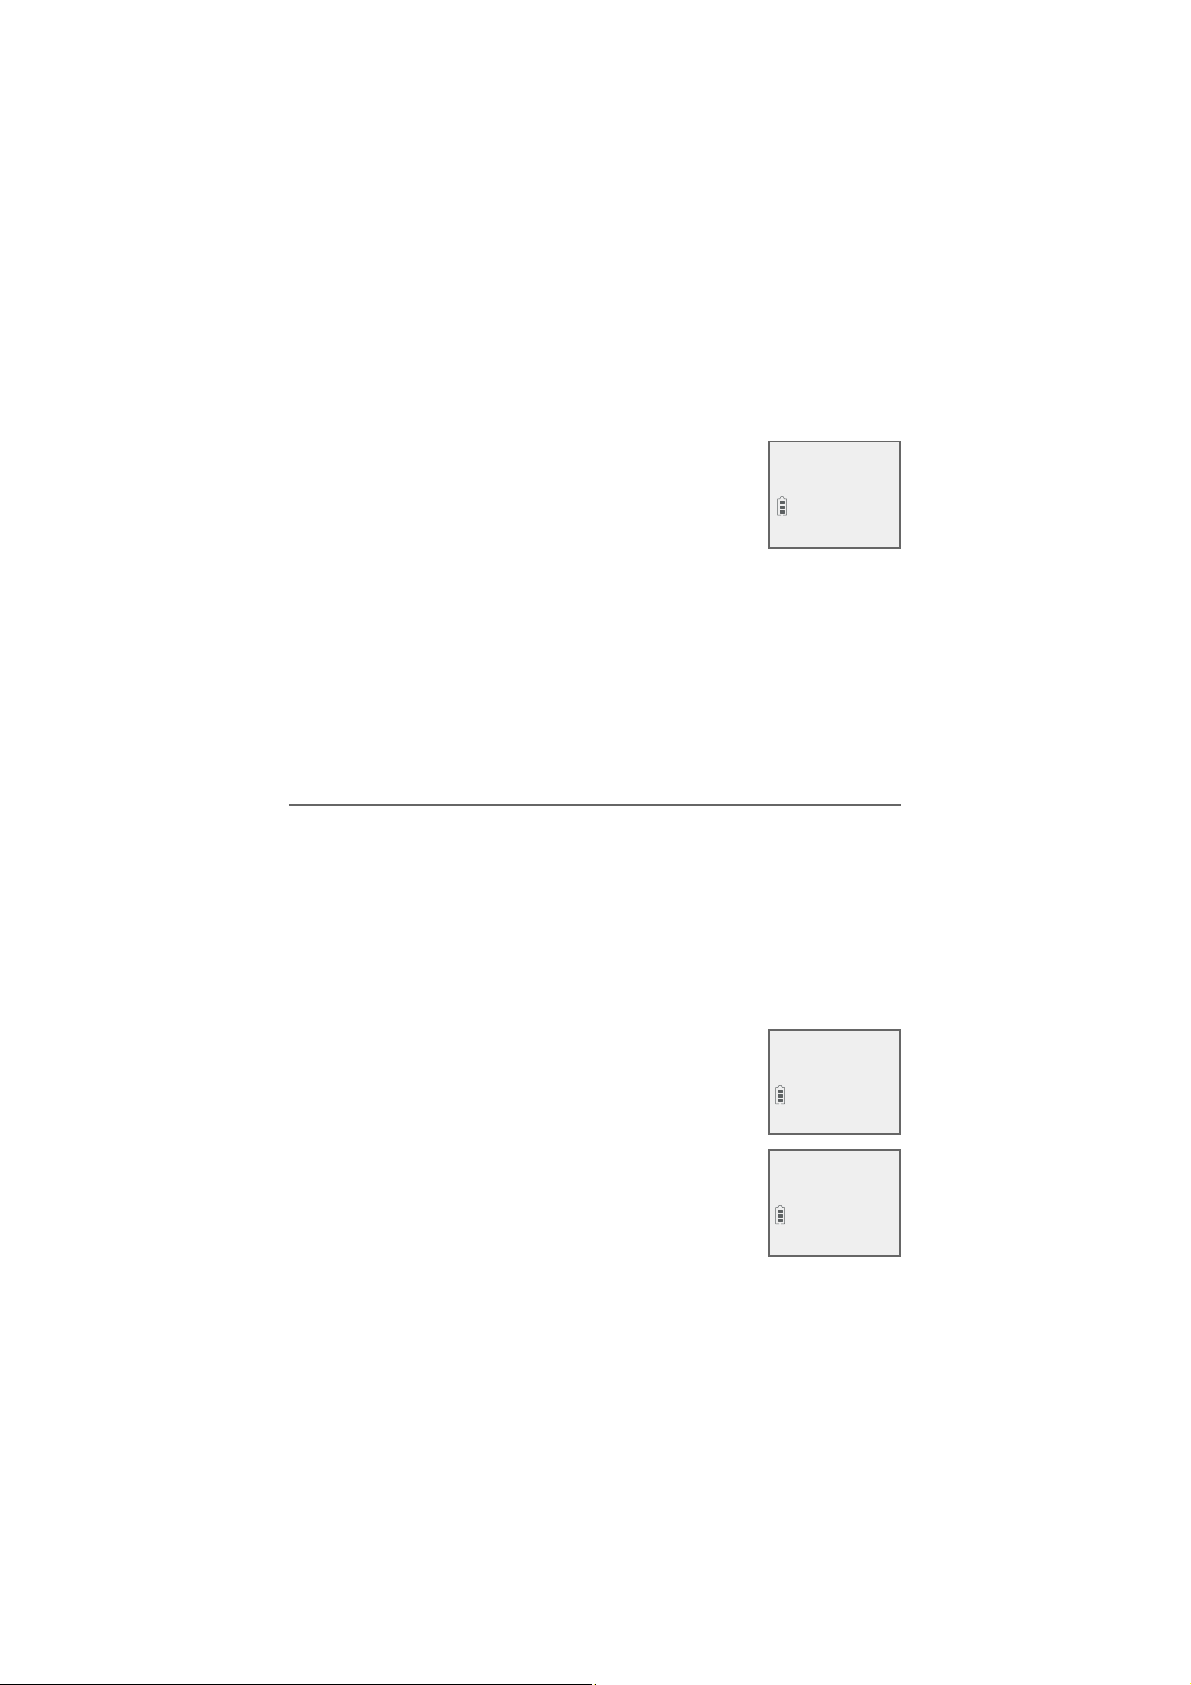
Answering system
Answering system
Answering system settings
Use the answering system menu of a system
handset to set up the announcement message, turn
on or off the answering system or message alert
Play messages
>Answering sys
tone, activate call screening, or change the number
of rings, remote access code or message recording
time. If you turn off the answering system and you change any
setting in the answering system setup menu, the answering system
automatically turns on again.
1. When the device is in idle mode, press MENU/
SELECT to enter the
main menu.
2. Press
CID or DIR to scroll to Answering sys, then press MENU/
SELECT.
Announcement
Your outgoing announcement plays when calls are answered by
the answering system.
The telephone has a default outgoing announcement, “Hello. Please
leave a message after the tone.” You can use this announcement, or
record your own.
You can record an announcement up to 90 seconds. The system
does not record any announcement shorter than two seconds.
To play your current outgoing announcement:
>
1. When the handset is in idle mode, press MENU/
SELECT to enter the main menu.
Announcement
Delete all old
2. Press CID or DIR to scroll to Answering sys,
then press
3. Press MENU/SELECT again to select
Announcement.
4. Press
press MENU/SELECT.
MENU/SELECT.
CID or DIR to scroll to Play annc, then
Record annc
>Play annc
72
Page 80

Answering system
Answering system settings
To record a new outgoing announcement:
1. When the handset is in idle mode, press MENU/
the main menu.
2. Press
CID or DIR to scroll to Answering sys, then press MENU/
SELECT.
3. Press
MENU/SELECT again to select
Announcement.
4. Press
MENU/SELECT to select Record annc. The
system announces, “Record after the tone. Press 5
when you are done.”
5. Speak towards the handset to record your announcement. Press
5 to end recording. Your recorded announcement plays.
To listen to the recorded announcement again, scroll to Play annc
and press
MENU/SELECT.
To reset your outgoing announcement:
1. When the handset is in idle mode, press MENU/
main menu.
2. Press CID or DIR to scroll to Answering sys, then press MENU/
SELECT.
3. PressPress MENU/SELECT again to select Announcement.
4. Press
CID or DIR to scroll to Reset annc, then press MENU/
SELECT. The screen shows Reset to default annc? PressPress MENU/
SELECT again to confirm. The screen shows Annc. reset to
default before returning to the previous menu.
-OR-
Press
CID or DIR to scroll to Play annc, then press MENU/
SELECT. While the announcement is playing, press MUTE/DELETE
to delete the announcement. The screen shows Annc. Deleted
before returning to the previous menu.
When your announcement is deleted, the system answers calls
with the default announcement described on page 72. You cannot
delete the default announcement.
73
SELECT to enter
>Record annc
Play annc
SELECT to enter the
Page 81
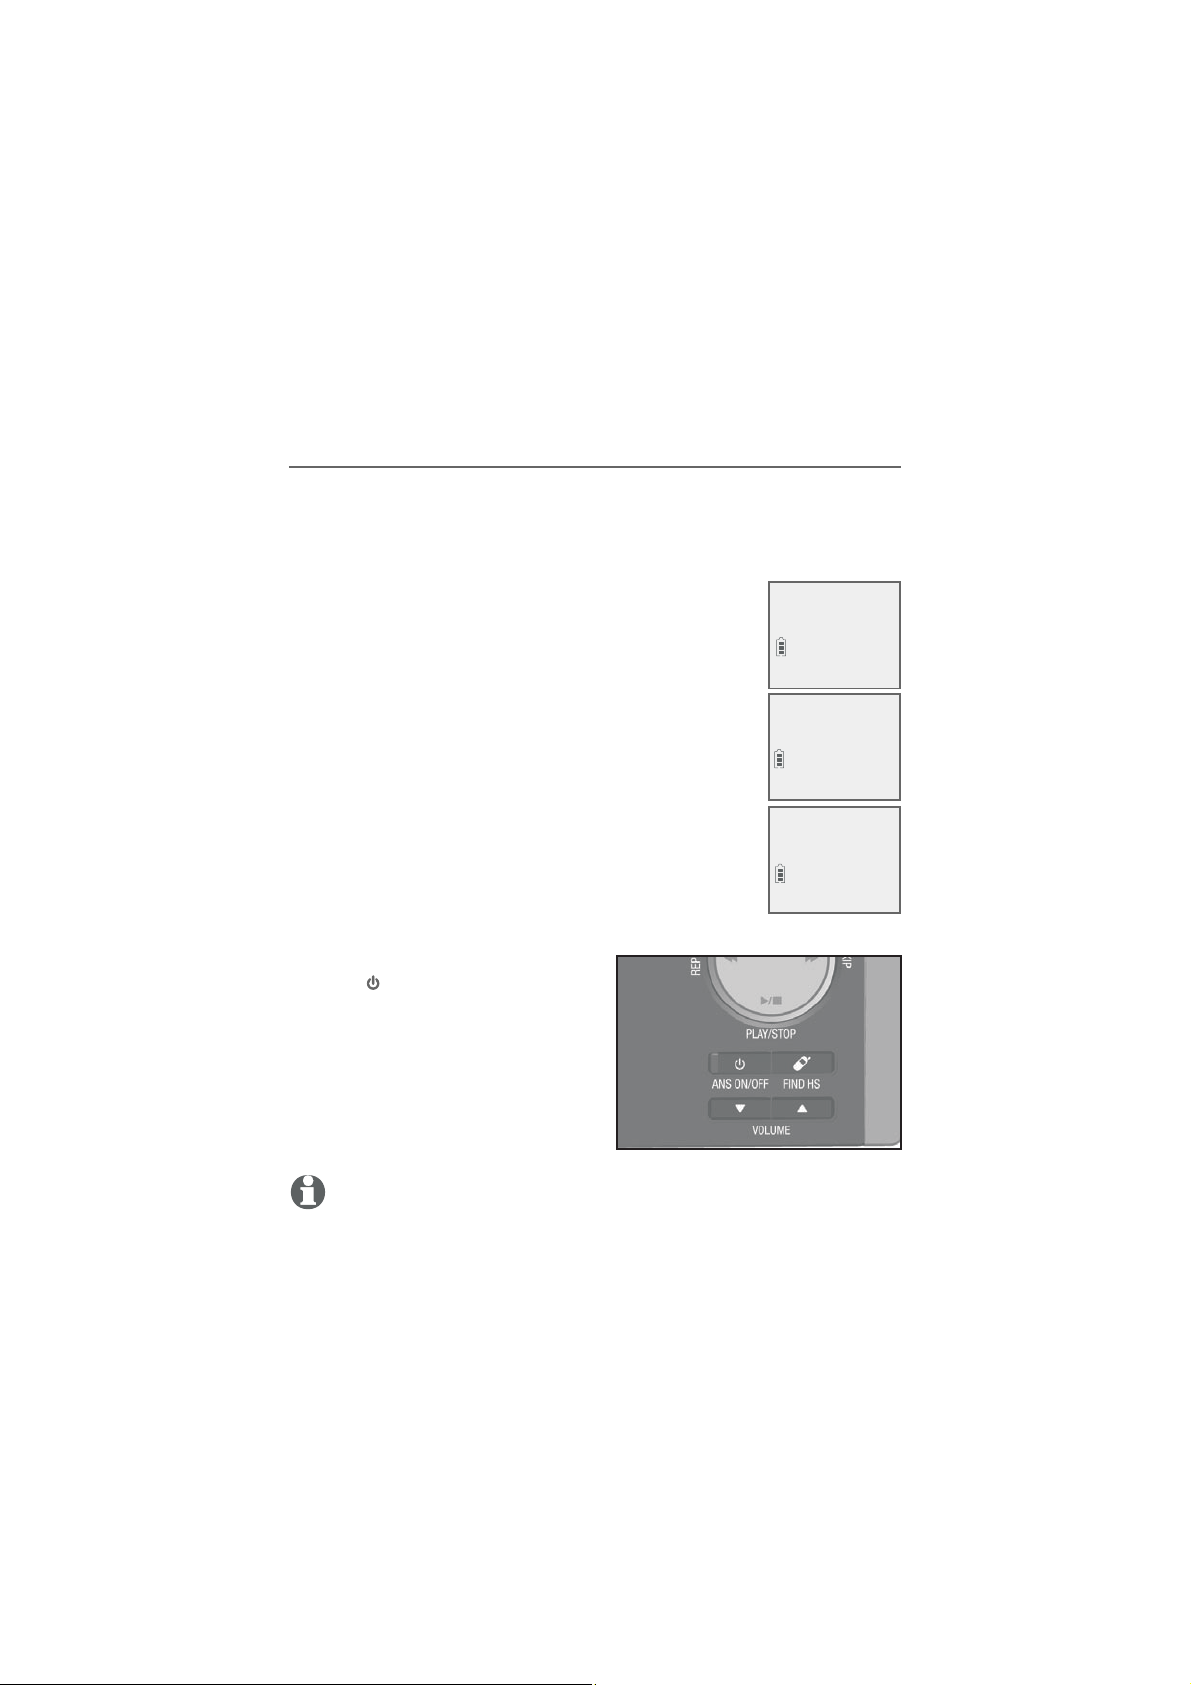
Answering system
Answering system settings
Answer on/off
By default, the answering system is on and ready to record
messages. You can turn the answering system off, but if you do so,
the answering system does not answer calls and record incoming
messages.
To turn the answering system on or off:
Using a cordless handset:
1. When the handset is in idle mode, press MENU/
SELECT to enter the main menu.
2. Press
CID or DIR to scroll to Answering sys,
then press MENU/SELECT.
3. Press CID or DIR to scroll to Answer ON/OFF,
then press MENU/SELECT.
4. Press
CID or DIR to highlight On or Off, then
press MENU/SELECT to save the setting. You hear
a confirmation tone.
When the answering system is on, the handset
shows ANS ON.
Using the telephone base:
•
Press
/ANS ON/OFF to turn
the answering system on or
off. If the answering system
is turned on, it announces,
“Calls will be answered.” If the
answering system is turned off,
it announces, “Calls will not be
answered.”
Play messages
>Answering sys
Record memo
>Answer ON/OFF
ANSWER ON/OFF
>On
NOTE: If the answering system is off and there is an incoming call, the system
answers after ten rings and announces, “Please enter your remote access
code.” For more information about remote access, see page 91.
74
Page 82
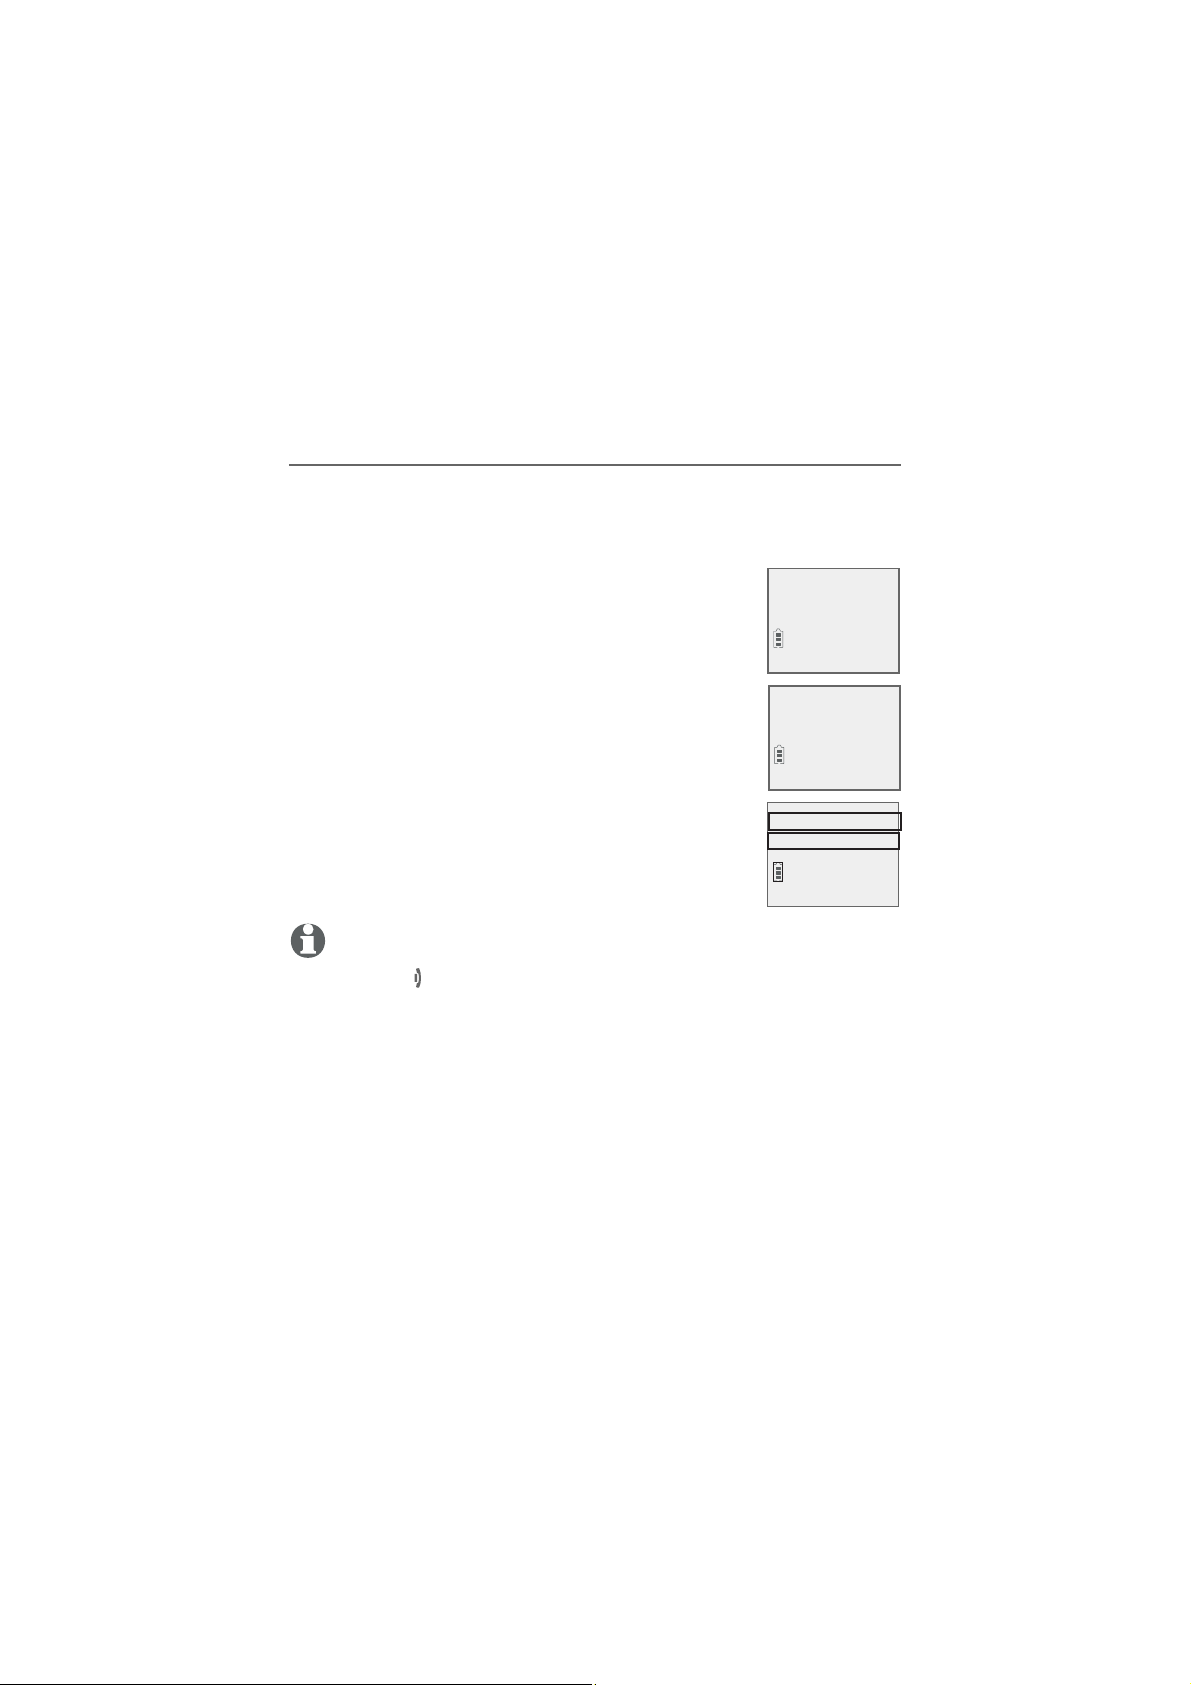
Answering system
Answering system settings
Voice guide
This feature is an alternative way for you to do the basic setup of
the answering system. You can follow the voice guide to record
your own announcement, set the number of rings, and set the
message alert tone.
This feature is only available on the cordless
handset.
1.
Press MENU/
SELECT on the handset when it is not
in use.
Press
2.
CID or DIR to scroll to Answering sys,
then press MENU/SELECT.
3.
Press CID or DIR to scroll to Voice guide, then
press MENU/SELECT. You hear a voice prompt,
“Hello! This voice guide will assist you with the
basic setup of your answering system.“
4.
Setup your answering system by inputting
designated numbers as instructed in the voice
guide.
NOTES:
•
You can press
If the system does not receive any input, it will announce “Sorry, I still have not
•
received any input. If you want to restart the voice guide, please enter the menu
and select Voice guide under Answering system. Good bye.”
After a power outage, the handset prompts you to set the date and time. After the
•
date and time setting is done or skipped, the handset prompts if you want to set up
the answering system via voice guide. Press
CANCEL/OFF to quit the voice guide at any time.
MENU/SELECT to start the setup.
Play messages
>Answering sys
Answer ON/OFF
>Voice guide
Setup Ans sys...
75
Page 83
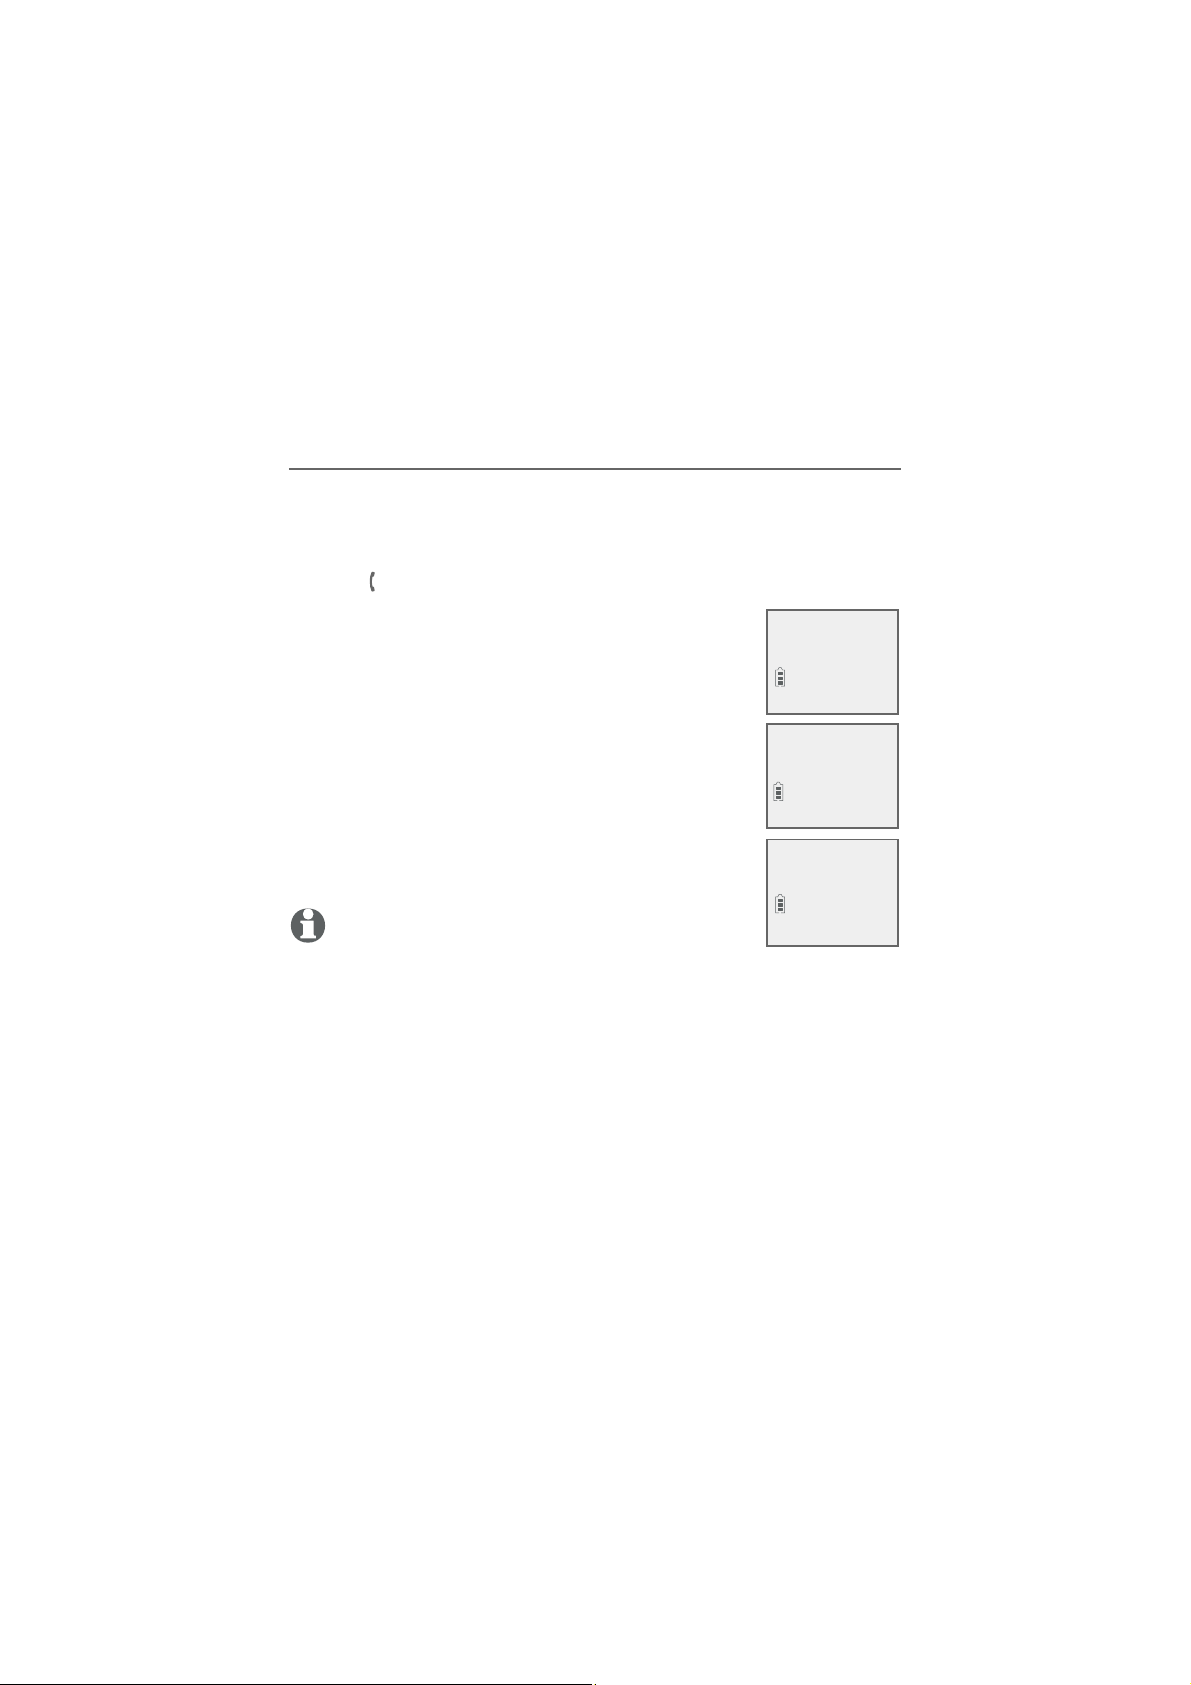
Answering system
Answering system settings
Call screening
Use this feature to choose whether incoming messages can be
heard over the speaker when they are being recorded. If you
turn call screening on, you hear the incoming message. While
monitoring an incoming message, you can answer the call by
pressing
PHONE/FLASH on the handset.
To change the setting:
1. When the handset is in idle mode, press MENU/
SELECT to enter the main menu.
2. Press
CID or DIR to scroll to Answering sys,
then press MENU/SELECT.
3. Press CID or DIR to scroll to Ans sys setup,
then press
MENU/SELECT.
4. Press MENU/SELECT to select Call screening.
5. Press CID or DIR to choose On or Off.
6. Press MENU/SELECT to save the setting. You hear
a confirmation tone.
NOTE: For more information on call screening, see page 84.
Voice guide
>Ans sys setup
>
Call screening
# of rings
CALL SCREENING
>On
76
Page 84
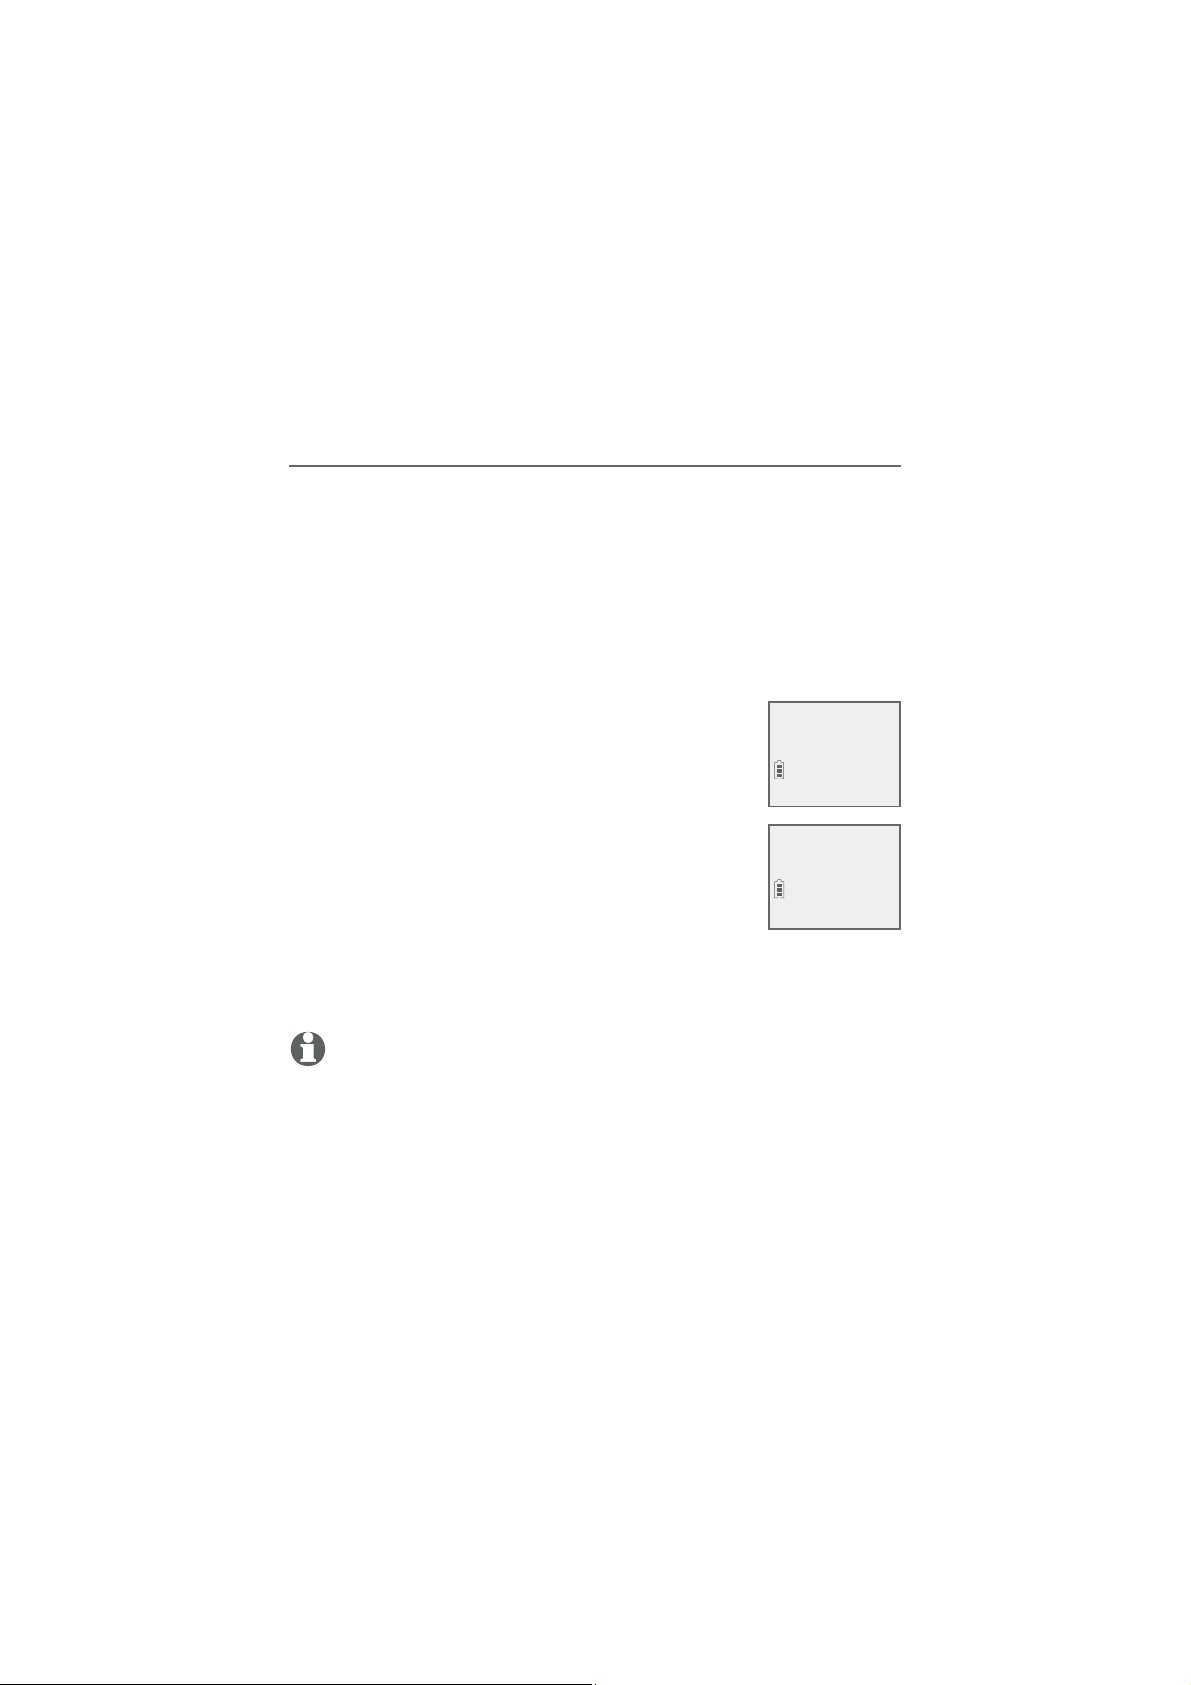
Answering system
Answering system settings
Number of rings
You can set the answering system to answer an incoming call after
two, three, four, five or six rings. You can also select toll saver. If
toll saver is selected, the answering system answers a call after two
rings when you have new messages, and after four rings when there
are no new messages. This feature allows you to check for new
messages and avoid paying long distance charges when calling from
out of your local area. By default, the answering system answers an
incoming call after four rings.
To set the number of rings:
1. When the handset is in idle mode, press MENU/
SELECT to enter the main menu.
2. Press CID or DIR to scroll to Answering sys,
then press
MENU/SELECT.
3. Press CID or DIR to scroll to Ans sys setup,
then press MENU/SELECT.
4. Press CID or DIR to scroll to # of rings, then
press
MENU/SELECT.
5. Press CID or DIR to choose among 2, 3, 4, 5,
6 or Toll saver.
6. Press MENU/SELECT to save the setting. You hear a confirmation
tone.
Call screening
># of rings
# OF RINGS
>4
NOTES:
If you subscribe to voicemail service through your telephone service provider, see
•
Answering system and voicemail indicators on page 81.
If you set the number of rings for the answering system as two or three rings, the
•
caller ID announce feature may not have enough time to announce the caller’s full
information.
77
Page 85
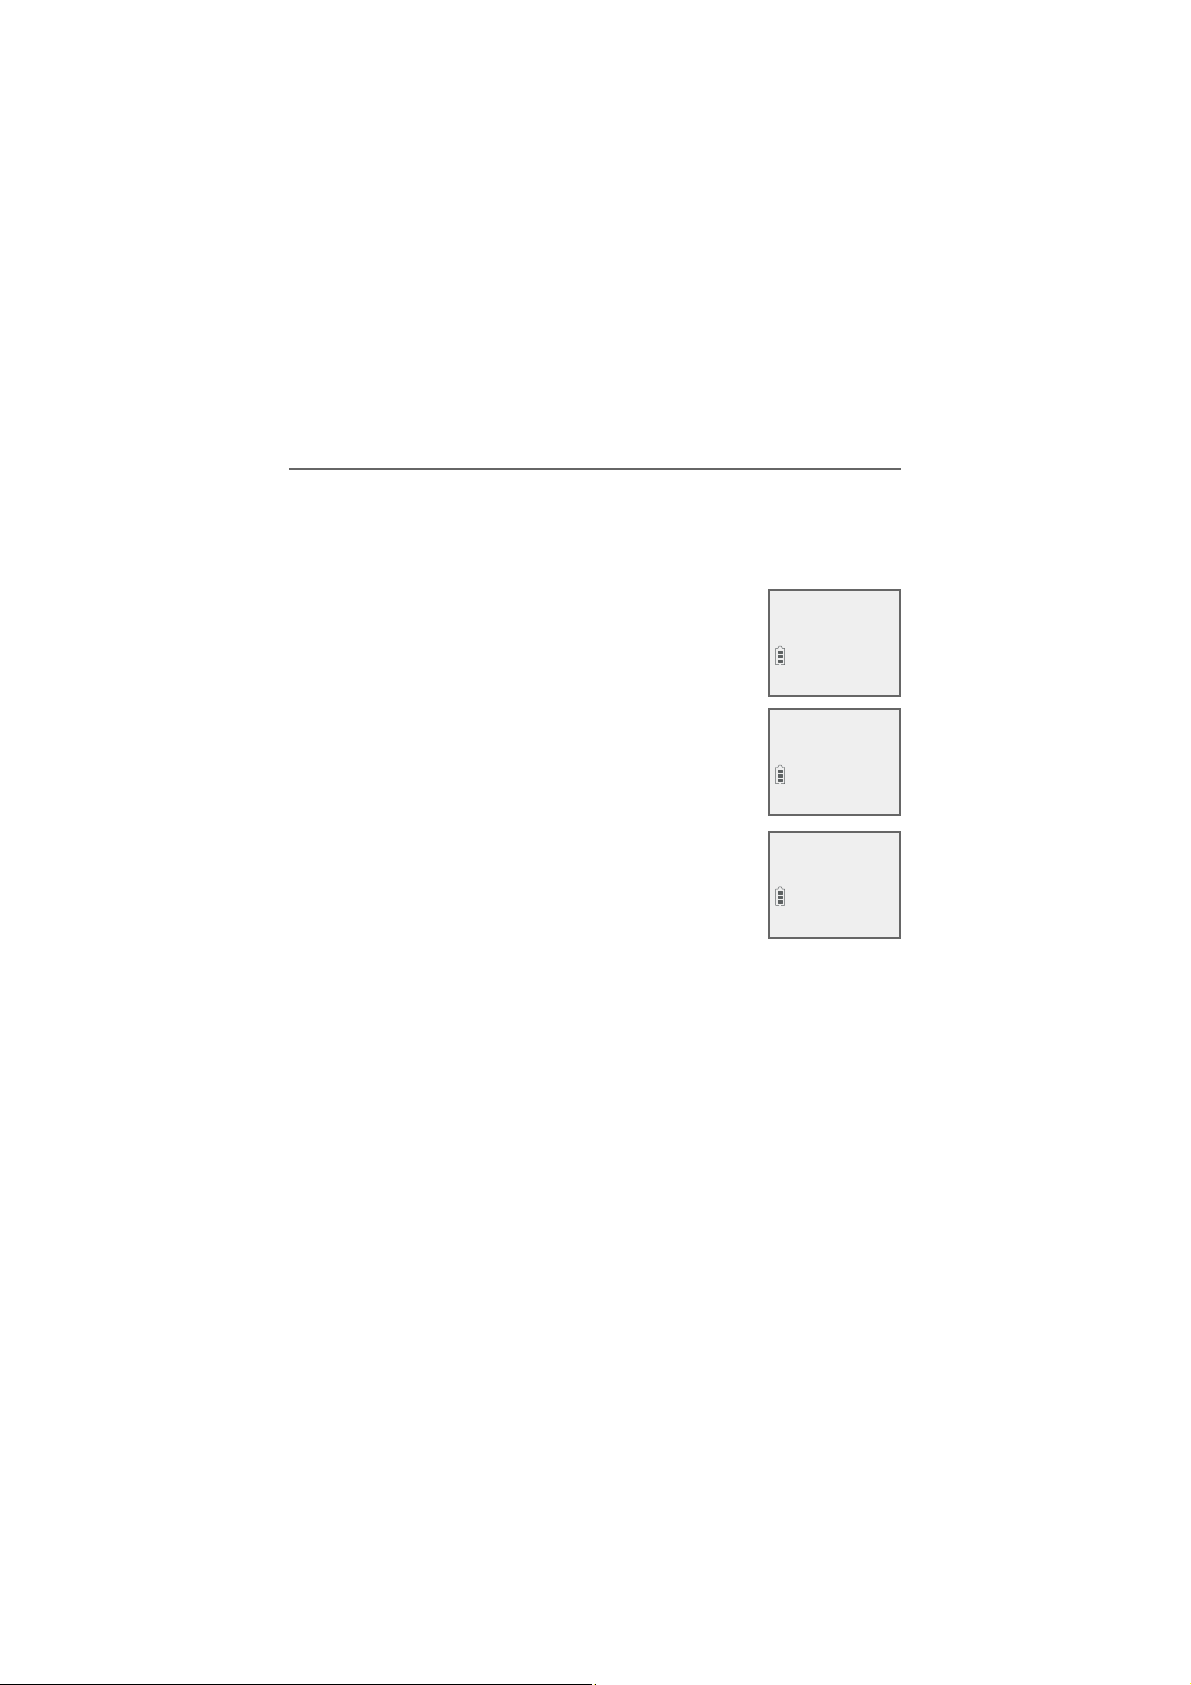
Answering system
Answering system settings
Remote access code
To access your answering system remotely from any touch-tone
phone, you need to enter a two-digit number (00-99). By default,
the remote access code is 19.
To change the remote access code:
1. When the handset is in idle mode, press MENU/
SELECT to enter the main menu.
2. Press CID or DIR to scroll to Answering sys,
then press MENU/SELECT.
3. Press
CID or DIR to scroll to Ans sys setup,
then press MENU/SELECT.
4. Press CID or DIR to scroll to Remote code,
then press
MENU/SELECT.
5. Use the dialing keys to enter a two-digit number.
Press MUTE/DELETE to backspace and delete a
digit.
6. Press
MENU/SELECT to save the setting. You hear a
confirmation tone.
Play messages
>Answering sys
Voice guide
>Ans sys setup
REMOTE CODE
19
Page 86
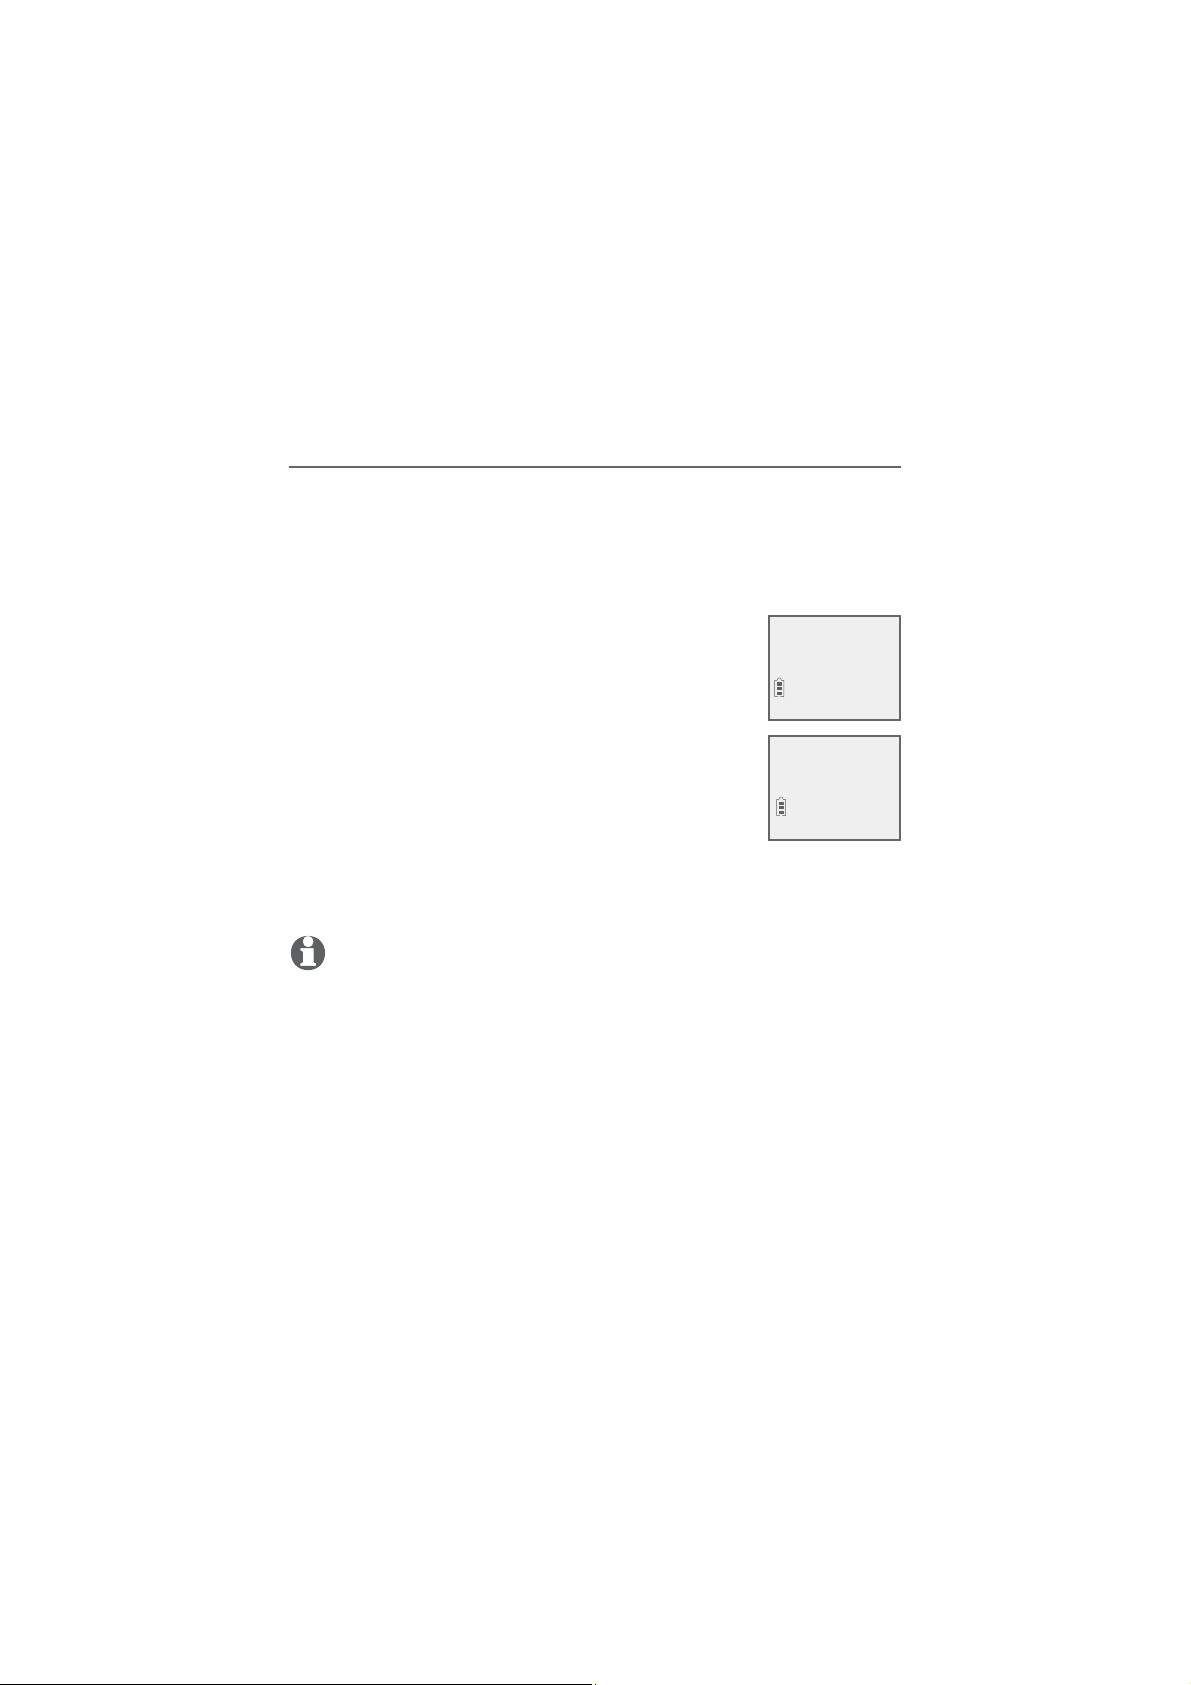
Answering system
Answering system settings
Message alert tone
When the message alert tone is set to On, and there is at least
one new message, the telephone base beeps every ten seconds. By
default, the message alert tone is set to off.
There is no audible alert at the handset.
To change the setting:
1. When the handset is in idle mode, press MENU/
SELECT to enter the main menu.
2. Press
CID or DIR to scroll to Answering sys,
then press MENU/SELECT.
3. Press CID or DIR to scroll to Ans sys setup,
then press MENU/SELECT.
4. Press
CID or DIR to scroll to Msg alert tone,
then press MENU/SELECT.
5. Press CID or DIR to choose On or Off.
6. Press
MENU/SELECT to save the setting. You hear a confirmation
tone.
NOTES:
The message alert tone beeps only if all the conditions below are met:
•
- Answering system is on.
- Message alert tone setting is on.
- There are new messages.
To temporarily turn off the message alert tone, see page85.
•
Remote code
>
Msg alert tone
MSG ALERT TONE
>On
Page 87

Answering system
Answering system settings
Message recording time
You can set the recording time allowed for incoming messages. The
message length is three minutes by default.
To change the setting:
1. When the handset is in idle mode, press MENU/
SELECT to enter the main menu.
2. Press CID or DIR to scroll to Answering sys,
then press MENU/SELECT.
3. Press CID or DIR to scroll to Ans sys setup,
then press
MENU/SELECT.
4. Press CID or DIR to scroll to Recording time,
then press MENU/SELECT.
5. Press
CID or DIR to choose 3 minutes, 2
minutes or 1 minute, then press MENU/SELECT to save the
setting. You hear a confirmation tone.
Msg alert tone
>Recording time
RECORDING TIME
>3 minutes
80
Page 88
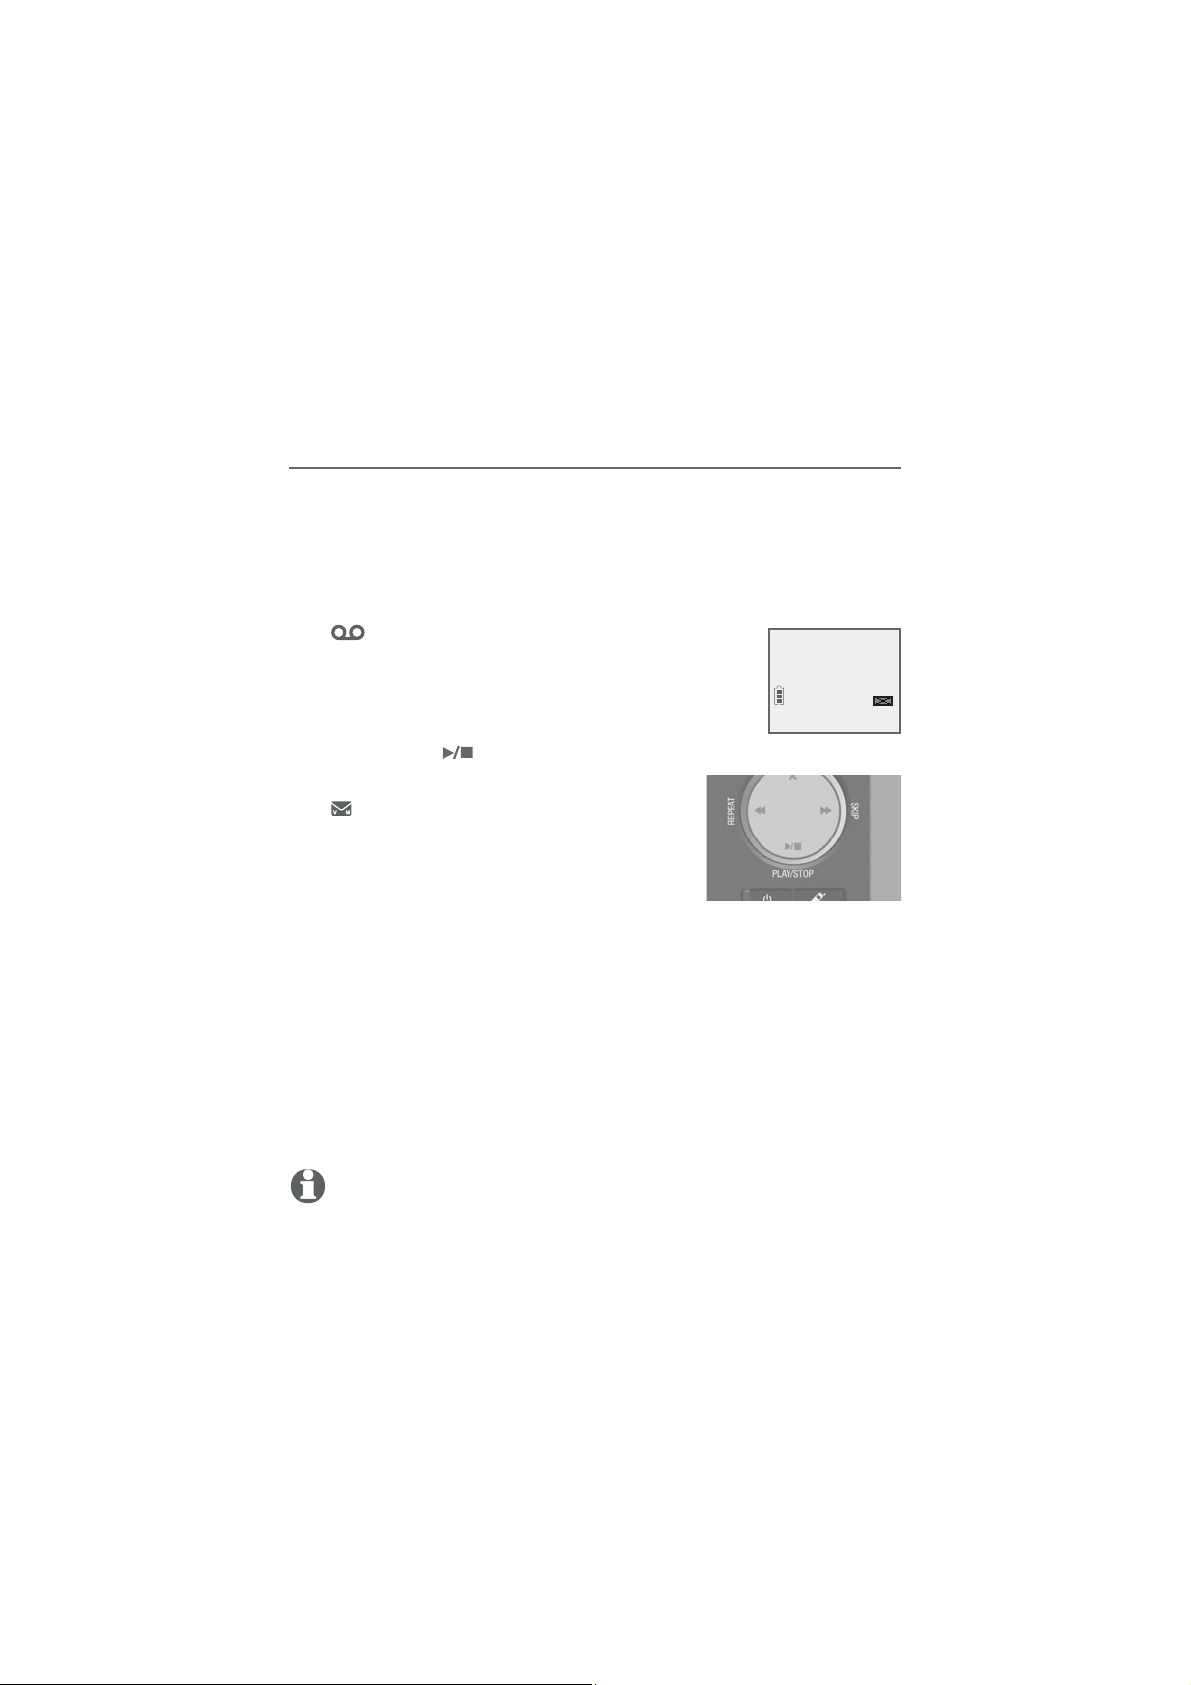
Answering system
About the answering system
Answering system and voicemail indicators
Your telephone has separate indicators for two different types of
voice messages: those left on its built-in digital answering system
and those left at your telephone service provider’s voicemail (fees
may apply). Your telephone’s built-in digital answering system
messages and voicemail messages are separate. Each alerts you
to new messages differently.
•
and XX New messages show on
If
the handset and the message window,
there are new messages in the built-in
answering system.
To listen to messages
recorded on your digital answering
HANDSET 1
1 New message
ANS ON
AM
10:01
10/15
system, press /PLAY/STOP on the
telephone base (page 86).
•
If
and New voicemail display on the
handset, your telephone service provider
is indicating that it has new voicemail
for you. To listen to your voicemail, dial
an access number provided by your
telephone service provider, followed by a security code or PIN.
Some telephone service providers bundle or combine multiple
services like voicemail and call waiting, so you may not be aware
that you have voicemail. To check what services you have and how
to access them, contact your telephone service provider.
To use your voicemail service rather than the answering system,
turn off the answering system. To use the answering system
rather than your voicemail service, contact your telephone service
provider to deactivate your voicemail service.
NOTE: After reviewing all new messages, the number of old messages
appears on the message counter.
81
Page 89

Answering system
About the answering system
Using the answering machine and voicemail together
You can also use your telephone answering system and voicemail
together by setting your built-in answering system to answer
before voicemail answers, as described below. To learn how to
program your voicemail settings, contact your telephone service
provider. If you are on a call, or the answering system is busy
recording a message and you receive another call, the second
caller can leave a voicemail message.
Set your answering system to answer calls at least two rings
earlier than your voicemail is set to answer. For example, if your
voicemail answers after six rings, set your answering system to
answer after four rings. Some voicemail providers may program
the delay before answering calls in seconds instead of rings.
In this case, allow six seconds per ring when determining the
appropriate setting.
82
Page 90

Answering system
About the answering system
Message capacity
The answering system can record up to 99 messages, depending
on the length of each message. Individual messages can be up to
three minutes, and the maximum recording time is approximately
22 minutes. The actual recording time depends on individual
message characteristics. Messages remain available for replay until
you delete them.
When there are new messages (including memos) on the answering
system, the number of messages stored shows in the message
counter.
If the answering system has less than three minutes of recording
time left, it announces, “Less than three minutes to record,” before
message playback at the handset or the telephone base. Rec mem
low displays on the device screen in idle mode. When you turn on
the answering system at the telephone base, it announces, “Calls
will be answered. Less than three minutes to record.”
If the memory is full, the answering system announces, “Memory
is full,” before message playback. The device screen displays Rec
mem full in idle mode. Once the memory is full, you cannot turn
the answering system back on if it has been turned off, nor can you
record new messages until old ones have been deleted. Memory
full displays if you want to turn on the answering system on the
handset but there is no memory.
Voice prompts
The system provides voice prompts to guide you through the setup
procedures on your handsets, message playback, remote access
and recording outgoing announcements. The system also provide
basic answering system setup via voice guide to record your own
announcement, set the number of rings, and set the message alert
tone.
83
Page 91

Answering system
About the answering system
Call screening
To screen a call at the telephone base:
If the answering system and call screening are on (see Call
screening on page 58), the announcement and the incoming
message broadcast at the telephone base when a call is answered
by the answering system.
Options while a message is being recorded:
•
Press VOLUME or VOLUME on the telephone base to adjust
the call screening volume.
•
Press
Press /PLAY/STOP to temporarily turn on the call screening
•
if call screening is set to off.
To screen a call at the handset:
While a message is being recorded, the handset shows
To screen call, press [SELECT]. Press
call.
Options while a message is being recorded:
Press
•
the call screening volume.
Press
•
Press MENU/SELECT to temporarily turn on the call screening if
•
call screening is set to off.
Press /SPEAKERSPEAKER to broadcast the announcement and the
•
incoming message through the speakerphone. Press again to turn
off the speakerphone.
/PLAY/STOP to temporarily silence the call screening.
MENU/SELECT to screen the
CID/VOLUME or DIR/VOLUME on the handset to adjust
OFF/CANCEL to temporarily silence the call screening.
84
Page 92

Answering system
About the answering system
Call intercept
While screening a call, you can stop recording and speak to the caller
by pressing
Base ringer
Press VOLUME or VOLUME on the telephone base to adjust
the ringer volume when the telephone is not in use.
You hear a sample of the ringer while adjusting the volume. The
telephone base announces, “Base ringer is off,” when you set the
volume to 0.
Temporarily turning off the message alert tone
If the message alert tone is turned on, the telephone base beeps
every ten seconds when there are new messages. Pressing any
telephone base key (except
silences the message alert tone.
However, if you press a key at the telephone base to silence the
message alert tone, the telephone base will also perform the
corresponding key function. For example, if you press X/DELETE
when in idle mode to temporarily turn off the message alert tone,
there is a voice prompt directing you to press X/DELETE again to
delete all old messages. The message alert tone is temporarily off.
Only press X/DELETE a second time if you wish to erase all old
messages in your answering system.
PHONE/FLASH.
/HANDSET LOCATOR) temporarily
The message alert tone resumes when you receive another
message.
85
Page 93
Answering system
Message playback
If you have new messages, you hear only the new messages in
chronological order. If there are no new messages, the system
plays back all old messages (in chronological order). If there are
both new and old messages, you have the option of playing the
new or old messages. The message counter flashes indicating the
number of new messages saved.
When playback begins, the total number of messages is
announced. Before each message, you hear the day and time of
the recording. If the date and time are not set, you hear, “Time and
date not set,” before playback. After the last message, you hear,
“End of messages.” If the recording time is less than three minutes,
you hear, “Less than three minutes to record” before playback (see
Message capacity on page 83).
To listen to messages at the telephone base:
Press
messages. The system announces the number of messages, then
begins playback. Press /PLAY/STOP again to end the message
playback.
To listen to messages on a cordless handset:
1. When the handset is in idle mode, press MENU/
2. Press MENU/SELECT again to select Play
The system announces the number of messages,
then begins playback. The message sequence is
shown on the handset. If there are no recorded
messages, the handset shows No messages and
you hear, “You have no message.”
/PLAY/STOP on the telephone base to listen to the
SELECT to enter the main menu.
messages.
If there are new and old messages, press
•
or
DIR to select Play new msgs or Play old
msgs, then press MENU/SELECT.
If there are only new or only old messages,
•
they will play automatically.
86
>Play new msgs
Play old msgs
CID
You have:
3 New messages
Charlie Johnson
4-Repeat 6-Skip
AM
10:01
NEW
MSG#
1/3
ANS ON
ANS ON
ANS ON
Page 94

Answering system
Message playback
Options during playback
When a message is playing, you can adjust the playback volume,
skip, repeat, pause or delete the message.
When messages are playing on the telephone base:
Press VOLUME or VOLUME to adjust the message playback
•
volume.
Press /SKIP to skip to the next message.
•
Press /REPEAT to repeat the message. Press twice to hear the
•
previous message.
Press X/DELETE to delete the message.
•
Press
•
When messages are playing on the handset:
Press
•
playback volume.
Press EQ to adjust the message playback audio quality.
•
Press 6 to skip to the next message.
•
Press 4 to repeat the message. Press twice to hear the previous
•
message.
Press
•
Press 5 or
•
Press /SPEAKERSPEAKER to switch between speakerphone mode and
•
handset mode.
Press PHONE/FLASH to stop playback. The screen shows Call
•
back?, then press
the caller if the caller’s number is available. If the dialing format
used is not correct, then use the following option to choose the
correct dialing format before calling back the caller.
/PLAY/STOP to stop the playback.
CID/VOLUME or DIR/VOLUME to adjust the message
MUTE/DELETE to delete the message.
OFF/CANCEL to stop the playback.
MENU/SELECT or PHONE/FLASH to call back
87
Page 95
Answering system
Message playback
Press MENU/SELECT to pause playback and show the caller ID
•
information if available. From here, you can press
to resume playback, or press # (pound key) repeatedly to show
the desired dialing option (page 62), then press MENU/SELECT
PHONE/FLASH to call back the caller. If you do not call back
or
within ten seconds, message playback resumes automatically.
NOTE: The equalizer stays on the same settings until you change it by
pressing EQ .
Delete all old messages
You can only delete old (reviewed) messages. You
cannot delete new messages until you review them.
You cannot retrieve deleted messages.
To delete all old messages on the telephone
base:
1. When the telephone is idle, press X/DELETE.
The system announces, “To delete all old
messages, press DELETE again.”
2. Press X/DELETE again. The system announces,
“All old messages deleted.”
To delete all old messages on the handset:
1. Press MENU/
SELECT when in idle mode to enter
the main menu.
2. Press CID or DIR to scroll to Answering sys. Press MENU/
SELECT.
3. Press
MENU/SELECT. The screen shows Delete all old messages?
4. Press
CID or DIR to highlight Delete all old, then press
MENU/SELECT again to confirm. The screen displays
Deleting... and then All old msgs deleted! There is a
confirmation tone.
OFF/CANCEL
Announcement
>Delete all o ld
Delete all
old messages?
Deleting...
88
Page 96
Answering system
Recording and playing memos
Memos are your own recorded messages used as reminders for
yourself or others using the same answering system. Play and
delete them in the same way as incoming messages.
Record a memo
1. When the handset is in idle mode, press MENU/
SELECT to enter the main menu.
2. Press CID or DIR to scroll to Answering sys.
Press MENU/SELECT.
3. Press
CID or DIR to highlight Record memo,
then press MENU/SELECT. The system announces,
“Record after the tone. Press 5 when you are
done.” You can record a memo for up to four
minutes.
4. Speak towards the handset to record a memo.
5. Press 5 to stop recording. The system announces,
“Recorded.” The system does not save memos
shorter than two seconds.
Play back a memo
Play memos the same way as messages. See Message playback
on page 86.
Play messages
>Answering sys
Delete all o ld
>Record memo
RECORD MEMO...
5-Stop
89
Page 97

Answering system
Base message counter displays
The base message counter shows the total number of answering
system messages. See the following table for other message
counter displays.
Message counter displays
0
0
(flashing)
1-99
1-99
(flashing)
1-99 & F
(alternating)
--
0-6
1-8
No messages.
You need to set the clock (page 13).
Total number of old messages and memos, or message
number currently playing during old message playback.
Total number of messages and memos. The number
flashes when there are new or missed messages.
After a power failure, the number in the message
counter flashes to indicate that you need to set the
clock.
Memory is full. You must delete some messages before
recording new messages.
The system is answering a call, recording a message or
memo, or is being reached remotely.
The telephone line is in use.
Shows for two seconds while adjusting the telephone
base ringer volume.
Shows for two seconds while adjusting the telephone
base speaker volume.
90
Page 98

Answering system
Remote access
You can reach your answering system remotely by dialing your
home telephone number from any touch-tone telephone.
To remotely reach your answering system:
1. Dial your telephone number from any touch-tone telephone.
2. When the system answers, enter the two-digit remote access
code (19 is the default code. See page 78 to change it).
The system automatically announces the number of new or
•
old messages (if any), and then begins to play them.
3. You can also enter the following remote commands:
Remote
commands
1
2
3
33
4
5
5
*
6
7
*
8
0
4. Hang up or press 8 to end the calls.
Actions
Press to listen to all messages.
Press to listen to new messages only.
Press to delete the current message
(during playback).
Press twice to delete all old messages.
Press to repeat the current message
(during playback).
Press to stop any operation (including recording).
Press to listen to a list of remote commands.
Press to skip to the next message (during
playback).
Press to record a new announcement.
Press to end remote access
(the call will be terminated).
Press to turn the answering system on or off.
91
Page 99

Answering system
Remote access
Cut out and carry the remote access wallet card at the back of this
user’s manual for quick reference.
NOTES:
If you do not enter a valid remote access code, the system answers the call auto-
•
matically.
If you pause for more than four seconds during remote access, you hear a help
•
menu listing all features and commands. If there is no command for another 20 seconds, the call ends automatically.
If the memory is full, the answering system answers after ten rings and announces,
•
“Memory is full. Enter the remote access code.” Enter your remote access code to
access the messages and announcements.
92
Page 100
Appendix
Adding and registering handsets/headsets
Your telephone can support up to 12 DECT 6.0 cordless handsets
(AT&T model CL80114, sold separately) or up to ten cordless
handsets and two cordless headsets (sold separately). Visit
www.telephones.att.com/headsets for a list of compatible
DECT 6.0 cordless headsets. Each new handset or headset must be
registered to the telephone base before use. You must register each
handset or headset separately.
To register a cordless headset to this telephone system, please
refer to the user’s manual of the cordless headset for more details.
To register a cordless handset, see below.
The handsets provided within your product box are already
registered as HANDSET 1, and so forth. Additional handsets are
assigned numbers in the sequential order they are registered (up to
HANDSET 12).
Register a handset to the telephone base
1. Before you begin registration, make sure the
handset is out of the telephone base or charger
and shows To register HS, see manual.
2. Put the handset you wish to register on the
telephone base cradle.
3. The handset shows Registering... Please wait
and the IN USE light on the telephone base
turns on. HANDSET X Registered appears
on the handset screen ((HANDSET represents
the handset name, X represents the handset
number). The handset beeps and the IN USE
light turns off. The handset is now registered
with the telephone base.
To register HS,
see manual.
Registering...
Please wait
HANDSET X
Registered
 Loading...